WK3 Creative Reading

In the reading by Chris Crawford, they define interaction as “a cyclic process in which two actors alternatively listen, think, and speak.” He emphasizes that there are two actors, not one, and that is the only way to define something as interactive, but I disagree with his definition. I feel like there does not have to be a back and forth and an interaction can just be something simple like the user just clicking something and something appears. For example, in my Assignment 3, I had an interaction where if the user presses a key, a bubble appears, and if you click on the bubble, it disappears. To me, that is interaction even though the p5.js system is not necessarily thinking or speaking. I would describe it as what he thinks is low interactivity.

With that, I think characteristics of a strong interactive system is, first of all and most important of all, the system responding to the user. This means that the user should have input and be able to affect the outcome. Now, what makes a strong interactive system I think should be having multiple different outcomes, so multiple user inputs. In the section about “Thinking” he was talking about communication and how when you talk with someone who is a slow thinker, the conversation is meaningless and how “Good thinking can make a conversation sparkle.” Therefore, another strong interactive system has to feel engaging, so the user feels like whatever it is they are controlling in the system matters and is worth their time.

Finally, after reading and analyzing the text, some ideas I have for improving the degree of user interaction in my p5 sketch is maybe having the bubbles make a pop sound when the user clicks it. I could also have the user decide what size and color they want so they could personalize it. I also thought of having the background move as a gradient to the direction of where the mouse hovers.

Week 3 – Reading

The reading was actually so much more interesting than I thought it would be. I like that Crawford included playful moments and examples throughout because it kept me more interested while he was trying to explain an idea that could have easily felt more technical. To me, there was one line that really stood out, and that was when he said “interaction is not reaction on a higher plane of existence.” At first I didn’t really think that there was even a difference between reacting to something and interacting with something. I assumed that if something made me feel involved or allowed me to do something, then that was already interactive. Crawford made me question all of that. This also changed my way of thinking about interactions with Code. A computer is not automatically interactive just because I can click something or because something on the screen gets a reaction out of me. Interaction is more like a conversation.

He says both sides need to listen, think and respond. This made me look at the assignments that I’ve been doing in a completely different way. Instead of only asking whether the user can click or move or control something, I started to think about how the computer responds to what the user does and whether there’s a real back and forth happening. I used to think adding something like mousePressed()  automatically made a project interactive because the user could affect it, but now I know it’s beyond all that. So my biggest takeaway from this reading is definitely that interaction is much less simple than I originally thought it was.

Week 3: Reading Reflection

Before this reading, I had never had a clear definition of what interactivity means. Now I realize that one cannot call something interactive just because it reacts to input. If we consider the superficial meaning of interactivity that many people use, then even turning on a light is considered interactive. You press a button, and in response the light bulb turns on. Using this definition of interactivity is meaningless, since it makes almost everything interactive. For something to be truly interactive, it has to involve two sides that alternately listen, think, and speak.

It has to be like a dialogue between two sides, where each action shapes and changes future inputs. This made me rethink my last assignment, where I created a sketch with fireflies that fly away when the mouse cursor gets close. I used to think of this as interactivity, but it is really just a simple reaction to input. It is not an interactive dialogue, since only one side is speaking while the other is just listening without giving any response back.

I think I could make the fireflies respond differently depending on how the user moves the mouse. For example, if the user moves the mouse slowly, the fireflies could drift away calmly, but if the cursor moves faster, the fireflies could fly away more dramatically. This would at least make the interaction feel like the fireflies are thinking before reacting, rather than just responding the same way every time.

Week 3 – Functions, Arrays, and OOP

My concept:

When it came to thinking of what my concept should be this week, I wanted it to somehow relate it to current times. It might not be apparent in this country, but it is autumn season and I decided to portray the fall aesthetic to this assignment. Using classes and arrays, I wanted it to create an interactive scenery. My idea was, having leaves falling off a tree while also having the user have the ability to click the screen and add even more leaves. I wanted the overall code to give off warm and calm vibes in order to emphasize the true feeling of autumn. I used mostly brown, oranges, and yellows to achieve this. In my last assignment I said if I could do anything to elevate my code, it would be randomness, and that’s exactly what I did. The colors of the leaves are all random. I also added a windy motion in order for the falling to look more realistic.

Highlight of my code:

 //leaf class
class Leaf {

  constructor(x, y, size, speed) {
    this.x = x;
    this.y = y;
    this.size = size;
    this.speed = speed;

    // random colors leaves
    this.leafColor = random([
      "#c85d3a",
      "#e58b3a",
      "#d9a441",
      "#a94432",
      "#7a4a00"
    ]);
  }


  move() {
    

    // fallinf down
    this.y = this.y + this.speed;


    // windy
    this.x = this.x + 0.5;


    // returning to the top
    if (this.y > height) {
      this.y = 0;
    }
  }


  show() {

I’d like to say that the highlight of my code is my leaf class. This was my first time working with classes, so I was defiently proud on how it all came together and how I made multiple leaves with their own size, color, and speed. I also used random() to choose between different autumn colors, which helped make the leaves look less repetitive. My favorite part is the move() function because it makes each leaf fall while slightly moving to the side to give it a windy effect. I also added an if statement so when a leaf reaches the bottom, it returns to the top and continues falling. I made it so if the leaf goes pass the canvas, it moves back to the top. As the leaf falls, the y gets bigger and bigger, until it becomes bigger than the height. That’s when it goes all the way back.

How this was made: 

I started off with just a tree branch and a bunch of leaves falling. It felt very dull and plain, and the opposite of what I wanted the viewer to feel. I went on Pinterest to get some autumn inspiration and got inspired by the pale orange sky and the clouds. So I decided to make some more leaves on the branches and on the ground to give a more alive look, as well as some clouds and a sun, all using ellipses. Besides the overall look, I also worked on creating the leaf class that controlled every leaf. Inside the class, I used a constructor to give each leaf its own position, size, speed, and color. I wanted the falling leaves to give me realism so I added the move and show functions. The move() function makes the leaves fall down while also slightly moving to the right to give the effect of wind. The show() function draws each leaf on the screen. I also used an array to store all the leaves object. And a loop that  goes through the array and moves and displays every leaf. I also used mouse pressed so that whenever the user clicks, a new leaf is created at the mouse position. I think a struggle I had was thinking about how I wanted the leaves to fall down. Having them fall all straight looked very unnatural, so I added a small change to their x position to make it look like the wind was pushing them sideways. ( this.x = this.x + 0.5; ). The references helped me significantly when it came to recalling some steps like loops and mouse pressed.

This may contain: a tree with lots of leaves on the ground

References:

https://www.pinterest.com/search/pins/?q=fall%20and%20autumn%20aesthetic&rs=ac&len=12&source_id=ac_hoiAF6sn&eq=fall%20and%20aut&etslf=5522

https://p5js.org/reference/p5/for/

https://p5js.org/reference/p5/class/

https://editor.p5js.org/Aya_Riad/sketches/Wky6-ythQ

Reflection:

I liked how the ending product ending up looking. It has a moving effect that I’m very proud of, and i’m glad I got to learn how to use class and arrays. I think using random colors, sizes, and speeds helped make the leaves feel less repetitive. I also feel like I paid more attention to the aesthetics in this assignment and I feel like the outcome was defiantly worth the effort of creativity. Maybe if I had to work more on this, I’d play around with the movement of the clouds as well. Or maybe learn how to make a more accurate looking leaf, and different types of leaves. Overall, proud.

Week 3 – Assignment

Concept:

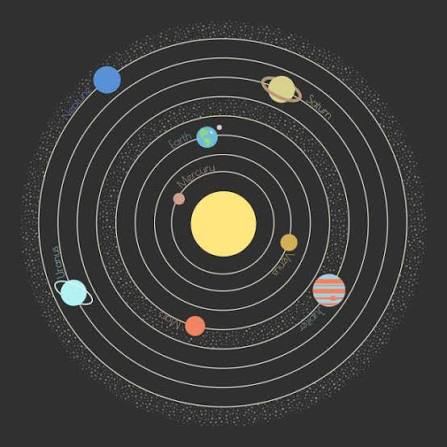
I have always loved space, especially anything to do with stars and the solar system, so for this assignment I decided to build a small generative solar system in p5.js using object oriented programming. Each orbiting body is a Planet object with its own distance from the sun, speed, size and color, all stored in an array so I could build and animate the whole system with loops instead of writing out five separate planets by hand. The exact stats for each planet are randomized within set ranges, so it looks a little different every time you refresh it, which felt fitting since no two solar systems out there actually look the same either.

How this was made:

I split the code into two files: sketch.js for the main setup/draw loop and the sun, and planet.js for the Planet class, which handles one planets data (distance, speed, size, color, current angle) plus its own update() and display() methods. In setup() I loop through and create 5 planets, spacing their orbit distances out with map() so they do not end up overlapping and giving each one a random speed, size and color. In draw() I loop through the array every frame so that update() moves each planet a little further along its orbit and display() draws it along with a faint ring showing its orbit path.

Code Highlight:

update() {
    this.angle += this.speed;
  }

  display() {
    push();
    //translate() shifts where (0,0) is on the canvas.
    //normally (0,0) is the top-left corner, so every shape would need
    //width/2 and height/2 added to its position to appear centered.
    //instead I move the origin itself to the center of the canvas once,
    //so I can treat the sun as sitting at (0,0) and calculate every
    //planets position relative to the sun instead of the corner
    translate(width / 2, height / 2);

    //orbit ring just a circle showing the path this planet travels
    //drawn centered on the new (0,0) which is now the canvas center
    noFill();
    stroke(255, 60);
    strokeWeight(1);
    ellipse(0, 0, this.distance * 2, this.distance * 2); //*2 because ellipse() takes diameter

    //this is the actual orbit math.
    //this.angle is a value in radians representing how far around
    //the circle the planet currently is (a full loop = TWO_PI, about 6.28)
    //cos(angle) and sin(angle) both output a number between -1 and 1 -
    //multiplying by this.distance scales that up to the actual orbit radius
    //I want turning it into a real pixel offset from the center.
    let x = cos(this.angle) * this.distance; //horizontal offset from center
    let y = sin(this.angle) * this.distance; //vertical offset from center

    //every frame angle increases slightly (from update()) which changes
    //the result of cos/sin slightly which moves x and y slightly 
    //that is what creates the smooth circular motion over time

    noStroke();
    fill(this.col);
    ellipse(x, y, this.size, this.size); //draw the planet at its calculated position

    pop(); //restore the coordinate system back to normal (undoes the translate)
           //so the next planet in the loop does not inherit this shift
  }

This is the part of the code in Planet class I am happy about, since it is where the actual orbiting motion happens. update() just nudges the planets angle forward a tiny bit every frame, like a slowly ticking clock hand. In display(), I use translate() to shift the canvas’s origin point to the center, so I can treat the sun as sitting at (0,0) instead of constantly adding width/2 and height/2 to every position. Then cos(this.angle) and sin(this.angle) calculate where a point at that angle would land on a circle, and multiplying by this.distance stretches that out to the planets actual orbit radius. Since the angle keeps increasing frame by frame, this position keeps recalculating slightly differently each time, which is what produces the smooth circular motion. I wrap the whole thing in push() and pop() so the translate only affects this one planet and does not carry over and throw off the position of the next planet in the loop.

Problems I ran into:

The orbit math was the main thing I struggled with like I understood conceptually that I wanted planets to move in circles but I could not figure out on my own how to turn an increasing angle into an actual x/y position on screen. I ended up going back to Claude multiple times to work through the logic and the translate() part step by step until it actually clicked. I also ran into an issue with the orbit rings not lining up with the planets real path. I had unfortunately forgotten that ellipse takes a diameter and not a radius, so my rings were drawn at half the size they should have been. On top of that, I had to switch from fully random orbit distances to using map() to space them out evenly since random values kept causing planets to spawn too close together or right on top of the sun.

Embedded Sketch:

Reflection and ideas for improvement

This was honestly one of my favorite assignments so far because of the subject matter. Using classes also made a lot more sense once I actually built something with them, since having each planet manage its own data felt way cleaner than juggling separate arrays. For future improvements, I would really like to make the orbits a little more realistic by making them elliptical instead of perfect circles and maybe add small moons orbiting the planets themselves and also add fading trails behind each planet so you can actually see the path it has traced instead of just a plain guide ring!!!

References:

https://p5js.org/reference/p5/translate

https://p5js.org/reference/p5/cos

https://p5js.org/reference/p5/sin

https://p5js.org/reference/p5/push

https://p5js.org/reference/p5/pop

https://p5js.org/reference/p5/map


Reading Reflection – Week 3

Before this reading, I thought anything that reacted when I touched or clicked it was automatically interactive. Crawford’s example of the refrigerator light made me reconsider that idea. I agree that a strong interactive system should do more than give one automatic response. It should understand the user’s input, process it in a meaningful way, and give a useful response. Video games support his argument because they react differently depending on a player’s choices, while a movie continues in the same way no matter what the viewer says or does. However, I think Crawford is slightly biased because his definition is very strict. Even simple interactions can still be enjoyable or helpful, especially for beginners or children.

For me, a strongly interactive system should respond quickly, provide clear feedback, and make the user feel that their choices matter. The response should also change depending on what the user does instead of repeating the same result every time. In my future sketches, I could improve interaction by using the mouse and keyboard to let users control objects, change colors, create new shapes, or remove items from an array. I could also make objects react differently depending on where the user clicks. The reading made me wonder whether a simple response can become strongly interactive if it leads to many different choices over time.

Week 3 – Assignment


My Concept:

For this assignment, I decided to create something relatively simple. My idea was to have a bathtub with foam bubbles resting on top of it. Whenever the user presses the screen, a new bubble appears from the bathtub and begins to float up. Each moving bubble is given a random position, size, and speed, which means that the bubbles do not always appear or move in the same way.

Code I’m Proud Of:

class Bubble {
  constructor(){
  this.x = random (10,390);
  this.y = random (275,300);
  this.xspeed = random (-0.5,0.5);
  this.yspeed = random (-3,-1);
  this.size = random(15,40);
  }

  move(){
  this.x = this.x + this.xspeed; 
  this.y = this.y + this.yspeed;
  }

  show(){
  //circle
  fill(255,255,255,120); 
  stroke('#90e0ef')
  circle(this.x, this.y, this.size);
  
  //white highlight in the circle
  noStroke();
  fill(255,255,255,220);
  circle(
  this.x - this.size * 0.2,
  this.y - this.size * 0.2,
  this.size * 0.2
);
  }
}

This is a section of code that I am really proud of because this is where I was able to take the idea of classes that we learned in class and actually use it in my own work. At first, I was a little confused about how one class could be used to create multiple bubbles. However, after looking back at the class presentations and watching The Coding Train’s video about classes, it started to make much more sense. I used the constructor to give each bubble a random position, speed, and size, which means that the bubbles do not all look or move in the same way. I then used the move() function to change the position of each bubble and the show() function to make it appear on the screen. I think this part helped me understand classes much better because I could actually see how the same class was being used to create multiple bubble objects.

How This Was Made:

I created this piece using p5. While working on this assignment, I referred back to my class notes and the presentation, as well as the p5 references and The Coding Train videos whenever I needed some extra help understanding how to apply the different concepts to my code. I also used ChatGPT to help me choose the colors and transparency values for the bubbles because I had an image in mind of how I wanted them to look but was struggling to recreate it in p5.

references:

https://p5js.org/reference/p5/mousePressed/

https://p5js.org/tutorials/variables-and-change/

https://p5js.org/reference/p5/rect/

ChatGPT – assistance with choosing the colors and transparency values for the bubbles

Reflection:

This assignment helped me become more comfortable with classes and arrays, which I initially found difficult to apply to my own work. One of the main problems I faced was organizing my code and knowing where each function should begin and end. I accidentally placed some of my functions inside other functions, but working through this problem helped me better understand the structure of my code.

Although I used ChatGPT to help me choose the color and transparency values for the bubbles, next time I would like to challenge myself to figure out these details on my own through experimentation and the references available to me. I think this would help me become more confident in making my own choices and solving problems independently. If I continued developing this piece, I would also like to allow the user to press the floating bubbles to pop them and add more details to the bathtub and background.

Week 3 Assignment

Overall Concept

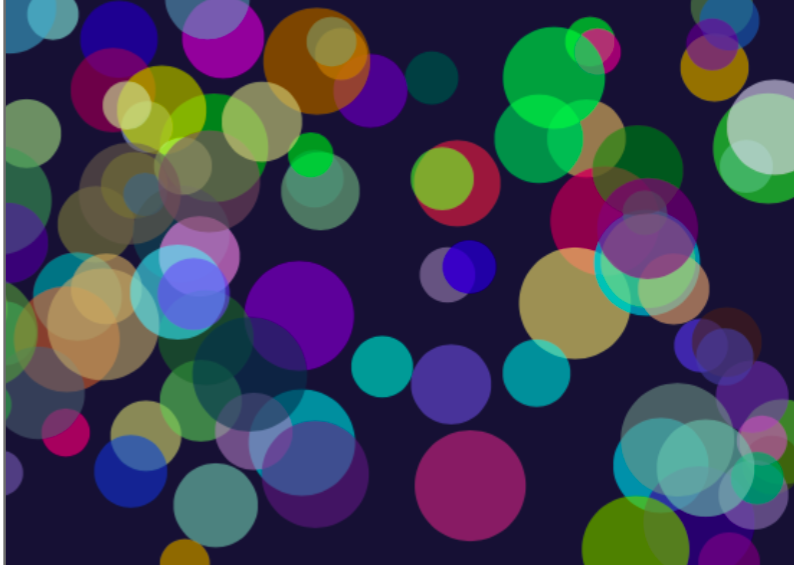
For this assignment, I wanted to create a generative artwork based on colorful bubbles floating around in a dark space. I chose bubbles because they are easy to recognize, but they can still create an interesting image when there are many of them moving together. I wanted the final artwork to feel calm, colorful, and slightly playful rather than looking like a game or a completely still picture.

Every time the sketch begins, the bubbles appear with random positions, sizes, colors, and speeds. Because these values are random, the arrangement is never exactly the same. Some bubbles are large and move slowly, while others are smaller and move more quickly. The random colors also create different combinations each time the program starts. I used a dark blue background to make the brighter colors more visible.

I used Object-Oriented Programming because every bubble needs the same basic information and actions. The Bubble class works as a template that stores each bubble’s position, speed, size, and color. It also contains methods that allow each bubble to move, bounce, and display itself. I then stored all the bubble objects inside one array and used loops to control them. This made it possible to create many bubbles without writing separate code for every one.

Sketch Code

let bubbles = [];

function setup() {
  createCanvas(600, 400);

  // create 100 bubble objects
  for (let i = 0; i < 100; i++) {

    let newBubble = new Bubble(
      random(50, 550),
      random(50, 350),
      random(-3, 3),
      random(-3, 3),
      random(30, 80),
      random(255),
      random(255),
      random(255)) ;

    bubbles.push(newBubble);
  }
}

function draw() {
  background(20, 20, 50);

  // make every bubble move, bounce, and display 
  for (let i = 0; i < 100; i++) {
    bubbles[i].move();
    bubbles[i].bounce();
    bubbles[i].display();
  }
}

class Bubble {

  constructor(x, y, xSpeed, ySpeed, bubbleSize, redValue, greenValue, blueValue) {
    this.x = x;
    this.y = y;

    this.xSpeed = xSpeed;
    this.ySpeed = ySpeed;

    this.bubbleSize = bubbleSize;

    this.redValue = redValue;
    this.greenValue = greenValue;
    this.blueValue = blueValue;
  }

  // move the bubbles
  move() {
    this.x = this.x + this.xSpeed;
    this.y = this.y + this.ySpeed;
  }

  // change direction when the bubbles reaches an edge
  bounce() {
    if ((this.x > width) || (this.x < 0)) {
      this.xSpeed = this.xSpeed * -1;
    }

    if ((this.y > height) || (this.y < 0)) {
      this.ySpeed = this.ySpeed * -1;
    }
  }

  // draw the bubbles
  display() {
    noStroke();

    fill(
      this.redValue,
      this.greenValue,
      this.blueValue,
      150
    );

    circle(this.x, this.y, this.bubbleSize);
  }
}

My main idea was to combine control with randomness. I controlled the canvas, movement, and general appearance, but then the individual colors, sizes, positions, and speeds were chosen randomly. This makes the artwork organised while still allowing each version to look different.


Embedded Sketch

Problems I Ran Into

One problem I noticed was that some bubbles moved very slowly while others moved much faster. This happened because their speeds were chosen randomly. At first, I thought something was wrong with the slower bubbles, but then I understood that they had received a speed close to zero.

Another small issue was that parts of the bubbles sometimes went outside the canvas before they bounced back. This happens because the program checks the center position of each bubble. I decided to keep it because the bubbles still return and continue moving. Chiefly, whenever I ran into a problem, I mainly went back to the Week 3 slides that cover functions, OOP & Arrays, because they explained each of these concept clearly and showed the process step by step.

Assignment #3 OOP

Concept:

When I first thought of art works based on class and object oriented programming, I thought of algorithmic drawings of trees, which I found very interesting and pretty, thus, I decided to base my work on nature, and specifically trees. I made the work to be interactive where the user can “build” a forest with trees of varied heights depending on where they press their mouse and also random colors of green so the forest doesn’t look like one whole block of green, and has more depth and layers. 

Highlight of codes I’m proud of:

I’m really proud of the tree class, especially the specific values of the circles, where each shifts a little based on the trunk’s center. I’m also very happy about the height manipulation where mouseY is used to determine the height of the tree!

class Tree{

  /* using the same x, and different y for the trunk 
  and the size for the tree bush and colors so i can change colors */
  constructor(x, startY, endY, size, colors){
    this.x = x;
    this.startY = startY;
    this.endY = endY;
    this.size = size;
    this.colors = colors; 
  }
  /* using the variables and slight value changes to 
  draw the trunk and circles */
  show(){
    strokeWeight(40);
    stroke('#804242');
  line(this.x,this.startY,this.x,this.endY);
    noStroke();
    fill(this.colors);
    circle(this.x+30,this.endY, this.size);
    circle(this.x+30, this.endY+50, this.size);
    circle(this.x-30, this.endY+50, this.size);
    circle(this.x-20, this.endY-10, this.size);
  }
  
}

Embedded sketch

How Was This Made

I first gained my momentum by laying out the bush class because it was relatively easier in shapes and positioning. I first created the class and all the parameters that’s needed and then tested out the show() method by giving them values on the sketch page and after tweaking the coordinates and it all, I translated the value relationship (the coordinates between each shape) back into variables in the class. 

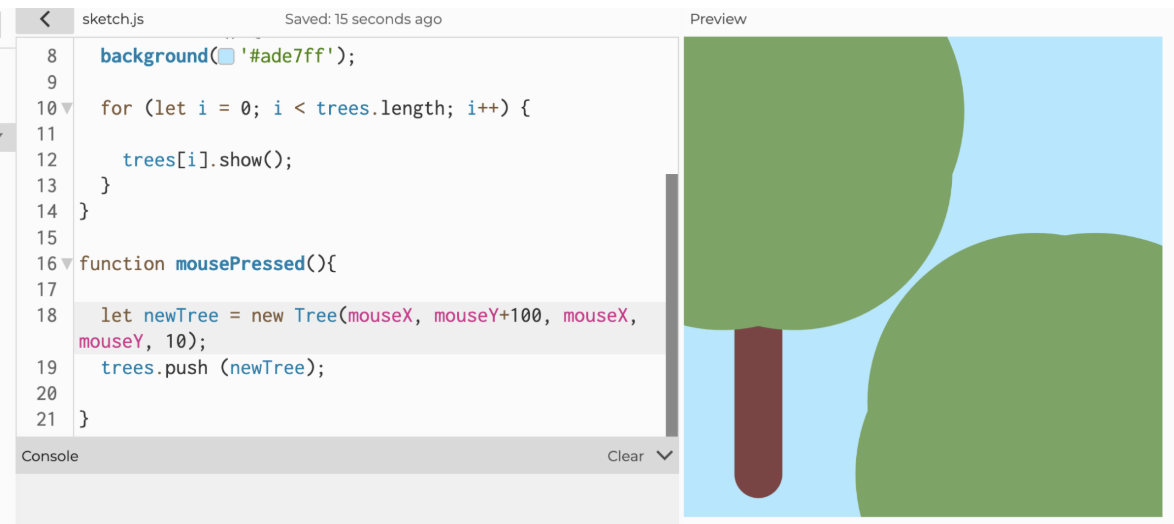
With that experience, I did the same with the trees class where I laid out possible parameters first and then tested them out in the sketch and refined them after testing. For instance, during the testing, I realized that there wasn’t a need to include an endX parameter because the x coordinate for the tree doesn’t move; the trunk’s x coordinate stays the same and the leaf clusters are based on the trunk’s coordinates. Therefore, I removed that parameter and updated the class. Then I started working on the responsive height feature where when the user presses on the screen, the coordinate of the mouse will be used as the height for the tree. To implement this, I relied on the p5js reference library to check on the mousePressed() function. After I placed in all the values, I tried to run it but ran into some confusing problems, which turns out is because of the parameter editing I did previously; I forgot there were only 4 parameters and I entered 5, which then caused the following error where leafs got way too big:

Entered mouseX as a parameter twice because I forgot I removed the “endX” from parameter, therefore mouseX got entered as the “size” value. 

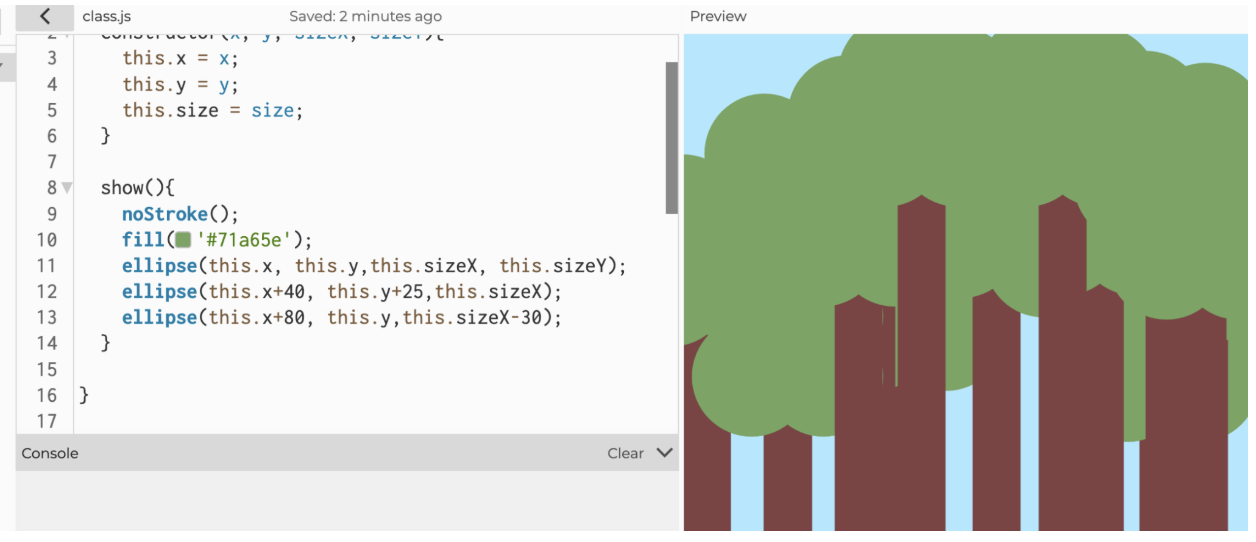
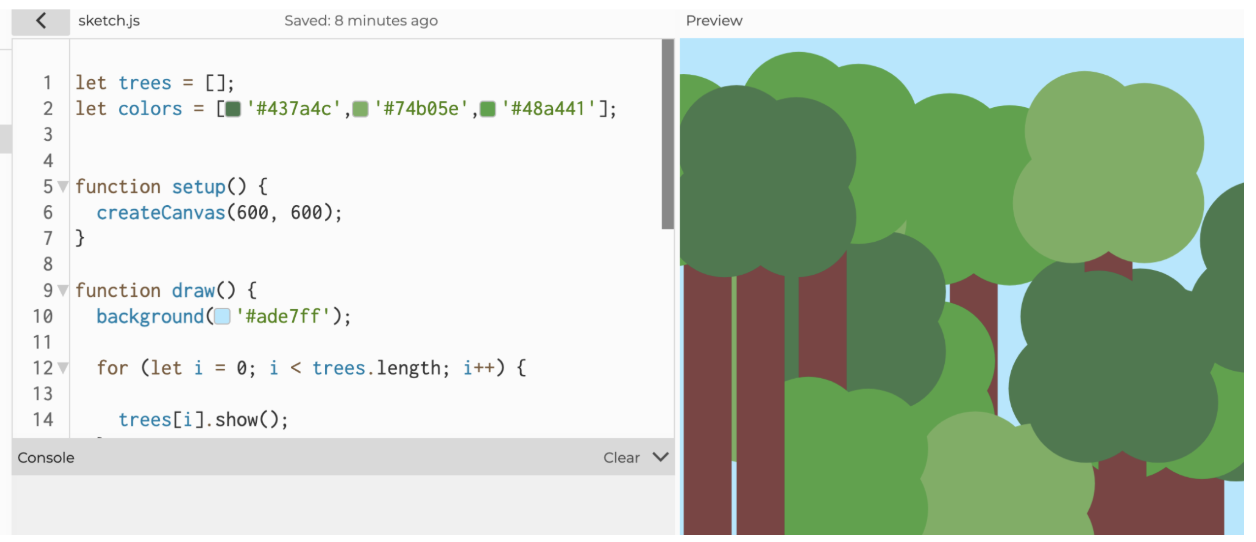
After fixing that I was pretty done with the technical aspects, but as I furthered my “experiment”, I realized that as the user grow more and more trees, the trees start blending into one another because of the lack of borders and same colors. To solve that I tried adding back the strokes, but they didn’t look good, so instead I decided to give the trees random colors by using an array.

Before: Trees blended with each other because too many overlapping of same color

After:

Lastly, I instantiated the bush class and switched the order of drawing so that the bushes are drawn after the trees and stays on top of them. 

Reflection for future work/ improvements: 

I hope to learn more complex features that allow me to expand the forest and allow me to play with more “details”. Also, I should keep track of the classes and their parameters so I don’t make the same mistakes when the parameters increase.

Reading Reflection Week 3

Interactivity basically means the user can do something and the media responds to them in a way involving thinking and things other than reaction, and interactivity is not a yes-or-no; it’s high and low and subjective to a degree. I think a strongly interactive system is one where the user can actively do something and see a response from the system. The user should feel like their actions matter, rather than just watching something happen. For example, in my p5.js sketch, the bubbles become interactive when I click the mouse because clicking creates a new bubble. I could make my sketch even more interactive by adding more ways for the user to control what happens. For example, I could let the user click on the fish to make them change direction, press different keys to change the background or add new animals, or move the mouse to control the bubbles. I could also add buttons that allow the user to change the speed or appearance of the objects. This would make the sketch feel more interactive because the user would have more control over what happens on the screen.Before reading this, I usually thought that getting lost in a mall was just my own problem or lack of attention.  It makes me think differently about interactive media because I realize that even simple things like buttons, maps, and directions need to communicate clearly with the user. Overall, these principles can make interactive media more intuitive, easier to use, and less frustrating.