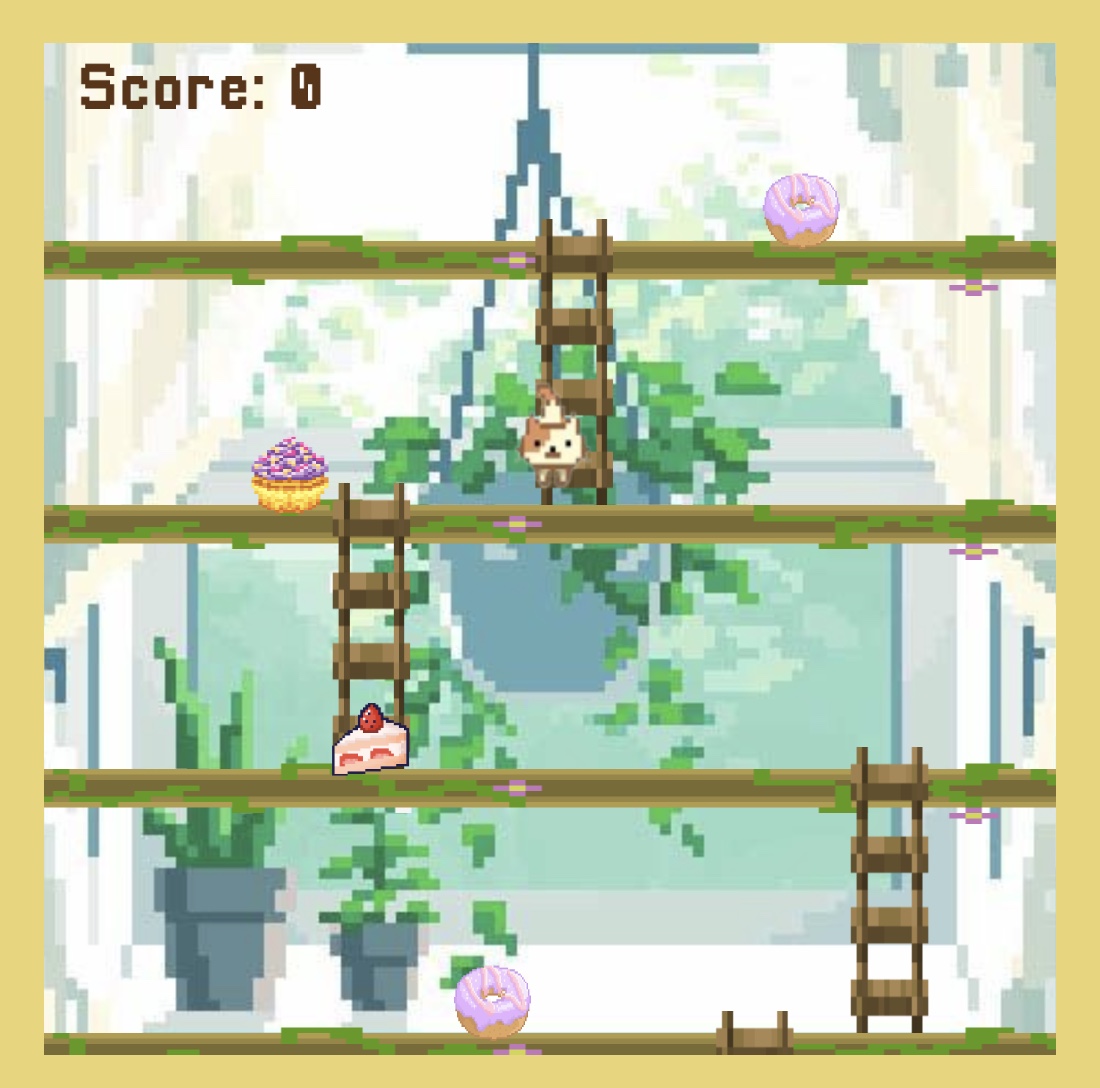
Final Project

Main Concept

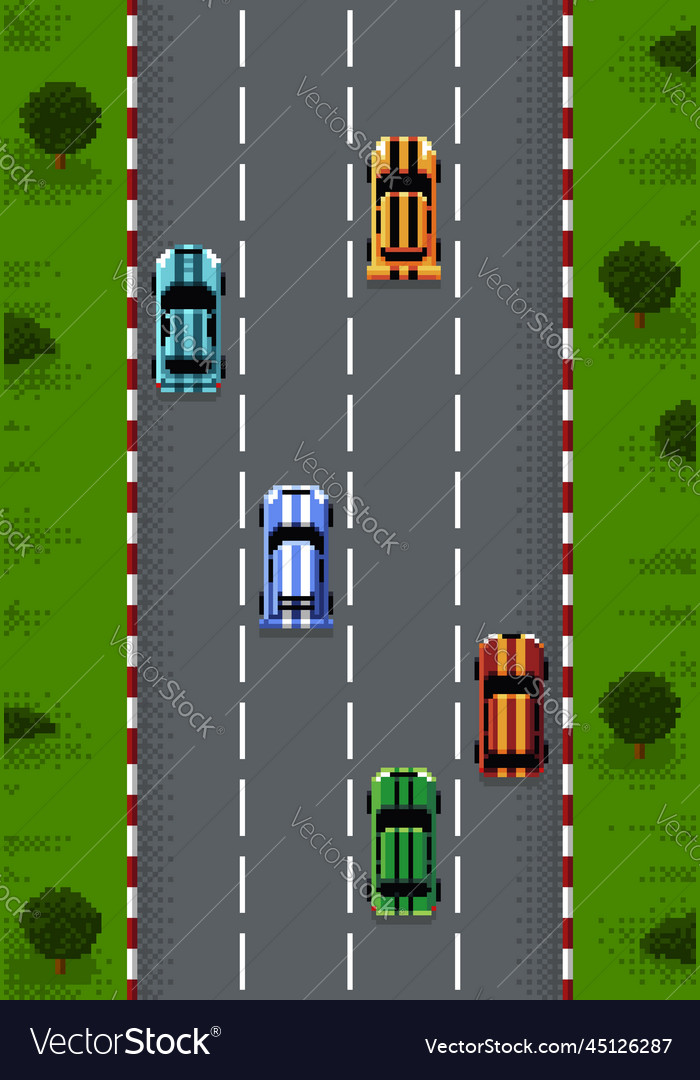
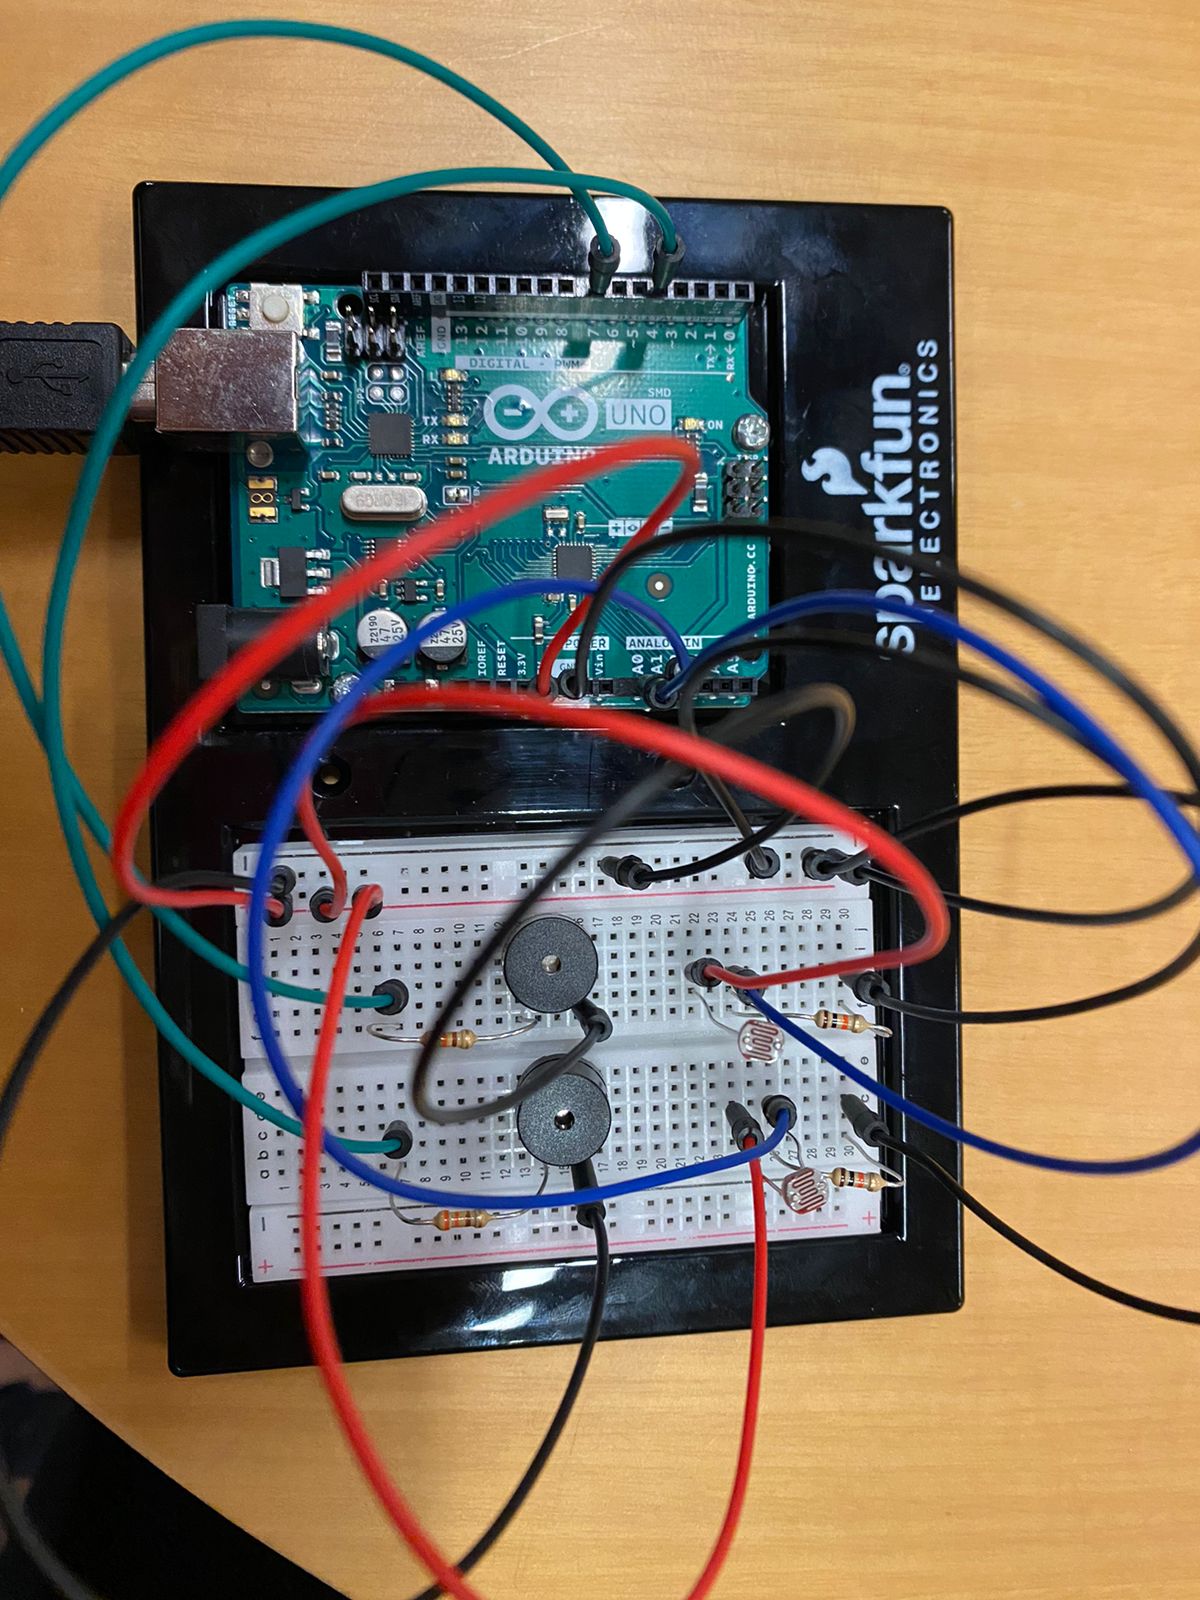
For the final project, I created a California themed car game. The physical hardware consists of a box with an arduino installed inside along with an ultrasonic sensor. There is a long road panel in front of it where the player places their NYU card keys and slides it along the road lanes to mimic the movement of a car on the road. The ultrasonic sensor detects the motion of the card along the lanes and causes the actual car in p5.js to move as well. On the screen, I decided to design the UI on a californian theme so I went with pictures and elements which depicted that concept. When the game begins, there are cars approaching the player from each lane and the player needs to move their key on the physical road to change the lane of the car on screen. With time the car speed increases and becomes more difficult. As it is a high score based game, every incoming car that is avoided is counted as one point so the ending page shows the high score and individual player score as well. As an indication of when the game has started, the green LED lights up on the box labeled “gas station” and similarly when the car crashes, red LED lights up or yellow goes off when the player is reading instructions, almost to imitate real life traffic lights. 

P5.js

In the p5.js code, I have created a game using different classes. There is the player class which deals with the movement of the player by receiving values from arduino and then mapping it according to the canvas and player position. Then there is a class for the incoming cars, which deals with the downward motion of the cars and is also passed as an argument to the player class to check if the x or y coordinates of the player coincide with those of the incoming cars, in which case the game ends as the cars crash. I created an array for the incoming cars so that they are added at a certain frameRate count and are removed from the array as soon as they go out of the canvas.

//variable declarations


let h = 600;
let w = 400;
let count = 0;
let pos = [55, 165, 270];
let charsize = 80 ; //defines size of player
let charheight = 100
let player; //variable for the player class object
let newcarssize = 100; 
let newcarswidth = 80;
let newcars = [];
let score=0;
let highscore=0;
let bonusarr = []; //array to store bonus objects
let caught = false; 
let bonuscaught = []; //
let scorebool = false;
let newchar = false; //boolean variable to help in creating new character when game starts again
let foodnum = 0; //to iterate over food array
let speedincr = 1; //for the vertical motion of newcarss
let carimg = 0;
let carspeeds = 2;

let r1=0;
let r2 =-600;
let r3 = 0;

let food = []; //array for food images

let gamestate = 'start'; //gamestate for changes in display
framewidth = 20; 

let a = 150;
let b = 300;
let c= 450;
let d = 550;

//image variables
var gif_loadImg, gif_createImg;
let pixelfont;
let startimg;
let startbutton;
let instructbutton;
let instructpage;
let endimg;
let road1, road2, road3;
let car1, car2, car3, car4, car5;
let cars = [];
let endsound, crash, backsound;
let tree;

//arduino variables
let rVal = 0;


//preload function for all the images and sound
function preload() {
    startimg = loadImage('2.png');
    startbutton = loadImage('startbutton.png');
    instructpage = loadImage('3.png');
    instructbutton = loadImage('instruct.png');
    endimg = loadImage('1.png');
    road1 = loadImage('road.png');
    road2 = loadImage('road.png');
    road3 = loadImage('road.png');
    car1 = loadImage('car1.png');
    car2 = loadImage('car2.png');
    car3 = loadImage('car3.png');
    car4 = loadImage('car4.png');
    car5 = loadImage('car5.png');
    tree = loadImage('tree.png');
  
    endsound = loadSound('endsound.mp3');
    crash = loadSound('crash.mp3');
    backsound = loadSound('background.mp3');
    

}


//====================================================
//class for the player object
class Character{
  constructor(){
    this.x = 5+ width/2-(charsize/2);
    this.y = height - ((charsize));
    this.speed = 4; //speed for the movement of player horizontally

  }
  
  display(){

    image(car2, this.x, this.y-10, charsize, charheight ); 


  }
  moveleft(){ //if left key is pressed, causes player to move left
    this.x -= this.speed;

    if (this.x < 0) {
      this.x = 0; //so player does not go beyond the canvas
    }
  }
  moveright(){ //if right key is pressed, causes player to move left
    this.x+=this.speed;

    if (this.x+charsize > width) {
      this.x = width-charsize; //so player does not go beyond the canvas
    }
  }
  update(newcars){
    
    if(rVal < 7){
      this.x = 55;
    }
    else if(rVal>=7 && rVal<14 ){
      this.x = 165;
    }
    else if(rVal >= 14){
      this.x = 270;
    }


        if(this.x>=newcars.x && this.x <= newcars.x+(newcars.pwidth) && this.y>=newcars.y &&  this.y<=newcars.y+ newcars.pheight){
          count++;

      console.log("Loss:" , count);
          crash.play();
          gamestate = 'over';
        

    }
    else if(this.x+charsize >=newcars.x && this.x+charsize <= newcars.x+(newcars.pwidth) && this.y>=newcars.y &&  this.y<=newcars.y+ newcars.pheight){
      count++;

      console.log("Loss:" , count);
      crash.play();
      gamestate = 'over';
            
            }
    
    else if(this.x>=newcars.x && this.x <= newcars.x+(newcars.pwidth) && this.y+charheight>=newcars.y &&  this.y+charheight<=newcars.y+newcars.pheight){
      
          count++;
      crash.play();

          console.log("Loss:" , count);
      gamestate = 'over';
            }


  }


}
//====================================================
//class to create newcarss
class incars{
  constructor(carimg, carspeeds){
    this.x = random(pos);
    this.y = 0;
    this.pwidth = newcarswidth;
    this.pheight = newcarssize;
    this.speed = carspeeds;
    this.num = carimg
    
  }
  
  displaynewcars(){
 
     image(cars[this.num], this.x, this.y , this.pwidth, this.pheight);
  }


  //causes newcars to move upwards
  update(){
    this.y += this.speed;

  }
  
  
}


function setup() {
  
  createCanvas(w,h);
  
  background(220);
  player = new Character();
  cars = [car1, car2, car3, car4, car5];


}

function draw() {
  if(frameCount == 1){
    backsound.play();
  }
  background(220);
   if (!serialActive) 
  {
    text("Press Space Bar to select Serial Port", 20, 30);
  } else 
  {

  }


  if(gamestate == 'start'){ //if game is at start page then display homepage


    startpage();


  }
  //if gamestate is of 'game' then plays the game through thegame() function
  else if(gamestate == 'game'){
        image(road1,  0,r1, width, height, 0, 0, road1.width, road1.height); //homepage image displayed
    image(road1, 0,r2,  width, height, 0, 0, road1.width, road1.height);
    
    r1+=2;
    r2+=2;

    if(r1 >= height){
      r1 = r2- height ;
    }
    if(r2>= height){
      r2 = r1-height ;
    }


  thegame(); //plays game through this function
    a++;
    b++;
    c++;
    d++;
    
       image(tree,  -75,a, 150, 150, 0, 0, tree.width, tree.height);
        image(tree,  -75,b, 150, 150, 0, 0, tree.width, tree.height);
            image(tree,  width-60,c, 150, 150, 0, 0, tree.width, tree.height);
        image(tree,  width-60,d, 150, 150, 0, 0, tree.width, tree.height);
    
    if(a > height+150){
      a = -150;
    }
    else if(b> height+150){
      b = -150;
    }
    else if(c> height+150){
      c = -150;
    }
        else if(d> height+150){
      d = -150;
    }


  }
  
  else if(gamestate == 'over'){ //if gamestate is over then end page displayed 


    image(endimg, 0, 0, width, height, 0, 0, endimg.width, endimg.height);

  endpage();
   
    
  }
  else if(gamestate == 'instructions'){ //displays instructions 
    instructionspage();

  }
}
//========================
function thegame(){ 

 
   //checks if game is started again and creates a new player to play the game again
    if(newchar == true){
     player = new Character();
    newchar = false;
  }


  //for keys to move the player
  if(keyIsDown(LEFT_ARROW)){
    player.moveleft();
  }
  else if (keyIsDown(RIGHT_ARROW)){
    player.moveright();
  }


  //for new newcars and elements to be created and added to their arrays
  if(frameCount%150 == 0){

    newcars.push(new incars(carimg, carspeeds));

    score++;
    console.log(score);
    carimg++;
    if(carimg>4){
      carimg = 0;
    }
    
 
  }


  //FOR LOOP
  for(let i = 0 ; i<newcars.length ; i++){
    //shows newcarss and updates their positions by decreasing y coordinated to move them up
    newcars[i].displaynewcars();
    
    newcars[i].update();


    //when newcars and food goes beyond the roof, they are removed from their arrays 
    if (newcars[i].y > height+400 ){
      newcars.splice(i, 1);
      // bonusarr.splice(i, 1);
      // bonuscaught.splice(i,1);
 

    }
    
    //Player's position checked against newcars and ladder's position
    player.update(newcars[i]);

    newcars[i].update();//moves it up
    
    
  }
  
  player.display(); 
  
  //END of FOR


}

//==============================

function startpage(){ //function to display the images of starting page
    image(startimg, 0, 0, width, height, 0, 0, startimg.width, startimg.height);


    imageMode(CENTER);
      image(startbutton, width/2, height/2, map(startbutton.width, 0, startbutton.width, 0, width/4), map(startbutton.height, 0, startbutton.height, 0, height/6));

    imageMode(CORNER);

    //checks if mouse pressed on the button and directs to instructions
    if(mouseX < width/2 + (width/(width/100)/2) && mouseX > width/2 - (width/(width/100)/2) && mouseY > height/2 - (height/(height/100)/2) && mouseY < height/2 + (height/(height/100)/2) && mouseIsPressed){
      gamestate = 'instructions';
      // success.play();
    }
  
}


function endpage(){ //function to display score and highscore and 'game over' page


  for(let i = 0 ; i<newcars.length ; i++){
      newcars.pop();
      bonusarr.pop();
      bonuscaught.pop();
  }
  newchar = true;
  
  if(score>highscore){ //updates the highscore with each previous score 
    highscore = score;
  }

  textAlign(CENTER);
  textFont('Times New Roman');
  fill("#FAF8F4");
  textSize(0.05*width);
  text('Score: '+score , width/2, (height/2)-58);
  text('High Score: '+highscore , width/2, ((height/2))-40);

  
  if(keyIsDown(ENTER)){ //when ENTER is pressed, gamestate changed so that game starts again
    gamestate = 'start';
    score= 0 ;
  }

}

function instructionspage(){ //displays instruction images 
  
  image(instructpage, 0, 0, width, height, 0, 0, instructpage.width, instructpage.height);
  

  image(instructbutton, (2.3*width)/4, (3.3*height)/3.7, map(instructbutton.width, 0, instructbutton.width, 0, 150), map(instructbutton.height, 0, instructbutton.height, 0, 50));
  
  //checks if mouse clicked on the button and continues to game state of playing the game
  if(mouseX>(2.3*width)/4 && mouseX < width && mouseY > (3.3*height)/3.7 && mouseY < height && mouseIsPressed){
    gamestate = 'game';
    //success.play();
  }


}


//====================
//ARDUINO


function keyPressed() {
  if (key == " ") 
  {
    // important to have in order to start the serial connection!!
    setUpSerial();
  }
}
function mouseIsPressed()
{
  readSerial();
}

// This function will be called by the web-serial library
// with each new line of data. The serial library reads
// the data until the newline and then gives it to us through
// this callback function
function readSerial(data) {
  ////////////////////////////////////
  //READ FROM ARDUINO HERE
  ////////////////////////////////////

  if (data != null) 
  {
    rVal = data;
  }
  
  //=============
  let sendToArduino=0;
  if(gamestate == 'game'){
    sendToArduino = 1;
  }
    else if(gamestate == 'instructions' || gamestate == 'start'){
    sendToArduino = 2;
  }
      else if(gamestate == 'over'){
    sendToArduino = 3;
  }
  sendToArduino = sendToArduino+"\n";
    
    writeSerial(sendToArduino);
}


Arduino

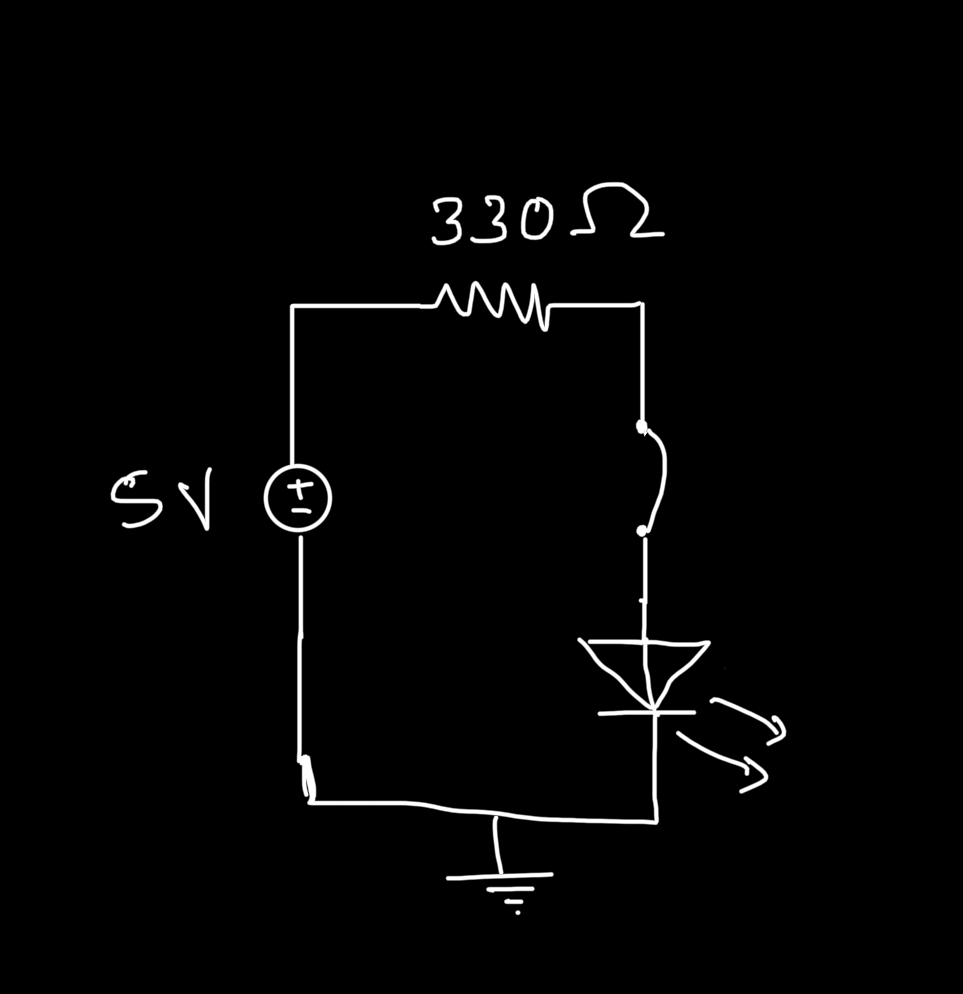
In arduino, the main component is the ultrasonic sensor and then the LEDs. I have set the trig and echo pins as well as the LED pins initially. The connection between arduino and p5.js is in sending data from the ultrasonic sensor when the card is moved in front of it. The data is read by p5.js and is then used to control the x-coordinate of the player car. The p5.js sends the data regarding the game states which controls the LED pins. The data is sent as an integer, each indicating the game state, and is then used to control the respective LEDs. I soldered the LEDs so I could fix it on top of the box. 


I was facing an issue with consistent readings from the ultrasonic sensor. As it sends out signals in a more spread out manner and reads very minor changes, the car was glitching because slightest tilt of the card was also causing the ultrasonic sensor to change values. I had to add a bit more delay to make sure the card movement has stabilized before the sensor reads its distance.

const int trigPin = 9;
const int echoPin = 10;
const int ledgreen = 2;
const int ledyellow= 4;
const int ledred = 7;
// defines variables
long duration;
int distance;
void setup() {
  pinMode(trigPin, OUTPUT); // Sets the trigPin as an Output
  pinMode(echoPin, INPUT); // Sets the echoPin as an Input
  Serial.begin(9600); // Starts the serial communication
  pinMode(ledgreen, OUTPUT);
  pinMode(ledyellow, OUTPUT);
  pinMode(ledred, OUTPUT);
}
void loop() {
  // Clears the trigPin
  digitalWrite(trigPin, LOW);
  delayMicroseconds(2);
  // Sets the trigPin on HIGH state for 10 micro seconds
  digitalWrite(trigPin, HIGH);
  delayMicroseconds(10);
  digitalWrite(trigPin, LOW);
  // Reads the echoPin, returns the sound wave travel time in microseconds
  duration = pulseIn(echoPin, HIGH);
  // Calculating the distance
  distance = duration * 0.034 / 2;
  // Prints the distance on the Serial Monitor
  //Serial.print("Distance: ");
  Serial.println(distance);
  
  //Serial.write(distance);


    int brightness = Serial.parseInt();
    if(Serial.read() == '\n')
{
      //Serial.println(brightness);
      if(brightness == 1){
        digitalWrite(ledgreen, HIGH);
        digitalWrite(ledyellow, LOW);
        digitalWrite(ledred, LOW);
      }
      else if(brightness == 2){
        digitalWrite(ledyellow, HIGH);
        digitalWrite(ledgreen, LOW);
        digitalWrite(ledred, LOW);
      }
      else if(brightness == 3){
        digitalWrite(ledred, HIGH);
        digitalWrite(ledgreen, LOW);
        digitalWrite(ledyellow, LOW);
      }
    
    
    }
    delay(300);
    //analogWrite(ledgreen, brightness);
  }


Future improvements

I feel like there is a lot that could still be improved. I think the first thing would be to add vertical motion to the car, I was unable to implement it because the ultrasonic sensor detects horizontal distance changes only so it was a bit difficult to manage both the axes. Another factor would be to change the sensor to infrared which would solve the problem of inconsistent readings because infrared sensors send signals in a direct line while ultrasonic sensors send them spread out so the accuracy of readings would be improved. I would also like to add button to the Arduino such as buttons to turn the music on or off and also for the port selection, which I was unable to implement as well.


User Testing : Final Project

User Test results:

I had my friend try the game by just giving her a general idea of the game. I forgot to mention that she had to pair the Arduino board first by pressing the space bar so that is definitely something i will keep in mind when finalizing the user interface for the project. I had explained to her how to use the card against the ultrasonic sensor because I had not yet designed the board for it. I think it was working fine but the movement of the car was glitching a little bit due to the tilt of the card and unstable hand movements. Because of the random motion of the card against the ultrasonic sensor and lack of proper hardware, the car movement was haphazard and missing the ‘game end’ condition.

I think this is particular user testing helped me realize a lot of the issues with my design. I had not laid out clear instructions for the Arduino board connection which meant that for someone who was new to this sort of implementation, starting the game would not have been possible. The lack instructions on how to navigate the card and the limits of the card distance was also another factor I had not yet implemented which I had to verbally explain to my friend.

I am however happy with the serial output from Arduino because I was experiencing issues before with consistent output to p5.js and that has been sorted out now. I am also happy with the p5.js visuals as I was able to extensively work on that as well and make it fitting to the theme.


Further work:

I think the number one thing I will focus on for now is fixing the haphazard motion of the car due to the unstable card motion. I am thinking of limiting the movement of the card by placing it in slider that I have yet to design. This will make sure that the card does not tilt and stay within the limit of horizontal distance that I have chosen for the game.

I also need to add the LEDs so that there is a green light for when the game is in ‘game state’ and red for when it has not yet started. I need to refine the p5.js code by adding last final components. I have yet to add music, code to send data to Arduino for the LEDs, and edit the interfaces further.

I also need to add instructions for the Arduino board connection at the start of the game and then instructions to navigate the card holder and its movements as well.


Final Project Proposal

Idea

For the final project, I wanted to create a game that uses the ultra sonic sensor to create a trackpad for the movement of the player. As a rough outline, I am thinking of creating a car game in which the goal is to avoid other cars in the lane and get the highest score. It would look something like this:

Arduino

The main component to be used in Arduino would be the ultrasonic sensor which will use the movement of our fingers to move the car along horizontal axis. The reading from the sensor will be provided to p5.js for the x-coordinates of the car. There will also be a button to start the game and a two LEDs to indicate if the game has ended or is still on going.

p5.js

The p5.js would read the values from the ultrasonic sensor and map them to fit the movement of the car and start the game when the button is pressed. The classes for the car, obstacles and other game components will also be created in p5.js. It will also send data to Arduino when the game phase has changed so that the LEDs light up.

Arduino + p5js in class exercises (Saamia and Khadija)

Exercise 1:

For our first exercise, we used a light sensor as the analog input value for the movement of the ellipse on the p5js screen. The rVal from Arduino is used to plot the x coordinate of the ellipse.

p5js code:

//exercise 1 p5js
let rVal = 0;
let alpha = 255;

function setup() {
  createCanvas(640, 480);
  textSize(18);
}

function draw() {
  
  if (key == " ") 
  {
    // important to have in order to start the serial connection!!
    setUpSerial();
  }
  
  // one value from Arduino controls the background's red color
  background(map(rVal, 0, 1023, 0, 255), 255, 255);

  // the other value controls the text's transparency value
  fill(255, 0, 255, map(alpha, 0, 1023, 0, 255));

  if (!serialActive) 
  {
    text("Press Space Bar to select Serial Port", 20, 30);
  } else 
  {
    ellipse(rVal/2,240,100,100);
  }
}

function keyPressed() {
  if (key == " ") 
  {
    // important to have in order to start the serial connection!!
    setUpSerial();
  }
}

// This function will be called by the web-serial library
// with each new line of data. The serial library reads
// the data until the newline and then gives it to us through
// this callback function
function readSerial(data) {
  ////////////////////////////////////
  //READ FROM ARDUINO HERE
  ////////////////////////////////////

  if (data != null) 
  {
    // make sure there is actually a message
    // split the message
    let fromArduino = split(trim(data), ",");
    // if the right length, then proceed
    if (fromArduino.length == 2) 
    {
      // only store values here
      // do everything with those values in the main draw loop
      
      // We take the string we get from Arduino and explicitly
      // convert it to a number by using int()
      // e.g. "103" becomes 103
      rVal = int(fromArduino[0]);
      alpha = int(fromArduino[1]);
    }
  }
}

Arduino Code:

//exercise 1 arduino

void setup() {
  Serial.begin(9600); 
  pinMode(LED_BUILTIN, OUTPUT);
// start the handshake
  while (Serial.available() <= 0) 
{
    Serial.println("0,0"); // send a starting message
    delay(300);            // wait 1/3 second
  }
}
void loop() 
{
  // wait for data from p5 before doing something
    while (Serial.available()) 
{
    digitalWrite(LED_BUILTIN, HIGH); // led on while receiving data

  // Read sensor value
  int sensorValue = analogRead(A0);
   Serial.print(sensorValue);
  // Map sensor value to screen width
  int screenValue = map(sensorValue, 0, 1023, 0, 800);

  // Send mapped value to p5.js
  Serial.println(screenValue);
  delay(50); //    for stability
}
digitalWrite(LED_BUILTIN, LOW);
}

Exercise 2:

In the second exercise, we implemented a slider to adjust the brightness of an LED using Arduino. The current position of the slider, accessed through slider.value(), was stored as the variable “brightness”, and subsequently transmitted to Arduino as the new brightness level for the LED.

p5js Code:

//exercise 2 p5js

let brightness;
function setup() 
{
  createCanvas(640, 480);
  textSize(18);
  slider = createSlider(0, 255, 0); 
  slider.position(85, 140);
}

function draw() 
{
  if (!serialActive) 
{
    text("Press Space Bar to select Serial Port", 20, 30);
  } 
else 
{
    text("connected", 20, 30);
    brightness = slider.value();
  }
  brightness = slider.value();
  //readSerial();
  if(mouseIsPressed)
{
    readSerial();
  }
}

function mouseIsPressed()
{
  readSerial();
}

function keyPressed() {
  if (key == " ") 
{
    // important to have in order to start the serial connection!!
    setUpSerial();
  }
}
function readSerial(data) 
{
    console.log(brightness);
    let sendToArduino = brightness+"\n";
    writeSerial(sendToArduino);

}

Arduino Code:

//exercise 2 arduino

int ledpin = 5;
void setup() {
  // Start serial communication so we can send data
  // over the USB connection to our p5js sketch
  Serial.begin(9600);

  // Outputs on these pins
  pinMode(ledpin, OUTPUT);

  //Blink them so we can check the wiring
  digitalWrite(ledpin, HIGH);
    delay(200);
  digitalWrite(ledpin, LOW);

  // start the handshake
  while (Serial.available() <= 0) 
{
    Serial.println("0");
    delay(300);
  }
}

void loop() {
  // wait for data from p5 before doing something
  while (Serial.available()) 
{
    int brightness = Serial.parseInt();

    if(Serial.read() == '\n')
{
      //Serial.println(brightness);
      analogWrite(ledpin, brightness);
    }
    analogWrite(ledpin, brightness);
  }
 
}

Exercise 3:

For this last exercise, we used an ultrasonic sensor to sense the distance and use this variable to change the wind movement in the p5js movement of the ball. The data values of the sensor ranged from 0 to around 3000 and therefore for any value below 1000 the wind blew from left to right and if the value was above 1000 wind and the ball moved towards the left.

p5js Code:

//p5js exercise 3
//declare variables
let velocity;
let gravity;
let position;
let acceleration;
let wind;
let drag = 0.99;
let mass = 50;
let value = 1401;

function setup() 
{
  createCanvas(640, 360); //create canvas
  noFill();
  position = createVector(width/2, 0);
  velocity = createVector(0,0);
  acceleration = createVector(0,0);
  gravity = createVector(0, 0.5*mass);
  wind = createVector(0,0);
}

function display()
{
  text("Press Space Bar to Start Serial Port", width/2 - 109, height/2 - 5);
}

function draw() {
background(255);
if (serialActive) //if the serial is active
{
  applyForce(wind);
  applyForce(gravity);
  velocity.add(acceleration);
  velocity.mult(drag);
  position.add(velocity);
  acceleration.mult(0);
  ellipse(position.x,position.y,mass,mass);
      if (position.y > height-mass/2) //if the ball touches the bottom
      {
      velocity.y *= -0.9; // A little dampening when hitting the bottom
      position.y = height-mass/2;
      }
}
else //if serial not active
  {
  fill(0);
  display();
  }
}

function applyForce(force)
  {
  // Newton's 2nd law: F = M * A
  // or A = F / M
  let f = p5.Vector.div(force, mass);
  acceleration.add(f);
  }

function keyPressed()
{
  if (key==' ')
  {
  setUpSerial();
  }

if (keyCode == UP_ARROW) //if up arrow is pressed
  {
  mass=random(15,80);
  position.y=-mass;
  velocity.mult(0);
  }
}

function readSerial(data) //call back function
{
let sendToArduino = value + "\n"; //sends value to Arduino with \n added
writeSerial(sendToArduino); //write to Arduino
  if (data != null) //if some information is received
  {
  console.log(data);
    if (data < 1000) //if the distance is less than 1000
    {
    wind.x = 1; //the wind blows to the right
    }
    else if (data > 1000) //if the distance is more than 1000
    {
    wind.x = -1; //the wind blows to the left
    }
  }
}

Arduino Code:

//exercise 3 arduino code
int value = 0;
const int trigPin = 7; //trig pin of Sensor
const int echoPin = 13; //echo pin of Sensor
int distance = 0; //distance data from sensor

void setup()
{
Serial.begin(9600); // Start serial communication at 9600 baud

//set the sensor pins as output and input 
pinMode(trigPin, OUTPUT);
pinMode(echoPin, INPUT);

while (Serial.available() <= 0)
{
  Serial.println(1400);
}
}

void loop()
{
//wait for p5js
while (Serial.available())
{
sensorReading(); //reading data from sensor
value = Serial.parseInt(); //parsing from the serial written data from p5js
}
}

//to read the sensor and find distance
void sensorReading()
{
//Send a short low pulse
digitalWrite(trigPin, LOW);
delay(2); //delay to avoid complications
digitalWrite(trigPin, HIGH); //sends a high pulse for 10 microseconds
delay(10);
digitalWrite(trigPin, LOW); //turn off the ping pin
distance = pulseIn(echoPin, HIGH); //Measure the duration of the ultrasonic pulse and calculate the distance
Serial.println(distance); //print the serial from distance
}

Video:

Musical Instrument – Light Sensitive Tabla

Idea:

Saamia and I created a unique version of the tabla, a pair of hand drums commonly used in traditional South Asian music.

The Tabla: Paired Drum of South Asia - Center for World Music

Initially, we thought of recreating the same instrument with the use of pressure sensor resistors but then we decided to make it light-sensitive. Our vision was to make the tabla come alive with an ethereal quality, allowing it to be played not by hand, but by the interaction of light. It was an interesting and fun project that resulted in a unique musical instrument.

Code:

#include "pitches.h"

//==========First resistor=============
int photoPin1 = A0;
int speakerpin = 7;

int melody[] = {

  NOTE_G4, NOTE_A4, NOTE_G4, NOTE_F4, NOTE_D4, NOTE_F4, NOTE_G4,
  NOTE_G4, NOTE_A4, NOTE_G4, NOTE_E4, NOTE_D4, NOTE_E4, NOTE_F4,
  NOTE_F4, NOTE_G4, NOTE_F4, NOTE_D4, NOTE_C4, NOTE_D4, NOTE_E4,
  NOTE_E4, NOTE_F4, NOTE_E4, NOTE_D4, NOTE_C4, NOTE_D4, NOTE_E4,
  NOTE_G4, NOTE_G4, NOTE_G4, NOTE_A4, NOTE_G4, NOTE_F4, NOTE_D4, NOTE_D4
};
//==========Second resistor=============
int photoPin2 = A1;
int speakerpin2 = 4;
int melody2[] = {

  NOTE_G4, NOTE_F4, NOTE_D4, NOTE_G4, NOTE_D4, NOTE_F4, NOTE_G4,
  NOTE_G4, NOTE_D4, NOTE_E4, NOTE_G4, NOTE_C4, NOTE_E4, NOTE_G4,
  NOTE_G4, NOTE_G4, NOTE_F4, NOTE_A4, NOTE_G4, NOTE_D4, NOTE_D4,
  NOTE_E4, NOTE_E4, NOTE_A4, NOTE_F4, NOTE_E4, NOTE_C4, NOTE_F4,
  NOTE_G4, NOTE_F4, NOTE_G4, NOTE_A4, NOTE_D4, NOTE_E4, NOTE_D4, NOTE_F4
};

void setup() {
  pinMode(speakerpin, OUTPUT);
  Serial.begin(9600);
}

void loop() {
  //====================First Speaker
  int lightRaw = analogRead(photoPin1);

  int light = map(lightRaw, 0, 700, -12, 35);

  if (light > 0 && light<33) 
  {
    tone(speakerpin, melody[light], 500);
  }
  else if(light == 35 || light < 33){
    noTone(speakerpin);
  }
  //===================Second Speaker
  int lightRaw2 = analogRead(photoPin2);

  int light2 = map(lightRaw2, 0, 700, -12, 35);

  if (light2 > 0 && light2<33) 
  {
    tone(speakerpin2, melody2[light2], 500);
  }
  else if(light2 == 35 || light2 < 33){
    noTone(speakerpin2);
  }

}

Process:

Initially, we began the project by connecting a single light sensor to a speaker. The main challenge we encountered was mapping the readings from the light sensor to play the correct melody from an array of notes. During the process of setting these thresholds, we decided to make the instrument turn off in bright conditions and start playing sound when the light sensor was covered by a hand in dimmer conditions. This approach created a similar hand action to that of hitting the tabla with the hand, resulting in a more authentic and natural playing experience.

After the initial phase, we decided to expand our project by adding another light sensor to take readings of the surrounding light. However, we faced a challenge when we realized that the changes in light conditions on the two light sensors were not being accurately reflected by the single speaker we were using. To solve this issue, we decided to divide the instrument into two separate speakers, with each speaker connected to one light sensor individually. This allowed for more distinct and clear sound production based on the readings of each light sensor.

Circuit:

Demo:

Analog Input/Output

Idea

While I really like sunlight or natural light filtering in through my window, if I am deeply focused on a task I often forget to turn the lights on when the sun has set and this has often lead to headaches and dryness in my eyes due to eye strain when working on my laptop in the dark. So I wanted to create an indicator using a light sensor and LED in which the LED starts to blink if the light in the room is very dim. The glaring red alarm LED can only be temporarily switched to a blue light when a button is pressed down because I often get lazy and don’t get up to turn on the lights. So the red light would continue to blink as long as lights are not turned on and it becomes brighter in the room.

Circuit

I created the following circuit for the light indicator. I connected the LDR with a pull down resistor of 10K Ω and in the same circuit added the red LED with its respective resistor of 330Ω. Then I connected the red LED and LDR with the blue LED through a button and following is the Arduino Uno code for the circuit:

const int BUTTON = 7; // the number of the pushbutton pin on the arduino board
int lastState = LOW; // the last state from the button
int currentState;    // the current reading from the button
const int LIGHT_SENSOR_PIN = A0; 
const int LED_PIN          = 3;  
const int LED_PIN_2          = 11;  
const int ANALOG_THRESHOLD = 500;
int Analog;

void setup() {
  Serial.begin(9600);
  pinMode(LED_PIN, OUTPUT); 

  pinMode(BUTTON, INPUT_PULLUP);
}

void loop() {
  Analog = analogRead(LIGHT_SENSOR_PIN); // read the input on LDR

  currentState = digitalRead(BUTTON); //read input on button 
  if(Analog < ANALOG_THRESHOLD){
    if (currentState==HIGH){
      digitalWrite(LED_PIN, HIGH);   // turn LED on 
      delay(500);                       // wait 
      digitalWrite(LED_PIN, LOW);    // turn LED off 
      delay(500);
    }
    else{
      digitalWrite(LED_PIN_2, HIGH);   // turn LED 
      delay(500);                       // wait 
      digitalWrite(LED_PIN_2, LOW);    // turn LED off 
      delay(500);
    }    
  
  }
  else{
    digitalWrite(LED_PIN, LOW);  // turn LED off
  }


}


Improvements

For future improvements I would want to add some sort of sound alarm to it as well so that I do not ignore the indicator at all because of the noise. I would also like to add a LED that starts blinking again after a set time period of the lights are not turned on in for example 5 minutes or something similar to this.

Unusual Switch

Idea

For this assignment, I struggled to come up with a creative way of connecting a switch without the use of hands. So during one of my stress cleaning episodes in my room, when I tapped on my trash bin to throw something in, the light bulb went off in my mind. That’s why I created a switch that connects when the lid of the bin closes and the light turns on.

How it works

I used the following set up of the circuit. I connected two of the wires with tape because I needed more length for the wire attached to the lid of the bin. A coin is also taped at the end of this wire to increase the surface area of contact between this wire and the one attached to the rim of the bin.

Future improvement

For future implementations, I would somehow want the light to turn on when the lid is open instead and position the wires in a way that it does not disrupt the usage of the bin. Or maybe if a green light turns on if the bin is closed and red light turns on if bin is open.

MidTerm Project- “Help Milo!”

Concept

My midterm project, “Help Milo!”, is a high score based game where the players help a cat named Milo collect as many food items as possible. When it came to deciding the kind of character and theme I would adopt for this game, I instantly knew it had to revolve around cats and specifically my pet cat, unsurprisingly named Milo. Initially, my sketch for this project was very abstract as I had created randomly sized platforms that emerged at different instances. But then the idea of creating an almost picture frame view of the game looked better, so I decided to go for a more organized platform design. 


In the game, the player uses LEFT and RIGHT arrow keys to move the cat along the platforms that continuously move upwards. Moving the cat to the top of the ladder causes it to climb down so it avoids touching the top of the frame. The player needs to collect as many food items as possible and avoid touching the upper frame or falling on the bottom frame. The score gets updated and high score is also displayed at the end. The game restarts when ENTER is pressed. 

Game Code

For this game, I created classes for both the player, platforms, and bonuses (food item). Through the classes, I was able to append the class objects into arrays for both platforms and bonuses so that the for loop in the draw function could iterate over the arrays for any function. At a specific frameRate, new platform objects and bonuses are created and then when they move beyond the frame, they are removed from the array to avoid lag in the game. 


I think I found it difficult to retrieve the attributes of different classes to use them in another class. I struggled to find a way in which I can use the y coordinate of the platform in the player class so that I can limit the movement of the player beyond the platform. Similarly, I wanted to access the coordinates of the bonuses for the player to collect them in a function. I figured out the solution by passing the entire object ‘platform’ or ‘bonus’ as an argument to the function in player. That way, I was able to access the different attributes of the other classes and use it to change the movement of the player. 

update(platform){
 
  //if the player in on the platform and not on the ladder space, then it stays on the platform
  if(this.y >= platform.y && this.y <= platform.y+platformsize && (this.x<platform.spacex || this.x > (platform.spacex+platform.spacewidth))){
    this.y = platform.y;
    
  }
  //if player on ladder space, it falls
  else if(this.x>platform.spacex && this.x < (platform.spacex+platform.spacewidth) && this.y >= platform.y && this.y <= platform.y+platformsize){
    this.rownum = 0;
    this.y+=1;
    this.col = (this.col+1)%4;
  }
  //initially it falls 
  else{
    this.y+=1;
    //this.col = (this.col+1)%4;

  }
}
//to check if the x and y coodinates of player and food is same to catch the food
bonuscatch(bonus){
  if(this.x>bonus.x && this.x < bonus.x+(bonus.size) && this.y>bonus.y && this.y <bonus.y+(bonus.size)){

    caught = true;
    success.play();
  }
}


A bug that constantly proved to be an ever present issue was the code placement in and outside the for loop to iterate over the arrays of platforms and bonuses. Due to the usage of a single for loop within the draw() function, it took me time to figure out how to manage iteration over the different arrays at the same time and call the different functions.  I think I found the use of sprite sheets and variable “gamestate” to change the user interface to be the most interesting to figure out.

Improvements

I think for future improvements, I would really like to implement some sort of obstacle in the game. I was able to implement the obstacles but could not edit their frequency because of the for loop and use of .splice() in the obstacle arrays. I would also like to add different levels to the game, add different elements to the levels to make them complex or easier. Creating different levels of the game through a random structure would also be an interesting aspect to develop.

MidTerm Progress – Infinite fall

Concept

For the midterm, I am planning to create a game in which a character falls and lands on different platforms that keep emerging from the bottom. The main goal is to stay on the platforms that are within the canvas dimensions for as long as possible and the time plus added components decide a player’s score for the round. It is a score based game and going above or below the top and bottom of the canvas respectively ends the game. 


I was intimidated by the code where I had to keep the ball (Player) on the platforms but by making separate classes of ball and platforms I was able to manage that as well. I still need to add more conditions to make the movement and fall of the ball smoother.

Further Work

I have only been able to get done with the basic idea of the game and still need to add the following features: 

  • Cause the ball to move as long as the key is pressed
  • Make the platforms appear in a more organized sequence
  • Fix the error where the ball seems to be passing through the platforms
  • Set conditions on how the game is lost (by touching the top of the canvas)
  • Add elements such as slowing down the speed etc. 

Assignment – Data Visualization

Concept

For this assignment, I selected the data from the London DataStore by King’s College London about “London Average Air Quality Levels”. The data shows background average readings for Nitric Oxide, Nitrogen Dioxide, Oxides of Nitrogen, Ozone, Particulate Matter (PM10 and PM2.5), and Sulphur Dioxide over the course of 9 years, from January 2010 to Aug 2019. I wanted to represent the readings in the form of particles of varying sizes and colors with a background color of sky to show how these air pollutants exist around us and the level of impact they make. 

Code

I started off by representing the pollutants’ readings using points on the normal canvas size but as the number of categories for pollutants compared to the number of months(rows) was small, I used map( ) to space out the particles across the y and x axis. I used ±random(1, -1) to cause a vibrating impact for the particles to kind of show them as molecules vibrating in the air. I also used map( ) to set the size of particles according to their recorded quantity in the air. For the other display, I displayed data as a continuous vertex which formed a diagonal line in the middle to display the net decrease in the quantity of pollutants in the air.

[Click mouse to change data representation and move mouse for date display]

The values increase top to bottom and that’s why the size of particles at the bottom is greater than that at the top. The size of particles depicts the magnitude of the readings, larger particles represent more quantity of a certain pollutant in the air. All seven pollutants that are recorded have different colors as well. The month and year is displayed along the bottom when the mouse moves within the column range of one data value.

Reflection

This particular assignment was fairly easy to work with because the majority of the tasks were performed by already existing table functions. It was interesting to see how simple data could be used to create such visual representations and experimenting with the same data caused different results. I think I would want to make the display more aesthetically pleasing and interactive next time.