Gopika and Bhavicka’s Final Project: Eyes of Enakshi

Well, here it is. I’m back for one last documentation on the Intro to IM website, and what looks like it will be the last one of the semester. It feels like it’s been a while since I’ve done one of these. I promise I’ll try to be organised this time, use sub-headings and all.

Before I go ahead, this is Gopika’s documentation for 90% completion of our project. It might be interesting to look at the changes.

The Idea and Story

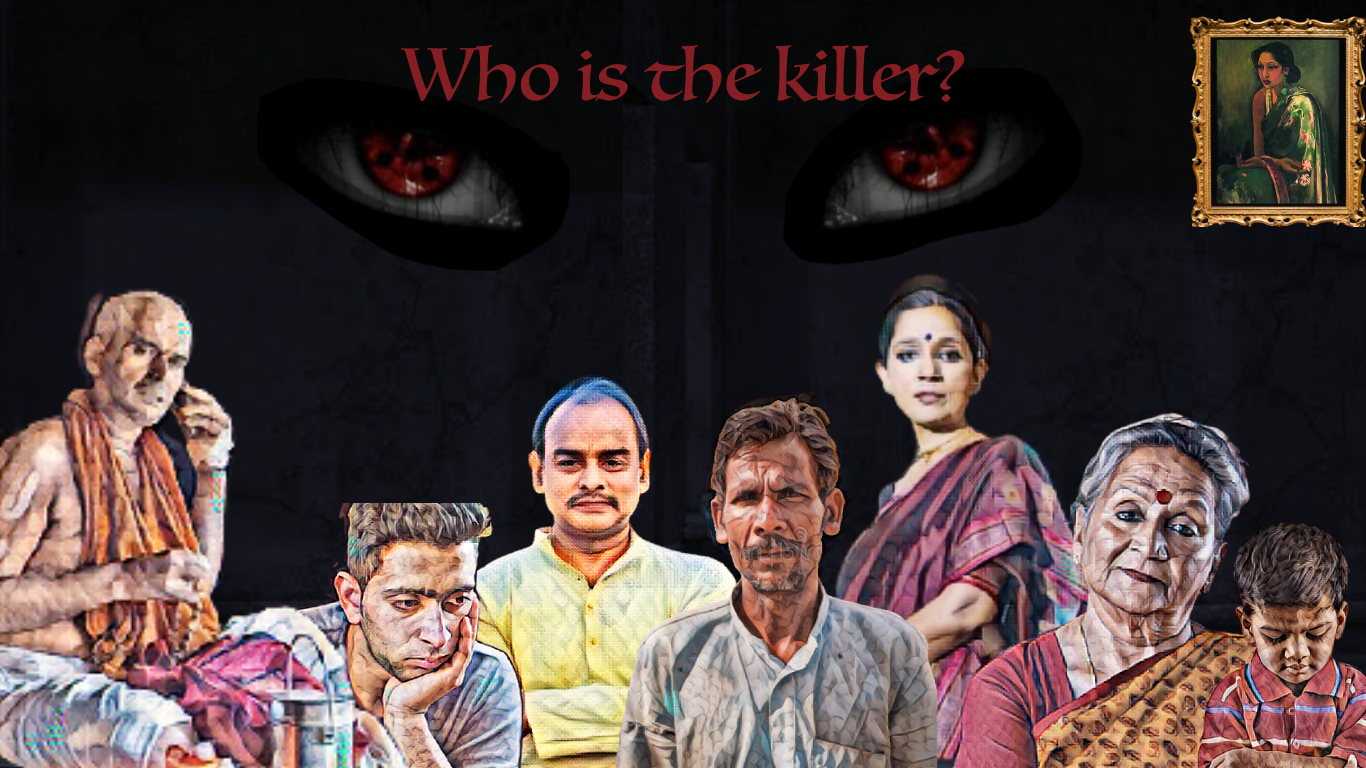
We wanted to make an interactive murder mystery game with Indian elements. We had already come up with our story by last time – a rich Indian businesswoman has been murdered in a town which seems to be convinced that Enakshi killed her. Enakshi is a supernatural creature of our own creation – based on the south Indian yakshis but employing subtler methods (her eyes of anger) to kill. However, she claims that she is not the one to do it – and it is up to you to find out the truth. We introduce a whole cast of characters including the dead woman’s young husband, his two siblings, his mother, the pujari (priest) of the temple and her dearest friend and her kid.

The Implementation

Early on, we had divided our work. Gopika would work on the main screen, introduction to the legend, interacting with Enakshi, and the wiring of the four clues (and figuring out the capacitance). I worked on the Morse code (and button), the character dialogue screens, the slider mechanism for choosing the killer and the two end screens. Most of these were incorporated into the main code by Gopika because she already had an established system for the buttons. We mostly used a legend variable which would increase or decrease based on the button pressings, and each different value of legend corresponded to a different thing. After that we worked on writing out and planning the clues together.

The Changes

After the user feedback we got from some players and also professor, we decided to change quite a few things and make our game simpler. First we decided to only have a one killer storyline (we were planning to make it randomised before). We also rethought the physical interaction of our clues. This was the game run-down:

  • Main game screen with About and Play
  • The Legend
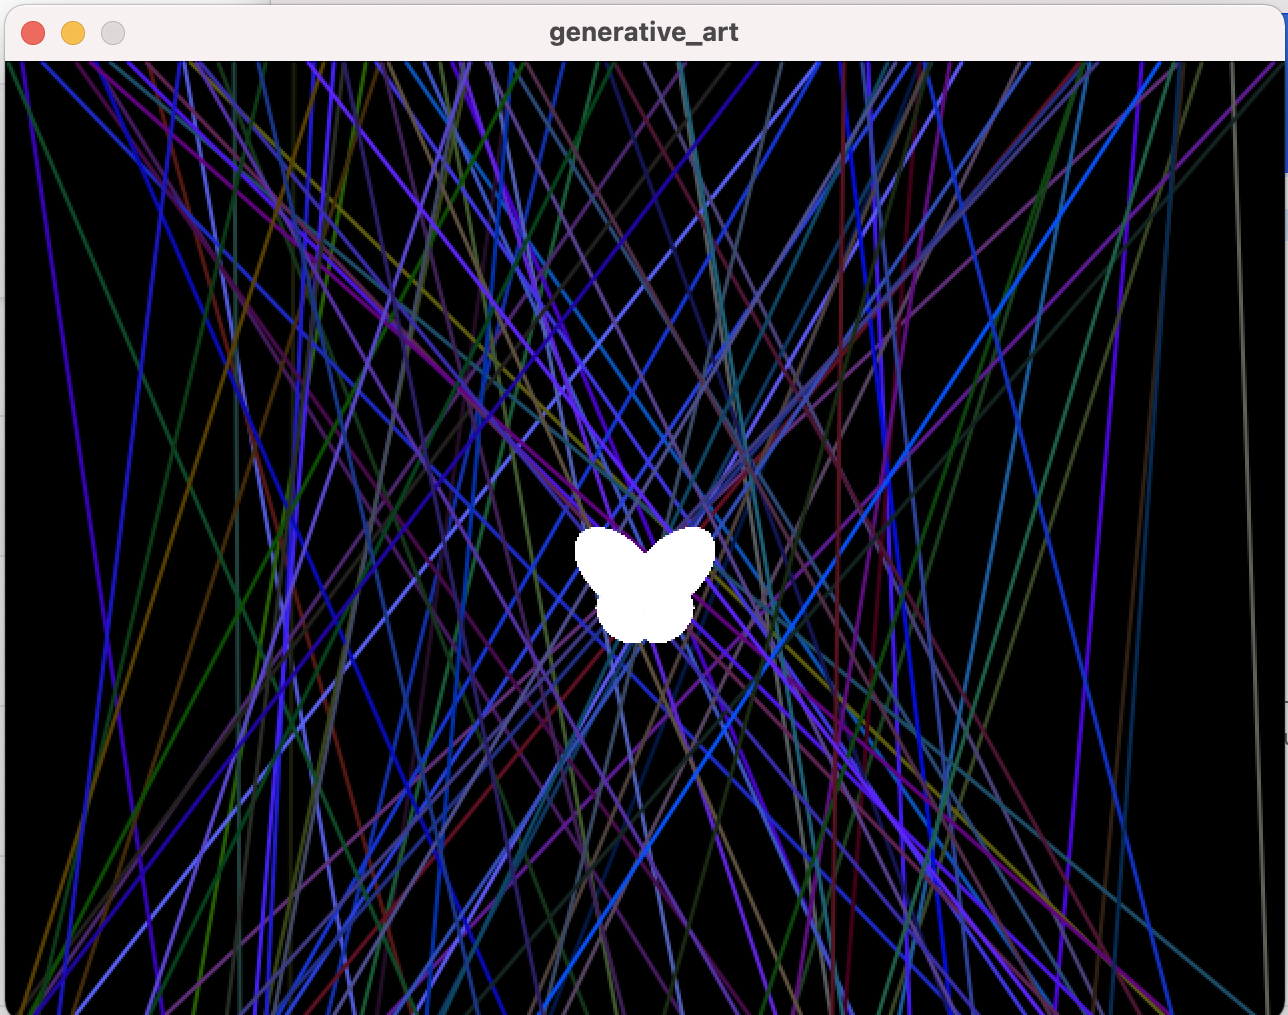
  • Interaction with Enakshi (with red eyes this time)
  • Introduction of the murder and characters
  • Morse code (finally figured out without delay and incorporated as a single unit into the main code now)
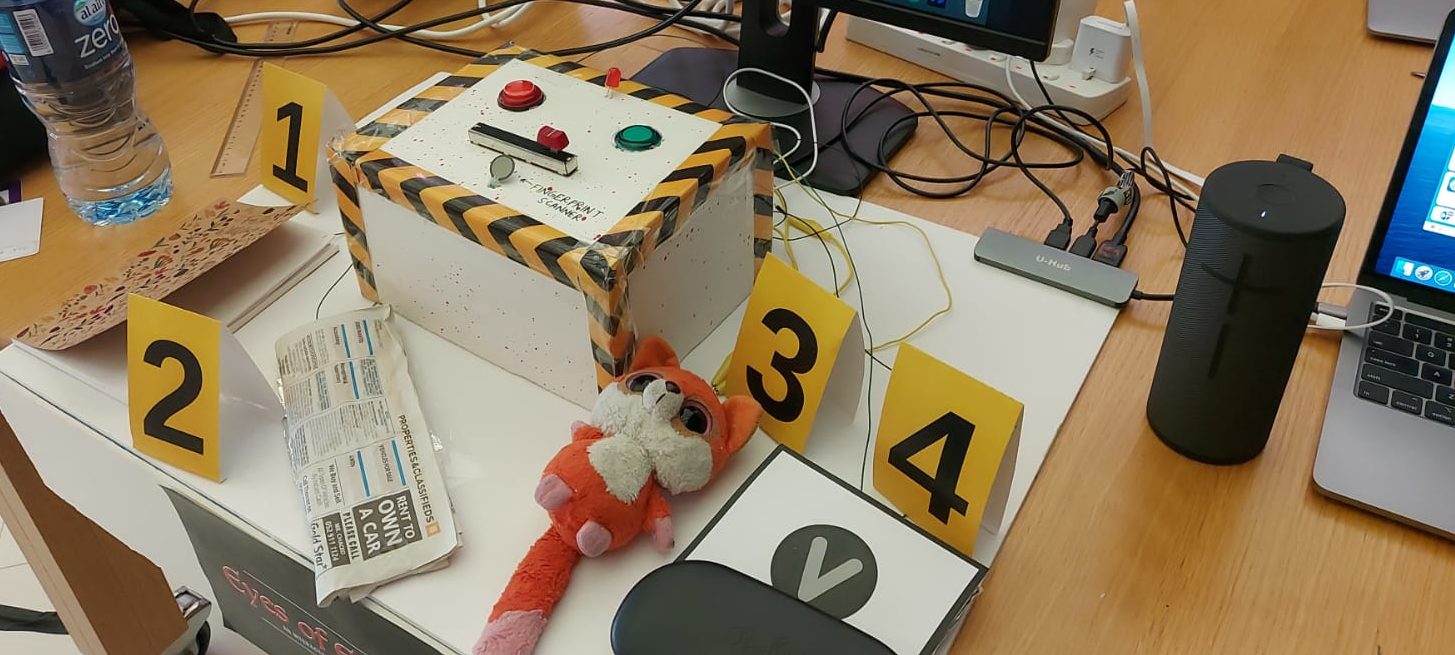
  • Pressing a force sensor to act as a fingerprint scanner and gain access to the clues
  • Clue 1: Turning to the diary page figured out through Morse and rubbing your finger on the page to have it appear on screen (through capacitance)
  • Clue 2: Lifting a newspaper attached to a foam board covered in foil and kept on foil (breaking the digital switch)
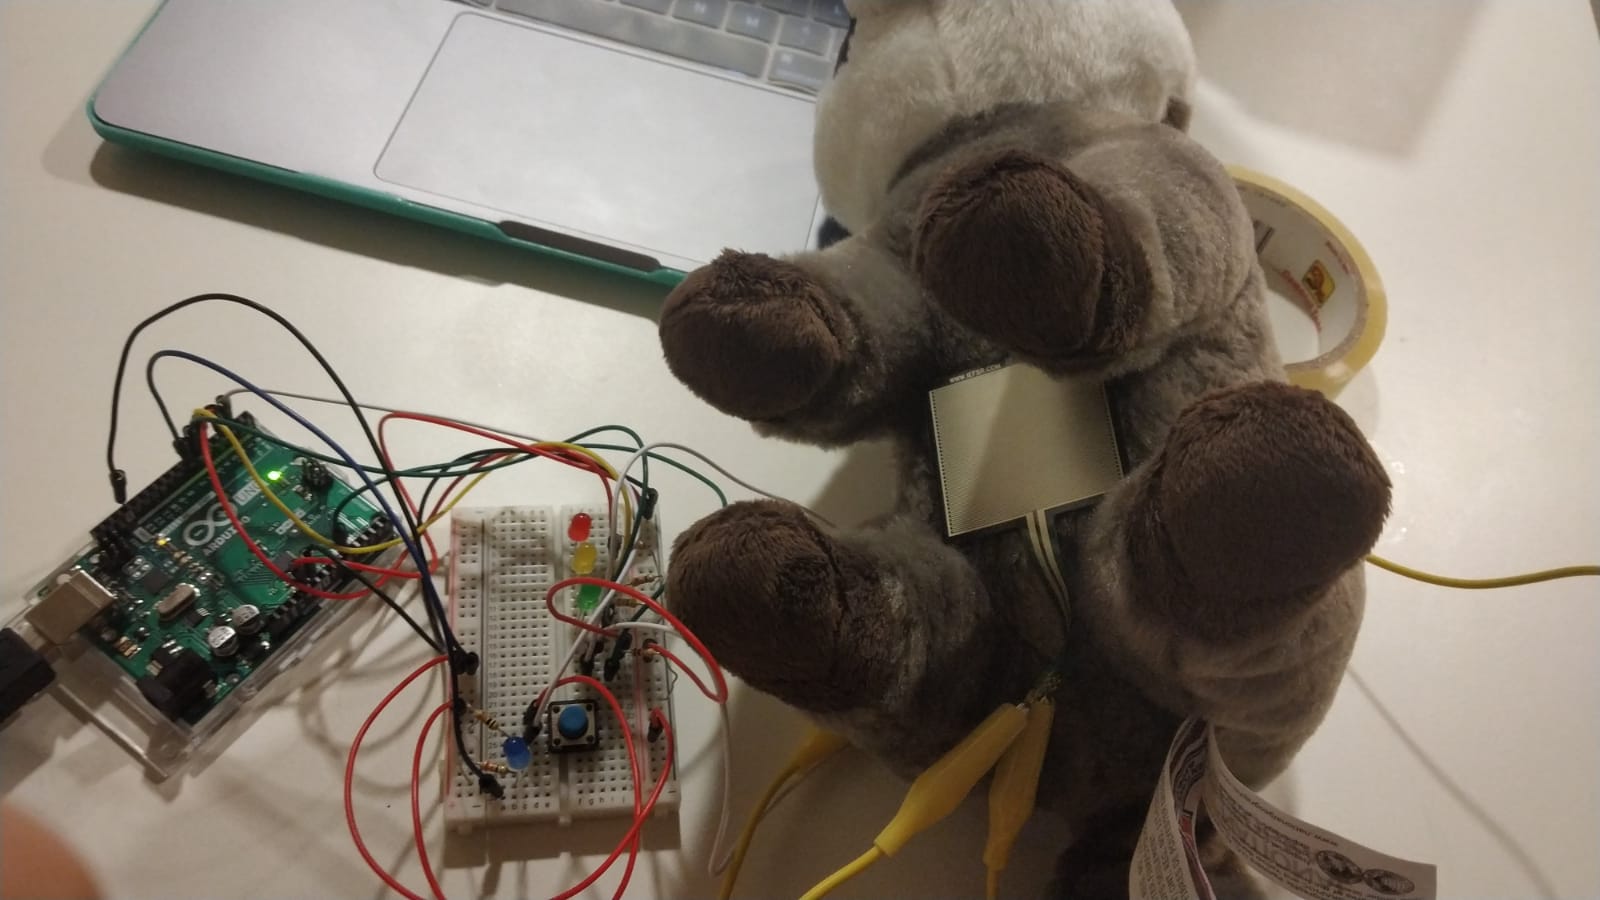
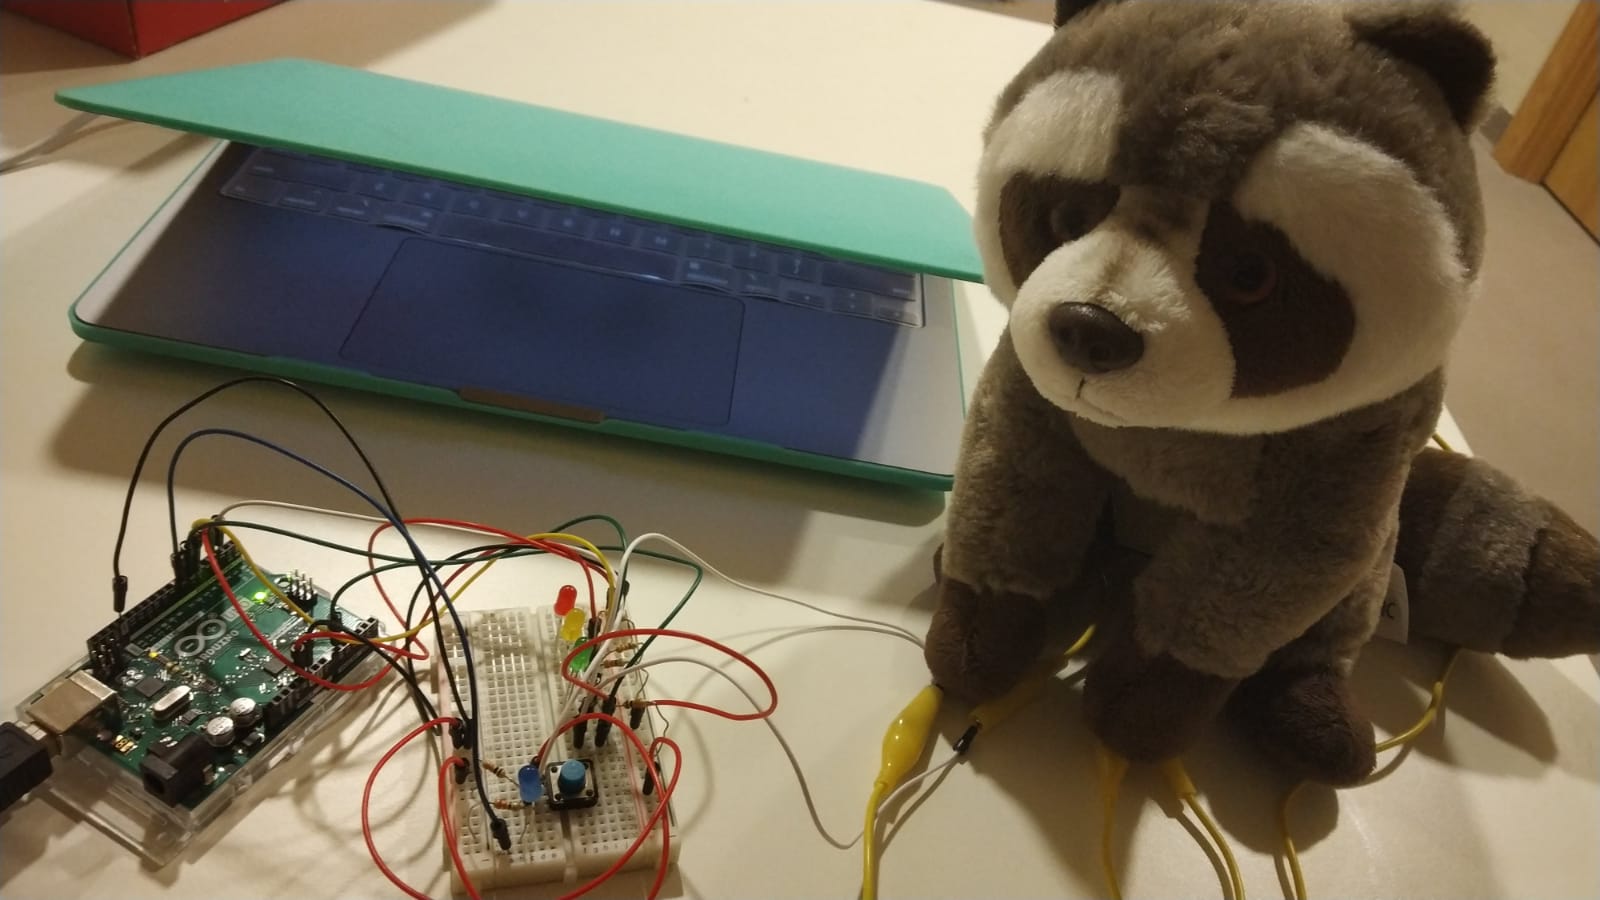
  • Clue 3: Lifting a toy from a larger rectangular force sensor (courtesy my previous experience with soft toys and force sensors) so that the reading gives 0
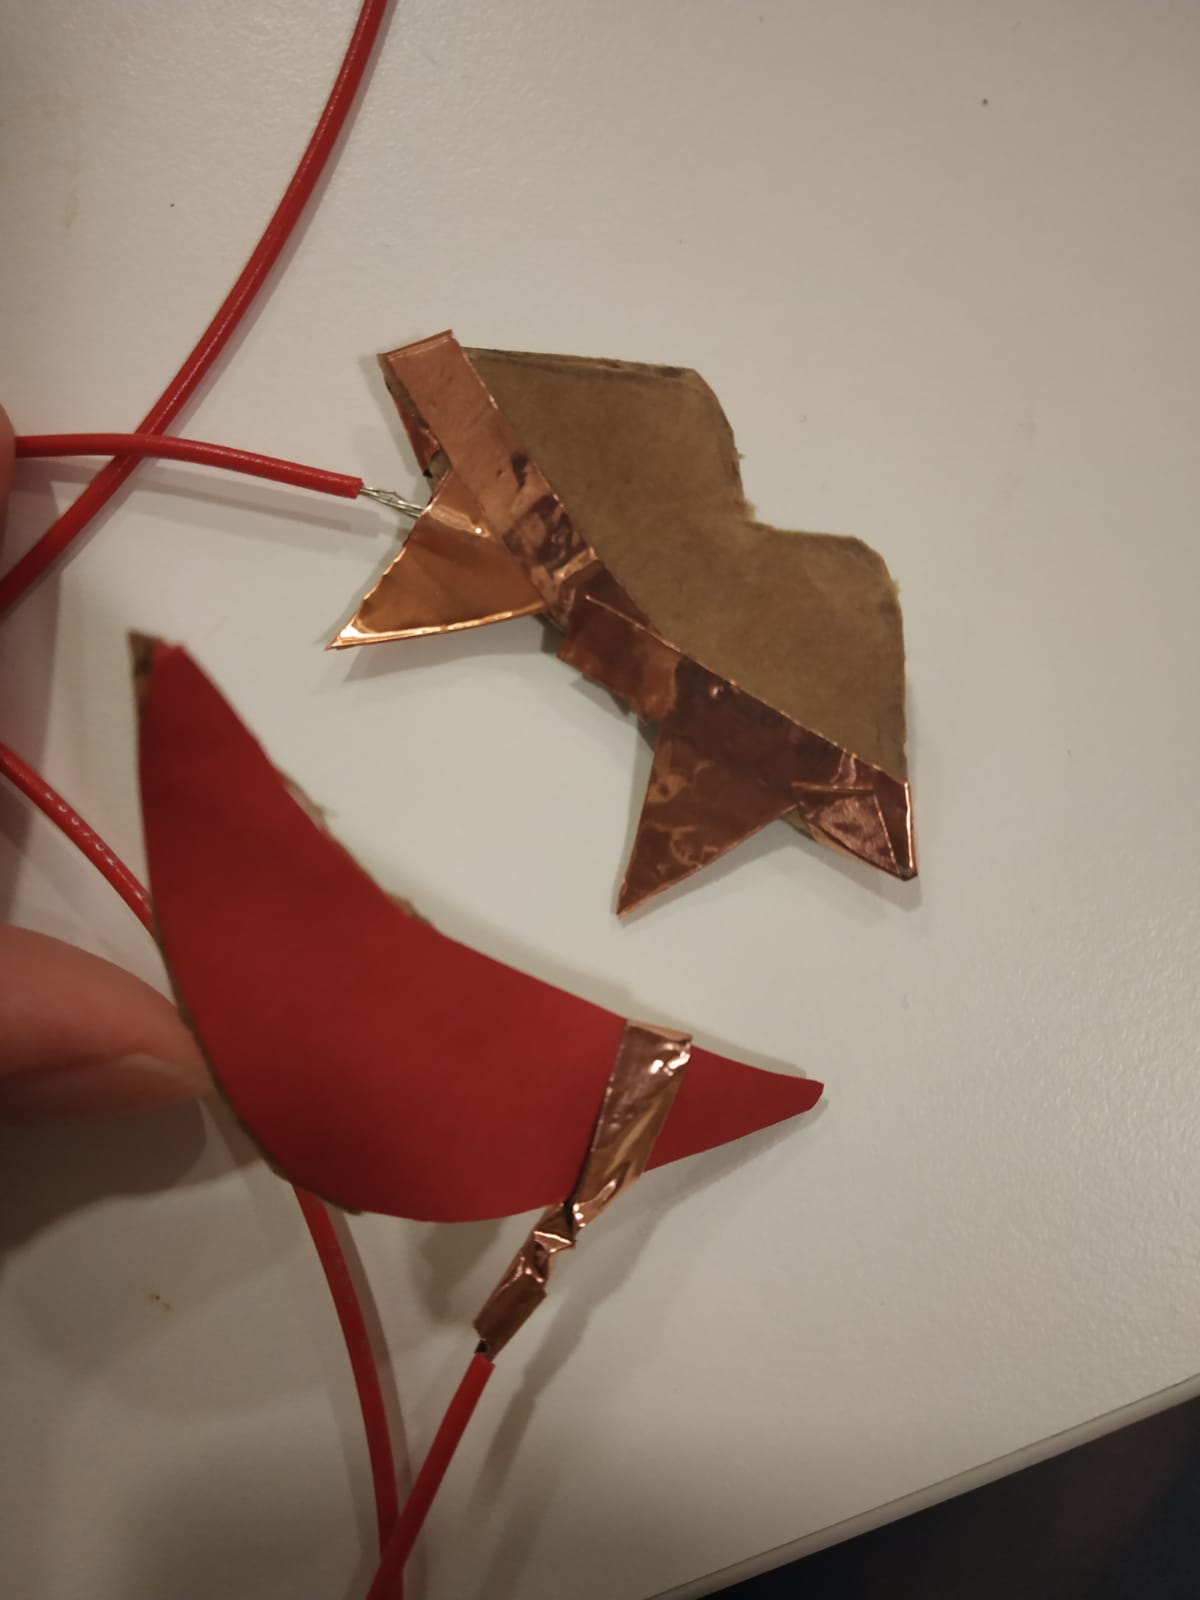
  • Clue 4:  A mechanism where a few layers of tissue separate a card (backed with foil) and a base of aluminium foil, where keeping a heavy object on the edge completes the circuit and lifting it breaks it.
  • Final sliding screen – made the animation effect more pronounced, and had a clue log (discarded the character log idea as it was too much info dumping)
  • Which leads to the two ending screens – winning and losing – if you know, you know.

    Our new Enakshi image with wonderfully realistic red eyes

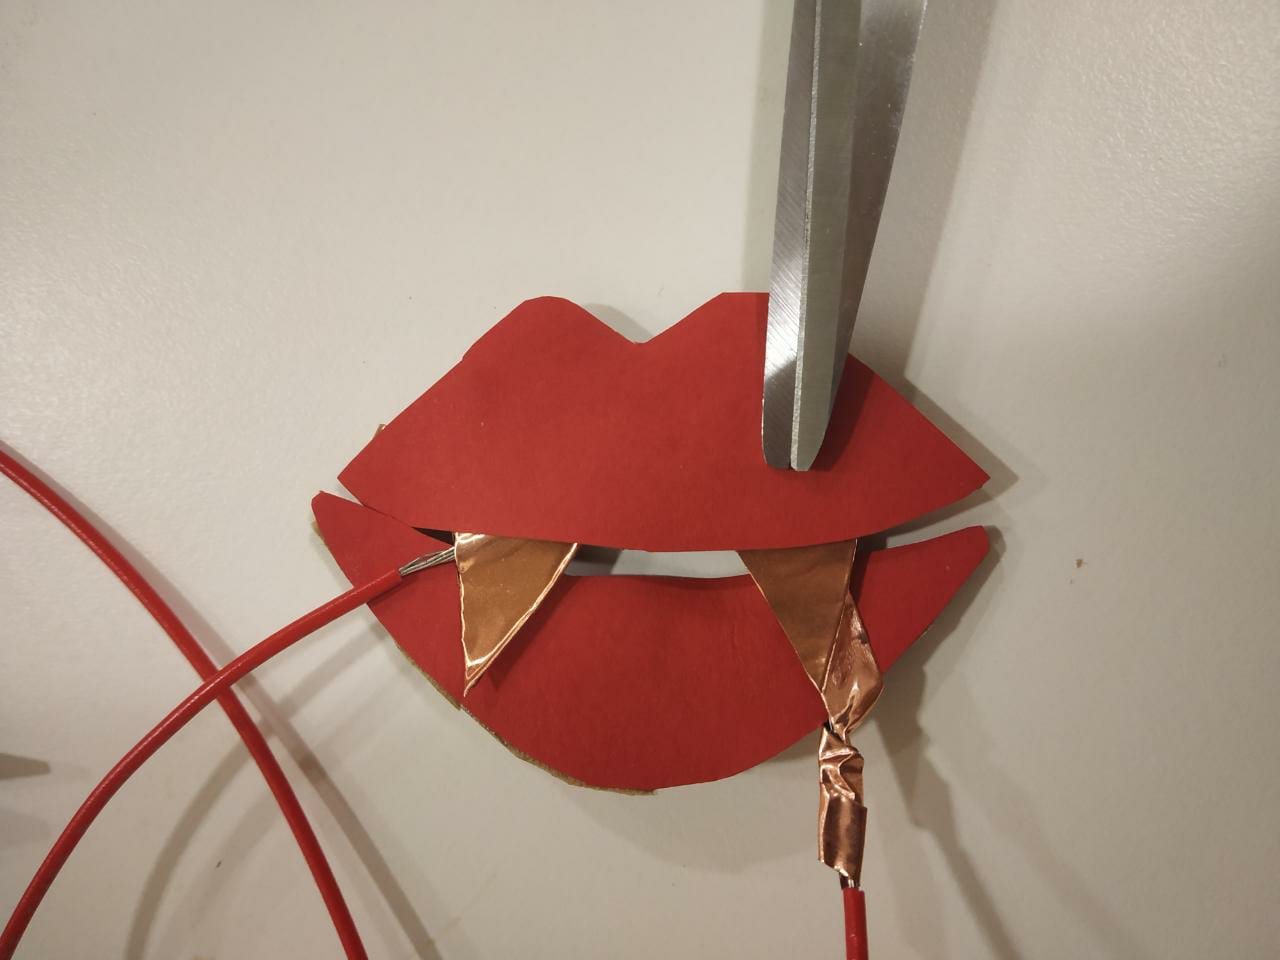
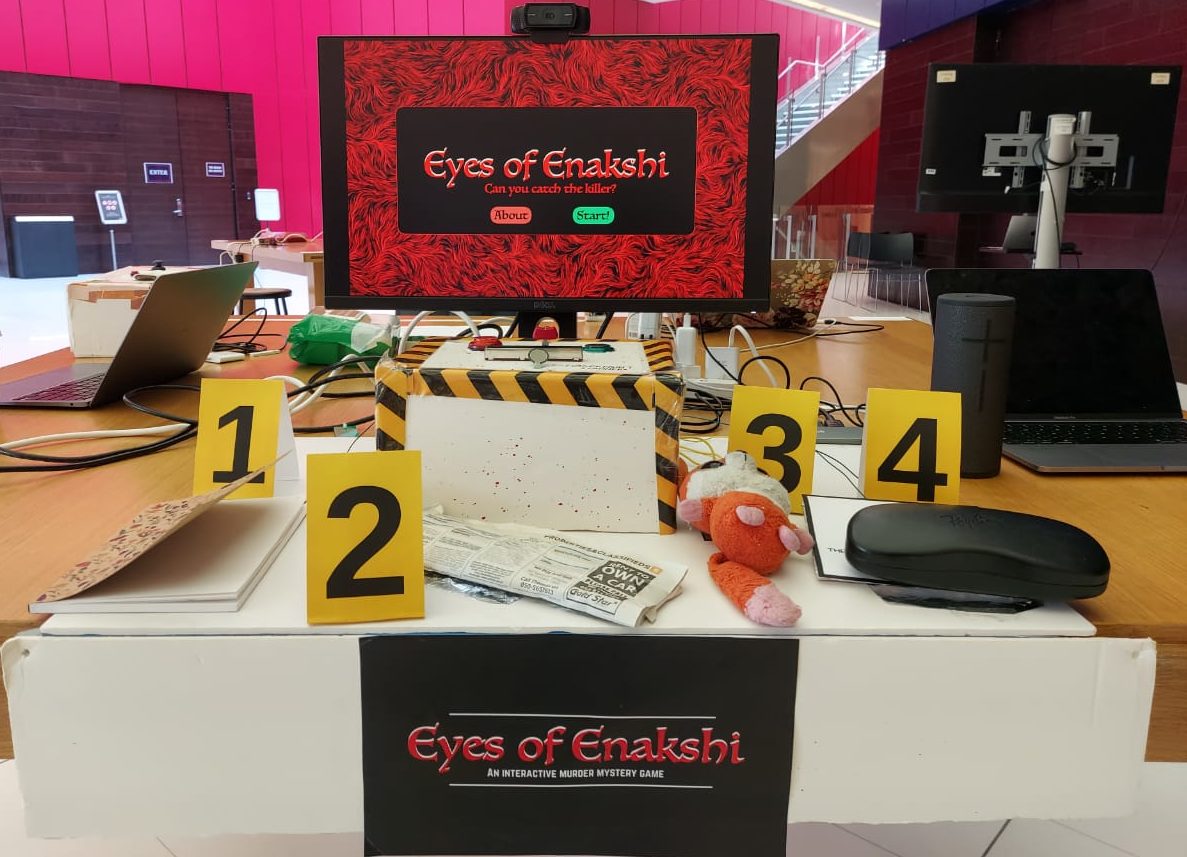
We also incorporated Shamma’s feedback and changed the main screen’s yellow highlights to white. And the biggest task of all – we had to make a control box and use buttons which would be easier for gameplay. After a lot of effort and truly ingenious tinkering (we had to use the sharp edges of the aluminium foil box for cutting), we were able to bring our conveniently blood splattered box to life. We also decided to use crime scene type evidence markers based on Professor’s feedback, and did a bit of decorating after that. The result was something we were really pleased with.

The result of blood, sweat and tears (not really I’m just being dramatic jk jk)

In the final show, we also got a monitor, speaker (we had added a game theme fittingly called ‘Tense Detective’ and winning and losing sounds), and a webcam to connect on the monitor so users wouldn’t have to switch between two physical screens. Though these all acted funky initially, we got them to all work in the end.

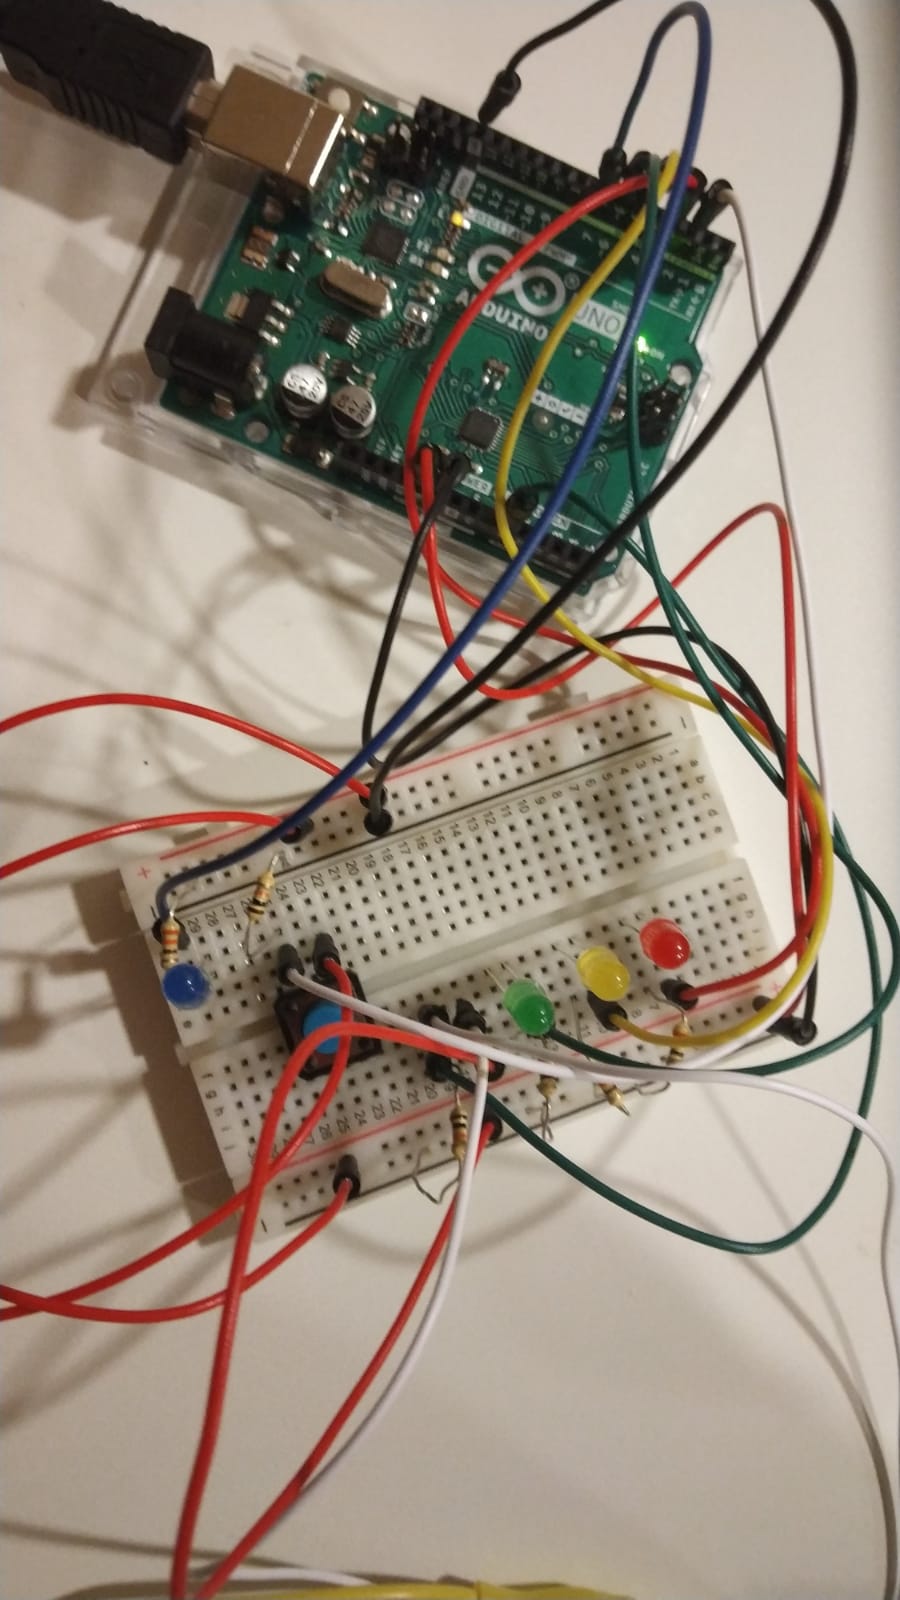
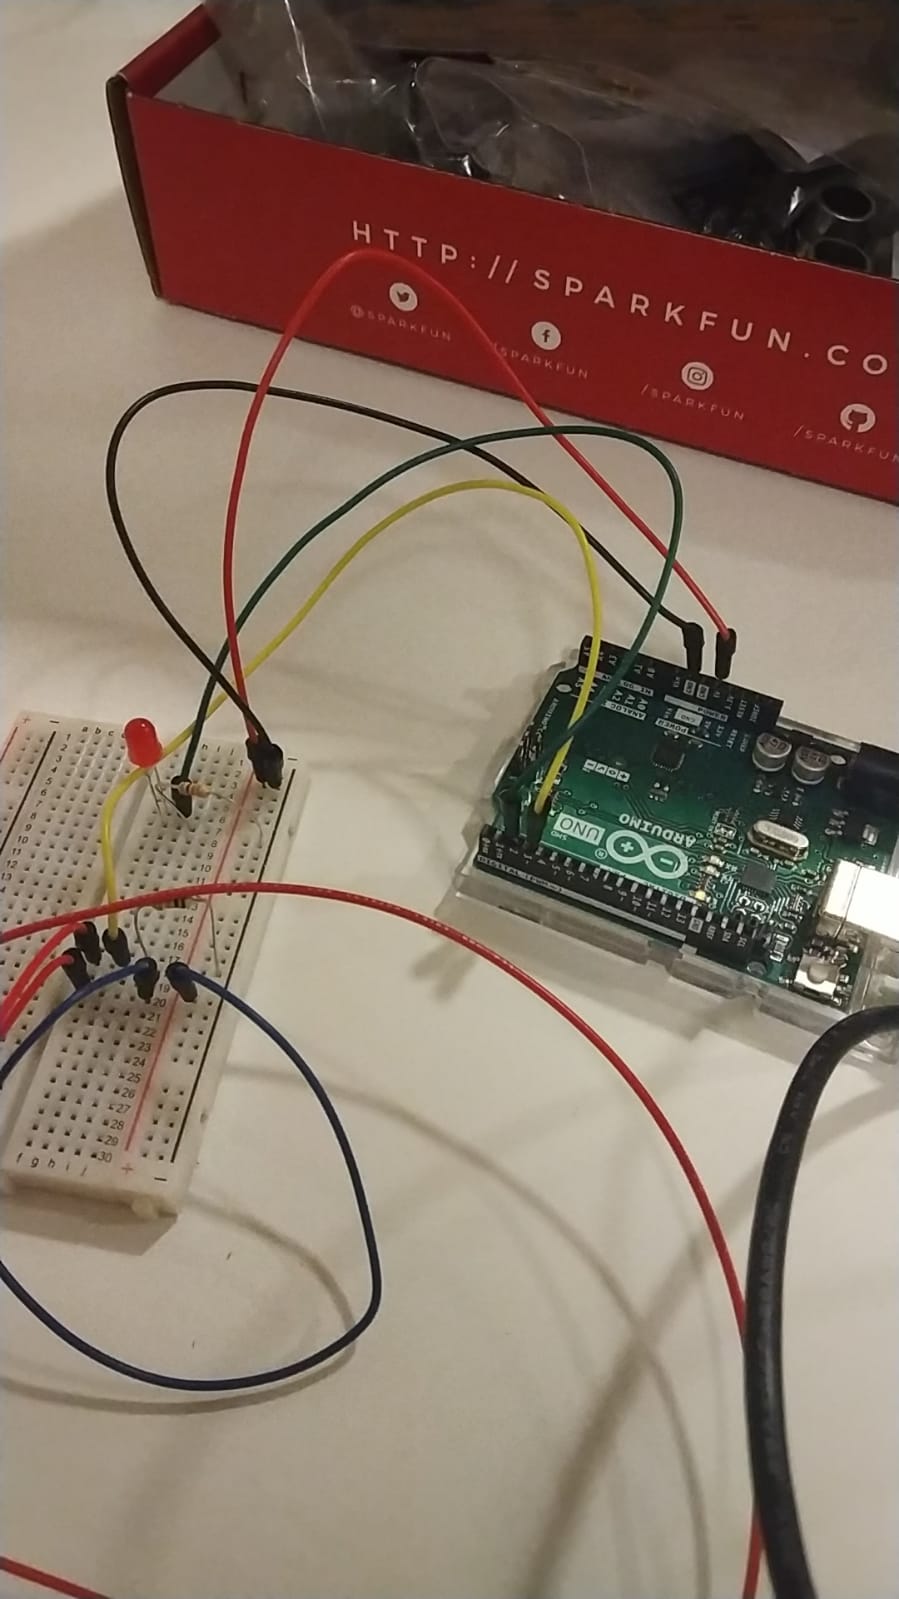
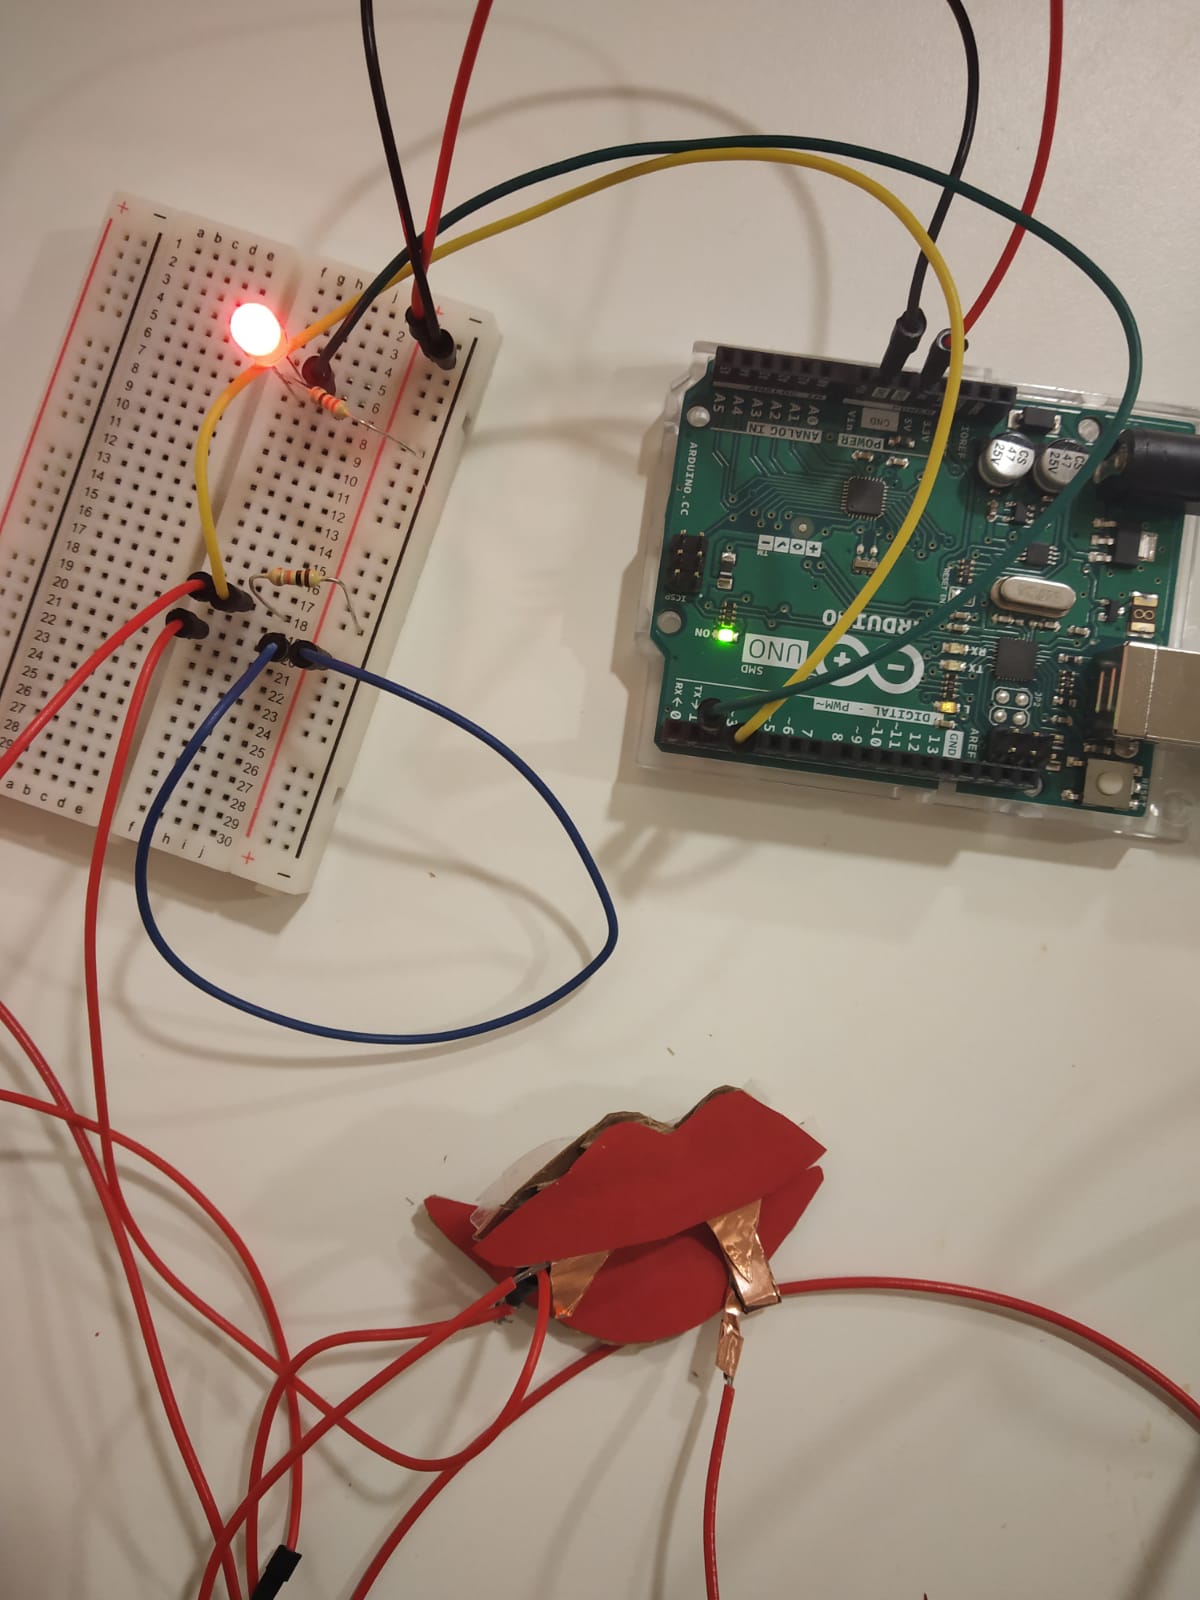
I am going to attach some photos of our Arduino circuits too but unfortunately we took the photos after it was already inside the box.

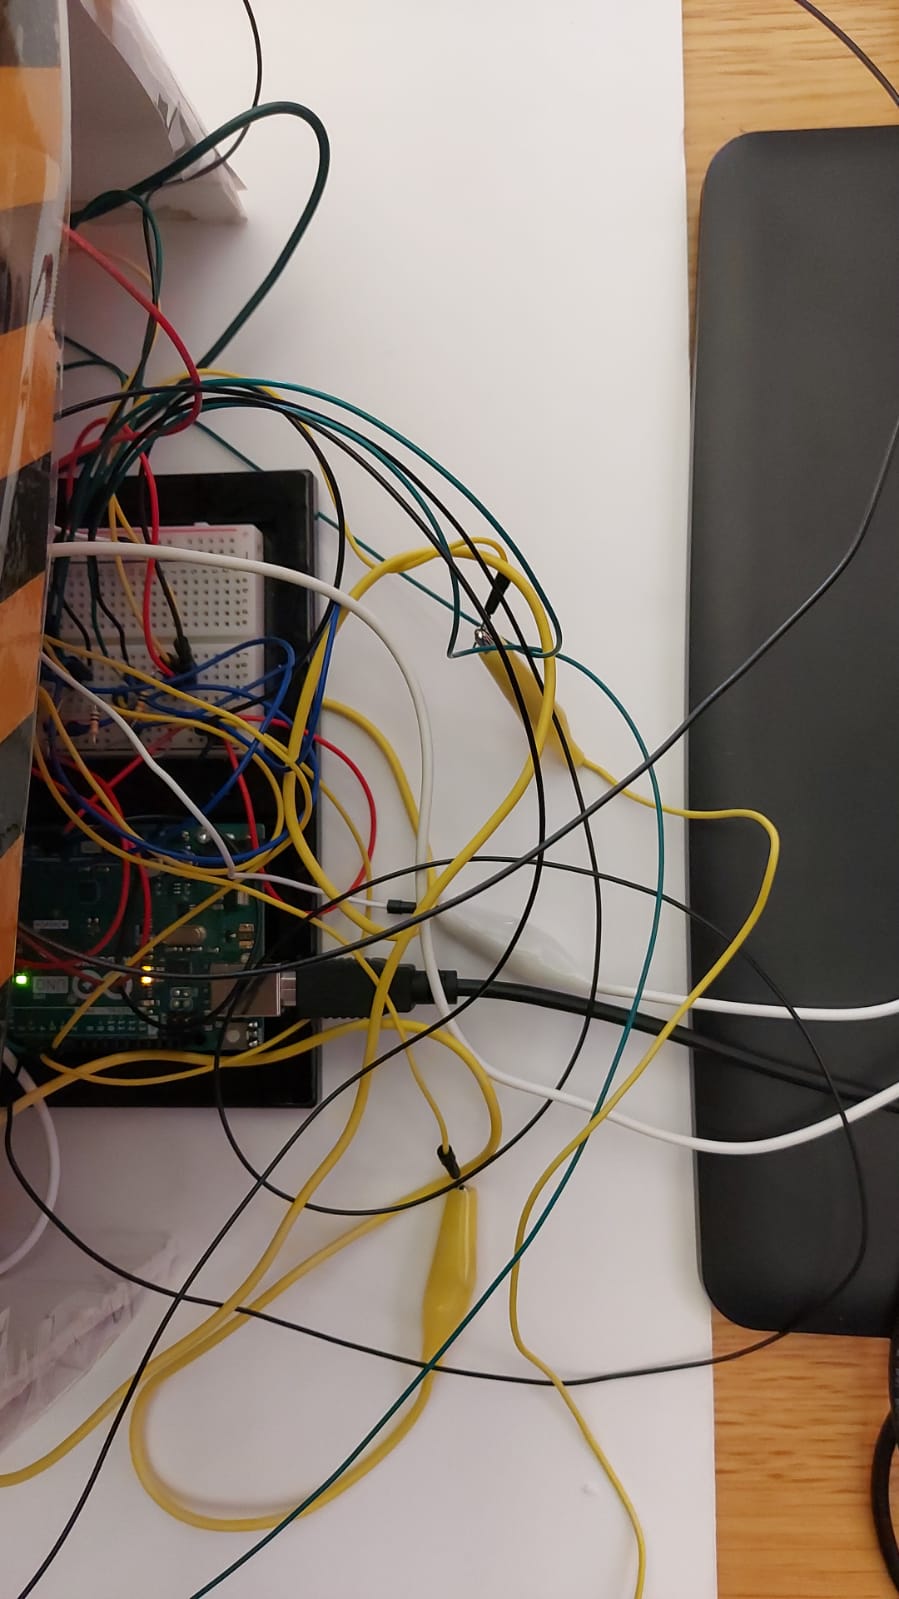
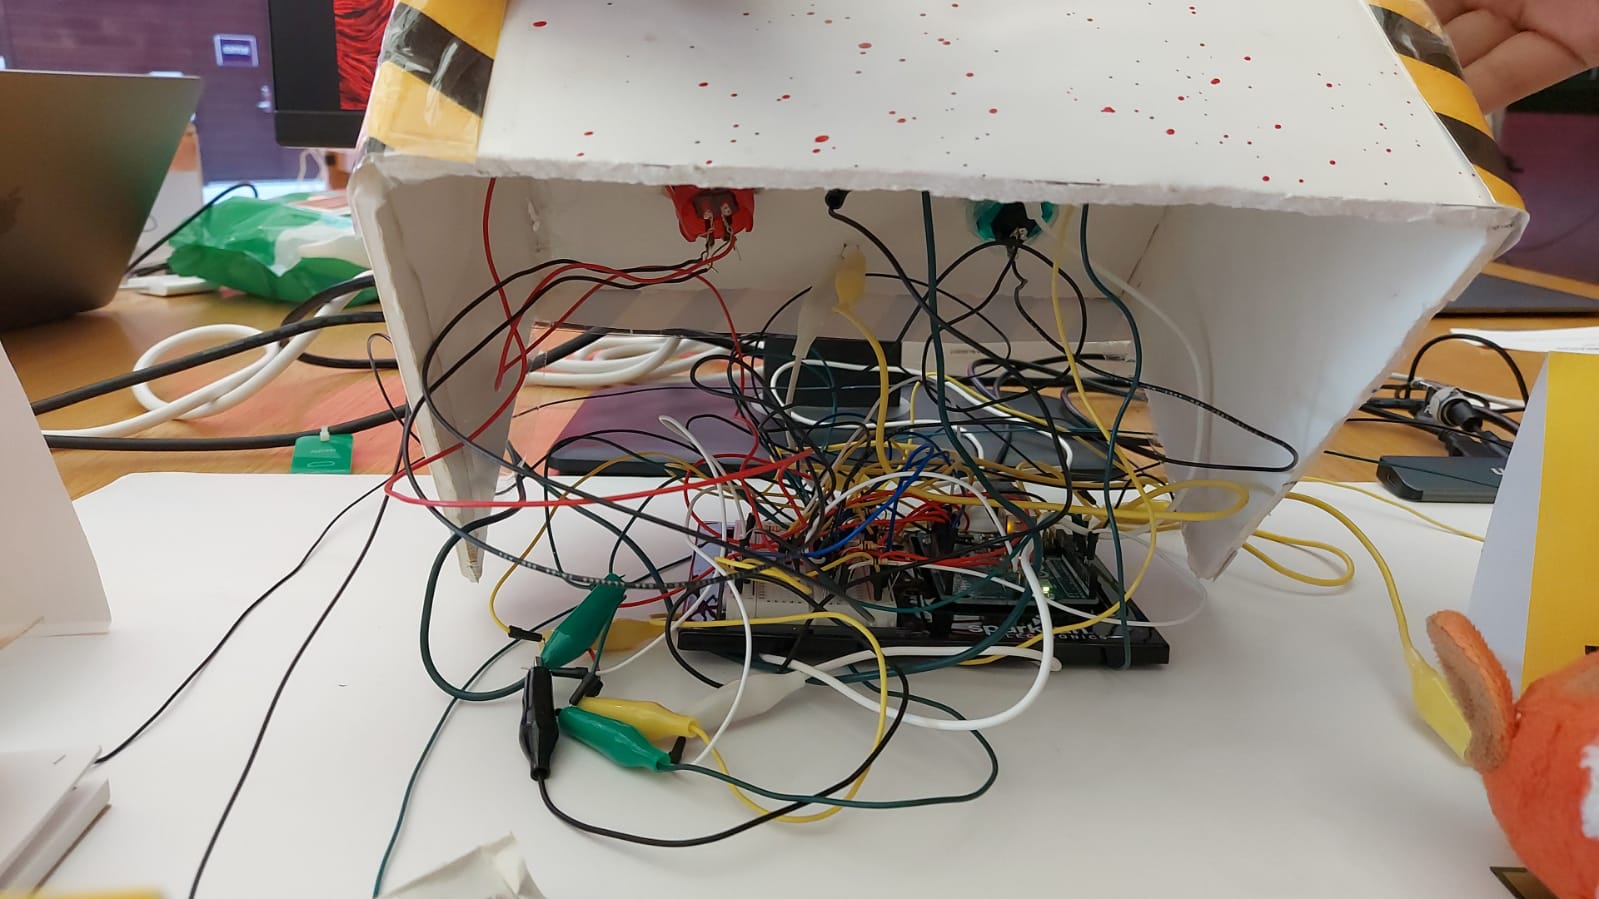
So yeah, it is a bit of a mess. But it should be easy enough to recreate it if we look at the code. Speaking of..

The Code

Since our code is very long, here is the github repo for it. It also has all the other visuals and sounds if you wanna take a look.

The Challenges

Like I already mentioned, everything we tried seemed to not work at first. Or it would be working one day and then not work the next, or not work when we incorporate it with the other clues. For example, the force sensors were messing with each other’s readings, and Gopika ended up finding that (void)analogRead(variable); before reading the actual variable could help. We used this but we never knew what worked in the end. Even the digital switches were very difficult to make fool proof, because we knew they had to be reset again and again for people to play. Even going through test runs was hard because of the length of the game, but in the end the final result was so worth it!

Final Showcase, Reflections and Funnies

We had sorted out all our problems by the final day and even printed a little nameplate of our own.

It was so so satisfying to see people finally play our game and figure out the killer – and a lot of times not. This is a fun game trailer style edit of some of our interactions during the showcase, with the beloved losing screen added this time.

Everyone who played seemed to really enjoy and be invested in it. A few notable funny/scared reactions came every time when

  • The legend video started moving
  • Enakshi through the fog
  • “I miss Mummy.”
  • The sliding screen animation
  • “Starting with you…” (for those who got to see it)

We were glad that the mother-in-law wasn’t the totally obvious choice and people were getting quite confused between her, the sister-in-law, and the husband. We even had some people choose the brother-in-law.

A few special mentions must go to Leo who kept insisting that it was the kid and almost made us change the choosing line-up, and to our green button. After so much time spent soldering our beautiful buttons, we didn’t account for the difference in their sizes and the green one ended up being a bit loose- and had the honour of being pushed through hard by a lot of people, starting with Fatima on our class in Monday. It was almost like she had predicted the future.

Overall this was a very rewarding and fun project to work on and it was great working with Gopika, I feel like our visions really aligned for this and it shows in the final product. We took on a lot and I am glad all our hard work was worth it. The showcase where people were loving our game was honestly the highlight of our Finals Week.

I can’t believe this semester and class is at its end now, I truly had such a great time and learnt so many new things, from Professor and also from the other people in the class. Everyone was really kind and helpful, and without much further ado I am going to sign off and wish everyone a great winter break.

Don’t worry, Enakshi is resting too.

For now.

Final Project Proposal: Gopika and Bhavicka

I know I had a whole set of different ideas, but I have my reasons okay – I love murder mysteries and when Gopika mentioned that she was planning to make one and give it an Indian twist and offered to partner up, I thought it would be more rewarding creatively to work on this project (as appealing as Bollywood DDR might be). I am very very excited to be working on it 🙂 (thank you for the offer once again!!)

Gopika provided a pretty succinct summary of it so I’ll copy that here:

“The interactive murder mystery game would let the user play detective at a murder scene. They will get a sense of the murder scene and characters in the beginning. Followed by this, they can inspect objects from the murder scene and get clues. Finally, the user can select who the murderer is.

As for the storyline, we have developed a pretty vague idea. We want the murder victim to be a rich man who was at their holiday home in a hill station in south India. We want to add in some supernatural elements (like Yakshi) to add to the thrill. For aesthetics, we want to have a soundscape that would consist of typical murder mystery elements like a nursery rhyme out of place,  jumpscares, etc.”

Materials/Space Needed

      • Projector – This could help give more of a horror vibe, but we are unsure how the controls would work with it
      • Slider – to choose the murder suspect at the end (but press a button to confirm)
      • Gloves (which the users will wear and touch the objects with)
      • Aluminium Foil (to put on the gloves, if this doesn’t work, we use switches on the objects)
      • Clue objects which fit the aesthetic of the game, for example a doll if there is a child and some Indian jewellery if possible

Again, Gopika provided the timeline we discussed so I have copied that as it is too:

“Timeline of the Game

      • Set the story – user interaction includes using buttons to go to the next scene and during this part of the game, the player gets to understand the characters, the story, and the motive of the game.
      • Clues inspection – in this part, the user gets to interact with the objects from the murder scene and find clues. The story develops in parallel as the user interacts with the objects to find clues. We were thinking of having the story progress once the user finds, for example, 2 clues. Rather than having a timer to reveal the story. So, the story goes at the pace of the player. Here are some ideas we’ve had for the clues:
        • Morse code with LEDs – have it seem like the supernatural element is communicating the clues to the player
        • Hidden switch in one of the objects to reveal a clue
        • Letters/messages/diary notes are revealed
        • Set up a switch that requires simultaneous pressure on multiple items. We were also thinking of having the pressure points be tapped in a certain sequence and a sequence is revealed by an earlier clue.
      • User chooses their pick – they can reach this phase by either pressing a button mid-game deciding to finalize their pick or after they’ve found all the clues.

The user has access to all the clues they found so far – throughout the game – they can access it by clicking a button. This helps them review all the clues they’ve gotten so far as they progress through the game.”

Hardest Part

I think the hardest part is developing the storyline in a satisfying way, such that it fulfils both our and the players’ expectations. Once we have this in place, setting up the visuals for the aesthetic we have in mind would also take some time, but the logical code should be relatively simple. The clues should be very carefully chosen and actually lead to the conclusion of who the killer is for someone who has no previous idea of the game. The audio and visual and interactive aspects should tie in to give you the whole murder mystery experience!

I think that’s all we have for now, and I can’t wait to start working on this practically!

Final Project Ideas

We are supposed to make a final project which combines Processing and Arduino, and as always, I have multiple ideas with a huge dose of indecisiveness.

Idea 1: DDR

I remember one of our readings mentioning this as an example of interactivity, but the idea of recreating a Dance Dance Revolution mat using force sensors sounds really fun to me. The Processing sketch would play the songs and also display which arrow you are supposed to step on when, and a score tally could be kept depending on whether the correct sensor was pressed on or not.

Idea 2: Piano Tiles

Because the musical instrument Jade and I made was a keyboard, I got reminded of the popular mobile application game Piano Tiles, which I used to play too. It would be a similar concept to DDR, the screen would show which note you should play and points could be accumulated based on correctness. There could be different levels of difficulty to choose from, to determine how fast the notes are to be played. The problem is that the keyboard circuit was really delicate and might be disturbed during the gameplay, but the Professor had mentioned soldering and a different kind of board which might fix this.

Idea 3: Some sort of Game Console

My other idea was to make some sort of game controller, which could be used to control a character on screen, and maybe use my midterm project or something else for this. Using the breadboard and buttons might be able to achieve this.

These are the only sort-of-concrete ones for now, in general I have a lot of thoughts swirling in my head and I’ll see what I end up leaning the most towards.

Week 11: Trio of Exercises

This week, we had to complete these three exercises:

  1. make something that uses only one sensor  on arduino and makes the ellipse in processing move on the horizontal axis, in the middle of the screen, and nothing on arduino is controlled by processing
  2. make something that controls the LED brightness from processing
  3. take the gravity wind example (https://github.com/aaronsherwood/introduction_interactive_media/blob/master/processingExamples/gravityExamples/gravityWind/gravityWind.pde) and make it so every time the ball bounces one led lights up and then turns off, and you can control the wind from one analog sensor

I was able to complete 2 of these in class, and the third one required some figuring out. The Arduino and Processing codes will be inserted for each in order here. I had to attach 2 videos at the end for exercise 3 because my phone memory was acting up and not letting me record long videos. This was the best I could manage.

Exercise 1

This exercise still has the code to take inputs from both sensors, in case we wanted to change it up.

Processing

import processing.serial.*;
Serial myPort;
int xPos=0;
int yPos=0;
boolean onOff=false;
boolean onOff2=false;

void setup(){
  size(960,720);
  printArray(Serial.list());
  String portname=Serial.list()[2]; 
  println(portname);
  myPort = new Serial(this,portname,9600);
  myPort.clear();
  myPort.bufferUntil('\n');
}

void draw(){
  background(255);
  ellipse(xPos,height/2,30,30); 
  
}

void serialEvent(Serial myPort){
  String s=myPort.readStringUntil('\n');
  s=trim(s);
  if (s!=null){
    println(s);
    int values[]=int(split(s,','));
    if (values.length==2){
      xPos=(int)map(values[0],0,1023,0, width);
      yPos=(int)map(values[1],0,1023,0, height);
    }
  }
  myPort.write(int(onOff)+","+int(onOff2)+"\n");
}

Arduino

int left = 0;
int right = 0;

void setup() {
  Serial.begin(9600);
  Serial.println("0,0");
  pinMode(2, OUTPUT);
  pinMode(5, OUTPUT);
}

void loop() {
  while (Serial.available()) {
    right = Serial.parseInt();
    left = Serial.parseInt();
    if (Serial.read() == '\n') {
      digitalWrite(2, right);
      digitalWrite(5, left);
      int sensor = analogRead(A0);
      delay(1);
      int sensor2 = analogRead(A1);
      delay(1);
      Serial.print(sensor);
      Serial.print(',');
      Serial.println(sensor2);
    }
  }
}

Exercise 2

Processing

import processing.serial.*;
Serial myPort;
int xPos=0;
int yPos=0;
boolean onOff=false;
boolean onOff2=false;

void setup(){
  size(960,720);
  printArray(Serial.list());
  String portname=Serial.list()[2]; 
  println(portname);
  myPort = new Serial(this,portname,9600);
  myPort.clear();
  myPort.bufferUntil('\n');
}

void draw(){
  background(255);
  ellipse(mouseX,mouseY,30,30); 
  
}

void serialEvent(Serial myPort){
  String s=myPort.readStringUntil('\n');
  myPort.write((int)map(mouseY, height, 0, 0, 255)+"\n");
}

Arduino

int brightness;

void setup() {
  Serial.begin(9600);
  Serial.println("0,0");
  pinMode(2, OUTPUT);
  pinMode(5, OUTPUT);
}

void loop() {
  while (Serial.available()) {
    brightness = Serial.parseInt();
   
    if (Serial.read() == '\n') {
      analogWrite(5, brightness);
     Serial.println("0");
      
    }
  }
}

Exercise 3

Processing

PVector velocity;
PVector gravity;
PVector position;
PVector acceleration;
PVector wind;
float drag = 0.99;
float mass = 50;
float hDampening;
int sensor = 0;
int sensor_prev = 0;
float pos_prev = 0;

import processing.serial.*;
Serial myPort;
int xPos=0;
int yPos=0;
boolean onOff=false;
boolean onOff2=false;
int bounce = 0;

void setup() {
  size(640,360);
  noFill();
  position = new PVector(width/2, 0);
  velocity = new PVector(0,0);
  acceleration = new PVector(0,0);
  gravity = new PVector(0, 0.5*mass);
  wind = new PVector(0,0);
  hDampening=map(mass,15,80,.98,.96);
  printArray(Serial.list());
  String portname=Serial.list()[2]; 
  println(portname);
  myPort = new Serial(this,portname,9600);
  myPort.clear();
  myPort.bufferUntil('\n');
}

void draw() {
  background(255);
  bounce = 0;
  if (sensor==0){
    wind.x=0;
    velocity.x*=hDampening;
  }
  applyForce(wind);
  applyForce(gravity);
  velocity.add(acceleration);
  velocity.mult(drag);
  position.add(velocity);
  acceleration.mult(0);
  ellipse(position.x,position.y,mass,mass);
  if((int)position.y >= height-mass/2 && (int)position.y != pos_prev){
    bounce = 1;
  }
  
  if (position.y > height-mass/2) {
      pos_prev = (int)position.y;
      velocity.y *= -0.9;  // A little dampening when hitting the bottom
      position.y = height-mass/2;
    }
}
  
void applyForce(PVector force){
  // Newton's 2nd law: F = M * A
  // or A = F / M
  PVector f = PVector.div(force, mass);
  acceleration.add(f);
}

void keyPressed(){
  if (key==' '){
    mass=random(15,80);
    position.y=-mass;
    velocity.mult(0);
  }
}

void serialEvent(Serial myPort){
  String s=myPort.readStringUntil('\n');
  s=trim(s);
  if (s!=null){
    int i = int(s);
    sensor = (int)map(i, 0, 1023, 0, width);
    if(sensor>sensor_prev){
      wind.x=1;
    }
    else if(sensor<sensor_prev){
      wind.x=-1;
    }
    sensor_prev = sensor;
  }
  myPort.write(bounce+"\n");
  
}

Arduino

int onOff;

void setup() {
  Serial.begin(9600);
  Serial.println("0,0");
  pinMode(2, OUTPUT);
  pinMode(5, OUTPUT);
}

void loop() {
  while (Serial.available()) {
    onOff = Serial.parseInt();
    if (Serial.read() == '\n') {
      int sensor = analogRead(A0);
     digitalWrite(5, onOff);
     Serial.println(sensor);
      
    }
  }
}

I used the value of the sensor compared to its previous value to move the wind left and right, instead of the left and right keys. I was initially going to leave the LED on at the end after updating bounce in the existing if block, but then I thought the same logic could be applied to the y position of the ball too and I added another if block to accommodate that.

Note: I’m not able to transfer the longer video for now, I’ll try to get it up as soon as I can.

That’s it for now, no long rambling post this time!

Week 9: Give Some Space to Your Soft Toys Too!

This week we had to use both analog and digital input and connect them to LEDs to give analog and digital input. When professor mentioned soft toys in class, my mind went back to my own soft toy, a small cuddly raccoon. I thought about how most people hug their soft toys, but maybe when they are in distress they might forget how much force they are actually applying and end up hurting their soft toy by squeezing too hard.

So, my idea was to use a force sensor and attach it to a soft toy, and using the analog input, either a green, yellow or red LED will slowly light up using mapped values, depending on the force values (which go from around 0 to a 1000). The digital input would be a button which would switch on a blue LED to indicate you are using the set-up. Once the red LED lights up and there’s an overload, the blue light will start blinking to get your attention so that you can stop holding your soft toy so tight.

This project took me a lot of time to complete, because I couldn’t debug it properly before the submission day (I know, I know, I did it again) and then I spent the whole of next day and night sleeping after taking a painkiller after my Pfizer booster shot. Major major thanks to Eric, who helped me figure out today why it wasn’t working and finally get the outcome I wanted. It only took a few lines of code to be changed in the end, as is usually the (very frustrating) case in coding.

The first problem I had was that the analog input wasn’t working as it should, even though I reinitialised each LED every time in the loop. This was fixed by making a function for the default (LOW) states and calling them in each if block. And then, once analog was working, the digital part suddenly didn’t light up as brightly as before but I realised that was because I had forgotten to declare the pinMode for the blue LED in the mess of copy and pasting. Apart from that, digital output mostly involved Frankensteining different bits of code from class.

Here is the code, and the comments will hopefully make it clear:

const int force = A0;
const int led1 = 3;
const int led2 = 5;
const int led3 = 6;
const int led4 = 7;
const int button = 2;
unsigned long timer = 0;
int timerAmount = 100;
bool flip = false;
bool onOff = false;
bool prevButtonState = LOW;
bool overload = false;

void setup() {
  
  Serial.begin(9600);
  pinMode(led1, OUTPUT);
  pinMode(led2, OUTPUT);
  pinMode(led3, OUTPUT);
  pinMode(led4, OUTPUT);
  pinMode(button, INPUT);
  timer = millis();
}

void loop() {
  
  int mappedValue;
  int forceValue = analogRead(force);

  Serial.print("Force value: "); //for debugging
  Serial.println(forceValue);

  //green light
  if (forceValue <= 300) {
    off();
    mappedValue = map(forceValue, 0, 300, 0, 255);
    analogWrite(led3, mappedValue);
    overload = false;
  }

  //yellow light
  else if (forceValue <= 750) {
    off();
    mappedValue = map(forceValue, 301, 750, 0, 255);
    analogWrite(led2, mappedValue);
    overload = false;
  }

  //red light
  else if (forceValue <= 1100) {
    off();
    mappedValue = map(forceValue, 751, 1000, 0, 255);
    analogWrite(led1, mappedValue);
    overload = true;
  }

  //to switch on the blue light once
  bool currentState = digitalRead(button);
  if (currentState == HIGH &&  prevButtonState == LOW) {
    onOff = !onOff;
    digitalWrite(led4, onOff);
  }

  prevButtonState = currentState;

  //to make the blue light blink when there's an overload ie the red light is on
  if (overload == true) {
    if (onOff == true && millis() >= timer) {

      flip = !flip;
      digitalWrite(led4, flip);
      timer = millis() + timerAmount;

    }
    else if (currentState == LOW) {
      digitalWrite(led4, LOW);
    }
  }
}

//default state 
void off() {
  analogWrite(led1, LOW);
  analogWrite(led2, LOW);
  analogWrite(led3, LOW);
}

Here is how the circuit works:

And here are some pictures of the circuit, along with how it looked after I attached it to my raccoon using tape:

And this is a final demonstration of how it is supposed to work:

I think that’s all, I can’t think of anything else to add here except for a thank you to Eric once again and apologies for the late post (once again)!

Week I’m Not Sure: Bloody Buttons!

The prompt for this week was to create an unusual switch which didn’t require hands, which we could use in place of the buttons we had been using in class. My initial ideas for this were either a wand touching a “Lumos” placard or a ghost figurine on a stick touching some Halloween-y thing like a Jack-o-lantern, and then the touches resulting in the LED lighting up. However, as I confirmed with Professor, these involved too direct a use of hands. I would have been directly making the object touch the other objects with my hand.

So, I had to think of a new idea, and I was feeling the Halloween spirit from my earlier idea. I decided to make that my theme. Influenced by the moustache video we saw in class, I started thinking around the mouth area and I thought I could make a switch where if the mouth is closed, the light is switched on and otherwise it’s not. I then remembered a spooky thing which goes there – a vampire’s fangs!

I had a certain image in my head and I got to work to execute it the best I could. I got cardboard and copper tape and long red wires with stranded cores from the IM lab. I didn’t want to just directly attach fangs to my lips because I wasn’t sure how safe it was, and because I thought making cartoon lips would be much more fun. So, I cut the shape of the lips out of the cardboard (one of the most time-consuming things in this project) and 4 fang shapes out of the thicker copper tape. I stuck one of the two long wires between two of these and joined the other two back-to-back too, to make it conductive on both sides. Luckily I had some red coloured paper which I could cut in the shape I wanted and paste it on the cardboard for the lips. For the bottom lip, I did this right away and then attached the required wire in its place with copper tape. It almost looked like the vampire had a lip piercing.

For the upper lip, I had to somehow connect the fangs on two ends and I didn’t want that to be visible. So I first ended up making something like this after using the thin copper tape for connection:

This was shaping up to be what I wanted it to be like, but first I thought I should test if my idea even works without red paper covering the tape. My circuit was a quite simple change from the ones we worked on in class. Instead of the button, I had two wires placed in the bread board where the legs would have been. This helped me place the resistors and other wires as required. The two wires which were replacing the button, each had their ends connected to one of the longer red wires, simply by twisting them together. So, if everything worked correctly and the right fang touched the “lip piercing”, the circuit should be complete and the LED would light up.

I had chosen the colour red because well, it reminded me of blood. And I decided that if the LED blinked when the vampire “bit” and sort of gave an alarm/heartbeat effect, it would be cool. My code combined the two main circuits we had done in Wednesday’s class. Here, LED was the output and the wire leading to the fangs was the input. When the input is HIGH, the light would start flashing at the given intervals. Otherwise, it should stop. It took me a bit of trial and error to arrive at a code which did what I wanted, but I finally got it.

const int ledPin = 2;
const int fangsPin = 3;

unsigned long timer = 0;
int timerAmount = 300;
bool flip = false;

void setup() {
  // put your setup code here, to run once:
  pinMode(ledPin, OUTPUT);
  timer = millis();
  pinMode(fangsPin, INPUT);
}

void loop() {
  // put your main code here, to run repeatedly:
  bool currentState = digitalRead(fangsPin);
  if (currentState == HIGH && millis() >= timer) {

    flip = !flip;
    digitalWrite(ledPin, flip);
    timer = millis() + timerAmount;

  }
  else if (currentState == LOW) {
    digitalWrite(ledPin, LOW);
  }

}

And this code worked with the lips I currently had, so I decided to go ahead and glue on the upper red part too. And too my relief, it worked with that too.

Lips don’t lie
A look at the overall circuit

I hope these make my circuit a bit clearer.

Then came the hardest part: Attaching these lips to my own lips. This involved a lot of tape and adjusting for the flimsiness of the whole thing. I had to make the copper wire “piercing” on the lower lip much thicker by adding more and more rounds of wire- so that it would be easier for the fang to reach. And I had to figure out the pressure and angle I should use. A couple of times by the time I went to take a video, the tape attached to my lips would wear out and I would have to redo everything. This video is not perfect- the tape was a little flimsy again so I wasn’t able to close my mouth properly for a second, but you can see that it works without me having to touch my hand to the fang- which was what was happening initially. I also realised too late that in my bid to draw something which would completely cover my real lips, I had perhaps made the lips too thick. But oh well, I wanted something cartoony anyway. They might look a little lopsided here.

I think that’s about it. Though this isn’t as smooth and perfectly artistic as I would have wanted, I’m still pleasantly surprised that the concept worked out (I don’t know what I would have done if it hadn’t).

Happy end of spooky season to y’all!

Midterm: The Fight Goes On

As stated last week, my project was inspired by the classic Road Fighter game, but trying to adapt it to another theme instead. And unfortunately (but not that surprisingly), this post is coming a night later than I thought it would, the 14th “night” instead of 13th.

In my game, named “Magic Fighter” now, the main character (it was pointless to get a wizard with a cloak because the movements would be hidden and I wanted a more retro feeling game) is trying to reach the safety of the Hogwarts castle, running away from a great evil threat. On the way, you can pick up objects like potions, charms and chocolates (it helps) which will increase your health, and you have to avoid dark magic residues and dementors on the way which will decrease your health and the time you have. You can see your health percentage in a bar on the side, as well as the timer.

Update: I can now add the graphics here. I made everything a darker colour because I thought the evening look fit it more.

I am done with all the mechanics of the game and also with the sprites and images for most things, but as I was testing out my object images, my laptop started a weird thing where I am not able to edit or see the image sizes of any of my images, because the cursor changes to the loading symbol whenever I try. Fortunately, this happened after I had already taken care of the character and enemies, and inserted one of the object images as a test, but I have to make more object variety options and update the code accordingly, and also insert something at the finish line. The png images have been ready since long, and I tried everything to get my editor to work properly, but it is just not happening.

I am going to attach a zip folder anyway, but I hope to post a proper code breakdown and video once I am able to insert the images I want to. So until then, this documentation is going to be a bit bare. Everything else is done, and it is still a playable game which you can try out.

I was also not able to implement super and sub classes because for some reason, the display function in all of them was giving a problem. So my final code now has separate classes. Overall, display has been acting a bit weird. Also, it might be a bit weird to see the dementors disappear once you hit them but let’s just assume they left because they got what they wanted. If they are not immediately removed from the array then the health would decrease to 0 almost immediately. But I did implement the dist() function as mentioned in the tip.

Overall, this project has given me a lot of trouble and I have perhaps made it more difficult for myself than I needed to, not because of the actual difficulty of the game itself but the way I set about it the past few days and how I have been managing things in general, and my laptop certainly hasn’t helped. I haven’t been able to cope with the stress of submitting a less than perfect game, I really wanted it to complete my vision. I can’t help but feel disappointed that this is still not over, and I am praying that in the morning my laptop will magically let me do what I need to do. This is a request (especially to Professor) that if you see this current version, by all means, go ahead and play it, but do check out the updated one too, I will update the documentation with it as soon as it is ready and it will look much better then.

(Edit: I am keeping this just so that you can see how much I was done with before, but this is not the final version now)

im_midterm_project 

I am really sorry 🙁

Updates:

My laptop still is refusing to work with PNGs, so in the end I had to resort to other methods but finally, I am done. Huge thanks to the internet for providing free tools.

Here are the start and end screens of my game. I have tried to keep the font and sprites to a retro look.

Additionally, here is the code for easier reading:

import processing.sound.*;

Character character;
Object[] objects;
Enemy[] enemies;
MovingEnemy[] moving_enemies;
int timer;
float health_percentage;
boolean game_over;
boolean started_game = false;
PFont f;
int finishline_y;
SoundFile theme;
SoundFile pick;
SoundFile hit;
PImage hogwarts;

void setup() {
  size(1000, 720);
  f = createFont("ARCADE.TTF", 72);
  textFont(f);
  theme = new SoundFile(this, "rise-and-shine.mp3");
  pick = new SoundFile(this, "object pick.wav");
  hit = new SoundFile(this, "enemy hit.wav");
  character = new Character(500, 500, 57, "Main Character.png", 100, 140, 4);
  objects = new Object[30];
  enemies = new Enemy[30];
  moving_enemies = new MovingEnemy[30];
  hogwarts = loadImage("hogwarts.png");

  //object initialisation
  for (int i = 0; i<10; i++) {
    int choice = int(random(3)); //so that one of the three options is chosen
    objects[i] = new Object(random(275, 725), random(-5200, 695), 25, choice==0? "potion.png": choice==1? "charm.png": "chocolate bar.png", 50, choice==2? 87: 50); //so that as the negative is updated to positive, the illusion of movement is created

    //to ensure the objects don't overlap with each other
    for (int j = 0; j<i; j++) {
      if (i!=j && objects[i].distance(objects[j]) < 50) {
        while (objects[i].distance(objects[j]) < 50) {
          objects[i] = new Object(random(275, 725), random(-5200, 695), 25, choice==0? "potion.png": choice==1? "charm.png": "chocolate bar.png", 50, choice==2? 87: 50);
        }
      }
    }
  }

  //enemy initialisation
  for (int i = 0; i<30; i++) {
    enemies[i] = new Enemy(random(275, 725), random(-5200, 695), 30, "magic blast.png", 60, 48);

    //to ensure they don't overlap with each other
    for (int j = 0; j<i; j++) {
      if (i!=j && enemies[i].distance(enemies[j]) < 60) {
        while (enemies[i].distance(enemies[j]) < 60) {
          enemies[i] = new Enemy(random(275, 725), random(-5200, 695), 30, "magic blast.png", 60, 48);
        }
      }
    }
  }

  //moving enemies initialisation
  for (int i = 0; i<20; i++) {
    moving_enemies[i] = new MovingEnemy(random(280, 720), random(-12000, 690), 60, "dementor.png", 120, 116, 280, 720);

    //to ensure they don't overlap with each other
    for (int j = 0; j<i; j++) {
      if (i!=j && moving_enemies[i].distance(moving_enemies[j]) < 120) {
        while (moving_enemies[i].distance(moving_enemies[j]) < 120) {
          moving_enemies[i] = new MovingEnemy(random(280, 720), random(-12000, 690), 60, "dementor.png", 120, 116, 280, 720);
        }
      }
    }
  }
  timer = 65;
  health_percentage = 100;
  finishline_y = -2600;
  game_over = false;
  if (started_game == false)
    startScreen();
}

void draw() {

  if (started_game && !game_over) {
    if (frameCount % 60 == 0)
      timer-=1;    
    finishline_y+=1; //so that the finish is slowly reached
    gameDisplay();
  }
}

void startScreen() {
  background(0);
  textSize(60);
  text("MAGIC FIGHTER", 280, 300);
  textSize(30);
  text("Reach the safety of the castle in time!", 200, 365);
  text("Avoid the green magic and Dementors. Pick up the other objects!", 50, 400);
  textSize(25);
  text("Press the left and right arrow keys for movement", 250, 450);
  textSize(40);
  text("Click to begin!", 370, 490);
}

void gameDisplay() {
  
  //game winning conditions
  if (character.y == finishline_y) {
    background(0);
    fill(255);
    textSize(60);
    text("Congratulations!", 275, 300);
    text("You are safe now!", 240, 365);
    textSize(30);
    text("Click to play again", 365, 435);
    theme.stop();
    game_over = true;
    return;
  }
  
  //game losing conditions
  if (character.health <= 0 || timer <= 0) {
    background(0);
    fill(255, 255, 255);
    textSize(100);
    text("Oops, Game Over!", 145, 310);
    textSize(30);
    text("Click to play again", 365, 415);
    theme.stop();
    game_over = true;
    return;
  }

  //basic background
  background(#5D575F);
  noStroke();
  fill(#2E793B);
  rect(0, 0, 250, 720);
  fill(0);
  rect(750, 0, 1000, 720);

  //displaying the objects and enemies and character
  for (int i = 0; i<30; i++) {
    //picking  up objects
    if (objects[i]!=null) {
      if (dist(character.x, character.y, objects[i].x, objects[i].y) <= character.r + objects[i].r) {
        objects[i] = null;
        if (character.health+2 < 150) {
          character.health+=2;
        } else {
          while (character.health < 150) {
            character.health+=1;
          }
        }
        //object sounds
        pick.play();
      }
    }

    //being hit by enemies
    if (enemies[i]!=null) {
      if (dist(character.x, character.y, enemies[i].x, enemies[i].y) <= character.r/2 + enemies[i].r) {
        character.health -= 10;
        timer -= 1;
        enemies[i] = null;
        //hit sounds
        hit.play();
      }
    }

    if (moving_enemies[i]!=null) {
      if (dist(character.x, character.y, moving_enemies[i].x, moving_enemies[i].y) <= character.r/2 + moving_enemies[i].r) {
        character.health -= 10;
        timer -= 1;
        moving_enemies[i] = null;
        //hit sounds
        hit.play();
      }
    }

    //"finish line"
    imageMode(CORNER);
    image(hogwarts, 150, finishline_y-529);
    imageMode(CENTER);

    if (objects[i]!=null)
      objects[i].display();

    if (enemies[i]!=null)
      enemies[i].display();

    if (moving_enemies[i]!=null)
      moving_enemies[i].display();
  }

  //calculating health
  fill(255, 255, 255);
  textSize(36);
  text("Health: ", 780, 100);
  health_percentage = int((character.health * 100) / 150.0 * 100) / 100.0;
  noStroke();

  //To change colour depending on health
  if (health_percentage >= 50)
    fill(0, 250, 0);
  else if (health_percentage >= 20)
    fill(255, 255, 0);
  else
    fill(255, 0, 0);
  rect(780, 125, character.health, 25);
  noFill();
  strokeWeight(5);
  stroke(255, 255, 255);
  rect(780, 125, 150, 25);
  fill(255, 255, 255);
  textSize(22);
  text(str(health_percentage) + "%", 935, 150);

  //To display timer
  fill(255);
  textSize(36);
  text("Time: ", 780, 225);
  textSize(40);
  text(str(timer), 780, 260);
  
  character.display();
}

void mouseClicked() {
  if (started_game == false) {
    started_game = true; //to start game
    theme.play();
  } else if (game_over) {
    frameCount = -1; //to restart game
    theme.play();
  }
}

//for movement when the left or right keys are pressed
void keyPressed() {
  if (keyCode == LEFT)
    character.pressed_left = true;
  else if (keyCode == RIGHT)
    character.pressed_right = true;
}
void keyReleased() {
  if (keyCode == LEFT)
    character.pressed_left = false;
  else if (keyCode == RIGHT)
    character.pressed_right = false;
}

The different classes:

class Character {
  float x, y, r, vx;
  int img_w, img_h;
  boolean pressed_left; //for the keys pressed
  boolean pressed_right;
  int health;
  PImage spritesheet;
  PImage[] sprites;
  int num_frames, frame;

  Character(float x, float y, float r, String s, int w, int h, int num_frames) {
    this.x = x;
    this.y = y;
    this.r = r;
    img_w = w;
    img_h = h;
    spritesheet = loadImage(s);
    sprites = new PImage[num_frames];
    for (int index = 0; index < num_frames; index++) {
      sprites[index] = spritesheet.get(index*img_w, 0, img_w, img_h);
    }
    frame = 0;
    this.num_frames = num_frames;
    vx = 0;
    health = 150;
    pressed_left = false;
    pressed_right = false;
  }

  void display() {
    update();
    image(sprites[frame], x - img_w/2, y - img_h/2);
  }

  void update() {
    if (pressed_left == true && x-r>300)
      vx = -5; //to change direction
    else if (pressed_right == true && x+r<800)
      vx = 5;
    else
      vx = 0;

    x+=vx;

    //for moving slower between the different frames
    if (frameCount % 5 == 0)
      frame = (frame + 1) % num_frames;
  }
}
class Enemy {

  float x, y, r;
  int img_w, img_h;
  PImage img;

  Enemy(float x, float y, float r, String s, int w, int h) {
    this.x = x;
    this.y = y;
    this.r = r;
    img = loadImage(s);
    img_w = w;
    img_h = h;
    imageMode(CENTER);
  }

  void update() {
    y+=2;
  }

  void display() {
    update();
    image(img, x, y, img_w, img_h);
  }

  float distance(Enemy other) {
    return dist(this.x, this.y, other.x, other.y);
  }
}
class MovingEnemy {

  float x, y, r, vx, ll, rl;
  int dir;
  int img_w, img_h;
  PImage img;

  MovingEnemy(float x, float y, float r, String s, int w, int h, float ll, float rl) {
    this.x = x;
    this.y = y;
    this.r = r;
    img = loadImage(s);
    img_w = w;
    img_h = h;
    imageMode(CENTER);
    this.ll = ll;
    this.rl = rl;
    vx = random(1, 5); //to have random speeds
    dir = int(random(0, 2));
    if (dir==0) {
      vx*=-1;
    }
  }

  void update() {
    x += vx;
    if (x<ll) { //moving between left and right limits
      vx*=-1;
      dir = 1;
    } else if (x>rl) {
      vx*=-1;
      dir = 0;
    }

    y+=2;
  }

  void display() {
    update();
    image(img, x, y, img_w, img_h);
  }

  float distance(MovingEnemy other) {
    return dist(this.x, this.y, other.x, other.y);
  }
}
class Object {
  float x, y, r;
  int img_w, img_h;
  PImage img;

  Object(float x, float y, float r, String s, int w, int h) {
    this.x = x;
    this.y = y;
    this.r = r;
    img = loadImage(s);
    img_w = w;
    img_h = h;
    imageMode(CENTER);
  }

  void update() {
    y += 2; //for downward movement
  }

  void display() {
    update();
    image(img, x, y, img_w, img_h);
  }

  float distance(Object other) {
    return dist(this.x, this.y, other.x, other.y);
  }
}

I hope the comments and my previous explanations make everything clear.

Finally, here is a video of me playing the game, once when I won, once when I lost. The game gets quite slow sometimes so the audio at the end glitched, otherwise it should stop at the end. I got the main theme from chosic.com.

Here is a zip folder where you can see all the sprites and images and sounds, and play the final game itself!

im_midterm_project 2

And phew, this is finally done! I hope I didn’t miss out anything. And despite what it might seem like, I did enjoy working on this game, until the very end! 🙂

Update 2.0: Well, my work wasn’t done. The above zip file won’t work either. Because I had apparently not saved the latest version of my code. Here is one which will hopefully work.

im_midterm_project 4

Midterm Progress Fighter

For the midterm project, I wanted to make something inspired by the classic Nintendo game Road Fighter, something which I have spent hours playing on my uncle’s old console.

Here is a video of the game for reference:

My game would only be vaguely inspired by the elements of this game. For one, the mechanism is different. I will keep the player stationery while the background moves. I am also going to change the theme to that of a Harry Potter/magic inspired one, based on the sprites I find.

The similarities are that I will also have objects like potions or chocolates to pick up, which will increase the player’s health and there will be other “enemies” such as Dementors (hopefully) in the path which you should strive to avoid. Later in the game, there are blue moving cars which might swerve onto your path, and similarly, I plan to have a moving category of enemies too.

So far, I have written the code for the classes which the main character and the objects belong to. The main character can move left and right from edge to edge of the road, using keyCODE and boolean variables. The objects are initialised with random y values with a range starting from a high negative number, so that they will appear on screen slowly. I will adjust these numbers once I know the length of my game.

The class defining the main character:

class Character {
  float x, y, r, vx;
  boolean pressed_left; //for the keys pressed
  boolean pressed_right;
  
  Character(float x, float y, float r) {
    this.x = x;
    this.y = y;
    this.r = r;
    vx = 0;
    pressed_left = false;
    pressed_right = false;
  }
  
  void display() {
    update();
    fill(134, 46, 46); //placeholder
    ellipse(x, y, 2*r, 2*r);
  }

  void update() {
    if (pressed_left == true && x-r>250)
      vx = -5;
    else if (pressed_right == true && x+r<750)
      vx = 5;
    else
    vx = 0;

    x+=vx;
  }

This is the class for the objects:

class Object {
  float x, y, r;

  Object(float x, float y, float r) {
    this.x = x;
    this.y = y;
    this.r = r;
  }

  void update() {
    y += 2; //for downward movement
  }

  void display() {
    update();
    fill(36, 24, 180);
    ellipse(x, y, 2*r, 2*r); //recording has old version with just r
  }

}

This is the main sketch so far:

Character character;
Object[] objects;

void setup() {
  size(1000, 720);
  character = new Character(500, 500, 60);
  objects = new Object[30];
  for (int i = 0; i<30; i++) {
    objects[i] = new Object(random(275, 725), random(-5200, 695), 30); //so that as the negative is updated to positive, the illusion of movement is created
  }
}

void draw() {
  //placeholder backgrounds
  background(139, 138, 147);
  noStroke();
  fill(98, 222, 92);
  rect(0, 0, 250, 720);
  fill(0, 0, 0);
  rect(750, 0, 1000, 720);
  //displaying the objects and character
  for (int i = 0; i<30; i++) {
    objects[i].display();
  }
  character.display();
}

//for movement when the left or right keys are pressed
void keyPressed() {
  if (keyCode == LEFT)
    character.pressed_left = true;
  else if (keyCode == RIGHT)
    character.pressed_right = true;
}
void keyReleased() {
  if (keyCode == LEFT)
    character.pressed_left = false;
  else if (keyCode == RIGHT)
    character.pressed_right = false;
}

With these placeholder ellipses and rectangles, the program looks something like this:

There’s a long road ahead…

I am hoping to make this all more efficient by converting some of these classes into super classes. After this, apart from the sprites obviously and incorporating the design of the theme, I have to insert the enemy class, create those objects, and then link them to the character’s health. Every collision with an enemy would be detrimental to the health. I also have to update it such that once the character has touched the object, they disappear from the screen. There will be a health bar on the side which updates depending on whether you picked up objects or bumped into enemies. This game is also going to be timed, so if your health goes to zero or you aren’t able to reach the finish line (which will also be themed) within time, the game is over. But there will always be the option to restart the game and try again!

But here, this a video of the movement so far:

I hope I am able to achieve my vision with this and this is transformed into something much more magical! (all by next week :p)

Week 4: Spell-Binding Incantations (Generative Text)

I solemnly swear I was up to no good with this assignment.

I have been back into a Harry Potter phase of sorts so of course I had to project that agenda onto this assignment. My urge for this week had always been to make text representative of its meaning, because I love when that is done in media. And when I thought of linking it to Harry Potter, I thought that spells would be the perfect way to achieve this effect.

I ran through a lot of ideas and settled on three relatively well-known spells: Wingardium Leviosa, Accio, and Lumos. Wingardium Leviosa (LeviOsa not LeviosAR) is the levitating charm many people might remember from the first movie, which does exactly what you would expect a levitating charm to do. So, I wanted this text to float up from the bottom and then once it had reached around the top, keep hovering over there. This was simple enough with a function to change the y value according to a particular speed.

In the process of floating up (pay attention, Ron)

The Accio spell can summon any object you take the name of (unless of course it has some anti-summoning protection). To put this effect in text I wanted to have the letters floating around the screen randomly, and then have them abruptly come to their final location. For this, I re-used the Letter class we had done in class, and some of the code from the circular orbit example, because I basically wanted to achieve the opposite flow of it. I made some minor changes to the Letter class, which is here:

class Letter { //copied from in-class code with very slight changes
  float x, y;
  float xSpeed, ySpeed;
  char letter;

  Letter(float _x, float _y, char _c) {
    x = _x;
    y = _y;
    xSpeed = ySpeed = 0;
    letter = _c;
  }

  void update() {
    x += xSpeed;
    y += ySpeed;
  }

  void display() {
    text(letter,x,y);
  }

  void checkEdges() {
    if (y>height) {
      y=0;
    }
    if (y<0) {
      y=height;
    }
    if (x>width) {
      x=0;
    }
    if (x<0) {
      x=width;
    }
  }
}

Here’s a random screenshot of the moving letters:

Accio a coherent blog post :’)

And finally, Lumos would produce a small glowing white light at the tip of your wand, useful for seeing in the darkness. This was pretty simple to achieve, by drawing white text instead of the yellow when a certain time had passed, but also having some yellow transparent bigger text in the background. The idea was that the colour change from yellow to white would give the lighting up effect.

The Golden Trio

Having decided the overall placement and executing the spells, I thought of inserting a background for a more Harry Potter-esque experience, and decided there could be nothing better than the Hogwarts castle itself.

Hoggy hoggy Hogwarts in the background

And then I added a darker tint and added an alpha value to make it faded, and I was done!

Final Still

I haven’t talked a lot about my process so I’ll mention the highlights here. First of all, I had to download the font and it was not a monospaced one, as I realised in my very first test. So I had to figure out a way to make them it look regularly spaced in the spells where I was separating characters, and for this I used arrays. Every element of the two text_width arrays stored the length of the string uptil the current character, and I updated that alongside in the displaying loop. For the Wingardium Leviosa levitation, I also added the noise code from class to make it look more natural.

Iconic Harry Potter Font

For each spell, I made a function which carried out their meaning, and timed them using frameCount. I also included the functionality that on clicking the mouse, frameCount would be reset to -1, hence essentially restarting the sketch. I was thinking of adding Hedwig’s theme as an audio file to run in the background, but then I thought it wouldn’t run long enough and would sound weird. I do plan to check out if I can keep the audio running without it resetting with the mouse click. And of course, the background image and font file had to be included in the sketch folder in Processing.

This was the main sketch’s code:

PFont f;
PImage img;
String spell1 = "Wingardium Leviosa"; //spell for levitation
String spell2 = "Accio"; //spell for summoning something
String spell3 = "Lumos"; //spell for lighting the tip of the wand
int posx1;
int posy1;
float posx2;
int posy2;
int speed = 2;
float[] text_widths1; //will help in determining the width of substrings
float[] text_widths2;
int x_offset = 250;
Letter letters[] = new Letter[spell2.length()]; 

void setup(){
  size(640, 640);
  img = loadImage("Hogwarts background.jpg");
  f = createFont("HARRYP__.TTF", 72); //Harry Potter font used in the movies
  textFont(f);
  textAlign(CENTER);
  posx1 = width/2 - x_offset;
  posy1 = height - 72;
  posx2 = width/2 - textWidth(spell2)/2;
  posy2 = height/2 - 36;
  text_widths1 =  new float[spell1.length()];
  text_widths2 =  new float[spell2.length()];
  for(int i = 0; i<spell2.length(); i++){ //initialising the moving letters for Accio
    letters[i] = new Letter(random(640), random(640), spell2.charAt(i));
    letters[i].xSpeed = random(-5,5);
    letters[i].ySpeed = random(-5,5);
  }
}

void draw(){
  background(0);
  tint(136, 152, 155, 80); //dark, faded effect
  image(img, 0, 0);
  
  fill(245, 206, 49);
  for(int i=0; i<spell1.length(); i++)
  {
    //as it is not a monospaced font, text_widths arrays help in storing the width of the string upto
    // that character. Here I calculate this by adding the previous element of the array to the width of the current letter
    if(i==0)
      text_widths1[i] = textWidth(spell1.charAt(i)); 
    else
      text_widths1[i] = text_widths1[i-1] + textWidth(spell1.charAt(i));
      
    text(spell1.charAt(i), posx1 + (i==0? text_widths1[0]-13: text_widths1[i]), posy1 + noise(frameCount*.01+i*0.01)*100 - 50);

  } 
  levitate(); //starts the levitating effect 
  
  if(frameCount > 250 && frameCount < 400) //for the passage of time
  {
    for(int i = 0; i<spell2.length(); i++){ //random movement
      letters[i].update();
      letters[i].display();
      letters[i].checkEdges();
    }
  }
  
  if(frameCount >= 400)
    summon(); //to bring the letters into place
    
  if(frameCount >= 450 && frameCount < 525){
    //fill(181, 192, 193); - discarded idea for turning grey to yellow
    fill(245, 206, 49);
    text(spell3, width/2 + 100, height-height/4);
  }
  
  if(frameCount >= 525){
    lightItUp(); //to give the effect of the yellow being lit up into white
  }
  
}

void levitate(){
  if(posy1 - speed > 120) //to levitate upwards uptil a certain point below the border is reached
    posy1 -= speed;
}

void summon(){
  for(int i = 0; i<spell2.length(); i++){ //stops the random movement by fixing x and y values
    if(i==0)
      text_widths2[i] = textWidth(spell1.charAt(i));
    else
      text_widths2[i] = text_widths2[i-1] + textWidth(spell1.charAt(i));
      
    letters[i].x = posx2 + (i==0? text_widths2[0]-13: text_widths2[i]); //same logic for character widths
    letters[i].y = posy2;
    letters[i].display();
  }
}

void lightItUp(){
  fill(245, 206, 49, 90); //to give a faint yellow glow from behind
  textSize(79);
  text(spell3, width/2 + 100, height-height/4);
  fill(255);
  textSize(72);
  text(spell3, width/2 + 100, height-height/4);
}

void mouseClicked(){
  frameCount = -1; //resets everything because setup() is called at frameCount = 0
}

And with all that said, here is the video with all the animations I have been talking about:

I hope this was able to achieve even a little bit of a magical effect. And there’s nothing more to add from my side, so I’ll just say:

Mischief Managed.

Week 3: The Butterfly Effect (Generative Art)

I have a deep fascination for the Butterfly Effect so of course when it was mentioned in class, I wanted to take my assignment’s concept from it.

I started off with very high expectations. My idea was that I wanted something to represent the universe, and a butterfly flapping in front of it. But I quickly found out that to recreate a galaxy or something similar, I would pretty much have to copy reference code from somewhere.

I started experimenting on my own, and thought that beziers and curves might be useful. Curves served my purpose well enough, but I could not control them to cover the whole height of the screen like I had wanted. So, I settled on lines.

Now, I wanted to use noise to make it dynamic, but noise meant equal distances, and I wanted more chaos to represent the universe. So, I ended up with random. I had been drawing lines in the main sketch, but I realised they could be objects too. Here is my Line class. In another more complex version, it could have more functionality.

class Line{
  
  float _x1;
  float _x2;
  color col;
  
  Line(){
    _x1 = random(width);
    _x2 = random(width);
    col= color(random(100), random(100), random(255)); //more in the spectrum of blues to resemble galaxies
  }
}

I also restricted the colour scale to a more blue-heavy tone because that reminds me of the universe. Here is the drawing with a static photo of the lines:

All lined up

Then, I wanted the butterfly to be a class of its own too so that in variations, more butterfly objects could be inserted easily. In my vision for this drawing, I wanted it to be a white butterfly right in the middle of the screen. I used only ellipses, leaving out the “stick” of the body to make it look more stylistic. I used the translate(), rotate() and pushMatrix() and popMatrix() functionalities. The only thing left to figure out was the flapping itself, and I tried a couple of approaches. First I tried to change the rotation every few seconds (using frameCount) but that was looking too stilted and it didn’t look like flapping at all. I ended up just changing the heights and widths of the wings to give the illusion of movement. It’s still not perfect, but it’s better than what I thought was possible. My initial plan had also been that the flapping would change the noise and bring change on the screen, but since I used random I couldn’t do that.

Here is my Butterfly class:

class Butterfly{
  
  int upper_width; //referring to the wings
  int lower_width;
  int upper_height;
  int lower_height;
  
  Butterfly(){
    upper_width = 30;
    lower_width = 20;
    upper_height = 50;
    lower_height = 30;
  }
  
  void draw(){
    
    //left wings
    pushMatrix();
    translate(width/2, height/2);
    
    if(frameCount%50==0){ //for the occasional flapping effect
      upper_width = 20;
      upper_height = 60;
      lower_width = 10;
      lower_height = 40;
    }
    else {
      upper_width = 30;
      upper_height = 50;
      upper_width = 30;
      lower_width = 20;
      upper_height = 50;
      lower_height = 30;
    }
    
    rotate(PI*2-PI/4);
    noStroke();
    fill(255);
    ellipse(-35, 19, lower_width, lower_height);
    ellipse(-20, 0, upper_width, upper_height);
    popMatrix();
    
    //right wings
    pushMatrix();
    translate(width/2, height/2);
    
    if(frameCount%50==0){
      upper_width = 20;
      upper_height = 60;
      lower_width = 10;
      lower_height = 40;
    }
    else {
      upper_width = 30;
      upper_height = 50;
      upper_width = 30;
      lower_width = 20;
      upper_height = 50;
      lower_height = 30;
    }
    
    rotate(PI/4);
    noStroke();
    fill(255);
    ellipse(35, 19, lower_width, lower_height);
    ellipse(20, 0, upper_width, upper_height);
    popMatrix();
  }
}

Here’s a comparison with one of my early trials with noise and the final version:

How it started
You never know where your choices will lead you

And here’s a video of the movement:

The main sketch ended up looking like:

int num_lines = int(random(75, 100));
Line[] lines = new Line[num_lines]; //array of Line objects
Butterfly butterfly = new Butterfly(); //Butterfly object

void setup(){
  size(640, 480);
}

void draw(){
  background(0);
  
  for(int i =0; i<num_lines; i++)
  {
    lines[i]=new Line();
    strokeWeight(2);
    stroke(lines[i].col);
    line(lines[i]._x1, 0, lines[i]._x2, 480); //drawing top to bottom lines
    butterfly.draw(); //the butterfly with flapping effect will automatically be drawn on top
  }
 
}

Overall, it ended up much different from the whimsical space-y theme I wanted, and seems more representative of the string theory or something in the background.

But, I guess that’s the Butterfly Effect for you.