Final Project Documentation: CONNECTED – Ons & Sarah

Idea

As you might remember, we jumped between a few ideas, and after brainstorming with Aaron and long conversations among each other, we decided on an idea. When we started, it was a bit vague, but the more progress we made the more everything made sense and became clearer. 

So, our project is an experience in which two users answer questions that are meant to explore how similar these users are to each other by mapping the data from their answers onto the screen and then visualizing it gradually as users interact with the set-up. This visualization happens when users’ traces intersect in the area of a question where they answered similarly to reflect connection. The “bloom” we used to resemble connection differs based on how close the answers were, making it the most dramatic when users have the exact same answer. 


This final idea ended up reminding us of a lot of things that we find fascinating and enjoy:

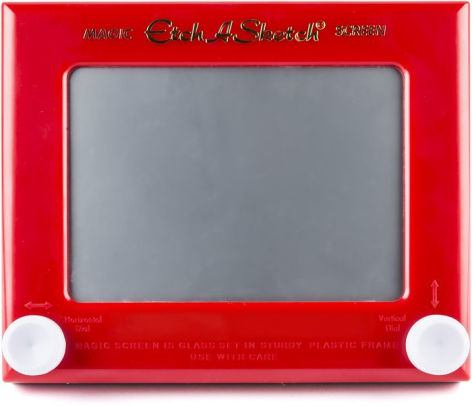
  • The concept of an etch-a-sketch 
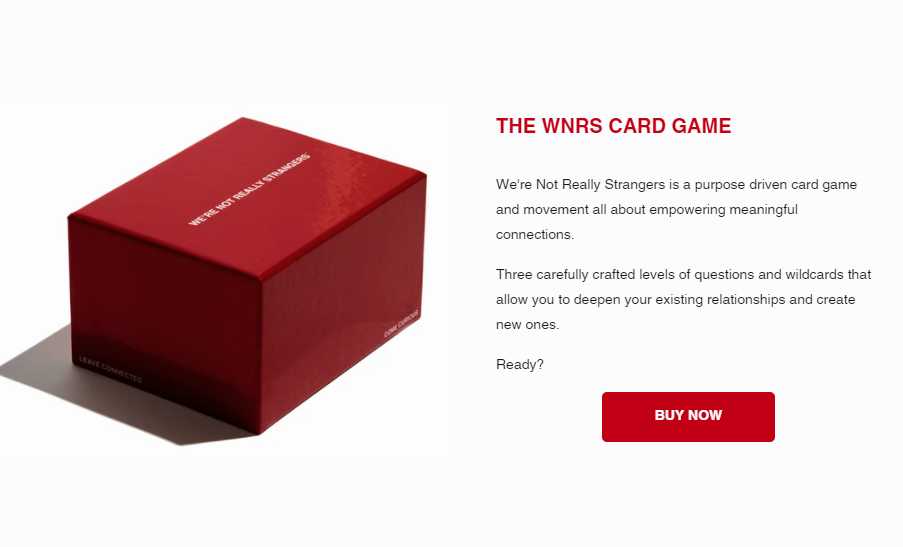
  • A card game called “We are Not Really Strangers” 


  • Colors!!  
  • Human connection


The Experience

To take you through our game, we will demonstrate our Arduino set-up and the three different screens that make up our experience:


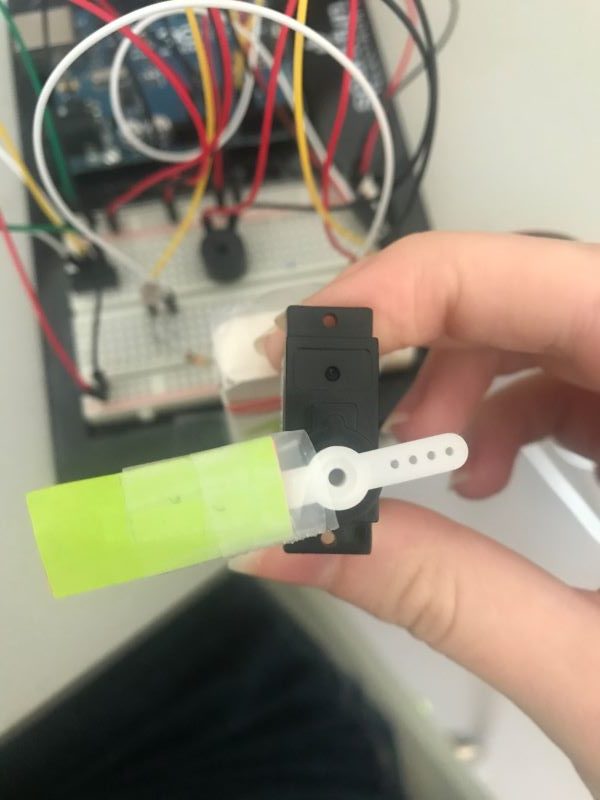
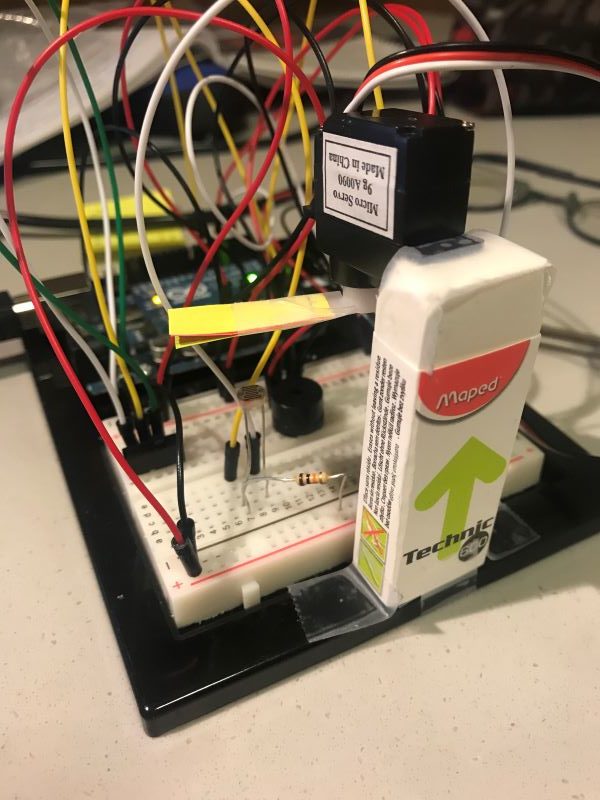
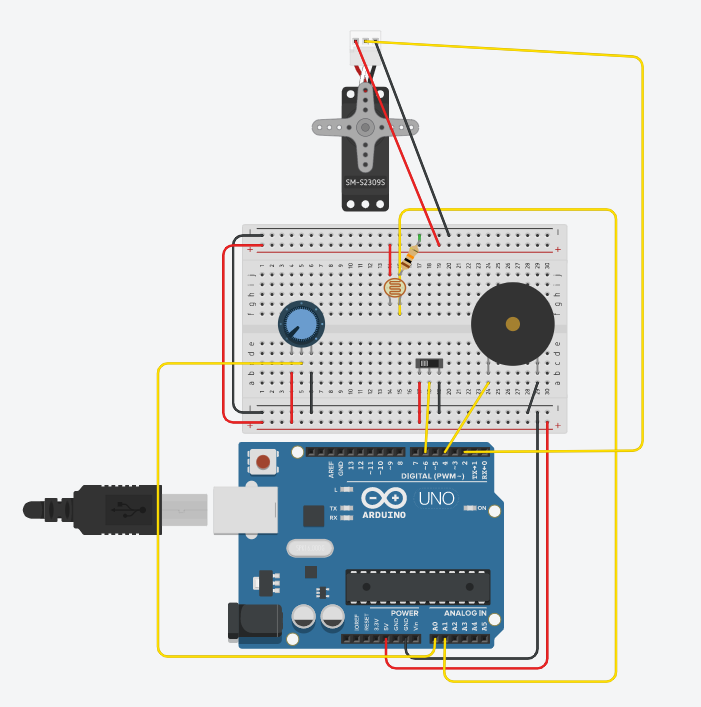
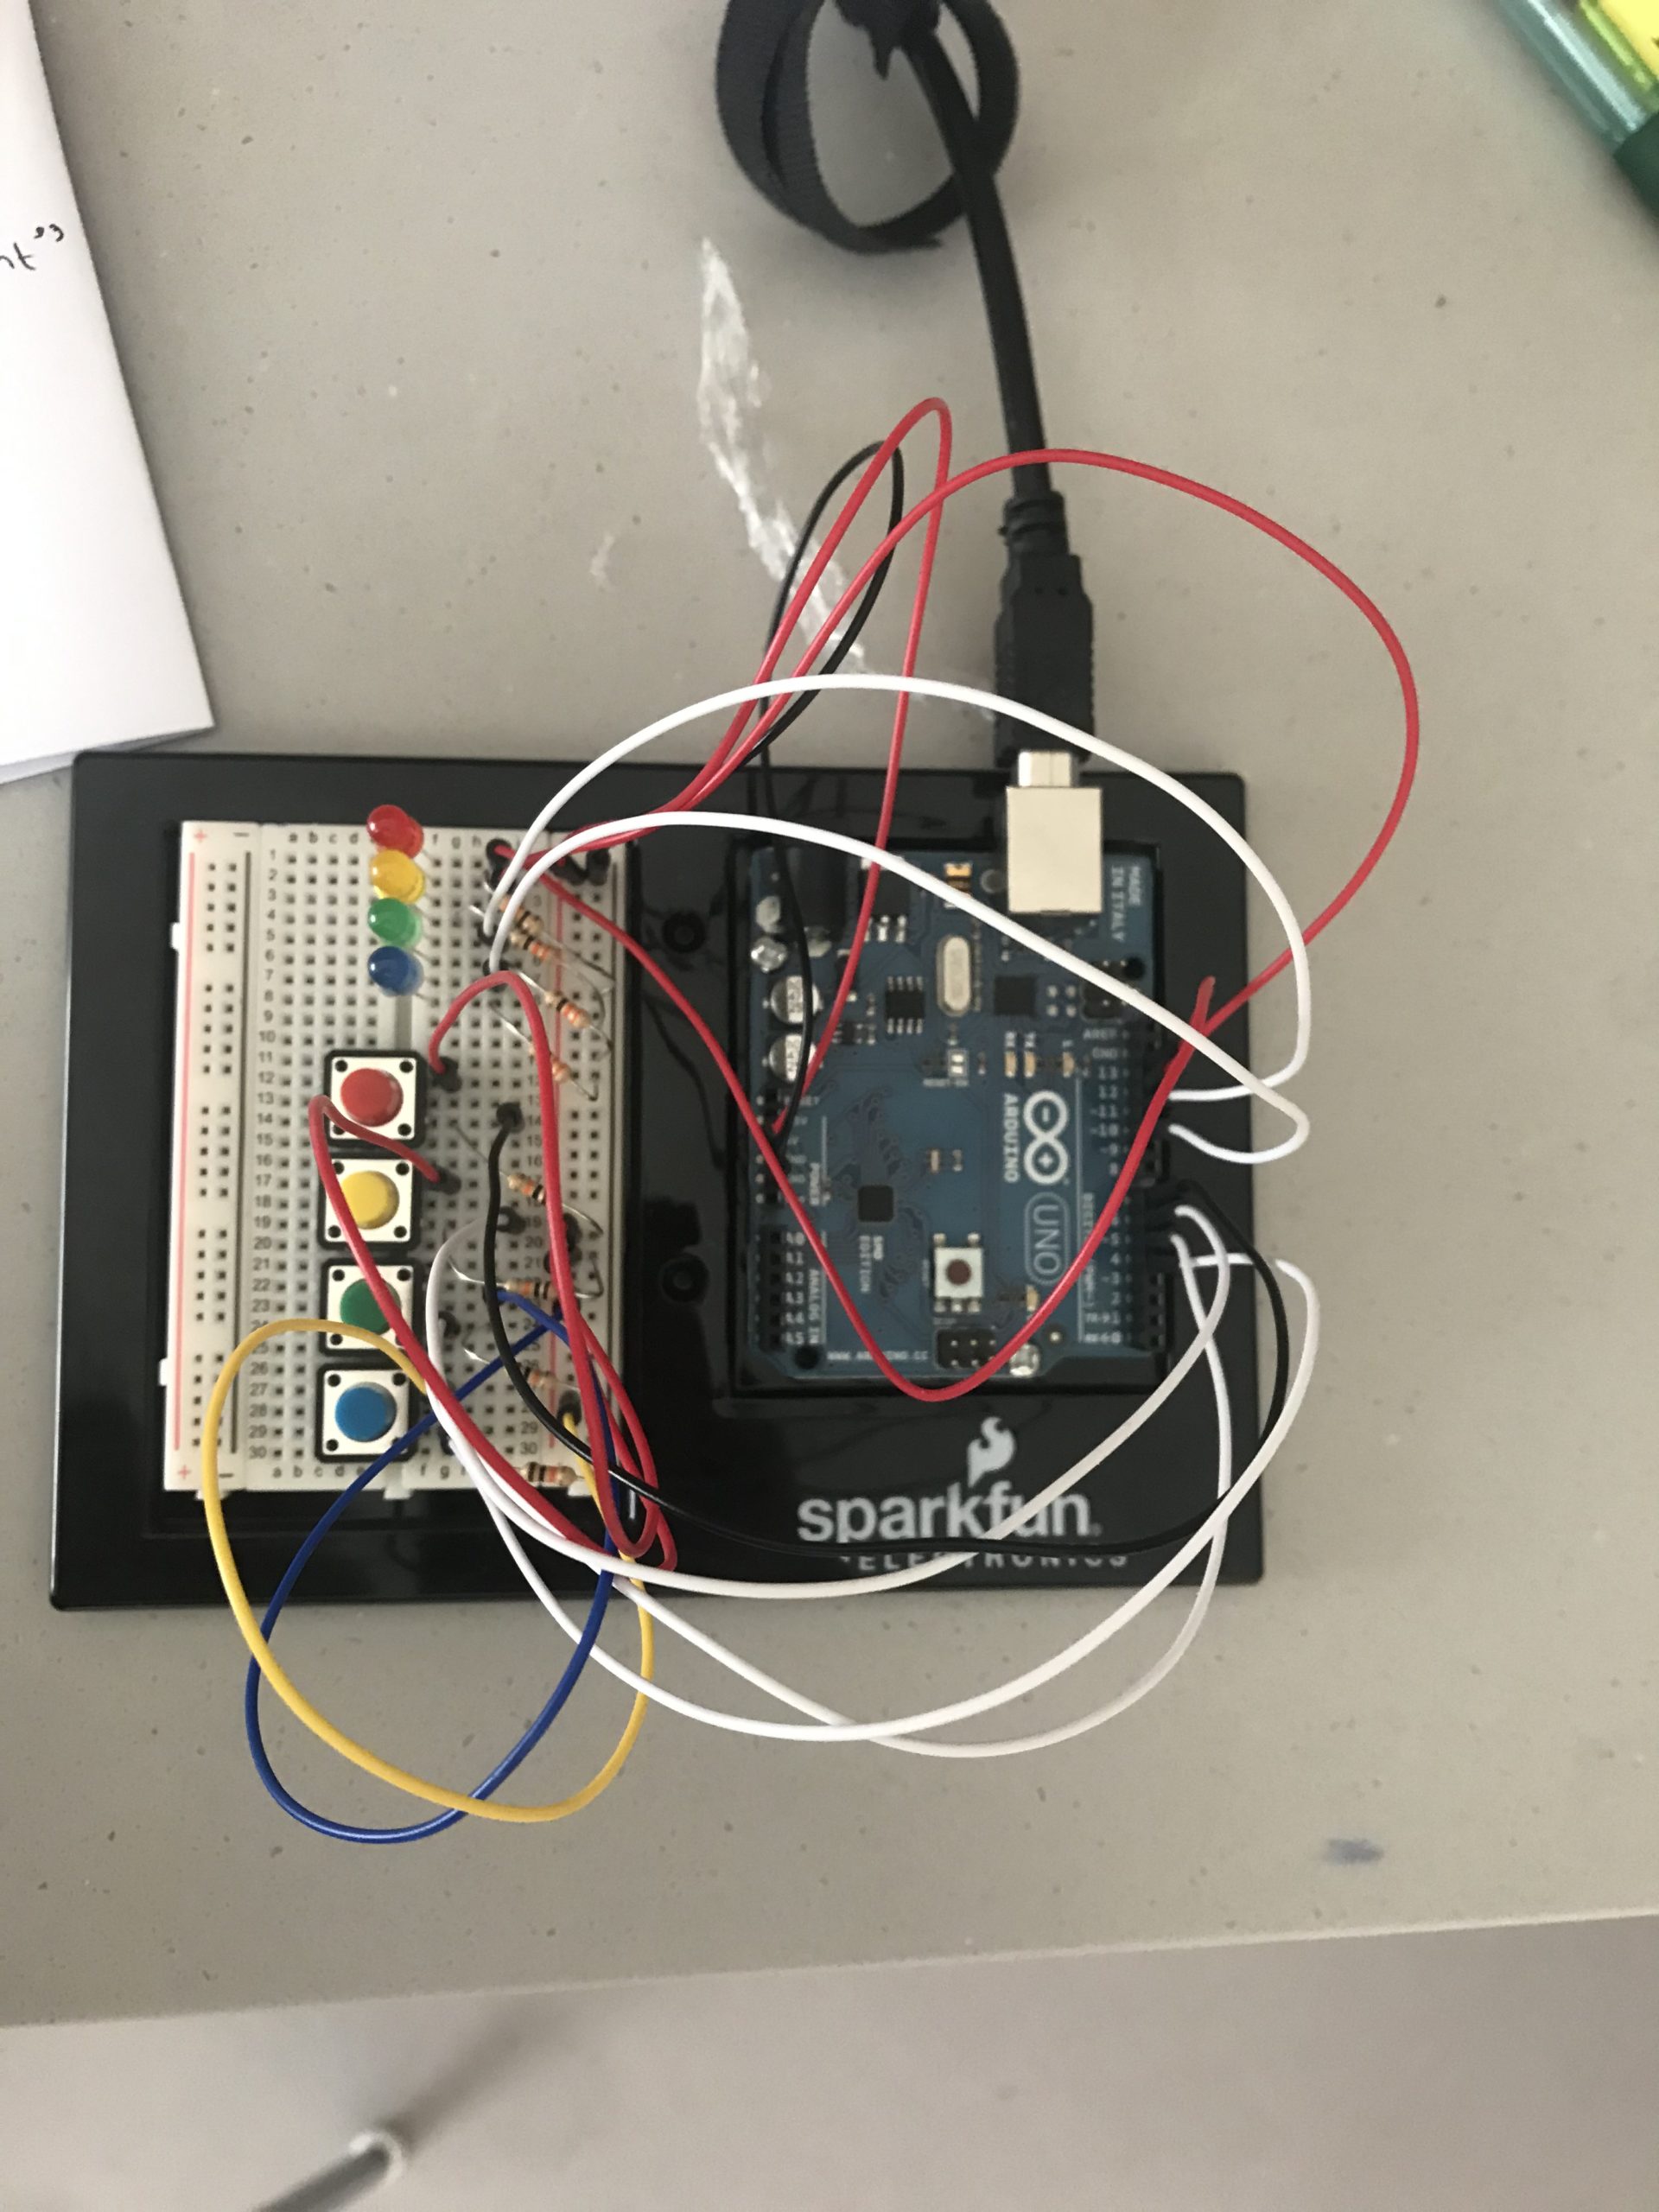
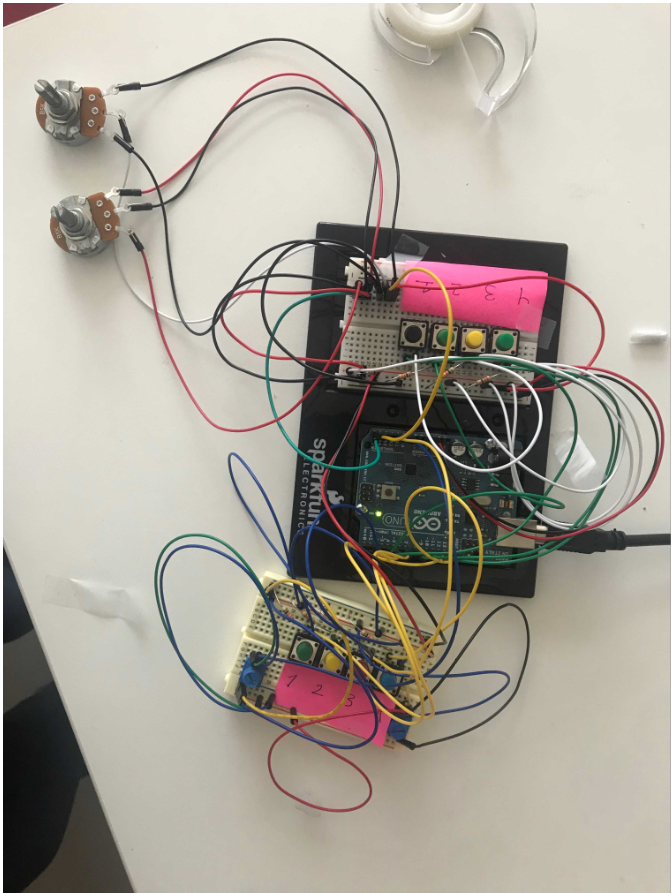
For Arduino, we wanted to have two different “stations” for each user. Each user on their breadboard has 4 buttons (reflecting Strongly disagree, disagree, agree, strongly agree for answering questions), and two potentiometer knobs for the etch- a – sketch. 

Although finding pieces was an initial struggle, people on campus were generous enough to lend us some pieces — especially Amina! Shout out to you :-). 

As you can see we had to work with the larger potentiometers, which initially caused a glitch due to loose wires, but then when taped down they worked just fine. 

As for the code, we used an ascii handshake to send one button reading and the 4 values from the potentiometers in a comma-separated string, which we trimmed, divided and casted in processing. For the buttons, we gave each button a unique value so we can indicate the answer chosen in processing (rather than just depending on 0 and 1).


int button1Pin = 2;
bool prevButton1 = LOW;
int button2Pin = 4;
bool prevButton2 = LOW;
int button3Pin = 8;
bool prevButton3 = LOW;
int button4Pin = 10;
bool prevButton4 = LOW;

int button5Pin = 13;
bool prevButton5 = LOW;
int button6Pin = 12;
bool prevButton6 = LOW;
int button7Pin = 7;
bool prevButton7 = LOW;
int button8Pin = 5;
bool prevButton8 = LOW;

void setup() {
  pinMode(button1Pin, INPUT);
  pinMode(button2Pin, INPUT);
  pinMode(button3Pin, INPUT);
  pinMode(button4Pin, INPUT);

  pinMode(button5Pin, INPUT);
  pinMode(button6Pin, INPUT);
  pinMode(button7Pin, INPUT);
  pinMode(button8Pin, INPUT);
  Serial.begin(9600);
  Serial.println("0,0");

}

void loop() {


  if (Serial.available() > 0) {
    char inByte = Serial.read();


    int u1Op1 = digitalRead(button1Pin);
    int u1Op2 = digitalRead(button2Pin) + 2;
    int u1Op3 = digitalRead(button3Pin) + 4;
    int u1Op4 = digitalRead(button4Pin) + 6;

    int u2Op1 = digitalRead(button8Pin) + 10;
    int u2Op2 = digitalRead(button7Pin) + 12;
    int u2Op3 = digitalRead(button6Pin) + 14;
    int u2Op4 = digitalRead(button5Pin) + 16;

    int knob1U1 = analogRead(A0);
    delay(1);
    int knob2U1 = analogRead(A1);
    delay(1);
    int knob1U2 = analogRead(A4);
    delay(1);
    int knob2U2 = analogRead(A5);

    if (u1Op1 == 1 &&  prevButton1 == LOW) {
      Serial.print(u1Op1);
       Serial.print(',');
    } else if (u1Op2 == 3 &&  prevButton2 == LOW) {
      Serial.print(u1Op2);
      Serial.print(',');
    } else if (u1Op3 == 5 &&  prevButton3 == LOW) {
      Serial.print(u1Op3);
      Serial.print(',');
    } else if (u1Op4 == 7 &&  prevButton4 == LOW) {
      Serial.print(u1Op4);
      Serial.print(',');
    } else if (u2Op1 == 11 &&  prevButton5 == LOW) {
      Serial.print(u2Op1);
      Serial.print(',');
    } else if (u2Op2 == 13 &&  prevButton6 == LOW) {
      Serial.print(u2Op2);
      Serial.print(',');
    } else if (u2Op3 == 15 &&  prevButton7 == LOW) {
      Serial.print(u2Op3);
      Serial.print(',');

    } else if (u2Op4 == 17 &&  prevButton8 == LOW) {
      Serial.print(u2Op4);
      Serial.print(',');
    }
    else {
      Serial.print(-1);
      Serial.print(',');
    }


    Serial.print(knob1U1);
    Serial.print(',');
    Serial.print(knob2U1);
    Serial.print(',');
    Serial.print(knob1U2);
    Serial.print(',');
    Serial.println(knob2U2);

    prevButton1 = u1Op1;
    prevButton2 = u1Op2 - 2;
    prevButton3 = u1Op3 - 4;
    prevButton4 = u1Op4 - 6;


    prevButton5 = u2Op1 - 10;
    prevButton6 = u2Op2 - 12;
    prevButton7 = u2Op3 - 14;
    prevButton8 = u2Op4 - 16;
  }
}


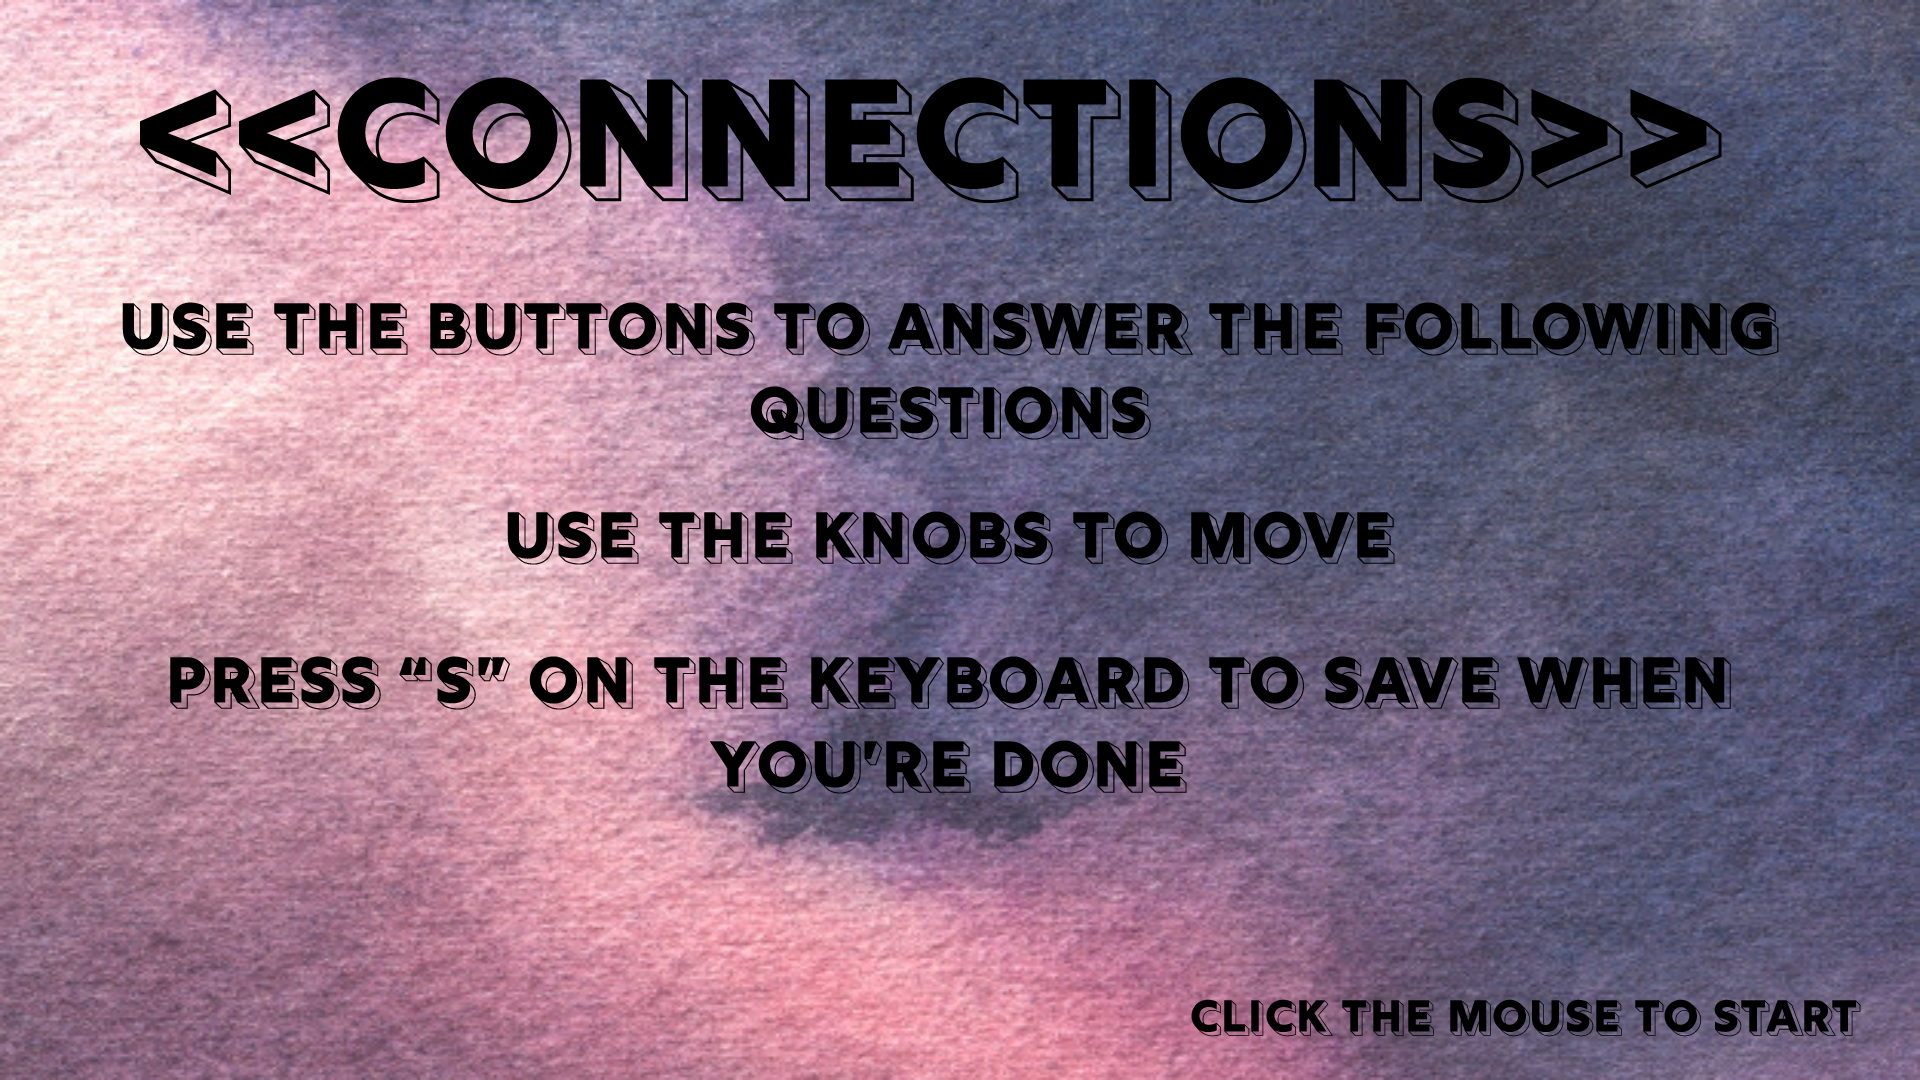
  1. Start Screen: we wanted to offer the users some quick pointers before they start. Here, we tried our best not to spoil what’s going to happen afterward but communicate all the needed information. 


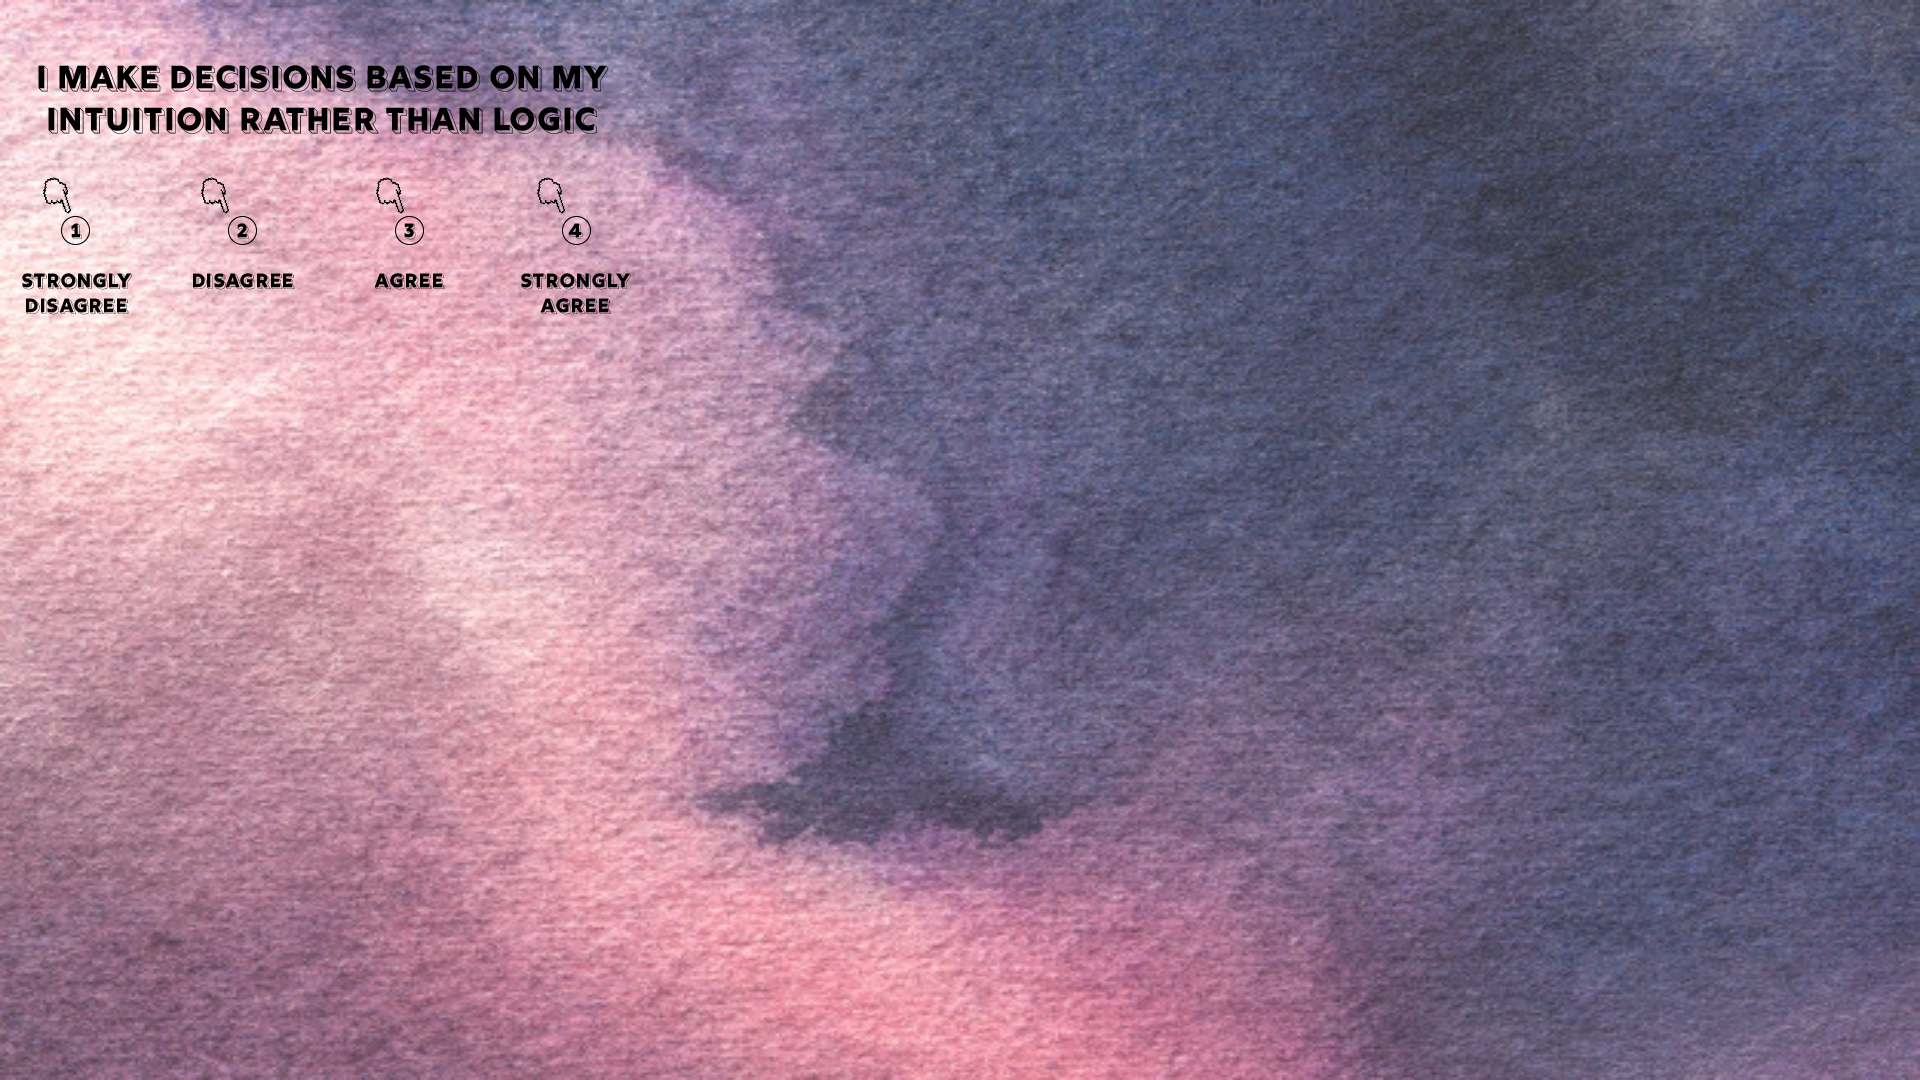
2. Question Screen: Here, all the questions display in a grid, one after the other. When both users answer, the next question appears, and all answers are recorded and the answer difference between them calculated. This answer difference becomes the measure of their similarity that affects the blooming.


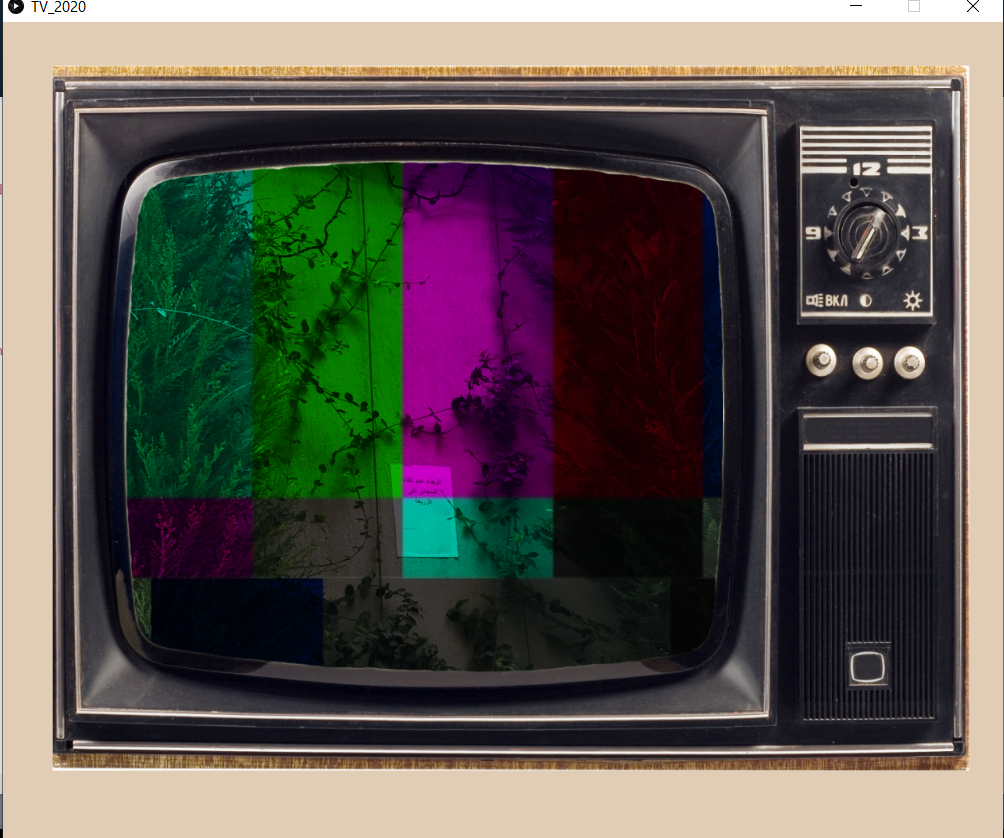
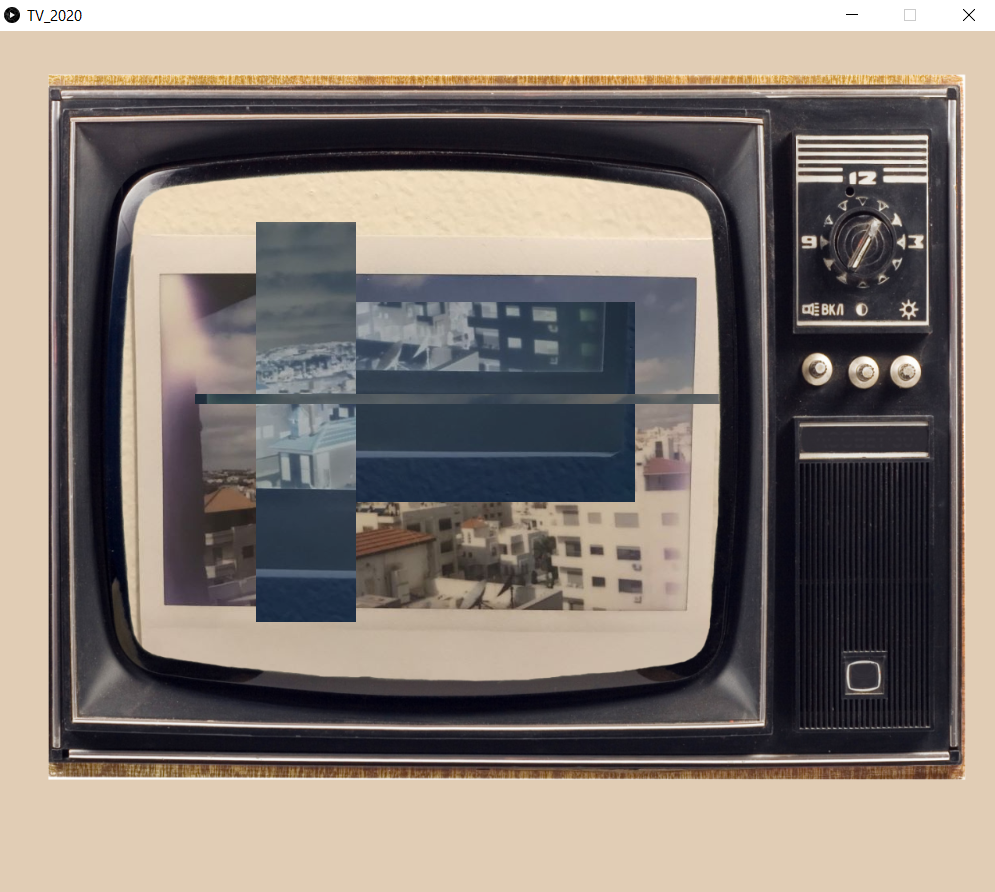
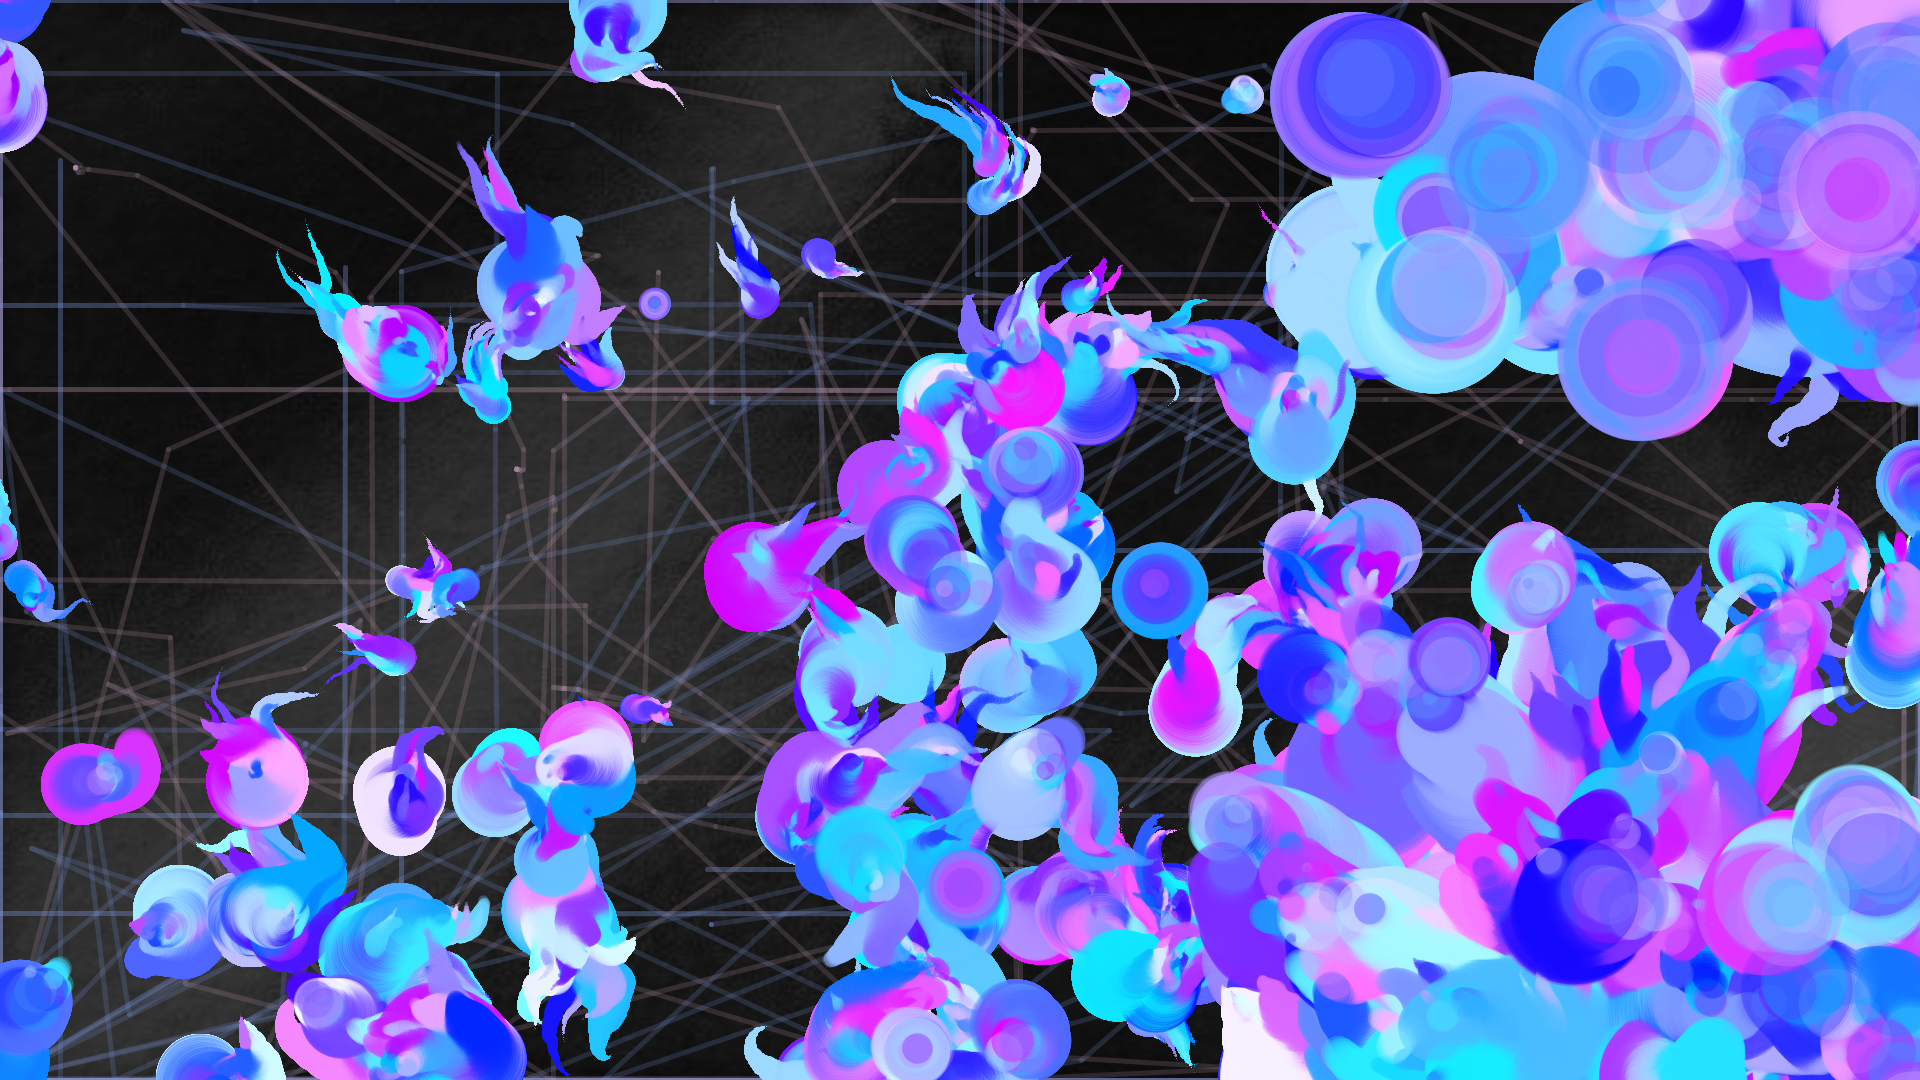
3. Drawing screen: Here, users use the potentiometer knobs to move around the screen, if they intersect in an area where answer difference = 0, they will see a dramatic explosion of color happen in front of them. This explosion will be smaller for answer difference 1 and 2, and non-existent for answer difference 3. 


4.End Screen:

This appears after the users “save” their sketch and it explains the concept to them. 

Some Main Features in the Code + Key Challenges during Implementation


Questions:

We had a question class, which creates class objects in a grid that we display one by one as users answer. This class includes the text display, variables to record user answers, the variable to calculate answer difference, and booleans to check if the question has been answered. 


The Traces:

In the beginning, we were just trying the code using the keyboard, and we were drawing points. We were moving the point one pixel at a time. We, later, realized that this wouldn’t work with the potentiometers. It was also causing way too much discontinuity in the traces. To slightly fix this, and get a better effect overall, we started recording the lastX and lastY read by the potentiometers, and drawing lines from (lastX, lastY) to (currentX,currentY) instead of points.


Collisions 

One of the main issues we ran into was detecting collisions between the traces.

There was a lot to think about in order to only detect valid collisions.

We needed to compare the color of pixels in two different PGraphics layers, each one containing the trace of one user. Whenever a pixel location is colored in both of the layers, a collision is detected.

However, we also needed to keep track of collision locations so that a collision wouldn’t be detected twice in the same location.

Since the strokeWeight of the traces is larger than just 1 pixel, and the lines are not just at 90-degree angles (they can be as squiggly as your heart desires) we also needed to check if a collision has already happened within a radius close to the current collision detected.

The bloom 

For the bloom, it took us a while to figure out what we wanted it to look like. We ended up using code we found on OpenProcessing (credits go to the post https://www.openprocessing.org/sketch/486216 ), as our base. We struggled a bit to incorporate it into our code, but we tweaked parts of it and changed some parameters to get it to work with our idea.

User Test:


Testing this experience with people actually tied our concept together, it suddenly made much more sense when we saw how the users went about it and their reactions. For example, in the case of the video above, after the users read through the end screen their reactions were something like: “oh! This is a painting about our friendship”, then discussing their answers and how similar and different they are, and then asking if they could print it. Although we tested it with friends, we think this could be a great conversation starter for two strangers! 

Future Improvements 

Perhaps adding more questions or delving deeper with what we ask could be an interesting improvement to this experience, adding more meaning to it. Furthermore, in terms of the Arduino setup, we really wanted to make it more appealing and better divided, however, the limitations made it a bit difficult to make it look neater. 

Finally, if we had more chances to user test we would’ve definitely been able to reveal details in the user experience that could be enhanced. 

Code 

Sarah&OnsFinal

Main Code

import processing.serial.*;
Serial myPort;

PGraphics user1, user2, blooms;
ArrayList<Integer[]> collisions;
int c_index = -1;
IntList collisionLocations; 
Question[] questions; 

int screen = 0;

int questionNumber = 0;
int Answer = 0;
int currentU1Answer = 0; 
int currentU2Answer = 0;

String timestamp;

int qCols = 3;
int qRows = 3;

//int goingThruQs = 0;

int x; 
int y; 
int lastX; 
int lastY;  

int x2; 
int y2; 
int lastX2;
int lastY2; 

float a, b, c, d, e, f ; 

PImage traceBg;
PImage questionBg;
PImage startScreen;
PImage endScreen; 

void setup() {


  background(0);
  fullScreen();
  println(width + " " + height);
  String portname = Serial.list()[2];
  myPort = new Serial (this, portname, 9600);
  myPort.clear();
  myPort.bufferUntil('\n');

  collisionLocations = new IntList(); 

  x = 0;
  y = height/2;
  lastX = 0;
  lastY = height/2;
  x2 = width;
  y2 = height/2;
  lastX2 = width;
  lastY2 = height/2;


  questions = new Question[qCols*qRows];


  int questionIndex = 0;
  for (int r2 = 0; r2 < qRows; r2++) {
    for (int c2 = 0; c2 < qCols; c2++) {

      questions[questionIndex] = new Question( questionIndex, c2*640, r2*360);

      questionIndex +=1;
    }
  }
  collisions = new ArrayList();
  user1 = createGraphics(width, height);
  user2 = createGraphics(width, height);
  blooms = createGraphics(width, height);
  pts = new ArrayList<Particle>();

  traceBg = loadImage("bg2darker.jpg");
  startScreen = loadImage("startScreen.png");
  questionBg = loadImage("bg.jpg");
  questionBg.resize(width, height);
  endScreen = loadImage("endScreen.png");
}

void draw() {

  if (screen == 0) {
    image(questionBg, 0, 0, width, height);
    image(startScreen, 50, 50 );
  }

  if (screen == 1) {
    questions[questionNumber].display(); 
    goingThroughQuestions(questionNumber);
    if (questions[questionNumber].user1Answered && questions[questionNumber].user2Answered && questionNumber < 8 ) {
      questions[questionNumber].answerDifference = abs(questions[questionNumber].user1Answer - questions[questionNumber].user2Answer); 
      println(questions[questionNumber].answerDifference); 
      questionNumber += 1;
    }
    if (questionNumber == 8 && questions[questionNumber].user1Answered && questions[questionNumber].user2Answered) {
      questions[questionNumber].answerDifference = abs(questions[questionNumber].user1Answer - questions[questionNumber].user2Answer);
      image(traceBg, 0, 0, width, height); 
      screen = 2;
    }
  }
  if (screen == 2) {


    stroke(183,150,172,50);
    strokeWeight(5);

    line(x, y, lastX, lastY); 
    user1.beginDraw();
    user1.stroke(255);
    user1.strokeWeight(5);
    user1.line(x, y, lastX, lastY);
    user1.endDraw();

    lastX = x;
    lastY = y;
    stroke(120,150,220, 50);
    strokeWeight(5);

    line(x2, y2, lastX2, lastY2);
    user2.beginDraw();
    user2.stroke(255, 0, 0);
    user2.strokeWeight(5);
    user2. line(x2, y2, lastX2, lastY2);
    user2.endDraw();

    lastX2 = x2;
    lastY2 = y2;

    //image(user1, 0, 0);
    //image(user2,0,0);
    user1.loadPixels();
    user2.loadPixels();

    for (int i=0; i<width; i++)
    {
      for (int j=0; j<height; j++)
      {
        if ( user1.get(i, j) == color(255) && user2.get(i, j) == color(255, 0, 0) &&!exists(i, j) && !existsInRadius(i, j))

        {
          Integer[] c= {i, j};
          collisions.add(c);
          collisionLocations.append(location(c[0], c[1])); 
          c_index += 1;
          yes = true;
        }
      }
    }


    blooms.beginDraw();
    blooms.smooth();
    blooms.colorMode(HSB); 
    
    blooms.rectMode(CENTER);
    if (c_index > -1)
    {
      bloomValues(questions[collisionLocations.get(c_index)].answerDifference);
      //blooms.ellipse(collisions.get(i)[0], collisions.get(i)[1], diameter, diameter);
      if (a != -1 && b != -1 && c != -1 && d != -1 && e != -1 && f != -1) {
        drawcool(blooms, collisions.get(c_index)[0], collisions.get(c_index)[1], a, b, c, d, e, f);
      }
    }

    blooms.endDraw();
    image(blooms, 0, 0);
  }
  if (screen == 3) {
    image(questionBg,0,0);
    image(endScreen,50,50);
  }
}


void goingThroughQuestions(int i) {
  //answer is not zero only when a button has been pressed
  if ( Answer == 1 || Answer == 3 || Answer == 5 || Answer == 7) { //if one of these buttons is pressed then it's the first user
    if (!questions[i].user1Answered) {  // if the question hadn't been answered already 
      questions[i].user1Answer = currentU1Answer; //assign the user 1 arduino variable to the user1 question variable
      questions[i].user1Answered = true;
      //println("user 1 " + questions[i].user1Answer);
      //not sure if the following 2 lines make sense, to me it's like restarting and waiting for a new button press
      currentU1Answer = 0; 

      Answer = 0;
    }
  }  
  if ( Answer == 11 || Answer == 13 || Answer == 15 || Answer == 17) {
    if (!questions[i].user2Answered) {
      questions[i].user2Answer = currentU2Answer; 
      questions[i].user2Answered = true;

     
      currentU2Answer = 0;

      Answer = 0;
    }
  }
}


void serialEvent(Serial myPort) {
  String s=myPort.readStringUntil('\n');
  s=trim(s);
  if (s!=null) {
    int values[]=int(split(s, ','));
    if (values.length==5) {
      Answer = (int)values[0]; 
      x=(int)map(values[1], 0, 1023, 0, width);
      y=(int)map(values[2], 0, 1023, 0, height);
      x2=(int)map(values[3], 0, 1023, 0, width);
      y2=(int)map(values[4], 0, 1023, 0, height);
    }
  }
  if (Answer != -1) {
    if (Answer == 1 || Answer == 3 || Answer == 5 || Answer == 7) {
      currentU1Answer = Answer;
    } 
    //second set of buttons for user 2
    if (Answer == 11 || Answer == 13 || Answer == 15 || Answer == 17) {
      currentU2Answer = Answer - 10 ;
    }
  }
  myPort.write('0');
}

//function to check if collision already exists in array
boolean exists(int x, int y)
{
  for (int i=0; i<collisions.size(); i++)
  {
    if (collisions.get(i)[0]==x && collisions.get(i)[1]==y)
    {
      return true;
    }
  }
  return false;
}


//function to check if collisions exists in radius 
boolean existsInRadius (int x, int y)
{
  for (int i=0; i<collisions.size(); i++)
  {
    if (sq(collisions.get(i)[0] - x) + sq(collisions.get(i)[1] - y) <= 20*20)
    {
      return true;
    }
  }
  return false;
}

//function to check in which question's "area" the collision happened in
int location(int x, int y) {
  int qIndex = 0;
  for (int r2 = 0; r2 < qRows; r2++) {
    for (int c2 = 0; c2 < qCols; c2++) {
      if (x >= c2*640 && x <= (c2+1)*640 && y >= r2*360 && y <= (r2+1)*360) {
        return qIndex;
      } 

      qIndex +=1;
    }
  }
  return -1;
}

//function to take parameters for the bloom based on the answer difference
void bloomValues(int diff) {
  if (diff == 0) {
    //lifespan
    a = 70; //80;
    b = 150;  //120;
    
    //decay
    c = 0.7;
    d = 0.99;
    //weightRange
    e = 60; 
    f = 180; //120;
  } else if (diff == 2) {
    //lifespan
    a = 55;
    b = 80; 
    //decay
    c = 0.63;
    d = 0.9;
    //weightRange
    e = 20;
    f = 100;
    
  } else if (diff == 4) {
    //lifespan
    a = 30;
    b = 65; 
    //decay
    c = 0.63;
    d = 0.83;
    //weightRange
    e = 8;
    f = 35;
    
  } else if (diff == 6) {
    a = b = c = d = e = f = -1;
  }
}

void keyPressed() {
  if (key == 'S' || key == 's') {
    timestamp = year() + nf(month(), 2) + nf(day(), 2) + "-"  + nf(hour(), 2) + nf(minute(), 2) + nf(second(), 2);
    saveFrame(timestamp+".png");
    screen = 3;
  }
}

void mouseClicked(){
 screen = 1; 
}

 Bloom Class

ArrayList<Particle> pts;
boolean yes;
int coolingTime;

void drawcool(PGraphics pg, Integer x, Integer y, float a, float b, float c, float d, float e, float f) {  
  pg.beginDraw();
  if (yes) 
  {
    for (int i=0;i<10;i++) {
      Particle newP = new Particle(x, y, i+pts.size(), i+pts.size(), a,b,c,d,e,f);
      pts.add(newP);
    }
    
  }
  for (int i=0; i<pts.size(); i++) {
    Particle p = pts.get(i);
    p.update();
    p.display(pg);
  }

  for (int i=pts.size()-1; i>-1; i--) {
    Particle p = pts.get(i);
    if (p.dead) 
    {
      pts.remove(i);
    }
   
  }
  coolingTime++;
  stop();
  //yes = false;
  pg.endDraw();
}

void stop(){
  if (coolingTime>1)
  {
    yes = false;
    coolingTime = 0;
  }
}

//CLASS
class Particle{
  PVector loc, vel, acc;
  int lifeSpan, passedLife;
  boolean dead;
  float alpha, weight, weightRange, decay, xOffset, yOffset;
  color c;
  float a, b,cc,d,e,f; 
  
  Particle(float x, float y, float xOffset, float yOffset, float thisa , float thisb , float thisc, float thisd, float thise ,float thisf){
    loc = new PVector(x,y);
    a = thisa;
    b = thisb;
    cc = thisc;
    d = thisd;
    e = thise;
    f = thisf;
    
    float randDegrees = random(360);
    vel = new PVector(cos(radians(randDegrees)), sin(radians(randDegrees)));
    vel.mult(random(1));
    
    acc = new PVector(0,0);
    lifeSpan = int(random(a, b)); //HERE IS HOW LONG THE ANIMATION IS (timewise)
    decay = random(cc, d); //HERE IS HOW FAR IT GOES
    c = color (random(255), random(255), 255, 75);
    weightRange = random(e,f);//random(5,90); //HERE IS THE SIZE 
    
    this.xOffset = xOffset;
    this.yOffset = yOffset;
  }
  
  void update(){
    if(passedLife>=lifeSpan){
      dead = true;
    }else{
      passedLife++;
    }
    
    alpha = float(lifeSpan-passedLife)/lifeSpan * 70+50;
    weight = float(lifeSpan-passedLife)/lifeSpan * weightRange;
    
    acc.set(0,0);
    
    float rn = (noise((loc.x+frameCount+xOffset)*0.01, (loc.y+frameCount+yOffset)*0.01)-0.5)*4*PI;
    float mag = noise((loc.y+frameCount)*0.01, (loc.x+frameCount)*0.01);
    PVector dir = new PVector(cos(rn),sin(rn));
    acc.add(dir);
    acc.mult(mag);
    
    float randDegrees = random(360);
    PVector randV = new PVector(cos(radians(randDegrees)), sin(radians(randDegrees)));
    randV.mult(0.5);
    acc.add(randV);
    
    vel.add(acc);
    vel.mult(decay);
    vel.limit(3);
    loc.add(vel);
  }
  
  void display(PGraphics pg){

    pg.beginDraw();
    pg.strokeWeight(0);
    pg.stroke(0, alpha);
    pg.point(loc.x, loc.y);
    
    pg.strokeWeight(weight);
    pg.stroke(c);
    pg.point(loc.x, loc.y);
    pg.tint (255,125);
    pg.endDraw();
  }
}


Question Class

class Question {
  //variables to store input answers
 
  
  PImage image;
  
  
  int user1Answer;
  int user2Answer; 
  int answerDifference; 
  //question location (corresponding to area on screen)
  int x;
  int y;
  int coverX = 0;
  //question box dimensions (it could be something that we design and upload to processing(?))
  int w = 640;
  int h = 360;

  int c = 255; //alpha

  int questionNumber; 

  String questionText; 
  

  boolean user1Answered = false;
  boolean user2Answered = false;

  boolean sameAnswer; 

  Question(int tempQNumber, int tempX, int tempY) {
    questionNumber = tempQNumber;
    x = tempX;
    y = tempY;
    image = loadImage("question"+(questionNumber+1)+".png");


  }


  void display() {
    
   //background(0);
   image(questionBg,0,0); 
    fill(0);
    //noStroke();
    stroke(255);
    image(image,x, y);
    fill(255);
    //textSize(40);
    //text(questionText, x+w/4, y+h/4); 
    
  }

  
}


Refined Final Project Idea – Ons & Sarah

Idea

Inspired by our initial idea and a long conversation with Aaron and among ourselves, we came up with a new concept.

Our idea is to create a 2-person interactive generative art experience in which two people fill in a yes-no questionnaire about themselves, and then use an etch-a-sketch – like set up (two potentiometers) to generate a visualization of how alike they are and how much they have in common.

Arduino

Our Arduino will have two potentiometers per user as mentioned above to simulate the etch-a-sketch setup. One knob would control drawing on the x-axis, and the other would control drawing on the y-axis.

Etch-A-Sketch

Additionally, we will have three buttons. Two buttons for the yes-no questionnaire, and one to “save” the artwork so that the users can keep it afterward.


Processing

We’re thinking of mapping sections of the processing screen to correspond to different categories (e.g. hobbies, age…etc.), and then as the users make their way on the screen, they leave traces that reflect the data they gave us in the beginning. When two traces meet at a point that symbolizes something in common a more complex shape “blooms” there.

At this point, it feels a bit difficult to visualize what it will exactly look like as it will require a lot of experimentation and trial and error!

Experience

For now, we’re thinking of having it all on one processing screen. So the users alternate filling in the questionnaire, and then continue to generate the art. However, if we find that we satisfied all the other elements we’re thinking of, we might try to make it across two devices


Final Project Proposal – Ons & Sarah

For the final project, Ons and I will be working together to build an interactive travel experience that brings together Arduino and Processing.

Idea

We’re thinking of doing a virtual trip around the world. The Arduino would be used to navigate “around the world” and the visuals would be through processing. The analog elements that we’re considering are:

  • A potentiometer: to control a servo motor.  (A small globe will be stuck onto the servo so that the user will be able to spin it using the potentiometer.)

NOTE: The location will probably be determined by the angle of the servo, but for the purpose of “visual clarity” and successful cognitive mapping we will have something pointing to the globe to indicate the current location.

  • A distance sensor: using it as a zoom tool so the user zooms in and out of the visuals on processing
  • Button: This could add an extra element to the idea, for example, if someone presses the button it would trigger some sort of activity that relates to the location such as generating art specific to the location (we’re still thinking this through)

Questions/Concerns 

  • The Scope: we’re not sure how far we should go with the features, is an interactive “exploration” experience enough, or should we add more (such as the suggestion of the button) 
    • Another element we’re confused about in the scope is should it be a “world tour” or should it be to a specific region 
  • Servo: how could we navigate the globe vertically? In this would a 2D map be better? 


Week 10: Creative Spaces in the UAE

Intro + Idea

This weekend, I visited an art exhibition in a space called Warehouse 421 in Mina Zayed. It was my first time exploring a creative space other than the Louvre, and I realized that I wanted to make a checklist of some of the main places that I would like to visit during my time here. Something else I realized, is that sometimes it’s hard to visualize how far something is in the UAE (does that make sense?), I’m still constructing a mental map of Abu Dhabi but find myself still needing to refer to Google Maps to make an estimate of the distance.

This inspired my game, I wanted to show the user pictures of some art/creative spaces in the UAE, and for them to estimate how far they are by interacting with the sensor.


Initial Attempts

Again, I wanted to experiment with the Ultrasonic Sensor. I spent a lot of time understanding how it works, and the conversions needed to change time to distance. I found it really fascinating and actually recalled that it isn’t my first experience with the sensor! I used to use it in robotics back in high school, but I guess I didn’t have that clear of an understanding of it.

some of my notes

This video was really helpful in terms of understanding the functionality and conversion. However, I struggled a lot with the serial communication part. I was initially able to print out the distance in CM on the screen but then was faced with a lot of difficulties and errors when it came to working with the value for the game functionality.


Final Idea

So, for this one, I switched to the light sensor/photocell and thought it could be interesting to see how one could map brightness to distance. I completed my communication using the ascii handshake, as I wanted the full range of readings.

For the game, I created an array of locations in the UAE and another array of distances (referring to the distance from campus).  I created three categories:

  1. 1-10 KM Away
  2. 11 – 20 KM Away
  3. Outside the City

Then, based on the distance array I classified all the locations in the group. As for the input, I created brightness ranges, i.e. if the brightness was between 50- 200 (sensor covered), the spot is in the 1 – 10 KM category…etc. Whatever the user inputs is then saved in a variable that is used to compare with the “correctCategory”. So, if the user gets “Louvre Abu Dhabi”, they’re meant to cover the sensor. If they do, their input value saves UserInputCategory as 1, and hence it shows a correct message when it is compared to the CorrectCategory variable.

I tried to make the sequences logical in terms of cognitive mapping and how the user interacts with the game, rather than ordered in the code. Meaning that category 1 has the darkest range while category 2 has the brightest, and 3 (actually farthest from the sensor and farthest from campus) has a brightness in between.


Here’s an example of the gameplay, I’m missing a start screen and a replay button since I focused on getting this part to work. As you can see, I had indicators on my desk, the first one indicating spaces that are within the city but a bit farther from campus, and the second one indicating spaces outside of the city. So, for the second example, when I got “Alserkal Avenue” located in Dubai, it only worked when I moved to the suitable indicator.

However, this is not always the case, there’s a glitch in the code, and I’m afraid it might be how sensitive the photocell is, as sometimes it shows the “correct” message at the wrong time.

Possible Developments

I found myself understanding the concepts of serial communication we went over in class, and the other examples but struggled with the application a bit, especially with the distance sensor. So trying to work with it more could be helpful before starting to work on the final project.

A nice development/addition to this game would be inquiring about estimate cab price rather than distance. I found that many students estimate how far someplace is by how much a cab would cast. e.g. 50 AED to YAS mall, so anything around that would cost around the same amount. It might be more relatable and interesting that way!


Arduino Code:

int photoCell = A0;

void setup() {
  // put your setup code here, to run once:
  Serial.begin(9600);
  Serial.println('0'); //initial message
 
}

void loop() {
  if(Serial.available()>0){ //checks if something is recieved from processing
    char inByte=Serial.read(); //and reads it
    int photoCellReading = analogRead(A0); //reads my photocell 
    delay(1);
    Serial.println(photoCellReading); //sends it to processing
    
  }
}


Processing Code:

import processing.serial.*;
Serial myPort;
int data=0;

int userInputCategory = 0; //variable dependent on user input
int correctCategory; //variable dependent on location distance, used to compare with user input
int randomLocation; //random location for each run

//arrays of locations and how far they are from campus
String[] locations =  {"Louvre Abu Dhabi", "Warehouse 421", "Abu Dhabi Cultural Foundation", "Etihad Modern Art Gallery", "Alserkal Avenue", "Sharjah Art Foundation"};
int [] distanceFromCampus = {6, 10, 13, 18, 132, 167};

//loading images and font
PImage image; 
PFont f;

void setup() {
  size(960, 540);
  printArray(Serial.list());
  String portname=Serial.list()[2];
  println(portname);
  myPort = new Serial(this, portname, 9600);
  myPort.clear(); //clearing port from any previous data
  myPort.bufferUntil('\n'); // reading until the new line
  
  randomLocation = (int)random(0,locations.length); // generating a random location for the play
  
  //loading the suitable image
   image = loadImage(locations[randomLocation] + ".jpg");  
   imageMode(CENTER);
   image.resize(350,350);
   
   
   //font
   f = createFont("Montserrat-BoldItalic.ttf",20);
   textFont(f);
   textMode(CENTER); 
 
  
}
void draw() {
  background(102,133,147);
  fill(0);
  // if statement to set the correct category based on location
  if (distanceFromCampus[randomLocation] <= 10) {
    correctCategory = 1;
  } else if (distanceFromCampus[randomLocation] >= 10 && distanceFromCampus[randomLocation] <= 20) {
    correctCategory = 2;
  } else if (distanceFromCampus[randomLocation] > 100) {
    correctCategory = 3;
  }
  //setting user input categories 
  if (data >= 100 && data <= 200) {
    userInputCategory = 1;
  } else if (data >= 700 && data <= 830) {
    userInputCategory = 3;
  } else if (data > 855) {
    userInputCategory = 2;
  }
//println(randomLocation);

  switch (randomLocation) {
  case 0:
    //display stuff
    textSize(40);
    text(locations[randomLocation],width/2-250, height - 450);
    image(image, width/2,height/2 + 30);
    //compares user input to the correct value and displays correct if the user is right
    if (userInputCategory == correctCategory) {
      background(102,133,147);
      text("CORRECT", width/2-100,height/2);
      break;
    }

  case 1:
    
    textSize(40);
    text(locations[randomLocation],width/2-250, height - 450);
    image(image, width/2,height/2 + 30);
    if (userInputCategory == correctCategory) {
        background(102,133,147);
      text("CORRECT", width/2-100,height/2);
      break;
    }
  case 2:
    
    textSize(40);
    text(locations[randomLocation],width/2-250, height - 450);
    image(image, width/2,height/2 + 30);
    if (userInputCategory == correctCategory) {
        background(102,133,147);
      text("CORRECT", width/2-100,height/2);
      break;
    }
  case 3:
   
    textSize(40);
    text(locations[randomLocation],width/2-250, height - 450);
    image(image, width/2,height/2 + 30);
    if (userInputCategory == correctCategory) {
       background(102,133,147);
      text("CORRECT", width/2-100,height/2);
      break;
    }
  case 4:
    
    textSize(40);
    text(locations[randomLocation],width/2-250, height - 450);
    image(image, width/2,height/2 + 30);
    if (userInputCategory == correctCategory) {
        background(102,133,147);
      text("CORRECT", width/2-100,height/2);
      break;
    }
  case 5:
    
    textSize(40);
    text(locations[randomLocation],width/2-250, height - 450);
    image(image, width/2,height/2 + 30);
    if (userInputCategory == correctCategory) {
        background(102,133,147);
      text("CORRECT", width/2-100,height/2);
      break;
    }
  }
}


void serialEvent(Serial myPort) {
  //recieves the value as string and reads it one line at a time
  String s=myPort.readStringUntil('\n');
  s=trim(s); //trimming for any additional or hanging white spaces
  if (s!=null) { // if something is received
    data=(int (s)); //set the variable to the integer value of the string
  }
  //println(data);
  myPort.write('0'); //send something back to arduino to complete handshake
}


Week 9: Happy Birthday?

Intro + Initial Attempts

This week’s assignment was quite challenging! I tried many things and had to change up details in my idea a lot to get it to work. I was really inspired by the Sound Wall example from Peter Vogel and wanted to incorporate that in the assignment so I can play around with both the photoresistor and the servo motor. Initially, I coded my servo to automatically keep sweeping from left to right, over the photoresistor. I had a small piece of paper taped on my servo arm to cast a shadow over the photoresistor.

 The goal was to have a song playing, and then whenever the arm is over the photoresistor, the song switches to a lower octave to simulate a darker sound. The issue I had here is that the code for sweeping the servo arm relied on the delay(), and I think that interfered with triggering the buzzer in a regular manner.


//sweep code from Arduino Reference//
  for (pos = 0; pos <= 180; pos += 1) { // goes from 0 degrees to 180 degrees
    // in steps of 1 degree
    servo.write(pos);              // tell servo to go to position in variable 'pos'
    //delay(40);                       // waits 40ms for the servo to reach the position
  }
  for (pos = 180; pos >= 0; pos -= 1) { // goes from 180 degrees to 0 degrees
    servo.write(pos);              // tell servo to go to position in variable 'pos'
    //delay(40);                       // waits 40ms for the servo to reach the position
}

So, I decided to move the servo arm in an analog matter using the potentiometer and was presented with a second issue. I struggled with having the music playing all the time simultaneously with moving the servo, so I couldn’t have it switch between songs like I had imagined. I’m still a bit confused about how the movement of the servo interferes with the buzzer functions and how to navigate that and want to look into that.

Final Idea

So, I decided to make an “instrument” that plays Happy Birthday when the photoresistor reads a high value of intensity, and then when the knob is turned and the servo arm casts a shadow over the photoresistor the song stops. Then, when the photoresistor detects light again, it starts the song from the beginning.

Here’s my set-up, I used the eraser to elevate my servo!


Here’s a demo:

As you can see, my buzzer is lagging which presented another issue that I’m confused about. The durations of the notes are accurate, and I used the concept of the rate that we covered in class which makes me question if moving a servo and playing the buzzer at the same time causes this.


For the digital input, I used a switch. If the switch is flipped, it moves the servo arm to cover the photoresistor and doesn’t allow the user to move the arm, turning the music off and locking the device.

Overall, brainstorming adding a lot of interacting elements was a lot of fun for me! I would love to find a way to make my initial idea (where the pitches lower in response to shadow) work, though.

Here’s my circuit diagram and code:


#include "pitches.h"
#include <Servo.h>

Servo servo;
//defining photoresistor pin
int photoResistor = A1;
//potentiometer
int potenKnob = A0;
//buzzer pin
int buzzerLoc = 4;
//switch pin
int switchPin = 6;


//array for birthday song notes
int notes[25] = {NOTE_C5, NOTE_C5, NOTE_D5, NOTE_C5, NOTE_F5, NOTE_E5, NOTE_C5, NOTE_C5, NOTE_D5, NOTE_C5, NOTE_G5, NOTE_F5, NOTE_C5, NOTE_C5, NOTE_C6, NOTE_A5, NOTE_F5, NOTE_E5, NOTE_D5, NOTE_AS5, NOTE_AS5, NOTE_A5, NOTE_F5, NOTE_G5, NOTE_F5};
//array for the duration of each note
int durations[25] = {8, 8, 4, 4, 4, 2, 8, 8, 4, 4, 4, 2, 8, 8, 4, 4, 4, 4, 4, 8, 8, 4, 4, 4, 2};

//variable to keep track of which note in the song is playing
int whichNote = 0;


void setup() {
  servo.attach(2);
  Serial.begin(9600);
  pinMode(switchPin, INPUT);

}

void loop() {
  //variable to read the switch state
  int switchState = digitalRead(switchPin);

  //variable that reads from the photoresistor
  int prVal = analogRead(photoResistor);
  //variable to check previous photoresistor value
  int prevPrVal;
  //reading the potentiometer location
  int knobValue = analogRead(potenKnob);
  //mapping to 180 cause it's being used to move the servo
  int mappedKnobValue = map(knobValue, 0, 1023, 0, 180);

  //moving the servo
  servo.write(mappedKnobValue);

  //rate at which the music is meant to play, settled 600 after trial and error
  int rate = 600 / durations[whichNote];


  //condition that checks if servo arm is above photoresistor
  if (prVal >= 800) {
  //condition that checks if the photoresistor was previously covered, so the song starts over when the arm moves, rather than resuming from the middle
    if (prevPrVal < 800) {
      whichNote = 0; //back to beginning
    }

    if (millis() % rate == 0) { //condition to move through each note
      tone(buzzerLoc, notes[whichNote], rate); //plays the note by referring to the note from the array
      whichNote = (whichNote + 1) % 25; //to loop through the song
      delay(1);

    }


  }
  //condition that checks digital input from switch,
  if (switchState == HIGH) { //if the switch is flipped, the instrument is "locked" and no one can play the song by moving the potentiometer knob
    servo.writeMicroseconds(2100); //writing a value to the servo to move it digitally
  }
  prevPrVal  = prVal; //setting the current photoresistor reading to the previous variable, to check next time


}


Week 8: Emotion-O-Meter

Intro

Brainstorming for this week was pretty tough. I went from playing around with the potentiometer and ultrasonic sensor to choosing to prioritize adding signifiers and things that add more context to a project. I personally think I could’ve done something more complex or experimented more with sensors, but by the time I reached this realization I was in too deep in this assignment. However, I will make it a goal to explore the sensors and switches I still haven’t touched in the kit (temperature sensor, photoresistor, and switch).

Note: check this link for a good starting point on Ultrasonic Sensors:

Idea 

After brainstorming and trying to find inspiration, I decided to make use of the potentiometer’s movement in a circular motion and wanted to do something that has to do with the user needing to point the arrow of the potentiometer towards a specific thing to get a specific interaction.

So, the potentiometer was my source of analog input.

For this, I recalled the feeling charts I used to have in kindergarten, as well as the reversible octopus plushie that took over TikTok. Both these things are tools meant to make it easier for children to express their emotions without having to struggle through verbalizing it.

Feelings Chart Example 
Octopus Plushie


So, I thought it would be interesting to do something similar. The user inputs their feeling by twisting the dial to a certain quadrant in a circle cutout that I added to my circuit. An LED to the emotion lights up. Then, for the digital input and output, I used a simple button and LED, and the user turns on the LED if they feel like they want to talk further about why they feel the way they feel.

Add-ons to Circuit


Implementation

In terms of the code, it was actually pretty simple. I just read through the values that the knob gives on the serial monitor, and added ranges for each LED to turn on accordingly. So, for the yellow quadrant of the circle the range was 220 – 186, and so if the user turns it and the reading is in that range, the yellow LED turns on and the rest turn off. As for the digital part, I just applied the switch example we looked over in class.

Here’s a demo:

(Okay, I did actually film horizontally, I’m not exactly sure why the video still turned out like this 🙁 (help))

Reflection and Development

I really enjoy the aspect of adding a story or context to what I’m making, it somehow makes the process much easier and I enjoyed doing that here. However, I do think I could’ve gone for something a bit more complex to push myself and really get comfortable with working with analog inputs. I think one of the main issues I have in this program is that the varying of brightness in the LED lights doesn’t make much sense in context, and I want to look into how to use elements of analog output for my benefit and to enrich my ideas. Any suggestions or insight is appreciated as always :-)!

Code 

//define variables for button and LEDs
int button = 2;
int yellowLed = 11;
int greenLed = 10;
int blueLed = 9;
int redLed = 6;
int expressionLed = 3;

//booleans to check if the button is pressed + to turn LED on (digital)
bool prevButtonState = LOW;
bool expressionLedState = false;

//determining knob input for the dial
int knob = A0;

void setup() {
  pinMode(yellowLed, OUTPUT);
  pinMode(greenLed, OUTPUT);
  pinMode(blueLed, OUTPUT);
  pinMode(redLed, OUTPUT);
  pinMode(button, INPUT);
  pinMode(expressionLed, OUTPUT);
  Serial.begin(9600);
  // put your setup code here, to run once:

}

void loop() {
  // put your main code here, to run repeatedly:
  int knobValue = analogRead(knob);
  int mappedValue = map(knobValue, 0, 1023, 0, 220); //i thought mapping to 220 rather than 255 could be helpful, since my circle has 4 divisions, but it didn't make much of a difference. 
   

  if (mappedValue >= 186) { //first quadrant, very happy
    analogWrite(greenLed, 0);
    analogWrite(blueLed, 0);
    analogWrite(redLed, 0);
    analogWrite(yellowLed, mappedValue);

  }
  else if (mappedValue <= 185 && mappedValue >= 105) { //second quadrant, happy
    analogWrite(yellowLed, 0);
    analogWrite(blueLed, 0);
    analogWrite(redLed, 0);
    analogWrite(greenLed, mappedValue);

  }
  else if (mappedValue <= 104 && mappedValue >= 22) { //third quadrant, neutral
    analogWrite(greenLed, 0);
    analogWrite(yellowLed, 0);
    analogWrite(redLed, 0);
    analogWrite(blueLed, mappedValue);

  }
  else if (mappedValue <= 21 && mappedValue >= 0) { //fourth quadrant, sad
    analogWrite(greenLed, 0);
    analogWrite(yellowLed, 0);
    analogWrite(blueLed, 0);
    analogWrite(redLed, mappedValue);
    if (mappedValue <= 5){
      analogWrite(redLed, mappedValue + 5); //to avoid light turning off
    }

  }
  //digital, turns on an LED if the individual presses it
  int buttonState = digitalRead(button);
  if(buttonState == HIGH && prevButtonState == LOW){
  expressionLedState = !expressionLedState;
  }
  digitalWrite(expressionLed, expressionLedState); 
  prevButtonState = buttonState;


  //analogWrite(led,mappedValue);
//  Serial.print(knobValue);
//  Serial.print(" ");
//  Serial.println(mappedValue);

}


Week 7: Rainbow Riddle – LEDs and Buttons

Intro

Starting something new is always scary. Ever since class on Wednesday, I had this assignment on my mind and I kept questioning how fast I could be able to get accustomed to working with the Arduino Uno. After going through our class recording and playing around with the elements a bit, I felt nostalgic for the days I did Lego robotics in high school and realized that it’s a lot of fun exploring the possibilities that this kit has. Also, I felt like getting feedback from something you’re doing with your hands when you’re trying to debug your code is so helpful! It helped me understand better how what I write is translating into reality.

Idea 

So, my first instinct was to create a puzzle based on color theory. Maybe that the user needs to press the yellow and blue buttons to turn on an LED? So I went down that path and decided to make a puzzle that’s inspired by the colors of the rainbow.

Game Play

Puzzle Set-up

A player has 4 buttons and 4 LEDs in front of them, and the goal is to get all four LEDs flashing simultaneously. Before starting they get a few instructions or pointers:


  1. You need six steps to achieve the task
  2. These steps have a specific order/sequence
  3. You can press a maximum of two buttons at the same time
  4. Here’s a riddle to give you a hint:
“You see me in the air
But I am not a kite
I am what’s created
When water refracts light”

(I found this on a children’s riddle website)

Solution

The solution is inspired by the colors of the rainbow which I considered to be (Red, Orange, Yellow, Green, Blue, Violet) ((Sorry, Indigo)). So here are the steps to the solution:

  1. Press Red Button
  2. Press Red + Yellow Buttons
  3. Press Yellow Button
  4. Press Green Button
  5. Press Blue Button
  6. Press Blue + Red Buttons

It has to be in that specific sequence, or else the LEDs won’t flash!

Video Examples

(Just realized I should’ve filmed horizontal videos!)

My solution is highly dependent on the sequence, so if the Red button is pressed in step one, the Red LED turns on to signify the completion of the step. Otherwise, it wouldn’t trigger anything. Here’s an example of me pressing some buttons at the wrong time

Finally, I thought it would be fun if I got someone to test it so my suitemate volunteered! She almost got it from the first time! 🙂

Logic

To transition between steps, I used Switch() and created a variable number called step number to move between the steps of my solution sequence. So, when step number = 0, the puzzle only responds to the play pressing the red button.

Improvement

One point of improvement could be adding another LED that flashes when a wrong button is pressed, to add more feedback for the user. I pointed out where that would be included in my code in the comments.

Also, if I had an extra button, I would make a reset button since the user has to get through the puzzle for it to restart or I have to re-upload the program.

Code

Here’s my commented code!

//introduce LED pin variables
int blueLedPin = 10;
int greenLedPin = 11;
int yellowLedPin = 12;
int redLedPin = 13;


//introduce Button pin variables
int redButtonPin = 7;
int yellowButtonPin = 6;
int greenButtonPin = 5;
int blueButtonPin = 4;

//introduce variable to keep track of steps
int stepNo = 0;


void setup() {
  //set pin modes
  pinMode(redLedPin, OUTPUT);
  pinMode(yellowLedPin, OUTPUT);
  pinMode(greenLedPin, OUTPUT);
  pinMode(blueLedPin,OUTPUT);

  pinMode(redButtonPin, INPUT);
  pinMode(yellowButtonPin, INPUT);
  pinMode(greenButtonPin, INPUT);
  pinMode(blueButtonPin, INPUT);
  
  Serial.begin(9600);

}

void loop() {
  //creating variables for all button states, to read if button is pressed 
  int redButtonState = digitalRead(redButtonPin);
  int yellowButtonState = digitalRead(yellowButtonPin);
  int greenButtonState = digitalRead(greenButtonPin);
  int blueButtonState = digitalRead(blueButtonPin);

  //using a switch function to move between steps, this makes the sequence aspect of the puzzle possible.
  switch (stepNo) {
    // 1st color is red, move must be red button
    case 0:
    // checks if red button is pressed, and turns it on then off accordingly
      if (redButtonState ==  HIGH) {
        digitalWrite(redLedPin, HIGH);
        delay(700);
        digitalWrite(redLedPin, LOW);
        //if the step is performed correctly, it moves on to the next step of the puzzle
        stepNo += 1;
        //here, there's a possibility to add an else if statement, where if any of the other buttons are pressed an 
        //additional "error" LED light would flash, indicating a mistake
      }
      break;

    case 1:
    //2nd color is orange, move must be red + yellow buttons
      if (yellowButtonState == HIGH && redButtonState == HIGH) {
        digitalWrite(redLedPin, HIGH);
        digitalWrite(yellowLedPin, HIGH);
        delay(700);
        digitalWrite(redLedPin, LOW);
        digitalWrite(yellowLedPin, LOW);
        stepNo += 1;
      }
      break;
    case 2:
    //3rd color is yellow, move must be yellow button
      if (yellowButtonState == HIGH) {
        digitalWrite(yellowLedPin, HIGH);
        delay(700);
        digitalWrite(yellowLedPin, LOW);
        stepNo += 1;
      }
      break;

    case 3:
    //4th color is green, move must be green button
      if (greenButtonState == HIGH) {
        digitalWrite(greenLedPin, HIGH);
        delay(700);
        digitalWrite(greenLedPin, LOW);
        stepNo += 1;
      }
      break;
    case 4:
    //5th color is blue, move must be blue button
      if (blueButtonState == HIGH) {
        digitalWrite(blueLedPin, HIGH);
        delay(700);
        digitalWrite(blueLedPin, LOW);
        stepNo += 1;
      }
      break;

      case 5:
      //6th color is violet, move must be blue + red buttons
      if (blueButtonState == HIGH && redButtonState == HIGH) {
        //introducing a variable for number of times that all the lights will flash, will use in a while loop
        int flashes = 0;
        //10 flashes when the user finishes the pattern
        while(flashes < 10){
          //flashing technique from class, all LEDs on, delay, LEDs off, delay
        digitalWrite(blueLedPin, HIGH);
        digitalWrite(redLedPin, HIGH);
        digitalWrite(yellowLedPin, HIGH);
        digitalWrite(greenLedPin, HIGH);
        delay(400);
        digitalWrite(blueLedPin, LOW);
        digitalWrite(redLedPin, LOW);
        digitalWrite(yellowLedPin, LOW);
        digitalWrite(greenLedPin, LOW);
        delay(400);
        //adding flashes to eventually exit the while loop
        flashes+=1;}

        //restarts the puzzle
        stepNo = 0;
      }
      break;


  }


}


Week 7 – Midterm

Here we are, after Fall-ish break also known as Midterms Week:

Back to the Spelling Game

After a lot of planning, and not much sleep, I managed to achieve the general idea of my game, with a few bugs and missing elements. Although I would have loved to have it as I imagined, I think with the amount of time + midterms that I had, this is a cool result!

Additionally, if you still didn’t notice, I always try my best to avoid making games for our assignments and often opt for the artwork option. The thought of coding a game often scares me, especially when I think of moving between screens and checking for correct moves. So, this was a great challenge for me! And while I feel like I’m a bit more familiar with game states and other elements, I still think I can work on my game-making skills, and will probably end up looking at your codes for help 🙂

what planning looks like for me

List of Classes: 

  • Animals: this is where I load and display the visual for my animal
  • Buttons: where I create the start and replay buttons
  • Letter: Where I create letter blocks for a keypad grid and check for player clicks.


Steps

  • Make a start button, start screen, and then switch to the gameplay screen that is linked with an animal.


  • Make a keypad for each possible animal. This keypad must contain the letters of the animal name in random order, and it must not repeat letters within the alphabet list:

For this bit, I created two functions

  1. WordCharsinKeypad(): fills the characters from the animal name into the keypad randomly (the letters won’t appear next to each other).
  2. fillRemainingKeys(): checks for remaining empty spots in the keypad and fills them with a random letter from the alphabet without repeating letters from that alphabet array.
  • Display the game playing screen, make the keypad interactive, and give feedback to the user by printing on the screen the letters they get correctly:

I initially aimed to provide two types of feedback. One, which is evident in my program, is that the animal is gradually spelled out on the screen and a letter is added when the player picks the correct letter.

The other, however, I struggled with, which is showing a “try again” message when the player presses the wrong letter. For now, the program just doesn’t respond to a wrong letter.

When I tried to apply the second feedback this is what I got:

  • Finally, I wanted to switch between screens, as you can see above, move from the start screen to the gameplay screen, to the replay screen:

For the start and replay, I relied on buttons from my button class, however, for moving from gameplay to replay screen, it only requires the player to guess the complete word. A small issue I have here is that the last letter does not display before moving to the replay screen. I tried to resolve it with delay()  and altering the if condition in the code, but I still haven’t figured it out.

Some Design Choices

  • I was truly excited to design my own animals, I thought it would be a great chance to work on my Adobe Illustrator skills. However, I placed that as my last priority and unfortunately did not have time for that. So I used free PNGs from open source websites.
  • My game is missing sound, this is something that I will work on and practice as I still feel a bit unfamiliar with it
  • I tried to use soft colors with great contrast to appeal to the child’s eye
  • Keeping accessibility in mind, I made sure to use a font that is legible for most kids. This typeface is OpenDyslexic and it is specifically designed to make it easier for anyone with dyslexia to read a text.

Example of a Game Run

Future Developments

For a more developed version of this game, it would probably incorporate the sounds I mentioned in my progress post, my own designs, and levels rather than one run.

Here’s my code!

Main Function

// to load OpenDyslexic Font
PFont f; 
//for final screen
PImage confetti; 
boolean wrongLetter = false;
//startScreen
int screenNumber = 0;
//a string array to pick a random animal each time start is pressed:
String[] animalNames = {"CAT", "OWL", "FROG", "FISH", "PANDA", "MONKEY", "TURTLE", "CHAMELEON"}; 
// string where the random animal picked from array is stored:
String word; 
//character array of all letters in the alphabet:
char alphabet[] = {'A', 'B', 'C', 'D', 'E', 'F', 'G', 'H', 'I', 'J', 'L', 'M', 'N', 'O', 'P', 'Q', 'R', 'S', 'T', 'U', 'V', 'W', 'X', 'Y', 'Z'}; 
//initializing a letter object array for a keypad:
Letter[] keypad = new Letter[12]; 
//initializing the animal object for the animal displayed in the run:
Animals animal4Run; 
//columns for keypad grid display
int cols = 3;
//rows for keypad grid display
int rows =4; 
// a variable that checks the players progress of selecting the correct letters -- e.g. if they have "CA" out of "CAT" it will equal 1 
int playerPosition = 0; 
//initializing a button object for start button
Buttons startButton;
// initializing a button object for replay button
Buttons replayButton; 
//an empty string variable. It will be used to reflect the player's progress in choosing the correct letter
String wordInProg; 

void setup() {
  size(960, 540);
  confetti = loadImage("CONFETTI.png");
  confetti.resize(960, 540);
  //using OpenDyslexic so the font could be readable for most
  f = createFont("OpenDyslexic-Bold.otf", 20);  
  textFont(f);
  //creating the start button object
  startButton = new Buttons(width/2, height/2+100, 100, 70, "Start"); //creating the start button object
  //creating the replay button object
  replayButton = new Buttons(width/2, height/2+200, 100, 70, "Replay"); 
  //setup the word in progress as an empty string, it will fill gradually as the player picks the correct letters.
  wordInProg = "";
  //generates a random index to pick a random animal each time run is clicked
  int indexForRun = (int)random(0, animalNames.length); 
  //sets the word variable using the generated random index
  word = animalNames[indexForRun];
  //creates an animal object using the word
  animal4Run = new Animals(word); 
  //index variable to go through all objects in the keypad array
  int index = 0; 
  for (int c = 0; c < cols; c++) {
    for (int r = 0; r < rows; r++) {
      //using columns and rows for a grid display
      keypad[index] = new Letter('x', c, r); 
      index += 1;
    }
  }

  //function that fills the characters from the animal name into the keypad in random positions
  wordCharsInKeypad(); 
  //function that fills the remaining empty keypad spaces
  fillRemainingKeys();
}

void draw() {
  background(227, 181, 164);
  //switch function to move between game screens
  switch(screenNumber) { 
  // case 0 is the start screen
  case 0:
  //calls setup to randomize a new animal everytime start is pressed
    setup(); 
    fill(232, 95, 92);
    textSize(60);
    text("Spell the Animal Name Game!", width/2, height/2 - 100);
    //display function for start button
    startButton.buttonDisplay();
    //checks if player clicks the start button and moves on to the next game screen
    if (mousePressed && mouseX >= startButton.xLoc - startButton.buttonW/2 && mouseX <= startButton.xLoc + startButton.buttonW/2 && mouseY >= startButton.yLoc - startButton.buttonH/2 && mouseY <= startButton.yLoc + startButton.buttonH/2) {
      screenNumber = 1; 
    }
    break;
  // playing screen
  case 1: 
    fill(156, 255, 250);
    textSize(50);
    text("What is this animal called?", width/2, height/2 - 200);
     //displays the player's progress in choosing the correct letters on the screen
    text(wordInProg, width/2-50, height/2 + 200);
    for (int i = 0; i < keypad.length; i ++) {
      //displays all letter objects in the keypad
      keypad[i].display(); 
      //displays the image of the animal in question
      animal4Run.display(); 
      //loops through all letters to check if 1. they are clicked , 2. if they are the correct letter 
      for (int j = 0; j < keypad.length; j++ ) { 
        textSize(20);
        //calls a function that checks whether the letter is clicked 
        keypad[j].letterIsClicked(); 
        if (keypad[j].letterClicked == true) {
          keypad[j].letterClicked = false;
          //println(">>>", keypad[j].letter, cat.animalName.charAt(playerPosition));
          if (keypad[j].letter != animal4Run.animalName.charAt(playerPosition)) {
            text("try again", width/2 - 300, height/2);} //?????
          //checks if the character clicked in the keypad matches the character that is at the player's position in the animal name
          if (keypad[j].letter == animal4Run.animalName.charAt(playerPosition)) {
            //this condition ensures that it adds the correct letters only for as long as the word in progress is the same length as the animal name, otherwise you would get "CATTTTTTTTTT" 
            if (wordInProg.length() < animal4Run.animalName.length()) {
              //keeps adding to reflect the player's progress
              wordInProg = wordInProg + animal4Run.animalName.charAt(playerPosition);
              //println(wordInProg);
              //println(keypad[j].letter + " " + cat.animalName.charAt(playerPosition));
              //condition: as long as the player position is still less than the length of the animal name, keep adding as the name is not complete yet
              if (playerPosition < animal4Run.animalName.length() -1) {
                playerPosition+= 1;
               //checks if the word is complete to switch to end screen that reflects success and gives replay button
              } else if (playerPosition == animal4Run.animalName.length()-1) {
                screenNumber = 2;
                break;
              }
            }
          }
        }
      }
    }
    break;
   //end screen
  case 2:
  //resets player position for next iteration of the game
    playerPosition = 0;
    for (int k = 0; k < keypad.length; k++ ) {
      //resets any letters clicked
      keypad[k].letterClicked = false; 
    }
    background(227, 181, 164);
    imageMode(CORNER);
    //tint(255);
    //loads confetti image for celebration :)
    image(confetti, 0, 0);
    fill(232, 95, 92);
    textSize(60);
    text("What a Spelling Champ!", width/2, height/2 - 100);
    fill(156, 255, 250);
    text("Press Replay to Spell Again!", width/2, height/2);
    //displaying replay button
    replayButton.buttonDisplay();
    //checks if pressed to go back to start screen
    if (mousePressed && mouseX >= replayButton.xLoc - replayButton.buttonW/2 && mouseX <= replayButton.xLoc + replayButton.buttonW/2 && mouseY >= replayButton.yLoc - replayButton.buttonH/2 && mouseY <= replayButton.yLoc + replayButton.buttonH/2) {
      screenNumber = 0;
    }
  }
}


//function that inputs the characters of the animal name in the keypad
void wordCharsInKeypad() {
  //a boolean to check if all the characters have been input
  boolean complete = false;
  //i variable to loop through all letters in the animal name
  int i = 0;
  while (complete == false) { 
    //generating a random index so letters don't appear in correct order in the keypad
    int randomIndex = (int) random(keypad.length - 1);  
    // condition: if the key is empty, signified by 'x', fill it with this letter, and then move to the next character (to avoid overwriting keys)
    if (keypad[randomIndex].letter == 'x') { 
    
      keypad[randomIndex].letter = animal4Run.animalName.charAt(i); 
      i += 1;
    }
    //if all the letters from the animal name are in the keypad, exit the while loop
    if (i == animal4Run.animalName.length()) { 
      complete = true;
    }
  }
}

//function to fill the rest of the keypad
void fillRemainingKeys() {
 //same boolean and variable concept as before
  boolean complete = false; 
  int j = 0;
  while (complete == false) {
    //this boolean is to check if the chosen letter already exists in the keypad
    boolean duplicated = false;
    //generates a random index to input a random letter from the alphabet
    int randomIndex = (int) random(alphabet.length -1);
    // println(j, keypad[j].letter, alphabet[randomIndex], word.indexOf(alphabet[randomIndex]));
    //if this position in the keypad is empty AND the chosen character is not in the animal name (as that wouldve been input in the prev function, fill it in the keypad)
    if (keypad[j].letter == 'x' && animal4Run.animalName.indexOf(alphabet[randomIndex]) == -1) {
      //for loop that checks if the letter that we are about to input already exists in the keypad to avoid repetition
      for (int k = 0; k < keypad.length; k++) {
        if (keypad[k].letter == alphabet[randomIndex] ) {
          duplicated = true;
          //if it is a duplicate it breaks out of this for loop and restarts to generate a new letter
          break;
        }
      }
      //to continue trying to generate
      if (duplicated) {
        continue;
      }
      // if it isn't a duplicate it inputs it into the keypad
      keypad[j].letter = alphabet[randomIndex];
    }
    //if the letter is in the word, meaning it is already in the keypad, also continue to generate something else
    if (word.indexOf(alphabet[randomIndex]) != -1) {
      continue;
    }
    j+= 1;
    //condition to exit the while loop when the keypad is fully formed
    if (j == keypad.length) {
      complete = true;
    }
  }

  //for (int k = 0; k < keypad.length; k++) {
  //println(k, keypad[k].letter);
  // }
}

Animals Class

class Animals {
  //two vars for animal name and to load the suitable image
  String animalName;
  PImage animalImage;
  
  
  Animals(String tempAnimalName){
    animalName = tempAnimalName;
    //using animal name to load the image
    animalImage = loadImage(animalName+".png");
    animalImage.resize(300,300);
  }
  
  
  void display(){
   fill(0,255,0);
   imageMode(CENTER);
   image(animalImage,width/2-50,height/2);
   //rect(width/2,height/2,100,100);
   //fill(0);
   //textAlign(CENTER,CENTER);
   //textSize(15);
   //text("I am a" + " " + animalName, width/2,height/2);
  }
}

Buttons Class:

  class Buttons {
    int xLoc, yLoc, buttonW, buttonH; 
    String buttonTitle;
    //


    Buttons(int xLocTemp, int yLocTemp, int buttonWTemp, int buttonHTemp, String buttonTitleTemp) {
      xLoc = xLocTemp;
      yLoc = yLocTemp;
      buttonW = buttonWTemp;
      buttonH = buttonHTemp; 
      buttonTitle = buttonTitleTemp;
      
      
    }


    void buttonDisplay() {
      rectMode(CENTER);
       noStroke();
       fill(200);
       rect(xLoc, yLoc, buttonW, buttonH);
       fill(0);
       textSize(25);
       textAlign(CENTER,CENTER);
       text(buttonTitle, xLoc, yLoc);
      }
  }

Letter Class:

class Letter {
  char letter; 
  int xLoc, yLoc; 
  int blockW = 70;
  int blockH = 70;
  int colNo;
  int rowNo;
  //booleans to check during the game
  boolean letterClicked;
  boolean letterCorrect;


  Letter(char letterTemp, int tempColNo, int tempRowNo) {
    letter = letterTemp;
    colNo = tempColNo;
    rowNo = tempRowNo;
  }


  void display() {
    //as it is a grid object, col and row number are used for x and y coordinates
    rectMode(CORNER);
    fill(0);
    stroke(255);
    rect(700+colNo*70, 150+rowNo*70, blockW, blockH);
    fill(255);
    textSize(20);
    textAlign(CENTER, CENTER);
    text(letter, 735+colNo*70, 185+rowNo*70);
  }
  
  
//the function that checks if the letter is clicked
 void letterIsClicked() {
    if (mousePressed && mouseX >=  700+(colNo)*70  && mouseX <= 700+(colNo)*70 + blockW && mouseY >= 150+(rowNo)*70 && mouseY <= 150+(rowNo)*70+blockH) {
     // println("mouseY: ", mouseY, " - 200+(rowNo-1)*70: ", 200+(rowNo-1)*70, " - 200+(rowNo-1)*70+blockH: ", 200+(rowNo-1)*70+blockH);

      letterClicked = true;
      //println(letter, " Clicked");
    }
  }
  
}

Zip: midtermm_Game

Week 6 – Midterm Progress

I’ve spent a lot of time this week blurting out ideas for the code of my game. I just sat there and filled page upon page with notes, lists, and bullet points to try to figure out what logic is suitable for my game and how I could get it to function. By the end of that brainstorming session, I flipped through what I wrote…a little terrified by starting because it felt like there’s so much to think about.

The Idea

Last week, while brainstorming for this project, I realized that I’ve never seen anyone making a children’s game in this class or Intro to CS and thought it would be an interesting thing to explore. I think I also got a little too excited about the design possibilities that a project like this would give me.

So, I’m going for a spelling game, where a visual of an animal is displayed on the screen and the child has to click on letter blocks on the screen to spell out the animal’s name. When they get it right, the animal sound is triggered and they move on to the next level which presents an animal with a name more difficult to spell.

What I Have So Far

This weekend I got a few things done:

  • Made a list of classes needed and their properties
  • Finalized the list of animals I’m going to use (the levels)
  • Researched some games online to understand switching between different displays/windows
  • Planned my logic (the variables I need, what my logic could look like)
  • Started coding by creating a Button, Animal, and Letter class as well as a very simple start screen (only a start button).

I’m at a point where I kind of know what I need to do, but not sure how to organize it. So I’m hoping that talking through it today and spending more time breaking it down could make it easier to approach.


Week 5 – 2020, so far

Intro

Last week was quite a reflective week for me. I spent a lot of time thinking about how 2020 has been so far. Sure, it kind of sucks for almost all of us, but what I didn’t realize is that it’s going much faster than I ever anticipated and that there’s so much I’m grateful for this year. So, in some way, looking back feels like a blur…I remember everything and nothing at once, and I wanted to use this week’s assignment to communicate that state of mind.

Concept

The analogy I made in my brain was: looking back at the year is like watching my memories through a glitchy old TV, and so that’s exactly what I went for!

I usually create collections of 10-20 photos that represent every month for me, so I picked one picture from each month of 2020 so far to be displayed through the old tv.

Process

For starters, my first step was collecting my pictures and editing them all to be of the same dimensions and making sure these dimensions go well with the TV frame I had loaded onto my program.

Then, I started putting my images in a “slideshow’ that updates as the program is running.  So, I created an array of Images and variables for slide number, Time, and slide duration and looped through my images in the draw() loop.

Afterward, I started experimenting with possible glitches. I looked at the Processing reference and examples online to come up with interesting glitches that simulate a broken TV. I placed each glitch in its own function and used a random variable to call a different glitch each run to give the sketch a more authentic feel.

Glitch 1
by r00t-b33r on DeviantArt

I loaded a no signal image into the sketch and wanted to overlay it onto the pictures I was loading, but I didn’t want it to be too overpowering. So, I explored the blend() function and used the MULTIPLY filter which gave me a realistic result.

Glitch1

Here’s an example of what the function produces when the program runs.

void glitch1() {
  image(months[currentSlide], width/2-80, height/2-60); 
  blend(noSignal, width/2-80-300, height/2-60-300, 600, 600, width/2-80-300, height/2-60-300, 600, 600, MULTIPLY);
}


Glitch 2

My second glitch made use of the pixel array. I loaded the pixels for each image I used and set the color for each. For the Y value, I used a random function to create a bleeding effect so it doesn’t cover the whole TV when it alternates glitches, I also felt like it looked more interesting.

Glitch 2 – Bleeding Pixels
void glitch2() {
  months[currentSlide].loadPixels();
  for (int x = 0; x < months[currentSlide].width; x++) {
    for (int y = 0; y < random(months[currentSlide].height-400, months[currentSlide].height); y++) { 
      float pix = random(255);
      months[currentSlide].pixels[x+y*months[currentSlide].width] = color(pix);
    }
  }

  updatePixels(); 

  
}


Glitch 3

Here, I used the logic of getting subsections from the main image. I grabbed one fixed subsection (of the middle part always to keep the most important parts of the picture, the center, visible), and two random subsections. I placed these subsections at a random location and used the INVERT filter to create something more visually appealing. I used a modulus loop to slow down this movement. Otherwise, the program would run too fast making the glitch barely visible.

Glitch 3 – Inverted Subsections


void glitch3() {
  pushStyle();
  tint(255, 20);
  if (time%3== 0) {
    PImage subSection = months[currentSlide].get(300, 370, 500, 200);
    PImage subSection2 = months[currentSlide].get((int)random(0, 550), (int)random(0, 550), 100, 400);
    PImage subSection3 = months[currentSlide].get((int)random(0, 550), (int)random(0, 550), 900, 10);
    subSection.filter(INVERT);
    subSection2.filter(INVERT);
    subSection3.filter(INVERT);
    tint(200,255);
    image(subSection, random(300,722), random(140,640));
    image(subSection2, random(300,722), random(270,500));
    image(subSection3, random(500,722), random(270,500));
    //image(subSection3, random(width/2-80-100, width/2-80), random(height/2-60-200, height/2-30));
    
    
  }
  popStyle();
   
  
}
Glitch 4

Glitch 4 isn’t really a glitch, I just included a function that loads the image normally as I do at the beginning of the program to maintain some balance in the animation.

void glitch4() {

  image(months[currentSlide], width/2-80, height/2-60);
}
Text

Finally, I thought I’d give the images some context. So I created a string array that contains one thing I’m grateful for each month, and the program uses the slide number to load the matching array.


Final Product


What I was prioritizing this week, is approaching the assignment systematically and in an organized manner. I often feel like I am overwhelmed with ideas and don’t know where to start, I decided to take it step by step this week and did my assignment in separate programs that I put together in the end. This made me feel productive and made the process much more enjoyable.  This is one of the reasons this has been my favorite assignment so far, but I think it’s also because I enjoy working with visuals and mixing effects to achieve a specific aesthetic!

For further development, I want to familiarize myself more with the pixel array and explore the possibilities of using it. I would also be interested to see if I can generate pixels for a text if I used the geomerative library to get the points of my string.

Finally, here’s my complete code:

PImage tvFrame;
PImage noSignal;
PImage months[];

String gratefulFor[];
PFont f;
int picsNumber;
int time = 0;
int slideDuration = 100;
int currentSlide = 0;


void setup() {
  size(1000, 1000); 
  f = createFont("Nocturne-Rough.otf",60);
  textFont(f);
  tvFrame = loadImage("tv_frame.png");
  tvFrame.resize(1000, 760);

  noSignal = loadImage("noSignal.jpg");
  noSignal.resize(500, 500);
  picsNumber = 9;
  months = new PImage[picsNumber];
  months[0] = loadImage("jan.JPG");
  months[1] = loadImage("feb.JPG");
  months[2] = loadImage("march.jpg");
  months[3] = loadImage("april.jpg");
  months[4] = loadImage("may.JPG");
  months[5] = loadImage("june.jpg");
  months[6] = loadImage("july.JPG");
  months[7] = loadImage("aug.JPG");
  months[8] = loadImage("sept.jpg");
  for (int i = 0; i < months.length; i++) {
    months[i].resize(600, 600);
  }
  gratefulFor = new String[picsNumber];
  gratefulFor[0] = "January: travel";
  gratefulFor[1] = "February: live music";
  gratefulFor[2] = "March: safety";
  gratefulFor[3] = "April: windows";
  gratefulFor[4] = "May: family";
  gratefulFor[5] = "June: archives/memories";
  gratefulFor[6] = "July: nature";
  gratefulFor[7] = "August: loss";
  gratefulFor[8] = "September: friendship";
}


void draw() {
  background(225, 205, 181);
  imageMode(CENTER);
  image(months[currentSlide], width/2-80, height/2-60);
  fill(0);
  textSize(50);
  text(gratefulFor[currentSlide], width/2 - 450, height/2 + 450);

  time+=1;
  if (time>slideDuration) {
    currentSlide +=1;
    if (currentSlide > months.length-1) {
      currentSlide = 0;
    }
    time = 0;
  }


  int glitchNo = (int)(random(1, 5));
  if (glitchNo == 1) {
    glitch1();
  } else if (glitchNo ==2) {
    glitch2();
  } else if (glitchNo == 3) {
    glitch3();
  } else if (glitchNo == 4) {
    glitch4();
  }
  image(tvFrame, width/2, height/2-100);
  //println(glitchNo);
}


void glitch1() {
  image(months[currentSlide], width/2-80, height/2-60); 
  blend(noSignal, width/2-80-300, height/2-60-300, 600, 600, width/2-80-300, height/2-60-300, 600, 600, MULTIPLY);
}

void glitch2() {
  months[currentSlide].loadPixels();
  for (int x = 0; x < months[currentSlide].width; x++) {
    for (int y = 0; y < random(months[currentSlide].height-400, months[currentSlide].height); y++) { 
      float pix = random(255);
      months[currentSlide].pixels[x+y*months[currentSlide].width] = color(pix);
    }
  }

  updatePixels(); 

  
}

void glitch3() {
  pushStyle();
  tint(255, 20);
  if (time%3== 0) {
    PImage subSection = months[currentSlide].get(300, 370, 500, 200);
    PImage subSection2 = months[currentSlide].get((int)random(0, 550), (int)random(0, 550), 100, 400);
    PImage subSection3 = months[currentSlide].get((int)random(0, 550), (int)random(0, 550), 900, 10);
    subSection.filter(INVERT);
    subSection2.filter(INVERT);
    subSection3.filter(INVERT);
    tint(200,255);
    image(subSection, random(300,722), random(140,640));
    image(subSection2, random(300,722), random(270,500));
    image(subSection3, random(500,722), random(270,500));
    //image(subSection3, random(width/2-80-100, width/2-80), random(height/2-60-200, height/2-30));
    
    
  }
  popStyle();
   
  
}

void glitch4() {

  image(months[currentSlide], width/2-80, height/2-60);
}