Final Project Documentation- Dodge It!

Concept:

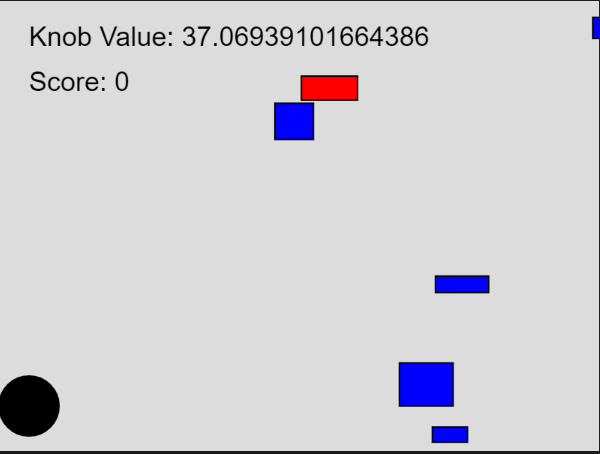
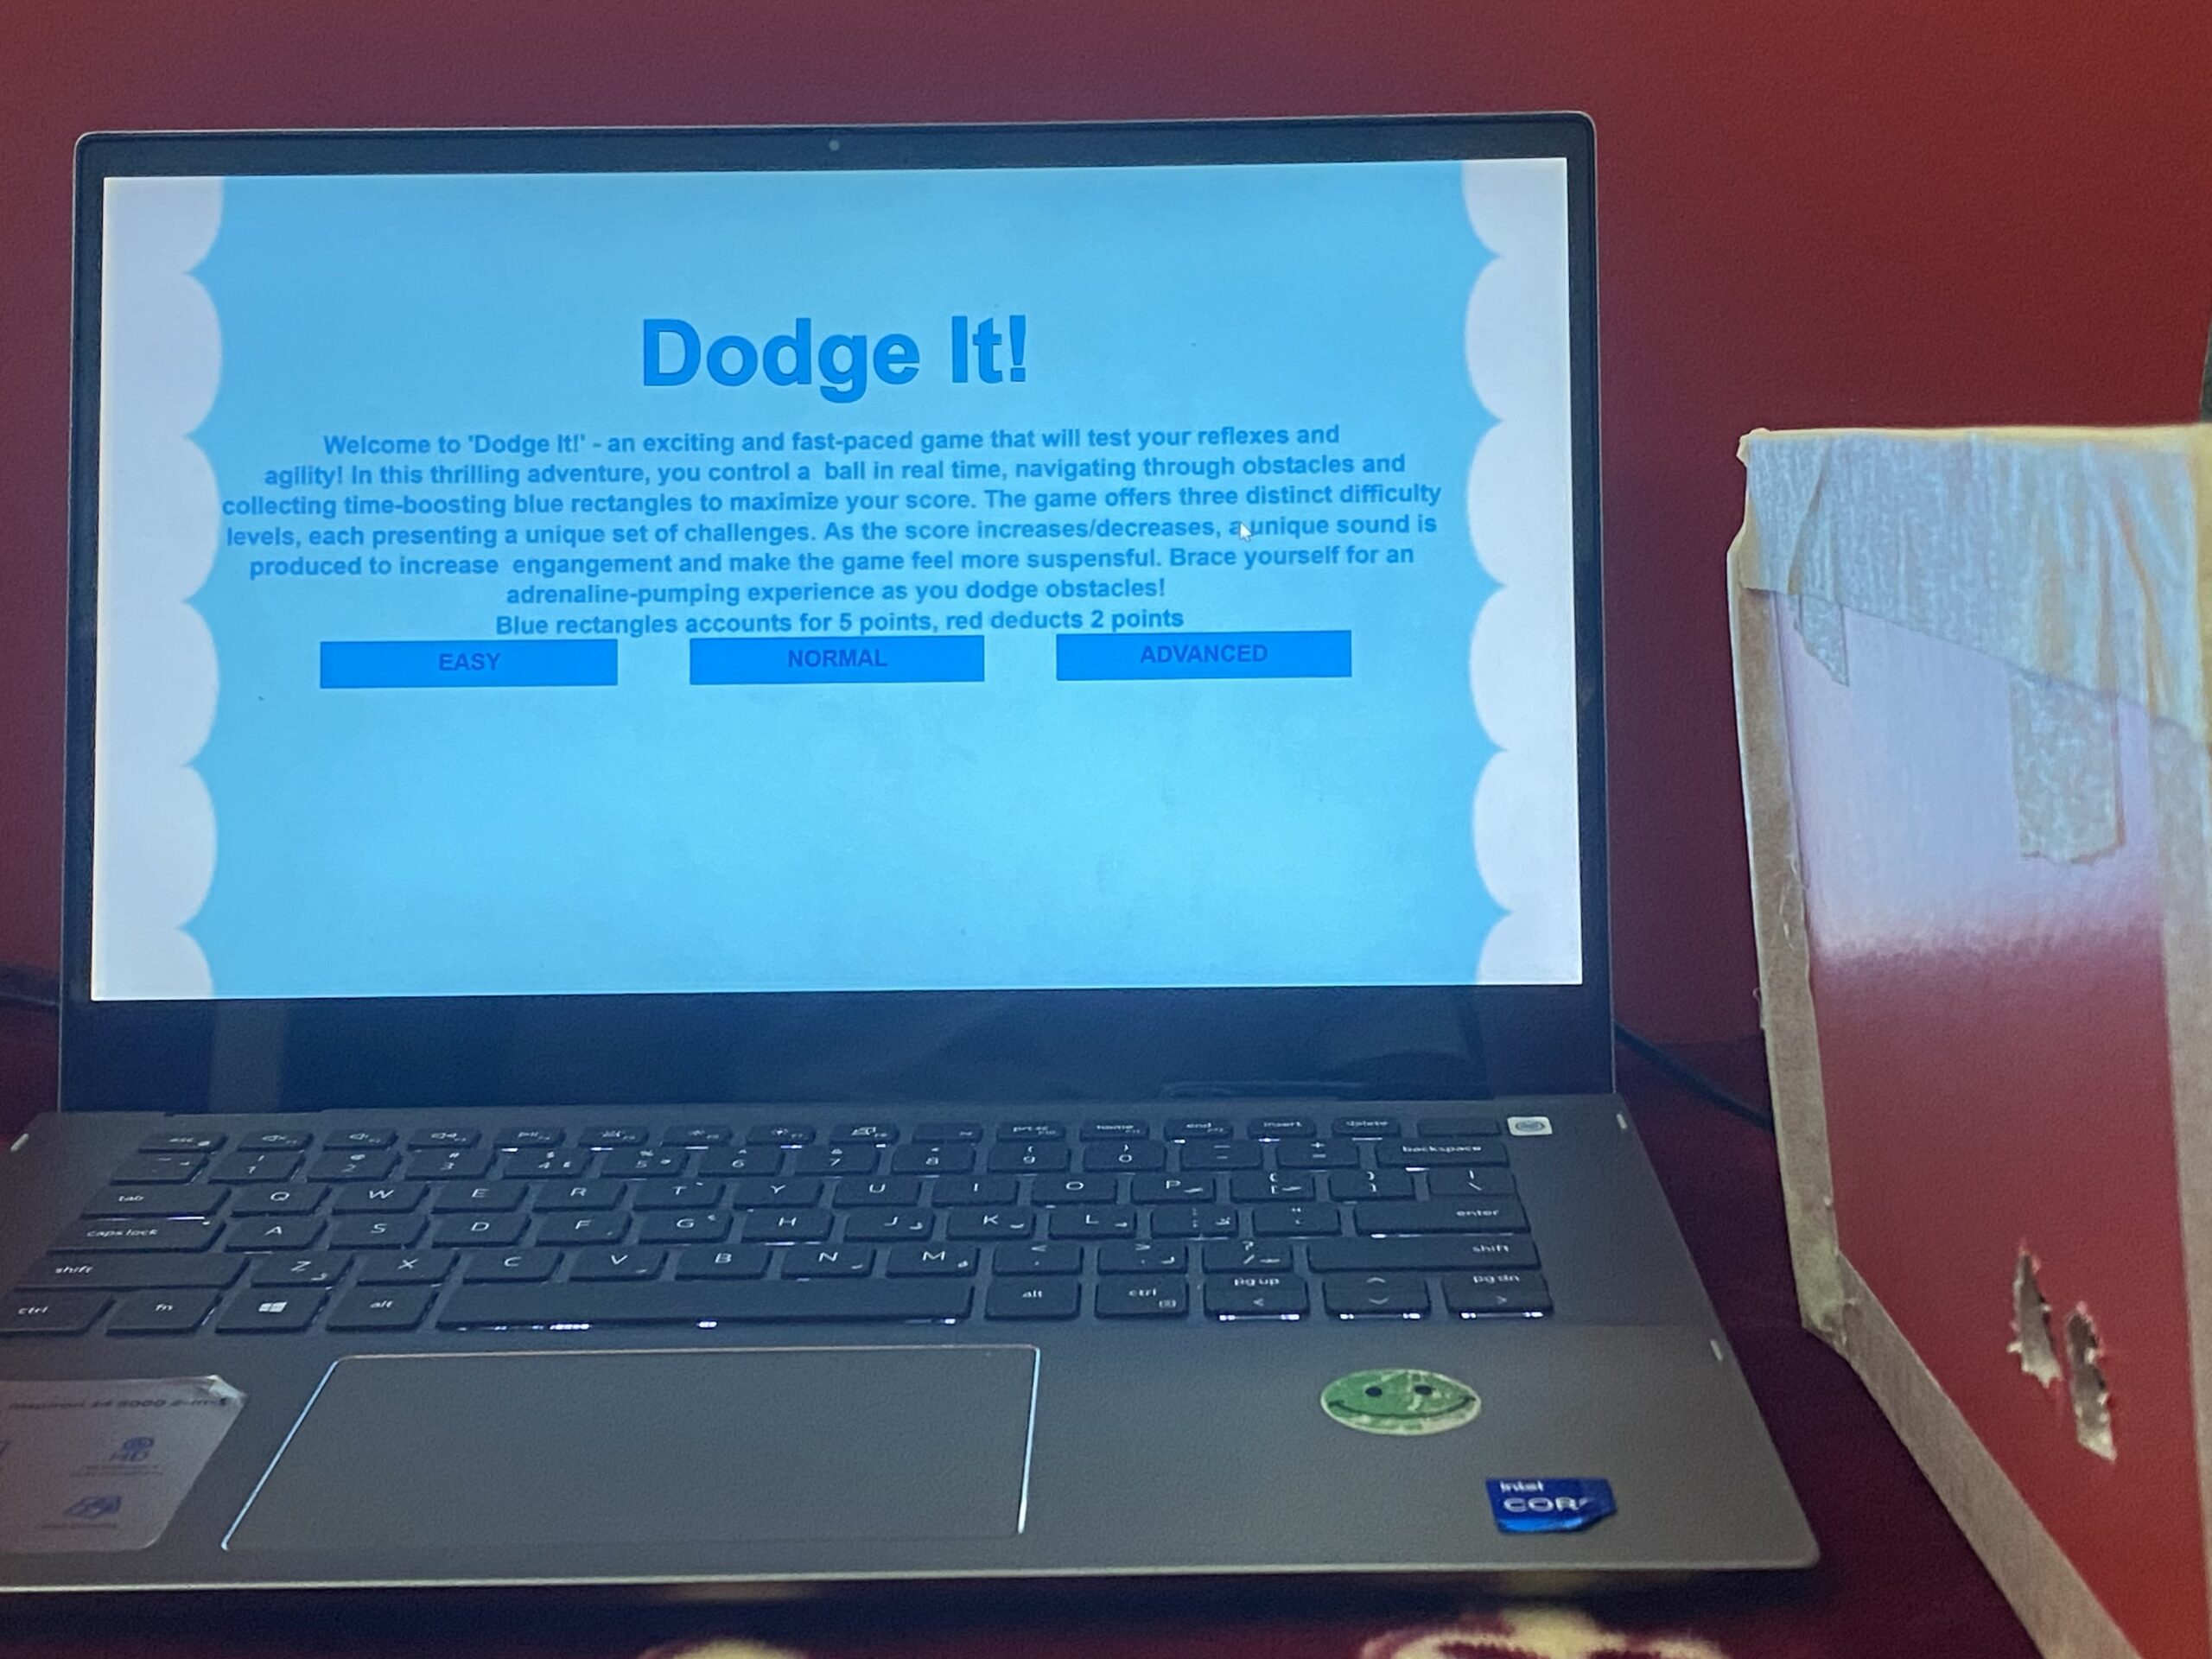
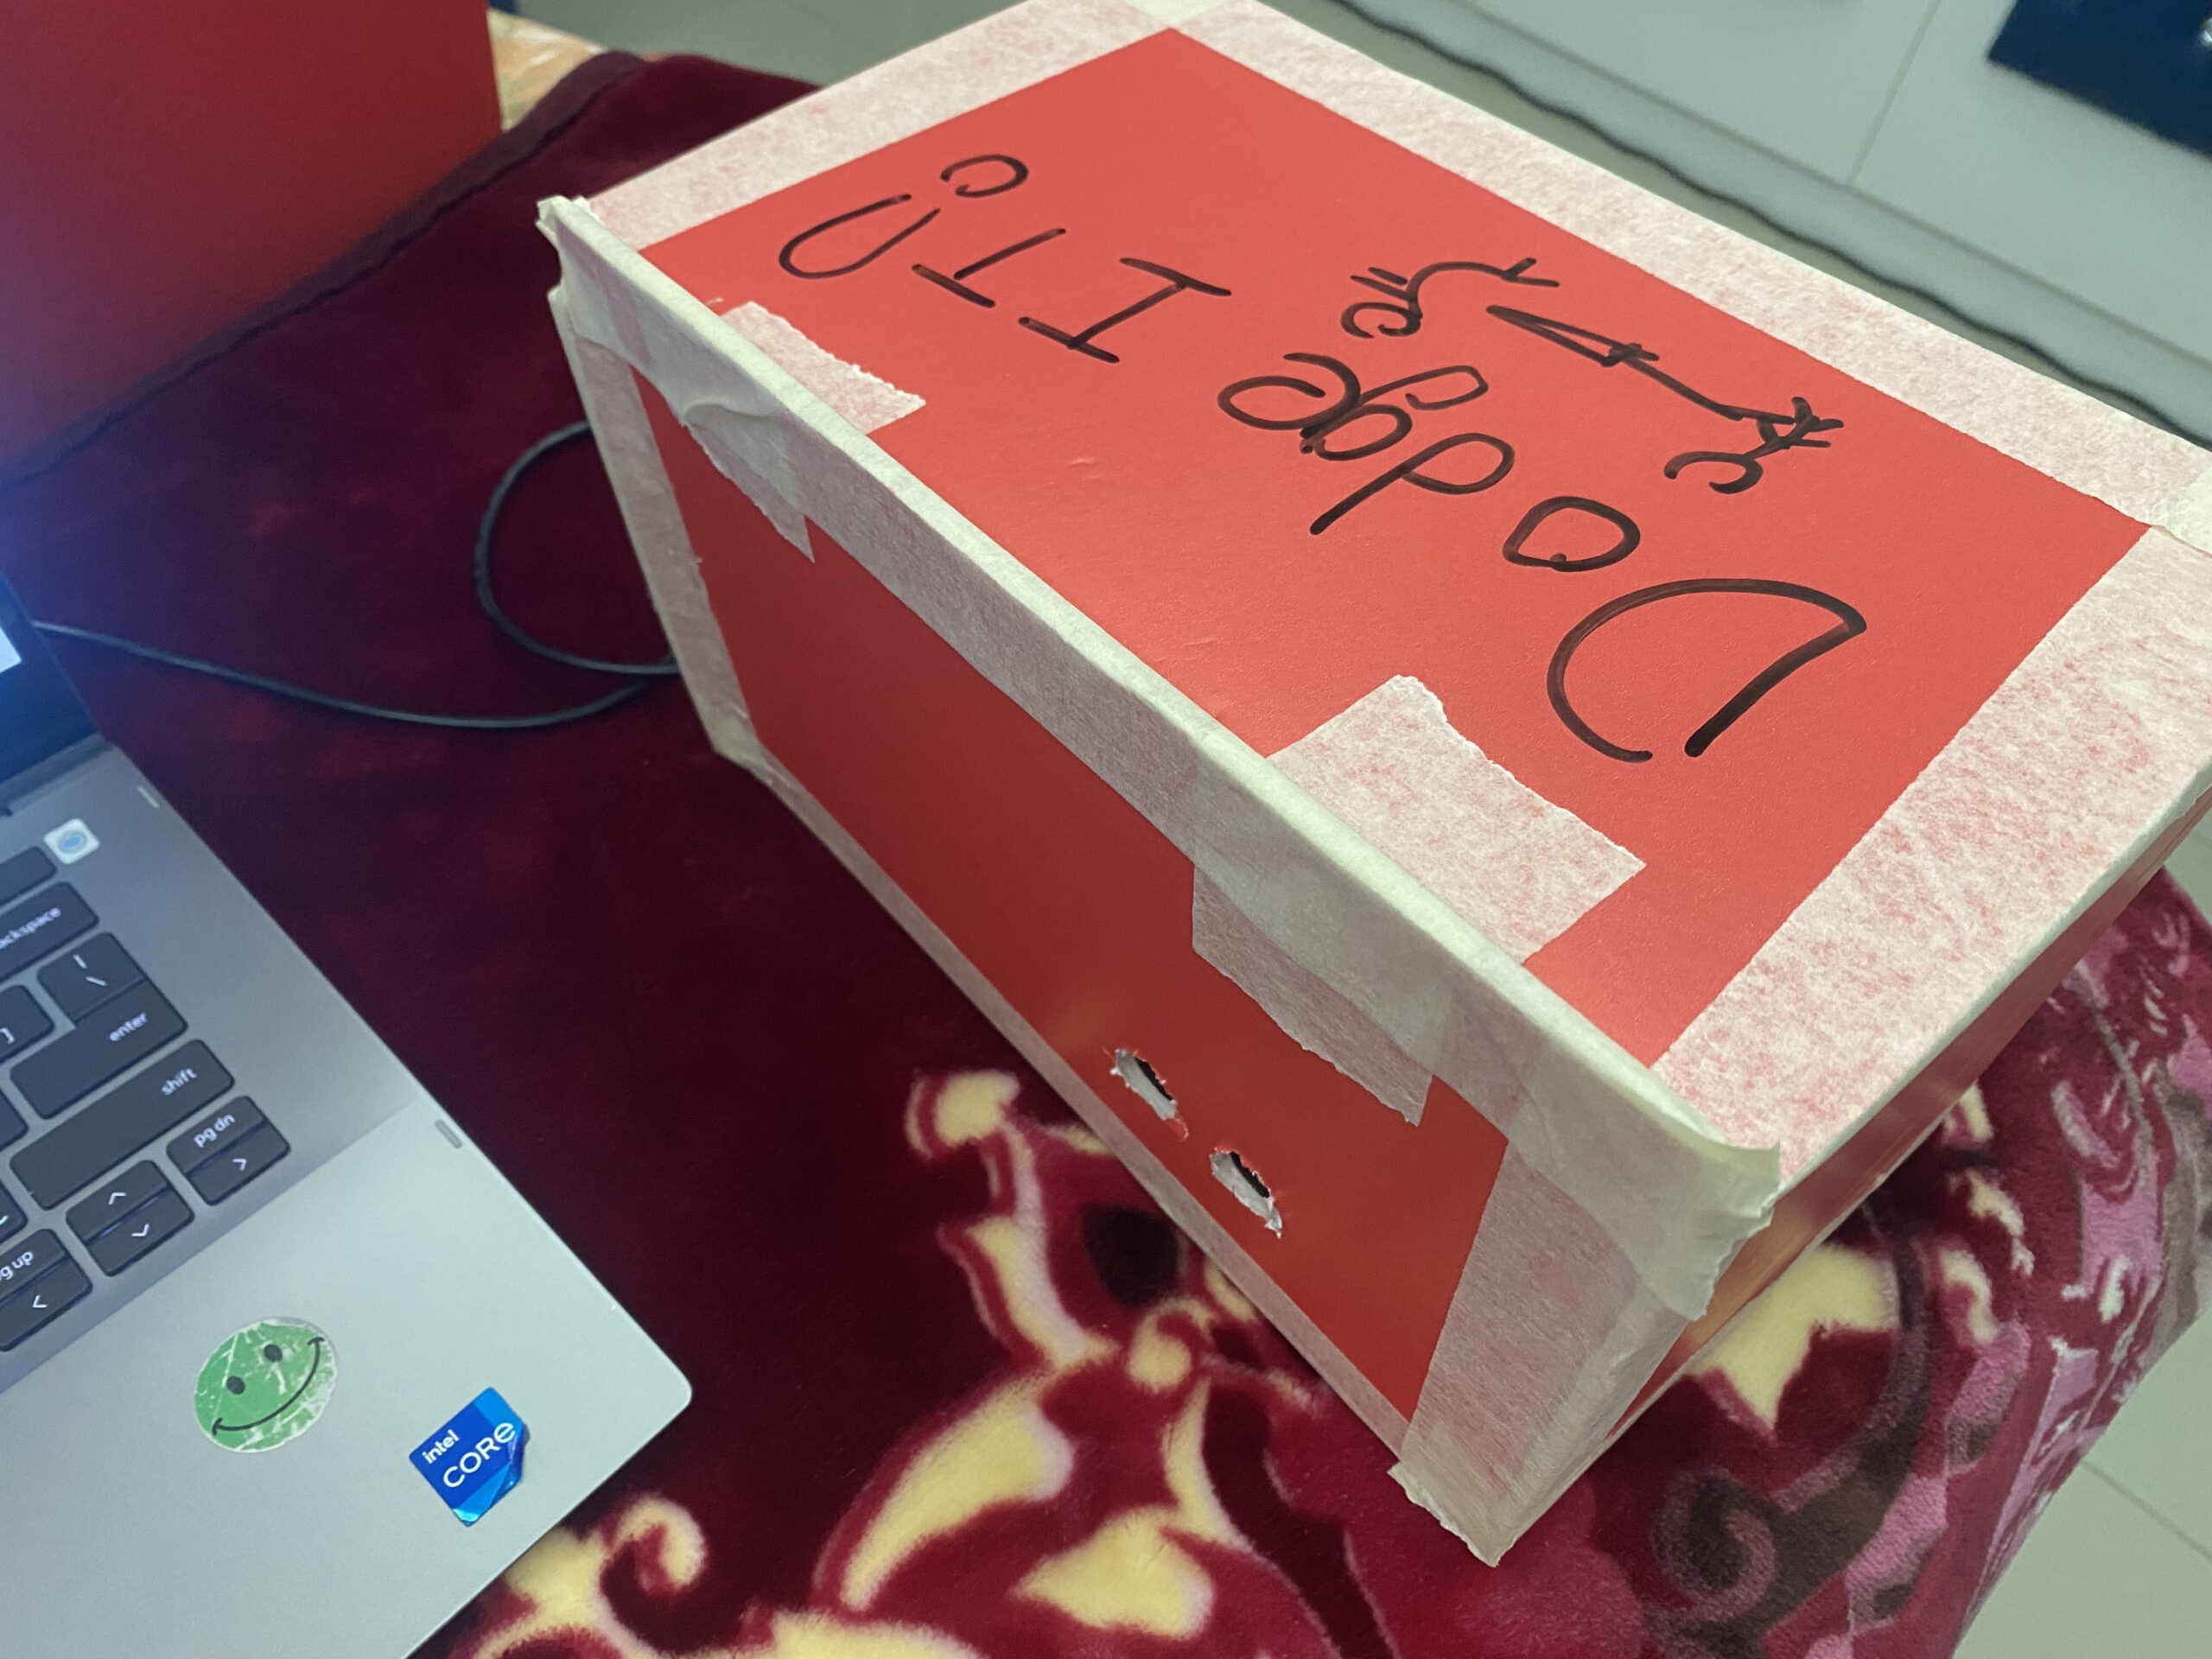
For my final project, I have created a game called “Dodge It!”. This game consists of moving rectangles- red and blue colored- on screen and there’s a ball that moves horizontally that the users control to navigate through these obstacles while dodging the red rectangles and picking up the blue ones to gain points.  There’s a slight twist to it, instead of using just buttons to control the ball, users use their physical hands to swipe left and right to control the ball’s movement in the game. To increase the interaction, I also implemented a system where every score will produce a unique tone and as the user loses scores, the tone keeps getting deeper and deeper as if they’re reaching the end, and as the score gets higher and higher, the tone gets higher showcasing an increased suspense element. The motivation behind this game is from online games that I used to play back in elementary school. These games were similar to “Dodge it!” but were mostly used by keyboard buttons to control the ball. Whereas, my game can make things much more interactive by using your own physical hands to control the ball’s movement, which adds a whole new spectrum of excitement and adrenaline rush as we navigate through the obstacles. My game also has different difficulty levels for users to choose from to make things more balanced between the enjoyers and the competitors.

Prototype:

Pictures:


Video:


Implementation:

Description of Interaction Design:

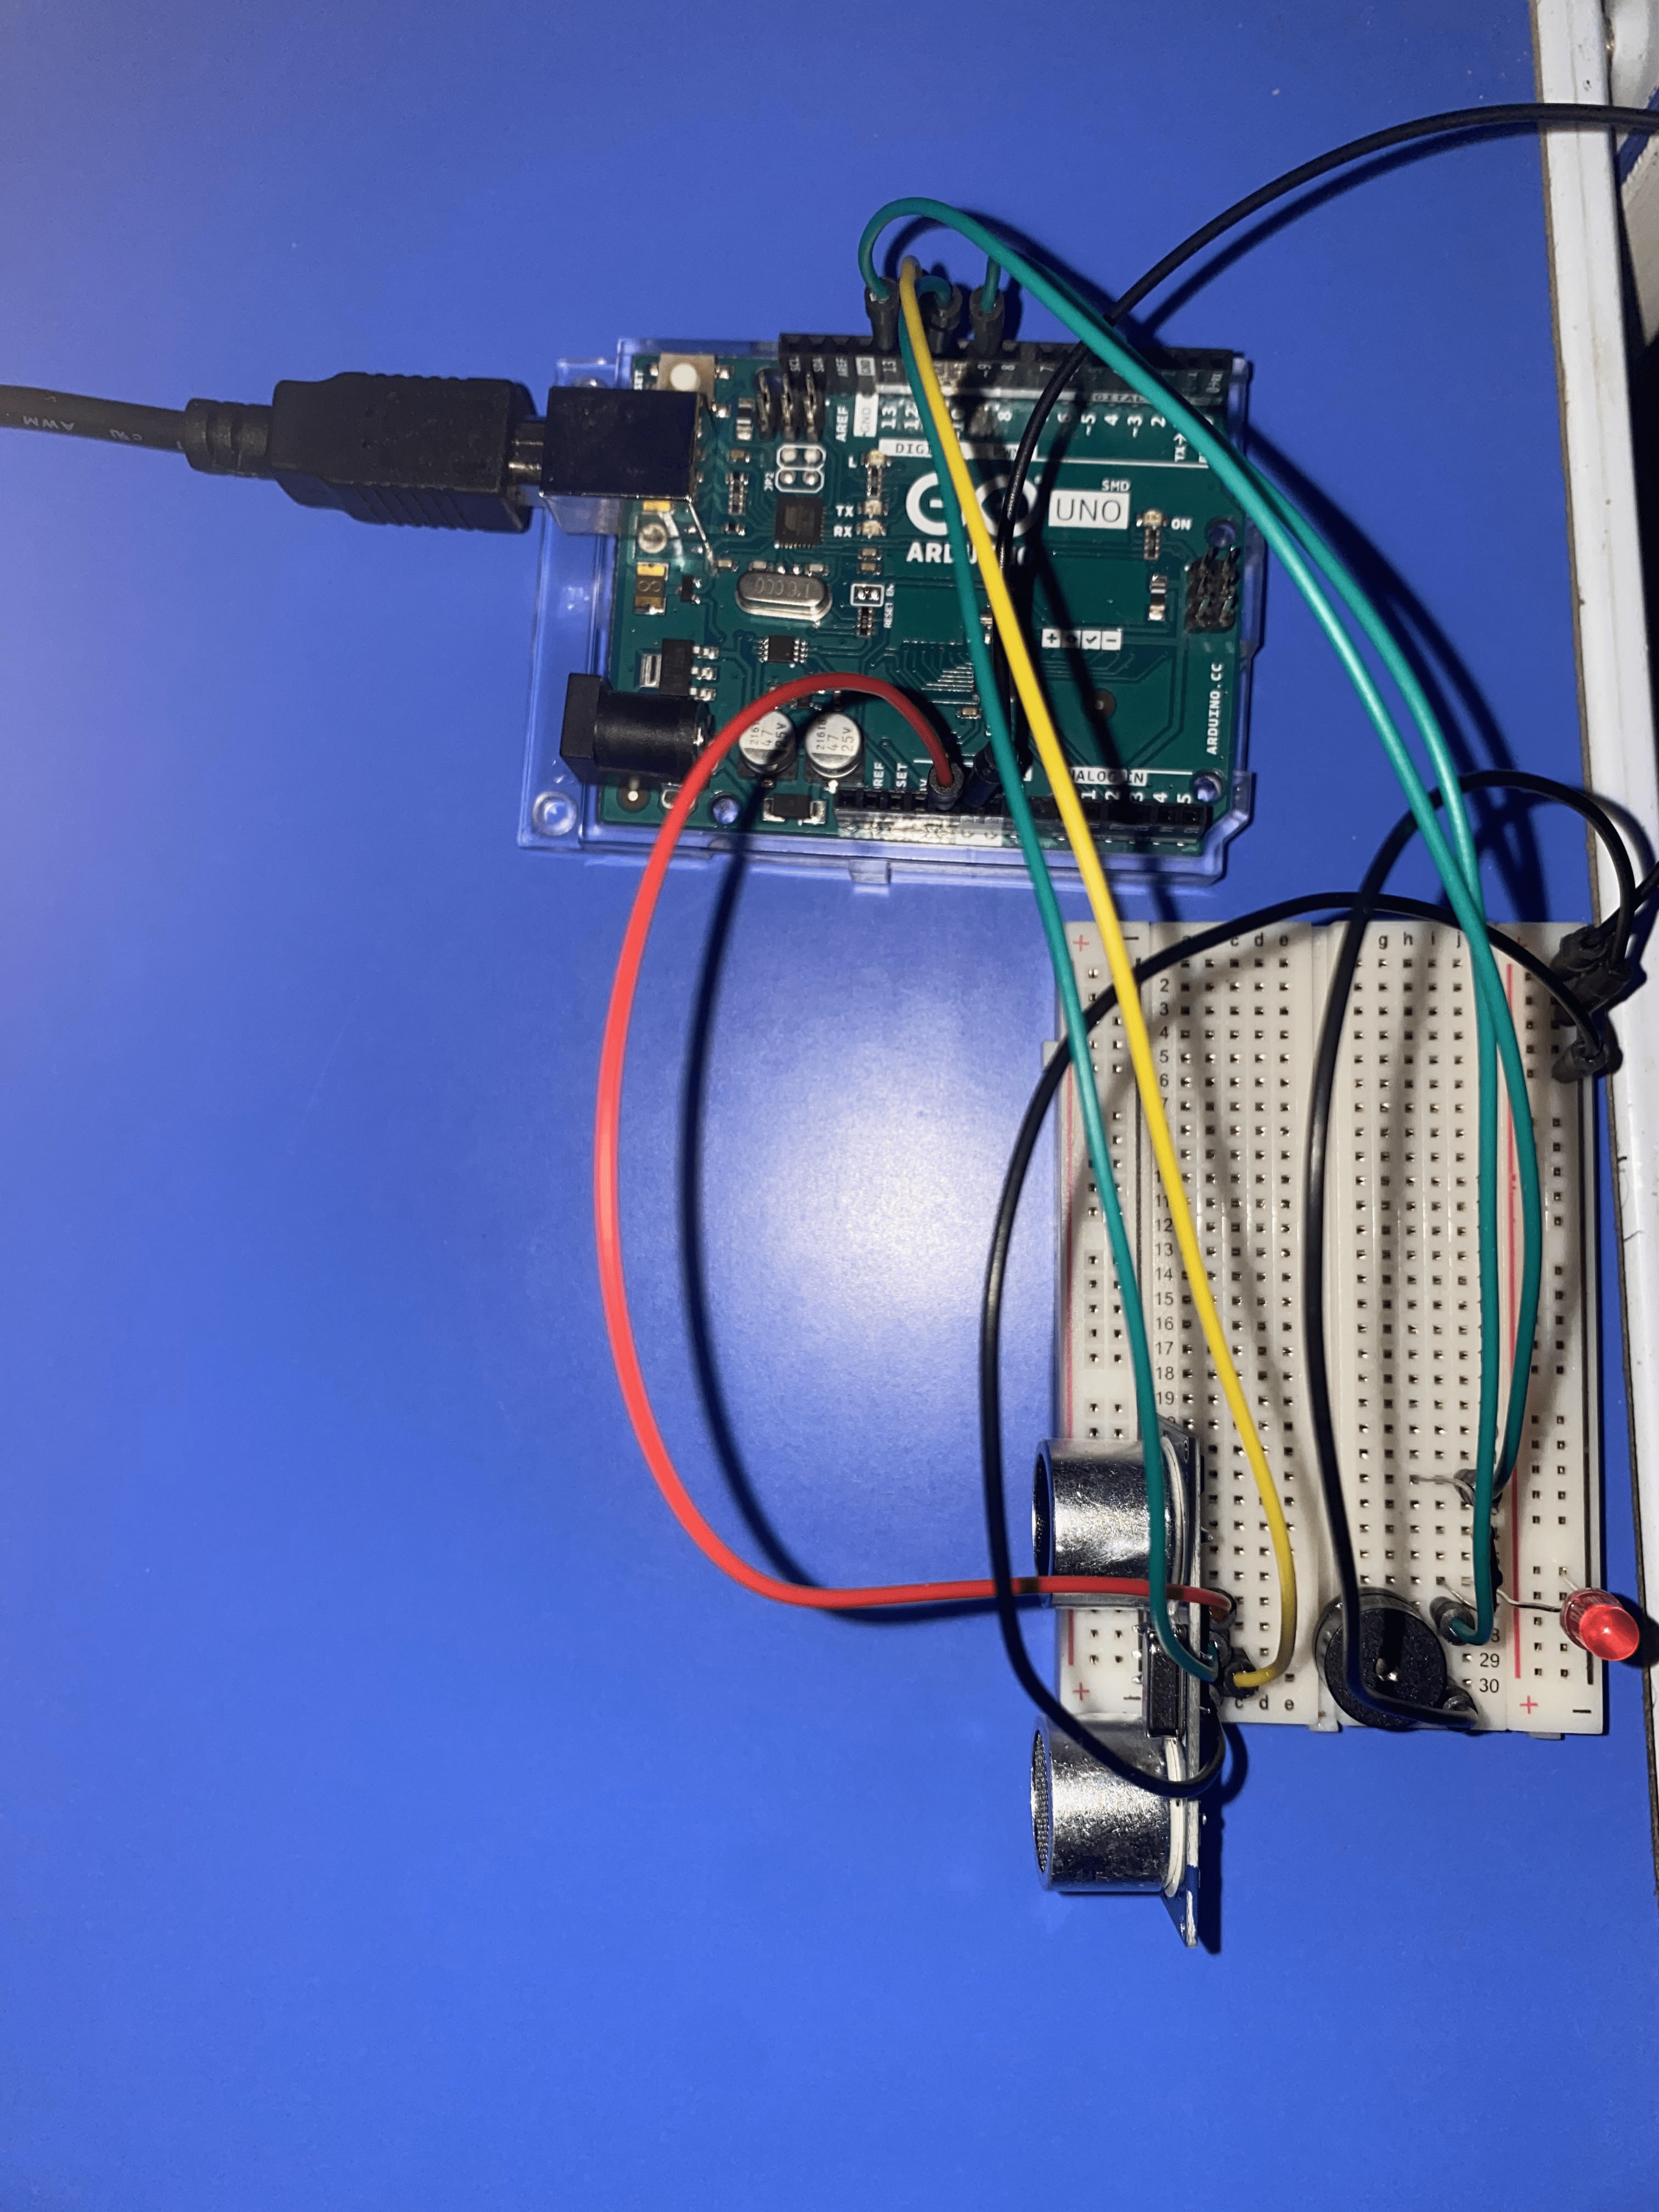
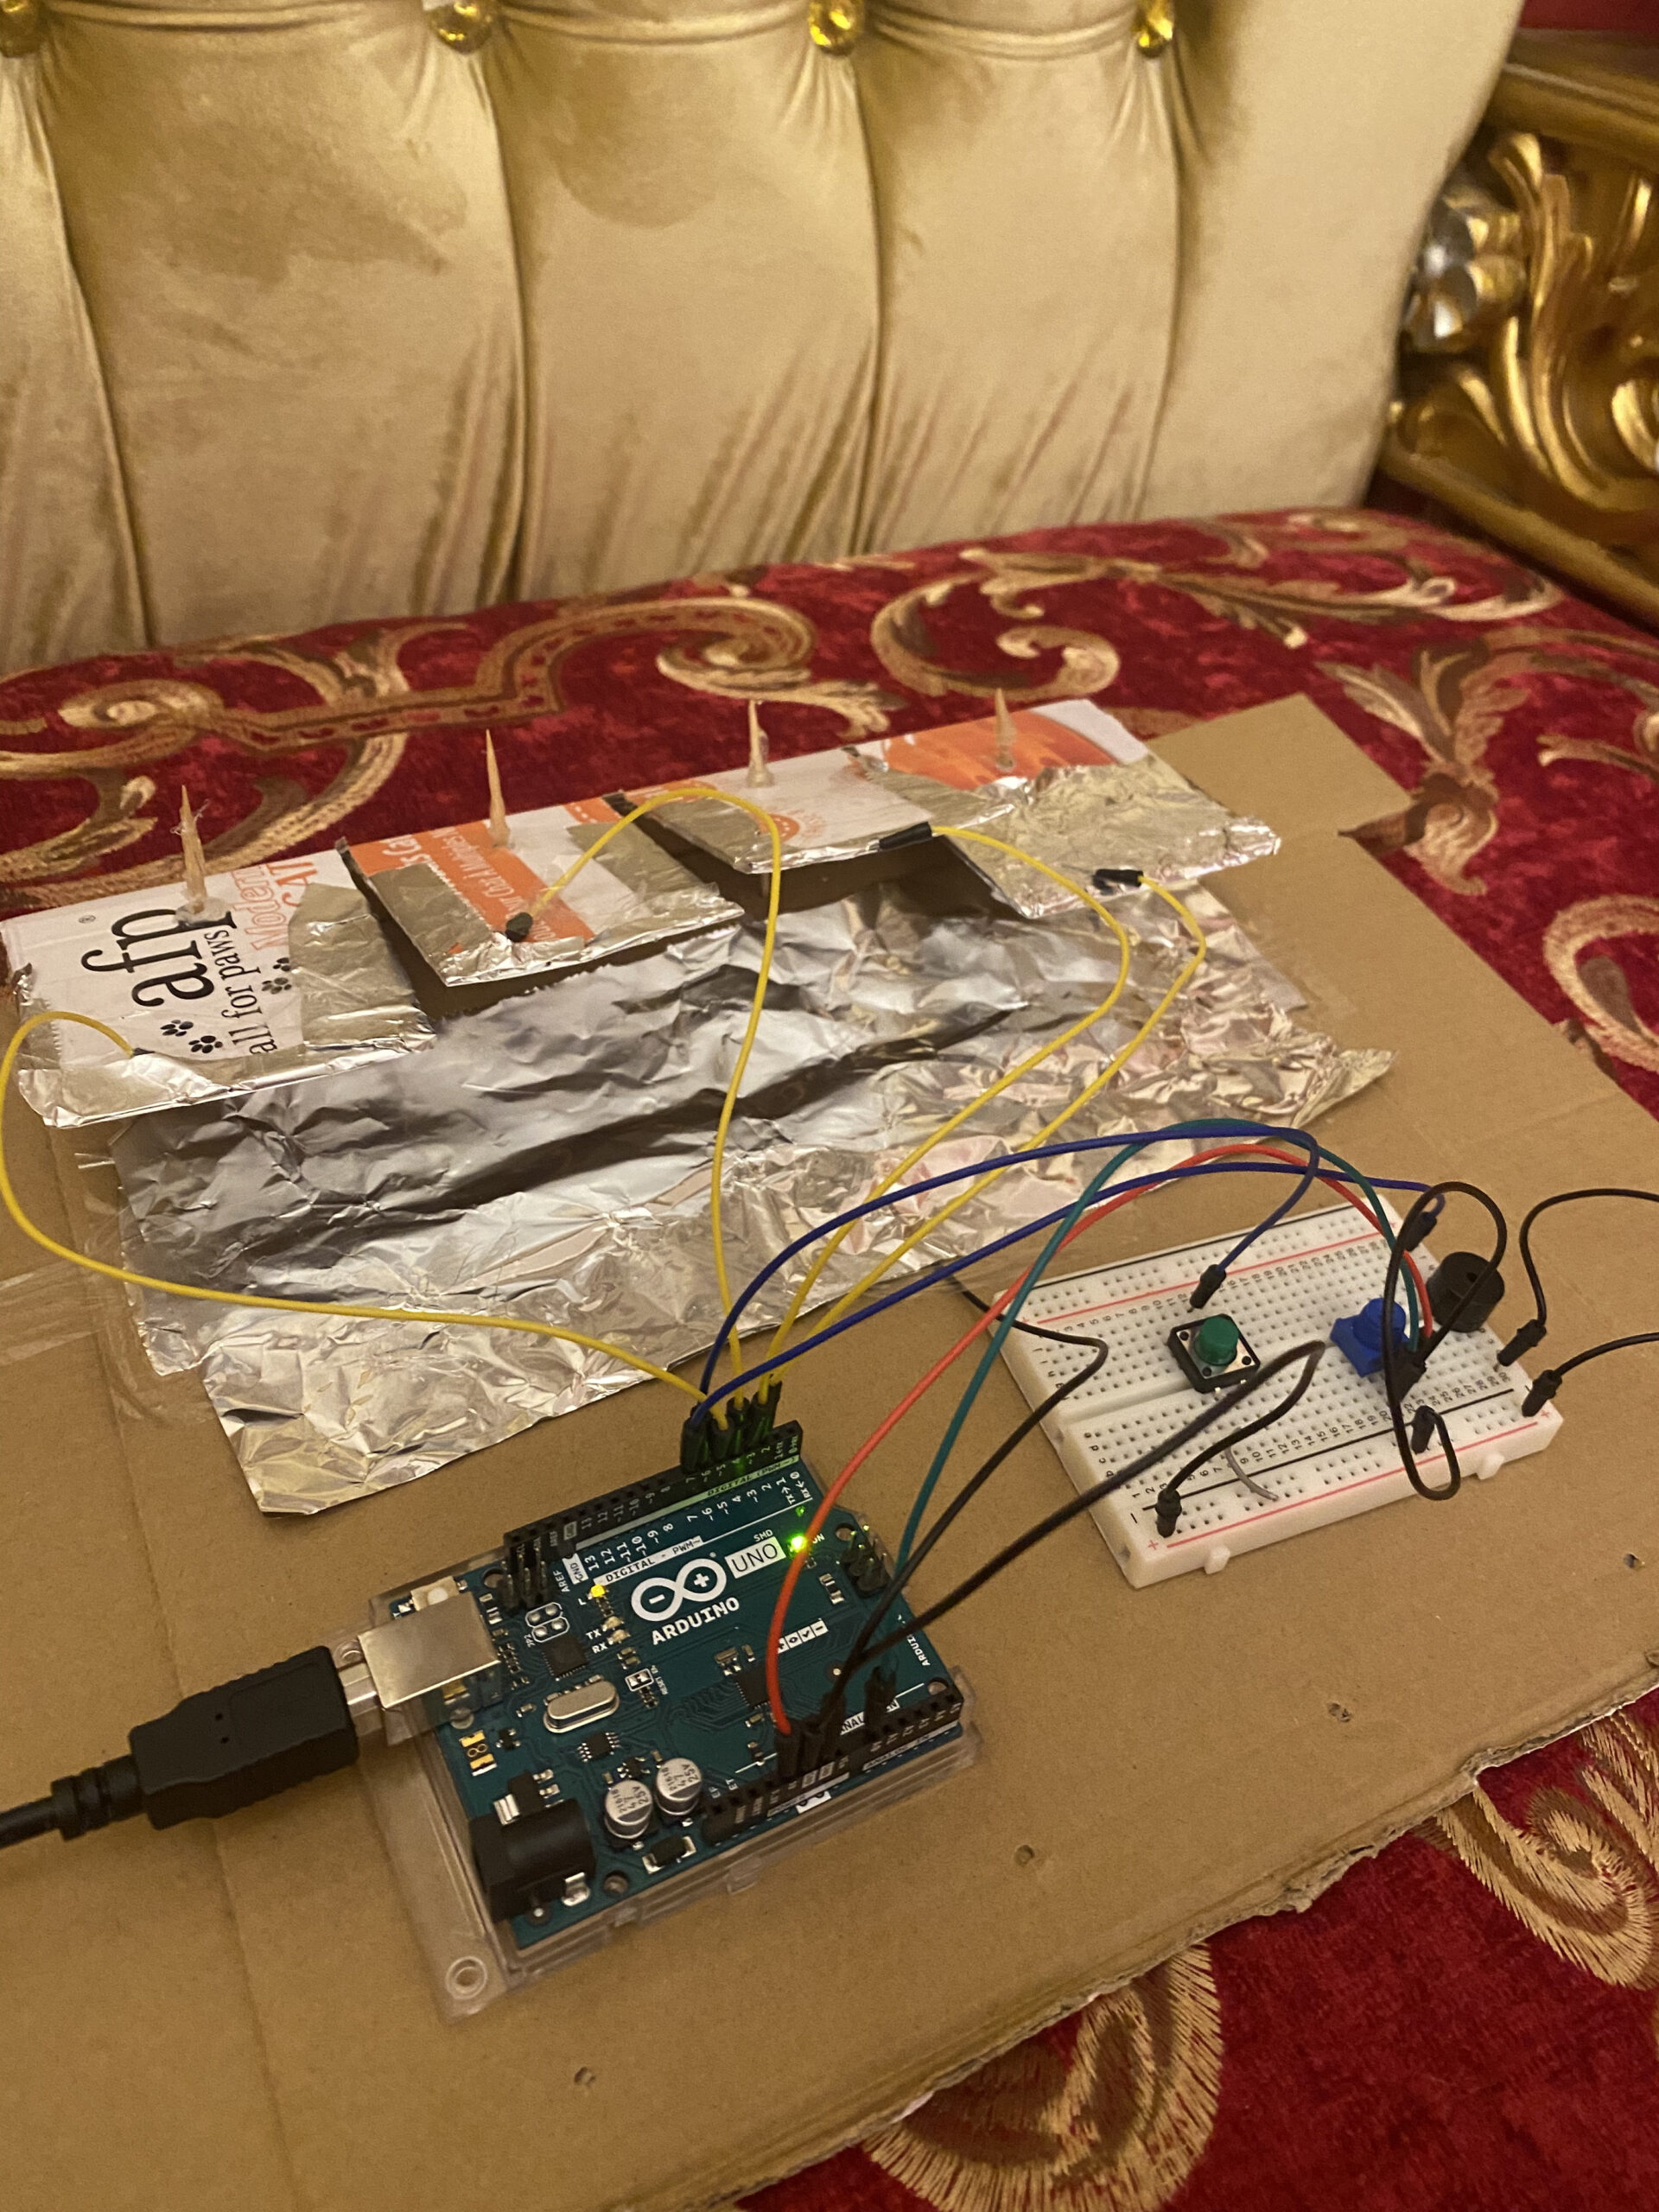
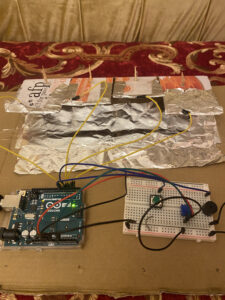
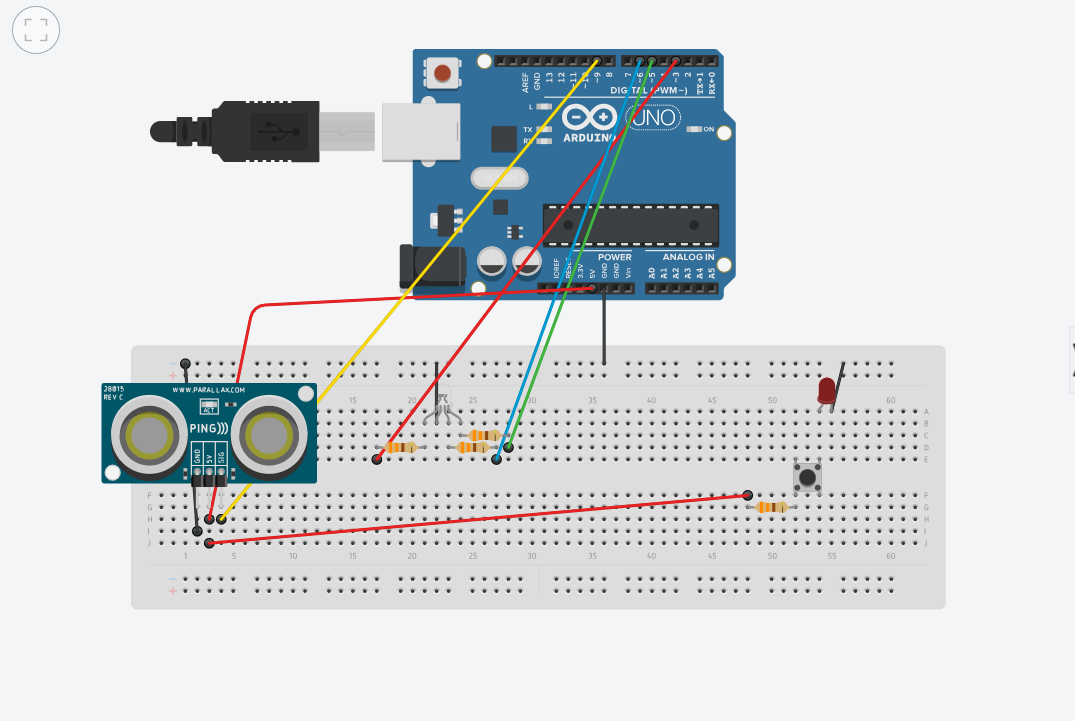
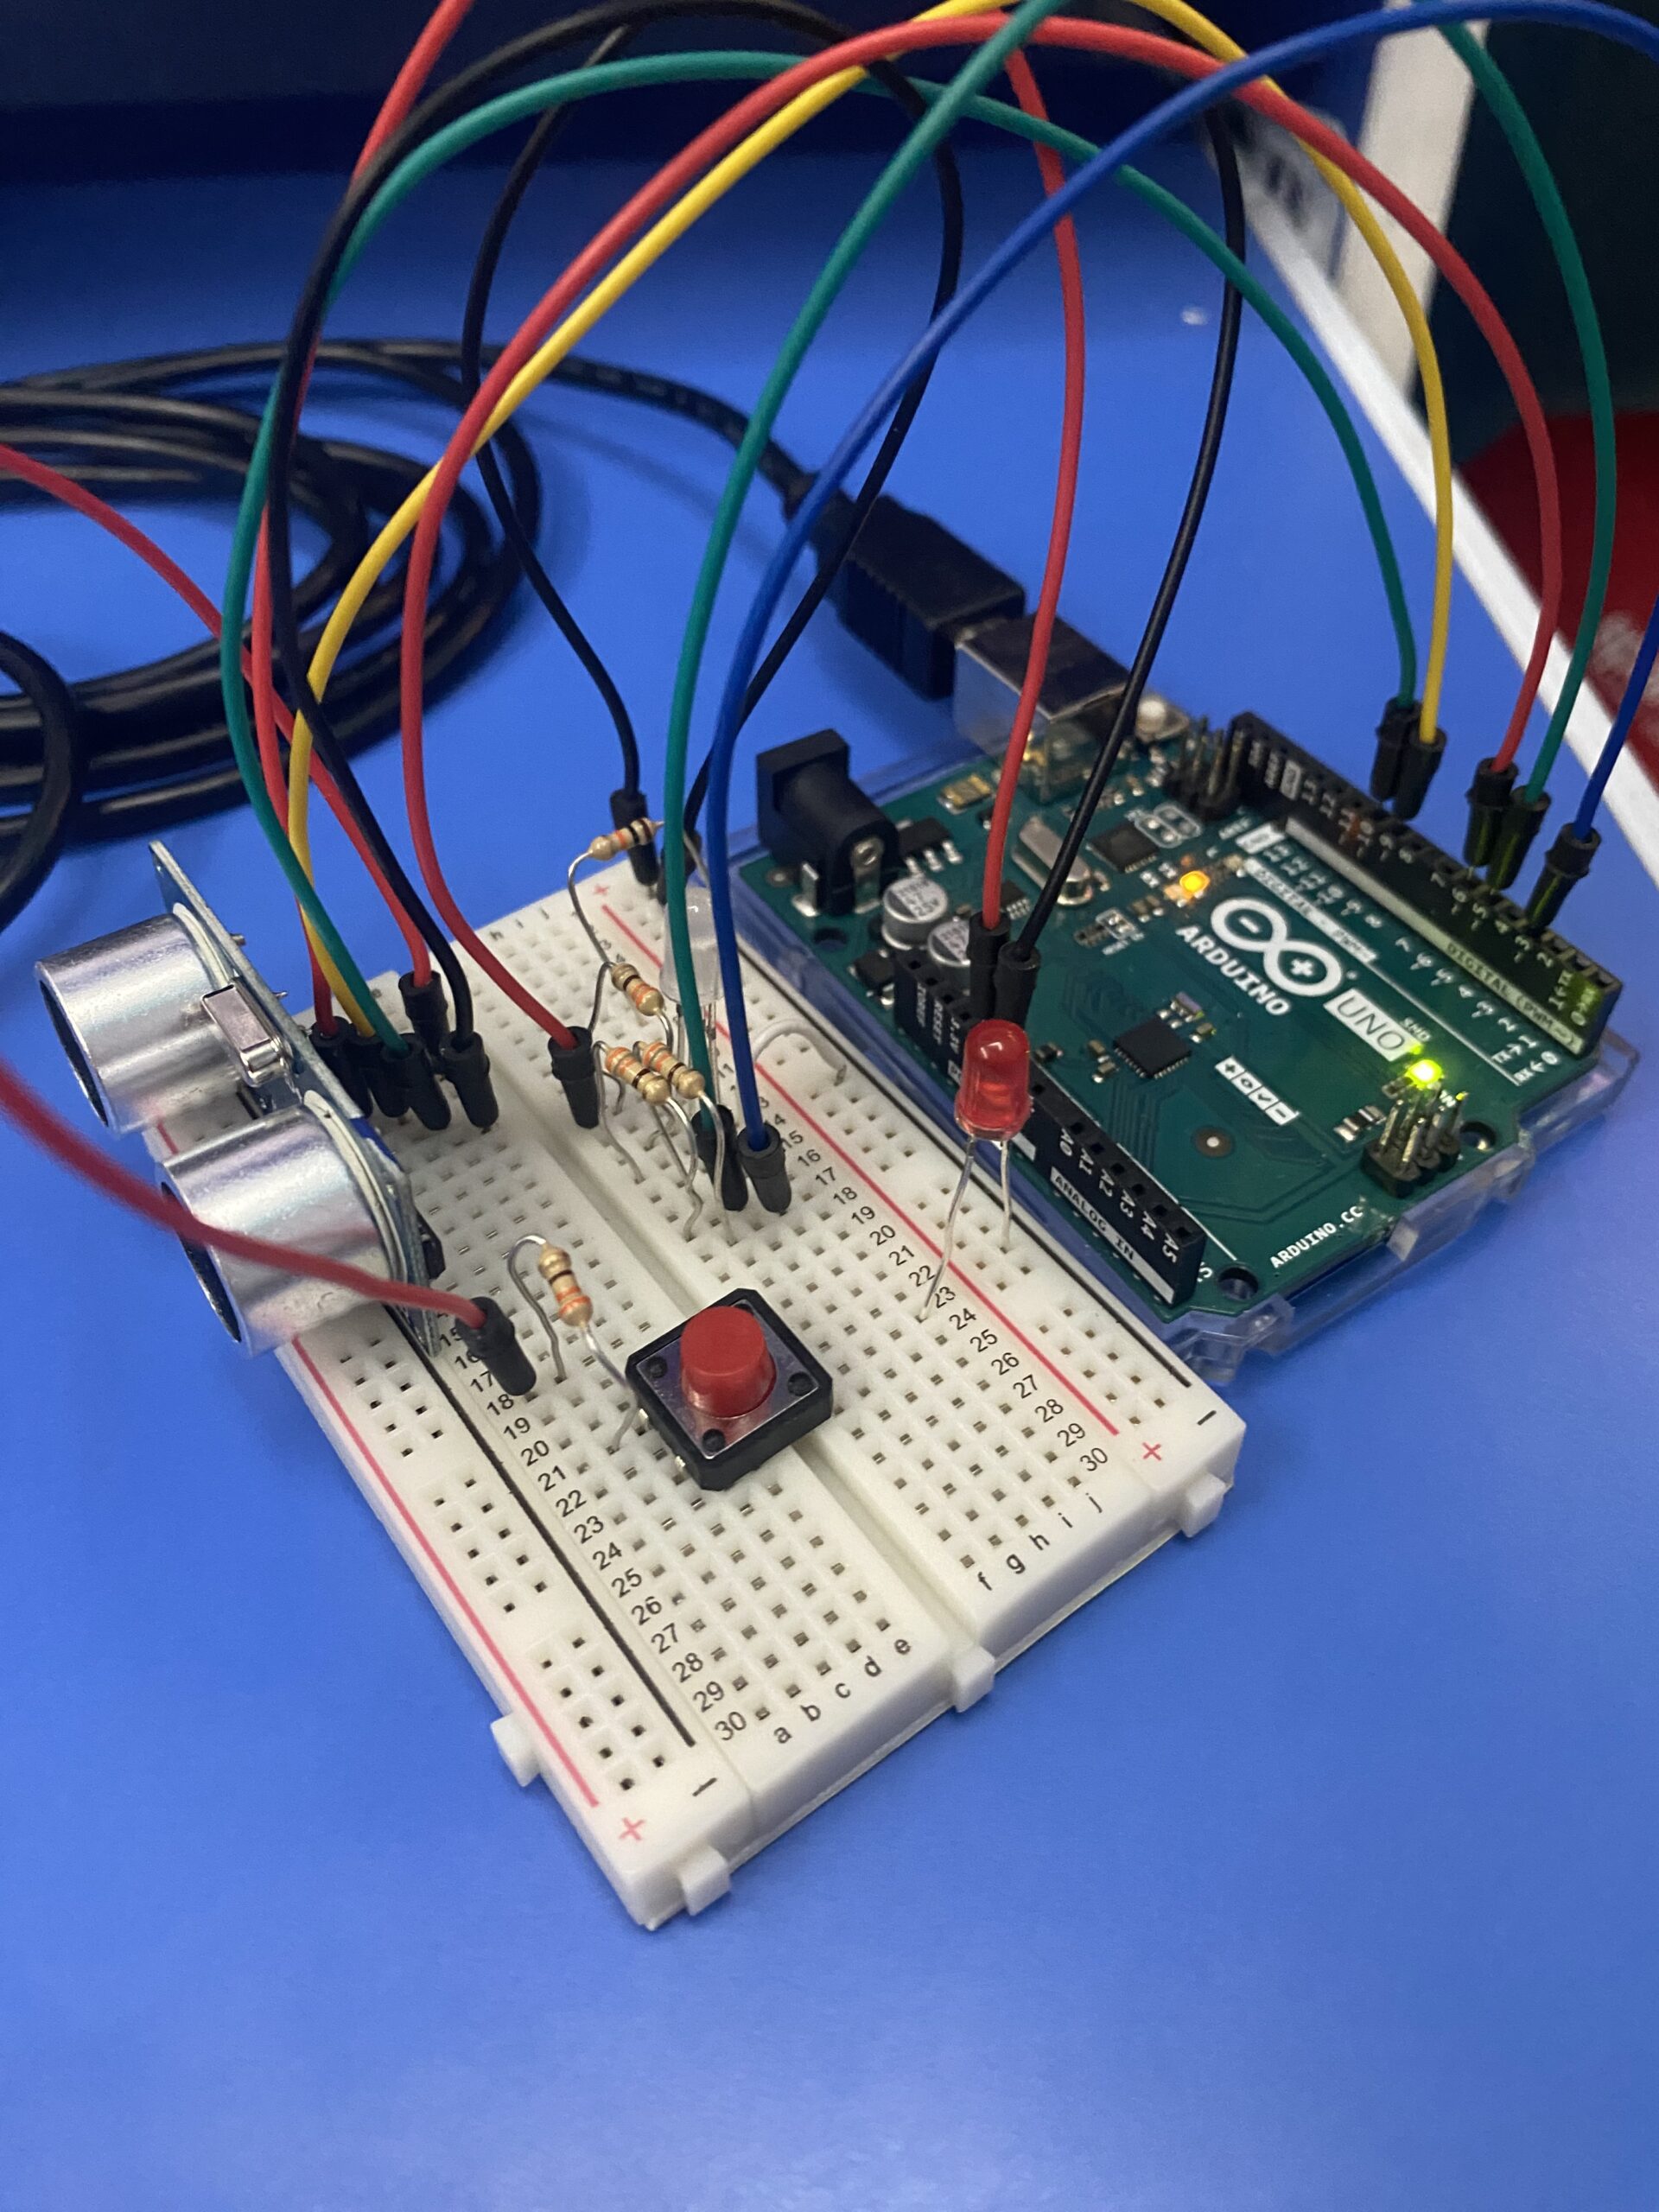
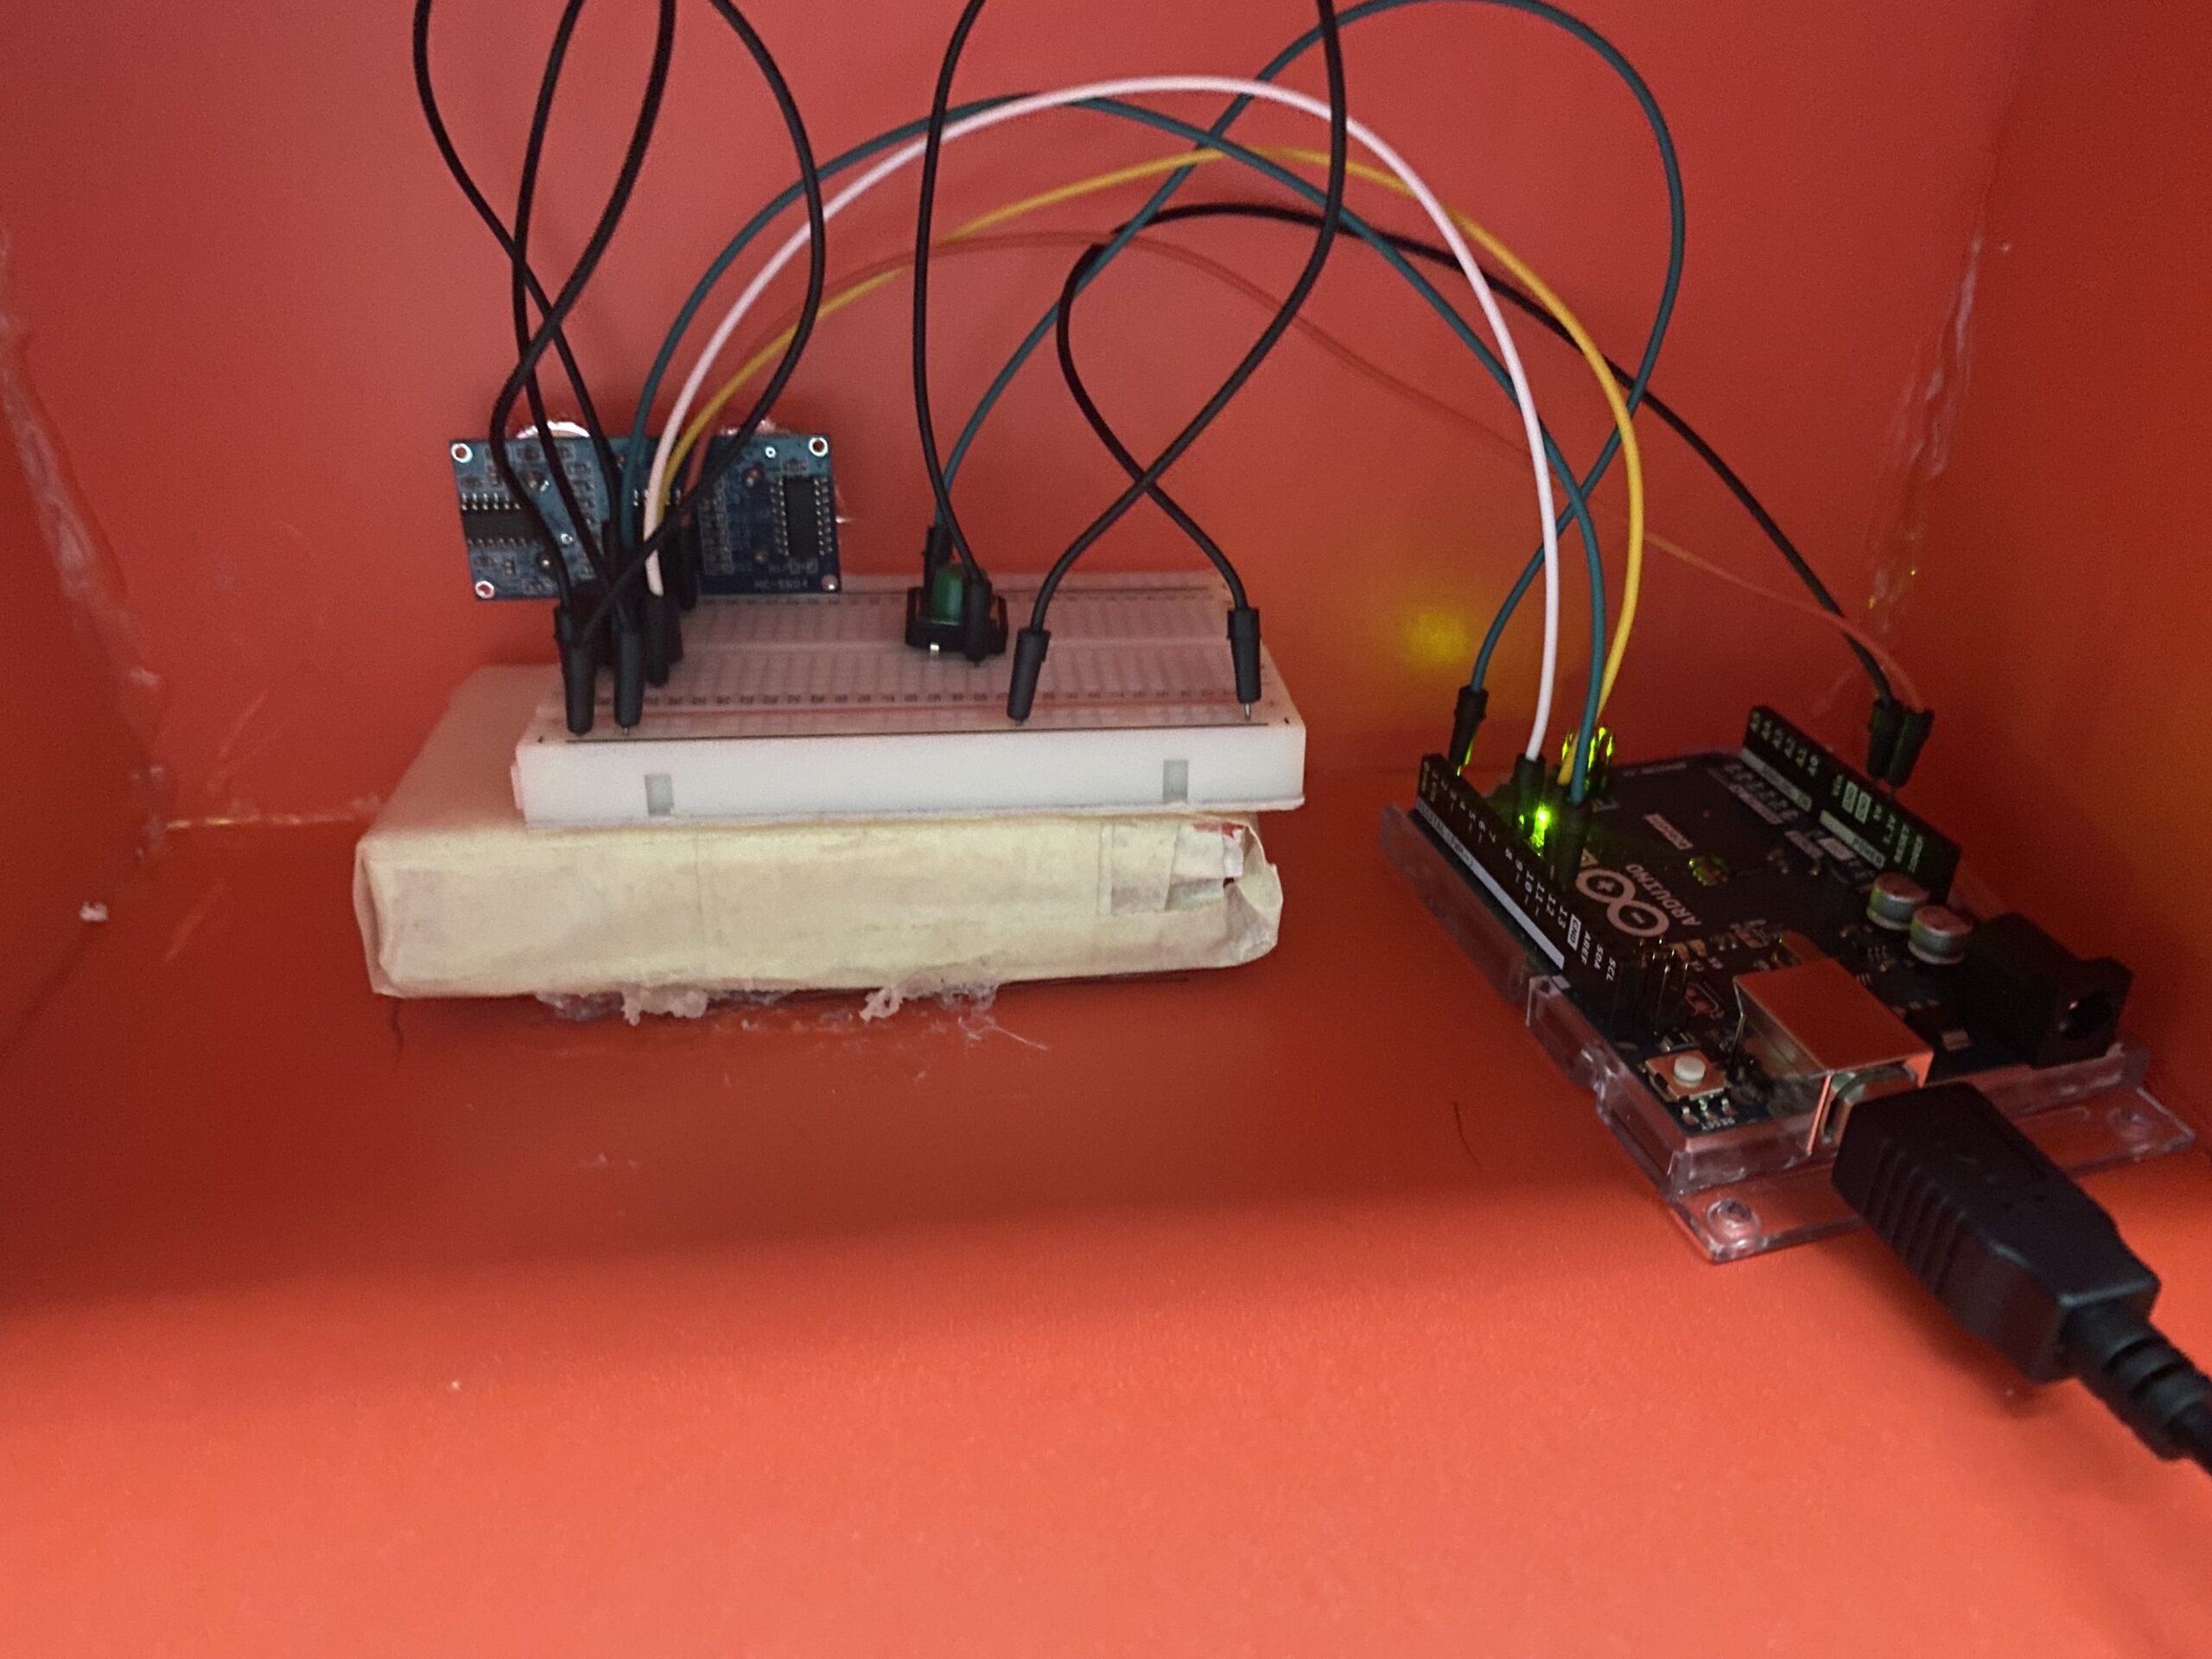
In order to balance out the lags that I was getting in between the code due to excessive elements being inputted by the Arduino and outputted to p5, I decided to make things much simpler and quite responsive by adding the necessary elements only. The prototype that I have created consists of an ultrasonic sensor incorporated within it and the users just need to put their hands in front of it and start playing straightforward. While I could have added more buttons to the prototype, this would have ruined the simplicity that I was aiming for. Also, more buttons would result in a bit more delay within the responsiveness of the ultrasonic sensor to the hand movement, and my goal was to make it as smooth as possible, so these changes were necessary.

Description of Arduino Code:

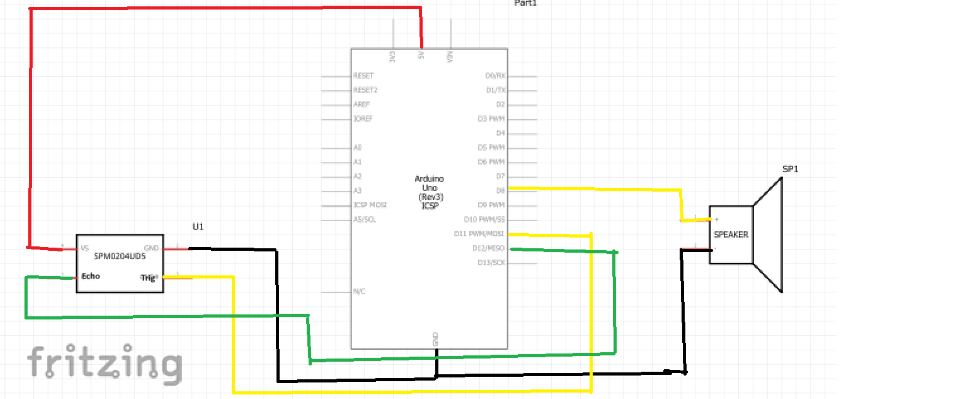
The Arduino part of the game is quite simple. I have added an ultrasonic sensor and a speaker. After connecting it to the digital pins, I utilized the send to p5 feature through serial print to send the outputted value of the ultrasonic sensor. The ultrasonic sensor outputs a value, which can be converted to distance through an equation, that distance is what I send to P5 which will later be reflected to the ball’s x coordinate. The Arduino receives the score value sent by p5; which will then be mapped and sent to the speaker to produce a tone. Additionally, I added an if condition to stop emitting a sound if the user is at the menu or endscreen.

//Define pins for speaker and ultrasonic sensor
const int trigPin = 11;
const int echoPin = 12;
const int speakerPin = 8;

void setup() {
  // Start serial communication so we can send data
  // over the USB connection to our p5js sketch
  Serial.begin(9600);
  pinMode(LED_BUILTIN, OUTPUT);

  // Outputs on these pins
  pinMode(trigPin, OUTPUT);
  pinMode(echoPin, INPUT);
  pinMode(speakerPin, OUTPUT);


}

void loop() {

  //GETS FROM P5
  int score = Serial.parseInt();

//if condition so that when score is 0 at menu and end screen, the sound doesnt emit and annoy us 
if(score==0)
{
  noTone(speakerPin);
}
else
{
  // Map the score to a frequency for the speaker
  int frequency = map(score, 0, 200, 100, 4000);
  // Play the tone
  tone(speakerPin, frequency);
}

  // sends a short pulse of ultrasonic sensor and waits a bit then receives it 
  digitalWrite(trigPin, LOW); 
  delayMicroseconds(2); 
  digitalWrite(trigPin, HIGH); 
  delayMicroseconds(10); 
  digitalWrite(trigPin, LOW); 

  // Time it takes for the pulse to travel back from the object long 
  int duration = pulseIn(echoPin, HIGH); 
  // Universal conversion of time into distance in cm 
  int distance = duration * 0.034 / 2;

  //SENDS TO P5
  Serial.println(distance);
  delay(50);

}


Description of P5.js code:

For my p5 side of the code, this took almost all of the time, designing an interactive interface that had aesthetic elements to it while also an interactive one. The p5 will receive values of distance from Arduino and input it towards the ball’s movements. One major factor that I had difficulty in would be smoothening the ultrasonic sensor’s reading. Initially, the ball was not as smooth, so I added a Lerp function to smoothen it out. Then the ball had abrupt changes in its distances, which is due to external issues from the ultrasonic sensor itself, so I fixed it by adding a maxPosChange variable to make sure that if the next reading is way greater than the previous one, the p5 will neglect that reading, ensuring a smoother path for the ball. As I set the foundation for my game in P5, I started working on the aesthetics, adding different difficulties and an end screen at the end. Each button also produces a hover sound and a click sound when clicked. I added texts explaining each difficulty. Finally, I also added a pause screen and exit to the main menu mid-game features to make things much faster and smoother to navigate.

While the code is long, I’ll only add the serial function where it sends and receives data to and from Arduino. You can navigate to the code by clicking on the P5 link above.

function readSerial(data) {
  ////////////////////////////////////
  // READ FROM ARDUINO HERE
  ////////////////////////////////////

  if (data != null) {
    // Parse the data received from Arduino
    let fromArduino = split(trim(data), ",");
    targetKnobValue = parseFloat(fromArduino[0]);
    print(targetKnobValue);
    
        // Check for abrupt changes in position and neglect them
    if (abs(targetKnobValue - knobValue) < maxPositionChange) {
      // Smooth the value we get from the Arduino using linear interpolation (lerp)
      knobValue = lerp(knobValue, targetKnobValue, easing);
    } 
  }

  //////////////////////////////////
  // SEND TO ARDUINO HERE
  //////////////////////////////////
  
  //if at menu or end screen dont send score to arduino
  if(option== MAINMENU || option== ENDSCREEN)
    {
    let notone=0;
    let sendToArduino= notone + "\n";
    writeSerial(sendToArduino);
    }
  else
    {
    let sendToArduino= score + "\n";
    writeSerial(sendToArduino); 
    }
}


  • Description of communication between Arduino and p5.js

As previously mentioned, both the P5 and Arduino complement and expand upon one another, where the Arduino receives the values of the changing score, and then maps that score to a a spectrum to produce a tone within the speaker. The Arduino will also send a distance value from the hand to the ultrasonic sensor to the P5 which is utilized in the ball class to control the ball’s movement. Of course, the distance is mapped to the Arduino’s dynamic canvas.

Some aspects of the project that I’m proud of

I’m mainly proud of the aesthetics and the beauty of the game. Adding a moving background for instance was not easy. I had to navigate through various websites to see how they did it. the implementation of various difficulties and how the screen changes everytime was also another aspect that I’m proud of. In addition to that, I’m also proud of how much I have decreased the errors in the ultrasonic sensor by adding proper lines of code to take care of the errors. Such as the abrupt changes in the ultrasonic sensor reading resulted in a big jump in the ball’s x coordinate, fixed by adding a tolerance which if the sensor exceeded from one reading to another, it disregards it. This made the game much more stable and I’m very proud of it.

Areas of Improvements

Some of the areas of improvement will most likely be towards the overall prototype and user interaction, due to issues with decreasing lag and delays I had to neglect certain buttons and elements that I could have added to the overall prototype while still achieving that simplistic look. For future improvements, more interactive elements can be added to the real-world prototype instead of just within the code. I could maybe also add a car that could be responsive to the scores, the higher the score results in the car moving at a higher speed and vice versa. I initially thought of doing that, but making a car was another big hassle, and adding it with the ultrasonic sensor would create multiple delays and issues within the execution of the ball’s movement.

IM SHOWCASE:

Final Project- User Testing

I conducted the user testing without giving them any prior notice and only reading from the interface, and they had some questions like when the game ends? So I added more text after that to make things more clear for the users. Other than that, once they got the hang of it, they were able to play the game easily and they figured out everything on how it works and how to stop. From the third iteration onwards, they become a master and play even better than I do(at least most of them). One area that could be improved is the addition of a text on the prototype saying Hover here or Put your hand here since they didn’t know where the sensor was in the beginning. That part of explaining where to hover the hand was the issue, which I will address by adding text on the prototype as mentioned.


Video:

Final Project Draft 1: Dodge it!

Concept:

For my final project, I pursued my initial idea and created a game that utilizes the ultrasonic sensor. The ultrasonic sensor will measure the distance from my hand and project that distance onto a ball’s horizontal position in p5. The ball can move left and right according to our hand movement. Multiple red rectangles are falling from above, and our job is to dodge them using our hands. There are also blue rectangles that spawn less frequently compared to the red ones. There is also a scoring system in which the score decreases by one after every frame, and hitting the red rectangles decreases the score by 2. Grabbing the blue rectangles that spawn less frequently is the only way to get a higher score. So the game becomes a fight against time and obstacles. As the score changes, the speaker that is connected to the breadboard also produces a different tone. Each score has its own unique tone produced by the speaker to make the game more engaging and fun. Therefore, this is a 2-way communication game, from p5 to Arduino and Arduino to p5.

Arduino:

Arduino will basically send the distance measured using the ultrasonic sensor to p5.Js. The Arduino side of the code will receive a score value from the p5. Arduino will input the echo pin(from ultrasonic sensor reading)  and outputs both the trig pin(from ultrasonic) and speaker pin(value received from p5).

Here is my code for it so far:

const int trigPin = 11;
const int echoPin = 12;
const int speakerPin = 9;

void setup() {
  // Start serial communication so we can send data
  // over the USB connection to our p5js sketch
  Serial.begin(9600);
  pinMode(LED_BUILTIN, OUTPUT);

  // Outputs on these pins
  pinMode(trigPin, OUTPUT);
  pinMode(echoPin, INPUT);
  pinMode(speakerPin, OUTPUT);

  //start the handshake
  while (Serial.available() <= 0) {
    digitalWrite(LED_BUILTIN, HIGH); // on/blink while waiting for serial data
    Serial.println("0,0"); // send a starting message
    delay(300);            // wait 1/3 second
    digitalWrite(LED_BUILTIN, LOW);
    delay(50);
  }
}

void loop() {
  // sends a short pulse of ultrasonic sensor and waits a bit then receives it 
  digitalWrite(trigPin, LOW); 
  delayMicroseconds(2); 
  digitalWrite(trigPin, HIGH); 
  delayMicroseconds(10); 
  digitalWrite(trigPin, LOW); 

  // Time it takes for the pulse to travel back from the object long 
  int duration = pulseIn(echoPin, HIGH); 
  // Universal conversion of time into distance in cm 
  int distance = duration * 0.034 / 2;

  //SENDS TO P5
  Serial.println(distance);
  delay(50);

  //GETS FROM P5
  int score = Serial.parseInt();
  // Map the score to a frequency for the speaker
  int frequency = map(score, 0, 100, 100, 4000);
  // Play the tone
  tone(speakerPin, frequency);
}

The Arduino board:

p5:

For the p5 side of the code, the p5 will receive the distance value measured from Arduino and map it onto the canvas. The p5 will also send a live score value to Arduino. There are multiple classes to my p5 code: ball class, Obstacle class, TimeRectangle class, a class for the port connection, and finally the main sketch.

This is my attached main sketch class:

//Initialize all variables
let knobValue = 0;
let targetKnobValue = 0;
let easing = 0.08; // Adjust this value for the desired level of smoothing
let score = 0;
let lastFrameCount;

//initialize the class objets
let obstacles = [];
let timeRectangles = [];
let ball;


function setup()
{
  createCanvas(400, 300);
  //call the ball object
  ball = new Ball(width / 2, height - 30, 20);
  //line of code to set lastframe to the new one
  lastFrameCount = frameCount;
}

function draw() {
  //set background
  background(220);

  //if function to connect port 
  if (!serialActive)
  {
    fill(0);
    textSize(18);
    text("Press Space Bar to select Serial Port", 20, 30);
  } 
  //else function if the port is connected
  else 
  {
    // lerp function linear interpolates(smoothes the value we get from arduino using distance sensor)
    knobValue = lerp(knobValue, targetKnobValue, easing);
    //updates ball position according to distance sens
    ball.update(knobValue);

    // Draw ball
    ball.show();

    // Draw and move obstacles
    for (let i = obstacles.length - 1; i >= 0; i--) {
      obstacles[i].update();
      obstacles[i].show();

      // Remove obstacles that are off-screen
      if (obstacles[i].offscreen()) {
        obstacles.splice(i, 1);
      } else {
        // Check for collision with the ball
        if (obstacles[i].collision(ball)) {
          // Handle collision (e.g., decrease score)
          score= score-2;
          obstacles.splice(i, 1); // Remove the obstacle
        }
      }
    }

    // Draw and move timeRectangles(blue ones)
    for (let i = timeRectangles.length - 1; i >= 0; i--) {
      timeRectangles[i].update();
      timeRectangles[i].show();

      // Remove timeRectangles that are off-screen
      if (timeRectangles[i].offscreen()) {
        timeRectangles.splice(i, 1);
      } else {
        // Check for collision with the ball
        if (timeRectangles[i].collision(ball)) {
          // Handle collision (e.g., increase score)
          score += 5;
          timeRectangles.splice(i, 1); // Remove the timeRectangle
        }
      }
    }

    // Print the current knobValue
    fill(0);
    textSize(18);
    text('Knob Value: ' + str(knobValue), 20, 30);

    // Display score
    text("Score: " + score, 20, 60);

    // Spawn new obstacles and timeRectangles randomly
    if (random() < 0.01) {
      obstacles.push(new Obstacle());
    }
    if (random() < 0.005) {
      timeRectangles.push(new TimeRectangle());
    }
    
       // Update the score every second by subtracting current frame with last frame recorded in setup
    if (frameCount - lastFrameCount >= 60) {
      score = max(0, score - 1);
      lastFrameCount = frameCount;
    }
    
  }
}

function keyPressed() {
  if (key == " ") {
    // important to have in order to start the serial connection!!
    setUpSerial();
  }
}

function readSerial(data) {
  ////////////////////////////////////
  // READ FROM ARDUINO HERE
  ////////////////////////////////////

  if (data != null) {
    // Parse the data received from Arduino
    let fromArduino = split(trim(data), ",");
    targetKnobValue = int(fromArduino[0]);
    print(targetKnobValue);
  }

  //////////////////////////////////
  // SEND TO ARDUINO HERE
  //////////////////////////////////
  let sendToArduino= score + "\n";
   writeSerial(sendToArduino);
}

The P5 interface:

Future improvements:

As of now, I just put down the main codes and functions for both platforms. I will have to work more on the visuals, designs, and aethstics side as a whole of the p5 game.


Week 11 Assignments

Concept:

After learning about the functionalities and the means of communicating between P5 and Arduino platforms, we were given the assignments to initialize various scenarios to and from p5.

First Assignment:

In this assignment, we initialized an Arduino to p5 connection using a potentiometer to control the horizontal position of an ellipse:

Arduino code:

const int potPin = A0;  // Analog pin connected to the potentiometer

void setup() {
  Serial.begin(9600);
}

void loop() {

    int potValue = analogRead(potPin);  // Read the value from the potentiometer
      // Send the potentiometer value to p5.js
      Serial.println(potValue);
}

P5 Code:

let ellipseHorizental;

function setup() {
  createCanvas(640, 480);
  textSize(18);
  ellipseHorizental = width/2; 
}

function draw() {
  background(220);

  // Draw ellipse with width based on potentiometer value
  fill(255, 0, 255);
  ellipse(ellipseHorizental, height / 2, 100, 150);

  if (!serialActive) {
    text("Press Space Bar to select Serial Port", 20, 30);
  } else {
    text("Connected", 20, 30);

    // Print the current potentiometer value
    text('Potentiometer Value = ' + str(ellipseHorizental), 20, 50);
  }
}

function keyPressed() {
  if (key == " ") {
    setUpSerial();
  }
}

function readSerial(data) {
  if (data != null) {
    // convert the string to a number using int()
    let fromArduino = split(trim(data), ",");

    // Map the potentiometer value to the ellipse width
    ellipseHorizental = map(int(fromArduino[0]), 0, 1023, 0, 640); 

  }
}

Video:

Assignment 2:

In this assignment, we initiated a p5 to Arduino response. The slider in p5 can control the brightness of an LED in Arduino.

Arduino code:

int LED = 5; // Digital pin connected to the LED

void setup() {
  Serial.begin(9600);
  pinMode(LED_BUILTIN, OUTPUT);
  pinMode(LED, OUTPUT);

  // start the handshake
  while (Serial.available() <= 0) {
    digitalWrite(LED_BUILTIN, HIGH); // on/blink while waiting for serial data
    Serial.println("0");             // send a starting message
    delay(300);                       // wait 1/3 second
    digitalWrite(LED_BUILTIN, LOW);
    delay(50);
  }
}

void loop() {
  // wait for data from p5 before doing something
  while (Serial.available()) {
    digitalWrite(LED_BUILTIN, HIGH); // led on while receiving data

    int brightnessValue = Serial.parseInt();
    if (Serial.read() == '\n') {
      delay(5);
      Serial.println(brightnessValue);
    }
    analogWrite(LED, brightnessValue);
    digitalWrite(LED_BUILTIN, LOW);
  }
}

P5 code:

let brightnessSlider;

function setup() {
  createCanvas(640, 480);
  textSize(18);

  // Create a slider
  brightnessSlider = createSlider(0, 255, 128); // Set the range and initial value
  brightnessSlider.position(20, 100); // Set the position of the slider
}

function draw() {
  background(255);

  // Draw a slider
  fill(255, 0, 0);
  rect(brightnessSlider.x, brightnessSlider.y, brightnessSlider.width, brightnessSlider.height);

  if (!serialActive) {
    text("Press Space Bar to select Serial Port", 20, 30);
  } else {
    text("Connected", 20, 30);

    // Print the current brightness value
    text('Brightness = ' + brightnessSlider.value(), 20, 50);
  }
}

function keyPressed() {
  if (key == " ") {
    setUpSerial();
  }
}
function readSerial(data) {
  if (data != null) {
    let sendToArduino = brightnessSlider.value() + "\n";
    writeSerial(sendToArduino);
    }
}
int LED = 5; // Digital pin connected to the LED

void setup() {
  Serial.begin(9600);
  pinMode(LED_BUILTIN, OUTPUT);
  pinMode(LED, OUTPUT);

  // start the handshake
  while (Serial.available() <= 0) {
    digitalWrite(LED_BUILTIN, HIGH); // on/blink while waiting for serial data
    Serial.println("0");             // send a starting message
    delay(300);                       // wait 1/3 second
    digitalWrite(LED_BUILTIN, LOW);
    delay(50);
  }
}

void loop() {
  // wait for data from p5 before doing something
  while (Serial.available()) {
    digitalWrite(LED_BUILTIN, HIGH); // led on while receiving data

    int brightnessValue = Serial.parseInt();
    if (Serial.read() == '\n') {
      delay(5);
      Serial.println(brightnessValue);
    }
    analogWrite(LED, brightnessValue);
    digitalWrite(LED_BUILTIN, LOW);
  }
}


Video:

Assignment 3:

This assignment we spent an unholy and frankly embarrassing amount of time on this. We modified the code from class and figured out a way to light up both LEDs when the ball on the screen bounces. The wind speed depends on readings from the LDR, so the ball goes in different directions when the board is in light or dark conditions. At a certain light level, the ball remains stationary.

Arduino Code:

int leftLedPin = 2;
int rightLedPin = 5;
void setup() {
// Start serial communication so we can send data
// over the USB connection to our p5js sketch
Serial.begin(9600);
// We&#39;ll use the builtin LED as a status output.
// We can&#39;t use the serial monitor since the serial connection is
// used to communicate to p5js and only one application on the computer
// can use a serial port at once.
pinMode(LED_BUILTIN, OUTPUT);
// Outputs on these pins
pinMode(leftLedPin, OUTPUT);
pinMode(rightLedPin, OUTPUT);
// Blink them so we can check the wiring
digitalWrite(leftLedPin, HIGH);
digitalWrite(rightLedPin, HIGH);
delay(200);
digitalWrite(leftLedPin, LOW);
digitalWrite(rightLedPin, LOW);

// start the handshake
while (Serial.available() &lt;= 0) {
digitalWrite(LED_BUILTIN, HIGH); // on/blink while waiting for serial
data
Serial.println(&quot;0,0&quot;); // send a starting message
delay(300); // wait 1/3 second

digitalWrite(LED_BUILTIN, LOW);
delay(50);
}
}
void loop() {
// wait for data from p5 before doing something
while (Serial.available()) {
digitalWrite(LED_BUILTIN, HIGH); // led on while receiving data
int left = Serial.parseInt();
int right = Serial.parseInt();
if (Serial.read() == &#39;\n&#39;) {
digitalWrite(leftLedPin, left);
digitalWrite(rightLedPin, right);
int sensor = analogRead(A0);
delay(5);
int sensor2 = analogRead(A1);
delay(5);
Serial.print(sensor);
Serial.print(&#39;,&#39;);
Serial.println(sensor2);
}
}
digitalWrite(LED_BUILTIN, LOW);
}

P5 Code:

let rVal = 0;
let velocity;
let gravity;
let position;
let acceleration;
let wind;
let drag = 0.99;
let mass = 50;
let groundFlag;
let dropFlag = false; // flag for when the spacebar is pressed and the ball should drop
let windFlag = false; // flag to start/stop wind

function setup() {
createCanvas(640, 500);
// noFill();
position = createVector(width / 2, 0);
velocity = createVector(0, 0);
acceleration = createVector(0, 0);
gravity = createVector(0, 0.5 * mass);
wind = createVector(0, 0);
groundFlag = 0;
frameRate(30);
textSize(20)
}
function draw() {
background(255);
text(&quot;rVal: &quot;+str(rVal), 20, 55);
text(&quot;wind.x: &quot;+str(wind.x), 20, 80);
if (!serialActive) {
text(&quot;Press Space Bar to select Serial Port&quot;, 20, 30);
} else {
text(&quot;Connected&quot;, 20, 30);
}
if (dropFlag == true) { // when spacebar is pressed, start the sketch
if (position.y == height - mass / 2) {
groundFlag = 1; // this value is sent to the LED in the Arduino end
} else {
groundFlag = 0;
}
applyForce(wind);
applyForce(gravity);
velocity.add(acceleration);
velocity.mult(drag);
position.add(velocity);
acceleration.mult(0);
ellipse(position.x, position.y, mass, mass);
if (position.y &gt; height - mass / 2) {
velocity.y *= -0.9;
position.y = height - mass / 2;
}
if (windFlag == true) {
wind.x = map(rVal, 0, 1023, -1, 1);
}
}

}
function applyForce(force) {
let f = p5.Vector.div(force, mass);
acceleration.add(f);
}
function keyPressed() {
if (keyCode == UP_ARROW) {
windFlag = true // wind is enabled when up arrow key is pressed
}
if (keyCode == DOWN_ARROW) {
windFlag = false // wind is paused when down arrow key is pressed
wind.x = 0
}
if (key == &quot; &quot;) {
setUpSerial();
dropFlag = true;
}
}
function readSerial(data) {
////////////////////////////////////
//READ FROM ARDUINO HERE
////////////////////////////////////
if (data != null) {
// make sure there is actually a message
let fromArduino = split(trim(data), &quot;,&quot;); // split the message
// if the right length, then proceed
if (fromArduino.length == 2) {
// only store values here
// do everything with those values in the main draw loop
// We take the string we get from Arduino and explicitly
// convert it to a number by using int()
// e.g. &quot;103&quot; becomes 103
rVal = int(fromArduino[0]);
alpha = int(fromArduino[1]);
}
//////////////////////////////////
//SEND TO ARDUINO HERE (handshake)
//////////////////////////////////

let sendToArduino = groundFlag + &quot;,&quot; + groundFlag + &quot;\n&quot;;
writeSerial(sendToArduino);
}
}

Video:

Reflection:

The overall exercises were a great way to comprehend further the logic behind the coding and how both platforms are intertwined.  Knowing how things are operated between each other, we can now effectively work on our final projects and have so many possibilities of projects to work on.


Final Project Idea- Dodge It!

For my final project, I am considering working on an interactive game where users can move a floating ball left and right using a physical knob, and their objective is to dodge incoming rectangles and any other objects on the way. The game will have multiple difficulties in which more objects will pop up, the ball can get much faster, etc. The motivation behind this game is a game that I played as a child that had the idea of dodging falling objects, and so I decided to create a game similar in its competitiveness but had a novel idea of the ball itself floating rather than objects falling down.

I will be using move communications from P5 to Arduino and vice versa. Communication from Arduino to p5 will be about the input of the ultrasonic sensor that senses the distance of the knob from a fixed point and moves the ball in the screen. Whereas, the interaction from p5 to Arduino will be about the blinking speed of an LED that is dependent on the score- the higher the score, the faster it’ll brink showcasing tension and just giving off an overall feel of pressure to the user. There will also be a sound beat playing using a speaker, the higher the score, the more it’ll beat to create this environment of tension and pressure.

Week 11 Reading Response

In Graham Pullin’s book, “Design Meets Disability,” he thoroughly discusses the importance of considering design factors in medically designed equipment for disabled individuals. In our evolving world, design plays an increasingly prominent role. Pullin proceeds to showcase various objects used by disabled people and explores how design can be integrated into them. While it’s commendable that he emphasizes design and aesthetics in medically designed equipment, my concern grows regarding how these designs might ultimately impact the overall affordability of such equipment.

Pullin suggests renaming wheelchairs as “chairwear” and hearing aids as “hearwear,” advocating for a shift from a medical to a consumer-oriented model. While the idea of personalized and fashionable devices is appealing, the incorporation of fashion and aesthetics may lead to higher demand, subsequently driving up prices and potentially making it challenging for disabled individuals to find specific equipment.

Disabled individuals would have a wide variety of colors, models, and designs to choose from when selecting medical equipment, a positive aspect. However, as the fashion industry becomes more competitive and expensive if medical equipment like hearing aids becomes overly equipped with designs and aesthetics, multiple brands might sell them at higher-than-usual prices. While this might not seem like a significant issue for those seeking both functionality and aesthetics, the increased prices could significantly affect individuals in lower economic statuses who urgently need medical equipment.

Due to the heightened demand for attractive medical equipment, the market may shift towards selling designer medical equipment at higher prices. Lower-status individuals may struggle to find affordable and reliable medical equipment, as cheaper options may incorporate less attention to electronics and have a higher tendency to malfunction. While Pullin’s consideration of beauty and design features within medical equipment is positive, it could jeopardize the easy access, affordability, and reliability of essential medical equipment. Unlike other fashion products that can be expensive and disposable, disabled individuals need proper equipment to perform tasks without difficulty or exposure to potential dangers caused by malfunctions.

An illustrative example of medical equipment seamlessly incorporating aesthetics and design is glasses, not for fashion but for medical purposes. In the past, medical glasses were simpler and affordable for everyone. However, due to the growing trend of glasses as a fashion accessory, many fashion industries sell proper medical glasses at much higher prices. In today’s world, purchasing only the lenses has become significantly costlier due to their high demand.

The absence of a substantial discussion on the affordability and democratization of these design solutions is a noticeable gap. Designing for disability, as Pullin suggests, should not only evoke positive images but actively address financial barriers. It is crucial to ensure that the benefits of resonant design reach a broad and diverse demographic, not just those with the financial means to engage in a boutique-style consumption model.

Week 10 Assignment: 4 Tabs Mini Piano

Concept:

In this week’s assignment, I decided to create a piano on a much smaller scale. As the title suggested, it is composed of 4 tabs. Its motivation is to make a piano that can be carried anywhere and played easily. The piano has multiple different tones to it, which can be adjusted with the use of a potentiometer. While there are digital applications where people can easily play piano, as this week’s text suggested- the importance of touch and expression when performing tasks compared to just touching a flat screen- I realized how a physical piano can bring forth a better experience than a digital one.

Prototype:

https://youtube.com/shorts/p7VoEhPxomk

Code:

#include "pitches.h"

//setting up various pins, numkeys is the number of keys on the piano, TABPins are the digital pins
const int numKeys = 4;                
const int TABPins[numKeys] = {2, 3, 4, 5}; 
const int pushButton = 6;            
const int speakerPin = 7;             

//variable to store the last pressed tab in it
int lastTAB = -1;                  
int pitch;                         
//variable for flagging system as open or close   
bool systemEnabled = false;           


void setup() {
  //set each buttonPin as input 
  for (int i = 0; i < numKeys; i++) {
    pinMode(TABPins[i],  INPUT);
  }
  //set the button as input 
  pinMode(pushButton, INPUT);
  Serial.begin(9600);
}

void loop() {
  // Check the state of the push button
  int buttonState = digitalRead(pushButton);

  // Toggle the system on/off when the button is pressed
  if (buttonState == LOW) {
    delay(50); 
    //when the button is pressed, invert the systemEnabled variable
    if (digitalRead(pushButton) == LOW) {
      systemEnabled = !systemEnabled;

      // If the system is now enabled, reset the lastTAB variable
      if (systemEnabled) {
        lastTAB = -1;
      }

      // Wait for the button to be released
      while (digitalRead(pushButton) == LOW) {
        delay(10);
      }
    }
  }

  // If the system is enabled, read the potentiometer value and play notes
  if (systemEnabled) {
    int potValue = analogRead(potentiometerPin);
    // Map potentiometer value to a pitch range
    pitch = map(potValue, 0, 1023, 200, 4000);  

    for (int i = 0; i < numKeys; i++) {
      int TABValue = digitalRead(TABPins[i]);

      // Play a note if the TAB is pressed and it's not the same TAB as the last one
      if (TABValue == LOW && i != lastTAB) {
        // note variable that stores a value from the loswet Note + the addition of the pitch which changes according to potentiometer
        int note = NOTE_B0 + pitch + i * 100;  
        // output the speaker with that note value for 1 second
        tone(speakerPin, note, 1000);
        delay(100);  

        // Update the lastTAB variable
        lastTAB = i;
      }
    }
  }
}

Reflection:

This was a fun hands-on exercise. One aspect of the project that took the most time was building the prototype which replicates the piano. The hard part on the other hand was most probably the setting up of the push button to flag the system as open or closed since I had to input in multiple delays to prevent various errors. As for future improvements, more tabs can be added within the piano to make it more feasible to produce multiple notes in one go. Also, the overall look of the piano can most probably be much better than this.


Week 10 Reading Response

“A Brief Rant on the Future of Interaction Design” reading:

The author of the article “A Brief Rant on the Future of Interaction Design” discusses some of the most important aspect that is not as much talked about in our current age. He addresses how the world is shifting from the usage of hands to feeling things and performing tasks with just a fingertip. We have shifted from relying on the sensations we get through our hands to just touching fingers on a flat screen to move around different applications and tasks. Why this shift though? This is mainly because of human laziness. Humans are lazy, and there’s nothing to deny there. We have tried every means possible to automate previous tedious tasks, and what did that cost us? It costs us to overthrow the tool that is the most necessary to us, and without it, we wouldn’t have come this far. Now of course we still use our hands and we have it completely intact, but we aren’t using it to their full potential. Hands as the author said, have very dense sensors on them, which means we can utilize them the best to feel what’s around us, nature, the objects, etc. With technological advancements, we are moving more towards a world with much less use of hands and ultimately we are being disconnected from our everyday world. In art and interactive media, interacting with users is a great thing and which the industry mainly focuses on, but much more interaction and experience can be gained through the implementation of physical objects instead of devices or as the author called it, “pictures under glass”. This article misses one point though, which is how the interactive arts are slowly progressing in this digitalized world. While technological advancements are leading more individuals towards a less sensory-felt future, the interactive arts do a great job at maintaining and bringing back this solid element of touch and expressions felt through it. Many projects nowadays, within interactive art, incorporate the use of hands to produce an aesthetic picture, sound, etc. This is because these creators have realized the power of hands, and through the implementation of these hands towards their physical projects, users can connect on a much deeper level with the art piece. This means that humans are still capable of bringing forth the usage of hands and feeling nature, it’s just that this time, it’s in a very new form.

In the follow-up of the author to the public criticism, the author answers many of the comments left by the audience. I liked how he mentioned about the question “My child can’t tie his shoelaces, but can use the iPad”, and I would like to add more to his response. Let’s compare a world where a child, called child A, swipes left and right on an iPad to play games, and another world where a child, called child B, plays normal, physical toys. Child A would gain more knowledge than child B since they have access to a vast number of games and probably some educational content. One thing that child A will miss greatly though are the reflexes, feelings, and the overall growth of the body. Child A’s mind will greatly grow, but it can not surpass child B’s body growth. By body growth, I do not mean it in terms of height or physical features, but more towards the feelings of touch, balance of body and getting used to it, understanding and feeling different elements, learning about what’s harmful and what’s not. Experiences make a person much stronger and they can learn much faster than just consuming information. Child B will get hurt from time to time from playing physical games and doing other activities that require movement, but at least their body will get used to it, and they will learn about how to handle situations that are dangerous to them in a much effective manner compared to child A who is sitting in one place swiping left and right. In the long run, child A will suffer a lot in the real world since his foundations and reflexes are much weaker than Child B’s; which is why individuals should not discard this important tool of using hands to feel what’s around us rather than learning what’s dangerous and what is not through textbooks.

Week 9 Assignment: Crossroad Warning Sensors

Concept:

In this week’s assignment, I have utilized the analog output features. From all the knowledge that I have gained from the classes, I have decided to create a prototype that shows drivers how far they are from the crossroad walking area in front of the signals. I decided to pursue this assignment because I noticed that there are a lot of people who get way too close to the crossroad walking which will interfere with the individual’s path and can be dangerous in some instances. The way the prototype warns the drivers is by portraying an LED output under the signal for each lane, if the driver is at a good distance, it shows green and the closer they the color fades into yellow, and finally into the red region where if the driver gets too close to the crossroad, it will illuminate a bright red LED showing that they shouldn’t go anywhere after that point. If the driver goes into the red region, there’s an option for the pedestrians to click a button on the pole to warn the driver to back off by illuminating the red light.

Prototype:

I used the ultrasonic sensor to detect the distance, and a common cathode LED to create green, red, and yellow colors in one LED. For the pedestrian warning button, I used a push button that connects the circuit to an external LED which will switch on with each push of a button.

Code:

const int trigPin = 9;
const int echoPin = 10;
const int bluePin = 6;
const int greenPin = 5;
const int redPin = 3;

// Declare variables for LED colors
int redValue = 0;
int greenValue = 0;
int blueValue = 0;

void setup() {
//initiate pins as inputs and outputs depending on its application
  Serial.begin(9600);
  pinMode(trigPin, OUTPUT);
  pinMode(echoPin, INPUT);
  pinMode(redPin, OUTPUT);
  pinMode(greenPin, OUTPUT);
  pinMode(bluePin, OUTPUT);
}

void loop() {
//sends a short pulse of ultrasonic sensor and waits a bit then receives it
  digitalWrite(trigPin, LOW);
  delayMicroseconds(2);
  digitalWrite(trigPin, HIGH);
  delayMicroseconds(10);
  digitalWrite(trigPin, LOW);

//Time it takes for the pulse to travel back from the object
  long duration = pulseIn(echoPin, HIGH);
//Universal conversion of time into distance in cm
  int distance = duration * 0.034 / 2;
  int brightness = 0;

//If conditions to produce light at specific distances
 if (distance < 10) {
  brightness = map(distance, 3, 10, 255, 0);
  //RED COLOR
  analogWrite(redPin, brightness);
  analogWrite(greenPin, 0);
  analogWrite(bluePin, 0);

} else if (distance >= 10 && distance < 20) {
  brightness = map(distance, 10, 20, 0, 255);
  //YELLOW COLOR
  analogWrite(redPin, brightness);
  analogWrite(greenPin, brightness);
  analogWrite(bluePin, 0);

} else if (distance >= 20 && distance <= 50) {
  brightness = map(distance, 20, 50, 0, 255);
  //GREEN COLOR
  analogWrite(redPin, 0);
  analogWrite(greenPin, brightness);
  analogWrite(bluePin, 0);

} else {
  // Default color
  setColor(0, 0, 0);  
}

//output codes to know what distance I am at as well as the proportionate RGB color
  Serial.print("Distance: ");
  Serial.print(distance);
  Serial.print(" cm | RGB Color: ");
  Serial.print("R: ");
  Serial.print(redValue);
  Serial.print(" G: ");
  Serial.print(greenValue);
  Serial.print(" B: ");
  Serial.println(blueValue);

  delay(20);
}

Reflection:

Overall, I learned a lot about the use of analog inputs/outputs and how digital pins differentiate from analog ones. Some of the difficulties I have faced were probably more on the code than the setup. Such as the mapping of the distance of the ultrasonic sensor to the LED’s increasing/decreasing brightness. Another issue was the conversion of time into distance, after looking through Google, I found a universal conversion from the time measured in pulse to the distance in centimeters.


Week 9 Reading Reflection

“Physical Computing’s Greatest Hits(and Misses)” Reading:

To be able to mimic and replicate nature and our overall surroundings within the digital medium is a great feat that is achieved through Digital Computing. This means that we can react with these elements that will stimulate our senses and produce a certain feeling/reaction within us all from the comfort of our homes. As time passes, Physical Computing gets better after each iteration and ultimately builds upon one another to come up with a much better prototype that can effectively stimulate our senses and give us the feeling of joy or pleasure. In the article,“ Physical Computing’s Greatest Hits(and Misses)”, the author discusses various projects that are created through Physical Computing which has a much deeper, more real stimulation produced from the outcome.

A common example of an outcome of Physical Computing that the author discusses repeatedly is how music is produced. Most of them incorporate various elements, like hand movements to simulate different sounds, floor pads that produce different sounds, etc. This then gives us humans the power to create music and aesthetically pleasing pictures and portraits merely through simple code and common devices that incorporate sensors. One thing I noticed within these projects is the notion of “randomness”. No matter what the outcome of that specific project is, it always is created through human senses and human movements, and these movements are, more often than not, random. Ultimately, randomness plays a crucial role in producing music and art pieces that are not always thought of or aligned but still don’t fail to make us amazed, pleased emotionally, and maybe even relieved in some cases.

There’s a specific line within the text that caught my attention, “The most common mistake made by designers of this type of project is to confuse presence with attention. Presence is easy to sense, as described above. It’s harder to tell whether someone’s paying attention, though.” It’s important to keep in mind that no matter how hard these projects incorporate various sensors to stimulate our emotions and overall senses if the individual is not trying to emotionally connect with the piece, then it would come out as random rather than having a meaning. I discussed how randomness in pieces can have its beauty, but that beauty will only be able to be seen and heard if the individual is actually attempting to engage with the pieces instead of just playing around with them. instead of just randomly clicking every button on a canvas to produce sound, you can for instance think of creative ways to create pleasing music by clicking specific buttons in a sequence- that;s is what engaging means. In the instance of physical computing, human interaction is important, but human engagement and the notion of “attention” are also vital to reaching the ultimate goal of stimulating the senses.

“Making Interactive Art: Set the Stage, Then Shut Up and Listen” Reading:

In Tigoe’s article “Making Interactive Art: Set the Stage, Then Shut Up and Listen”, Tigoe discusses the difference between conventional artwork and contemporary artwork such as interactive artwork. In artworks like Mona Lisa for instance, individuals have an impression of the artwork and look at some elements within it like the color, opacity, story, etc. These elements are all static- as in they never change over time or at least their interpretation doesn’t have a vast difference. Whereas, in interactive artworks, individuals are fully immersed in the art piece and each can have their own whole different interpretation and emotional attachment to it. Interactive artworks can work negatively or very positively in spreading their message to individuals depending on their emotional level and relevancy to their experiences.

Tigoe shed light on the important aspect of having a conversation with the artwork, if users were given the entire script and what to do or what to think, then that interactive art piece would be more of a conventional art piece instead of one in which novel emotions and ideas are produced. In other words. We have physical computing that presents those art pieces, and then we have the element of “attention” that was mentioned in the previous text- which is the engagement of individuals with the art piece. While one may want to spread an important message to the community through their interactive artwork, doing so while giving very clear instructions on how to think and what to think will only ruin the entire experience and the entire element of interactivity. There’s a famous quote out there, “To each their own”, as in each person will have their unique interpretation even if it doesn’t reach the ultimate conclusion you want them to, and there’s nothing wrong with it since it is also an interpretation of the many interpretations of an art piece.