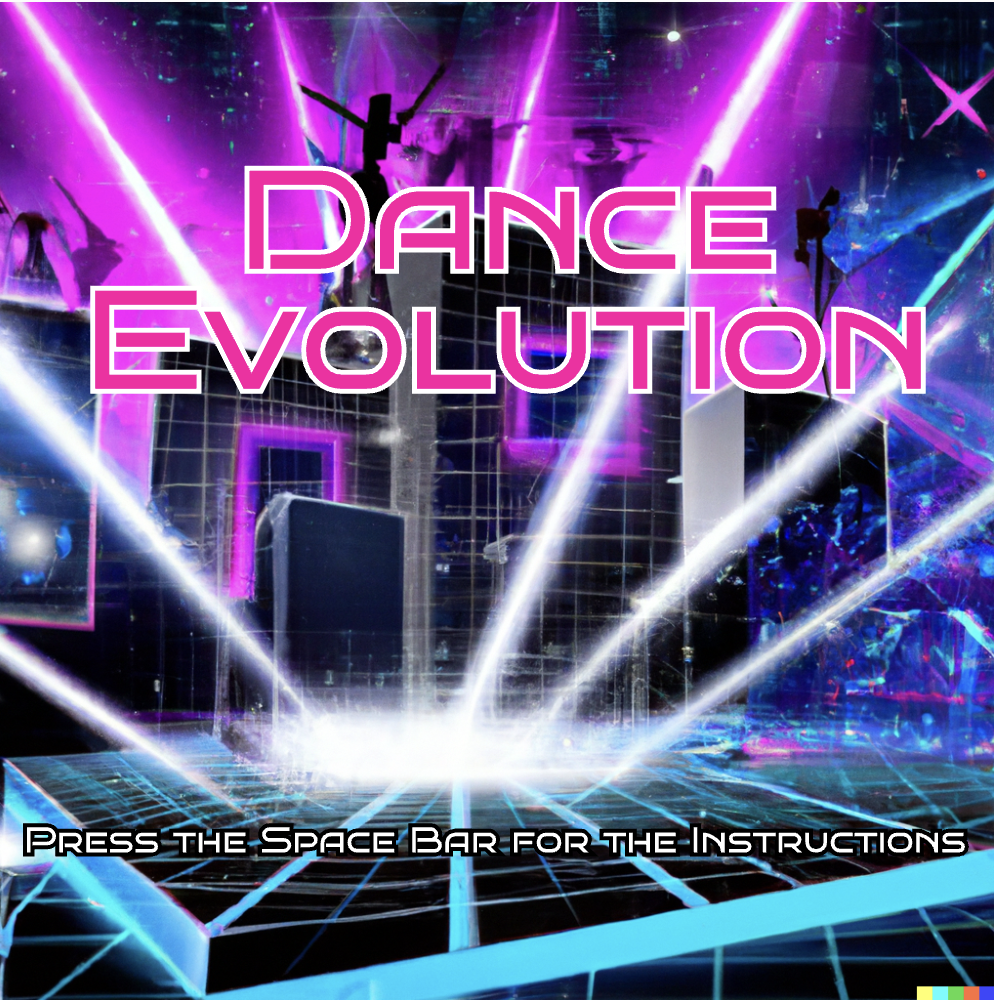
Concept:
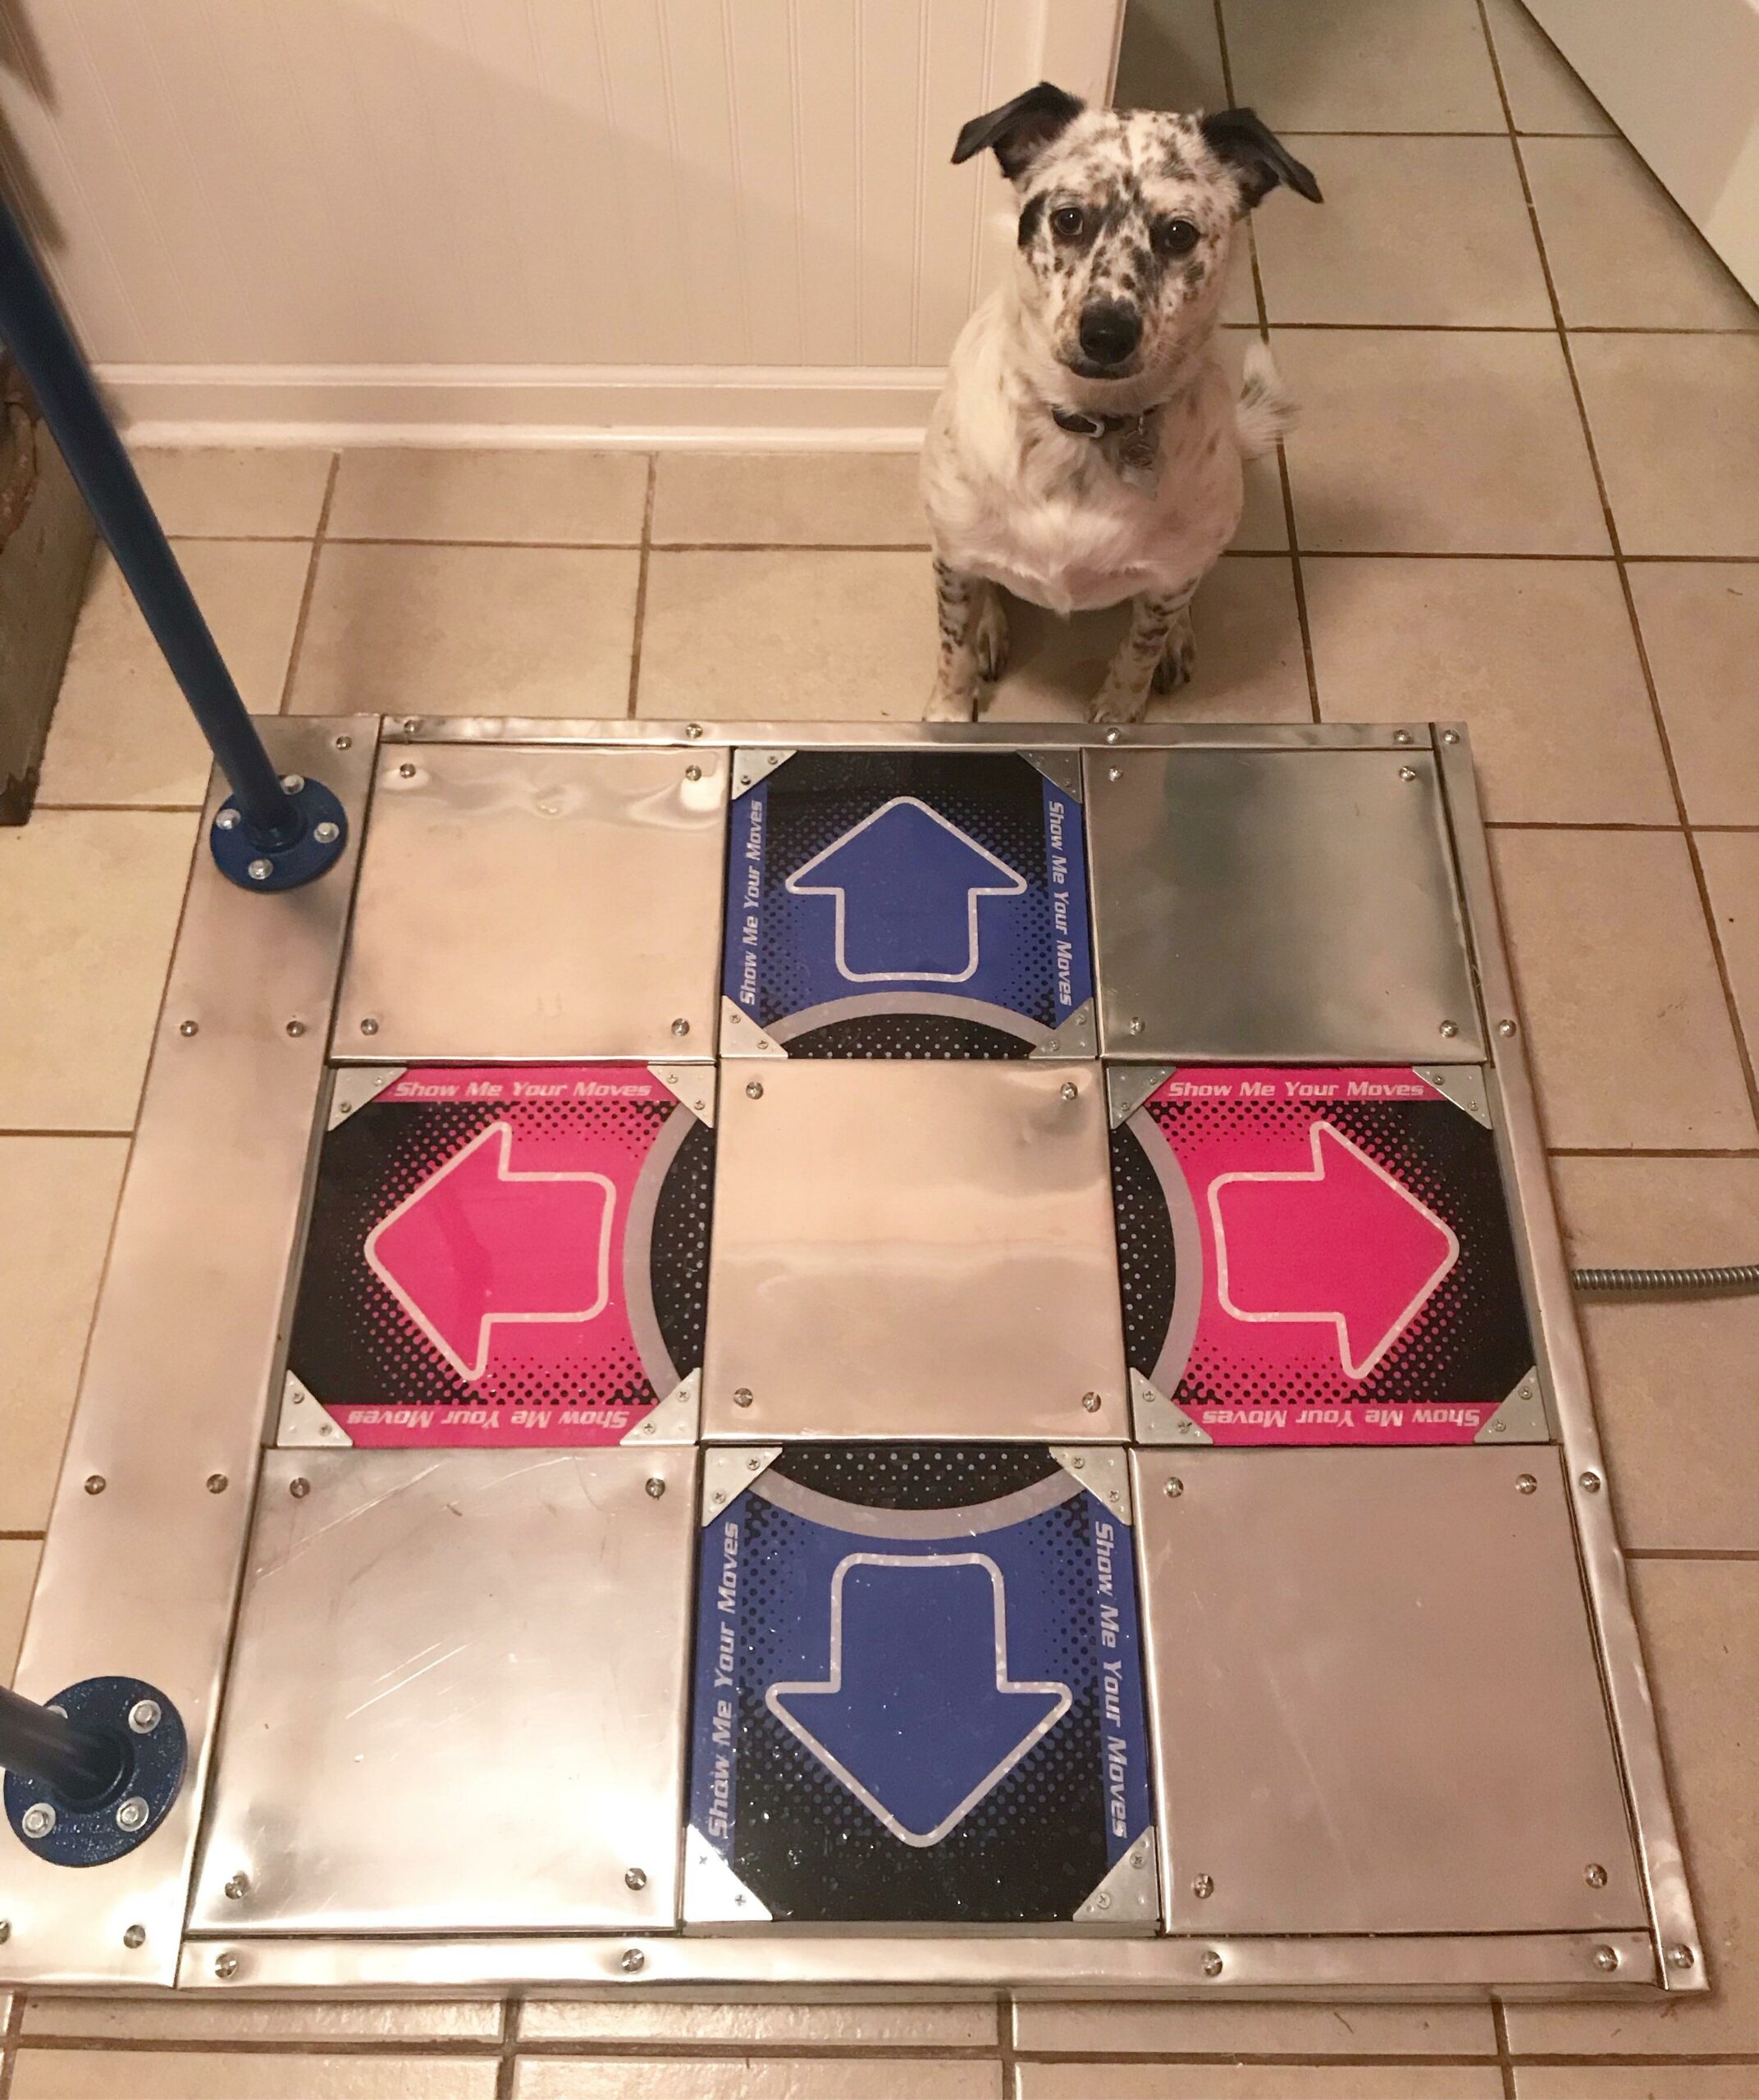
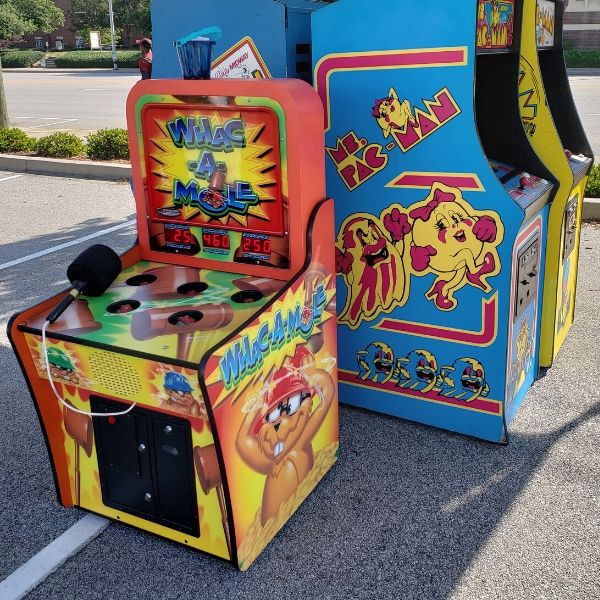
For my final project “Dance Evolution”, I decided to work on a “remake” of a famous Japanese video game called “Dance Revolution.” In this game, instead of being provided the music at the beginning, the user has to press on the tiles in order to generate and construct the music itself track by track. For each round, the user is shown an arrow pointing either to the left or to the right and they have to press on the respective tile in a timely manner, otherwise they lose. Them pressing on the tiles will start slowly “unlocking new tracks,” allowing them to construct the final song.
Implementation:
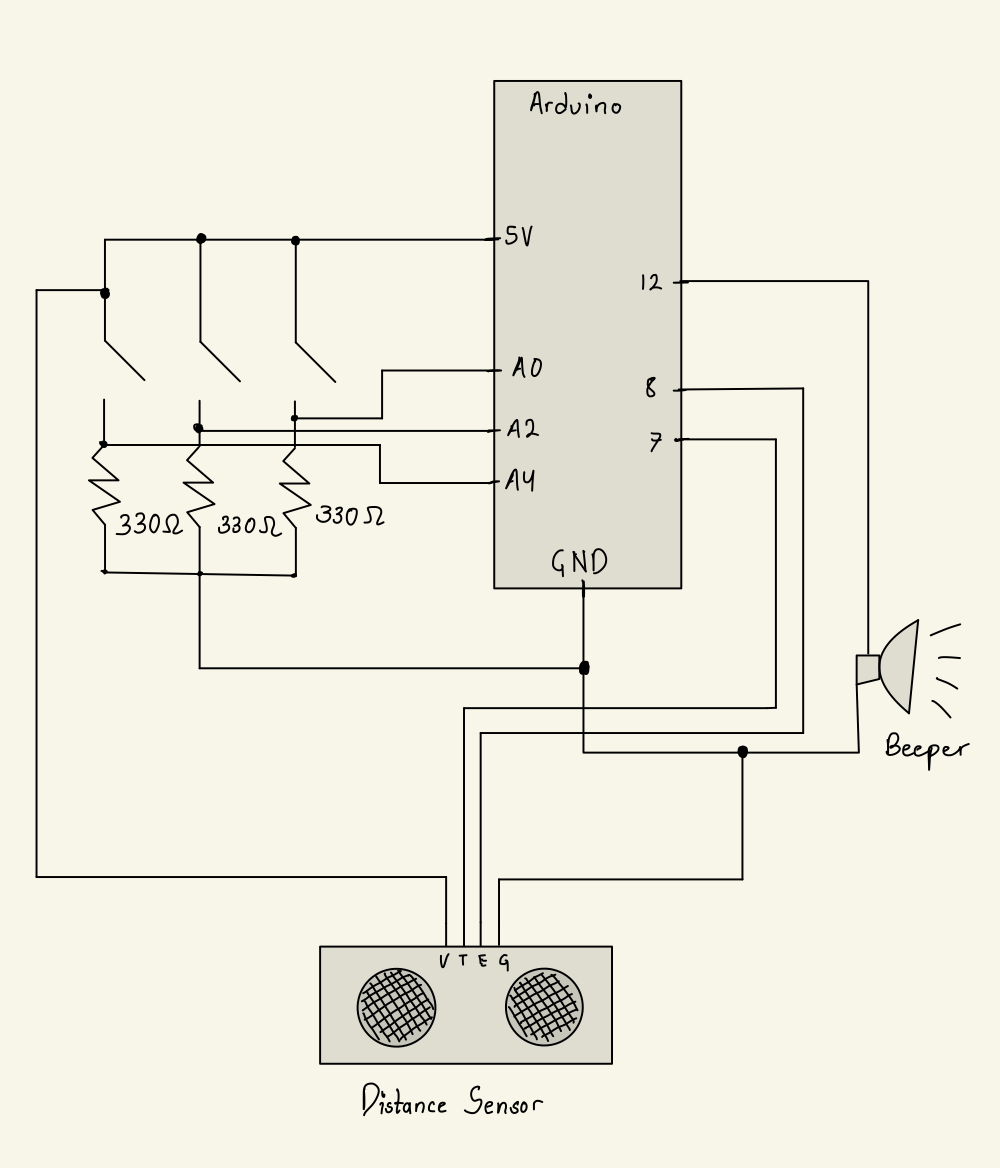
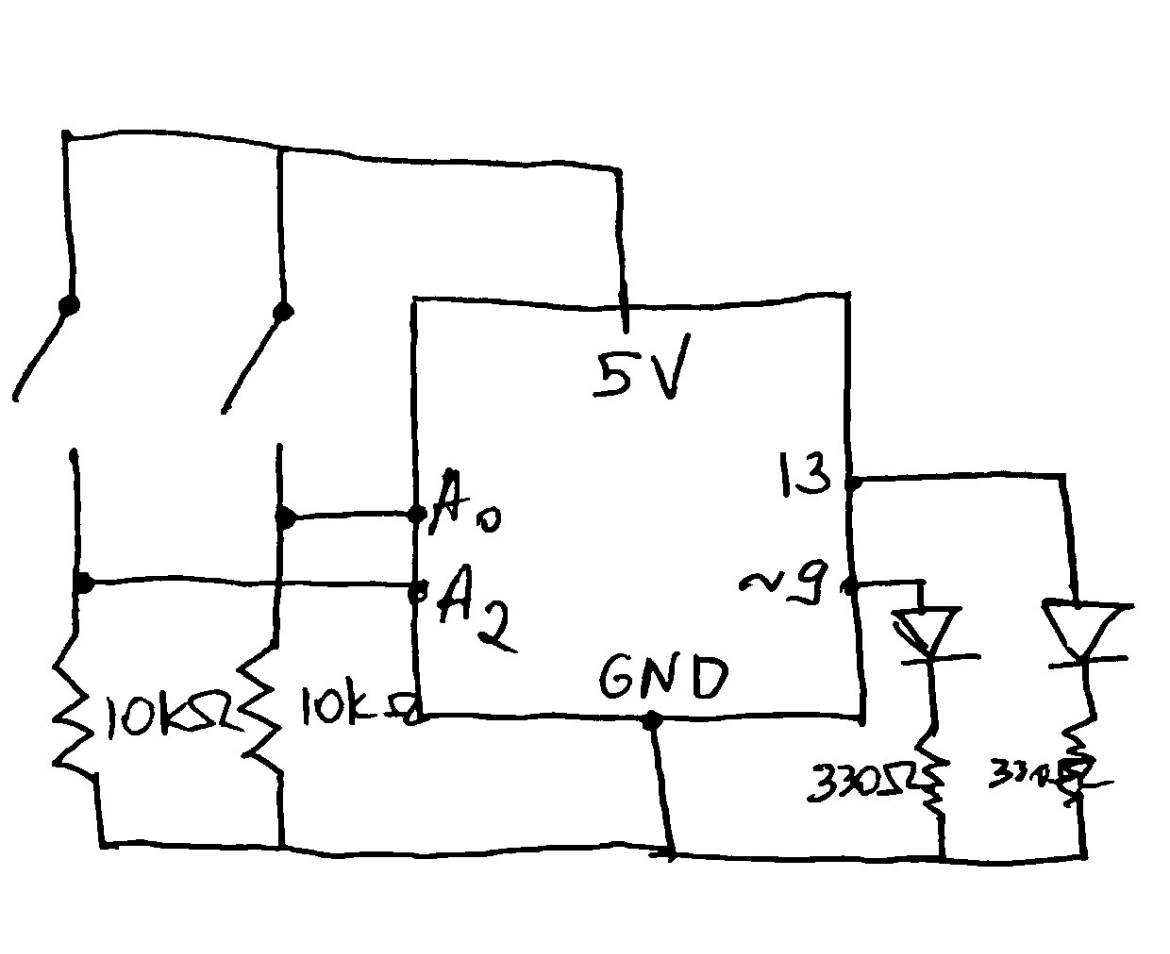
Arduino:
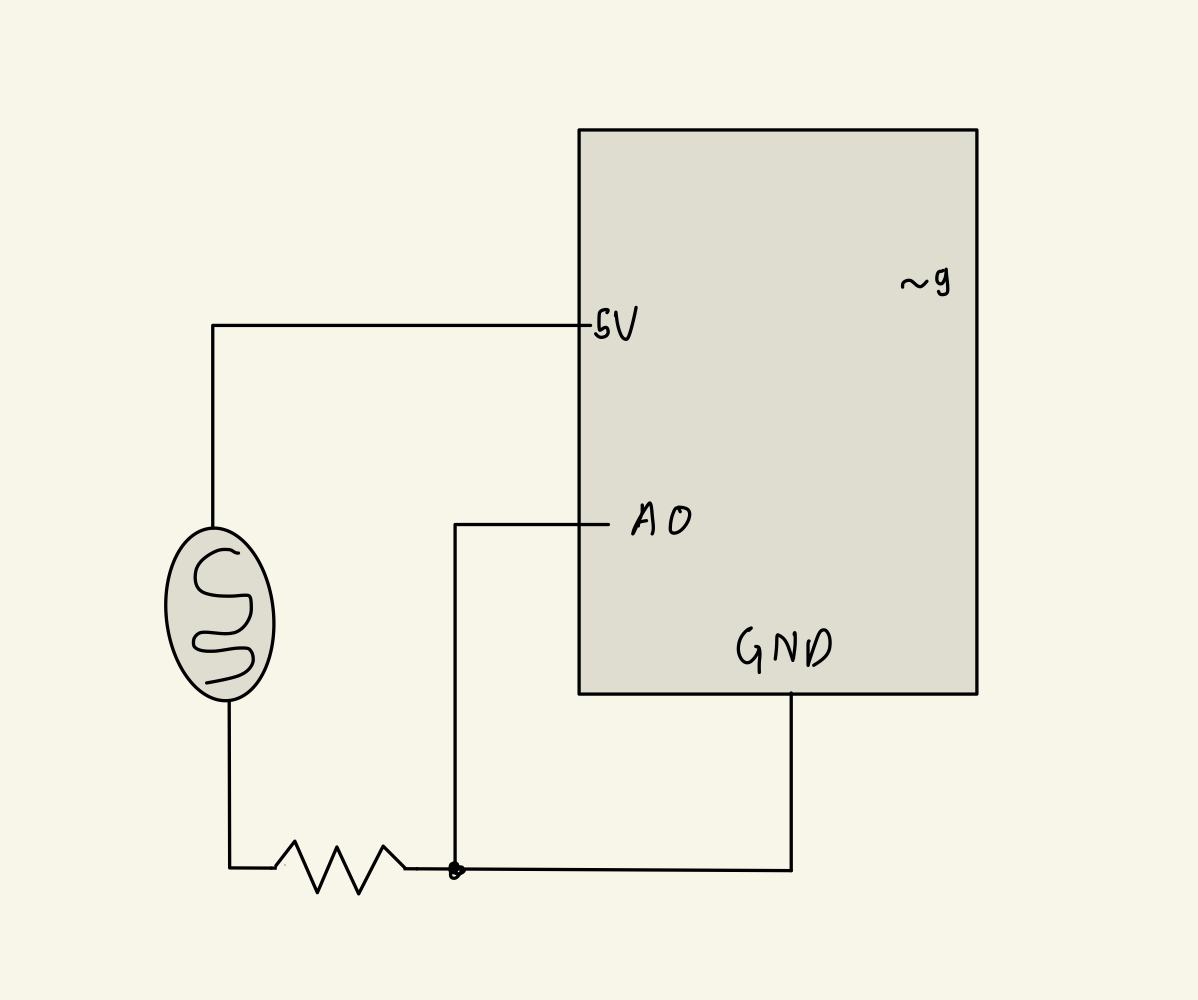
My Arduino board consisted of 3 force sensors. These would then trigger the work of p5js. However, an issue I faced for some time was that when the sensor was activated, Arduino would register multiple high values of the sensor, which was inconvenient specifically for my project as it would set off a chain of undesirable events. Therefore, when working on my Arduino board and code, I had to make sure I debounced the signal properly so that it only registered the activation only once when the sensor is pressed.
p5.js:
Initially, I thought that the p5.js implementation of the project would be straightforward. However, I encountered a variety of different issues that made me change my approach to making this game. Firstly, I was unable to properly play the sounds of my tracks when the sensors were pressed. It was very difficult to come up with an algorithm in which the activation of a sensor would lead to the playing of a track in a way that matches the other tracks (that may already be played) rhythmically. Therefore, I decided to play all the tracks in the setup and simply unmute each track when the sensor is triggered.
My p5.js code would take in the values of the sensor, or more specifically “signs” from the Arduino that the sensor was pressed and reached its maximum value, and would use that in order to generate new rounds of the game. My biggest obstacle throughout this process was creating an algorithm that would a) randomly pick between the two different images of arrows, b) make the user go from one round to the other, c) have the pictures be timed so that if the sensor is activated late, the user loses, etc. However, mainly through the usage of the “millis()” function, I was able to tackle these issues.
Code:
p5.js:
let bg;

//variables for all the musical tracks

let bass;

let hat;

let kick;

let snare;

let synth;

let strings;

let vox1;

let vox2;

let now; //variable that trackes the time every time the user presses on a button

let gameStartTime; //tracks the beginning of each round

let sensorValue;

let middleSensorVal;//value of the sensors that p5js receives from Arduino

let gameState = "start"; // Can be 'start', 'playing', 'end'

let threshold = 5000; //the value for the first arrow that appears

let num = 0; //the value that activates the different cases

let arrowImage = []; //an array that holds the values of the images of the arrows

let randomIndex; //selects a random image from an array

function preload() {
  vox1 = loadSound("vox_1.mp3");

  kick = loadSound("kick.mp3");

  vox2 = loadSound("vox_2.mp3");

  snare = loadSound("snare.mp3");

  bass = loadSound("hat.mp3");

  strings = loadSound("strings.mp3");

  synth = loadSound("synth.mp3");

  hat = loadSound("hat.mp3");

  bg = loadImage("background_image.png");

  arrowImage.push(loadImage("rightArrow.png"));
  arrowImage.push(loadImage("leftArrow.png")); //pushing the images into the array

  bruno = loadFont("BrunoAceSC-Regular.ttf"); //loading the font of the game
}

function setup() {
  createCanvas(windowWidth, windowHeight);
  textAlign(CENTER);
  imageMode(CENTER);

  //playing all the tracks during setup and muting each track

  vox1.setVolume(0);
  vox1.play();
  vox1.loop();

  vox2.play();
  vox2.setVolume(0);
  vox2.loop();

  strings.play();
  strings.setVolume(0);
  strings.loop();

  snare.play();
  snare.setVolume(0);
  snare.loop();

  synth.play();
  synth.setVolume(0);
  synth.loop();

  kick.play();
  kick.setVolume(0);
  kick.loop();

  bass.play();
  bass.setVolume(0);
  bass.loop();

  hat.play();
  hat.setVolume(0);
  hat.loop();
}

function draw() {
  background(220);
  image(bg, width / 2, height / 2, width, height);

  //assigning different functions to different states of the game

  if (gameState == "start") {
    drawMainPage();
  } else if (gameState == "instructions") {
    drawInstructions();
  } else if (gameState == "playing") {
    drawGame();
  } else if (gameState == "win") {
    drawWinScreen();
  } else if (gameState == "loss") {
    drawLossScreen();
  }
}

function windowResized() {
  resizeCanvas(windowWidth, windowHeight);
}

function drawMainPage() {
  textSize(70);
  fill("rgb(255,0,163)");
  stroke(255);
  strokeWeight(5);
  textWrap(WORD);
  textFont(bruno);
  text("Dance Evolution", width / 2, height / 5, width / 13);

  textSize(18);
  fill("white");
  stroke(0);
  strokeWeight(4);
  textFont(bruno);
  text("Press the Space Bar for the Instructions", width / 2, height / 1.2);
}

//setting up the serial connection

function keyPressed() {
  if (key == " ") {
    setUpSerial();
    gameState = "instructions";
  }
}

function drawInstructions() {
  textSize(60);
  fill("rgb(255,0,163)");
  stroke(255);
  strokeWeight(5);
  textWrap(WORD);
  textFont(bruno);
  text("Instructions", width / 2, height / 5);

  textWrap(WORD);
  textSize(16);
  stroke(0);
  strokeWeight(3);
  fill(255);
  textFont(bruno);
  text(
    "Once you start the game, you will see an arrow. Wherever the arrow points, that's the tile you should click on. Once you click on the tile, you will hear a track playing. Below the picture of the arrow, you will see the number of seconds you are given for each round. If you don't press the tile in time, you LOSE! If you manage to press on all the arrows on time and play all the tracks, you WIN!",
    0,
    height/2.5,
    width
  );

  textSize(18);
  fill("white");
  stroke(0);
  strokeWeight(4);
  textFont(bruno);
  text("Step on the Tile in the Middle to Play!", width / 2, height / 1.2);

  if (middleSensorVal == 1023) {
    gameState = "playing";
    restartRound(); //begins the game when the button is pressed
  }
}

function drawGame() {
  textSize(60);
  fill("rgb(255,0,163)");
  stroke(255);
  strokeWeight(5);
  textWrap(WORD);
  textFont(bruno);
  text("DANCE!", width / 2, height / 6.5);

  //tracking to see if the time that passed since the start of the round is less than the time the threshold

  if (millisInGame() < threshold && num < 8) {
    image(arrowImage[randomIndex], width / 2, height / 2, width/2, height/2);

    fill(255);
    strokeWeight(0);
    text(
      round(millisInGame() / 1000) + "/" + round(threshold / 1000) + " s",
      width / 2,
      height / 1.15
    );
  }

  //assigning the conditions for loss

  if (millisInGame() > threshold && num < 8) {
    gameState = "loss";
  }

  if (sensorValue === 1023 && num < 9) {
    num++;
    console.log(num);
    restartRound();
    threshold = threshold * 0.92;
    console.log(threshold);
    flag = true;
  }

  if (num == 8) {
    drawWinScreen();
  }

  switch (num) {
    case 0:
      break;
    case 1:
      vox1.setVolume(0.2);
      break;
    case 2:
      vox2.setVolume(0.2);
      break;
    case 3:
      kick.setVolume(0.2);
      break;
    case 4:
      bass.setVolume(0.2);
      break;
    case 5:
      snare.setVolume(0.2);
      break;
    case 6:
      hat.setVolume(0.2);
      break;
    case 7:
      synth.setVolume(0.2);
      break;
    case 8:
      strings.setVolume(0.2);
      break;
  }
}

function drawWinScreen() {
  background(220);
  image(bg, width / 2, height / 2, width, height);

  textSize(40);
  fill("rgb(255,0,163)");
  stroke(255);
  strokeWeight(5);
  textWrap(WORD);
  textFont(bruno);
  text("CONGRATULATIONS", width / 2, height / 5);

  textSize(18);
  fill("white");
  stroke(0);
  strokeWeight(4);
  textFont(bruno);
  text("Step on the tile in the middle to RESTART!", width / 2, height / 1.2);

  //restarting the game when the middle sensor is played

  if (middleSensorVal == 1023) {
    gameState = "instructions";
    vox1.setVolume(0);
    vox2.setVolume(0);
    strings.setVolume(0);
    snare.setVolume(0);
    synth.setVolume(0);
    kick.setVolume(0);
    bass.setVolume(0);
    hat.setVolume(0);
    num = 0;
    threshold = 5000;
  }
}

//tracking the start time of each round and generating an index to then randomly generate an image from the array

function restartRound() {
  now = millis();
  gameStartTime = now;

  randomIndex = floor(random(arrowImage.length));
}

//tracking the difference between the current time and the moment when the game started

function millisInGame() {
  return millis() - gameStartTime;
}

function drawLossScreen() {
  textSize(60);
  fill("rgb(255,0,163)");
  stroke(255);
  strokeWeight(5);
  textWrap(WORD);
  textFont(bruno);
  text("LOSS", width / 2, height / 5);

  if (middleSensorVal == 1023) {
    gameState = "instructions";
    vox1.setVolume(0);
    vox2.setVolume(0);
    strings.setVolume(0);
    snare.setVolume(0);
    synth.setVolume(0);
    kick.setVolume(0);
    bass.setVolume(0);
    hat.setVolume(0);
    num = 0;
    threshold = 5000;
  }

  textSize(18);
  fill("white");
  stroke(0);
  strokeWeight(4);
  textFont(bruno);
  text("Step on the tile in the middle to RESTART!", width / 2, height / 1.2);
}

//receiving the information from the Arduino

function readSerial(data) {
  if (data != null) {
    let fromArduino = split(trim(data), ",");

    if (fromArduino.length == 2) {

      middleSensorVal = int(fromArduino[0]);
      sensorValue = int(fromArduino[1]);

    }
  }
}

function keyTyped() {
  if (key === 'f') {
    toggleFullscreen();
  }
}
function toggleFullscreen() {
  let fs = fullscreen();
  fullscreen(!fs);
}
Arduino
const int leftPSensor = A0;
const int rightPSensor = A1;
const int middleSensor = A2;

int lastSensorStateLeft = 0;
int lastSensorStateMiddle = 0;

int threshold = 1022;

bool flag = false;

int rightPressureVal;
int leftPressureVal;
int middleSensorVal;

void setup() {

  pinMode(leftPSensor, INPUT);
  pinMode(rightPSensor, INPUT);
  pinMode(middleSensor, INPUT);
  Serial.begin(4800);
}

void loop() {

  leftPressureVal = analogRead(leftPSensor);
  rightPressureVal = analogRead(rightPSensor);
  middleSensorVal = analogRead(middleSensor);


  if (leftPressureVal < threshold && rightPressureVal < threshold && middleSensorVal < threshold) {
    flag = true;
  }

  if (flag == true && (leftPressureVal == 1023 || rightPressureVal == 1023)) {
      lastSensorStateLeft = 1023;
      flag = false;
    delay(300);
  } else {
    lastSensorStateLeft = 0;
  }

  if (flag == true && middleSensorVal == 1023) {
      lastSensorStateMiddle = 1023;
      flag = false;
      delay(300);
  } else {
    lastSensorStateMiddle = 0;
  }

  Serial.print(lastSensorStateMiddle);
  Serial.print(", ");
  Serial.println(lastSensorStateLeft);
}
Communication:
The communication between Arduino and p5.js proved to be a difficulty. As mentioned earlier, I tackled the issue of multiple registrations of the activation of the sender by debouncing it and ensuring that the value of the sensor is sent to p5js only once. However, when that was happening, despite p5.js recognizing the value, it would simply ignore it, even though it was clearly instructed to carry out an operation with the value. After some time, I realized that this issue could be resolved by decreasing the baud rate from 9600 to 4800 on both p5js and Arduino, which would allow p5js to recognize the one, small “1023” value that gets lost in a fast stream of values that are being received from Arduino. This was very helpful as it fixed the issue and ensured the smooth operation of the game.
Future improvements:
With this project, I am proud that it ultimately became what I envisioned, albeit with some limitations. I am proud of the algorithm that I used for flipping through rounds using the sensor and playing the different tracks themselves.
In the future I want to make sure there is more randomness to the process in terms of the different tracks that are played because as of now, the tracks are played in the same order. I also want to add different levels of difficulty where the user can choose to make the time given for their step on the tiles shorter. Finally, I want to improve the p5.js – Arduino communication in order to make sure that the user does not have to press on the tiles a few times for the value to be registered, which is an issue I observe currently.
Video:
User Testing:
I conducted user testing on one of my friends, whom I did not have explain the Instructions to. According to him, the instructions were clear. Despite that, he still struggled at times with clicking on the tiles as they would take a few tries for the value to be received by p5.js. All in all, however, he claimed that the game is fairly easy to understand.