Final Project – Saeed Lootah

Russian Roulette Final Project

To summarize this project was about making a game that was like Russian Roulette but without the gun. Instead two players would stand opposite each other and would have two options. First there is a “gun” (it just exists in the p5js sketch) that is loaded with a certain amount of live rounds and the rest are blank and then like the real Russian Roulette each player would get chances to shoot the other opponent or not or shoot themselves. If a player shoots themselves and its a blank then they get another turn making it more likely that the next round will be live and hence more likely that they will win and if they do shoot the other player and it is blank then their turn ends and they swap and the cycle continues. There is also 3 lives for each player and if one of them loses, i.e. runs out of lives they have to use a shock pen. The purpose of the shock pen was to create some kind of stakes just like the real Russian Roulette but more sane.

To me this project represents more than a fun creation. Genuinely, while I did enjoy it this was a huge learning experience and not just when it came to coding and soldering and whatever other physical things I did. I’ll explain how so as I go from beginning to end.

I originally had this idea before the midterm and I thought about creating a Russian roulette for my midterm. I chose a different path and made a Mexican Standoff game for my midterm. It was arguably slightly harder to make and for me going into it I really had little idea what I was doing. I learned how to change from different scenes (thanks to Pi telling me about a scene management class), but more importantly I learned a lot about planning as halfway through making it I had to sit down and I sketched a diagram of what I wanted the game to be like on a whiteboard in a library study room.

So in the midterm I just began to plan things properly and I wasn’t very efficient at it. So going into this project I also planned but unlike before I also had to consider the physical: Making and wiring all the components that I’ll need. Even planning it was difficult to be honest. Difficult because I didn’t really know where to start but also I didn’t know what was available in the intro to IM lab. I was very fortunate to learn more about what was available through our lessons where we learned about renting equipment but also saw the different sections in the lab, like the consumables or the blue closet (i dont know if it has a name).

Then when I had to start I had to learn serial communication. I think a lot of people can agree when I say it was very confusing and I would argue it remained a problem with my project from beginning to end even though I thought I understood it at the beginning. That was the biggest hurdle by far mentally because it had been bothering me for a couple days before because when I would go to try to understand the code from professor Aaron and change it to fit my project (4 buttons, a potentiometer and 2 LEDs) it wouldn’t work even though just before that it I felt I understood it when working with Snehil and Khalifa on the previous assignment.

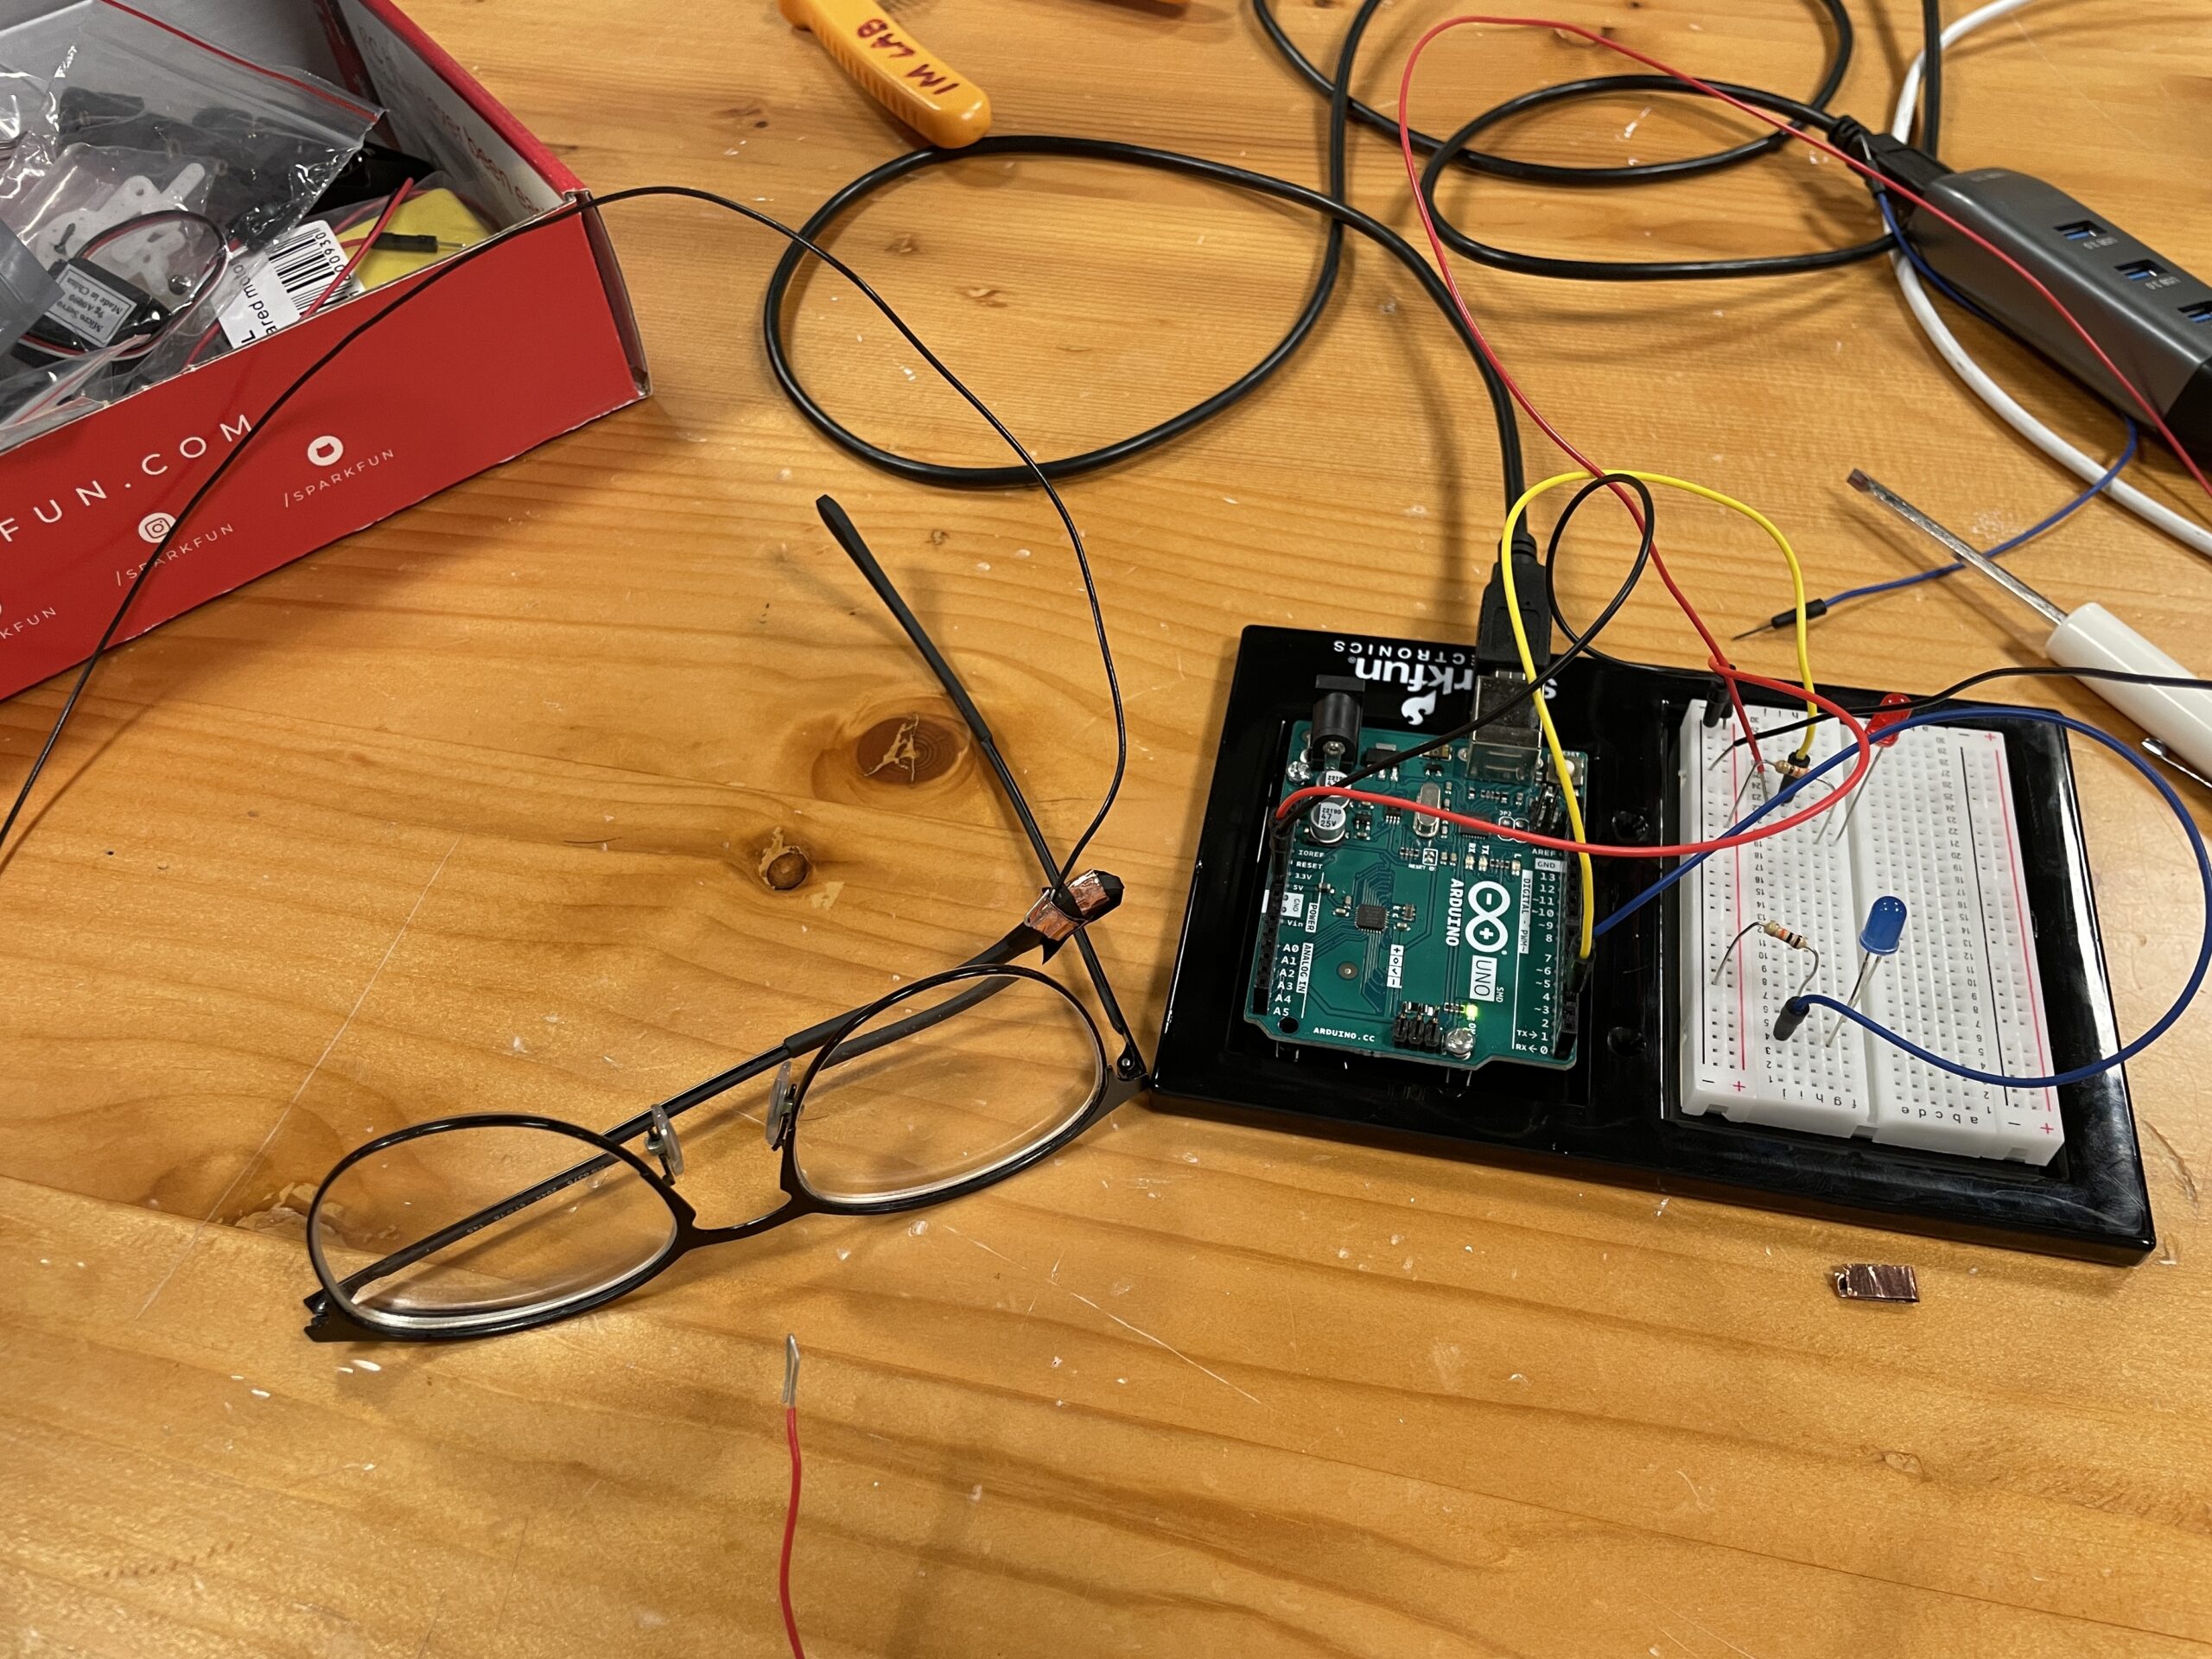
  • Include some pictures / video of your project interaction
  • How does the implementation work?
    • Description of interaction design
    • Description of Arduino code and include or link to full Arduino sketch
    • Description of p5.js code and embed p5.js sketch in post
    • Description of communication between Arduino and p5.js
  • What are some aspects of the project that you’re particularly proud of?
  • What are some areas for future improvement?

The way that my project works is first that the Arduino detects the button presses from each of the four buttons as well as the input from the potentiometer. Then using serial communication the Arduino sends the signals received from the buttons and potentiometer to the p5js sketch and in response the sketch relays back a message to create a handshake.

The p5js code is slightly more complex. First I have multiple scenes each of which managed by a scene management class where depending on the number that the class receives it calls on different functions, each of those functions are actually the scenes. For example the disclaimer scene is actually just a function which has all the shapes and so on being drawn and the function itself is only called upon when the scene number is 2. The same goes for the other scenes. As for the game itself: Firstly, after the animation there is an array of booleans totaling 6. If an element is true it means it is a live round and vice versa and then there is another global variable called selected_round and that is added up incrementally to signify which round is being selected from the chamber. As for the players, they have two options represented as two buttons. One button (the red one) means that the player can shoot themselves, and the other (the blue button) means that the player can shoot the other person in front of them. If the player chooses to shoot themselves and it’s a blank then it remains their turn and makes it more likely that the next round will be live and hence more likely that they can win the round. However, if a player chooses to shoot the other but it’s blank they switch turns making the odds in the favor of the other player as its now more likely for them that the next round is live. Furthermore, I added difficulties which means that depending on the difficulty chosen by the player there will be a varying amount of live rounds with the easiest difficulty being “Standard” which means only one live round, and the hardest being “Masochist” which can have between 3 and 5. Each of the players have 3 lives, then at the end of it all, if they choose to the loser has to use a shock pen so that there are stakes and to make the game more interesting.

I’m particularly proud of the UI elements, specifically holding down a button to go to the next page and so on. To me it felt the most satisfying.

For the future there are a lot of things I would change. I would have started by making the game aspect first, as I had made the mistake of starting at the start page ironically. This would have made my life a lot easier but at the same time I am somewhat glad that I did what I did because I felt that the UI was a large part of what I liked and I hope others liked about the game.


The sketch on p5js may be a bit weird because I had coded it on vscode and made it such that the canvas fit my mac screen so it may take a while to load and/or may be hard to use.
 

Final Final Project Proposal – Week 12

Safe Russian Roulette

Introduction

After having done a bit more research and some more ideation I am now sure of what I am going to create exactly. Of course there may be some changes down the road but the project should be at least 90% like what I’m going to outline here.

Inspiration

I originally had this idea before the midterm and it was going to be my midterm project but instead I changed it to the Mexican Standoff game. But, what I really wanted to do for both of these projects is make a game or anything that was interactive but that allowed for at least two people to enjoy the experience together.

I had been inspired by the indie game Buckshot Roulette as well. It’s a game where the player plays against a strange looking dealer who has lives and so does the player and the lives are represented by lightning bolts and there are abilities as well which makes the game more tactical. I wanted to almost recreate the game or at least the aesthetic but for now I will not do the abilities since I need to at least finish the foundation, i.e. just normal Russian Roulette.

The lightning bolts representing the lives of both the dealer and the player were done because each of them could be revived with a defibrillator. It was the lightning bolts themselves which lead to me having the idea of a player receiving an electric shock.

Then having the lives and a little menu on the side of the table inspired me to have a p5js sketch which can has a similar aesthetic.

How Russian Roulette works
& How this game will work

In the real game of Russian Roulette a revolver would be loaded with one live round and then the rest would either be empty or blanks.

In Safe Russian Roulette there will also be at least one live “round” and the rest are blanks, totaling 6 rounds. Depending on the difficulty chosen there will be between 1-5 rounds that are live. The names of the difficulties in ascending order are Standard (1 live round), Hard (1-2 live round), Harder (1-3 live rounds), Nearly Impossible (2-4 live rounds), Masochist (3-5 live rounds)

There will be 2 buttons for each player to press to either shoot themselves or the other. When the player shoots themselves they may either shock themselves or it may be a blank. If its a live round they lose and if its a blank they get a second turn which means its more likely that the next round will be live and therefore more likely that they will win if they shoot the other player. Each player has one life. Basically its a game of chance.

Before the players start shocking each other they will be greeted with a start page. There will be a potentiometer or knob of some kind and a button and together the user can select different options that are displayed using p5js. Options such as difficulty and retry.

There will also be some kind of lights that flash in a certain way which are in the middle of the table. It will display the number of live and blank rounds at the beginning (it can change color, red = live, white = blank) then, depending on the difficulty, it will either disappear completely, or it will show the number of rounds remaining but it will never show the number of live or blank rounds left, just the number of rounds left at most.

Then after one of the players lose it will indicate on the play screen who won and who lost and then ask the players if they want to play again or not. Also, during the game while the players are playing it will indicate the difficulty that the players are playing at so that others can see and in case they forgot.

Reading Reflection – Week 12

Personally, I liked this reading. The article Design meets Disability, mentions points which I hadn’t previously considered but are intuitive. While the author gave multiple examples of designs that were made to be more accessible while not highlighting one’s disability there were a few that stood out to me.

The most obvious product which is meant to help people with a disability are glasses. Like the article mentioned people don’t view glasses the same way as a wheelchair or a crutch or an arm sling. People see glasses as aesthetically appealing and as someone that wears glasses I haven’t seen as it as a disability either. I believe that the reason for this is mostly that glasses are very commonplace but that also they can be both aesthetically appealing and discrete.

The theme of aesthetically appealing and discrete is consistent for designs that are meant to also help those with a disability. The author mentioned the iPod but really it made me consider a previous reading we had. The previous reading discussed how something that is aesthetically appealing can be helpful for creativity and that people are willing to overlook small details. I wondered if a product that may not be as technically advanced as another can still sell more if the user-experience is far greater. I think this has already been shown to be the case with the Macintosh, and Macs in general, but also the iPhone which has a cult-following (including myself). While some people stick to the iPhone because of the apple ecosystem being very convenient I think a lot of people (and I am speaking from anecdotal experiences) like the user-interface both because it is intuitive and aesthetically appealing whilst being discrete, and because they have been using it for such a long time that it’s inconvenient to change. Many android phones have better features and some are cheaper and yet people, like myself, still choose to buy an iPhone.

Going into the final project now I want to try to make the design aesthetically appealing and keep certain parts discrete depending on the function. For example any buttons or switches that should be used by the players will be easy to see and everything else will hopefully add to the aesthetic whilst not being distracting. Hopefully I can have this done before user-testing so that I can change it before the final deadline if needed.

Final Project Proposal – Saeed Lootah

Russian Roulette

Introduction

Going into the final project I had a few ideas, some of which I had before the midterm. One of the ideas I had was Russian Roulette, but you get electrocuted instead of getting shot. I felt this was a much safer way of playing Russian Roulette whilst also giving each player the chance to play again if they want to. I chose electrocution because I felt the game still needed some kind of stake, otherwise it’s not nearly as exciting.

Outline

The plan is to have a two player game where each player sits across from the other on a table. To the side of the table is a screen which displays the number of lives each player has as well as an animation that will play when the round starts, when the “gun” is shot, and when the shot is a blank. The screen will also display information about who’s turn it is, and also will allow the players to see a tutorial and also allow the players to play another round. In the game there wont be a physical gun as such, the players will use buttons to control who to electrocute, themselves or the the other person, and sometimes it will be a blank. I may represent the bullets as resistors in any of the drawings just to add to the effect of Russian roulette. As for the electrocution: There will be a device upon which the player will place their hand and in the event that the player will be electrocuted the device will only deliver a small electric shock. I will not make this device myself (I do not trust myself, nor am I willing to test it), so I will search, as I already have been doing, for a small device which can deliver a small, harmless, electric shock.

Side note: The game will be properly labeled with safety signs to indicate that only people above the age of 18 can play and that there are electric shocks involved.

Week 11 Music – Saeed, Khalifa, Jihad

Concept:

The concept of this project was to create a mini drum pad, or what is equivalent to one, with the hardware we have available. The device would use buttons to trigger different buzzer sounds, mimicking the functionality of a traditional drum pad. Each button on the device would correspond to a different sound, with the frequency of these sounds adjustable via a potentiometer. This allows the user to modify the pitch of the tones.

Code:

// Defining pins assignments for buttons and buzzers
const int buttonPin1 = 2;
const int buttonPin2 = 3;
const int buttonPin3 = 4;
// Coded with the Aid of ChatGPT
const int buttonPin4 = 5; // Monitoring and playbacks button
// Coded with the Aid of ChatGPT
const int buzzerPin1 = 8;
const int buzzerPin2 = 9;
const int buzzerPin3 = 10;
const int potPin = A0; // Potentiometer connected to A0 for frequency control

// Variables to manage button states and debounce timing
int buttonState1 = 0;
int lastButtonState1 = 0;
int buttonState2 = 0;
int lastButtonState2 = 0;
int buttonState3 = 0;
int lastButtonState3 = 0;
int buttonState4 = 0;
int lastButtonState4 = 0;

unsigned long lastDebounceTime1 = 0;
unsigned long lastDebounceTime2 = 0;
unsigned long lastDebounceTime3 = 0;
unsigned long lastDebounceTime4 = 0;
unsigned long debounceDelay = 50; // Debounce delay in milliseconds

// Struct to hold buzzer activation data including the pin and frequency
struct BuzzerAction {
  int buzzerPin;
  int frequency;
};

// Coded with the Aid of ChatGPT
BuzzerAction record[100]; // Array to store each buzzer activation
int recordIndex = 0; // Index for recording array
//Coded with the Aid of ChatGPT

void setup() {
  // Initialize all button and buzzer pins
  pinMode(buttonPin1, INPUT);
  pinMode(buttonPin2, INPUT);
  pinMode(buttonPin3, INPUT);
// Coded with the Aid of ChatGPT
  pinMode(buttonPin4, INPUT);
// Coded with the Aid of ChatGPT
  pinMode(buzzerPin1, OUTPUT);
  pinMode(buzzerPin2, OUTPUT);
  pinMode(buzzerPin3, OUTPUT);
  pinMode(potPin, INPUT); // Setups potentiometer pin as input
}

void loop() {
  // Reads current state of buttons
  int reading1 = digitalRead(buttonPin1);
  int reading2 = digitalRead(buttonPin2);
  int reading3 = digitalRead(buttonPin3);
// Coded with the Aid of ChatGPT
  int reading4 = digitalRead(buttonPin4);
// Coded with the Aid of ChatGPT
  int potValue = analogRead(potPin); // Reads potentiometer value
  int frequency = map(potValue, 0, 1023, 200, 2000); // Maps potentiometer value to frequency range

  // Handle button 1 press and recording
  debounceAndRecord(reading1, &lastButtonState1, &buttonState1, &lastDebounceTime1, buzzerPin1, frequency);

  // Handle button 2 press and recording
  debounceAndRecord(reading2, &lastButtonState2, &buttonState2, &lastDebounceTime2, buzzerPin2, frequency);

  // Handle button 3 press and recording
  debounceAndRecord(reading3, &lastButtonState3, &buttonState3, &lastDebounceTime3, buzzerPin3, frequency);

  // Handles button 4 for playback
  if (reading4 != lastButtonState4) {
    lastDebounceTime4 = millis();
  }
  if ((millis() - lastDebounceTime4) > debounceDelay) {
    if (reading4 != buttonState4) {
      buttonState4 = reading4;
      if (buttonState4 == HIGH) {
        for (int i = 0; i < recordIndex; i++) {
          // Play each recorded buzzer action with the specific frequency recorded
          tone(record[i].buzzerPin, record[i].frequency, 200);
          delay(250); // Short delay between each buzzer action for clarity
        }
        recordIndex = 0; // Resets record index after playback
      }
    }
  }

  // Update last button states for next loop iteration
  lastButtonState1 = reading1;
  lastButtonState2 = reading2;
  lastButtonState3 = reading3;
  lastButtonState4 = reading4;
}
// Coded with the Aid of ChatGPT
// Function to handle button debouncing and recording buzzer actions
void debounceAndRecord(int reading, int *lastButtonState, int *buttonState, unsigned long *lastDebounceTime, int buzzerPin, int frequency) {
  if (reading != *lastButtonState) {
    *lastDebounceTime = millis(); // Reset debounce timer
  }
  if ((millis() - *lastDebounceTime) > debounceDelay) {
    if (reading != *buttonState) {
      *buttonState = reading; // Updates button state
      if (*buttonState == HIGH && recordIndex < sizeof(record) / sizeof(record[0])) {
        record[recordIndex++] = {buzzerPin, frequency}; // Records the buzzer activation
        tone(buzzerPin, frequency, 200); // Plays buzzer at recorded frequency
      }
    }
  }
  *lastButtonState = reading; // Updates last button state for debouncing
// Coded with the Aid of ChatGPT
}


Hardware Configuration: The system is designed with four button inputs and three buzzer outputs. Additionally, a potentiometer is used to control the frequency of the buzzer sounds. Button Functionality: Buttons 1 to 3 are connected to buzzers and are responsible for triggering sounds with variable frequencies determined by the potentiometer. Button 4 is designated for playback. It plays back a sequence of sounds that have been recorded based on earlier interactions with buttons 1 to 3.

Frequency Control: The frequency of the sounds is dynamically adjusted using a potentiometer. The analog value from the potentiometer is mapped to a specified frequency range (200 Hz to 2000 Hz), which determines how the buzzers sound.

Debouncing: To ensure reliable button press detection without noise interference, the code implements debouncing logic. This involves measuring the time since the last button state change and updating the state only if this interval exceeds a predefined threshold (50 milliseconds).

Recording and Playback (Aided by ChatGPT)

Recording: When a button (1 to 3) is pressed, the action (which buzzer is activated and at what frequency) is recorded in an array. This includes storing both the pin of the buzzer and the frequency at which it was activated.

Playback: When button 4 is pressed, the system iterates over the recorded actions and plays them sequentially. Each action triggers the corresponding buzzer to sound at the recorded frequency for a short duration.

Loop and Functions: The main loop continuously checks the state of each button and the potentiometer, updating the frequency accordingly. A helper function, debounceAndRecord, is used to handle the logic

Video of Project:

Reflection and ideas for future work or improvements:

Integrating a small display screen would significantly improve its functionality, further enhancing the project. This screen would provide real-time visual feedback on button presses and frequency outputs, allow users to scroll through and select different sounds or presets, and serve as a simple interface for directly programming the device.

The potential for further development and refinement holds exciting prospects. The integration of a display screen and the addition of more customizable buttons are immediate steps that will enhance the device’s usability and versatility. Further innovations could include wireless connectivity for easy integration with other music production software or the addition of sensors to enable gesture-based controls, which would offer an even more dynamic and immersive user experience.

Several key insights stand out after reflecting on what this project has taught us. First, the practical challenges of hardware interfacing taught us the importance of robust design and a solid plan for creating it. There is also a need for effective wire management and physical housing to enhance device durability and aesthetics.

Looking Ahead:

Overall, this project resulted in a functional and entertaining product and served as a significant learning experience, underscoring the importance of patience, precision, and creativity in making it happen. These lessons will guide further improvements and innovations in our future projects.

Reading Reflection – Week 11 – Saeed Lootah

A Brief Rant on The Future of Interactive Design

Firstly, its clear that the author has strong feelings about the visions that people are suggesting for the future of technology but I felt that the author described what he felt should change clearly. I personally really liked the example of a hammer where the handle is made for the human and on the other end is the actual tool. It’s a simple object but it made me realize the importance of human centered design. The author had a large emphasis on hands and basically the torso. I liked the distinction he had made between touchscreen devices and how its just a “picture under glass” meaning that there was no tactile feedback based on what part of the screen you were pressing or based on what program you were using. A personal anecdote of mine is that touch-typing on a laptop or just any physical keyboard is much, much easier than on a phone for example. It’s hard to tell which key you are pressing an often the only way of getting it right is by sheer luck. While he did not give any specific solution (which was a common response to the article) it was still necessary to outline the problem no matter how obvious it seemed.

It’s a common trope that in the future we will be interacting with holograms and swiping or touching imaginary screens in the air which we can only see when wearing some kind of glasses, which is similar to what apple are attempting with the apple vision pro. While it makes a lot of sense I’m not sure how it can be made more tactile. For one there has to be a sense of weight when interacting with something to make it more intuitive and some kind of feedback at our fingertips. I imagine a way of making some kind of tactile feedback at our fingertips could be by using some kind of glove which magically gives feedback (maybe in the future the solution will be obvious but right now its magic, at least for me). In any case I found the reading interesting and there is a lot to digest and consider despite its conciseness (I think thats a word).

Week 10 Reading Response – Saeed Lootah

I found both articles very interesting and it was fun reading both, maybe that was partly because they were written by the same person. In any case, starting with the “shut up, and listen” article; I have always found the interpretation of art to be a tricky subject. Mainly because I don’t believe that many of the interpretations that people see in the artwork were thought up by the artist him or herself. Often I get annoyed by some of the interpretations that people come up with since I feel it is so far from the original art but recently that has been less the case. The reason is, and also this is what I kept thinking about while reading the article, is that I have recently begun to think of art being able to stand on its own. What do I mean by that? Well, I mean that an artist isn’t really the creator of the artwork, but rather he is more a spectator. I say this because of one main reason (there are others but I can’t describe or explain it in detail and with clarity), an artist does not really come up with the idea of the artwork out of nowhere, he can say what “inspired” him but I believe inspiration are only things that resemble the idea not that the inspiration was the source of the idea. In thinking about this I searched to see if there were any quotes or artists that were quoted as saying something that fits/resembles my opinion.

“I saw the angel in the marble and carved until I set him free.” – Michelangelo 

“I never know what I’m going to put on the canvas. The canvas paints itself. I’m just the middleman.” – Peter Max

Of course not every artist or person is of the same opinion, but had it not been for the article I just read I would have never thought deeply about this.

As for the other article; I didn’t have thoughts or ideas that were as philosophical. As I was reading I realized that this article would be a great help for when we make the musical instruments using the Arduino’s after the Eid break. I also thought of how facial recognition could be used nowadays. Since the article was made in 2012 facial recognition was not nearly as advanced or reliable so the closest thing to that was the video tracking and the other things that were mentioned. Just something to think about.

Week 9 – Saeed Lootah

Before this assignment I spent a lot of time trying to brainstorm different ideas, I wasn’t really sure what to do until the last minute to be honest. Some of my ideas were if you say a specific word the switch triggers, or if you’re nodding off or maybe just a sound trigger, but none of those ideas seemed very original or interesting. Thankfully I ended up coming up with an idea I feel is far more unique.

When thinking about different limbs (other than my hands) and which I could move to cause the switch to turn on I eventually landed on my ear. Unlike most people I have the ability to slightly move my left ear. Not enough to be very noticeable but enough to have two contacts connect or disconnect.

The plan was to connect one wire to my glasses and one wire to the side of my head. I chose to do this because I noticed that when I do move my ear it also moves my glasses. Therefore, the switch would be turned on when I don’t move my ear as the glasses would be in its normal position, and the switch would be turned off once I move my ear.

Above is the finished product when it is not attached to me. The red wire on the bottom left is what I attach to my head with electrical tape and it is supposed to touch the copper contact that you can see on my glasses. You may also notice that on the breadboard there are two LEDs, one red, one blue. The red LED turns on when current is flowing between the contacts. Then the blue LED is connected to the Arduino. When the current is flowing a signal is sent to the Arduino, then the output is sent to the blue LED. I made it such that the blue LED flickers when current isn’t flowing, i.e. when I move my ear.

Making this was very tedious especially getting the wire on my head to stick and also because sometimes I had to take my glasses off while working on the project. Fortunately while writing this my glasses are on but I didn’t attach the red wire. Unfortunately, when I do attach the red wire it is slightly uncomfortable so I’ve decided to keep it disconnected until the last moment. There are also other problems with my design: The wires easily move around, I rely heavily on electrical tape to keep everything in place, and to make sure everything works I have to adjust my glasses as well since if they move then the switch no longer works, also the wires are messy. Since this is only a prototype problems are expected. Regardless I’m surprised at how well it works, for people who don’t realize I’m moving my ear it looks like I’m using my mind alone to control the light.

Thank you Aadhar the lab assistant for helping me with getting wires of the right length and finding electrical tape. And, thank you ChatGPT for writing the flicker code.


Code:


// PINS //
const int powerPin = 2;
const int outputPin = 3;
// ---------- //

// GLOBAL VAR //
int val = 0;
int outputVal = 0;
bool flicker = false;
// unsigned long time;
unsigned long previousMillis = 0;   // ChatGPT
const long interval = 200;
// ---------- //

void setup() {
  // note to self, returns either HIGH or LOW
  pinMode(powerPin, INPUT);
  pinMode(outputPin, OUTPUT);

  
  // Serial.begin(1000); // Begins serial communication with my computer

}

void loop() {
  // DIGITAL READ //
  val = digitalRead(powerPin);
  digitalWrite(outputPin, outputVal);
  // // ---------- //

  // time = millis();
  unsigned long currentMillis = millis(); // get the current time

  // Test
  // if(val == LOW) {
  //   outputVal = LOW;
  // } else {
  //   outputVal = HIGH;
  // }

// turn on later 
  if (currentMillis - previousMillis >= interval) {
      // save the last time you blinked the LED
      previousMillis = currentMillis;
      flicker = !flicker;
  }

  if(flicker && val == HIGH) {
    outputVal = HIGH;
  } else {
    outputVal = LOW;
  }

  // Serial.println();
}


Week 8a Reading Response

Now after having read both articles I realize how little beauty is appreciated in how productive it will make us. What I mean is that most people, myself included wouldn’t have thought that by getting a nicer looking laptop or by being in a more aesthetically appealing place that we could be more productive. However, not necessarily productive in general. The first author emphasized that positive affect (the experience of positive emotions, or feelings) could allow for broadened thinking, and make people more willing to disregard minor difficulties, and that positive affect is linked with a more aesthetically appealing design. That is not to say that all designs should focus on aesthetics. In a rocket or a plane for example, it is important that the design focus more on function so as to make it as easy as possible to complete simple tasks and not be distracted.

In the reading about the Apollo program I found it interesting how those in charge felt that because they had because “they were trained to be perfect” it meant that they wouldn’t make any mistakes. I wasn’t sure why they would think that. Personally, I don’t believe that they believed that they were perfect, instead I think those in charge thought that it would just be very unlikely that a mistake would happen, and maybe they just didn’t want to deal with adding any redundancies/error detection. Ultimately, the problem was that human-centered design wasn’t taken seriously.

As I was reading both articles I thought about the things I use around me. I’m not sure if this relates but I found that I am more willing to use something if its aesthetically appealing or just made me feel good in general. I’ll give an example: I was more willing to write notes or draw after buying a pen which feels nice to write with or if the notebook I’m using looks nice. Or, its easier for me to write code/debug if the environment around me makes me feel better. For example, being in bed is more comfortable than being in a public environment in my opinion.

Midterm – Saeed Lootah

For the midterm I wanted to do some kind of video game. I felt that it would be more fun and ironically more interactive than an interactive artwork. Originally I was stuck on the idea of Russian Roulette but that lead me to the idea of a Mexican Standoff. The premise of the game is that two players are facing each other and after a countdown they each have to shoot before the other player does. Furthermore, I wanted to prevent people from just holding down the shoot key so I made it so that if you shoot too early you fail.

I wanted the player to first see a main menu before they start the game. I was inspired by some of the previous works of students on their midterm and wanted something similar but also unique to my game. However, before I could start making it I had to find out how to do so. In class, I don’t remember which one exactly since it was a while ago now, I asked Pi about something to do with different pages/menus and he told me about a scene management class. That is a function or part of the code dedicated towards picking different menus. This ingenious solution was what I needed, and for that reason I put Pi in the credits menu for my game. Furthermore, Pi told me about game state machines and more about states in general in games, that concept helped me a lot during the creation of my project. I was proud of the code I made for the scene management class but not as proud as the code I made for the gameplay. A lot of work went into making the actual game itself and I wish I could show more of what I did without it being too boring but in any case; below is what I am most happy with.

function countdownFunctionality() {
  // frame rate is 60
    gameStarted = true;
    let x = 1;
    let xSecond = 60 * x; 
  
    let firstSecond =   initialFrameCount + xSecond * 1;
    let secondSecond =  initialFrameCount + xSecond * 2;
    let thirdSecond =   initialFrameCount + xSecond * (3+randomNumber)
  
    if(!(tooSoon1 || tooSoon2)) {
        // TODO sounds
      if(frameCount < firstSecond) {
        countDownDraw(3);
      }
  
      if(frameCount > firstSecond && frameCount < secondSecond) {
        countDownDraw(2);
      }
  
      if(frameCount > secondSecond && frameCount < thirdSecond) {
        countDownDraw(1);
      }
  
      if(frameCount > thirdSecond) {
        countDownDraw(4);
        player1.update();
        player2.update();
        fire = true;
      }
    }
  
  
  }

Above is the code for the countdown. I needed something that would (obviously) act like a normal countdown, going from 3 to 1 then to the words fire, but I also needed to have the program be able to detect a player firing at any point during the countdown. This meant I could not stop the program completely but still needed a way to add a delay. I chose to do this through essentially counting frames. Where when the function is called the frameCount at the time is kept and then the 1st, 2nd, 3rd, and final seconds are kept as a number which the frameCount has to be greater than for the appropriate icon to show. Then at the end of the code you can see the line “fire = true”. Fire is a boolean variable that was initialized outside the function and it is used to keep track of the states of the game, like Pi taught me 🙂 When it is true the players are allowed to shoot.

There are also a lot of general things about my code that I’m happy about. Primarily the way that I organized the code. I created a separate javascript file for each menu as well as the scene management class. This made things easier to navigate. Furthermore, going into this project I decided to use visual studio code instead of the website editor, I wasn’t sure how to at first but after some figuring things out I learned I had to use extensions, I found the specific extensions then spent a while learning how to use the extensions in the first place.

While the program works now, there are A LOT of things I would change. I added a lot of files thinking and sometimes trying to add them but eventually giving up because I ran into some kind of bug. If you end up going through the files you will notice this, and if you go through the comments you will notice that I wanted to add some extra features. I originally wanted to add a best of five game-mode but because of time constraints I had to give up on it for this project but maybe next time. Another thing I wish I could get to work, and there is still time is music that plays specific to the play menu and not just the main menu music which plays all the time. I haven’t been able to figure it out just yet because I was experiencing some bugs but I unfortunately cannot put aside time to do it at the moment, perhaps in the future, maybe even before class. Anyways, that’s all I have to say about this project. I’m happy with it overall, it is the most effort I’ve put into a coding project and the most lines of code that I’ve ever written, and I think it shows. I hope people have fun playing it.

P.S. The credits to all the people that have helped me and all of the people that made the sprites, images, etc. are in the credits section which you can find from the main menu.


6th March 2024:
Fixed a bug where if player 2 shoots too soon then player 1 does as well it shows that player 1 shot too soon and not player 2.