Final Project Introduction:
LADIES AND GENTELMEN!!!! I DID ITTTTTT:
- Describe your concept
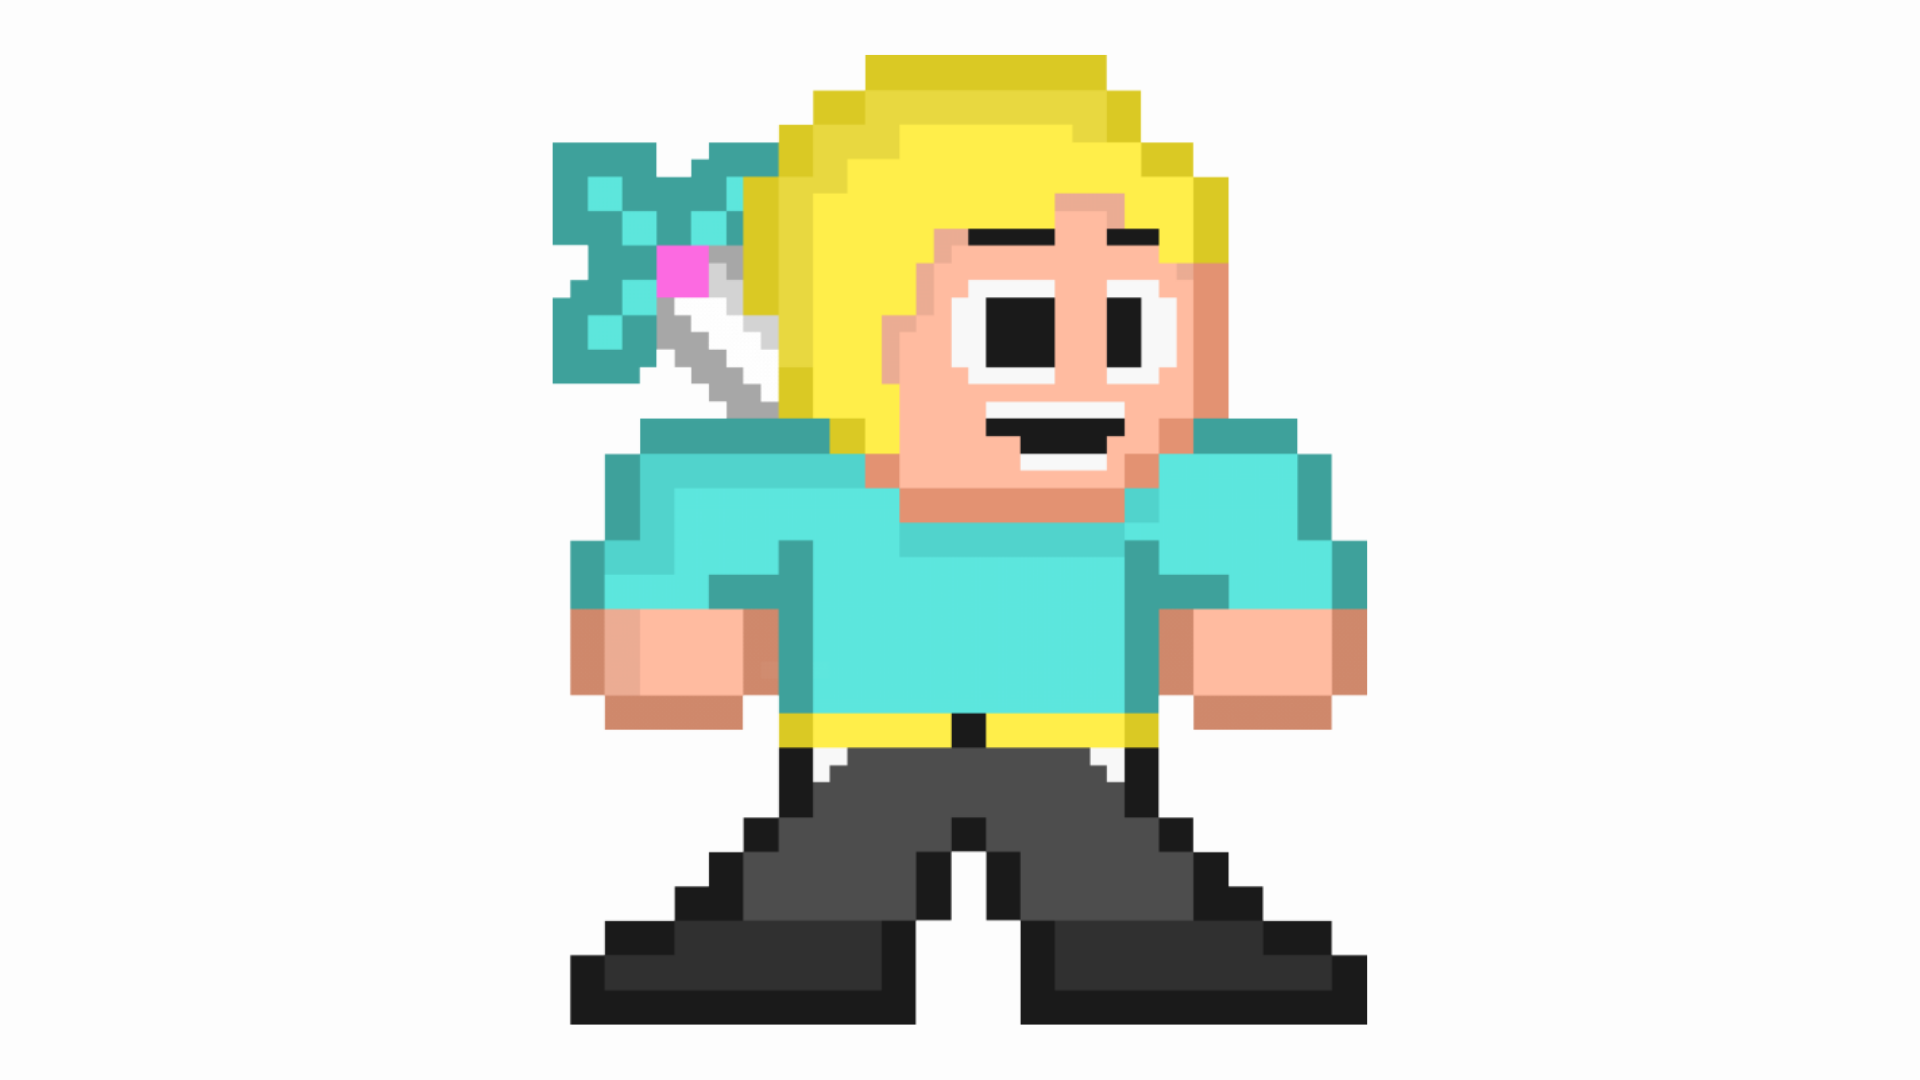
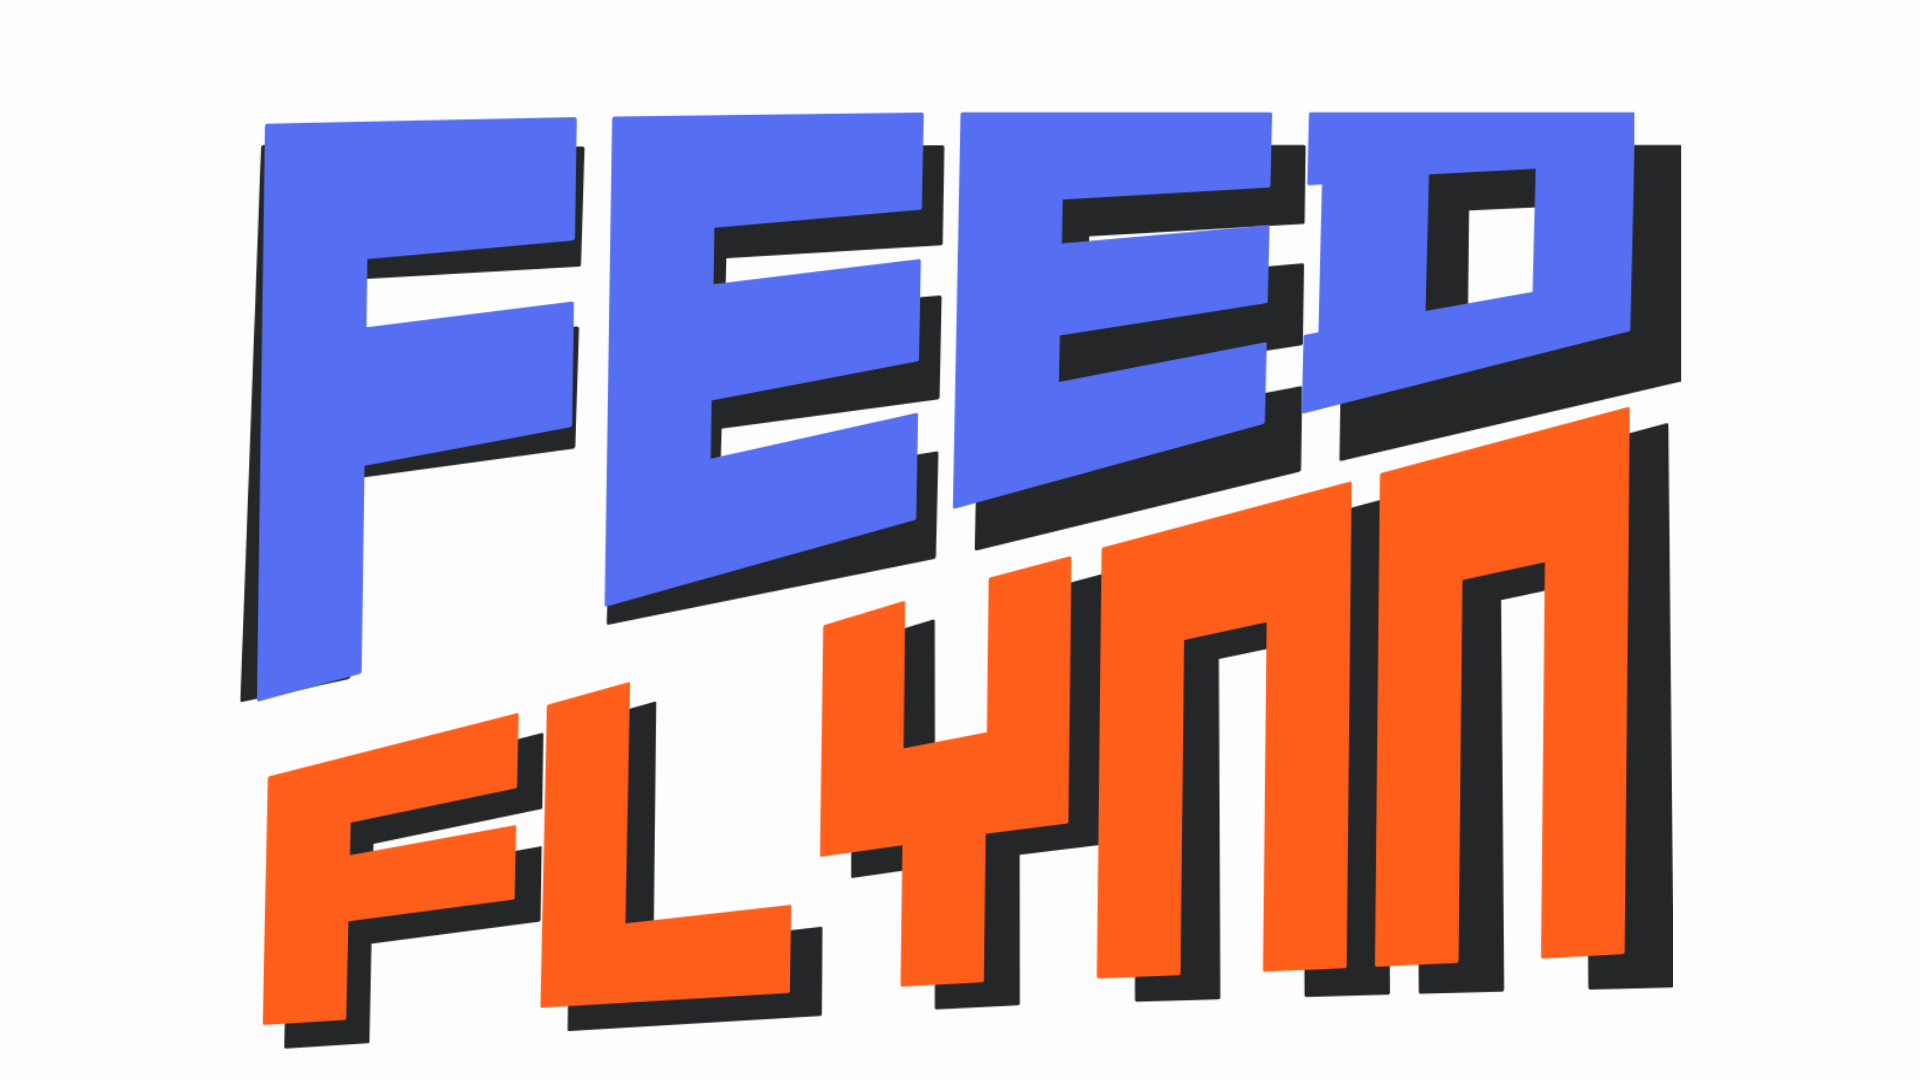
I aimed to delve into recreating a retro game named “Feed Flynn,” blending the Catcher and spaceship Tyrian games into one fun experience. Inspired by the saying “don’t eat the book” and my deep fondness for food, I wanted to craft a game celebrating my love for food—an arcade-style creation I call “Feed Flynn.”
You get points for Feeding Flynn donuts +10,
Burgers ( full Meal ) + 20
Books -3 (why would you even feed Flynn Books ;( )
Flynn also has the ability to shoot bullets to eliminate the books. It’s a 35-second challenge to compete for the highest score, a way to test your skills and challenge your friends for the top spot!
The game adopts a retro vibe with:
- A glitchy character sprite
- Pixelated character design
- Incorporation of music and sound effects
- Include some pictures / video of your project interaction
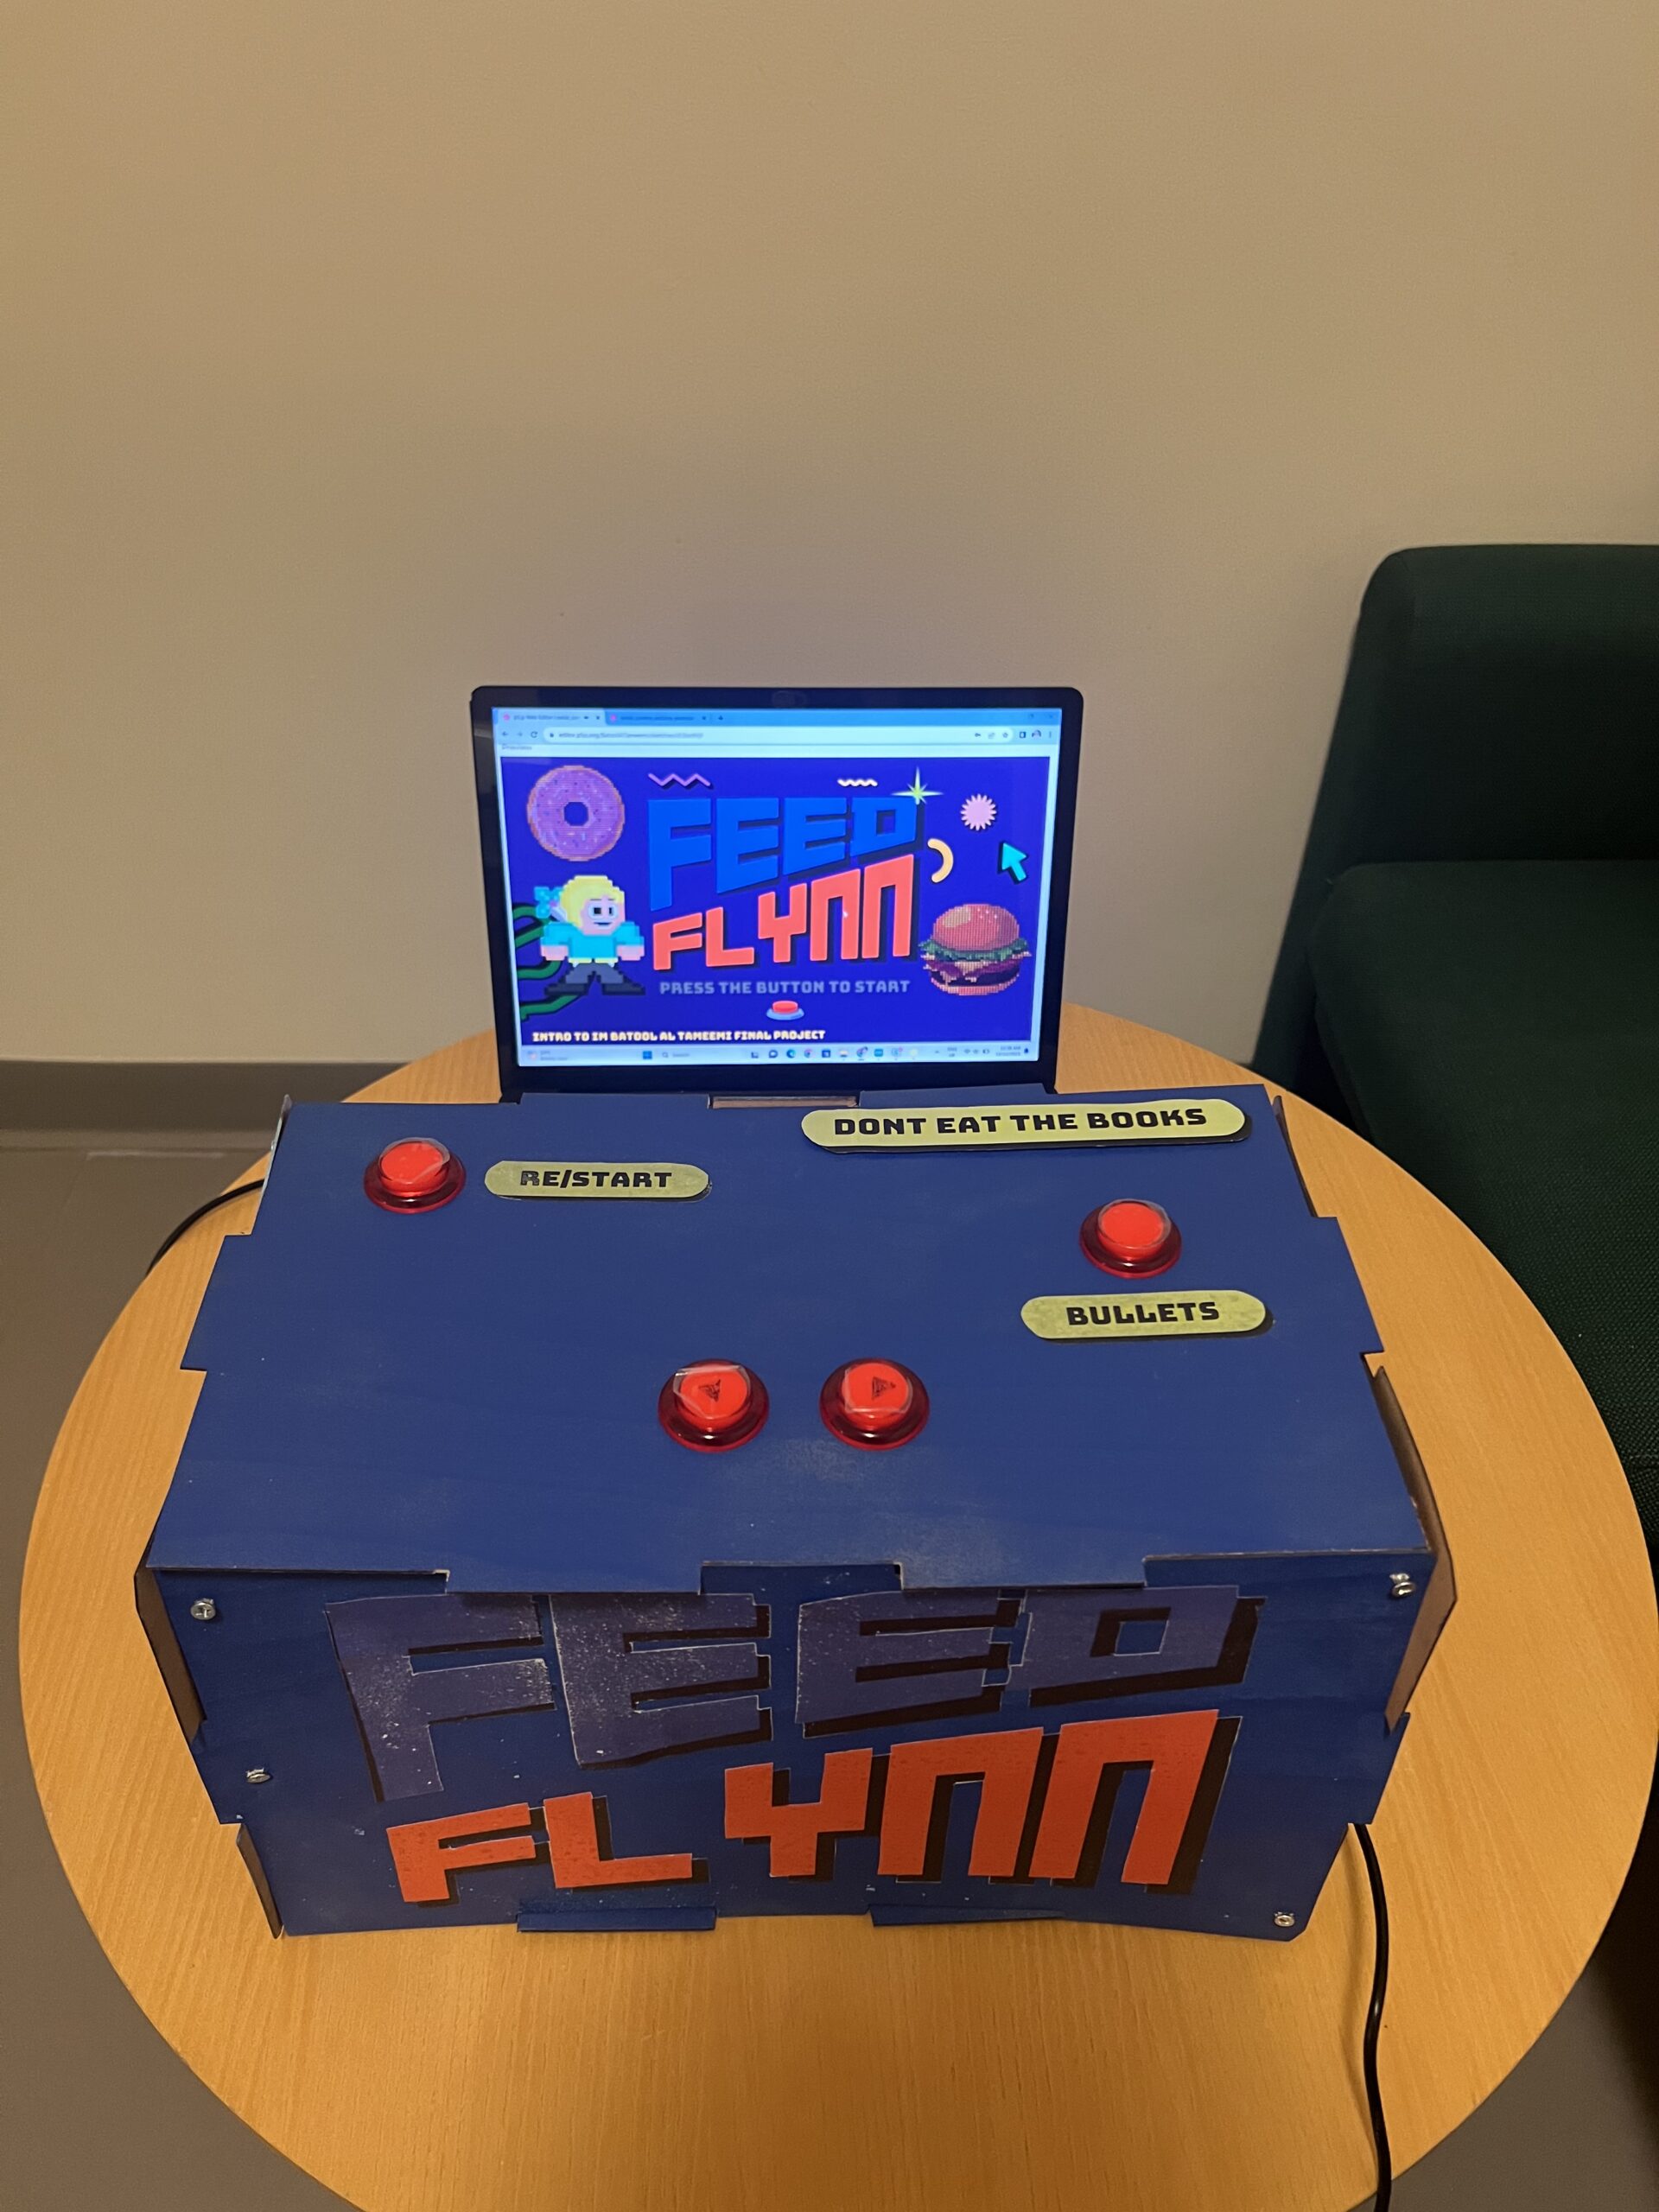
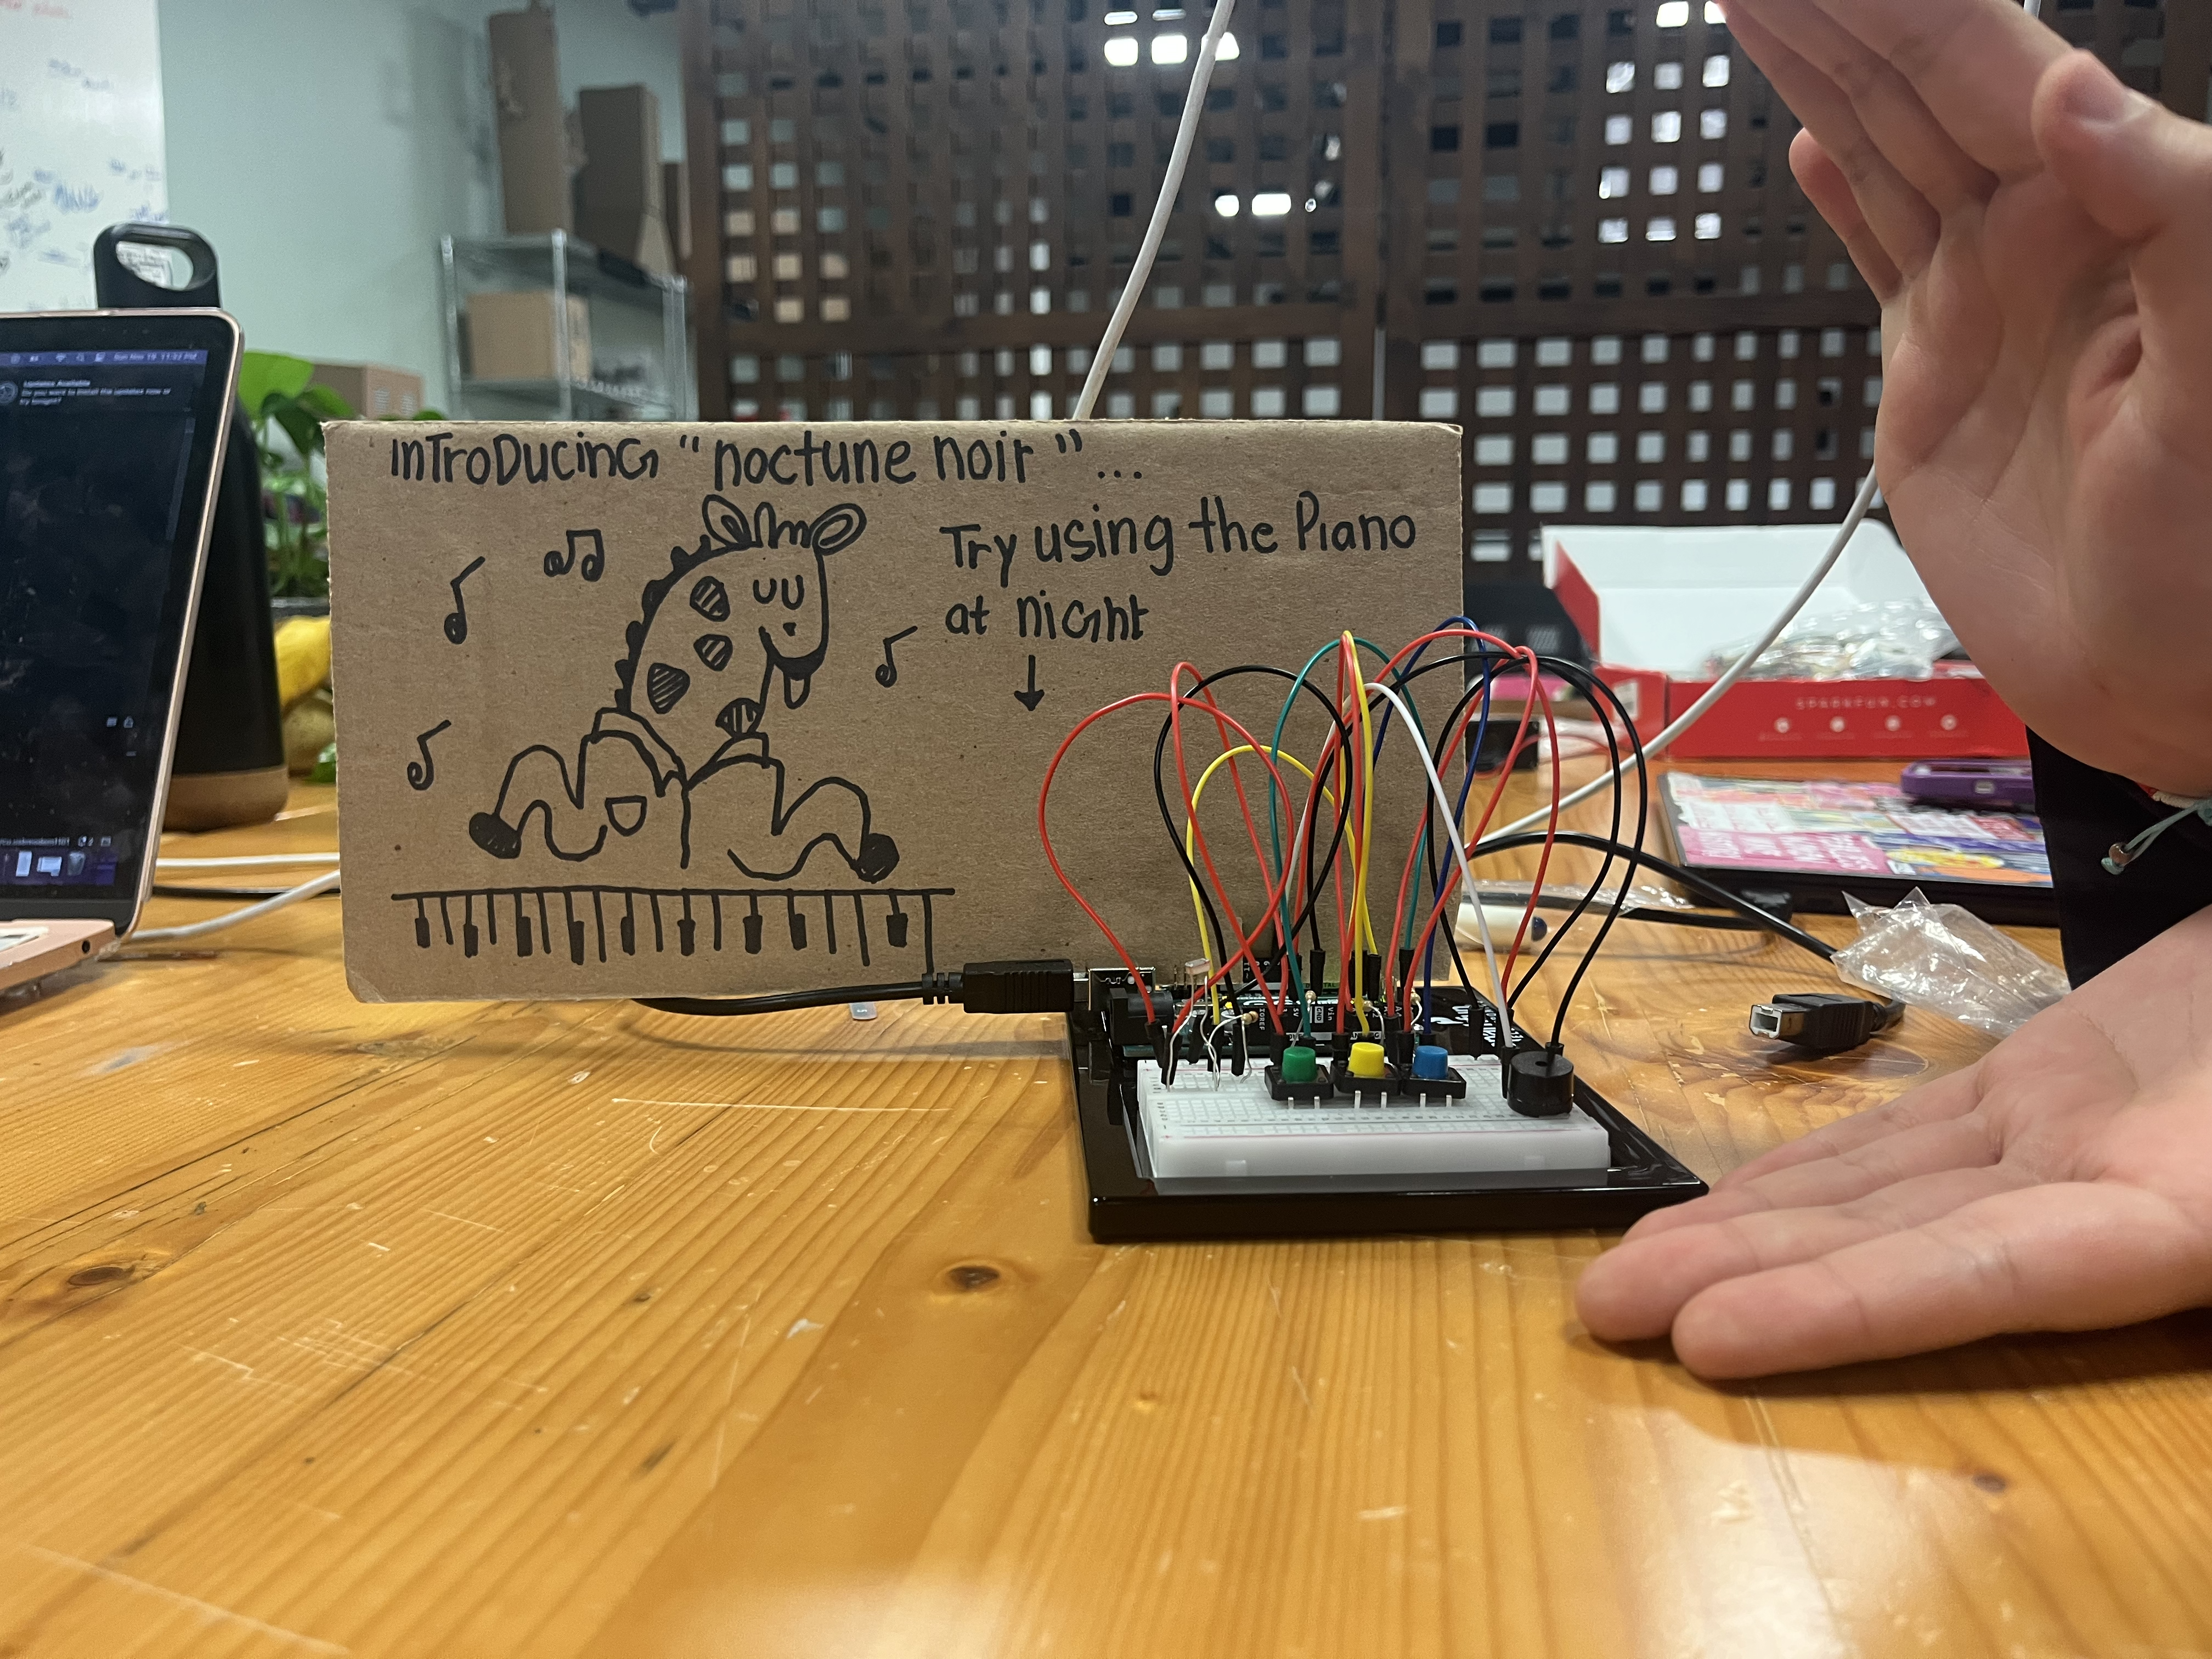
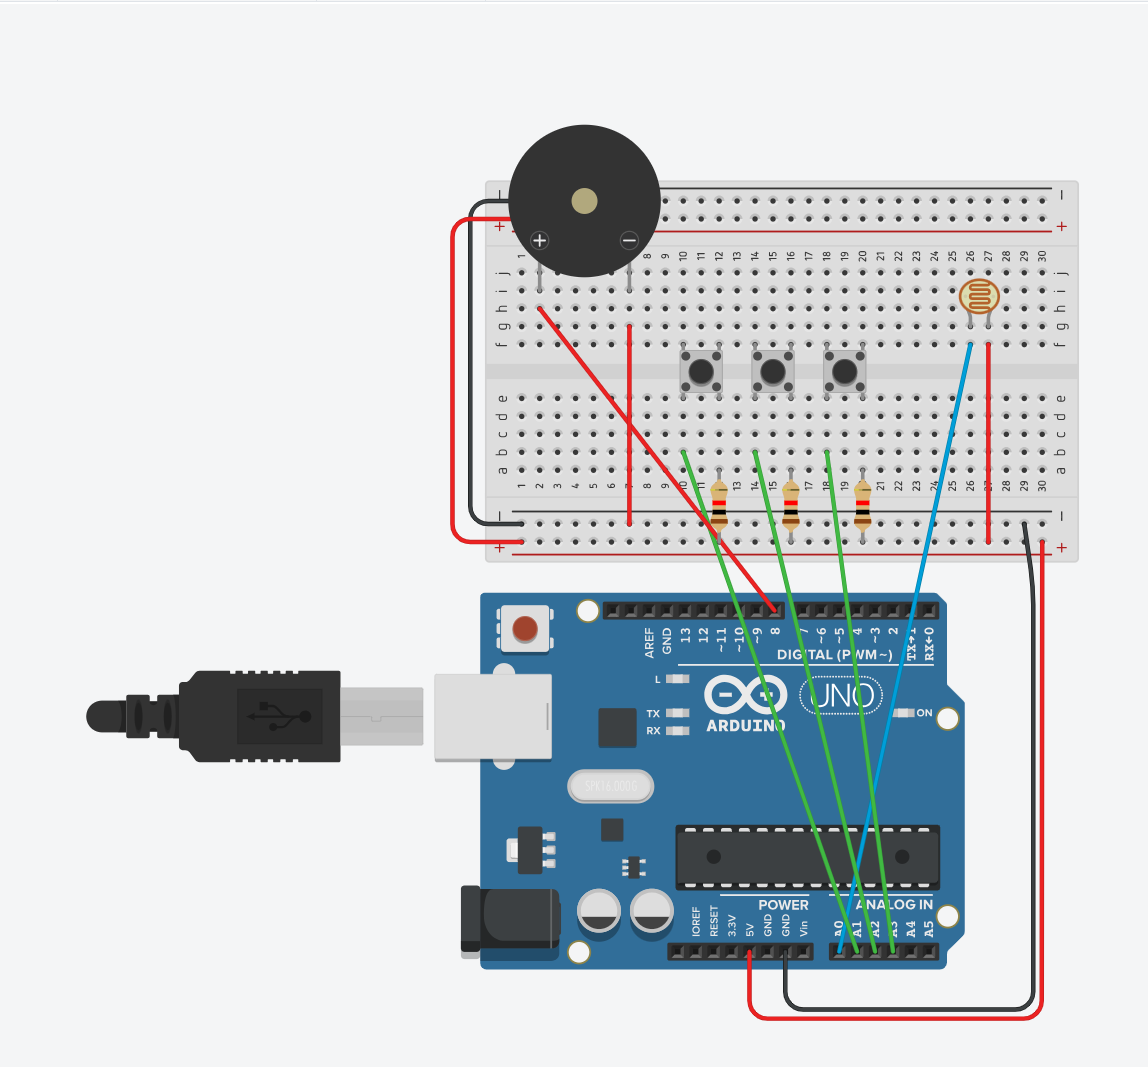
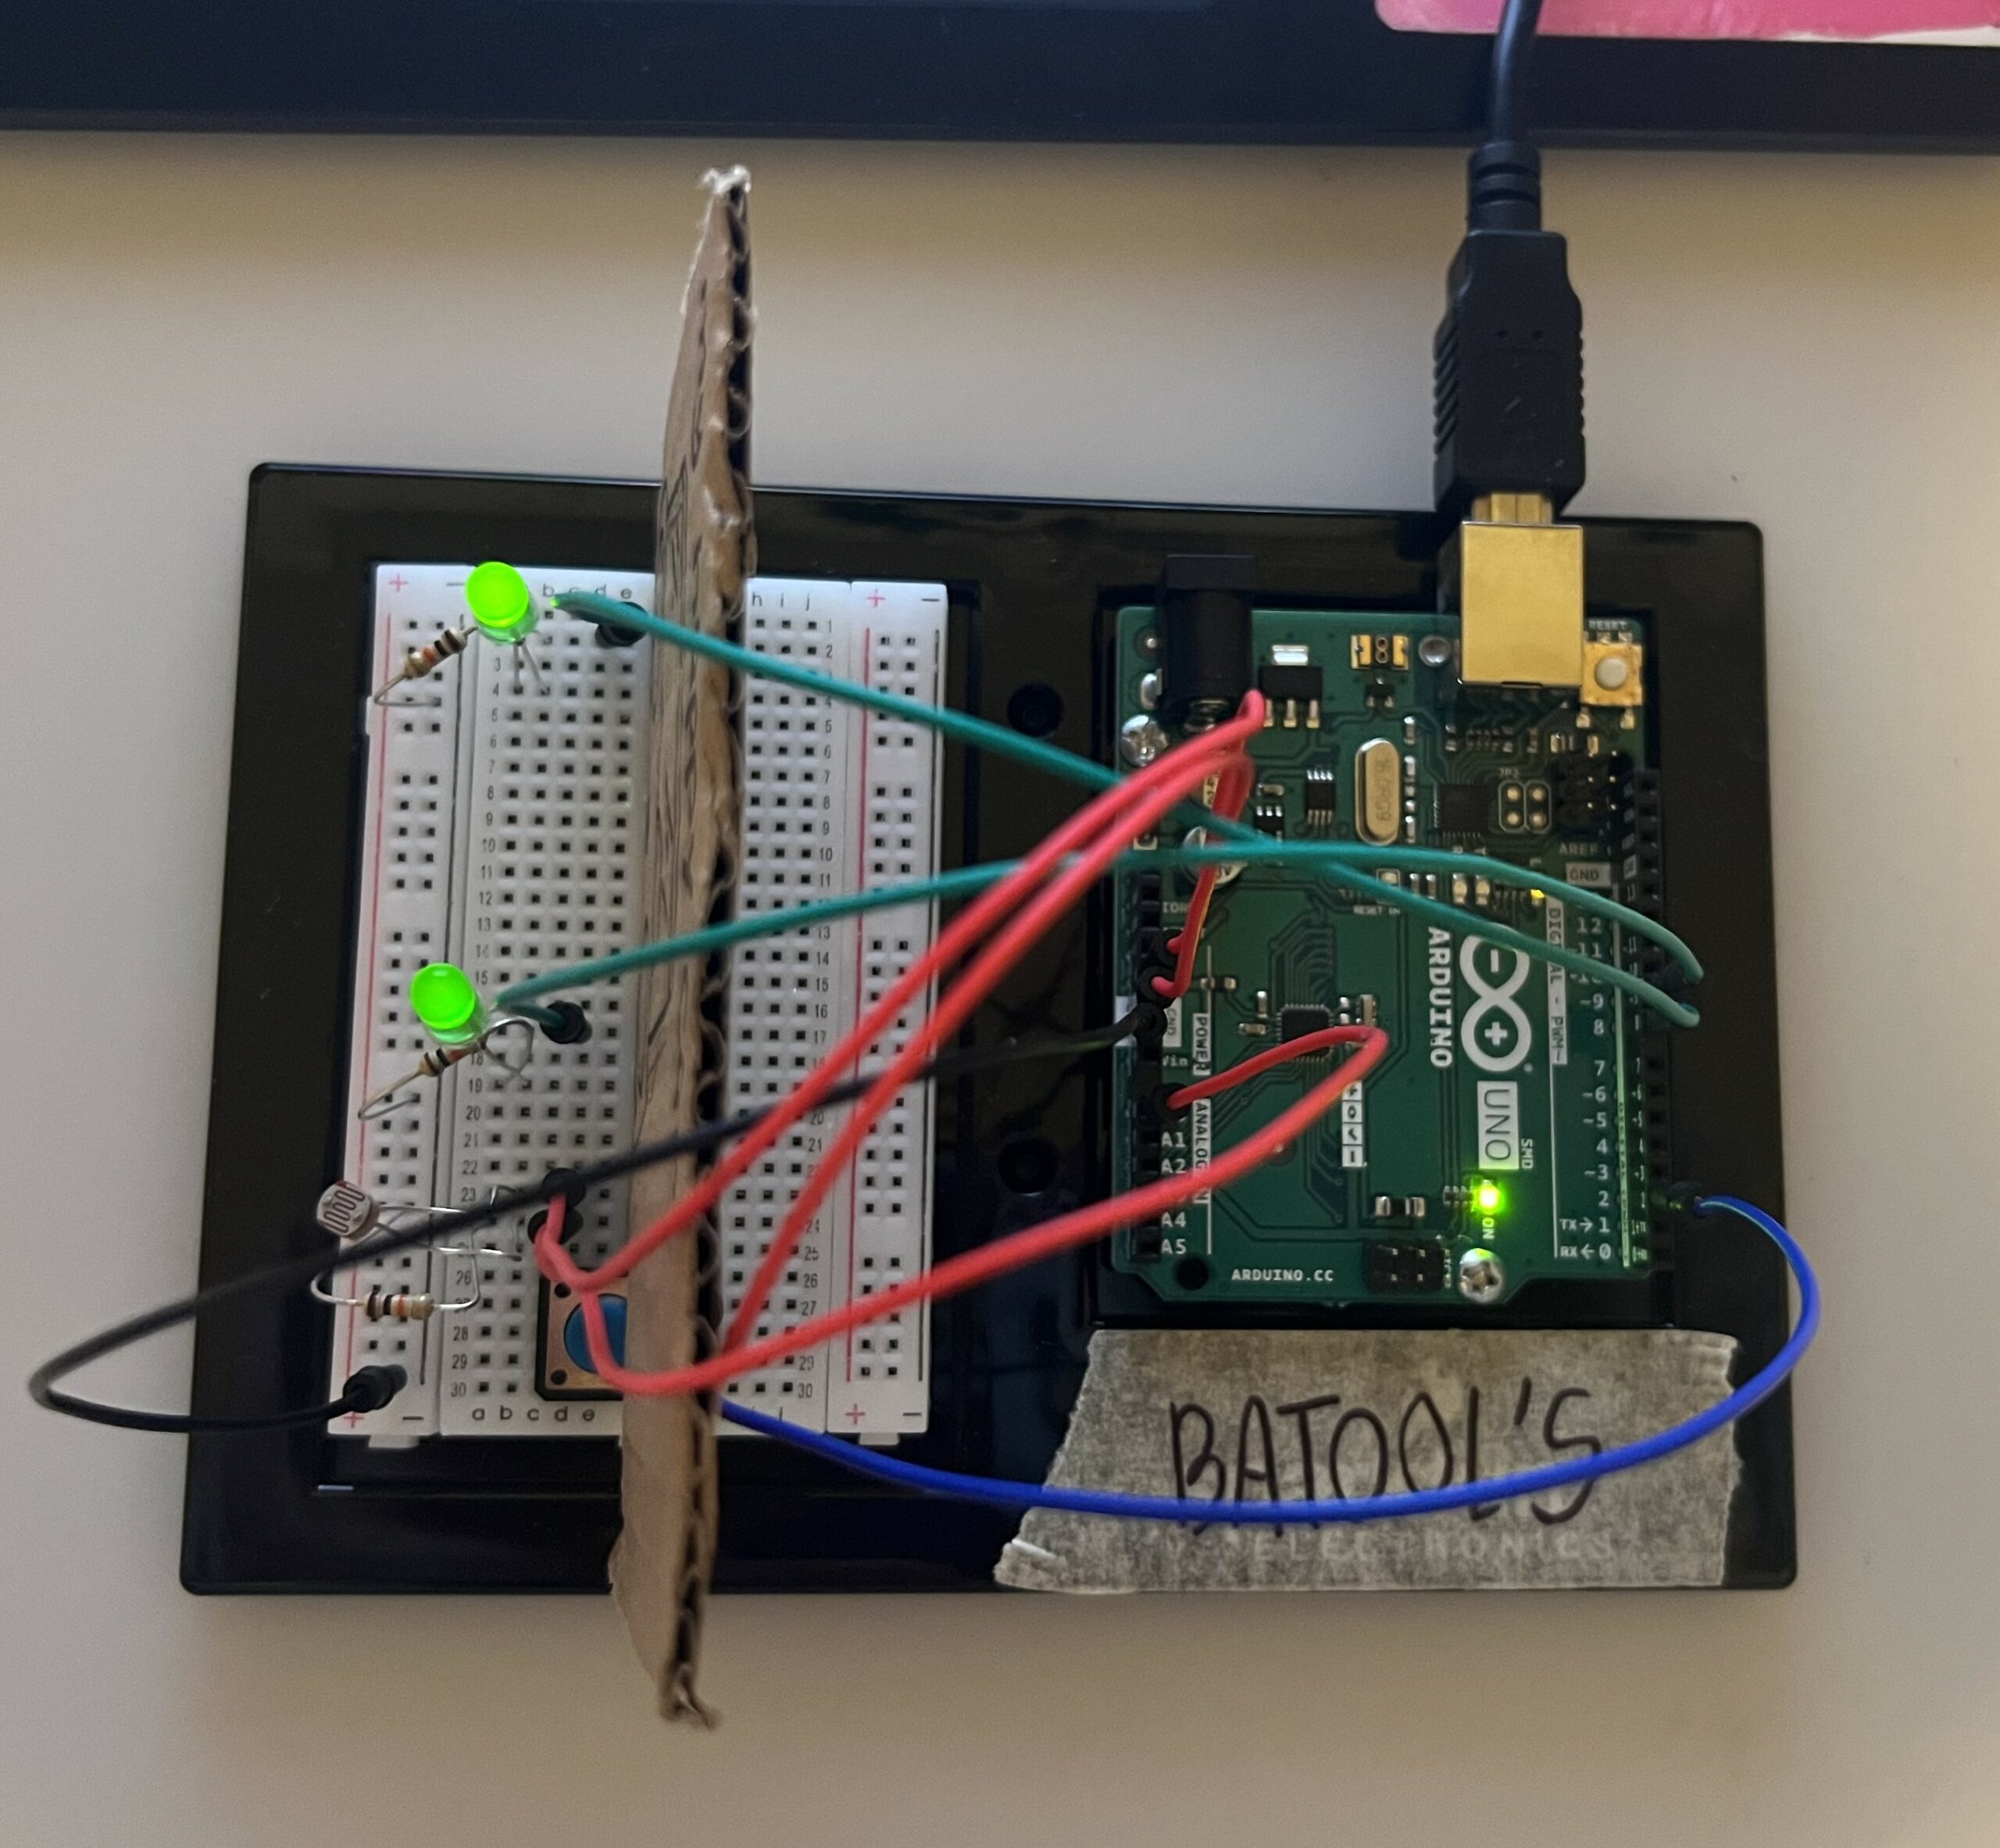
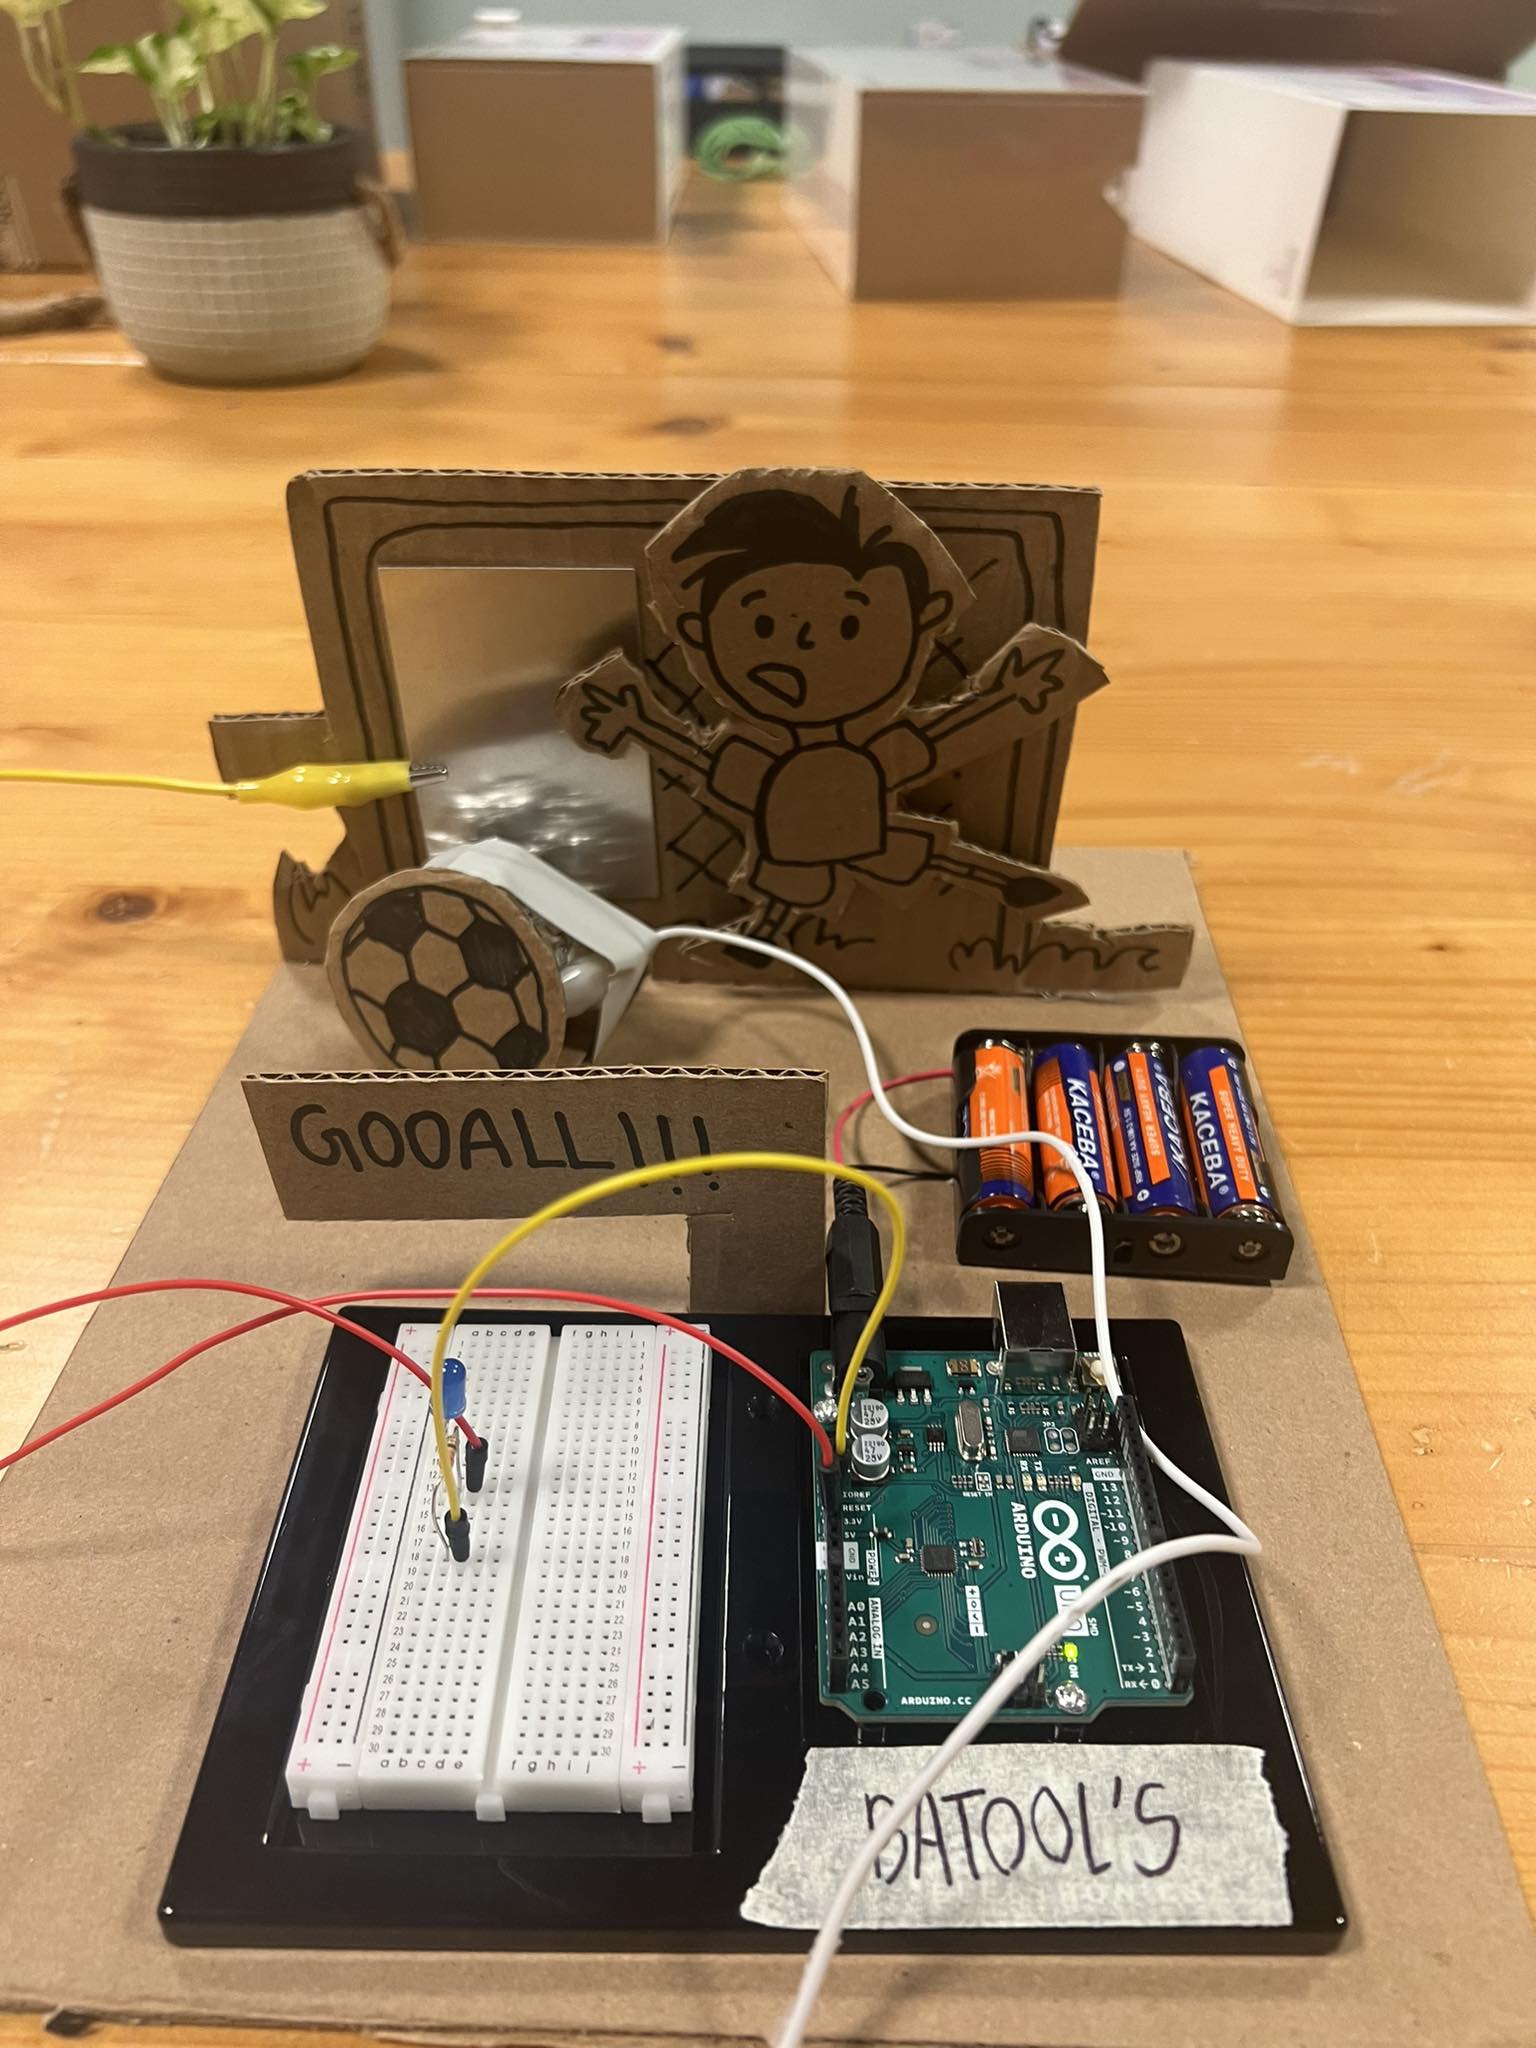
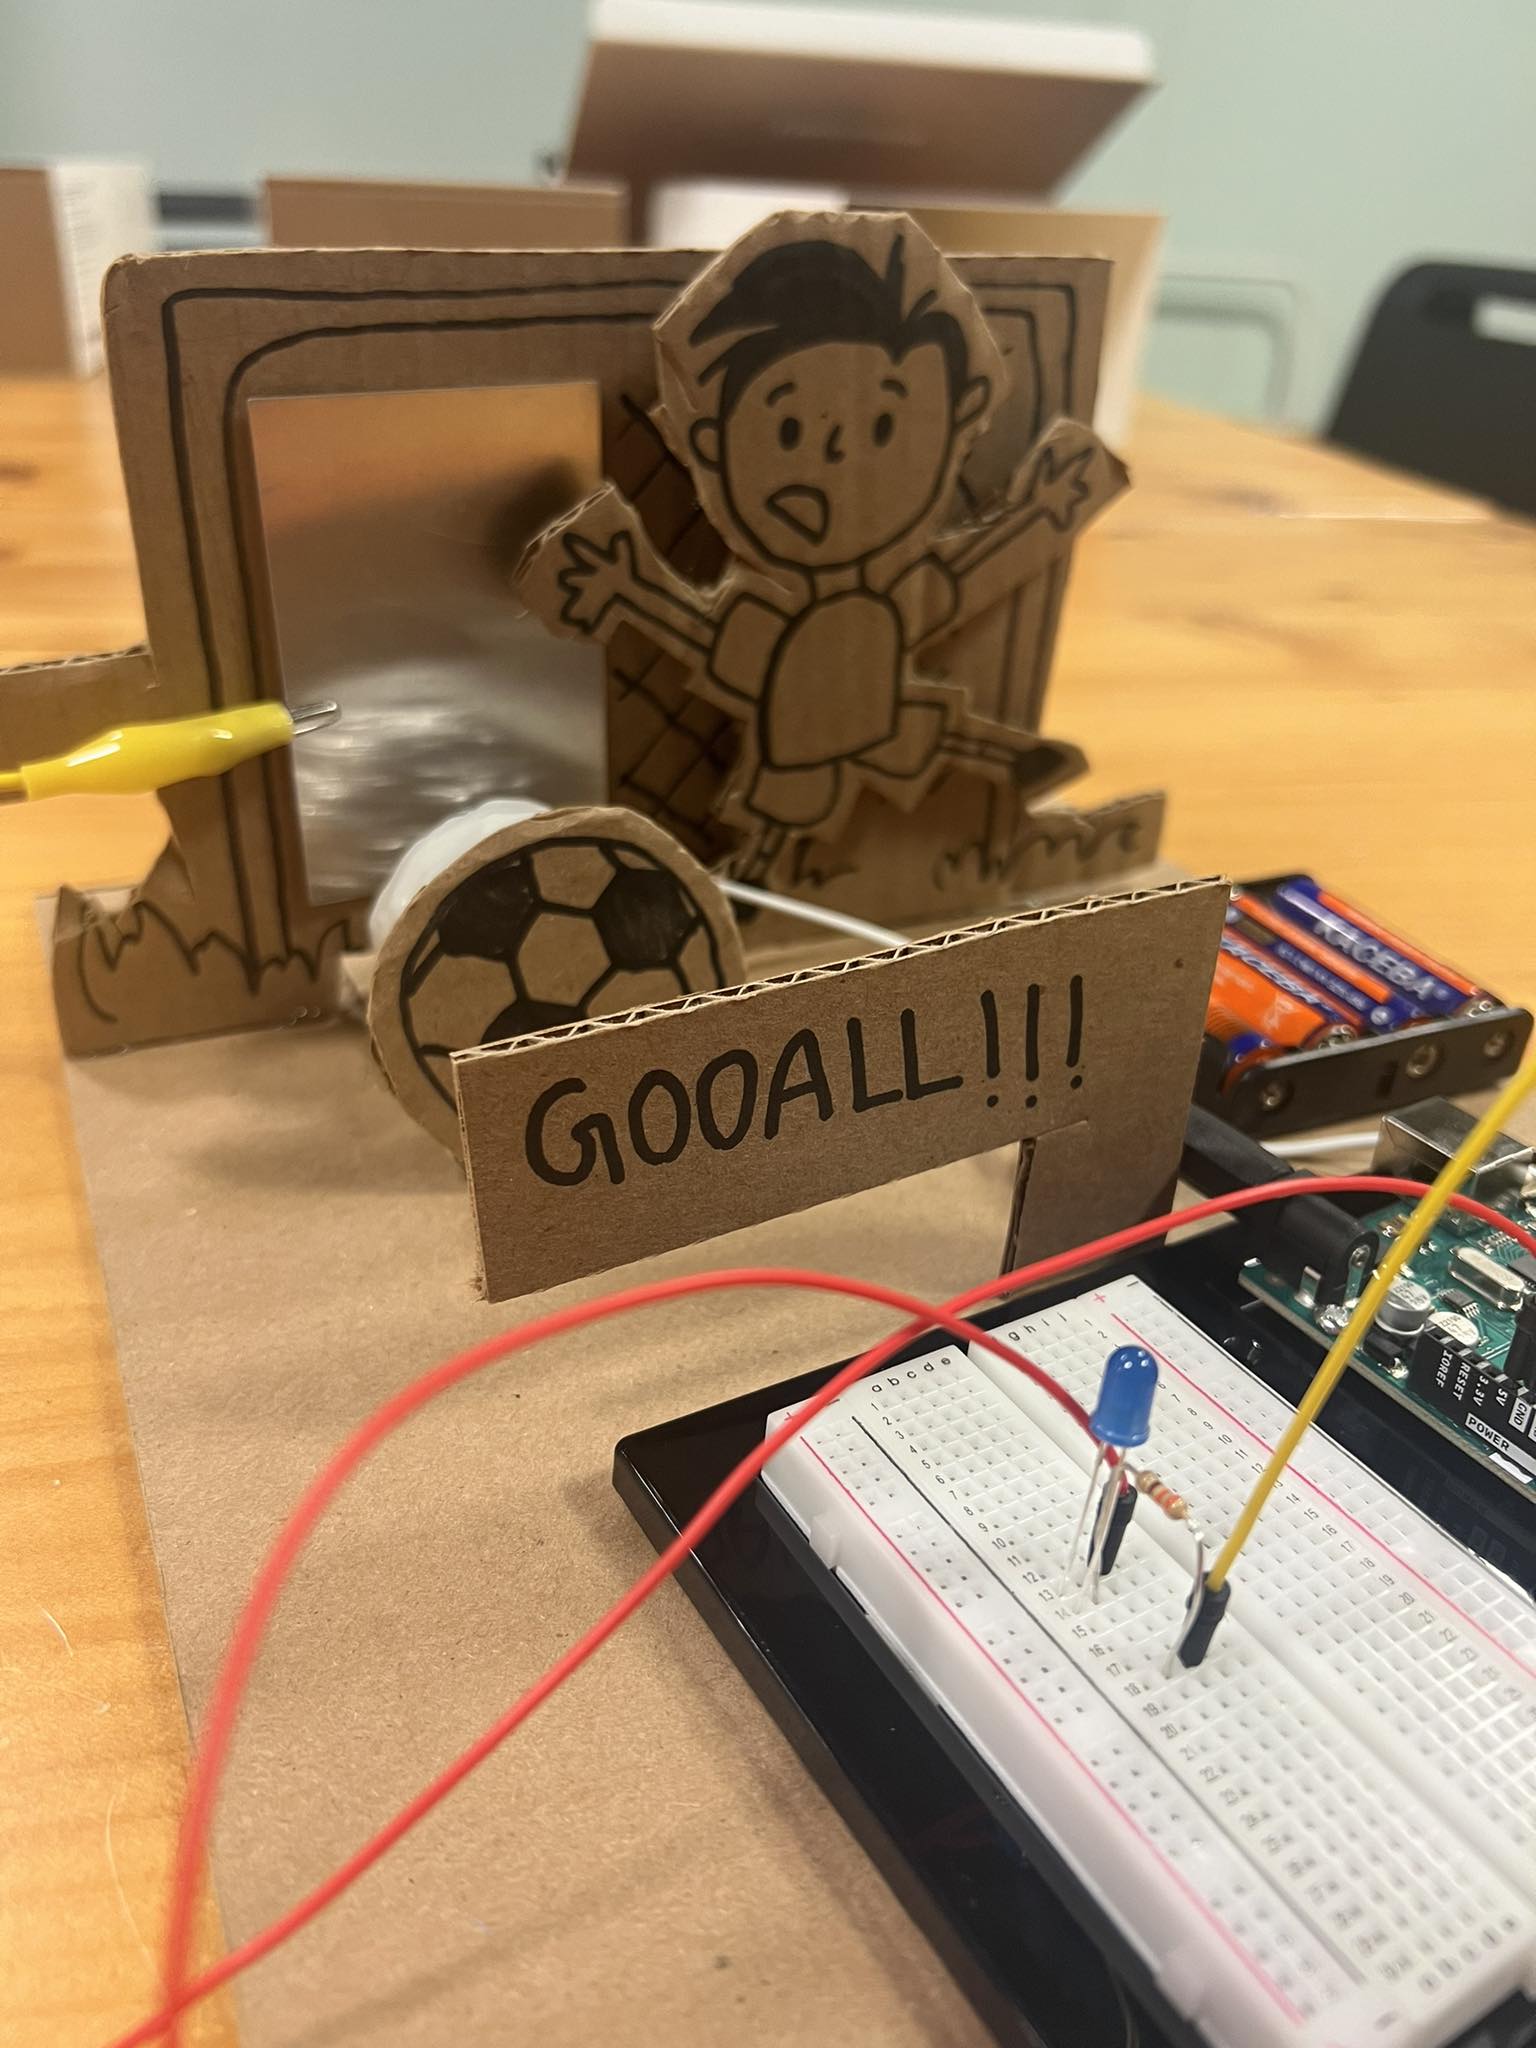
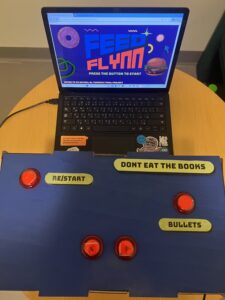
this is how my project hardware is looking ( retro arcade)
I decided to have my single line of instruction Do NOT eat the books on the box; Condensing complex rules into concise, clear instructions often enhances comprehension and user engagement
- How does the implementation work?
- Description of interaction design
Interaction design involves creating the interface between a user and a system, aiming to optimize the user’s experience. In the context of “Feed Flynn,” the game utilizes four arcade buttons to facilitate the player’s interaction:
-
-
- Start/Restart Button: This button initiates the game or restarts it once it’s over. It serves as the gateway to engage with the game, allowing the player to enter the gaming experience.
- Right/Left Buttons: These two buttons enable the movement of Flynn, the character, within the game. They provide directional control, allowing Flynn to navigate right or left within the gaming environment, dodging falling objects or positioning to catch desired items.
- Bullet Firing Button: This button empowers Flynn to shoot bullets in the game. By pressing this button, players can eliminate books, preventing them from being consumed by Flynn and avoiding point deductions. It adds an element of strategy and skill to the gameplay, requiring players to decide when to fire bullets strategically.
- Description of Arduino code and include or link to full Arduino sketch
-
const int buttonStartPin = 2; // Pin for the start button const int buttonLeftPin = 3; // Pin for the left button const int buttonRightPin = 4; // Pin for the right button const int buttonFirePin = 5; // Pin for the fire button void setup() { Serial.begin(9600); pinMode(buttonStartPin, INPUT_PULLUP); pinMode(buttonLeftPin, INPUT_PULLUP); pinMode(buttonRightPin, INPUT_PULLUP); pinMode(buttonFirePin, INPUT_PULLUP); } void loop() { int startButtonState = digitalRead(buttonStartPin); int leftButtonState = digitalRead(buttonLeftPin); int rightButtonState = digitalRead(buttonRightPin); int fireButtonState = digitalRead(buttonFirePin); // Invert button states before sending to serial Serial.print(!startButtonState); Serial.print(","); Serial.print(!leftButtonState); Serial.print(","); Serial.print(!rightButtonState); Serial.print(","); Serial.println(!fireButtonState); delay(100); // Optional delay to stabilize readings }- Description of p5.js code and embed p5.js sketch in post
-
-
let catcherX, catcherY; // Declaring variables for catcher position let objects = []; // Array to store falling objects let objectSpeed; // Variable to control object speed let gameStarted; // Flag to track game state let serial; // Serial port communication variable let points; // Variable to track player points let startTime; // Start time of the game let gameDuration; // Duration of the game let fireButtonState = 0; // State of the fire button let bullets = []; // Array to store bullets let backgroundImage; // Variable to hold a background image let backgroundImage2; // Another background image variable let backgroundImage3; // Third background image variable let catcherFrames = []; // Array to store frames of the sprite sheet let catcherIndex = 0; // Index to track the current frame let catcherSpeed = 0.2; // Speed of the catcher animation var gif; // Variable for a GIF element let catchSound; // Sound variable for catching objects function preload() { // Loading assets backgroundImage = createImg("https://media.giphy.com/media/v1.Y2lkPTc5MGI3NjExOHlzcmp4MTh1bDJqMTMzbXAyOTAzMHgxcTk0bmUyYXJncXBpd2d4cSZlcD12MV9pbnRlcm5hbF9naWZfYnlfaWQmY3Q9Zw/LV4MGiLrYrNaF3Dpbn/giphy.gif"); backgroundImage2 = loadImage("2.png"); backgroundImage3 = loadImage("6.png"); bungeeFont = loadFont('Bungee-Regular.ttf'); catcherSheet = loadImage('8.png'); books = loadImage("3.png"); donut = loadImage("4.png"); burger = loadImage("5.png"); gif = createImg("https://media.giphy.com/media/v1.Y2lkPTc5MGI3NjExNHBldTFuczNob251M3NiNjJ6cGl1aHczM3ZoN2c1em9hdXB5YTJvdSZlcD12MV9pbnRlcm5hbF9naWZfYnlfaWQmY3Q9cw/96t0nzIf5cgGrCdxFZ/giphy.gif"); gif.hide(); gameStartSound = loadSound('07. STAGE 2 [PC Engine]-1.mp3'); gameOverSound = loadSound('33. GAME OVER [PC-9801]-1.mp3'); catchSound = loadSound('heavy_swallowwav-14682.mp3'); } // Setup canvas and initial game conditions function setup() { createCanvas(889, 500); catcherX = width / 2; catcherY = height - 50; objectSpeed = 2; gameStarted = 0; points = 0; gameDuration = 35; startTime = millis(); serial = new p5.SerialPort(); serial.open('COM6'); serial.on('data', serialEvent); } // Game loop managing different game states function draw() { if (gameStarted === 0 ) { // Display the appropriate background image backgroundImage.size(889,500); if (!gameStartSound.isPlaying()) { gameStartSound.play(); } } else if (gameStarted === 1) { backgroundImage.hide(); image(backgroundImage2, 0, 0, width, height); gif.show(); gif.position(catcherX - 100, catcherY - 60); gif.size(200,100) // Draw catcher and game elements drawGame(); } } // Function handling the core game logic and rendering function drawGame() { let currentTime = millis(); let elapsedTime = (currentTime - startTime) / 1000; // Elapsed time in seconds let remainingTime = gameDuration - floor(elapsedTime); // Remaining time in seconds textSize(16); fill(0); textAlign(RIGHT); text(`Time: ${remainingTime}`, width - 80, 52); fill("rgba(0,255,0,0)"); noStroke(); // Draw catcher ellipseMode(CENTER); // Set ellipse mode to CENTER catcherX = constrain(catcherX, 25, width - 25); ellipse(catcherX, catcherY, 50, 50); // Draw a circle for the catcher // Generate falling objects continuously if (frameCount % 30 === 0) { objects.push(...generateObjects(3)); } // Draw falling objects for (let obj of objects) { drawObject(obj); obj.y += objectSpeed; // Check for catch if ( obj.y > catcherY - 10 && obj.y < catcherY + 10 && obj.x > catcherX - 25 && obj.x < catcherX + 25 ) { handleCatch(obj); } } fill(0); // Display points textSize(16); text(`Points: ${points}`, 170 , 50); textFont(bungeeFont); // Handle bullets handleBullets(); // Check for game over if (millis() - startTime >= gameDuration * 1000) { displayGameOver(); } } // Handling keyboard input for catcher movement function keyPressed() { const catcherSpeed = 5; if (keyCode === LEFT_ARROW) { catcherX -= catcherSpeed; } else if (keyCode === RIGHT_ARROW) { catcherX += catcherSpeed; } } // Handling serial port events for game control function serialEvent() { let data = serial.readLine(); if (data !== null) { let states = data.split(','); let startButtonState = parseInt(states[0]); let leftButtonState = parseInt(states[1]); let rightButtonState = parseInt(states[2]); fireButtonState = parseInt(states[3]); const catcherSpeed = 10; if (startButtonState === 1) { if (gameStarted !== 1) { gameStarted = 1; points = 0; // Reset points to zero when the game starts startTime = millis(); } } if (gameStarted) { if (leftButtonState === 1) { catcherX -= catcherSpeed; } else if (rightButtonState === 1) { catcherX += catcherSpeed; } } } } // Generating falling objects function generateObjects(numObjects) { let generatedObjects = []; for (let i = 0; i < numObjects; i++) { let type; let rand = random(); if (rand < 0.2) { type = 'square'; } else if (rand < 0.6) { type = 'circle'; } else { type = 'triangle'; } let obj = { x: random(width), y: random(-50, -10), type: type, }; generatedObjects.push(obj); } return generatedObjects; } // Drawing and displaying falling objects function drawObject(obj) { fill("rgba(0,255,0,0)"); noStroke(); if (obj.type === 'triangle') { ellipse(obj.x, obj.y, 30, 30); image(books, obj.x - 45, obj.y - 35, 90, 55); } else if (obj.type === 'circle') { ellipse(obj.x, obj.y, 30, 30); image(donut, obj.x - 39, obj.y - 22.5, 80, 45); } else if (obj.type === 'square') { ellipse(obj.x - 10, obj.y - 10, 30, 30); image(burger, obj.x - 60, obj.y - 45, 100, 60); }} // Handling catcher interaction with falling objects function handleCatch(obj) { if (obj.type === 'triangle') { points -= 3; } else if (obj.type === 'circle') { points += 10; } else if (obj.type === 'square') { points += 20; } catchSound.play(); // Play the sound when the catcher catches an object objects.splice(objects.indexOf(obj), 1); } // Handling bullet mechanics function handleBullets() { if (fireButtonState === 1) { bullets.push({ x: catcherX, y: catcherY }); } for (let i = bullets.length - 1; i >= 0; i--) { let bullet = bullets[i]; bullet.y -= 5; fill(255, 0, 0); ellipse(bullet.x, bullet.y, 5, 10); for (let j = objects.length - 1; j >= 0; j--) { let obj = objects[j]; if (dist(bullet.x, bullet.y, obj.x, obj.y) < 15 && obj.type === 'triangle') { objects.splice(j, 1); bullets.splice(i, 1); points += 5; } } if (bullet.y < 0) { bullets.splice(i, 1); } } } // Displaying the game over screen function displayGameOver() { gameStartSound.stop(); gameOverSound.play(); fill(0); // Display game over screen textFont(bungeeFont); image(backgroundImage3, 0, 0, width, height); console.log("Game Over"); textAlign(CENTER); textSize(24); fill(0); text("Game Over", width / 2, height / 2 - 90) ; text(`Your Score: ${points}`, width / 2, height / 2 ); gameStarted = 2; gif.hide(); }- Describtion of the code:
- Variables: Various variables are declared to manage game elements such as catcher position, falling objects, game state, time, sound, and image assets.
- preload(): Preloading assets like images, sounds, and fonts before the game starts.
- setup(): Initializing the canvas size, setting initial game conditions like catcher position, object speed, and game duration, as well as initializing the serial port communication.
- draw(): The main game loop that manages different game states and calls specific functions based on the game state.
- drawGame(): Handles the core game logic and rendering. Manages time, displays game elements, generates falling objects, checks for collisions, and handles points and game over conditions.
- keyPressed(): Listens for keypress events to control the catcher’s movement.
- serialEvent(): Handles events from the serial port for game control (button presses, etc.).
- generateObjects(): Generates falling objects of different types (triangle, circle, square).
- drawObject(): Draws and displays the falling objects based on their types (triangle, circle, square) using images.
- handleCatch(): Manages the interaction between the catcher and falling objects, updating points and removing caught objects.
- handleBullets(): Handles the bullet mechanics, allowing the catcher to shoot at falling objects, awarding points upon successful hits.
- displayGameOver(): Displays the game over screen, stops game sounds, shows the final score, and resets game states.
-
- Description of communication between Arduino and p5.js
At first, I struggled a lot with understanding serial communication. It was hard, and it made it tough to communicate well for the project. But when I asked for help and used the p5 .exe desktop app better, things got easier. Learning how to use it properly helped me improve how I communicated for the project.
- What are some aspects of the project that you’re particularly proud of?
I’m really happy with the graphics! Being a graphic designer, I put a lot of effort into creating Flynn and the game design. It was super fun to work on this video game, and I don’t think it’ll be my last! This time around, I loved playing with pixels, making animations, and exploring different pixel art styles for that cool retro theme.
I also noticed a visual connection between my Midterm Game “CatsAway” and this project. Both have this joyful vibe and a surreal feel, especially flying around and munching on books, which is part of my art style.
- What are some areas for future improvement?
Accessibility: I’m aiming to ensure the game is accessible to a wider audience by making it compatible across different devices or platforms. This improvement will make the game available to more players, which is a goal I’m focused on.