Final- Meera


Idea:

This is a simple to play Trivia game for children. There are Ten questions with only two choices ; A OR B.

To pick A the child must press the Green Button and to pick B he press the Red button. If the child gets the answer correct, they will automatically move on to the next question. If the child gets the answer wrong, they would be taken to a page that tells them they are wrong and that they must press r to go back and start again.

Once the kids get to the end of the game, the will be congratulated on making it to the end and given the option to play again.


Process: For the arduino we started out by testing the buttons using LED lights the LED lights when pressed were supposed to turn on there was difficulty getting them to work I connected some of them wrong but once I figured that out I moved on to finding the best serial code 4 this game. We worked with send multiple to processing and send byte to processing. 

I had some difficulty trying to make that work and I ended up mixing and matching codes 

After asking I found out that the code that I should be using is handshake

Handshake had some problems because it wasn’t obvious that I had to have arduino send something back from processing after further inspection that was solved. 

I was finally able to use the buttons on my game for processing. 

Creating the game was not very difficult are used images for the children to be more amused by and I kept the questions simple since I knew this is a kids game I did not want to make it very difficult on the children to solve this but at the same time I give them options that were very close and alike hoping it could create a little confusion for the child. 

Arduino took me a very long time to work with and that was with a lot of help eventually everything came together so here’s my final product

https://github.com/meera-420/Final-IM  < this file has the zip, the processing code , and the Arduino code.


Archive  < this is some images of the physical Arduino.

Link for the question I got online :

trivia-questions-for-kids

where I got my music :

featured

WK 10- Meera :

For this week’s assignment I went with a simple paddle with ball game. the aim is to get the paddle and the bored to touch, their is a count for any times the played either missed or hit the paddle with the ball. The count can be reloaded just by pressing the mouse. The paddle can be moved using the potentiometer.  It was very simple to make, however, I did face some difficulty understanding how to connect the Arduino to the processing. eventually after research and watching our class video a couple times , I was able to get it to work.

this is the Arduino code :

void setup() {
pinMode(0,INPUT);
Serial.begin (9600);
  

}

void loop() {
  int reading = analogRead (0);
  Serial.println ( reading );
  delay (50);
  
}

This is the processing code :

import processing.serial.*;

float ballX = 200;
float ballY =100;
float speedX= 7;
float speedY= 0;
int hit  = 0;
int miss =0;
String serialPortName ="/dev/cu.usbmodem141101";
Serial arduino;
float batPosition;
PImage bat;
void setup () {

  size ( 600, 600);
   bat = loadImage("bat.png");
 if(serialPortName.equals("/dev/cu.usbmodem141101")) scanForArduino();
  else arduino = new Serial(this, serialPortName, 9600);


}


void draw() {
  
  if (mousePressed){ 
    hit =0; miss =0;
  }
  if((arduino != null) && (arduino.available()>0)) {
    String message = arduino.readStringUntil('\n');
    if(message != null) {
      int value = int(message.trim());
      batPosition = map(value,0,1024,0,width);
    }
  }

  float paddle =100 ; // can make the paddle get smaller is if i add 1000/ (hit+10) 
  if (ballX <0 || ballX > width ) speedX = -speedX;
  if ( ballY> height) {
    speedY = -speedY;
float distance = abs(mouseX - ballX);
if (distance < paddle ) hit += 1;
else  miss +=1;
}else speedY +=1;

  ballX +=speedX;
  ballY +=speedY;

  background(0, 0, 0);
  ellipse ( ballX, ballY, 50, 50);
   image(bat,batPosition,height-bat.height); //rect (width-paddle, height -10, 2*paddle, 10); // where i want to connect the potntiometer cause it is the paddle
text ( " hit :" + hit ,10,30);
text ( " miss :" + miss ,90,30);
}
void stop()
{
  arduino.stop();
}


void scanForArduino()
{
  try {
    for(int i=0; i<Serial.list().length ;i++) {
      if(Serial.list()[i].contains("tty.usb")) {
        arduino = new Serial(this, Serial.list()[i], 9600);
      }
    }
  } catch(Exception e) {
    // println("Cannot connect to Arduino !");
  }
}

This is the final demo of the game :

Link for the Game: 


this was where I got the code to connect them together: https://www.instructables.com/Getting-started-with-Arduino-Potentiometer-Pong/


For the final project idea :


I have many ideas, but one that can work  was actually  inspired from an idea that Sarah had a while a go.

Sarah talked one time about a children’s game and i had the idea from that.


The concept would involve, buttons and a potentiometer.

The game would be a learning game for kids, the buttons would represent colors and the potentiometer and be used to draw things like circles and squares.

So far this idea , to me, is a foundational concept I wanna try. What I have pitched is not the whole concept, the further I explore I will be able to see what I can or can’t do and also mainly what I should and shouldn’t do. I believe it’ll be difficult but I do wanna explore this idea and I hope It works out.

During the break room meeting, I pitched this idea to my classmates who were there with me. Nathan gave me such a helpful idea , he said I could try having only two buttons and the my processing could be a type of quiz. I really liked this idea, it could be very simple for kids to learn from and after some research I believe it is doable .  There for  finally , for my final project I will be creating a simple trivia game for children using processing and with Arduino I will be using two button for the player to pick from the two option I will provide them with.

WK9 : Meera

To celebrate the early  spirit of Christmas, I wanted to make the buzzer play a Christmas tune. The tune plays  by pressing  the button ( switch ). I added , also, a Knob ( potentiometer) to control the volume of the tune. I struggled a lot with the Knob , I thought that the way I connected it was right because I used the example specified for the buzzer and knob but it turned out that their is a different way to connect it when a button is involved. Also the the code was difficult to figure out  but once that was sorted I was finally able to finish this project since connecting the buzzer to the button was very simple and fun to build.

jingle buzzer

Finally I hope you enjoy this project, it was fun to make:


#define buzzer 9
#define button 7

#include "pitches.h"

#define melodyPin 9

// Jingle Bells

int melody[] = {
  NOTE_E5, NOTE_E5, NOTE_E5,
  NOTE_E5, NOTE_E5, NOTE_E5,
  NOTE_E5, NOTE_G5, NOTE_C5, NOTE_D5,
  NOTE_E5,
  NOTE_F5, NOTE_F5, NOTE_F5, NOTE_F5,
  NOTE_F5, NOTE_E5, NOTE_E5, NOTE_E5, NOTE_E5,
  NOTE_E5, NOTE_D5, NOTE_D5, NOTE_E5,
  NOTE_D5, NOTE_G5
};

int tempo[] = {
  8, 8, 4,
  8, 8, 4,
  8, 8, 8, 8,
  2,
  8, 8, 8, 8,
  8, 8, 8, 16, 16,
  8, 8, 8, 8,
  4, 4
};


void setup() {// put your setup code here, to run once:
  pinMode ( button, INPUT);

  Serial.begin (9600);
  

}

void loop() {

  if (  digitalRead ( button) == HIGH) {

     Serial.println(" 'Jingle Bells'");
    int size = sizeof(melody) / sizeof(int);
    for (int thisNote = 0; thisNote < size; thisNote++) {

      // to calculate the note duration, take one second
      // divided by the note type.
      //e.g. quarter note = 1000 / 4, eighth note = 1000/8, etc.
      int noteDuration = 1000 / tempo[thisNote];

      tone(melodyPin, melody[thisNote], noteDuration);

      // to distinguish the notes, set a minimum time between them.
      // the note's duration + 30% seems to work well:
      int pauseBetweenNotes = noteDuration * 1.30;
      delay(pauseBetweenNotes);

      // stop the tone playing:
      tone (melodyPin, 0, noteDuration);

    }

    int knobValue = analogRead (A0);

    byte pwm = map(knobValue, 0, 1023, 0, 255);
    
    Serial.print ( knobValue);
    Serial.print ( "-");
   
    Serial. println ( pwm);


     analogWrite( tone, pwm);


    delay (1);

  } else {
    noTone (buzzer);
  
}
  
  }


WK8 – Meera:

int button = 2;
int ledY = 3;
int ledG = 5;
int ledB = 6;
int ledR = 4;
bool ledYState = false;
bool ledGState = false;
bool ledBState = false;
bool ledRState = false;
bool prevButtonState = LOW;
int knob = A0;
void setup() {
  pinMode  ( button, INPUT);
  pinMode ( ledY , OUTPUT);
  pinMode ( ledG, OUTPUT);
  pinMode ( ledB, OUTPUT);
  pinMode ( ledR, OUTPUT);
  Serial.begin(9600);
}

void loop() {
  int buttonState = digitalRead(button);
  Serial.println(buttonState);
  digitalWrite( ledY, ledYState);
  digitalWrite( ledG, ledGState);
  digitalWrite( ledB, ledBState);
  digitalWrite( ledR, ledRState);

  if (buttonState == HIGH && prevButtonState == LOW) {
    ledYState = !ledYState;
  }
  if (buttonState == HIGH && prevButtonState == LOW) {
    ledGState = !ledGState;
  }
  if (buttonState == HIGH && prevButtonState == LOW) {
    ledBState = !ledBState;
  }
  if (buttonState == HIGH && prevButtonState == LOW) {
    ledRState = !ledRState;
  }


  prevButtonState = buttonState;

  int knobValue = analogRead ( knob);

  if ( 300 < knobValue) {
    digitalWrite(ledG, HIGH);
    digitalWrite(ledB, HIGH);
    digitalWrite(ledY, LOW);
    digitalWrite(ledR, LOW);
  }
  else {
    digitalWrite(ledG, LOW);
    digitalWrite(ledB, LOW);
  }

  if ( 700 < knobValue) {
    digitalWrite(ledY, HIGH);
    digitalWrite(ledR, HIGH);
    digitalWrite(ledG, LOW);
    digitalWrite(ledB, LOW);
  }
  else {
    digitalWrite(ledY, LOW);
    digitalWrite(ledR, LOW);

  }
  Serial. println ( knobValue);

}

Wk8 : 

Knob alternation : 

MY FINAL TWIST WAS ADDING A HOUSE, I KNOW THE HOUSE DOESNT LOOK GREAT. HOWEVER, I THOUGHT IT GAVE PURPOSE TO THE LED SWITCH. IMAGINE WALKING INTO A HOUSE , TURNING ON THE LIGHT AND HAVING A SWITCH THAT CAN ALTERNATE BETWEEN THE LIGHTS YOU NEED. THIS IS WHAT I TRY TO DISPLAY IN THIS WEEKS ASSIGNMENT.


Midterm – Meera.

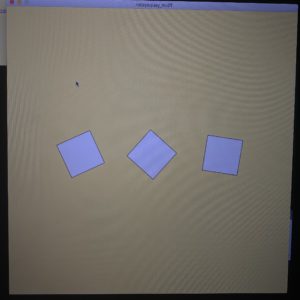
When coming up with an idea for this game, I wanted to make a game that tends to the compulsiveness of having things be in order. I started out with just one white box in the center of my screen. I wanted the box to be spinning around itself, once I did that I added two more boxes the same size as the one in the middle. These boxes spun in different orders around themselves and the objective was to strategically make them stop , on command, at a moment they were all aligned. The game was set up with no way of winning, so a different approach was given. The next approach was to have the boxes orbit as though they were in a solar system. Now that the approach was changed the objective was altered too, the objective became that all the boxes must align around a straight horizontal line that went across the middle of the game window. After setting that up, a system of knowing that the boxes were aligned had to be made, and adding a start menu.

desgin notes 1

rotaysqay recoding

solar rotate align recording

boxes start menu and alignment text


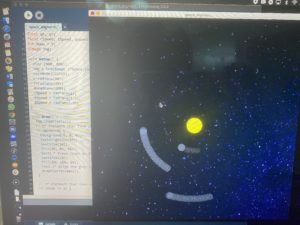
Now I had to clean up the idea, I needed a theme and sound and text and better orbiting for my boxes. I started with my theme, I took inspiration from the movement of the boxes and decided on making the theme a solar theme. I put a yellow sun in the middle of my screen and made the boxes into orbiting spheres that circle around the sun. I added an image for my background but it glitched the orbiting spheres, my issue was that I was uploading the image as a pixel rather than just as an image.

 the was how it looked before I fixed it.


Once that was done, I working on the orbiting of my spheres. The problem was that only two spheres aligned at a time, it was mostly the outer sphere which was “ ellipse #3” that never aligned well. I messed around with three of the main components of the orbiting: the radian, the speed, and the radius (ring radius, or how far from the center each orbit ellipse is ). When I altered #3’s speed it made a difference but it still didn’t align them enough. I attempted a little with the radius but that did nothing to my alignment, so I ventured off to my final experiment which was the radian. I decreased the number of the radian in #3 and it got very close to the alignment, so I decided to increase the range of acceptance of a coded alignment. Once I did that, the player could finally win. I added text to help the player see that which sphere is aligned once paused.


Orbit fix

post space aligment clean up


Finally, I imported a sound file to the game. At first, I had the sound play when key was pressed, but since I started out with the code “ song.play();” it got chaotic every time the player paused for alignment.  Thus, I had the “ song.play();” moved up to the void setup, but now the sound ended even though the player is still playing. Therefore, I changed it to “ song.loop();” and it finally worked.

Finally, here’s the end result:


boolean paused = false;
float r;
float t;
float q;
float rX, rY;
float tX, tY;
float qX, qY;
float rSpeed, tSpeed, qSpeed;
int mode = 0;
PImage img;

//sound stuff
import processing.sound.*;
SoundFile song;

void setup() {
  size (800, 800);
  img = loadImage ("Space copy.jpg");
  rectMode(CENTER);
  r=radians(30);
  t=radians(40);
  q=radians(100);
  rSpeed = radians(1);
  tSpeed = radians(1.5);
  qSpeed = radians(.9);
  song = new SoundFile( this, "UpBeet copy.wav");
song.loop();
song.amp(.05);
}

void draw() {
  image(img, 0, 0);
  // if statment that take us to the start menu
  if (mode==0) {
    background(0, 0, 0);
    textAlign(CENTER);
    textSize(20);
    fill(40, 85, 56);
    text( " Press Space to Play  :)", width/2, height/2);
    textSize(16);
    fill(50, 100, 89);
    text (" align the grey circles as horizontally as possible, press 'p' on your keyboard to align.", width/2, height/2+30);
    drawStartScreen();
  }

  // if statment that take us from the start menu to the game 
  if (mode == 1) {

    // line in the center 
    line(0, height/2, width, height/2);

    //  center ellipse- ellipse#1
    //rotate(r);
    fill(255, 255, 0);

    ellipse(width/2, height/2, 60, 60);

    fill(55, 64, 80);
    float radius = 100;
    rX = cos(r) * radius + width/2;
    rY = sin(r) * radius + height/2;
    ellipse(rX, rY, 30, 30); // x,y,w,h


    //middle ellipse- ellipse#2

    tX = cos(t) * radius*2 + width/2;
    tY = sin(t) * radius*2 + height/2;

    ellipse(tX, tY, 30, 30); // x,y,w,h


    ////outer ellipse- ellipse#3
    qX = cos(q) * radius*3 + width/2;
    qY = sin(q) * radius*3 + height/2;
    ellipse(qX, qY, 30, 30); // x,y,w,h

    if (!paused) {
      r+= rSpeed;
      t+= tSpeed;
      q+= qSpeed;
    }

    // IF STATMENTS TO LET THE PLAYER KNOW HOW THEY'RE DOING : 
    //println(abs(rY-height/2));
    if (paused) {
      if (abs(rY-height/2)<40 ) {
        textSize(30);
        fill(0, 255, 0);
        text("sphere1: good job!", width/2, height/2+50);
      } else {
        textSize(30);
        fill(255, 0, 0);
        text("sphere1: try again..", width/2, height/2+50);
      }
    }
    if (paused) {
      if (abs(tY-height/2)<40) {
        textSize(30);
        fill(0, 255, 0);
        text("sphere2: good job!", width/2, height/2 +80);
      } else {
        textSize(30);
        fill(255, 0, 0);
        text("sphere2: try again..", width/2, height/2+80);
      }
    }

    if (paused) {     
      if (abs(qY-height/2)<40) {
        textSize(30);
        fill(0, 255, 0);
        text("sphere3: good job!", width/2, height/2 +120);
      } else {
        textSize(30);
        fill(255, 0, 0);
        text("sphere3: try again..", width/2, height/2+120);
      }
    }
  }
}

// the drawing for the start menu 
void drawStartScreen() {
}

// the function that created the Start menu
void keyPressed() {
  if (key==' ') {
    if (mode==0) {
      mode=1;
    } else if (mode==1) {
      mode=0;
    }
  }

}

// the function that pauses the game
void keyReleased() {

  if ( key == 'p' ) {

    paused = !paused;
  }
  //img.updatePixels();
  image(img, 0, 20);
}

ZIP:

https://intro.nyuadim.com/wp-content/uploads/2020/10/space_sound_Midterm_.pde_.zip

space_sound

(let me know if it’s still not working) :), updated nov 2


Image used for the background :

Meera-Wk5

My vision for this project started out by wanting a blurred image to have a sort of spot light that unblurs the parts where the mouse moves. I looked into the Blur example on processing and the spot light example and encountered many obstacles.

From the blur effect:

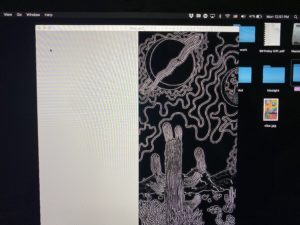
I applied this blur code to my image at first and it showed a side by side image. One was the original image and the other was, a grayscaled version of my image. This was after even after the learning from the professor how to fix this issue. So I experimented with the Kernels and I chose to use the “ Edge detection” way for this effect, rather than blurring it. ( it just seemed cooler )

after that I wanted to remove the side by side view so I inspected that code and found a way to remove the original display. Know I am left with the display with the effect but I wasn’t able to figure out how to move it to the center. I tried many things but my attempts , though they were close, did not work.

After consulting Jack he told me that my issue was at the end of the code, “ image(destination, 400, 0);” this was where my display  was controlled.

Once I finished my experiments with this code I started with the spot light


From the Spot light:

In this effect the spot light was working fine by my image was distorted and I didn’t know why,

Once I figure out why it’s distorted I can attempt to combine the codes together, I consulted Jack and he told me that my issue was in the “destination code”. Once I fixed that I attempted combing both codes.

Combing codes:

When combing the two codes, the codes didn’t run. I went through it with Jack and fixed a few things within the spot light loops.

When I included these two separate codes into one, they didn’t combine. They were their own separate entity. So I tried to create a trancperancy between them , since they overlapped, but I struggled since I didn’t really understand that code.

In the end my results though it not what I planned it was as close as my abilities can get me ( with help, lol).

so here is my final result :

float v = 1.0;  
float[][] kernel = {{ -1*v, -1*v, -1*v}, 
  { -1*v, 8*v, -1*v }, 
  { -1*v, -1*v, -1*v }};

PImage img, destination;

void setup() {
  size(800, 800);
  img = loadImage("vibe.jpg"); // Load the original image
  destination = createImage(img.width, img.height, RGB);
  // noLoop();
} 

void draw() {
  //image(img, 0, 0); // Displays the image from point (0,0) 
  img.loadPixels();

  // Create an opaque image of the same size as the original
  PImage centerImg = createImage(img.width, img.height, RGB);

  // Loop through every pixel in the image
  for (int y = 1; y < img.height-1; y++) {   // Skip top and bottom edges
    for (int x = 1; x < img.width-1; x++) {  // Skip left and right edges
      float sum = 0; // Kernel sum for this pixel
      for (int ky = -1; ky <= 1; ky++) {
        for (int kx = -1; kx <= 1; kx++) {
          // Calculate the adjacent pixel for this kernel point
          int pos = (y + ky)*img.width + (x + kx);
          // Image is grayscale, red/green/blue are identical
          float val = red(img.pixels[pos]);
          // Multiply adjacent pixels based on the kernel values
          sum += kernel[ky+1][kx+1] * val;
        }
      }
      // For this pixel in the new image, set the gray value
      // based on the sum from the kernel
      centerImg.pixels[y*img.width + x] = color(sum);
    }
  }
  // State that there are changes to edgeImg.pixels[]
  centerImg.updatePixels();


  image(centerImg, 0, 0); // Draw the new image

  destination.loadPixels();
  for (int y=0; y<img.height; y++) { // must include img. so that it takes the w/h of the image.
    for (int x=0; x<img.width; x++) {
      int loc = x+(y*img.width);
      float r = red(img.pixels[loc]);
      float g = green(img.pixels[loc]);
      float b = blue(img.pixels[loc]);
      float distance=dist(x, y, mouseX, mouseY);
      float adjustBrightness = (50-distance)/50;//((float) mouseX / width) * 8.0;
      r*=adjustBrightness; //a*=b
 same as 
a = a * b
      g*=adjustBrightness;
      b*=adjustBrightness;
      r=constrain(r, 0, 255); 
      g=constrain(g, 0, 255);
      b=constrain(b, 0, 255);
      destination.pixels[loc]=color(r, g, b);
    }
  }
  img.updatePixels();
  destination.updatePixels();
  image(destination, 400, 0); // top left is like the bottom
}


for reference this is the original :

angry w no rights- Meera


PFont f;
// int for the gradient (r,g,b).
int r = 0;
int g = 0;
int b= 0;
String feels;
int x;
float t = 400;
void setup(){
  size(800,800);
 //i went to the tools craeted a font and saved it and just wrote the name in loadFont.
  f =loadFont("Herculanum-60.vlw");
  textFont(f);
feels = "angry w no right";
x = width;

}

 
 void draw(){
  
   //Gradient background
   for (int i = 0; i<width; i++){
     stroke(i,i,i);
     line(0,i,width,i);
   }
  // text i chose to write, had to fill the text to be able to see it; couldnt find it intially.
 fill(0);
// what makes my sentence move back and forth is the wave and the random is making it go up and down 
float wave = sin (radians(frameCount));
 
 text(feels,90+wave*200,height/2+random(-100,100));

 }


Skippy the Stickman – Meera.

I believe that the toughest part of my process was trying to create something with the tools I have. I thought  to myself” what is the most convenient game anyone would ever want to play?”, and thought of just pressing the mouse in a repetitive way came to my mind. Since my game requires little effort from its user, it will have little effort done to it. Yet nevertheless, something will be done to it. The most prominent action that could occur on the scree is maybe a bouncing object or a jumping man. I took the harder one, the jumping man. I created his little plain world and made small boxes for him to jump over, but making him jump was so frustrating. I didn’t know how to make “mousePressed” create a jump for my poor stickman, so I decided to make him skip. Finally this was what I came up with:


float x = 56;
float a = 48;
float c = 46;
float v = 64;
float b = 66;
float y = 690;
float o = 750;
float u = 705;
float t = 725;
float r = 710;
float p = 762;


void setup(){
  size (800,800);
}

void draw(){

  // game background  


 //cement
  fill (108,107,107);
  rect(0,0,width,height);
 
  // boxes to jump over 
 fill( 172,102,22);
  square(10,741,50);
  square(200,741,50);
  square(380,741,50);
  square(560,741,50);
  square(745,741,50);
   
   //sky
  fill(135,206,250);
  rect(0,0,width,740);

//clouds
   // level one clouds 
    stroke(255);
    fill(255, 255, 255);
    // left cloud
    ellipse(45, 120, 126, 97);
    ellipse(107, 120, 70, 60);
    ellipse(-23, 120, 70, 60);
    
    // middle cloud
    ellipse(370, 100, 126, 97);
    ellipse(432, 100, 70, 60);
    ellipse(308, 100, 70, 60);
    //right cloud
    ellipse(670, 150, 126, 97);
    ellipse(740, 150, 70, 60);
    ellipse(606, 150, 70, 60);
    
// level two clouds 


  stroke(255);
    fill(255, 255, 255);
    // left cloud
    ellipse(80, 300, 126, 97);
    ellipse(150, 300, 70, 60);
    ellipse(10, 300, 70, 60);
    
    // middle cloud
    ellipse(370, 250, 126, 97);
    ellipse(432, 250, 70, 60);
    ellipse(308, 250, 70, 60);
    //right cloud
    ellipse(670, 300, 126, 97);
    ellipse(740, 300, 70, 60);
    ellipse(606, 300, 70, 60);
    
    
   //trees along the road 
   stroke(0);
   fill(51,102,0);
   triangle(30,740,57,640,85,740);
   triangle(107,740,134,640,162,740);
   triangle(184,740,211,640,239,740);
   triangle(539,740,566,640,594,740);
   triangle(616,740,643,640,671,740);
   triangle(693,740,720,640,748,740);

// stick man 
stroke(0);
fill(255, 255, 255);
//head
circle(x,690, 30);
//body
line(x,u,x,o);
//arms
//right
line(x,t,v,r);
//left 
line(x,t,a,r);
//legs
//right
line(x,o,b,p);
//left
line(x,o,c,p);

 x+=1; 
 v+=1; 
 c+=1;
 b+=1;
 a+=1;
}
 void mousePressed (){
 x+=100; 
 v+=100; 
 c+=100;
 b+=100;
 a+=100;
 }

:).

Flash Warning- Meera

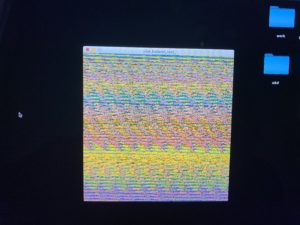
I couldn’t get very creative with my idea. It was hard trying to think of a fun pattern, I went over my class notes and played around with colors hoping I would get inspired but it was still very hard. the more I played around with the code I was able to see some sort of idea come out of it. My idea is is a colorful street. the dots in the center is supposed to represent a moving road, and the colorful squares are the top of the passing by buildings. the outcome really reminded me of a game but it can give headaches if one was to stare for to long. To be more specific it reminded me of pac man, so I decided to recreate it, or atleast attempt to recreate it.and here are my results.

int w= 30;
int x = 20;
int h = 600;
int center= h;
int paracenter = 100;
void setup(){
size( 600, 600);
background(255,20,147);
rectMode( CENTER);
//noLoop();
}


void draw(){
  
   //circle(300,300, 400);
  
   for (int i = 0; i<width; i+=w){
  fill(random(255),random(255),random(205));
    rect(random(i+ w/2), random(center-50,center+50), x, 100);
     rect(random(i+ w/2), random(paracenter-50,paracenter+50), x, 100);


    fill(239,255,0);
   arc(25, 355, 90, 90, 0, TWO_PI - QUARTER_PI , PIE);
    
     fill(random(0));
    fill(random(255));
    circle(i+w/2,350,20);
} 
  }

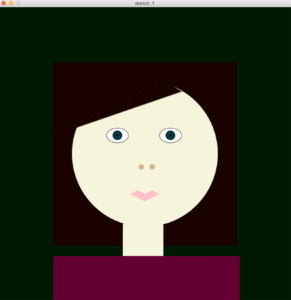
Meera :

size(800, 800);
background(0,25,0);

//hair
fill(25,2,0);
square(150, 150, 500);
//fringe

//head
fill(245,245,220);
circle(400,400,400);
noFill();

//neck
stroke(245,245,220);
fill(245,245,220);
rect(340,590, 110, 150, 7);

//fringe
stroke(25,2,0);
fill(25,2,0);
triangle(150,350,450,200,500,230);
triangle(150,350,300,200,450,200);
noFill();
noStroke();

// outer eye
stroke(0);
fill(255);
ellipse(325,350,60,40);
ellipse(470,350,60,40);
noFill();
noStroke();

// green part of eye
stroke(0);
fill(0,60,70);
circle(325,350,25);
circle(470,350,25);
noFill();
noStroke();

// puipl
stroke(0);
fill(0,0,0);
circle(325,350,5);
circle(470,350,5);
noFill();
noStroke();

//mouth
stroke(255,192,203);
fill(255,192,203);
triangle(360,510,380,500,400,510);
triangle(400,510,420,500,440,510);
triangle(360,510,400,530,440,510);
noFill();
noStroke();

//nose
stroke(217,179,130);
fill(217,179,130);
circle(390,436,14);
circle(420,436,14);
noFill();
noStroke();

//shirt or shoulders
fill(100,0,50);
rect(150,680,510, 200);
noFill();