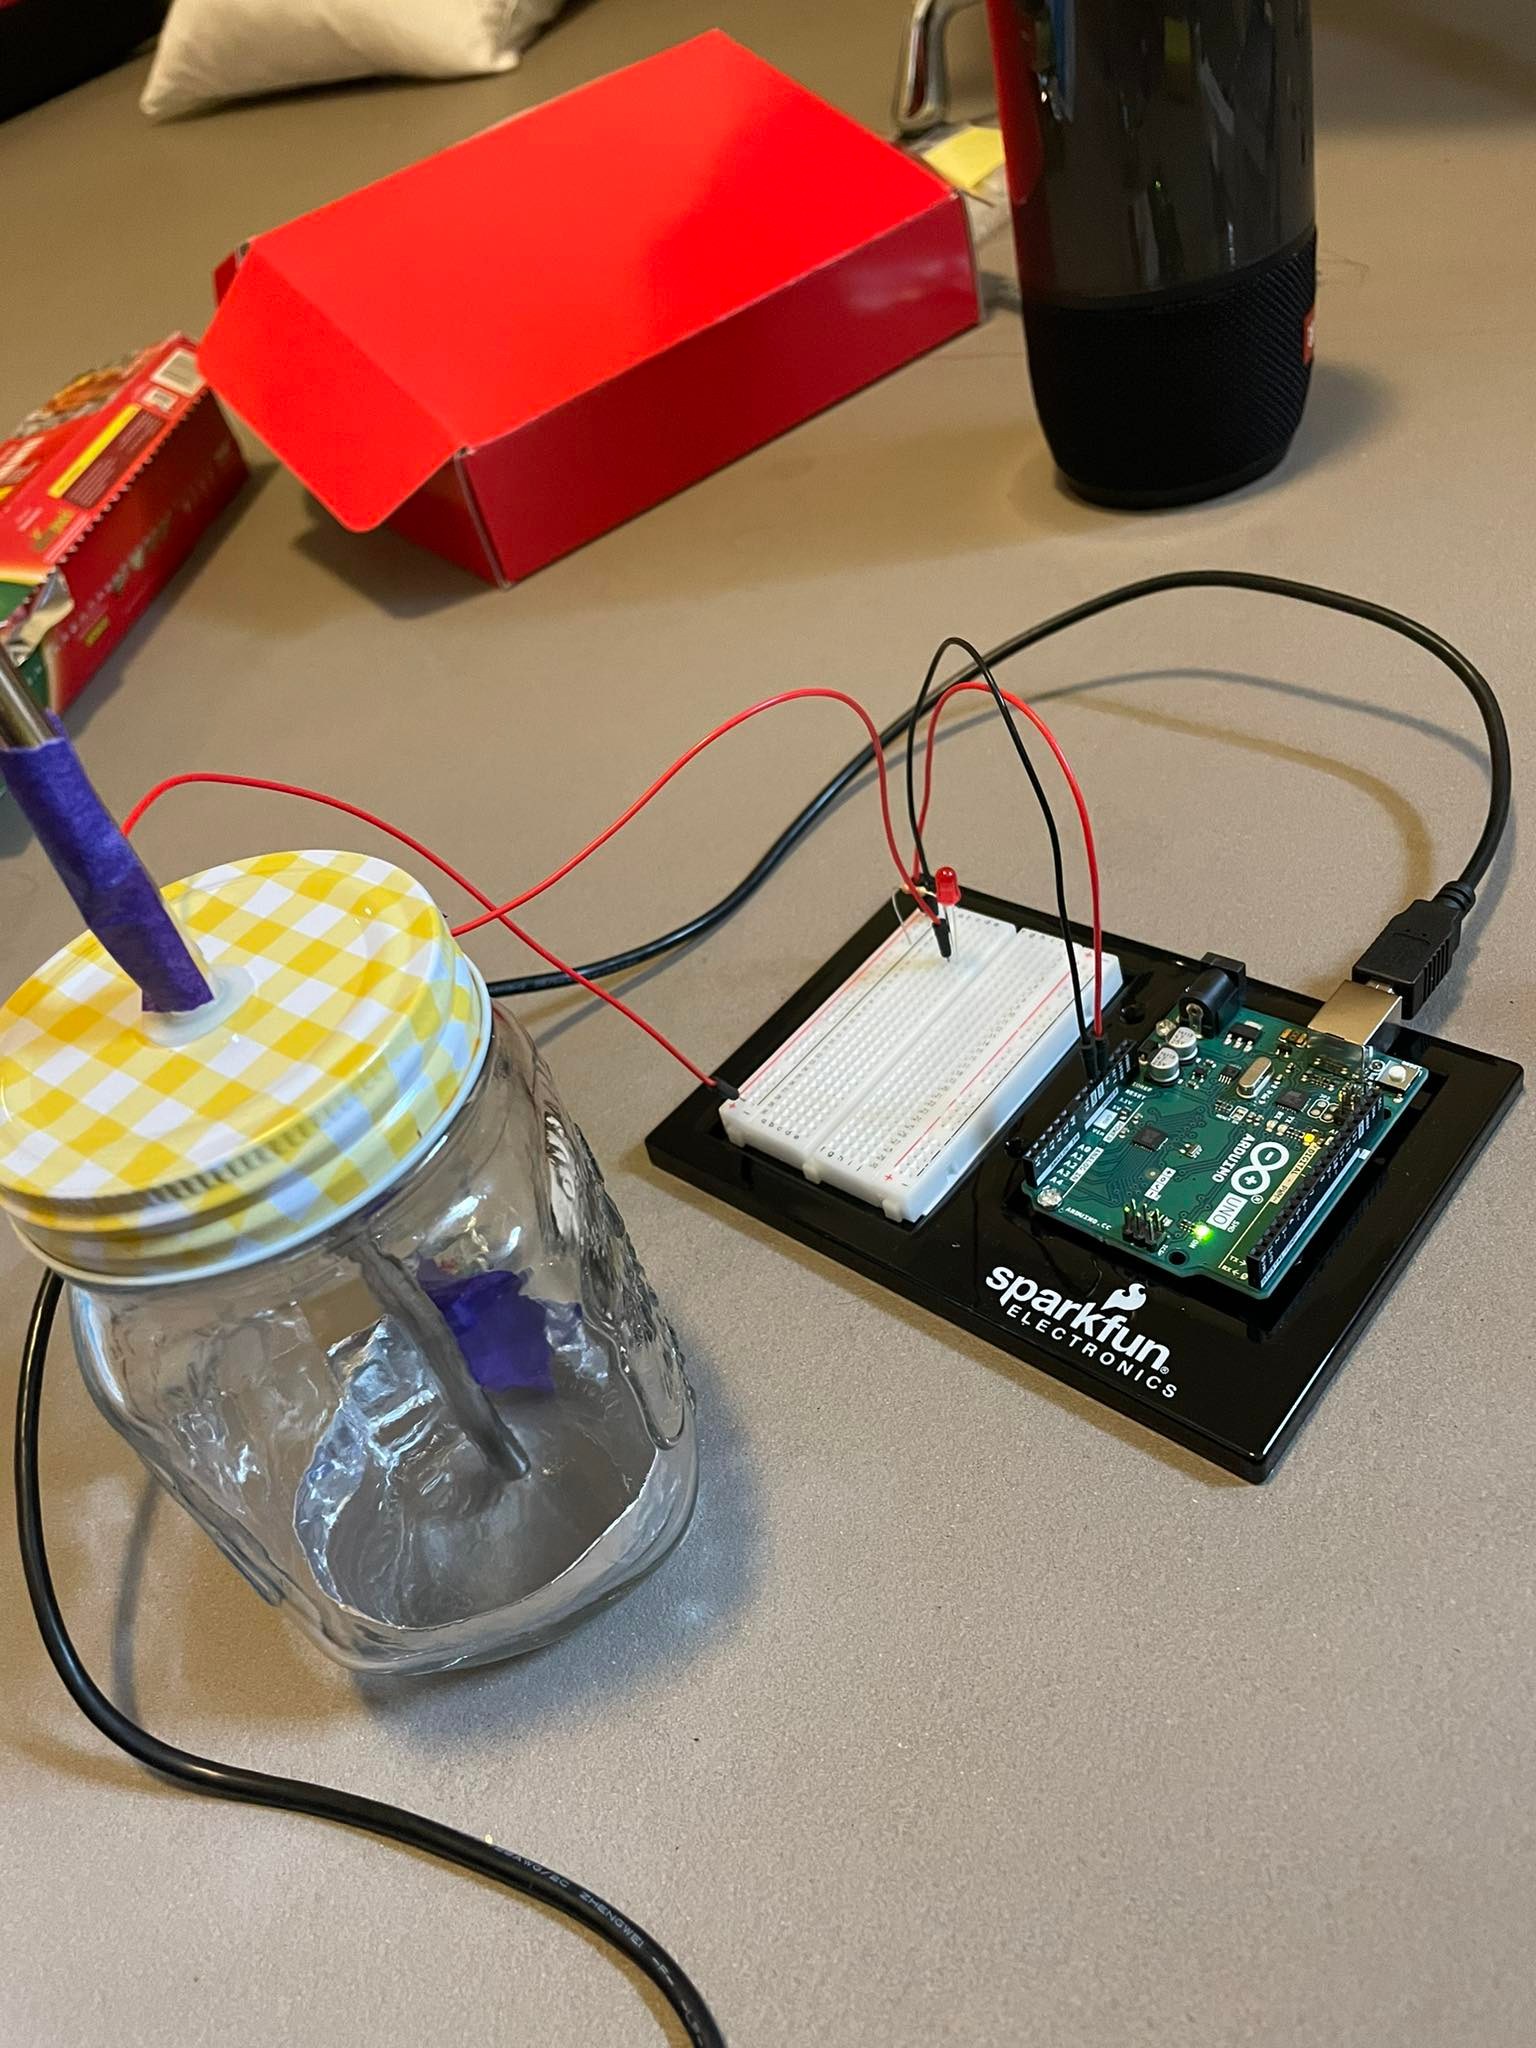
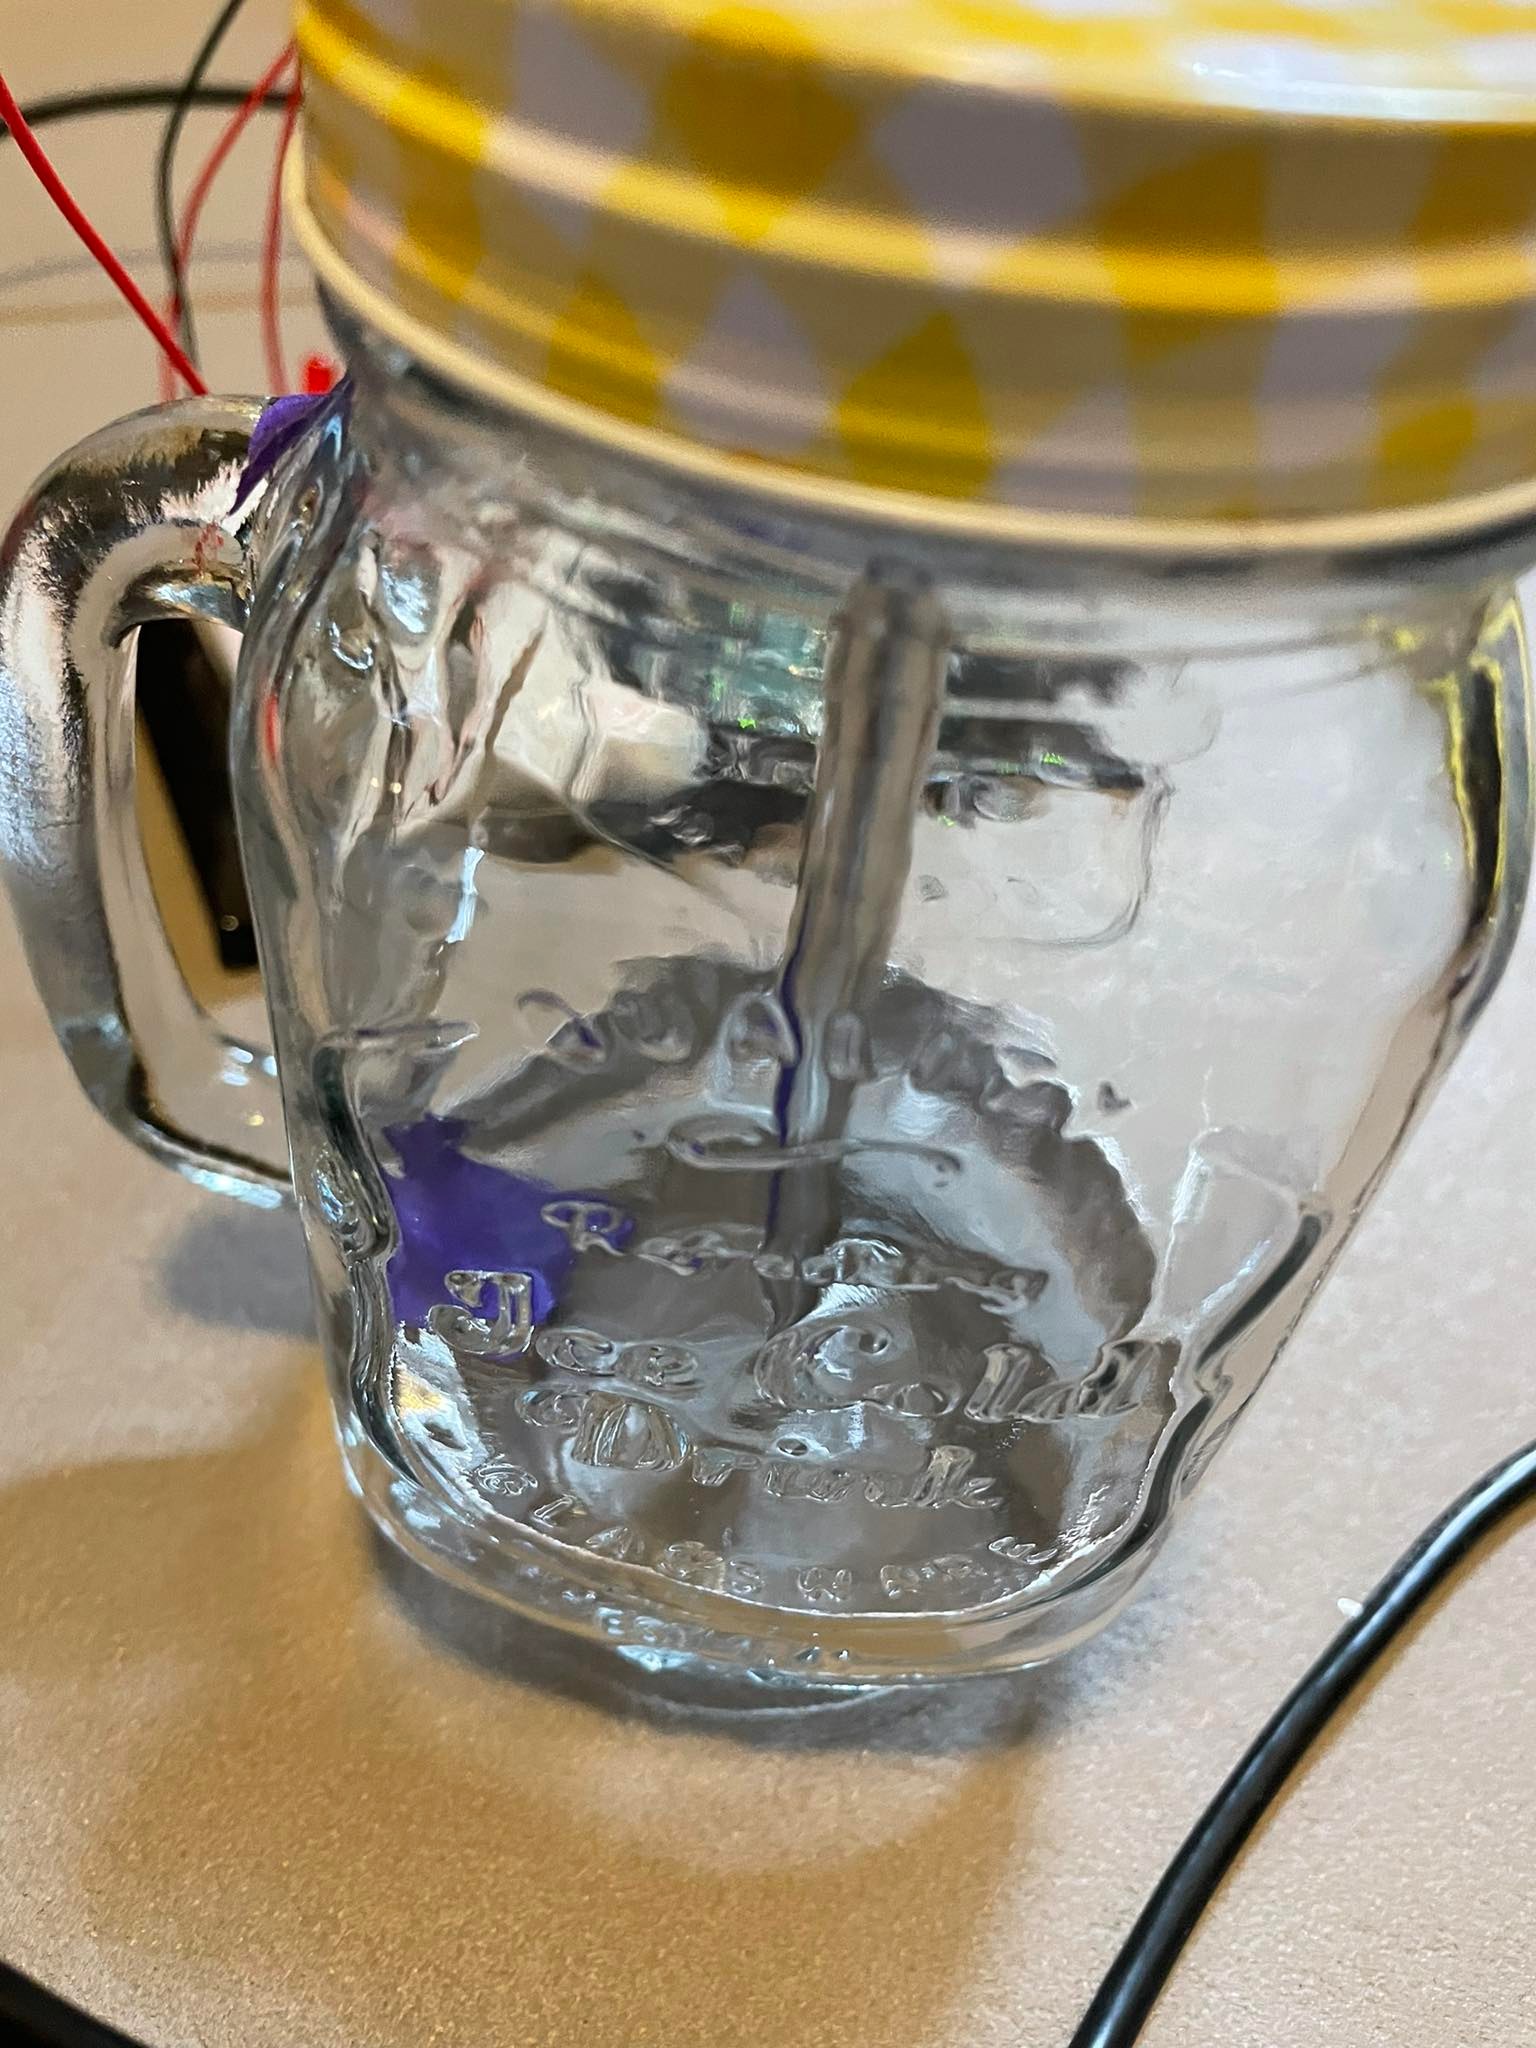
Concept: In most of the human living places in the United Arab Emirates, seawater is one of the main sources of daily water. I designed the switch so that it can let the user know when the sea water level inside the water tank is above a certain point.
How the Switch operates: Saltwater has Na+ (Sodium ions) and Cl- (Chloride ions) that help the water conduct electricity. Therefore, the two metal rods connect the two sides of the circuit through the saltwater’s conductivity, turning the LED on when the water level rises enough to hit both rods.
// NOTE: to make a voltage divider for the photo resistor (which you need)
// use a 10k ohm resistor

void setup() {
  // begin the serial connection at 9600 bits per second
  // (the baud rate)
  Serial.begin(9600);
  // for analog output connect to any of the PWM pins
  // these all have a tilda beside the pin number (~)
  pinMode(5, OUTPUT);
}

void loop() {
  // read the potentiometer on analog input pin A0
  int potValue = analogRead(A0); // analog read gives values in a maximum range of 0-1023
  // map the values from the potentiometer from 0-1023
  // into the range of an analog write (0-255)
  int mappedPotValue = map(potValue, 0, 1023, 0, 255);

  // read the photocell on analog input pin A1
  int lightValue = analogRead(A1);

  // print out the light value so we know the range
  Serial.println(lightValue);

  // based on the lowest and the highest numbers from the sensor,
  // map those to the analogWrite range
  // for example, if the lowest number is 500 nd the highest is 900
  // then do:
  int mappedLightValue = map(lightValue, 500, 900, 0, 255);

  // sometimes the numbers might go lower or higher than 500 or 900
  // it's important to constrain the mapped value
  //to never go lower than 0 and never higher than 255
  int constrainedValue = constrain(mappedLightValue, 0, 255);

  // finally, take the number from the photocell, that was mapped,
  // and then constrained, and use that for the call to analogWrite
  analogWrite(5, constrainedValue);//0-255
}
This week’s assignment was to create an Unusual switch, where hands isn’t required to turn on the switch. My idea was around creating a track and when a ball passes over it, the bulb/switch turns on.
Here is the circuit:
Basically, I have connected one end of the switch with the track (copper strip) and one to the foil, over which the ball would pass.
Here are some pictures of the circuit:
While the ideation took some time, it was fun making it!
For my circuit, I decided to use an LDR, because to me touch-less circuits oftentimes include elements that could rely on sound or on light. I used a 2222 Transistor to switch the process of having my led light up when there is light, which felt somewhat useless. Instead, I have my circuit configured in a way that inverses this process and makes my LED light up when the LDR is not met with light (detects darkness).
The use of this circuitry could easily be attributed to smart lighting systems which turn the light on when it is dark. I was initially inspired by this process of smart systems as I have them integrated all over my room. It was very interesting looking at a very simplified version of this process and making it myself with the basic mechanics.
In this demo I use my hands to create the shadow over the LDR, but you could use anything to create a shadow, which is why I would say my circuit is hands-free, as no hand contact comes to the circuit for the light bulb to turn on, only shadow/light.
For this assignment, I really tried thinking outside the box. And it finally clicked! In this assignment, I capture the process of me thinking and finally realizing what to do.
I start by making a circuit that is disconnected. It connects when two wires come into contact. I increase the length of the wires by attaching strips of aluminum foil to them using tape. Here is what the setup looks like:
And here is what I did with it:
I would agree with you if you said that the setup looks ugly, but I couldn’t think of any other way to do it. Maybe I could have made the wires longer so I don’t have to hold them up, and maybe I could have made them thinner. I will try to be more mindful of the design in further assignments.
When I showed this to a friend and asked them if they get it, they said “yeah, I think I have an idea 💡” and I couldn’t help but share this moment here 🙂
Initially, I wanted to create a secret entrance type switch with books, where if you aligned the books a specific way, the light would turn on (or in essence, the ‘door’ would open). However, this would require the use of hands in interacting with the books. So, I decided to shift away from this idea and play around with the use of one’s mouth in activating a switch.
I decided to come up with a switch that involved the use of a metal straw and how the switch would work is that the light would turn on when the straw touched the bottom sides of the bottle (to indicate that the straw is at the bottomest place possible). With that, I put aluminum foil at the bottom of the bottle (thankfully my hands could fit inside the bottle – making this project easier but not as easy as I thought, to assemble) and you would use your mouth to move the straw around the edge of the bottle and if you are at the bottom edges, the light would turn on.
The circuit itself is very simple – with the use of a standard circuit in turning on a bulb but adding an extra wire to the straw, and another to the aluminum foil a the bottom of the bottle.
Without further ado, here are some pictures of the switch and a video at the end:
I had so much fun doing this assignment, I couldn’t just stick to one switch. Initially, I had the idea of making the guitar strings my switch as when each string vibrates, it connects to a paper clip connected to a foil connected to the switch, turning on the lamp. I also connected different colored led lights so they can be triggered by different strings. However, I thought that this would require the use of my hands technically. Therefore, I came up with the idea of taping the foil to my eyebrows and making the lightbulb light whenever I make a “confused” face in irony as light bulbs usually stand for ideas.
I was then sleepy and got the idea of having the led light turn on whenever I close my eyes would be really fun. All you have to do is sleep and the light will turn on! My last idea was the hair straightener, where whenever I would straighten my hair, the light bulb lights. I am aware this requires the use of hands but, I wanted to include it for fun nonetheless.
Coming up with an idea for this was slightly challenging. I was inspired by ankle exercises I’ve been doing recently in which I would move my ankle around in different directions which gave me a few possible ideas.
Initially, I wanted to do a heel click with aluminum foil on my shoes with foil on the side of my shoes but when I connected the foil on each shoe to the wires, the LED would light up and produce a very faint light without the shoes touching each other. I then decided to wrap the foil around my shoe and step on the wire with it to make the switch.
I had one cable going into the foil inside my shoe and one cable under the shoe where I would step on it with the foil part of the shoe which would close the circuit.
At first, I was going to do a switch involving headphones but then I realized that that would require the use of my hands. So I moved on to another one of my limbs, the legs. I decided to make a switch that turns on when I sit down. I used aluminum foil to connect the wire from the seat, back to the light bulb. Then, I stuck another foil on my bottom which would connect the wires together and complete the circuit.
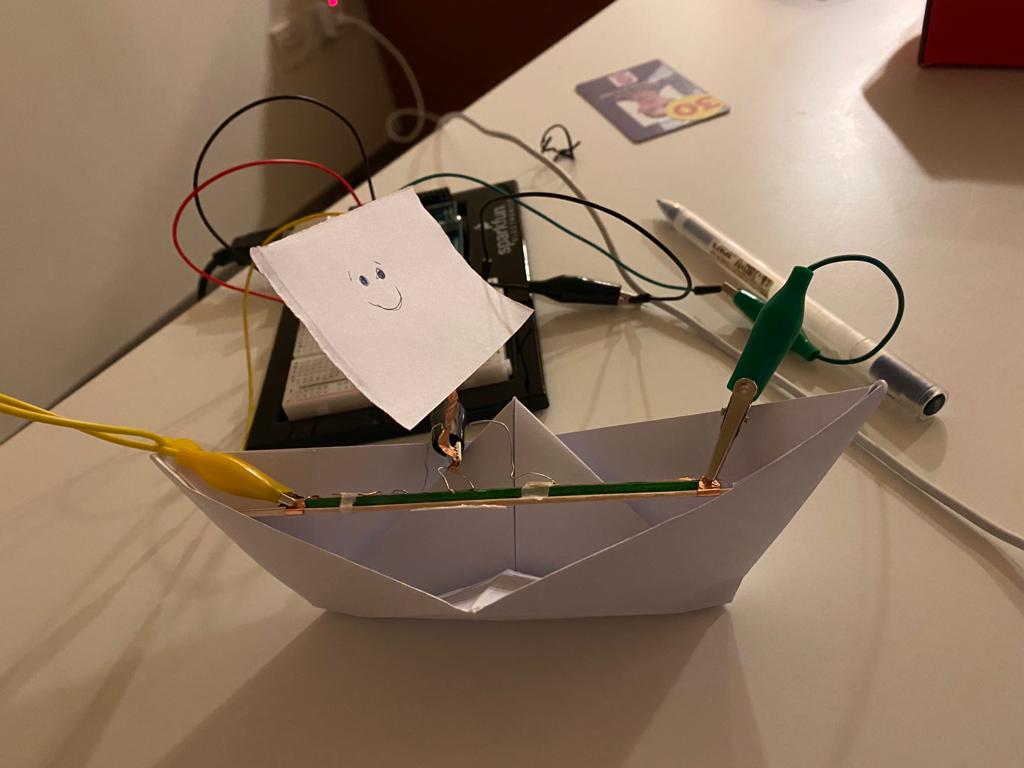
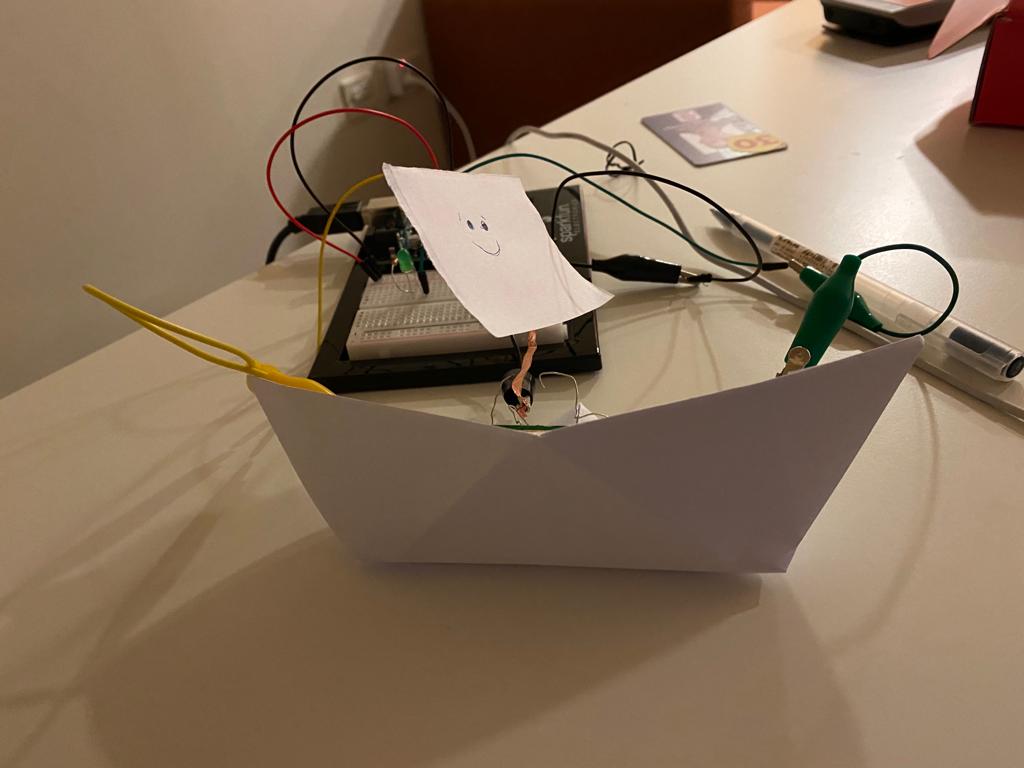
When asked to do a switch that did not require hands, I am unsure why but my head immediately went to a paper boat. My initial idea was to have a little boat on a plate with water that, when blown would move, touch another object and BAM LED light turns on. Nevertheless my design changed significantly throughout my process.
The first step in my process was to create the circuits. I created a circuit with two LED lights of different colors that, if connected to a ground cable would light up the LED. Thus, the boat would activate a different led in a different side of the plate. My switch would then have three modes (Off, Yellow, Green). As instructed in class I used resistors of 330, red cables connecting to 5Volts and black cables leading to ground for the circuits. I then, used colored cables according to the LED they were working on.
After this was done, I spent some time re-learning how to build paper boats and trying them out on a plate. At this point, I realized how complex it would be to use water, considering the little control I had over the boat’s movement and direction. So I thought I’d just ditch water but keep the boat. I came up with this prototype, which made the connection circuit very unreliable. The paper was too heavy and, again, I had little control over its movements.
After a lot of testing and new ideas I got to a switch that responds to wind. Blowing to be specific. I used copper tape and wires as well as two popsicle sticks to build my circuit. I, again, realized that having a fully connected circuit needs a lot of attention to detail. I needed to spend some serious time making small adjustments to the cables’ position and alter small details that would make my switch consistent and easy to use.
Yet, I would not drop the boat idea. Many boats, sail boats run on wind. So perhaps my switch is a mechanism to indicate which way the wind is blowing into. This was perfect. I built a boat to put my switch in and on we go!