original game concept
My game is based on a nightmare I used to have when I was a child.
I’m very claustrophobic, so I used to have a recurring nightmare where I would be in a room with a cake. The cake would get progressively bigger until it left me with no space for myself. My only way out was to eat it.
This is what I wanted the gameplay to be.
I would be able to move around, jump, and crouch to avoid the cake’s hits (candles). If it gets me, it gets bigger. If I get close to it and press the spacebar, I can eat a small chunk out of it. The game will end either if the cake takes up the whole room, or if I eat it first.
Changes made/ Updated version
Due to time constraints, and many many details I was not expecting to cause issues within my program, I had to change the concept slightly, and give up one aspect of the game.
So now, this is the concept of my game:
-
-
-
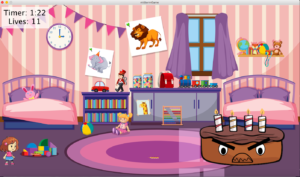
- It starts off similar. Me. Cake. In room.
- The cake can still shoot at me and get bigger if it hits me.
- I can still move around, jump and crouch to avoid hits.
HOWEVER, I gave up the part where I can eat the cake. So now, instead of eating it whole to win the game, another condition needs to be met:
-
-
-
- I have to last 1 minute and 30 seconds without the cake taking up the whole space.
- A timer is set up to take care of this.
- The cake will take up the whole space when it hits me 14 times. So as long as I have lives remaining (initial lives = 14), and 1 minute and 30 seconds have passed, I win.
aesthetic of the game
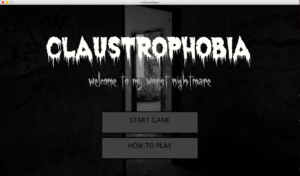
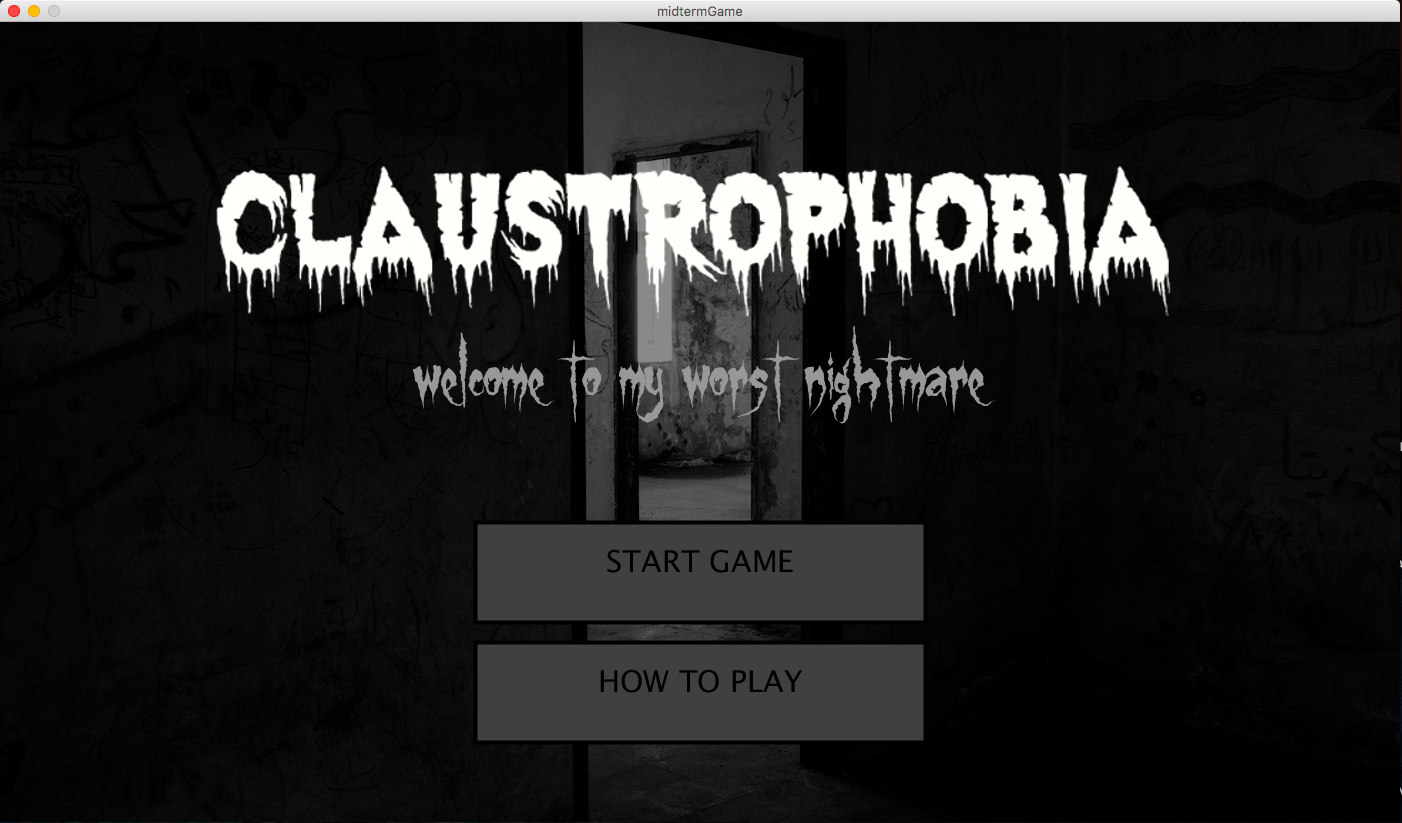
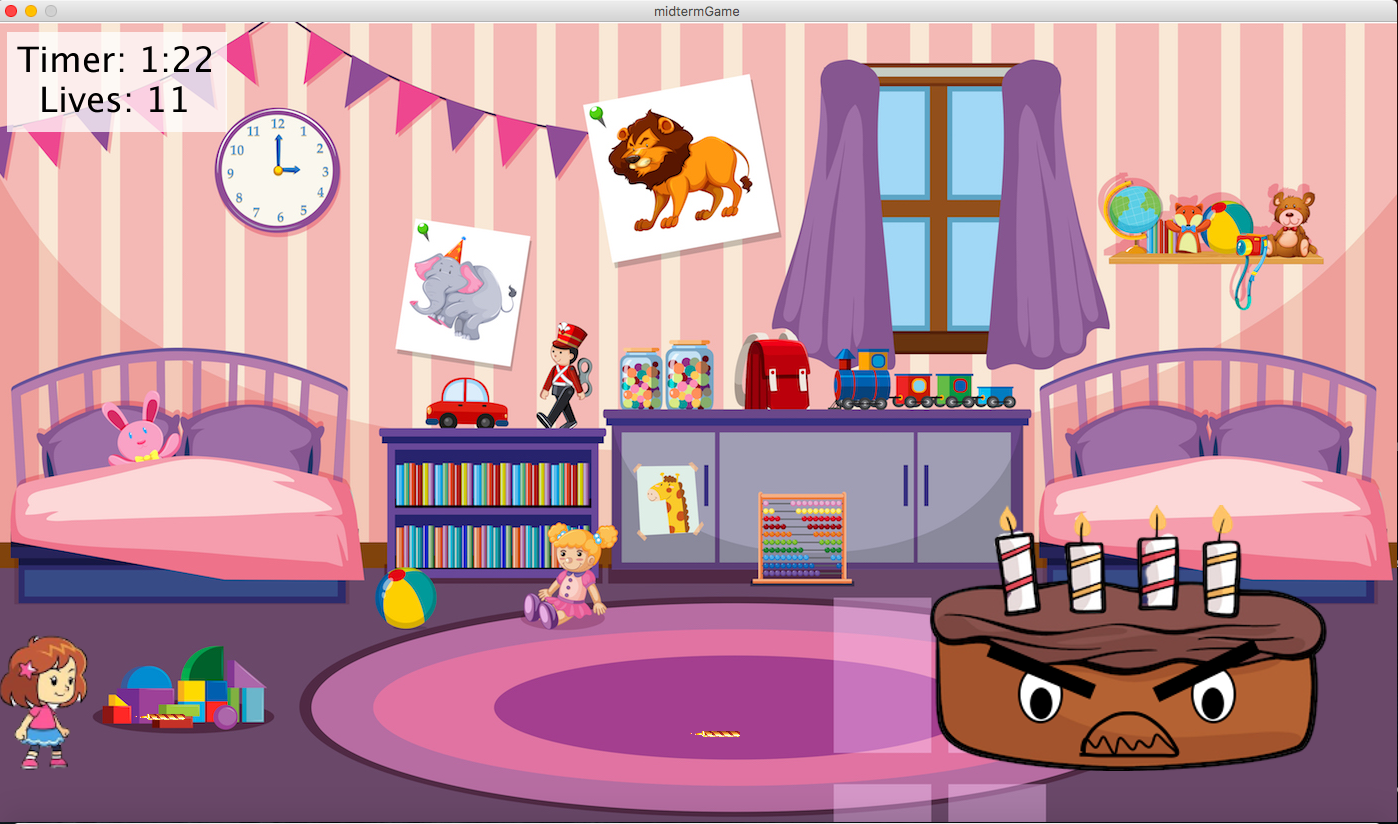
The game is supposed to be a bit humorous, in the sense that it makes you think that this is going to be a horror game, dealing with claustrophobia and nightmares, while in reality, it is quite light and silly since it is a childhood nightmare of mine.
The vibe of the start screen is very creepy, accompanied by equally creepy music. But when you press play, the whole vibe changes. The images are a lot more colorful, and the music becomes fun and bouncy.


remaining issue
I ran into multiple bugs and issues while working on this assignment. Most were handled. However, there is one I can’t seem to fix.
When the cake size grows bigger, and the image in the code is updated to grow in size, the program begins to run slower the bigger the image gets.
I’ve tried many approaches to fixing this(img.resize(), scale(), …) but none seem to do the trick.
I kept the cake visualized by a rectangle for the game to be able to run smoothly, but I still intend to look for a way around this as I find myself very intrigued by what else could possibly be causing this and how to fix it.
classes and tabs
I have six tabs for this program. One for the main, 4 for classes (Game, Person, Hit, Cake), and one more tab containing the display functions for each screen (Start screen, Instructions, Winning screen, Losing screen).
I have illustrated and explained the main and basic ideas by commenting throughout my code.
This is the Main tab:
import processing.sound.*;
SoundFile gamemusic,startmusic;
SoundFile pew, hit , scream,sleep;
PImage image1,image2,image3,bg,candle;
PImage creepy1, creepy2,title,title2,instruc,sleeping,screaming;
PImage[][] sprites;
Game g;
Person me;
Cake cake;
ArrayList<Hit> hits;
float ground ;
int timer, timeleft, timestart,seconds,minutes;
int temptime;
//variables to detect which screen we are on
int startMenu =1;
int howTo = 2;
int playGame = 3;
int gameState;
void setup() {
size(1400, 800);
gameState = startMenu; //start at start screen
temptime = 90;
timer = timeleft = 90000; // set timer for 1 minute 30 seconds
timestart = 0;
ground = height - 50;
g = new Game(); //new instance of our whole game
me = new Person(); //new person
cake = new Cake(); //new cake
hits = new ArrayList<Hit>(); //new hits array
//load all images
image1 = loadImage("me.png");
sprites = new PImage[3][6];
for (int y=0; y < 3; y++) {
for (int x=0; x< 6; x++) {
sprites[y][x] = image1.get(x*(image1.width/6), y*(image1.height/3), me.characterW, me.characterH);
}
}
image2 = loadImage("me3.png");
image3 = loadImage("cakee.png");
candle = loadImage("candle.png");
creepy1 = loadImage("creepy1.jpg");
creepy2 = loadImage("creepy2.jpg");
title = loadImage("title.png");
title2 = loadImage("title2.png");
instruc = loadImage("instruc.png");
sleeping = loadImage("sleep2.jpg");
screaming = loadImage("scream.jpg");
bg = loadImage("bg1.jpg");
//load all sounds, loop them and set their volumes to 0
pew = new SoundFile (this,"pew.mp3");
hit = new SoundFile (this,"gothit2.mp3");
scream = new SoundFile (this,"scream.mp3");
scream.loop(); scream.amp(0);
gamemusic = new SoundFile (this,"gamemusic.mp3");
gamemusic.loop(); gamemusic.amp(0);
startmusic = new SoundFile (this,"startmusic.mp3");
startmusic.loop(); startmusic.amp(0);
sleep = new SoundFile (this,"sleep.mp3");
sleep.loop(); sleep.amp(0);
}
void draw() {
if (gameState == startMenu){
startmusic.amp(1); //play start music
image(creepy1,0,0);
image(title, 200,140);
image(title2, 400,300);
displayStart(); //display start screen
//make new instances of everthing to restart everything
g = new Game();
cake = new Cake();
me = new Person();
hits = new ArrayList<Hit>();
gamemusic.amp(0); //mute other sounds
scream.amp(0);
sleep.amp(0);
}
else if (gameState == howTo){
image(creepy2,0,0);
image(instruc,500,100);
displayHow(); //display instructions screen
gamemusic.amp(0);
scream.amp(0);
sleep.amp(0);
startmusic.amp(1); //play music for this screen
}
else if (gameState == playGame){
if (g.won == false && g.lost == false) //if the game is still going
{
//display the game and play its music
image(bg, 0, 0);
gamemusic.amp(0.5);
startmusic.amp(0);
scream.amp(0);
sleep.amp(0);
temptime = minutes* 60 + seconds;
g.coolingTime++;
g.displayGame();
}
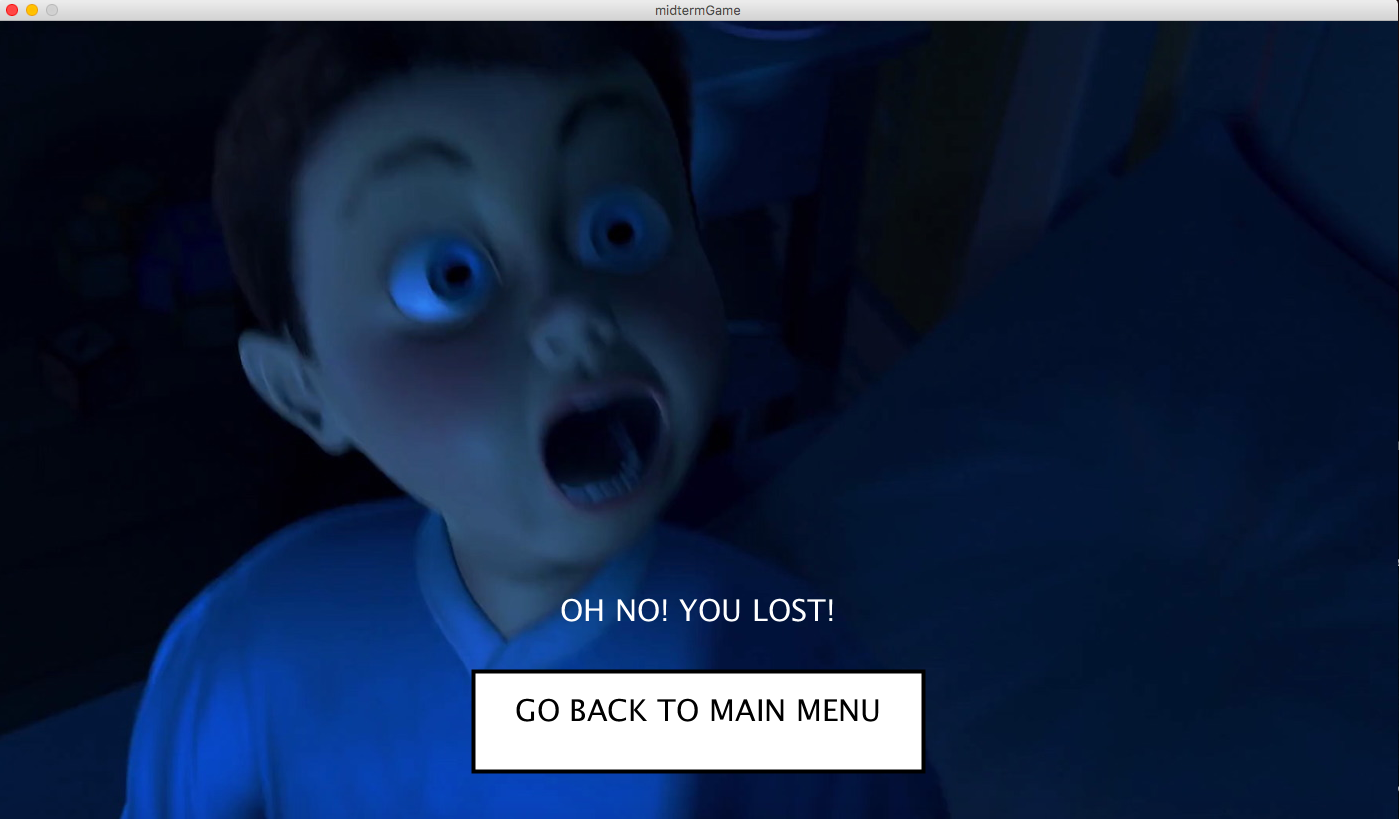
else if (g.lost == true) //if you lose, display lost screen
{
image(screaming,0,0);
gamemusic.amp(0);
startmusic.amp(0);
sleep.amp(0);
scream.amp(1);
lostGame();
} else if (g.won == true) //if you win display winning screen
{
image(sleeping,0,0);
gamemusic.amp(0);
startmusic.amp(0);
scream.amp(0);
sleep.amp(1);
wonGame();
}
}
}
//mouse pressed functions to make the buttons that switch between screen
void mousePressed(){
if (gameState == startMenu){
if (475<mouseX && mouseX<475+450 && 620<mouseY && mouseY<620+100){
gameState = howTo;
}
if (475<mouseX && mouseX<475+450 && 500<mouseY && mouseY <500+100){
gameState = playGame;
timestart = millis();
}
}
else if (gameState == howTo){
if (475<mouseX && mouseX<475+450 && 650<mouseY&& mouseY<650+100){
gameState = startMenu;
}
}
else if (gameState == playGame && (g.won || g.lost)){
if (475<mouseX && mouseX<475+450 && 650<mouseY&& mouseY<650+100){
gameState= startMenu;
}
}
}
This is the Game Class:
This is where an instance of the actual gameplay is defined using all other instances from other classes. It only has a displayGame() method which combines everything that needs to be done when you press START.
class Game
{
  boolean won ;
  boolean lost;
  int coolingTime, hitsCount, biggerCount, lives;

  Game()
  {
    hitsCount = 0;
    biggerCount = 0;
    coolingTime = 50;
    won = false;
    lost = false;
  }

  void displayGame()
  {
    timeleft =  timer - (millis() - timestart);
    seconds = (timeleft/1000) % 60;
    minutes = (timeleft/1000) / 60;
    //game

    me.jump();
    me.move();
    me.drawPerson();
    //for each hit draw it, move it and check it it collides with character
    for (int i=0; i<hitsCount; i++)
    {
      hits.get(i).updateHit();
      hits.get(i).drawHit();
      if ((me.hitPerson(hits.get(i))== true)) //if there is a collision
      {
        hits.get(i).y=900; //make hit disappear from view
        cake.bigger(me); //make cake bigger
        biggerCount++; //add to this counter which gives us how many times you've been hit
        if (hit.isPlaying()) {
          hit.stop();
        }
        hit.play(); //play hit sound if not already playing
      }
      if (hits.get(i).y == 900 || hits.get(i).x<0)
      {
        hits.remove(i); //to keep hits array small, remove any hit that is no longer needed
        // i.e if it disappeared from screen or if it already hit the character
        hitsCount--;  //and reduce this counter by 1
      }
    }


    if (coolingTime >= 100) { //add a new hit to hit array after some time
      hits.add( new Hit(random(550, ground-20)));
      hitsCount+=1; //increment hit counter
      if (pew.isPlaying()) {
        pew.stop();
      }
      pew.play(); //play shooting sound "pew pew" if it's not already playing
      coolingTime = int(random(50));
    }
    //draw and move the cake
    cake.drawCake();
    cake.moveCake();
    if (biggerCount == 14) //detect loss
    {
      lost = true;
    }
    if (biggerCount <14 && seconds == 0 && minutes == 0) //detect win
    {
      won = true;
    }
    //display timer and number of remaining lives
    if(seconds <= 5 && minutes == 0) //make timer show up bigger in the center of the screen
    //when you have 5 minutes left
    {
      fill (255,220);
      rect(width/2-250,height/3-70,500,200);
      fill(0);
      textSize(70);
      textAlign(CENTER);
      lives = 14 - biggerCount;
      text("Timer: "+seconds, width/2, height/3+10);
      text("Lives: "+ str(lives), width/2, height/3+100);
    }
    else{
      fill (255,190);
      rect(10,10,220,100);
      fill(0);
      textSize(35);
      textAlign(LEFT);
      lives = 14 - biggerCount;
      if(seconds < 10)
       text("Timer: "+ minutes+":0"+seconds, 20, 50);
      else
        text("Timer: "+ minutes+":"+seconds, 20, 50);

      text("Lives: "+ str(lives), 42, 90);
    }
  }

}
This is the Cake class:
All methods related to cake are defined here : drawCake(), moveCake(), bigger() (the last one is to make the cake bigger).
class Cake
{
  float cakeW, cakeH;
  float cakeX, cakeY,speed;
  float s;
  Cake(){
    speed = 0.5;
    cakeW = 300;
    cakeH = 200;
    cakeX = width -cakeW - 50;
    cakeY = ground-cakeH;
    s=1;
  }

  void drawCake()
  {
    noStroke();
    fill(0,150);
    rect(cakeX,cakeY, cakeW, cakeH);
    //image(image3,cakeX,cakeY,cakeW, cakeH);
  }
  void moveCake() // to slightly move the cake to the left and right
  {
    cakeX -= speed;
    if (cakeX > width -cakeW - 25 || cakeX< width -cakeW - 75)
    {
      speed *= -1;
    }
  }
  void bigger(Person thisMe) // to make the cake bigger everytime you are hit
  {
    //change size
    cakeH *= 1.1;
    cakeW *= 1.1;
    //push back x and y accordingly
    cakeX = width -cakeW - 50;
    cakeY = ground-cakeH;
    //upadte the x of the character to not let it be displayed afte the border of the cake
    float d =dist(thisMe.characterX,thisMe.characterY,cakeX,thisMe.characterY);
    if ( d< thisMe.characterW)
    {
      thisMe.characterX -= (thisMe.characterW -d) ;
    }

  }

}
This is the Hit class:
It has drawHit and updateHit methods.
An ArrayList of hits is defined in the Main Tab to contain all hits.
class Hit
{
  float x,y, speed;
  int w,h;

  Hit(float thisY)
  {
    w= 50;
    h = 6;
    //setting speed for every hit depending on timer
    if (90-temptime <= 20) {speed = 8;}
    else if (90-temptime > 20 && 90-temptime<= 30 ) {speed = 9;}
    else if (90-temptime > 30 && 90-temptime <= 40 ) {speed = 10;}
    else if (90-temptime > 40 && 90-temptime <= 50 ) {speed = 11;}
    else if (90-temptime > 50) {speed = 13;}
    x = cake.cakeX;
    y = thisY;
  }

  void drawHit()
  {
    fill(0);
    noStroke();
    //rect(x,y,w,h);
    image(candle,x,y,w,h);
  }

  void updateHit() //moving the hit
  {
    x-= speed;
  }
}
This is the Person class:
It has 4 methods: jump , move, drawPerson, and hitPerson(this one is to check for collision with hits).
class Person
{
  int characterW;
  int characterH;
  int direction;
  int step;
  float xspeed;
  float yspeed;
  float characterX;
  float characterY ;
  boolean crouching; //boolean to check if player is crouching or not
  boolean jumping; //boolean to check if player is already jumping

  Person()
  {
    characterW=100;
    characterH=150;
    direction = 2;
    step = 0;
    xspeed= 5;
    yspeed = 0;
    characterX= 0;
    characterY= ground-characterH;
    crouching = false;
    jumping = false;
  }

  void jump(){ //function to make character jump
    characterY += yspeed;

    if (characterY + characterH > ground) { //check if character is back on the ground
      //set variables to initial state
      characterY = ground - characterH;
      yspeed = 0;
      jumping = false;
    }
    else { //if character is in the air
      yspeed ++; //bring him back to the ground (gravity)
    }
  }
  void move(){ //function to move the character with the arrow keys
    if (keyPressed && keyCode == RIGHT){
        direction = 0;
        if(characterX + characterW < cake.cakeX){
          characterX += xspeed;
        }
    }
    else if (keyPressed && keyCode == LEFT){
        direction=1;
        if (characterX > 0){
          characterX -= xspeed;
        }
    }
    else if (!keyPressed){
      direction = 2;
    }
    else if (keyPressed && keyCode == UP && !me.jumping) { // only jump if you're not already jumping
      me.yspeed = -15;
      me.jumping = true;
    }

    if (keyPressed && keyCode == DOWN){ //if crouching, update character height and y
      crouching = true;
      characterW=140;
      characterH = 93;
      characterY= ground-characterH;
    }
    else {crouching = false; characterW = 100; characterH = 150;} //if not, reset them to original

    if (frameCount%xspeed==0) { //iterate through sprites
        step = (step+1) % 6;
    }
  }

  void drawPerson()
  {
    if (!crouching){
      //rect(characterX, characterY, characterW, characterH);
      image(sprites[direction][step],characterX,characterY);
    }
    else if(crouching) {
      //rect(characterX, characterY, characterW, characterH);
      image(image2,characterX,characterY);
    }
  }
  boolean hitPerson(Hit h) //checking collision with a hit
  {
    if((h.x>characterX +characterW) && dist(h.x+h.w/2,h.y+h.h/2,characterX+characterW/2,characterY+characterH/2) <= characterW/2+h.w/2)
    {
      return true; // means there is a collision from front or back
    }
    if((h.x<=characterX +characterW) && dist(h.x+h.w/2,h.y+h.h/2,characterX+characterW/2,characterY+characterH/2) <= characterH/2+h.h/2)
    {
      return true; // means there is a collision from top or bottom
    }
    else {return false;} // if not, there is no collision
  }
}
And finally! This is the tab for the screen display functions:
//function to display losing screen
void lostGame(){
fill(255);
textSize(30);
textAlign(CENTER);
text("OH NO! YOU LOST!", width/2,600);
fill(255);
stroke(0);
strokeWeight(4);
rect(475,650,450,100);
fill(0);
text("GO BACK TO MAIN MENU",475+450/2,650+100/2);
if (475<mouseX&& mouseX<475+450 && 650<mouseY&& mouseY<650+100){
stroke(255);
strokeWeight(4);
fill(0);
rect(475,650,450,100);
fill(255);
text("GO BACK TO MAIN MENU",475+450/2,650+100/2);
}
}
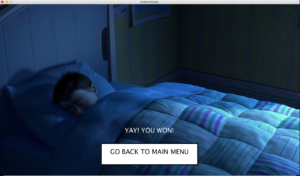
//function to display winning screen
void wonGame(){
fill(255);
textSize(30);
textAlign(CENTER);
text("YAY! YOU WON!", width/2,600);
fill(255);
stroke(0);
strokeWeight(4);
rect(475,650,450,100);
fill(0);
text("GO BACK TO MAIN MENU",475+450/2,650+100/2);
if (475<mouseX&& mouseX<475+450 && 650<mouseY&& mouseY<650+100){
stroke(255);
strokeWeight(4);
fill(0);
rect(475,650,450,100);
fill(255);
text("GO BACK TO MAIN MENU",475+450/2,650+100/2);
}
}
//function to display start screen
void displayStart(){
textSize(30);
textAlign(CENTER);
fill(64);
stroke(0);
strokeWeight(4);
rect(475,500,450,100);
rect(475,620,450,100);
fill(0);
text("START GAME",475+450/2,500+100/2);
text("HOW TO PLAY",475+450/2,620+100/2);
if (475<mouseX&& mouseX<475+450 && 500<mouseY&& mouseY<500+100){
stroke(255);
strokeWeight(4);
fill(0);
rect(475,500,450,100);
fill(255);
text("START GAME",475+450/2,500+100/2);
}
if (475<mouseX && mouseX<475+450 && 620<mouseY && mouseY<620+100){
stroke(255);
strokeWeight(4);
fill(0);
rect(475,620,450,100);
fill(255);
text("HOW TO PLAY",475+450/2,620+100/2);
}
}
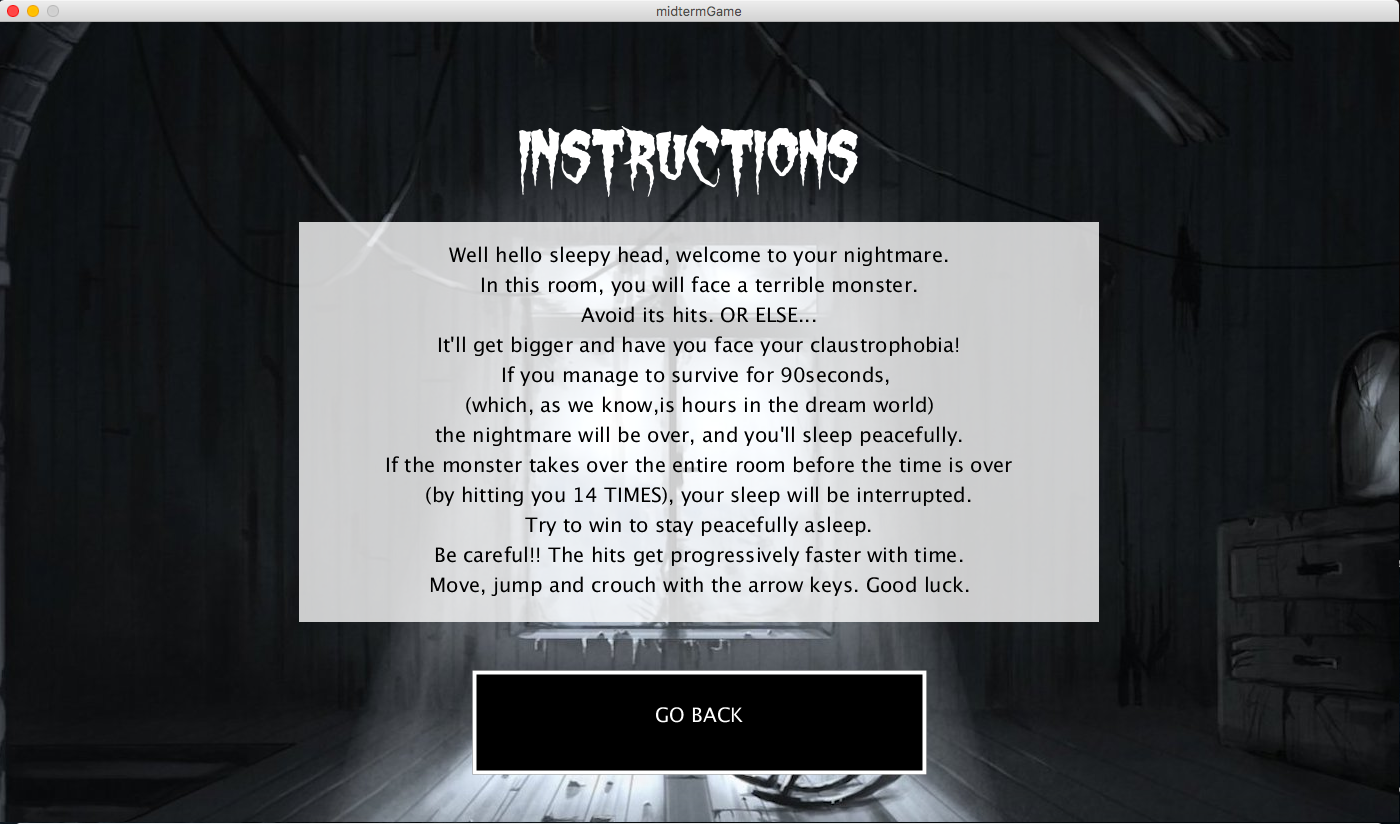
//function to display instructions screen
void displayHow(){
fill(255,200);
noStroke();
rect(300,200,800,400);
fill(0);
textSize(20);
textAlign(CENTER);
text("Well hello sleepy head, welcome to your nightmare.", width/2,240);
text("In this room, you will face a terrible monster.", width/2,270);
text("Avoid its hits. OR ELSE...", width/2,300);
text("It'll get bigger and have you face your claustrophobia!", width/2,330);
text("If you manage to survive for 90seconds, ", width/2,360);
text("(which, as we know,is hours in the dream world)", width/2,390);
text("the nightmare will be over, and you'll sleep peacefully.", width/2,420);
text("If the monster takes over the entire room before the time is over", width/2,450);
text("(by hitting you 14 TIMES), your sleep will be interrupted.", width/2,480);
text("Try to win to stay peacefully asleep.", width/2,510);
text("Be careful!! The hits get progressively faster with time.", width/2,540);
text("Move, jump and crouch with the arrow keys. Good luck.", width/2,570);
fill(64);
stroke(0);
strokeWeight(4);
rect(475,650,450,100);
fill(0);
text("GO BACK",475+450/2,650+100/2);
if (475<mouseX&& mouseX<475+450 && 650<mouseY&& mouseY<650+100){
stroke(255);
strokeWeight(4);
fill(0);
rect(475,650,450,100);
fill(255);
text("GO BACK",475+450/2,650+100/2);
}
}
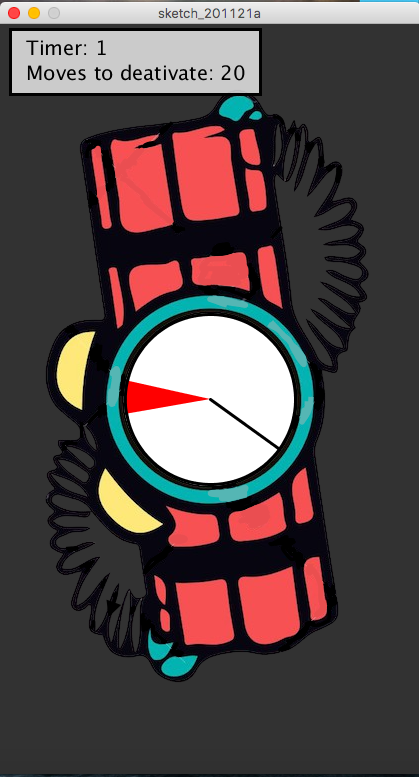
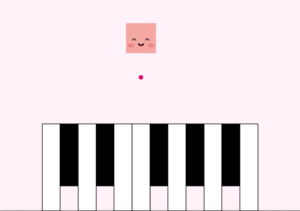
Final game
(has a rectangle instead of cake image)
If you want to try the game out, here is the .zip file!
midtermGame
UPDATE
I fixed the image resizing problem with an off-screen buffer using PGraphics.
This is the working version of the game.
fixedGame


