So, I would like to start by saying, Cole and I have a working bomb! xD
Despite some external circumstances, we both have been able to finish this project successfully; we have a bomb, which works, explodes, and has a full mechanism to be diffused, along with full game aesthetics and UI. Honestly, it was a really fun project to work on. Kudos to Cole for being an amazing partner 🙂
Please go through our previous documentations to get an idea of how our project came along:
Since we were dealing with both Arduino and Processing, if something went wrong, or wasn’t working the way we expected it, it was really hard to find out where the problem was. It could have been in the circuit, or the Arduino code, or the handshake (arising from the difference in speeds of Arduino and Processing), or the Processing code/logic. So, we used a lot of println() statements to check if the input/output was being read from the Arduino and being correctly passed on to Processing. One problem we faced was on stage 3 when you have to replicate the LED patterns. It would set the bomb off sometimes even if the pattern was correct. After racking our brain on what was incorrect in the logic of our code, we realized that the problem was with the discrepancy in the speed of Arduino and Processing (even after establishing the serial communication) and not our code. Processing wouldn’t read all buttons pressed on the Arduino every time. When we printed these out, we realized where the problem was. This resulted in the addition of a small flashing light on the Processing screen on the bottom left corner to indicate which button color was pressed and read by Processing. If that light doesn’t flash, that means the button input wasn’t read. This proved to be a very important signifier.
Making it a bit harder
So, we coded our program to wait for specific inputs at each stage. But, what if a user by mistake, presses something Arduino/Processing is not waiting for at a specific stage such as a button when submit was expected? Since it is a bomb, ideally it should go off if something incorrect is done. So, to make the game harder and interesting, but not letting the bomb go off at every wrong input, giving the user a little flexibility to play around and have fun, we decided to have 2 checks. 1) Make the bomb explode if an incorrect input is given from one of the input methods the particular stage is waiting for, 2) reduce the time left by 10 seconds if an incorrect input is given from a wrong input method. In our program, you can record an input by either pressing one of the four buttons on the Arduino screen or the submit button on the Processing screen for the distance and potentiometer. If an input is expected from the Arduino button and submit button is mistakenly clicked, it reduces the time. However, if a yellow Arduino button was expected, but a red one was pressed, then the bomb goes off.
Additional Touches and User Experience
We decided to add sounds for user experience and specific feedback to the user. For example, it was essential to indicate to the user when their time was reduced. So we added a sound for this to the Processing program. Then, of course, you want to hear an explosion right when the bomb goes off? Should look real. So, we decided to add a sound to both our end screens – if you win or lose. Finally, we also have the best sound of all, the bomb being defused and the game being won!
Game Design and UI
We made a total of 6 screens for the whole game (the last one having 2 parts) – 1) A start/menu screen, 2) a ‘how to play’ screen, 3) a player mode choosing screen which would navigate to the game screen or bomb instructions screen, 4) bomb instructions screen, 5) the game screen, 6) end screen: win screen and lose screen.
Honestly, UI takes quite some time to implement because of all the design, color choices, etc. We even added back buttons for easy navigation and a ‘play again’ button if the user wishes to go back and replay the game, switch roles with their partner, etc.
Our game is also designed in a way that it can be 2 players or 1 player. For one player, all you would have to do is keep a screenshot/printout of the bomb instructions printed out and handy.
See a video for each in the end!
User Testing
Shoutout to all our friends who played the game. Several nights we had friends trying out the game which helped us make several changes. We found that the instructions needed to be written in a more straightforward manner about the flow of the game, the non-technical language used to describe the Arduino, as well as some limitations in what Processing was handling.
Processing/Arduino communication: As Processing is more powerful running on a laptop than on a computer, all the logic about which lights are on is done via Processing. Every handshake involves sending 4 boolean variables, one for each light, as well as two bomb state variables (exploded or defused) to the Arduino. Arduino receives this information, lights up the passed LEDs or goes into an exploded/defused state. Arduino then returns the state of each button, the distance meter reading, and the potentiometer back to Processing.
Random LED: Each time the bomb goes into a new phase, the variables for each light are randomized within the constraints of that round. For example, in the round where a random amount of LEDs flash, first a random number 1-4 is chosen and then that many random LEDs are flashed.
Button Press/Used: Since Processing is running at 60fps(if we are lucky) and Arduino is running at a much faster rate, we had to add a variable that would determine if a button is being pushed, similar to the function mouseClicked(){}. We created a boolean variable that would be set to true whenever a button was recorded being down and back to false when released so we could keep track between rounds and extra inputs were not recorded.
Bomb timer: Processing gives current time in milliseconds using the function millis(). We used milliseconds as a unit to do all time calculations – recording start time of game, getting the current time, calculating time elapsed and time left, periodically updating those and also noting the final time taken to diffuse the bomb for the end screen. However, we wanted the time to be displayed in the usual format of minutes and seconds, so we made a convert time function to display it in the appropriate format.
Please read through my previous blog post if you haven’t to better follow this one 🙂
Once Cole and I had finalized our idea for the final project, the first very important thing was to finalize the instructions for bomb diffusion. We both had a preliminary idea on how our game should work – have LEDs light up to give a signal, press buttons according to that, this should give you the next task to do and a few such tasks should culminate in cutting a wire. This seemed very easy until we started making a plan. We realized, there were a lot of things to consider, and based on that, we could have many permutations of things we could do / signals and tasks we could create. So we decided on the things we will be using on our Arduino board for input and output first. Due to limited pins, we had to maximize what we could use and different signals we could create. We decided on 4 LEDs as output signals and 4 buttons (different colors), potentiometer, and distance meters as inputs. We made a complete plan on how to start, which instruction will lead to what and so. It can be found below. And I must mention, it took longer than we thought and harder than we assumed to chart this plan!
Instructions Part 1
Instructions Part 2
After this plan was made, Cole and I decided to first get started with some basics of our Arduino and interface on Processing.
Interface of Processing
We decided to start with the interface first because once we have the visualization, it will be easy to display the Arduino reads on the screen and check if our code/wiring is appropriate or not. Also, it is very hard to code the entire logic with no visible output. So, once we integrate Arduino with processing, we should be able to see the results on the screen.
I started with sketching the wires. I was thinking about how it could be possible to have wires disappear once they are cut. The best way I could imagine was draw these pieces individually and then display the appropriate wires based on their state (1 for uncut and 0 for uncut).
Next, I wanted to try to make the distance meter and potentiometer reading on screen. For testing purposes, I made them map to mouseX. This will be switched to Arduino readings later. The rotation of the needle was a little hard to achieve because I wanted it to pivot over a very particular point in the image. With a little trial and error and some calculations, I think I got that right!
You can find the working videos below:
I am currently working on displaying the bomb timer/countdown on the screen. This is proving to be a bit challenging. After this, I will start with the driver program for the game which is the LED sequences, and randomizing those. Based on that, the code for the rest of the game will follow. Each LED sequence needs to wait for input and update multiple flag variables and then change the sequence to give the next signal. I have charted out a plan on how this will work… implementation will hopefully follow soon 🙂
Arduino Part
For the Arduino part, Cole finished creating the Arduino with all the wiring. On the board, we have 4 LEDs, 4 buttons with corresponding colors to the LEDs, a potentiometer, a distance sensor, and a buzzer.
We have also completed the Arduino code needed to control the whole board from Processing as well as send the inputs from the sensors back.
Here is the Arduino circuit (note the distance meter in Tinkercad is a 3 pin, not a 4 pin variant like we have so I just placed 4 wires in the top left corner where the distance meter is actually at)
Tinker-cad ModelActual Arduino
Code
For the above, I have started with creating a few classes (currently have one for the wires, more are to come for the timer and LEDs). I have also broken down the into various sections and made functions based on different game stages / input we are waiting for from the bomb diffuser.
The Arduino code has also been completed by Cole as mentioned above.
For the full code (Arduino and Processing), you can follow this GitHub link.
Cole and I plan on making a game similar to the popular VR game “Keep Talking and Nobody Explodes.” This is a two-player game where one person is faced with a bomb and a timer counting down till it explodes. Depending on the level, the bomb will look different each time with a series of lights, buttons, symbols, etc. The bomb diffuser will have to communicate with a second player, the instructions reader. The instructions reader will have a list of instructions that they will have to communicate with the bomb diffuser within the time limit so they both together are able to diffuse the bomb. These instructions will be dependent on what the bomb defuser sees on-screen (Processing) or the Arduino board, so two-way communication is critical for success.
The ‘Keep Talking and Nobody Explodes’ Game
GAME MECHANICS
Defusing the Bomb:
The bomb will be diffused when all the tasks provided by the instructions reader are completed. Tasks will include interaction with the on-screen bomb as well as the Arduino inputs such as lights, buttons, and dials.
Communication:
We plan to give LED signals (visible to the bomb diffuser only) which they would have to communicate to the instructions reader. Based on the LED pattern, the instructions reader will be prompted to ask a series of questions from the bomb diffuser based on what they see in front of them. According to the replies, the instructions reader will provide appropriate instructions to the bomb diffuser to diffuse the bomb.
The Instructions Giving Process:
Each set of LEDs would correspond to a particular set of tasks. These tasks would unfold layer by layer by constant communication between instructions giver and bomb diffuser as to what the latter sees and what the former instructs to do based on that.
We will have different LED signals like different LED combinations lighting up (same or different colors), some or all blinking LEDs, speed of the blink, a combination of LED colors, blinks and numbers, etc. We plan to categorize the LED signals into broad to narrow structure which will enable the instructions-giver to navigate through and provide appropriate instructions. For example, the first category will be the number of LEDs lighting up. The diffuser will answer this question and suppose they say 4 LEDs are lit. Then the instruction giver will read the instructions corresponding to that and say, for example, press the blue button. After pressing the button, the diffuser needs to answer the next question, which in turn will enable them to get another instruction.
The purpose of each LED set will be to enable the bomb diffuser to cut a wire; and to cut this wire, there would be intermediate steps of above-mentioned question/answers (communication between the instructions-giver and bomb diffuser) and small tasks like pressing buttons, being at an appropriate distance from a sensor, etc. After a couple of them, the bomb diffuser will be instructed to cut a particular wire.
Once the wire is cut, the task provided by this set of LEDs is finished and the next set of LEDs will light up for the next wire to be cut.
Game Over:
The game will get over in one of the 3 cases:
The bomb diffuser is able to cut all the wires within the time limit where the players win
The time runs out and the bomb explodes; the players lose here
Or the players cut a wrong wire, so still, the bomb explodes and they lose
We plan that if any of the intermediate instructions go wrong (for example the red button is pressed instead of the blue) before the wire cut action, those errors will result in the reduction of the time.
PRELIMINARY IMPLEMENTATION IDEA
We plan to create an array with a list of all possible LED combinations.
This array will drive our entire program
Depending on the series/types/color of LEDs lighting up, we will have the appropriate interface on Processing and appropriate wait for a particular set of inputs from the Arduino board. Once the set of actions are completed, we get another set of LED lightings (by picking a random index in our array).
TWO OR ONE PLAYER?
The way we plan to make our interface, this game can be played by either 2 or 1 player. However, the game is more fun and interesting when you are communicating with a friend.
In our game, the instructions will be amiable in the start menu. If 2 players are playing the game, each can open the Processing interface on their laptops. The instructions giver can open the instructions page while the bomb diffuser can continue to the bomb-diffusing screen. Arduino will be attached to the second player’s laptop. Then, the players can communicate and play the game.
If it is only one player, then the player will have the option to look at the instructions. In such a case, the player will themselves have to read the appropriate instructions based on what they see and perform the tasks.
For this week’s assignment, we had to complete 3 examples illustrating the use of Arduino and Processing together. Below are my codes for each of the tasks.
For my first 2 tasks, I partnered with Maaz, while for my third task, I partnered with Rock.
TASK 1:
Make something that uses only one sensor on Arduino and makes the ellipse in processing move on the horizontal axis, in the middle of the screen, and nothing on Arduino is controlled by Processing.
For this task, I used the potentiometer to control the horizontal position of the ball. The higher the value in the potentiometer, the closer the ball is towards the right end of the screen and vice versa. Since the ball position is variable and not just 0 and 1, this is an analog read from the potentiometer.
TASK 2:
Make something that controls the LED brightness from processing.
Here, I used the x position of the mouse on the screen to control the brightness of the LED. The extreme right position of the cursor means maximum (i.e. 255) brightness of the LEd and the extreme left means zero brightness. Since the position is variable, this is an analog write to the LED.
My Processing Code for the first 2 tasks is as follows:
import processing.serial.*;
Serial myPort;
int xPos=0;
int yPos=0;
boolean onOff=false;
boolean onOff2=false;

void setup() {
  size(960, 720);

  //keep the starting position of the ball in the middle of the screen
  xPos = width/2;
  yPos = height/2; //wont be using yPos for this task

  printArray(Serial.list());
  String portname=Serial.list()[3];
  println(portname);
  myPort = new Serial(this, portname, 9600);
  myPort.clear();
  myPort.bufferUntil('\n');
}

void draw() {
  background(255);
  ellipse(xPos,height/2,30,30); //for task 1
}

//this is a callback fn. - called whenever smthg comes in serial buffer
void serialEvent(Serial myPort) {
  String s=myPort.readStringUntil('\n');
  s=trim(s);
  if (s!=null) {
    println(s);
    int values[]=int(split(s, ','));
    if (values.length==2) {
      //for task 1
      //use the potentiometer readings to map the horizontal position off the ball on the screen
      xPos=(int)map(values[0], 0, 1023, 15, width-15); //eclipse position
      //yPos=(int)map(values[0], 0, 1023, 0, height); //when yPos == h
    }
  }

  //for task 2
  //control the led brightness using the mouseX position on screen.
  //extreme left = 0 brightness, extreme right = max (i.e. 255) brightness
  float ledBrightness = map(mouseX, 0, width, 0, 255);
  myPort.write(int(false)+","+int(ledBrightness)+"\n");
}
TASK 3:
Take the gravity wind example and make it so every time the ball bounces one led lights up and then turns off, and you can control the wind from one analog sensor.
My Processing Code for this task is as follows:
import processing.serial.*;
Serial myPort;
//int xPos=0;
//int yPos=0;
boolean onOff=false;
boolean onOff2=false;

//for gravity - task 3
PVector velocity;
PVector gravity;
PVector position;
PVector acceleration;
PVector wind;
float drag = 0.99;
float mass = 50;
float hDampening;


void setup() {
  size(960, 720);

  printArray(Serial.list());
  String portname=Serial.list()[3];
  println(portname);
  myPort = new Serial(this, portname, 9600);
  myPort.clear();
  myPort.bufferUntil('\n');

  //for gravity - task 3
  noFill();
  position = new PVector(width/2, 0);
  velocity = new PVector(0, 0);
  acceleration = new PVector(0, 0);
  gravity = new PVector(0, 0.5*mass);
  wind = new PVector(0, 0);
  hDampening=map(mass, 15, 80, .98, .96);
}

void draw() {
  background(255);

  velocity.x*=hDampening;

  applyForce(wind);
  applyForce(gravity);
  velocity.add(acceleration);
  velocity.mult(drag);
  position.add(velocity);
  acceleration.mult(0);
  ellipse(position.x, position.y, mass, mass);
  if (position.y > height-mass/2) {
    velocity.y *= -0.9;  // A little dampening when hitting the bottom
    position.y = height-mass/2;
    //if hits the ground, then light the bulb
    onOff=true;
  } else
    onOff=false;

  myPort.write(int(onOff)+","+int(false)+"\n");
}

//this is a callback fn. - called whenever smthg comes in serial buffer
void serialEvent(Serial myPort) {
  String s=myPort.readStringUntil('\n');
  s=trim(s);
  if (s!=null) {
    println(s);
    int values[]=int(split(s, ','));
    if (values.length==2) {
      //use the potentiometer readings to map the wind value between -5 to 5
      wind.x=map(values[0], 0, 1023, -5, 5); //controlling the wind using potentiometer
    }
  }
}

//============================================================================
//for gravity - task 3

void applyForce(PVector force) {
  // Newton's 2nd law: F = M * A
  // or A = F / M
  PVector f = PVector.div(force, mass);
  acceleration.add(f);
}
My working video of the task is as follows:
Arduino Code:
The following is the Arduino code for all 3 examples:
I did not make any changes to this.
int left = 0;
int right = 0;

void setup() {
  Serial.begin(9600); //serial 9600 mean 9600 bits per sec - rate/frequency of communication
  Serial.println("0,0"); //vvv imp line - this is settong up the handshake - someone needs to speak first
  pinMode(2, OUTPUT);
  pinMode(5, OUTPUT);
}

void loop() {
  while (Serial.available()) {
    right = Serial.parseInt();
    left = Serial.parseInt();
    if (Serial.read() == '\n') {
      digitalWrite(2, right);
      analogWrite(5, left);
      int sensor = analogRead(A0);
      delay(1);
      int sensor2 = analogRead(A1);
      delay(1);
      Serial.print(sensor);
      Serial.print(',');
      Serial.println(sensor2);
    }
  }
}
Circuit:
The circuit diagram for these examples can be found here.
I have always loved to hear violins. I have never been a musician myself, neither do I know any basics of music (chords, strings, notes etc.) but violin has always fascinated me. So, for this assignment, I was very tempted to make a violin.
PROCESS and DIFFICULTIES
First of all, it was important to search about violins. What strings it has, how many of them (yes, I did not know violin has 4 strings!), how you play chords on it. Honestly, there was a lot of music terms that I didn’t understand, but hopefully, with the help of my friends, I got the technicalities correct in my Arduino-controlled-violin xD
So, to replicate the 4 strings, I placed 4 buttons on my Arduino (see picture below).
If you press a button, it should play the open string note for that button. I problem I faced is here is that if I pressed a button, the sound would keep on continuing even when I released the button. To fix this, I used the noTone() function. I programmed it so that the tune stops playing when I release the button. However, this was not enough. I implemented the following code:
if (b1State == HIGH)
   tone(sPin, b1Note);
else if (prevB1State == HIGH and b1State == LOW)
   noTone(sPin);
A more difficult problem I faced was being able to play sounds from 2 button at a time. If I pressed 2 buttons simultaneously, the voice would become squeaky and annoying. I didn’t know what was happening. (See video below).
After searching on the net, I found that there is a frequency controller inside our buzzer, which can only play one frequency at a time. So, the buzzer can only play one tune at a time and not more. I found a fix for this, using multiple input wires and different resistors along with the alalogWrite() function instead of the tune() function. This would be able to write more than one frequency on the buzzer but this was more challenging to implement than it seemed. I didn’t have the correct resistors to put in. I tried various combinations of series and parallel resistors that could give me the desired Ohm value, but I wasn’t able to achieve it correctly to be able to implement my notes properly.
So, I decided I will restrict the user to one button at a time. I ensured that if another button is pressed while one was already pressed, the second button would not play the tune. Only when the first one is released, will the second one be played. I did this by altering the code in the following way:
if (b1State == HIGH && b2State == LOW && b3State == LOW && b4State == LOW)
   tone(sPin, b1Note);
Next came playing different chords. The best way I thought of implementing this was to use a photocell which when tapped upon, would change the chord of my buttons. Each button would then signify the note played by first, second, third or fourth finger of that chord. I used the following picture as a reference to do so:
I am not sure my interpretation of t=it is necessarily correct, but being a person with no music background, I would say this is my version of the Violin hehe.
I added a little paper around my LDR to stabilize its readings. Otherwise, the threshold for touch would change depending upon my relative position to it and how much light I had been blocking.
For final touches, I decided to add a way to change the pitch/scale of the notes one was playing. So, I added a potentiometer for that. I wanted to keep a choice of 3 different scales – 3, 4, 5 (I hope they are called scales!) so I dived my potentiometer range into 3, and depending upon its value, the scale would change. One could further divide it to play all the scales if need be.
I also printed out the potentiometer readings, and chord choice so the user is aware of the chord and scale they are playing at. I f we keep the serial monitor open while playing the violin, it is a good indicator.
My final output looks like this:
I am very happy with what I made! Also, this project was much more exciting than usual because I learned and searched about music notes and tried to understand them for the first time ever! (It was hard to understand and I still don’t get it fully – I think not unless I start playing an instrument – but nevertheless, it was very fun 🙂 )
TINKER-CAD MODEL
CODE
The pitches.h file is the one Prof. Aaron shade with us in class. Below is the code I wrote (pitches.h file in another tab).
#include "pitches.h"

const int b1Pin = 13; //for the button pin - to play musical notes
const int b2Pin = 8; //for the button pin - to play musical notes
const int b3Pin = 7; //for the button pin - to play musical notes
const int b4Pin = 4; //for the button pin - to play musical notes
const int sPin = 2; //the speaker pin
const int ldrPin = A0; //the photo cell pin
const int potPin = A2; //potentiometer pin

bool b1State = false;
bool prevB1State = false;
bool b2State = false;
bool prevB2State = false;
bool b3State = false;
bool prevB3State = false;
bool b4State = false;
bool prevB4State = false;

int b1Note;
int b2Note;
int b3Note;
int b4Note;

int photoValue;
int prevPhotoValue;
int knobValue;
int chordChoice = 0; //0=E, 1=A, 2=D, 3=G

void setup() {
  pinMode(b1Pin, INPUT);
  pinMode(b2Pin, INPUT);
  pinMode(b3Pin, INPUT);
  pinMode(b4Pin, INPUT);
  pinMode(sPin, OUTPUT);
  pinMode(ldrPin, INPUT);
  pinMode(potPin, INPUT);

  Serial.begin(9600);

}

void loop() {

  b1State = digitalRead(b1Pin);
  b2State = digitalRead(b2Pin);
  b3State = digitalRead(b3Pin);
  b4State = digitalRead(b4Pin);

  photoValue = analogRead(ldrPin);
  knobValue = analogRead(potPin);
  //Serial.println(photoValue);

  if (photoValue < 150 && prevPhotoValue > 150)
    chordChoice = (chordChoice + 1) % 4; //i.e. change chord

  Serial.println((String)photoValue + " " + (String)chordChoice + " " + (String)knobValue);

  assignNotes();

  if (b1State == HIGH && b2State == LOW && b3State == LOW && b4State == LOW)
    tone(sPin, b1Note);
  else if (prevB1State == HIGH and b1State == LOW)
    //this is so that this happens only once when when button is released and not all the time
    noTone(sPin);
  if (b2State == HIGH && b1State == LOW && b3State == LOW && b4State == LOW)
    tone(sPin, b2Note);
  else if (prevB2State == HIGH and b2State == LOW)
    noTone(sPin);
  if (b3State == HIGH && b2State == LOW && b1State == LOW && b4State == LOW)
    tone(sPin, b3Note);
  else if (prevB3State == HIGH and b3State == LOW)
    noTone(sPin);
  if (b4State == HIGH && b2State == LOW && b3State == LOW && b1State == LOW)
    tone(sPin, b4Note);
  else if (prevB4State == HIGH and b4State == LOW)
    noTone(sPin);

  prevB1State = b1State;
  prevB2State = b2State;
  prevB3State = b3State;
  prevB4State = b4State;
  prevPhotoValue = photoValue;
}

void assignNotes()
{
  if (knobValue <= 341) //play on the 3rd scale
  {
    switch (chordChoice)
    {
      case 0:
        b1Note = NOTE_FS3;
        b2Note = NOTE_G3;
        b3Note = NOTE_A3;
        b4Note = NOTE_B3;
        break;
      case 1:
        b1Note = NOTE_B3;
        b2Note = NOTE_CS3;
        b3Note = NOTE_D3;
        b4Note = NOTE_E3;
        break;
      case 2:
        b1Note = NOTE_E3;
        b2Note = NOTE_FS3;
        b3Note = NOTE_G3;
        b4Note = NOTE_A3;
        break;
      case 3:
        b1Note = NOTE_A3;
        b2Note = NOTE_B3;
        b3Note = NOTE_CS3;
        b4Note = NOTE_D3;
        break;
    }
  }
  else if (knobValue > 341 && knobValue <= 682) //play on the 4rd scale
  {
    switch (chordChoice)
    {
      case 0:
        b1Note = NOTE_FS4;
        b2Note = NOTE_G4;
        b3Note = NOTE_A4;
        b4Note = NOTE_B4;
        break;
      case 1:
        b1Note = NOTE_B4;
        b2Note = NOTE_CS4;
        b3Note = NOTE_D4;
        b4Note = NOTE_E4;
        break;
      case 2:
        b1Note = NOTE_E4;
        b2Note = NOTE_FS4;
        b3Note = NOTE_G4;
        b4Note = NOTE_A4;
        break;
      case 3:
        b1Note = NOTE_A4;
        b2Note = NOTE_B4;
        b3Note = NOTE_CS4;
        b4Note = NOTE_D4;
        break;
    }
  }
  else //play on the 5nd scale
  {
    switch (chordChoice)
    {
      case 0:
        b1Note = NOTE_FS5;
        b2Note = NOTE_G5;
        b3Note = NOTE_A5;
        b4Note = NOTE_B5;
        break;
      case 1:
        b1Note = NOTE_B5;
        b2Note = NOTE_CS5;
        b3Note = NOTE_D5;
        b4Note = NOTE_E5;
        break;
      case 2:
        b1Note = NOTE_E5;
        b2Note = NOTE_FS5;
        b3Note = NOTE_G5;
        b4Note = NOTE_A5;
        break;
      case 3:
        b1Note = NOTE_A5;
        b2Note = NOTE_B5;
        b3Note = NOTE_CS5;
        b4Note = NOTE_D5;
        break;
    }
  }
}
This week’s assignment sounded very simple – just use LEDs as we did in class in a creative way. But, to be honest, making the entire circuit without having the professor in front of you to guide you made it pretty hard!
I did remember how to connect each component – that wasn’t the problem. What was problematic was connecting all of it together. Do I connect it in series? Or parallel? Do I put the 330-ohm resistor or the 10k-ohm one? And I think silliest of all… the design choice of my circuit. I ended up having so many wires in the circuit, it was hard to keep track of them all and even harder to add new components in the middle of this mesh or relocate any of the components.
Nevertheless, this assignment has been very crucial to make me understand how to set up my circuit and code it appropriately. It seemed very tough in the beginning, I had to keep going back to the lectures and class notes to see how to proceed. But now I know and am confident! :))
THE IDEA
So, for this week’s assignment, I decided to create a robbery scene. The bell-curve class example inspired me to do so. While playing around with the spread and speed of that code, I created a chain with reminded me of an alarm system. I initially thought of an ambulance light.. but this didn’t interest me enough to go ahead with. Then, inspired by one of my favourite shows – Money Heist, I came up with the idea of the Great Heist in which I could use the alarm system I imagined.
THE PROCESS
I first started with setting up the 4 LEDs in the corners which I wanted to use for my alarm. I did something very stupid – or rather did not do – connect the ground (-) vertical line on the left hand side to the right one or a separate ground. And for a long time, I went on going crazy as to why 2 of my LEDs were not working!
After that, I added a fifth LED. What I had initially planned for was, there would be a LED that would start blinking as a thief came nearer the diamond; also it would start blinking faster as the distance minimized. Then, when the thief would touch the diamond, the red LEDs would go on, signaling a museum lockdown. However, I could not go ahead with this idea for 2 reasons. First, I was unable to control the range using the LDR. I was getting very different values each time, and I figured after some trial and error that it was happening based on how I was positioned/seated, if I laid back or sat up straight, the position of my arm, and also, my hair! So, it wasn’t feasible to go ahead with this idea. Second, I needed digital input as well. The LEDs controlled by the LDR were analog ones.
Then, I came up with a very interesting idea. I decided to have a button that could disable the alarm system. Now, if it were Money Heist, the professor had to be saved, right! I couldn’t let my thief get caught. So, this made for a perfect escape. The button would be linked to a LED which would signal if the alarm system is disabled or not. From the museum’s perspective, They would have such a disabler for restoration purposes. In such a case, they would need an indicator that the alarm system is disabled so as to remember to turn it back on. From the thief’s perspective, the thief would need an indicator of when the system is disabled so that he can make his move. Hence, I then coded the fifth LED as such and made the red LEDs turn on only if the yellow LED was off (sin=gnaling the alarm system is enabled).
What next?
It was showtime! I prepared my museum for its opening (i.e. made the banner, placed the diamond and ribbon) and dressed my thief for his heist.
Here is a video of my final outcome – The Story of the Great Heist:
THE CIRCUIT
THE CODE
//for outer LEDs
const int numLEDs = 4;
float ledPos[numLEDs] = {0, .25, .5, .75};
int ledIndex[numLEDs] = {3, 5, 9, 11};
int speed = 5; //higher number is slower
float spread = 0.02; //to make bell curve wider or narrower
float bellCurveCenter = -spread; //set the postion to start outside of 0 to 1 so the first LED is dark
float brightness;

//for the inner LEDs
int LEDin = 7;
bool onOff = false;
long timer = 0;
int timerLength; //instead of delay(500)

//for LDR
int photoPin = A2;
float photoValue; //to keep track of the distance of object aka thief

//for button
int buttonPin = 13;
float buttonState;
float prevButtonState = false;

//==================================================================================================================

void setup()
{
  //the the 4 outer LEDs
  for (int i = 0; i < numLEDs; i++)
    pinMode(ledIndex[i], OUTPUT);

  //for the inner LED
  pinMode(LEDin, OUTPUT);

  //for photocell to keep track of the distance
  pinMode(photoPin, INPUT);

  pinMode(buttonPin, INPUT);

  Serial.begin(9600);
}

//==================================================================================================================

void loop()
{
  photoValue = analogRead(photoPin);
  //Serial.println(photoValue);

  buttonState = digitalRead(buttonPin);

  if (buttonState == 1 && prevButtonState == 0)
  {
    onOff = !onOff;
  }

  digitalWrite(LEDin, onOff);
  buttonState = prevButtonState;

  if (photoValue < 400 && !onOff)
    outerLEDs();
  else //switch the LED off irrespective of whatever state it was in
  {
    //brightness = 0;
    for (int i = 0; i < numLEDs; i++)
      analogWrite(ledIndex[i], 0);
  }
  //outerLEDs();
}

//==================================================================================================================

//for the outer 4 LEDs
void outerLEDs()
{
  // taken this code from our class example

  for (int i = 0; i < numLEDs; i++)
  {
    // finding the distance of each LED from the center of our bell curve
    float distance = abs(ledPos[i] - bellCurveCenter);
    // this is the formula for the bell curve, multiply by 255 to put in the proper range for brightness
    brightness = exp(-0.5 * pow(distance / spread, 2)) * 255;
    analogWrite(ledIndex[i], brightness);
  }

  // move the center
  // you could adjust the speed with a potentiometer
  if (millis() % speed == 0)
    bellCurveCenter += .01;

  // start it over when it reaches the end
  // reset based on the spread so that it fades all the way out before resetting
  if (bellCurveCenter > 1 + spread)
  {
    bellCurveCenter = -spread;
  }
}
Yes, I finally made a card game that I can play by my rules!
For my Intro to IM midterm project, I decided to make a 2 player card game – Cards Royale. It is inspired by many card games I have played all these years with my family and friends. I must admit that I was very skeptical about this idea initially and thought of changing it multiple times, but there was something in me which did not let me chose any other game to build. My motivation for a card game came about when I was ardently searching for my favorite card game – Judgement – online, so that I could play with my family from afar. Playing cards together has been my family’s little tradition since childhood and I have learned over some 15 trick-making card games till now. Thus, not having been able to find my favorite game online, it felt like the perfect opportunity to try making a computer version of it myself! Hence, I started in this journey – yes, I would call it a journey because it really was one.
Why I was skeptical about this game was because there are many things to keep in mind in a card game and I am a person who does a task with utmost perfection and details; I cannot leave it unfinished in between – especially not a card game. Hence, I wasn’t sure if I could do justice to the card game keeping all the game rules, table rules, strategy, visual appearance to make it seem realistic, in mind. Nevertheless, this was not an excuse. I decided to take on this challenge and make a card game as true as the original card games I have played since childhood. This motivation of mine guided a majority of the design choice decisions, rules, user experience, interactivity, etc. which I describe in this documentation.
DESIGN CHOICE
My game consists basically of 3 screens – a home screen, an instructions screen, and a game screen. I first started with the game screen because that is the main part and, honestly, I had planned to go ahead with this idea only if I felt feasible and good about it after having tried my hands on trying to code the game screen for a considerable amount of time and effort.
Game Screen
Instructions Screen
I first sketched out a basic layout of how my objects of the game should be placed on the screen (see the previous document for visuals). The placement was very important as I designed it in accordance with table rules – players seated opposite each other, the deck of cards on one side and tricks on the other, close to the person who made it, and cards played in the center of the table.
Next, I had to decide the theme and color scheme. I want to keep it royal and posh, something of a luxury to capture our annual festivity spirit of Diwali. Plus, if you go to any card playing area, this is a common theme you find. So, I decided to go with a royal maroon patterned background with textured green table cloth (which is a screenshot of a snooker table image by the way), complemented with the colors yellow and red.
When I was first designing my home screen, I wasn’t very satisfied with how it looked. It seemed fine but it didn’t quite catch the vibe I was going for. It felt like I needed the heading to be creative. Hence, I decided to create my own logo in Adobe Draw which would be just perfect for my game (the text is also handwritten and not a font – some of my friends thought otherwise 🙂 ).
Home Screen – Before
Home Screen – After
MINUTE DETAILS
My drawing endeavor didn’t just finish here. Once I started adding sounds, I felt the need to add a mute button (I personally was a little fed up hearing the sounds over and over again every time I made an edit and ran the code again, plus it was essential for user experience – giving them more flexibility and control). While working on the mute button, I couldn’t find a similar mute and unmute button in yellow color which would compliment my home button. I saw many designs online but they just didn’t fit in. So, I decided to sketch that as well (see below). This was simplistic; fitting just fine and not overcrowding my screen.
Mute
Unmute
I also faced some challenges initially with my mute button as I was using mousePressed with a toggle boolean variable which made the mute button switch rapidly again and again if the button was pressed for a long time (see video below). I was able to fix this by replacing it with mouseClicked() function.
This actually brought me to consider another interactivity choice. Often in card games, undo is not allowed (a table rule which states that once a card has been taken out of the hand – irrespective of whether it has played on the table or not – it cannot be put back in hand and must be played). So, while playing a card game online, it often requires you to press hard enough on the trackpad to play a card. This is done to avoid a card being played by an unintentional tap on the trackpad (I believe this is specific only to laptops). Hence, to implement this idea in my game, I changed my mousePressed keyword for menu option buttons, mute/unmute button, home button, etc. to a mouseClick so that they would work on just a tap, while I kept the playing cards action as mousePressed so that the user would have to press on the trackpad to actually play – distinguishing it from other actions and requiring careful thought.
Another detail I focused on was arranging the cards in hand in sorted order. The first thing you do after picking up cards in your hand is arrange them by suit and number. This makes it easier to track your cards and keep a count to play efficiently. I used bubble sort to arrange them in order.
I also decided to have the cards in hand flip depending on whose turn it is. Initially, cards for both the players were open. This was okay since both of them would be playing on the same screen so it is quite likely that they see each other’s cards (so it wouldn’t really. ake sense ti hide them). However, in an actual game, you are not supposed to see the other person’s cards. Hence, to give that feeling, I decide to close the cards for the player whose turn it wasn’t, to avoid this as much as possible and also motivate them to not see by maybe closing their eyes or turning the laptop. I also closed the cards for both players when each had played and it was time to see who made the trick. This allows both of them to see what card has been played and take a note of it before it is taken off-screen, without having a glimpse of each other’s cards.
THE HOME BUTTON
Keeping user experience in mind, I felt the need to add a home button in case a user wanted to go back to see instructions in between the game or restart the game. There were a few things to consider here –
If the user clicked the home button in between the game to see the instructions screen maybe, then they should be able to go back and resume their game from there. Or if they misunderstood some instructions and wanted to restart, they should have that option too. Hence this called for a need to have a pop-up screen to provide this choice menu.
Initial Pop-Up
Final Pop-Up
This option should not be provided when the start game is clicked for the first time.
Neither should it be provided if the user clicked home button instead of the ‘play again’ button once the game was over. So it called for special if conditions to implement this.
The started boolean variable I created for this purpose proved to be useful in other parts of my code as well.
ANIMATION
Now, to make the game look more realistic and seem like it was actually being played on a table, I decided to add a physical dealing of cards effect along with collecting a trick and keeping it aside effect. This animation proved harder than I imagined (more details can be found about the dealing effect in the previous post).
The trick collecting effect was added to solve 2 purposes. One is mentioned above and the other was to fix the error I was getting last time (as mentioned in the previous blog post). What was happening is that if one played a card which was lower in rank than their previous one, it would not show on the table because I display the cards in sequential order, so the higher-ranked card would be displayed on top of the lower-ranked card.
As it can be seen in the video above, as you play cards from left to right, each new card is played on top of the other. However, if you go back and play a card from the left of the previously played card (the 10 of clubs or 5 of diamonds in the above video for example), they are not visible on the screen when played.
To fix this problem, it was necessary to make the cards disappear before the next one is played. However, it wasn’t that easy. If I made a card invisible after it is played, it would become invisible as soon as it was played and it wouldn’t be possible to see what card was played (see below).
Hence, to fix this, I decided it would be a nice touch to have the cards go sideways into the trick pile and then make them disappear. However, it still didn’t quite fix the problem. I still felt the need to have the 2 cards be displayed on the table for a while before they are collected into a trick. (See below – trick one being made without any pause). I decided to add a delay after the cards are being played to fix this problem. However, using the delay() function didn’t quite work because it was pausing at the wrong moment – before the second card is played instead of after the second card is played. (See below – trick 2 being made with a delay at the wrong time).
I used the millis() function instead of delay() to fix this as I got to know that delay() cannot be used to delay something inside a draw() loop, rather it is used after a draw() loop is finished and before the next one starts. It took some time for me to be able to understand millis() and implement the pause at the correct time. Once I got it, it proved to be very useful and I also used it to add a pause at the beginning of a deal so that the deal isn’t started immediately once a user clicks start game. However, it takes some 0.5 seconds to start so that the user can adjust to the new screen setting of a playing table. (This delay does not occur if you continue a game, only comes when you start a new game or restart the previous game.)
SOUND EFFECTS
Now adding sound effects was crucial to make it a more realistic experience. I wanted to add sounds of dealing cards, flipping cards, collecting tricks, etc. However, I didn’t get any free good quality playing cards sound on the internet. So, I decided to record them on my own. I used audacity to record sounds while I dealt, flipped, or played cards, and made tricks. I edited each of those, extracting the best single sound I could get. I used the noise reduction feature to remove some of the background noise and some other effects like pitch, speed to make it sound comfortable and not very shrieky.
The sound of flipping cards was important for another reason. Since I decided to hide the cards of players when it was not their turn, it was important to indicate somehow that a player has played a card and now it’s the other person’s turn. So, I decided to add the flip sound which would indicate that a player has played their card and the cards have been flipped (closing the previous player’s cards and opening the other player’s) so that the next person can now play.
I also found a piece of good background music (a casino jazz piece) to add to my game which would make it more lively. I also added cheering in the end which I again found online.
TEST RUN
So, testing my game by making people play was very important for the development of my game at various stages. I have made more than 21 people play this game till now and got great insights on how people understood my game, use the interface and navigate the playing arena. This helped me improve my user interactivity and design.
My instructions page changed a couple of times based on what experience people have had playing cards and it helped me break it down to very simple words so that a person who has never played cards before is still able to understand, play and enjoy the game. My end screen also saw many stages of development based on the feedback I got from various people. I decided to go with the most popular one. I even focused on small details like increasing the size of the text indicating whose turn it is to play and changing the volume of the sound effects so that none overpowers the other.
End Screen 1
End Screen 2
End Screen 3
End Screen 4
Once the logic of the game was coded, I made more and more people play which helped me become aware of many bugs and glitches in my code which I was able to fix in time.
This was also a great confidence booster. The entire weekend went by me building this game and playing it with my friends (and family on zoom). It was a great success! People really enjoyed it and wanted to play more (which is great for me!) and I was happy to see that those who never played cards before could also understand and play it, thoroughly enjoying it, while those who have had experience with cards, appreciated the tiny details I incorporated to make it as realistic to an actual game as possible.
THE FINAL WORKING VERSION
Here is a tutorial of my game –
I am really happy with what I have built and now am confident that I can expand it to more players, add more variations, and maybe put it online so that many can play virtually!
So, we have to make a game for our midterm. The first thing that came to my mind was the long-missed card game I used to play with my family. That game is a 5 player game that would have become very difficult to cod in the limited time and also go beyond the scope of the assignment. Hence, I decided to adapt that game to my version of a 2-player game (somewhat similar to an already existing card game called ‘Honeymoon Bridge’). I get so excited by even just hearing the word ‘cards’, hence there was no better choice for me for this project.
Now to simplify what the game is (as many people aren’t familiar with tricks-making card games), here is an outline –
There will be a normal playing deck of 52 cards, however, only 26 cards will be dealt.
Each player gets 13 cards and the aim of the game is to make the most tricks.
None of the players know which are are still in the deck / have not been dealt so a lot of strategy and some guesswork is required to win the game.
Now, what does it mean to make a trick? Both players play a card one by one. The bigger numbered card gets the trick (King is the highest).
There are a few rules as to what cards you can play. The first player can put any card, but everyone else on the table has to play a card of the same suit. In case you do not have any cards left of that suit, you may play any other suit but you cannot get the trick in that round.
The player who plays first is decided by who makes the trick. For the first round, the person who is dealt first plays first.
Since each player has 13 cards, there will be 13 rounds and any player needs a minimum of 7 tricks to win the game.
Once 7 tricks have been made, the game finishes.
Besides figuring out the logic, I also had to keep in mind how visually my game arena looks and how I envision my cards to move along the screen to give a sense of an actual card game. I started with first planning out and sketching all my idea (see one of my many pages below), going over pseudocode, and then finally started programming it in Processing.
I first made placeholders for where all I wanted my cards, deck, playing table, etc. to be.
Background and Playing Table
Displaying Cards in Hand
Once the cards and deck were placed, it was time to deal cards. I was going for a theme where one could see each card being dealt. Initially, it was a big disaster (see video below). I was unable to control the position or the timing of the cards being dealt. After working for about 3 hours on it, I decided to leave it for a while and then come back to it.
If not physically, I thought it is a good idea to focus on logically dealing the cards. For that, I made 2 arrays – p1Hand and p2Hand – to keep track of card IDs that have been assigned to each player. I used random() to assign the cards and a boolean variable dealt to keep track of if a card has been dealt or not (so as to not repeat a card while dealing). Once the cards had been dealt ‘logically’, I made a sorting function to arrange the cards by suit and number because you cannot play a good card game without having arranged the cards in hand properly! I used Bubble Sort to do this (which I knew from one of my previous CS courses).
Cards Arranged By Suit
After this, I tried again to deal the cards ‘physically’ on the screen and surprisingly succeeded. I got to it by going step by step and building a really complicated code, which I hope to simplify if I am able to think of a better alternative. Though, having the cards deal exactly how I wanted them to, gave me a lot of satisfaction. This was the hardest part till now.
Then I made placeholders for where the cards had to be played on the playing table and just tried coding for the cards to show up there with a click.
Once that worked properly, I tried going further and coding this according to game rules (being able to click on certain cards or not according to the game rules and keeping track of whose turn it is). Also, after both players have played their cards, the round counter increments, and I call the trick() function to check who won the trick and calculate the total number of tricks of each person.
This is my progress as of now (better to watch the video on 2x speed! :D) –
It contains a few bugs that I still need to fix –
The tricks are not incrementing all the time. There is some error in that which I have to look at
Not all cards are being shown on top
Things I still need to work on –
Change the turn based on who makes the trick
After making a trick, the cards need to go on the right side and stack up like you put tricks in a line (this will again require animation)
Rounds need to be updated properly
Appropriate delays need to be made in order to see the movements on the board
Decide whether PC is the second player or have 2 people play it – and accordingly code it
Add sounds of dealing, playing, stacking to make it more realistic
Make the menu and instructions page
Make the end page with a restart option
Introduce the trump variation if time left
Introduce the ‘baazi’ variation if time left
(and anything else that I am currently missing)
CODE
The Card class:
class Card
{
  int id; /* rom 1 to 52 -
           first 13 = clubs, then diamonds, heart and last 13 spades
           - according to heirarchy of suits */
  int number;
  String suit;
  PImage cImg;
  float posX, posY, prevPosX, prevPosY;
  boolean dealt; //it the card has been assignmed to any player
  boolean visible; //a card is visible only in the hand or table
  boolean played; //to keep track whether the card has been played by a player or not

  //constructor - get parameters of photo, number and suit
  Card (int cid, int num, String s, PImage img)
  {
    id = cid;
    number = num;
    suit = s;
    cImg = img;
    dealt = false;
    visible = false;
    played = false;
  }

}
The main code:
/*
 SOME BASIC GAME RULES
 A deck of 52 cards
 Only 26 cards are dealt - 13 per player
 Each player plays one card, the one who has a higher card winds the trick  - this is one round
 the game has 13 rounds
 so whoever makes 7 tricks first has more tricks and thus has won the game
 the player who plays his card second can only play a card of the same suit unless they don't have that suit
 the player who makes the trick plays first in the enxt round
 */

int screenMode = 1;

//loading all images
PImage[] bg;
PImage[] cImgs;
PImage table;

//Deck deck;
Card[] cards;
int[] p1Hand; //keeps track of the cards in hand for player one (by id)
int[] p2Hand; //keeps track of the cards in hand for player two (by id)
//Card[] back; - can have this seperately

//game screen positions
float cardW, deckW, pCardW;
float ratio;
float tableH, tableW; //dimension of the playing table
float marginX, marginY; // to keep track of our=tside table margins
float p1X, p2X; //to keep track of position where players play their cards
float deckPosX, deckPosY;

//variables needed while dealing the cards
boolean dealt = false;
int dealCardNum = 0; //to keep track of which card is being dealt;
float dealIncNum = 5; //how much distance to cover for each dealt card
int[] ctr; //to keep track how much distance my dealt card has travelled

//variables needed while playing
int round = 0; //game consists of total 13 rounds (each player has 13 cards)
int turn = 1; //to keep track which player's turn it is
int firstTurn = 1; //to keep track of which player has to start round - no restriction on playing the card
int card1Played; //to keep track of which card was played first - to match the suit
int p1trick = 0; //to keep track of the number of tricks made by player 1
int p2trick = 0; //to keep track of the number of tricks made by player 2

void setup()
{
  //canvas size
  size(1200, 800);
  //fullScreen();
  background(255);
  //frameRate(180);

  //setting the various positions of game screen
  tableW = width*0.6;
  tableH = height*0.55;
  marginX = (width-tableW)/2;
  marginY = (height-tableH)/2;
  cardW = (tableW+marginX)/13; //for cards in hand
  ratio = 1056/691; //to determine height of cards depending on cardW
  deckW = marginX*0.6; //for cards in the deck
  p1X = width/2 - deckW;
  p2X = width/2 + deckW;
  deckPosX = marginX/2;
  deckPosY = height/2;

  rectMode(CENTER);
  imageMode(CENTER);
  textAlign(CENTER, CENTER);

  //loading backgrounds for different game screens
  bg = new PImage[4];
  bg[1] = loadImage("bg1.jpg");

  //loading additional images
  table = loadImage("table.jpg");

  //loading card images
  cImgs = new PImage[53]; // 1 extra for back side
  // to store card image names
  String[] filenames = {"back.png", "AC.png", "2C.png", "3C.png", "4C.png", "5C.png", "6C.png",
    "7C.png", "8C.png", "9C.png", "10C.png", "JC.png", "QC.png", "KC.png",
    "AD.png", "2D.png", "3D.png", "4D.png", "5D.png", "6D.png", "7D.png",
    "8D.png", "9D.png", "10D.png", "JD.png", "QD.png", "KD.png",
    "AH.png", "2H.png", "3H.png", "4H.png", "5H.png", "6H.png", "7H.png",
    "8H.png", "9H.png", "10H.png", "JH.png", "QH.png", "KH.png",
    "AS.png", "2S.png", "3S.png", "4S.png", "5S.png", "6S.png", "7S.png",
    "8S.png", "9S.png", "10S.png", "JS.png", "QS.png", "KS.png" };
  for (int i=0; i<=52; i++)
    cImgs[i] = loadImage(filenames[i]);

  //creating my card objects
  cards = new Card[53];
  cards[0] = new Card(0, 0, "back", cImgs[0]);
  //for clubs - cards 1-13
  for (int i=1; i<=13; i++)
    cards[i] = new Card(i, i, "clubs", cImgs[i]);
  //for diamonds - cards 14-26
  for (int i=14; i<=26; i++)
    cards[i] = new Card(i, i-13, "diamonds", cImgs[i]);
  //for hearts - cards 27-39
  for (int i=27; i<=39; i++)
    cards[i] = new Card(i, i-26, "hearts", cImgs[i]);
  //for spades - cards 40-52
  for (int i=40; i<=52; i++)
    cards[i] = new Card(i, i-39, "spades", cImgs[i]);

  //player hands
  p1Hand = new int[13];
  p2Hand = new int[13];

  //deal
  ctr = new int[26];
  for (int i=0; i<26; i++)
    ctr[i]=0;
  deal();
}

void draw()
{
  switch (screenMode)
  {
  case 0 :
    startScreen();
    break;
  case 1 :
    gameScreen();
    break;
  case 2 :
    exitScreen();
    break;
  case 3 :
    instScreen();
    break; //instruction screen
  }
}

void startScreen()
{
}

void gameScreen()
{
  //background - red texture
  image(bg[1], width/2, height/2, width, height);
  //display the table
  pushStyle();
  strokeWeight(10);
  fill(0);
  stroke(0, 120, 70);
  rect(width/2, height/2, tableW, tableH);
  popStyle();
  image(table, width/2, height/2, tableW, tableH);

  //displaying deck cards
  //for (int i = 0; i<26; i++)
  image(cards[0].cImg, marginX/2, height/2, deckW, deckW/691*1056);
  pushStyle();
  fill(255, 255, 0);
  textSize(18);
  text("Deck", marginX/2, height/2-deckW/691*1056*1.2/2);
  popStyle();

  //displaying other placeholders
  pushStyle();
  fill(0, 0, 0, 160);
  rect(p1X, height/2, deckW, deckW/691*1056);
  rect(p2X, height/2, deckW, deckW/691*1056);
  fill(255, 255, 0);
  textSize(16);
  text("Player 1 Card", p1X, height/2-deckW/691*1056*1.2/2);
  text("Player 2 Card", p2X, height/2-deckW/691*1056*1.2/2);
  popStyle();

  //dealing cards
  if (!dealt)
  {
    for (int i=0; i<26; i++)
      if (ctr[i]>dealIncNum)
        if (i%2==0)
          image(cards[0].cImg, marginX/2+cardW/2+i/2*cardW, height-marginY/2, cardW, cardW/691*1056);
        else
          image(cards[0].cImg, marginX/2+cardW/2+i/2*cardW, marginY/2, cardW, cardW/691*1056);
    if (dealCardNum%2 == 0)
      dealCards(marginX/2+cardW/2+dealCardNum/2*cardW, height-marginY/2);
    else
    dealCards(marginX/2+cardW/2+dealCardNum/2*cardW, marginY/2);
    if (dealCardNum >= 26)
      dealt = true;
  }

  //start game after dealing cards
  else
  {
    //play cards in the center
    //println(mouseX + " " + mouseY);

    //if it is Player 1's turn
    if (turn == 1)
    {
      if (firstTurn == 1) //player 1 is starting the round
      {
        if (mouseX<width-marginX/2 && mouseX>marginX/2 &&
          mouseY<height-marginY/2+cardW/691*1056/2 && mouseY>height-marginY/2-cardW/691*1056/2
          && mousePressed)
        {
          //background(255);
          int cardPlayed;
          cardPlayed = int((mouseX-marginX/2)/cardW);
          card1Played = p1Hand[cardPlayed];
          cards[card1Played].posX=p1X;
          cards[card1Played].posY=height/2;
          cards[card1Played].played = true;
          turn=2; //player 2's turn now
          //image(cards[p1Hand[cardPlayed]].cImg, cards[p1Hand[cardPlayed]].posX, cards[p1Hand[cardPlayed]].posY, cardW, cardW/691*1056);
        }
      }
    }

    if (turn == 2)
    {
      if (firstTurn == 2) //player 2 is starting the round
      {
        if (mouseX<width-marginX/2 && mouseX>marginX/2 &&
          mouseY<marginY/2+cardW/691*1056/2 && mouseY>marginY/2-cardW/691*1056/2
          && mousePressed)
        {
          //background(255);
          int cardPlayed; //gives index of card in hand not cards array
          cardPlayed = int((mouseX-marginX/2)/cardW);
          card1Played = p2Hand[cardPlayed];
          cards[card1Played].posX=p2X;
          cards[card1Played].posY=height/2;
          cards[card1Played].played = true;
          turn=1; //player 2's turn now
          //image(cards[p1Hand[cardPlayed]].cImg, cards[p1Hand[cardPlayed]].posX, cards[p1Hand[cardPlayed]].posY, cardW, cardW/691*1056);
        }
      } else //if the player is second to play in this round
      {
        if (mouseX<width-marginX/2 && mouseX>marginX/2 &&
          mouseY<marginY/2+cardW/691*1056/2 && mouseY>marginY/2-cardW/691*1056/2
          && mousePressed)
        {
          int cardPlayed; //gives index of card in hand not cards array
          cardPlayed = int((mouseX-marginX/2)/cardW);
          if (check(p2Hand[cardPlayed], p2Hand)) //to check if the card played is correct or not;
          {
            //updating position of the card
            cards[p2Hand[cardPlayed]].posX=p2X;
            cards[p2Hand[cardPlayed]].posY=height/2;
            cards[p2Hand[cardPlayed]].played = true;

            //see who won the trick
            trick(p2Hand[cardPlayed], 2);
            round++;
            cards[card1Played].visible = false;
            cards[p2Hand[cardPlayed]].visible = false;
            turn = 1; //needs to be changed according to who made the trick
          }
        }
      }
    }

    //display all the cards in their respective places
    for (int i=1; i<=52; i++)
      if (cards[i].visible)
        image(cards[i].cImg, cards[i].posX, cards[i].posY, cardW, cardW/691*1056);

  pushStyle();
  fill(255, 255, 0);
  textSize(18);
  text(p1trick, width-marginX/2, height/2+deckW/691*1056*1.2/2);
  text(p2trick, width-marginX/2, height/2-deckW/691*1056*1.2/2);
  popStyle();

    //loop();
  }
}


void dealCards(float x, float y)
{
  if (ctr[dealCardNum]<=dealIncNum)
  {
    float incrementX = (x-deckPosX)/dealIncNum;
    float incrementY = (y-deckPosY)/dealIncNum;
    float incrementDeckW = (cardW-deckW)/dealIncNum;
    //x = marginX/2+cardW/2+0*cardW;
    //y = height-marginY/2;
    //dealPosXi += (x - dealPosXi)*0.5;
    //dealPosYi += (y - dealPosYi)*0.5;
    //dealDeckW += (cardW - dealDeckW)0.5;
    image(cards[0].cImg, deckPosX+ctr[dealCardNum]*incrementX,
      deckPosY+ctr[dealCardNum]*incrementY,
      deckW+ctr[dealCardNum]*incrementDeckW,
      (deckW+ctr[dealCardNum]*incrementDeckW)/691*1056);
    ctr[dealCardNum]++;
  } else
  {
    //image(cards[0].cImg, x, y, cardW, cardW/691*1056);
    dealCardNum++;
  }
}

void sortCards(int[] hand) //using bubble sort - I know this from my prev CS course
{
  int n = hand.length;
  for (int i = 0; i < n - 1; i++)
  {
    for (int j = 0; j < n - i - 1; j++)
    {
      if (hand[j] > hand[j+1])
      {
        //swap the elements
        int temp = hand[j];
        hand[j] = hand[j+1];
        hand[j+1] = temp;
      }
    }
  }
}


boolean check(int index, int[] hand)
{
  if (cards[index].suit == cards[card1Played].suit)
    return true; //correct card has been played
  else
  {
    //first check if there are cards of this suit
    for (int i=0; i<13; i++)
      if (cards[hand[i]].suit == cards[card1Played].suit && !cards[hand[i]].played) //found a card of same suit
      {
        text("You must play a card of the same suit", width/2, marginY*1.1);
        return false;
      }
    return true;
  }
}

void trick(int card2, int player)
{
  int card1 = card1Played;
  if (cards[card1].suit == cards[card2].suit)
  {
    if (card2 > card1)
    {
      if (player == 1) //first player played a greater card
        p1trick++;
      else if (player == 2)
        p2trick++;
    }
    else //if the second card played is smaller
    {
      if (player == 1) //first player played a greater card
        p2trick++;
      else if (player == 2)
        p1trick++;
    }
  }
  else
  {
    if (player == 1)
      p2trick++;
    else
      p1trick++;
  }
}

void exitScreen()
{
}

//instruction screen
void instScreen()
{
}

void deal()
{
  //assigning cards to each player / logically dealing cards
  int cid;
  for (int i=0; i<13; i++)
  {
    do {
      cid = int(random(52))+1;
    } while (cards[cid].dealt);
    if (!cards[cid].dealt)
    {
      cards[cid].dealt = true;
      p1Hand[i]=cid; //player 1 has been assigned/dealt this card
      //println(cid);
    }

    do {
      cid = int(random(52))+1;
    } while (cards[cid].dealt);
    if (!cards[cid].dealt)
    {
      cards[cid].dealt = true;
      p2Hand[i]=cid; //player 2 has been assigned/dealt this card
      //println(cid);
    }
  }

  //sort the cards in hand - because you cannot play until you arrange cards properly
  sortCards(p1Hand);
  sortCards(p2Hand);

  //displaying hand cards for player 1 that have been assigned/dealt
  int j;
  for (int i = 0; i<13; i++) {
    j = p1Hand[i];
    //update position in the class attribute for those cards
    cards[j].posX = marginX/2+cardW/2+i*cardW;
    cards[j].posY = height-marginY/2;
    cards[j].visible = true;
    //image(cards[j].cImg, cards[j].posX, cards[j].posY, cardW, cardW/691*1056);
    //fill(0,0,255);
    //tresting if values have been assignmed properly
    //text(p1Hand[i], marginX/2+cardW/2+i*cardW, height-marginY/2);
    //text(cards[p1Hand[i]].id, marginX/2+cardW/2+i*cardW, height-marginY/2);
  }
  //displaying hand cards for player 2 that have been assigned/dealt
  for (int i = 0; i<13; i++) {
    j = p2Hand[i];
    //update position in the class attribute for those cards
    cards[j].posX = marginX/2+cardW/2+i*cardW;
    cards[j].posY = marginY/2;
    cards[j].visible = true;
    //image(cards[j].cImg, cards[j].posX, cards[j].posY, cardW, cardW/691*1056);
  }
}
This week’s project was data Visualization. My work today was built upon the class example of plotting a line graph and inspired by Google Trends data representation of a line graph to make it more advanced and also interactive!
In the class example, we downloaded a .csv file of the number of cupcakes sold worldwide from January 2004 to February 2021. This is what we worked on when just learning how to read files and manipulate data on the screen :
There was a plotting problem in this code because we used the line() function to draw the line between 2 data points (see below). We had to keep track of the previous point in this case which gave an error in the beginning for the initial point and did not plot the last point. I managed to fix this by shifting the indices but the method was not very efficient. Using the vertex() function inside beginShape() and endShape() function proved to be more logical.
After I got the plotting correct, I positioned my line graph properly in the center of the page (a little off-centered from the top to leave space for the heading) and drew the axes and border.
This was crucial for what I was going to do next – The most challenging part of this Data Visualization.
THE TASK!
Inspired by how Google represents its line graphs, I wanted to make my line graph interactive – display the value of y-axis whenever the user hovers over a data point.
Now, there were several things to keep in mind here:
Since the line graph only plots the data points and joins them together, it is crucial that we display only the data available to us represented by the points and not the intermediate values. For this, I had to first locate find peaks and locate which peaks are closest to the mouse pointer (because I should not display a random intermediate value if a mouse pointer is in between two consecutive data points). I did integer division for this and then compared if the previous or the latter peak was greater.
Once the closest peak was determined, I need a vertical line through it and I have to display the corresponding x and y values for this data point. To get the data values for a certain peak, I actually had to reverse the code for how I got peak values to create the vertical line. This took quite a bit of time to figure out and understand how to implement.
Where to display the text? I decided to display the year and month on the top right corner as it looked neat and compact. But faced more dilemma as to where to display the number of cupcakes. It should be close to the peak value but not close to other points (to avoid confusion). Displaying this text with respect to MouseX and MouseY proved to be a great idea! The vertical line passing through the point clearly indicates which point corresponded to the data and also gives the user flexibility as to where they want it to be displayed – giving them a sense of control (and it’s honestly fun too to see it move that way!).
Now one major problem I faced here was a mismatch of the line graph, the vertical line, and the text that was being displayed. None of them were matching. After a lot of trial and errors and printing ample println() statements, I was able to make all 3 coincide.
Yet, another problem awaited me. Since I was retrieving the data from the .csv file based on where the mouse pointer was, I often ran outside the bounds of the rows in the table which kept on giving the error.
Even when I restricted the value to be shown only when the mouse was in the range, there was a sight range in which I still got an error. In an attempt to fix this, I discovered something new about the curveVertex() function (which I used before vertex() to draw my line graph). curveVertex does not draw the first and last point. So, when my mouse pointer was with the first 2 and last 2 points, I was still getting an error. I managed to fix this by switching to vertex() function which draws all points.
Once I finally managed to get the line graph as desired, I labeled the axes, made grid lines, etc. to make it look more professional. I also added color to break the monotony. The process looks like below:
What more can my data say?
Once I was satisfied with my line graph, I wanted to add some additional information about the data by using another representation method. I decided to show the number of cupcakes sold as a percentage of the maximum number of cupcakes sold in the entire data collected. This would tell me how the cupcakes in a particular month performed as compared to the others. A pie chart seemed just the right fit for this! I used the arc() function in which I made the arc as complete as the percentage of cupcakes sold.
Lastly, I added the heading, gave a background color and I was done! This is what my final outcome looks like:
CODE
Table table;
float spacing;
float marginT, marginB, marginL, marginR; // of the rectandle
float h, w; // height and width of the display
float innerBorderX, innerBorderY; // for the line graph
int peakX; // to display value of cupcakes
int maxVal = 100; //found the max num of cupcakes sold in any month by using max() function in excel
int arcW;
float arcX, arcY; // for pie chart
String s1 = "Number of Cupcakes Sold Worldwide", s2 = "From January 2004 to February 2021"; //for my heading

//defining colors
color blue1 = color(42, 157, 244);
color blue2 = color(10, 57, 200);
color greyblue = color(208, 239, 255);
color grey1 = color(146, 167, 179);
color grey2 = color(231, 230, 225);

void setup() {
  fullScreen();
  //size(1280, 720);
  loadData();
  marginT = 0.2*height;
  marginB = height - 0.05*height;
  marginL = 0.1*width;
  marginR = width - 0.1*width;
  h = marginB - marginT;
  w = marginR - marginL;
  innerBorderX = 0.05*w;
  innerBorderY = 0.05*h;
  arcW = 120;
  arcX = marginR-arcW/2;
  arcY = marginT/2;
  println(w);
  loadData();
}

void loadData() {
  // Load CSV file into a Table object
  table = loadTable("multiTimeline.csv", "csv");
  // spacing is rowcount - 4 since the first three rows and the last row are superfluous
  spacing = (w-2*innerBorderX)/(table.getRowCount()-3);
}

void draw() {
  background(grey2);

  //draw display rectangle
  pushStyle();
  stroke(grey1);
  rect(marginL, marginT, w, h);
  popStyle();

  //to display x and y axis
  pushStyle();
  strokeWeight(2);
  line(marginL+innerBorderX, marginT+innerBorderY, marginL+innerBorderX, marginB-innerBorderY);
  line(marginL+innerBorderX, marginB-innerBorderY, marginR-innerBorderX, marginB-innerBorderY);
  //label the axes
  textSize(16);
  textAlign(CENTER);
  fill(grey1);
  text("Cupcakes", marginL+innerBorderX, marginT + innerBorderY - 7);
  text("Month", marginR-innerBorderX, marginB - innerBorderY + 17);
  popStyle();

  //grid lines
  pushStyle();
  stroke(grey2);
  fill(grey1);
  textSize(16);
  textAlign(RIGHT);
  //line1
  float yline = map(25, 0, 100, marginB-innerBorderY, marginT+2*innerBorderY);
  line(marginL+innerBorderX, yline, marginR-innerBorderX, yline);
  text("25", marginL+innerBorderX-5, yline);
  //line 2
  yline = map(50, 0, 100, marginB-innerBorderY, marginT+2*innerBorderY);
  line(marginL+innerBorderX, yline, marginR-innerBorderX, yline);
  text("50", marginL+innerBorderX-5, yline);
  //line 3
  yline = map(75, 0, 100, marginB-innerBorderY, marginT+2*innerBorderY);
  line(marginL+innerBorderX, yline, marginR-innerBorderX, yline);
  text("75", marginL+innerBorderX-5, yline);
  //line 4
  yline = map(100, 0, 100, marginB-innerBorderY, marginT+2*innerBorderY);
  line(marginL+innerBorderX, yline, marginR-innerBorderX, yline);
  text("100", marginL+innerBorderX-5, yline);
  popStyle();

  //draw the line graph first
  pushStyle();
  strokeWeight(3);
  stroke(blue1);
  noFill();
  beginShape();
  // start at row 3 since the first few rows are filler
  for (int i = 3; i < table.getRowCount(); i++) {
    TableRow row0 = table.getRow(i);
    float interest = row0.getFloat(1);
    float x = (i-3)*spacing ;
    float y = map(interest, 0, 100, marginB-innerBorderY, marginT+2*innerBorderY); //map the data values to my display area
    vertex(marginL+innerBorderX+x, y);
  }
  endShape();
  popStyle();

  //Draw line and circle on line with mouseX
  //Choose closest peak

  //if mouse is inside the inner box
  if (mouseX<marginR-innerBorderX && mouseX>marginL+innerBorderX && mouseY<marginB-innerBorderY && mouseY>marginT+innerBorderY)
  {
    //See if it is closer to prior peak
    if ((mouseX % spacing) < spacing/2 ) {
      peakX = int(mouseX / spacing);
      //println("condition1");
      //println(mouseX);
      //println("spacing = " + spacing);
      //println("mouseX % spacing = " + mouseX % spacing);
      //println("peakX = " + peakX);
    } else {
      //otherwise closer to next peak
      peakX = int(mouseX / spacing) + 1;
    }

    //Print text at mouse of the peak value
    pushStyle();
    fill(0);
    textSize(20);
    if (int(peakX-int((marginL+innerBorderX)/spacing))+3 < 209) //to avoid out of bounds error
    {
      //draw the vertical line
      line(peakX * spacing, marginT, peakX * spacing, marginB);

      //write value of peak
      String val = nf(table.getRow(int(peakX-int((marginL+innerBorderX)/spacing))+3).getFloat(1), 0, 0);
      text(val, mouseX, mouseY);

      //display month
      pushStyle();
      textAlign(RIGHT);
      String mon = table.getRow(int(peakX-int((marginL+innerBorderX)/spacing))+3).getString(0);
      textSize(16);
      text("Year-Month: " + mon, marginR - 25, marginT + innerBorderY);
      popStyle();

      //draw circle at peakX at height using map function
      TableRow r0 = table.getRow(int(peakX-int((marginL+innerBorderX)/spacing)+3));
      float value = r0.getFloat(1);
      float cirY = map(value, 0, 100, marginB-innerBorderY, marginT+2*innerBorderY);
      pushStyle();
      fill(blue2);
      stroke(blue2);
      circle(peakX*spacing, cirY, 7);
      popStyle();

      //draw piechart for number of cupcakes sold as a percentage of max value
      pushStyle();
      fill(greyblue);
      stroke(grey1);
      arc(arcX-20, 0+arcY, arcW, arcW, 3*PI/2, 3*PI/2+value/maxVal*TWO_PI, PIE);
      textAlign(CENTER, CENTER);
      textSize(16);
      fill(0);
      text(nf(value/maxVal*100, 0, 1) + "%", arcX-20, arcY);
      popStyle();
    }
    popStyle();
  }

  //heading
  pushStyle();
  fill(blue2);
  textSize(40);
  textAlign(LEFT, TOP);
  text(s1, marginL+20, 0+40);
  textSize(20);
  fill(blue1);
  text(s2, marginL+20, 0+90);
  popStyle();
}
This week’s assignment was to create a game using Object-Oriented Programming. My idea for the game was inspired by one of my favorite childhood computer games in which we had to collect apples to gain points and beware of the bombs which reduced points. For this project, I wanted to recreate this game.
Object-Oriented Programming was ideal to create this game because I could create the falling objects and the basket as separate classes and then manipulate each one of those in a much easier manner by just varying a few parameters than having to deal with each object individually.
I started with first creating a falling object class in which I had apples and my first goal was to make them move as required – changing their x position each time they came again onto the screen for the next round and even increasing their speed the longer the game progresses to increase difficulty (see below). Then came the basket class and making it move according to user input.
With the basket:
Once I managed to move the apple and the basket as I desired, the next step was to check whether the user actually caught the fruit in the basket or not. Checking for this and increasing the score for it was relatively easy, however, creating a sense that the fruit was actually being captured in the basket was quite difficult. See my first attempt to check for collision:
Clearly, the score is increasing, but no user would know they caught the fruit unless they look at it. This is not user-friendly at all because you cannot concentrate not the game if you have to look at the score again and again. so, it was important that the fruits disappeared once they collided with the basket. However, the problem with this was that I was displaying the fruit image in the run() method of the class but I was checking for collision outside the class. So, if I used tint() to make the opacity of the object zero, everything on the canvas would go transparent. If I put this in the class function, the image in the run() would still draw the fruit, and the purpose of making it invisible failed.
I managed to solve this problem by first rearranging a few lines in the code so that the layering would be appropriate for what I was going to do next. I then created another class member (variable) which kept track if the object collided or not. I would only display the image in the run() method of the class if visible was true (see code below).
DETAILING
Once I got the semantics of the game in place, it was time for some diversity! I first added a scenic background to make it interface pleasing and then I decided to have different fruits; each amounting to different points. I also decided to have a stone (equivalent to the bomb in my childhood game) to make it more interesting. The game would finish when the score would go less than zero.
USER EXPERIENCE
What is a game if you do not know what to do or see how your game went? So, along with creating an illusion of fruits falling in the basket by making my fruits disappear after collision, I decided to have an initial instructions menu and a “Game Over” comment in the end with the display of the user’s highest score achieved during the game for enhanced user experience. I learned how to display text on the screen for this project!
See a video of my final game in progress:
The speed of the falling fruits increases the longer the game progresses to increase the difficulty:
CODE
My class Obj for the falling objects (the different fruits and stones):
class Obj {
  float posX, posY;
  float objWidth, objHeight;
  float speed;
  PImage objImg;
  int points;
  int imgCode;
  boolean scored; //to not keep adding score for basket height
  boolean visible; //to make it dissapear when fals in the basket

  //constructor
  Obj(int _imgCode, PImage _img) {
    objWidth = random(30, 60);
    objHeight = objWidth*780/801; //original pic ratio = 801x780
    posX = random(width-objWidth)+objWidth/2;
    posY = 0-objHeight/2;
    speed = random(1, 3);
    imgCode= _imgCode;
    objImg = _img;
    //points = 10;
    scored = false;
    visible = true;
    assign();
    println(speed);
  }

  void fallObj() {
    posY += speed;
    if (frameCount%300==0 && speed<25) //cap on speed so that it doesnt get too fast
    {
      speed*=1.2; //speed of game keeps increasing to increase difficulty
      //println(frameCount);
      //println(speed);
    }
  }

  void checkEdge() {
    if (posY > height+objHeight/2) {
      posX = random(width-objWidth)+objWidth/2;
      posY = 0-objHeight/2;
      scored = false;
      visible = true;
    }
  }

  void run() {
    fallObj();

    if (visible == true)
      image(objImg, posX, posY, objWidth, objHeight);

    checkEdge();
  }

  void assign()
  {
    if (imgCode == 0)
    {
      points = -50;
      speed++; //icrease the speed of rocks a bit
    }
    else if (imgCode == 1)
      points = 5;
    else if (imgCode == 2)
      points = 15;
    else if (imgCode == 3)
      points = 20;
  }
}
My class Basket:
class Basket
{
  float posX, posY;
  float bWidth, bHeight;
  float speed;
  PImage bImg;
  //int points;

  //constructor
  Basket(PImage _img)
  {
    bWidth = 180;
    bHeight = bWidth/2; //original pic ratio =
    posX = width/2;
    posY = height-bHeight/2;
    speed=15;
    bImg = _img;
  }

  void run()
  {
    image(bImg, posX, posY, bWidth, bHeight);
    if (frameCount%300==0 && speed<40) //cap on speed so that it doesnt get too fast
    {
      speed*=1.5; //to increase speed of basket as game gets faster
    }
  }

  void shiftR()
  {
    //if (posX<width-bWidth/2)
    if (posX<width-bWidth/2-speed)
      posX+=speed;
    else
      posX=width-bWidth/2;
    image(bImg, posX, posY, bWidth, bHeight);
  }

  void shiftL()
  {
    if (posX>0+bWidth/2+speed)
      posX-=speed;
    else
      posX=bWidth/2;
    image(bImg, posX, posY, bWidth, bHeight);
  }
}
The main draw() function:
Obj[] objects;
Basket basket;
PImage[] objImgs;
PImage basketImg;
PImage bg; //background image for game
int score = 0;
int maxScore = 0; //to display in the end
boolean started = false; //to keep track of start screen
color beige = color(225, 198, 153);

//==================================================================================================

void setup() {
  size(1000, 650);
  //fullScreen();

  //loading the background
  bg = loadImage("bg7.jpeg");
  //loading the various object images - fruits, basket and stone
  objImgs = new PImage[4];
  objImgs[1] = loadImage("apple1.png"); //code 1 = apple = 5 points
  objImgs[2] = loadImage("mango1.png"); //code 2 = mango = 15 ponits
  objImgs[3] = loadImage("pear1.png");  //code 3 = pear = 20 ponts
  objImgs[0] = loadImage("rock.png");   //code 0 = enemy = -50 points
  basketImg = loadImage("basket4.png");

  rectMode(CENTER);
  imageMode(CENTER);

  //creating my objects for the game
  basket = new Basket(basketImg);
  //falling objects
  objects = new Obj[9];
  for (int i=0; i<objects.length; i++)
  {
    int imgCode = i%objImgs.length;
    objects[i] = new Obj(imgCode, objImgs[i%objImgs.length]);
  }
}

//==================================================================================================

void draw()
{
  if (started == false)
    startScreen();

  else
  {
    //background(bg);
    image(bg, width/2, height/2, width, height);

    basket.run();
    for (int i = 0; i<objects.length; i++) {
      objects[i].run();
    }

    scoring();
  }
}

//==================================================================================================

void keyPressed()
{
  if (started)
  {
    if (key == 'd' || (key == CODED && keyCode == RIGHT))
      basket.shiftR();
    if (key == 'a' || (key == CODED && keyCode == LEFT))
      basket.shiftL();
  }
  if (key == ENTER)
    started = true;
  if (key == BACKSPACE)
    endScreen();
}

//==================================================================================================

void scoring()
{
  fill(255);
  textSize(30);
  textAlign(LEFT);
  text("SCORE: " + score, 20, 40);

  //check if any fruit caught in basket
  for (int i=0; i<objects.length; i++)
  {
    if (objects[i].posX+objects[i].objWidth/2>=basket.posX-basket.bWidth/2 &&
      objects[i].posX-objects[i].objWidth/2<=basket.posX+basket.bWidth/2 &&
      objects[i].posY>=basket.posY-basket.bHeight/3 &&
      objects[i].scored == false)
    {
      score+=objects[i].points;
      objects[i].scored = true;
      objects[i].visible = false;
    }
  }

  if (maxScore<score)
    maxScore=score;

  if (score<0)
    endScreen();
}

//==================================================================================================

void startScreen()
{
  background(beige);
  fill(255);
  textAlign(CENTER);
  textSize(40);
  text("SHREYA'S FARMLAND", width/2, height/4);
  textSize(20);
  text("Collect the fruits in the basket,", width/2, height/3);
  text("BEWARE of the stones!", width/2, height/3+25);
  textSize(15);
  text("Points gained are as follows:", width/2, height/3+80);
  //textAlign(LEFT,CENTER);
  text("Apple :  +05", width/2, height/3+100);
  text("Mango:  +15", width/2, height/3+120);
  text("Pear    :  +20", width/2, height/3+140);
  text("Stone  :  -50", width/2, height/3+160);
  textSize(15);
  text("Press ENTER to start the game, press BACKSPACE to quit", width/2, height*3/4);
  //text("Press BACKSPACE to quit", width/2, height*3/4);
}

//==================================================================================================

void endScreen()
{
  noLoop();
  //tint(255,50);
  background(beige);
  //noTint();
  fill(255);
  textAlign(CENTER);
  textSize(40);
  text("GAME OVER!", width/2, height/2-40);
  textSize(20);
  text("Your Highest Score: " + maxScore, width/2, height/2+20);
}


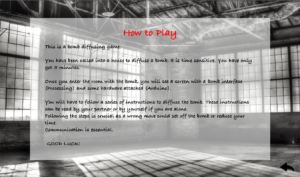
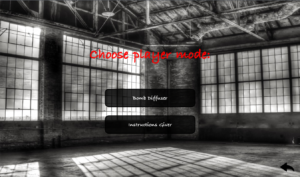

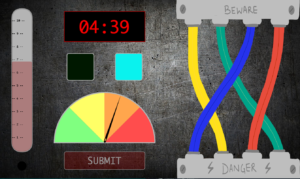
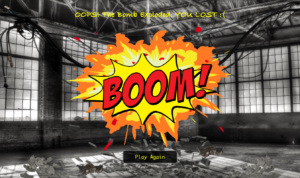
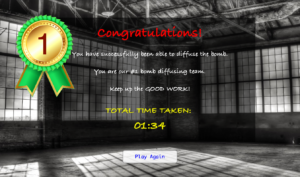
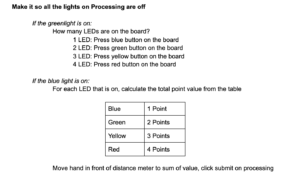

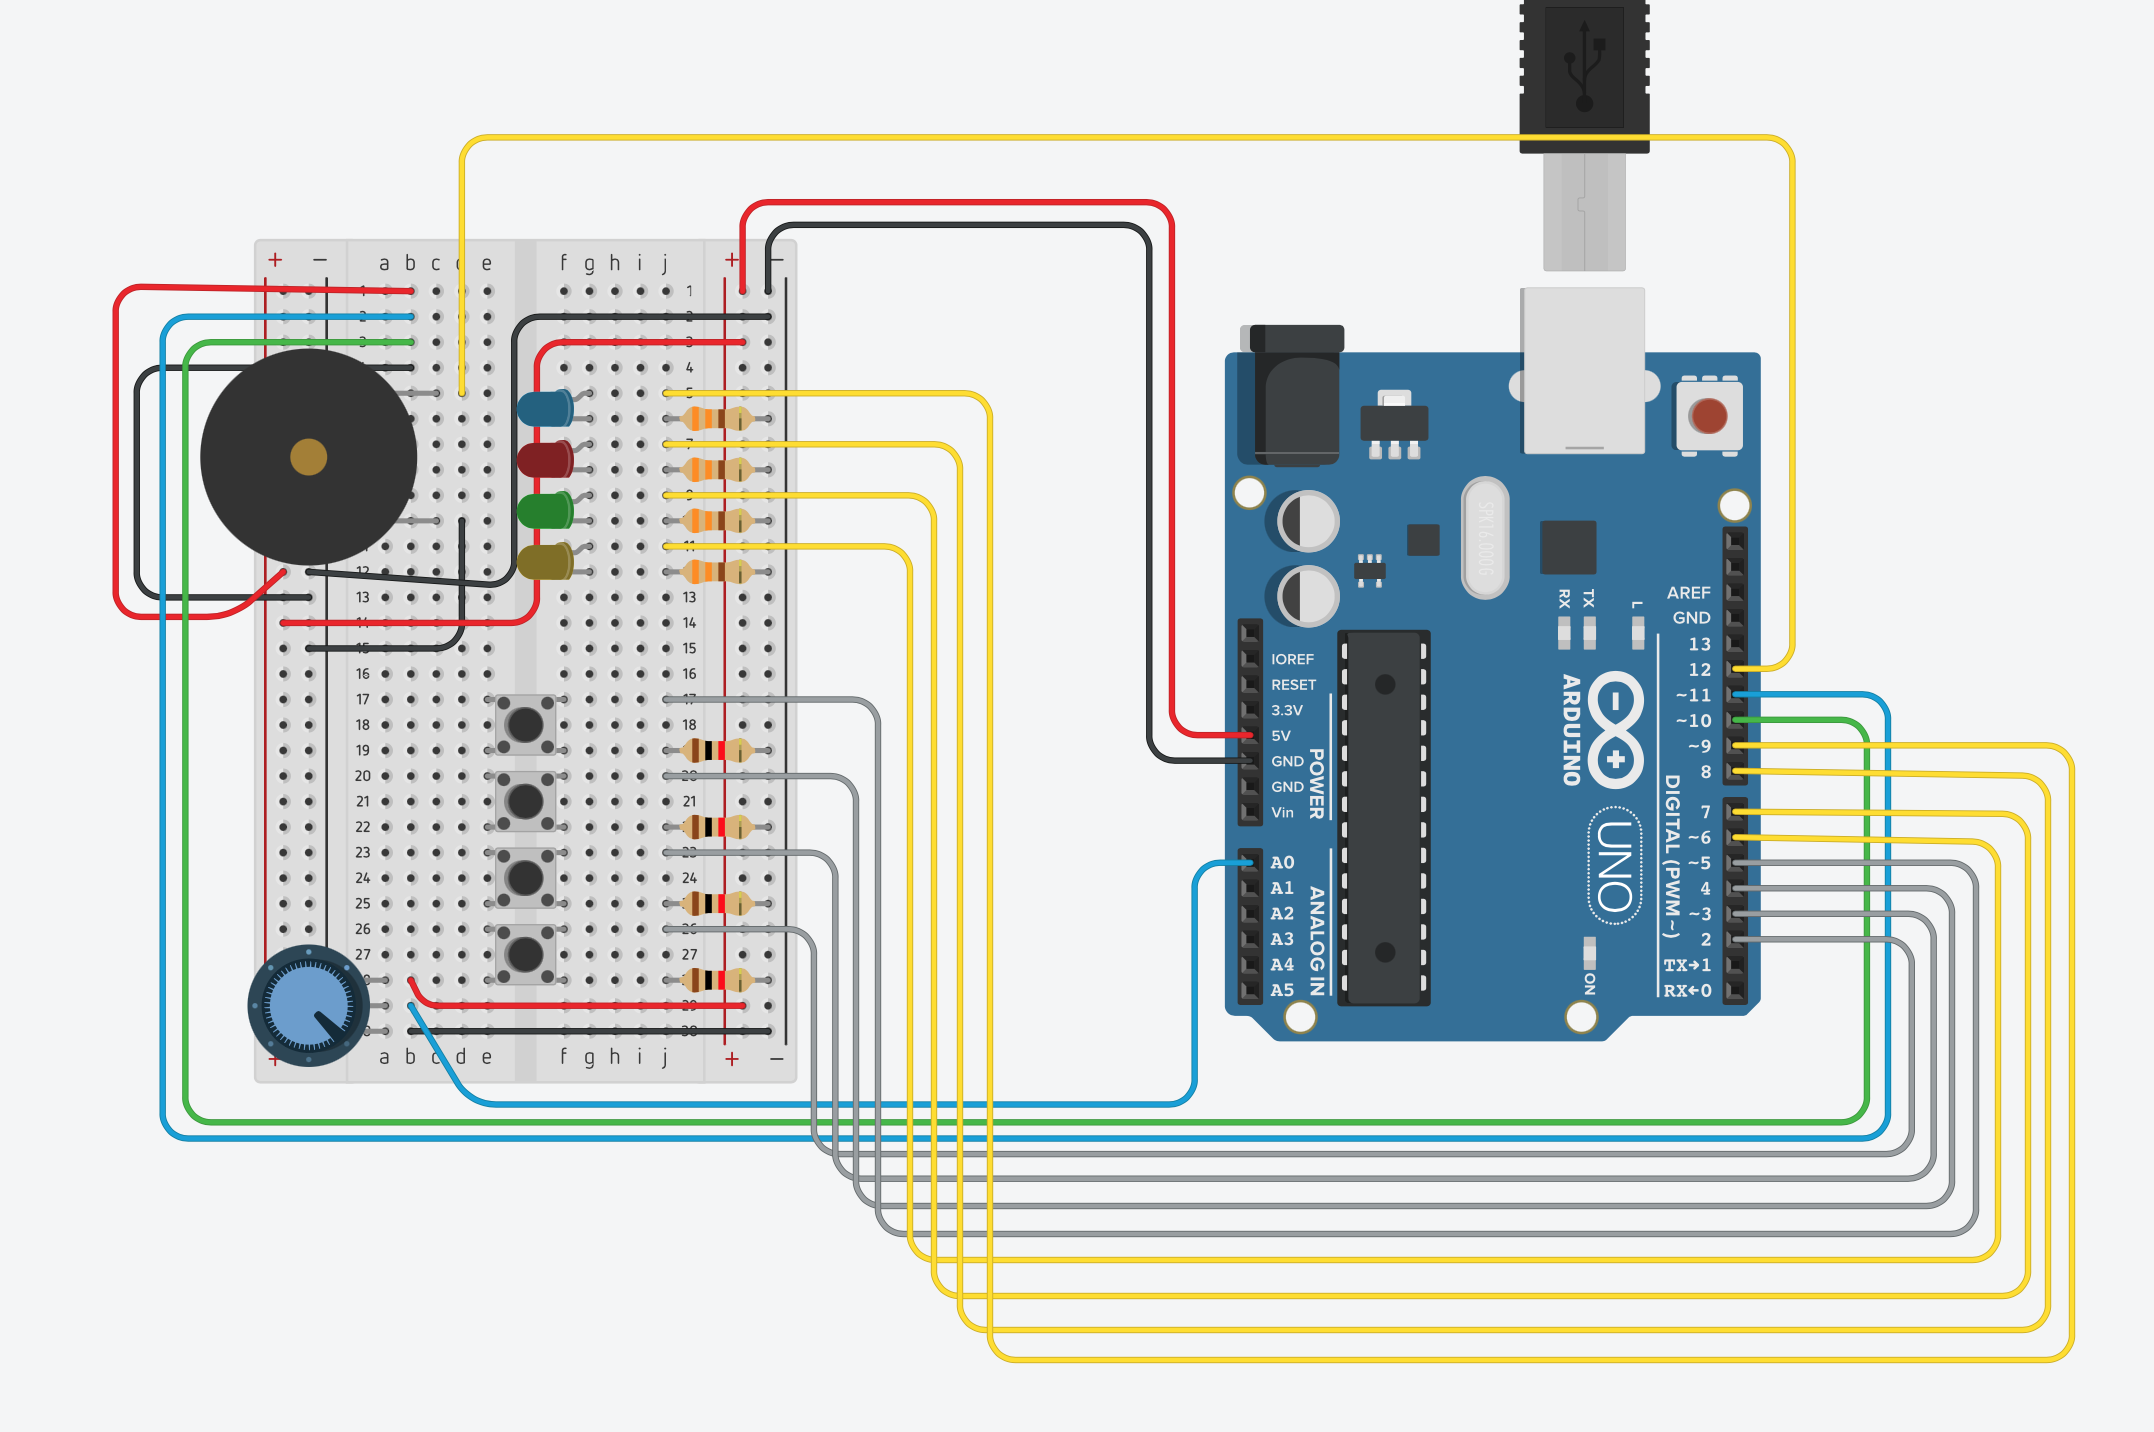
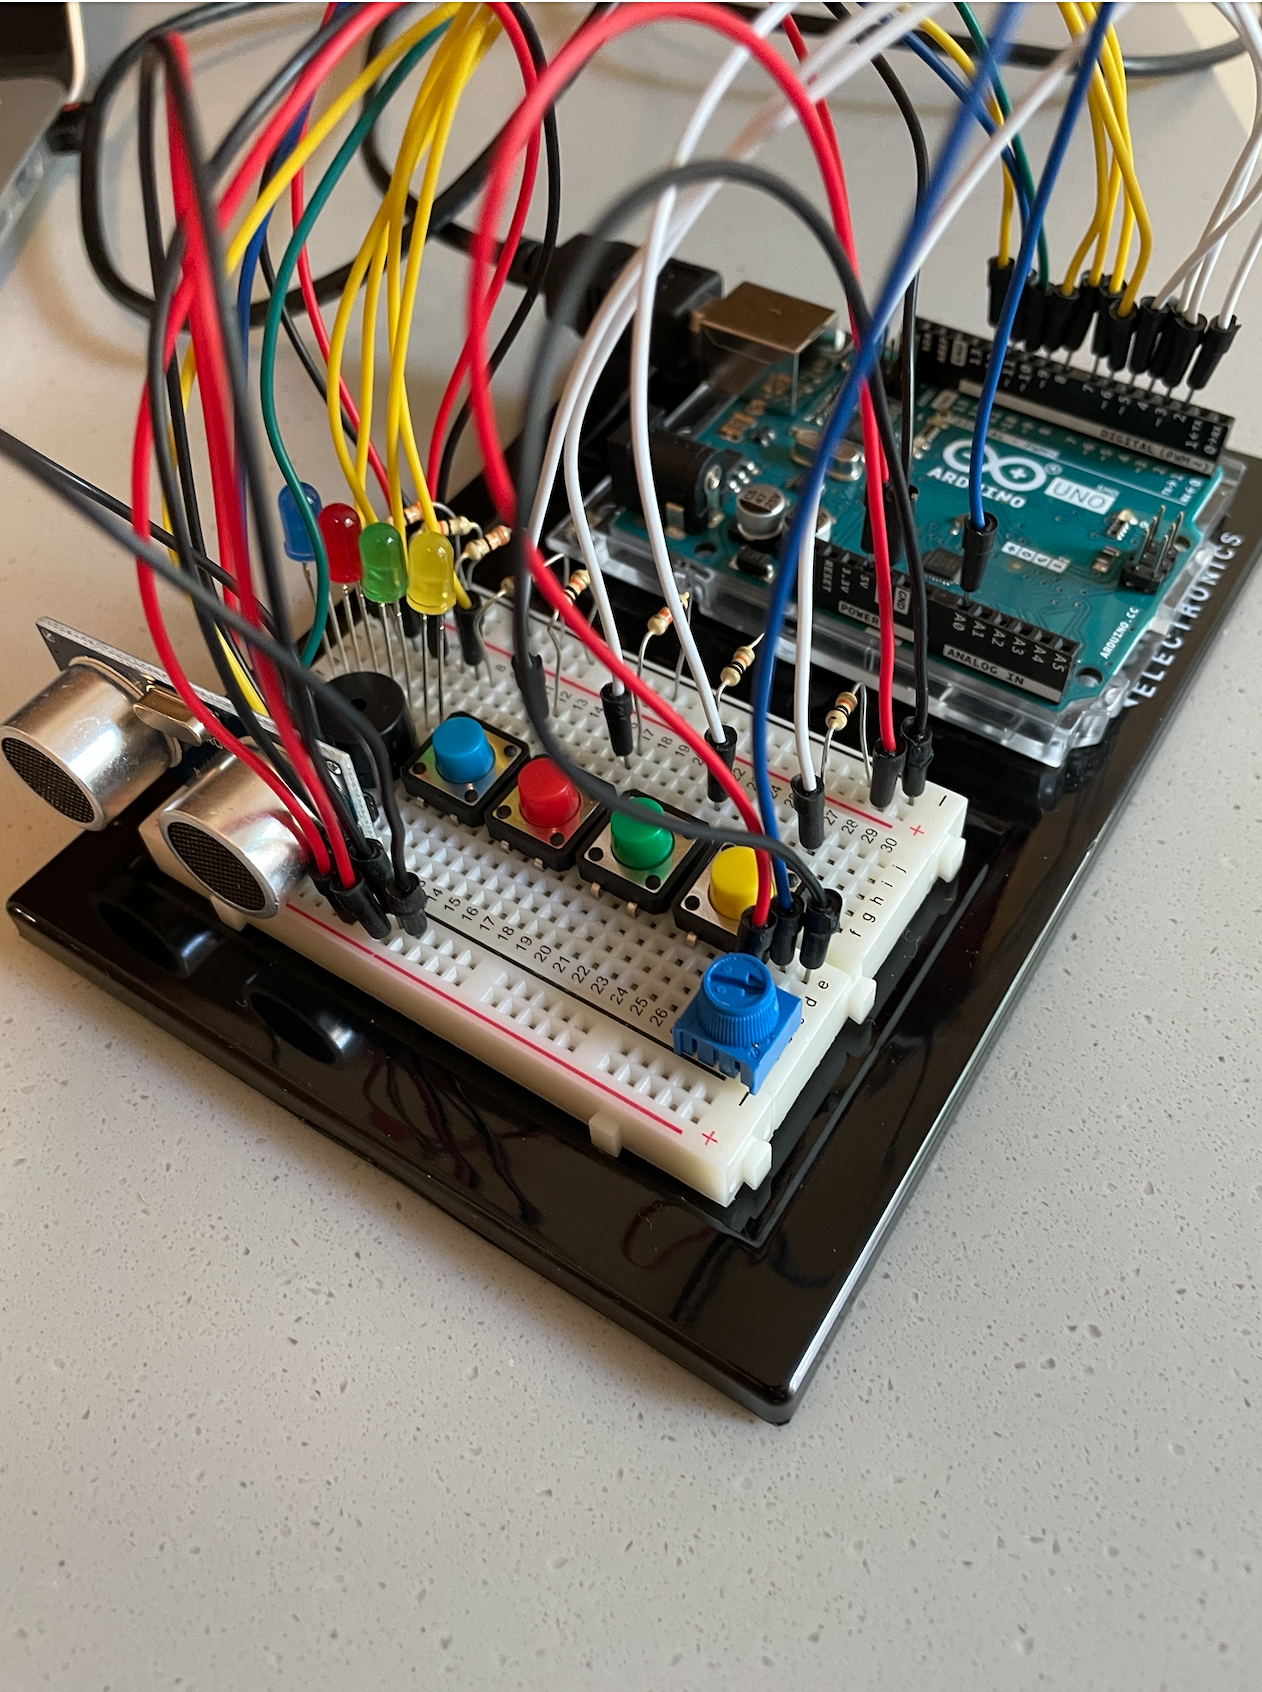
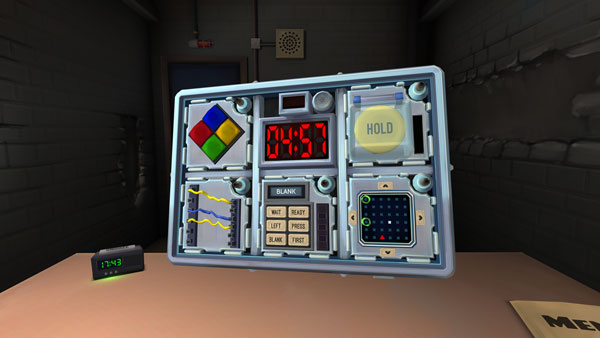
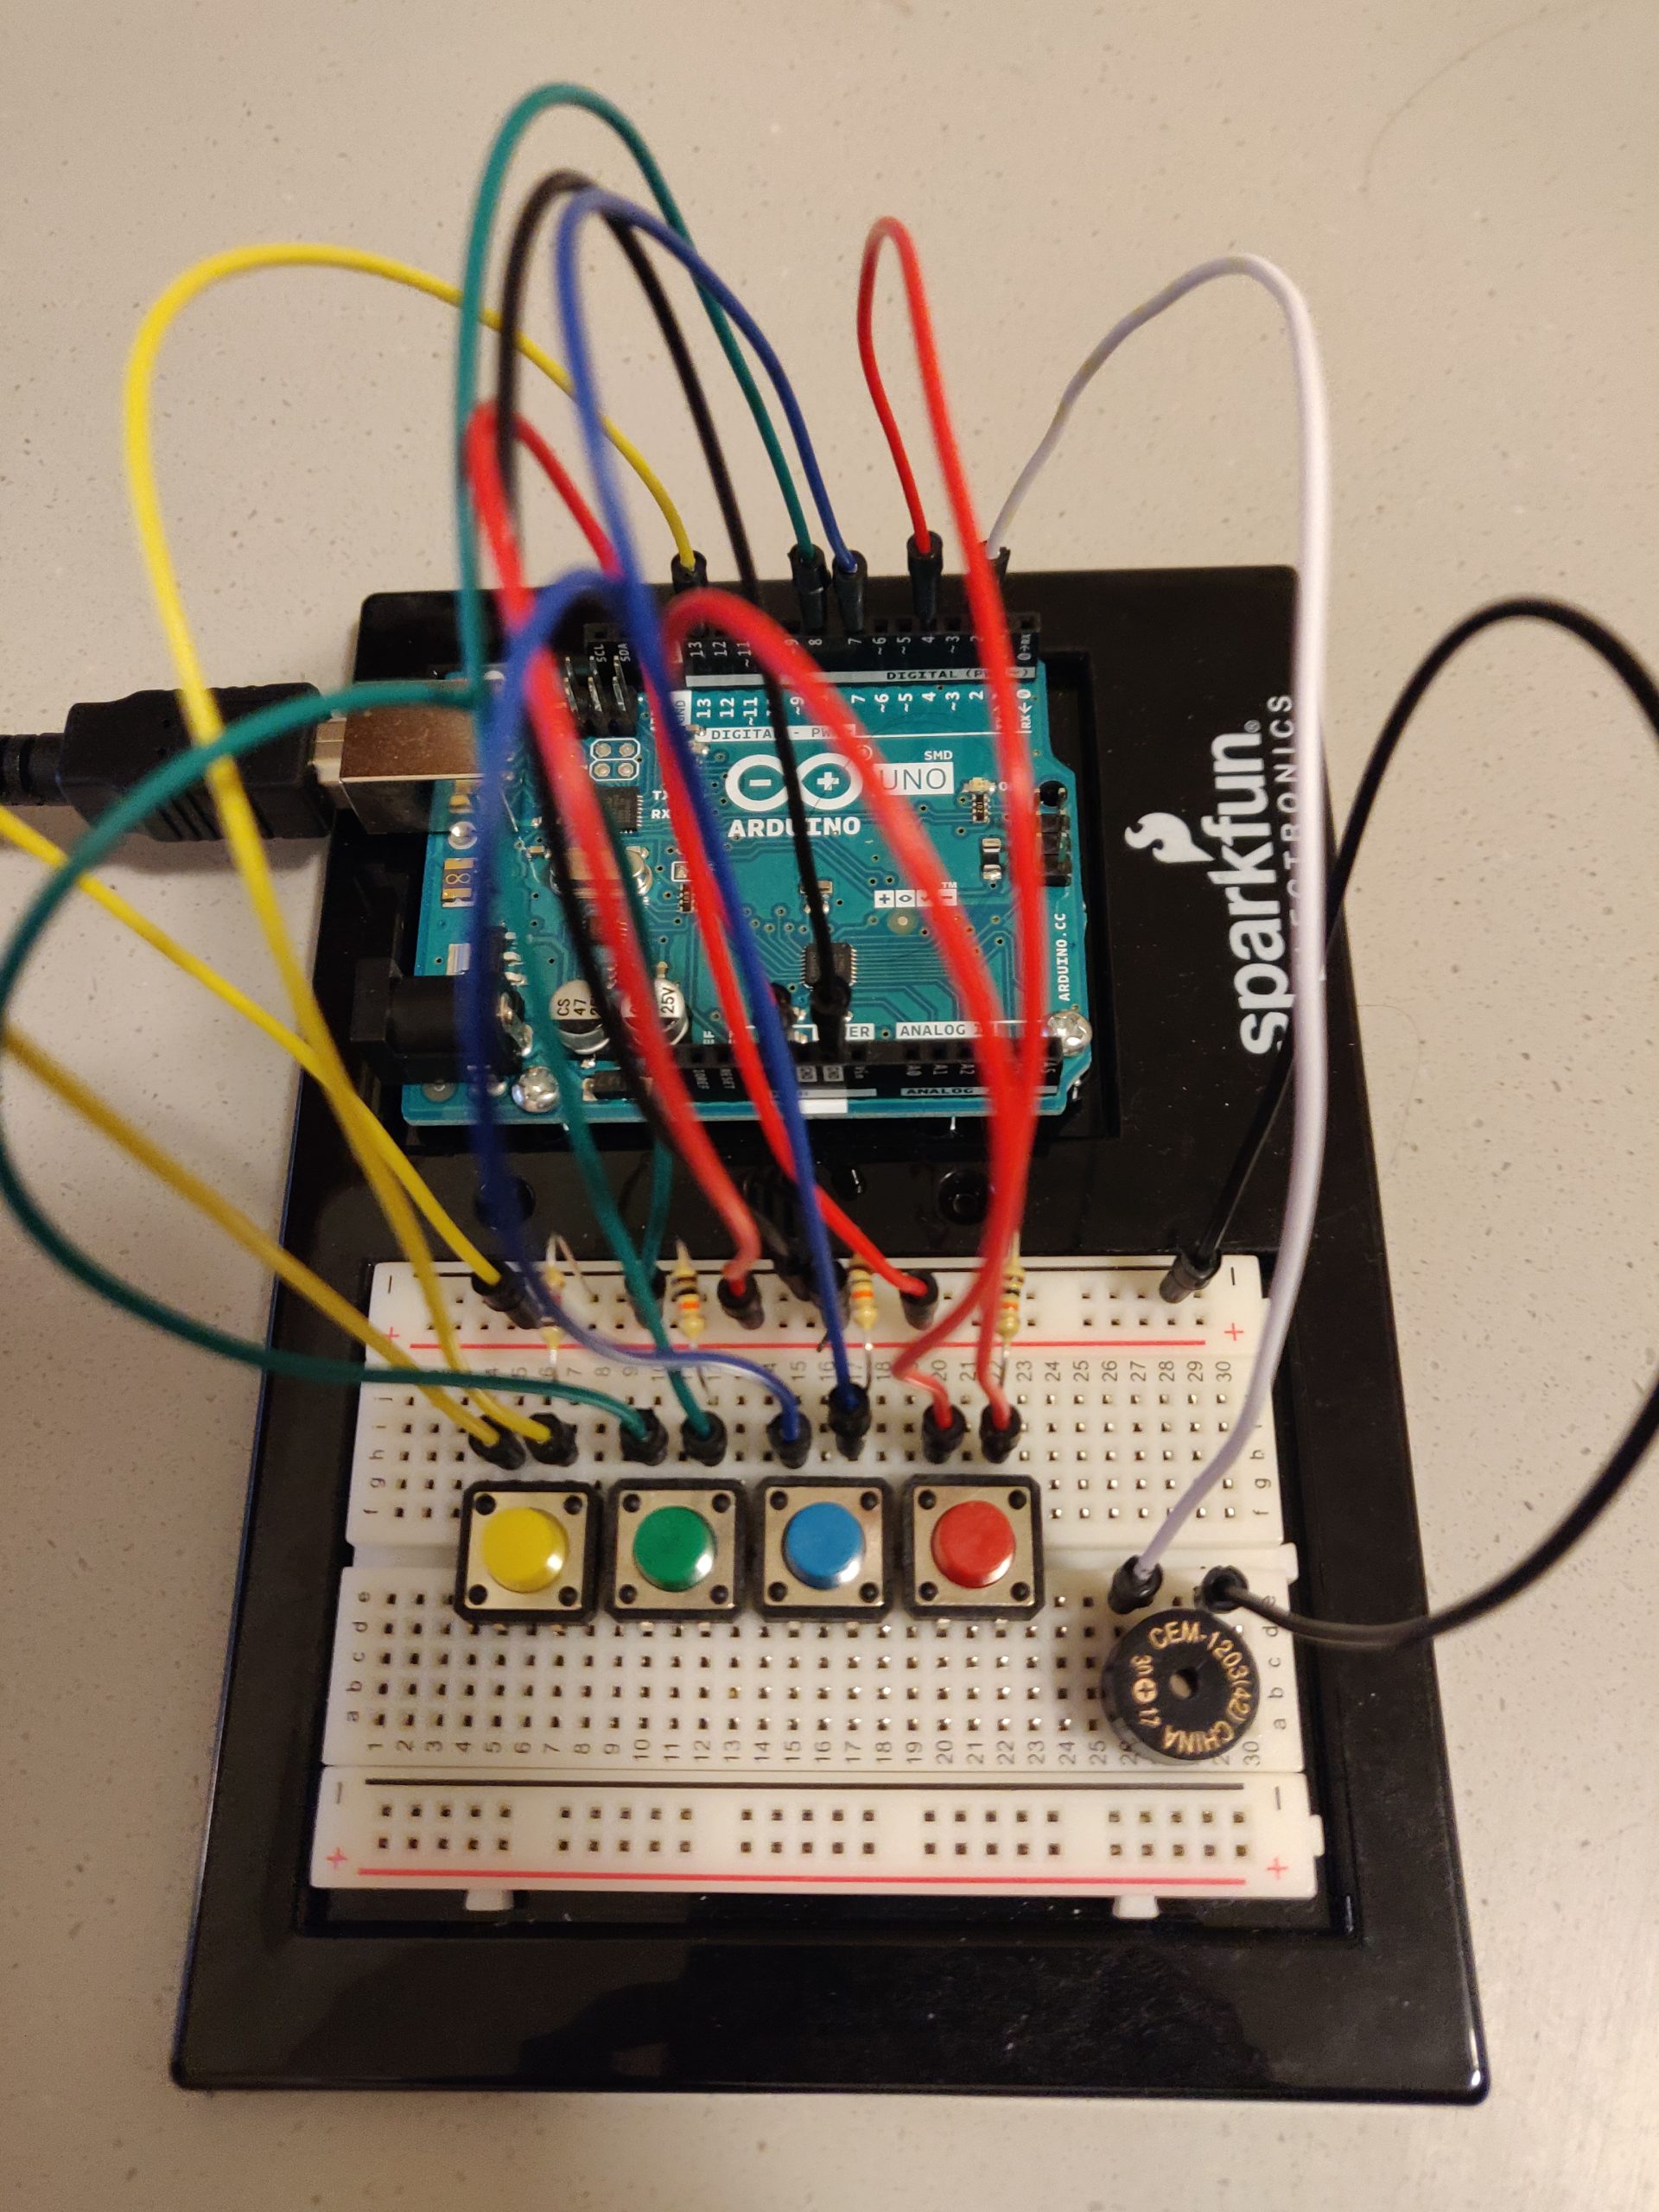
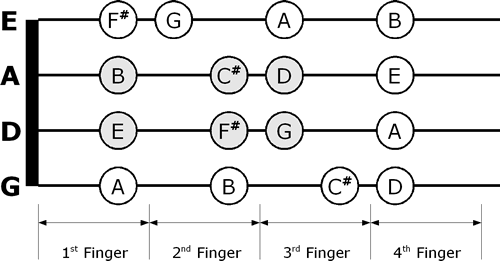
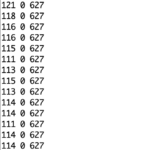
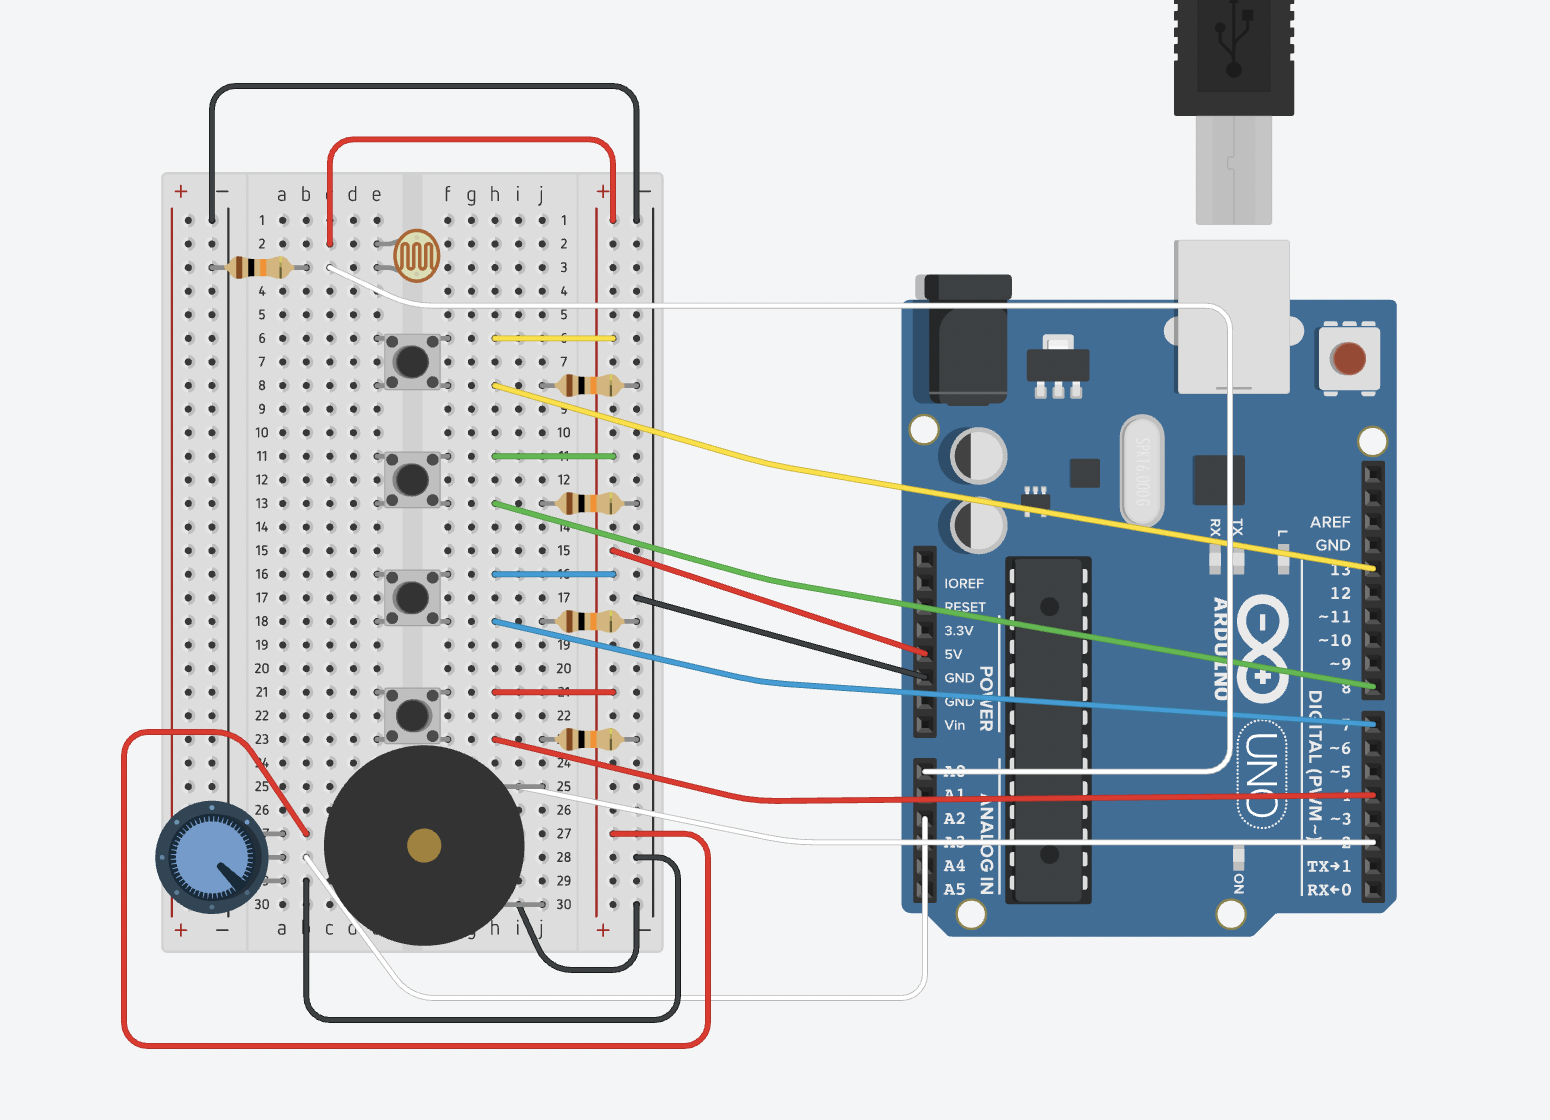
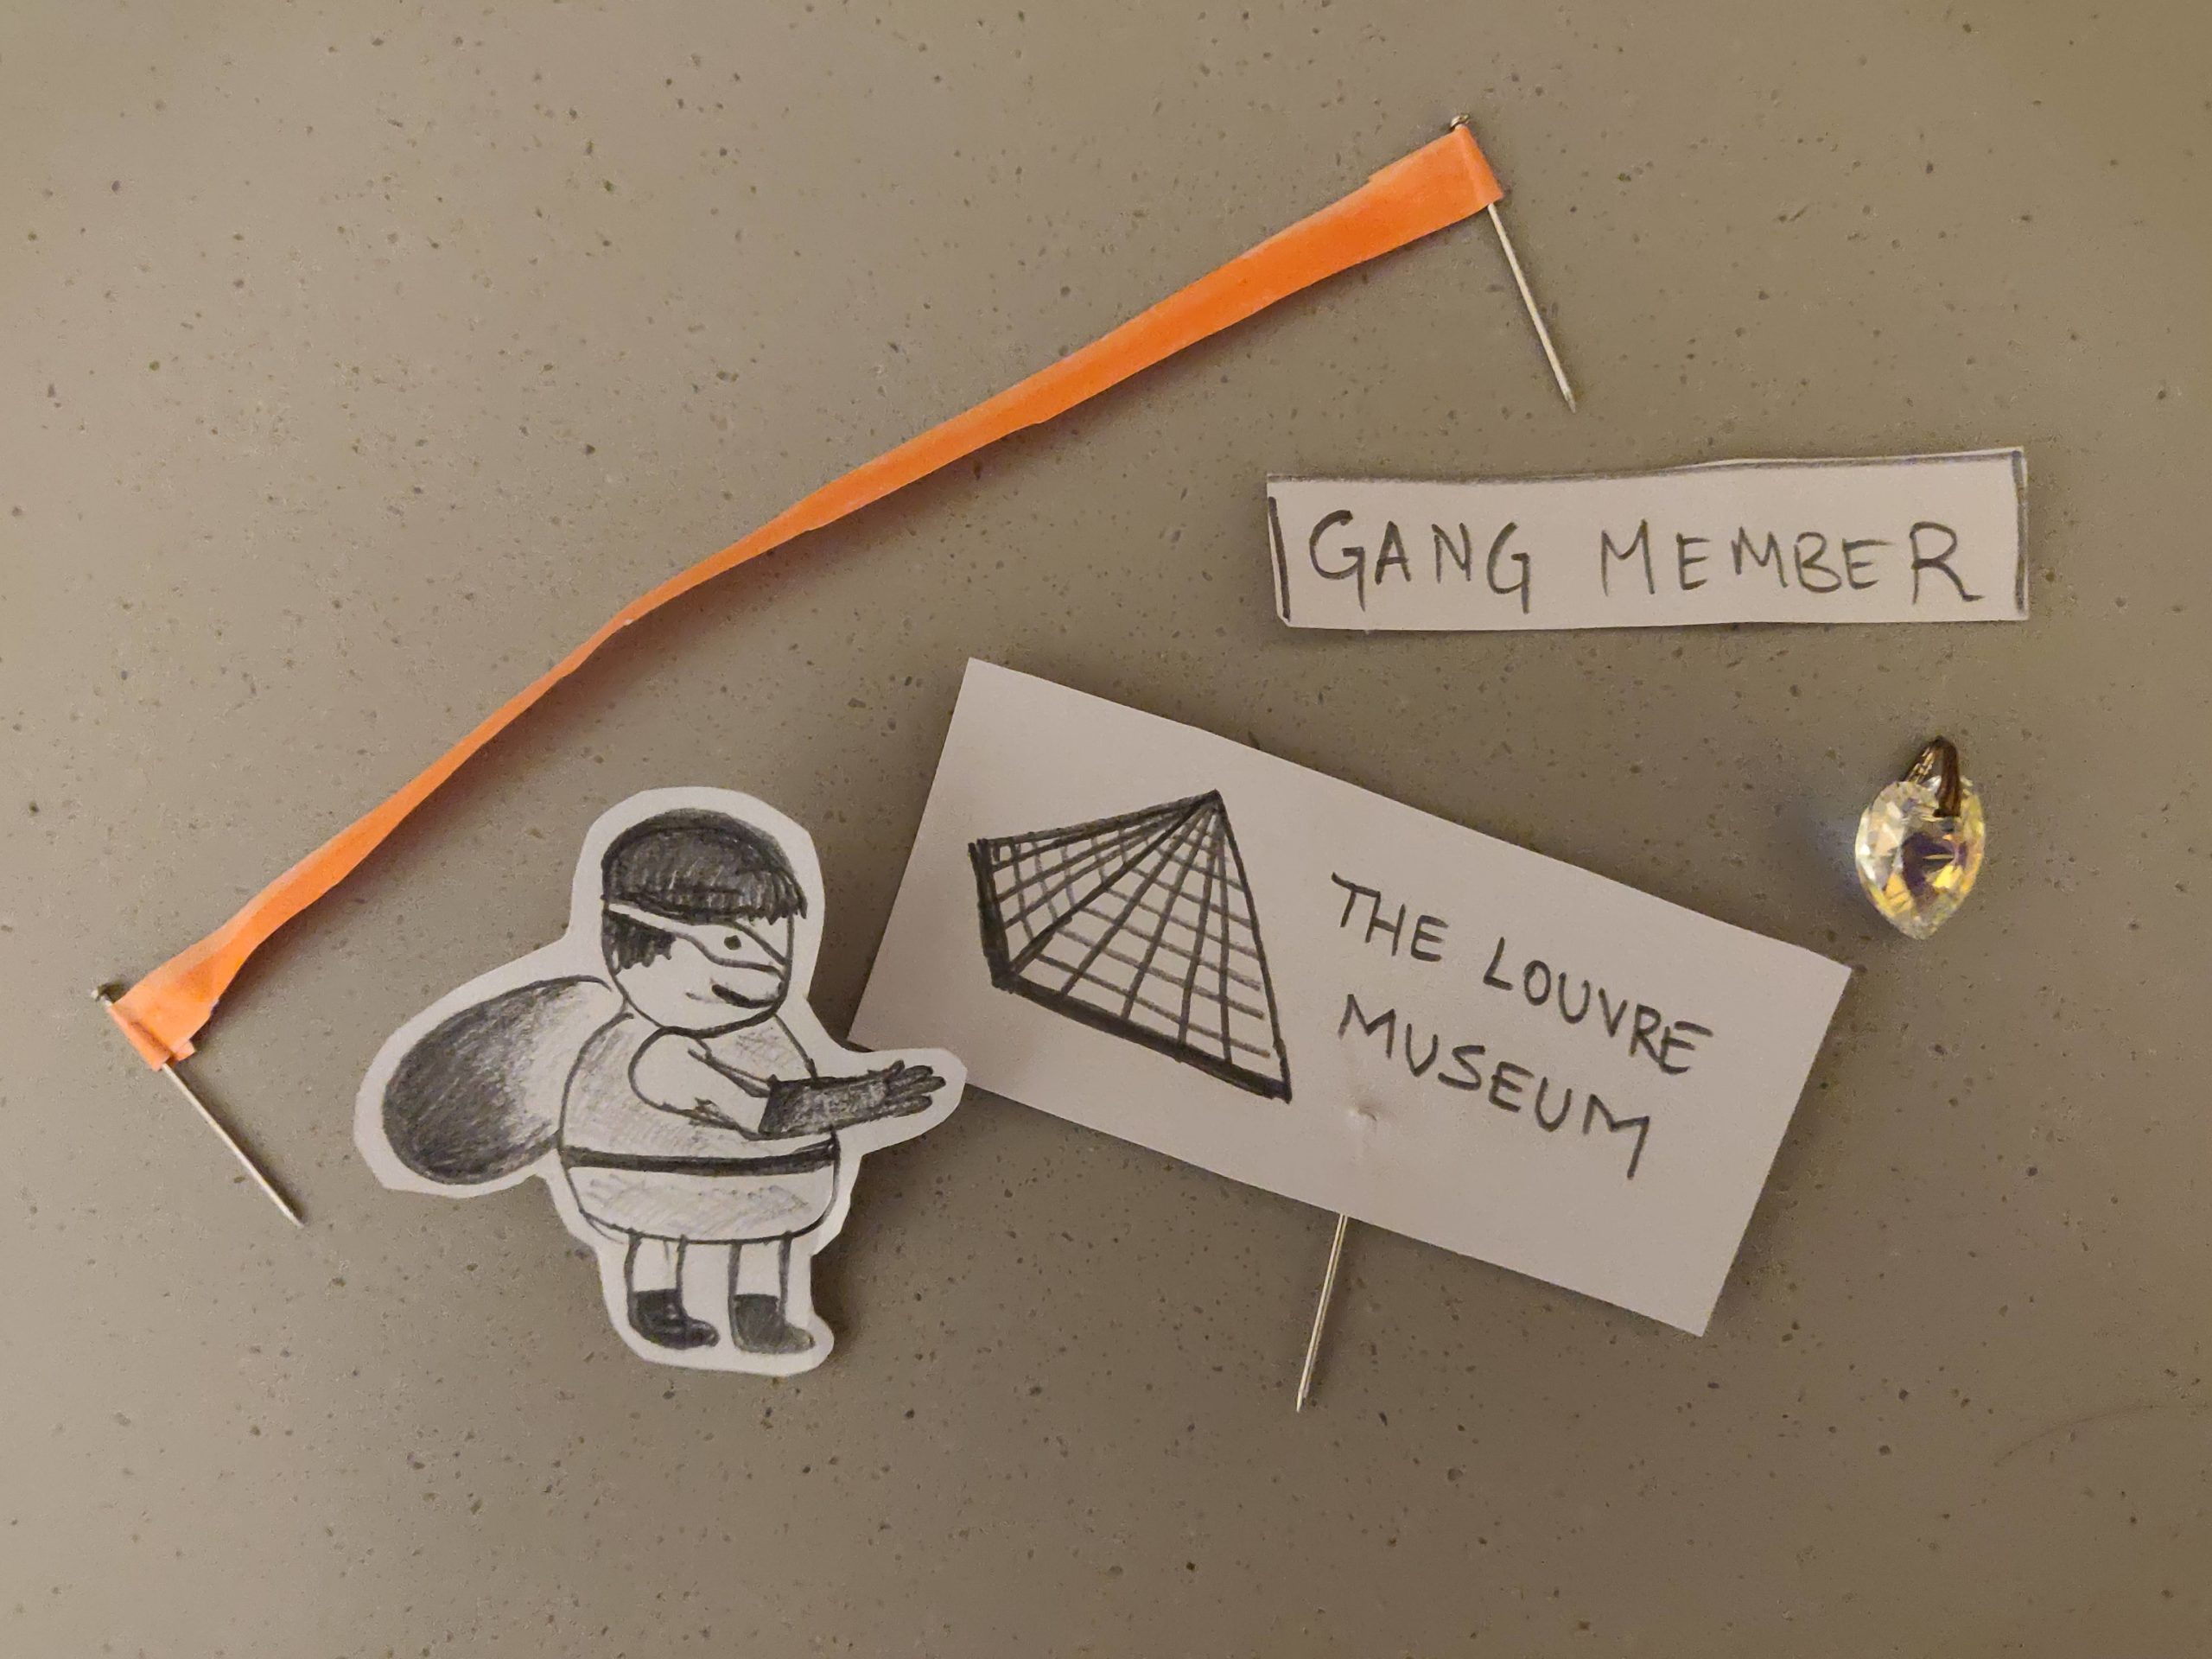
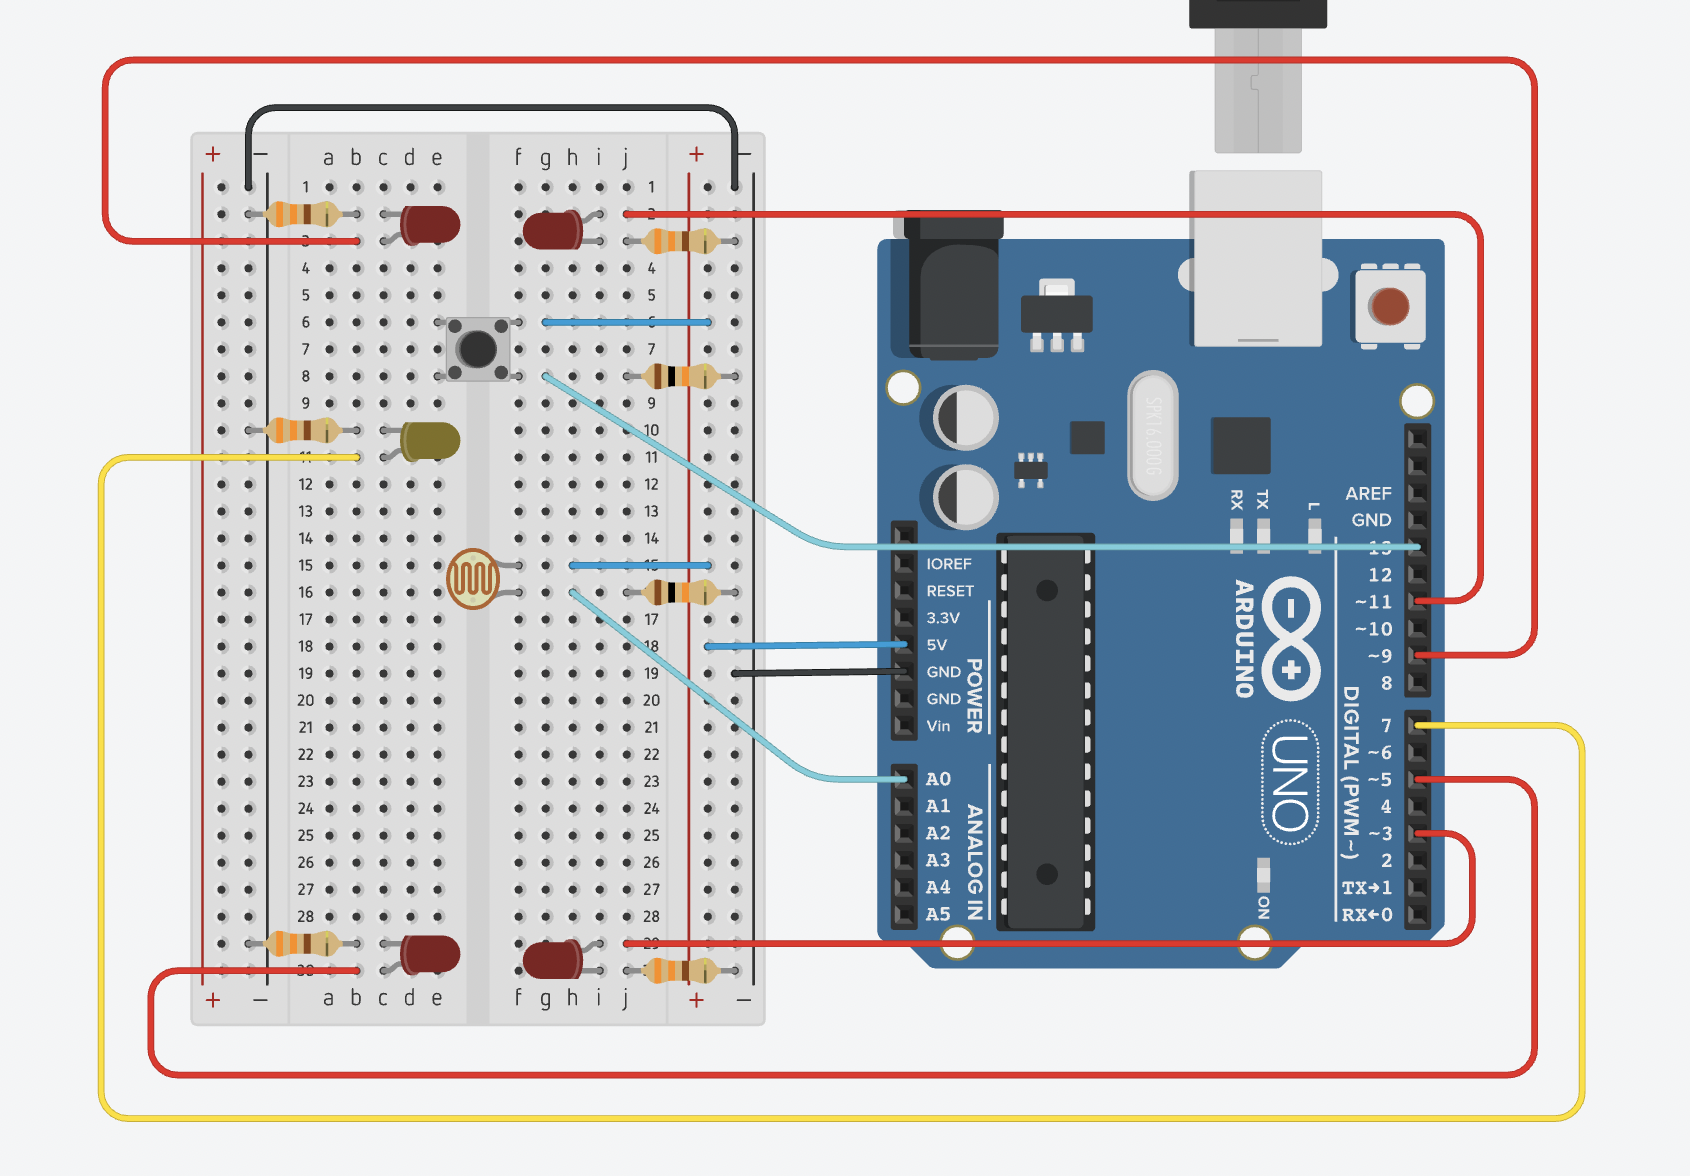
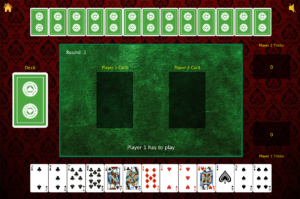
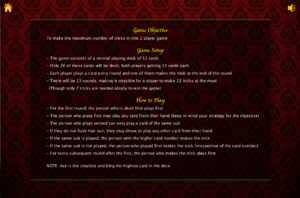
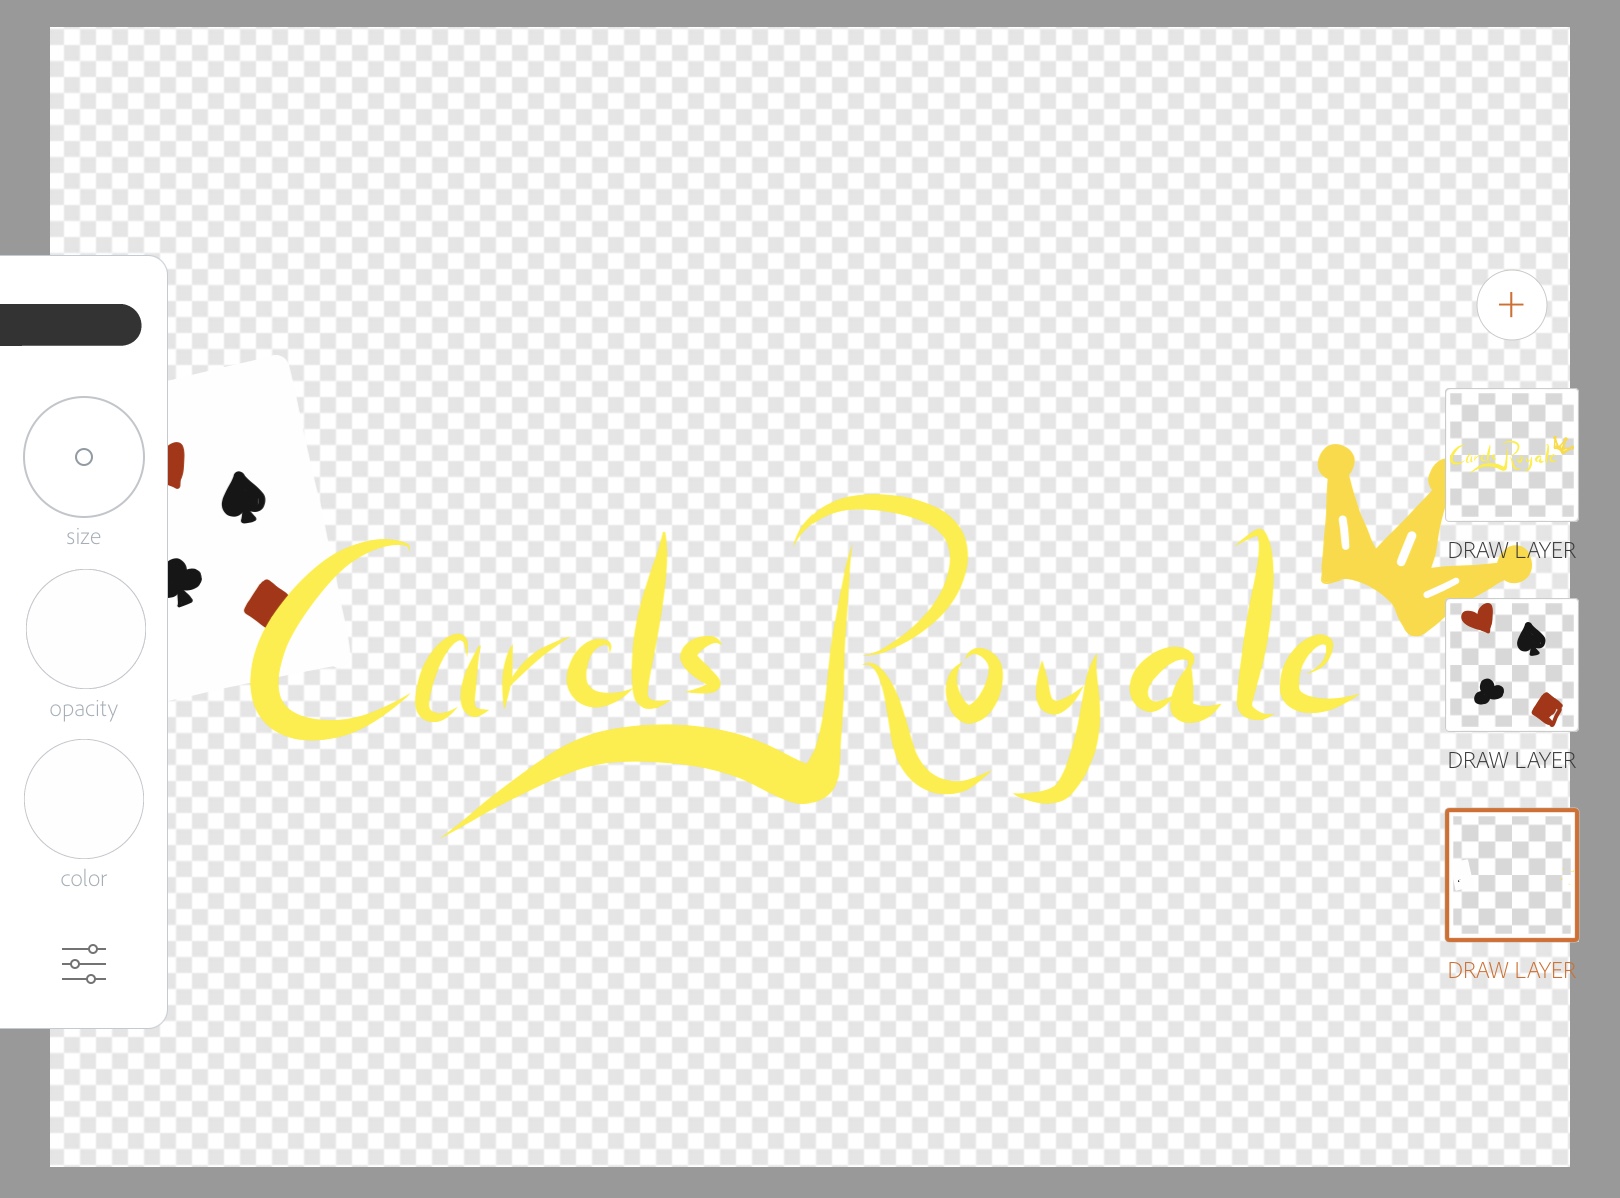
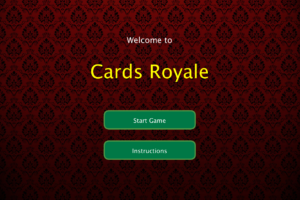
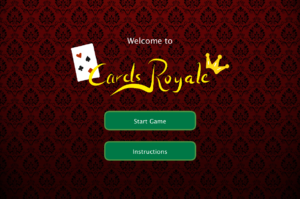
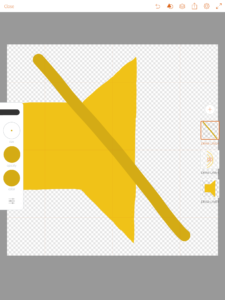

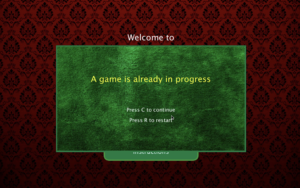
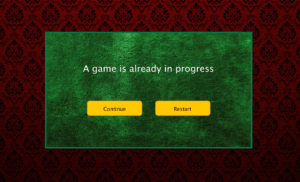
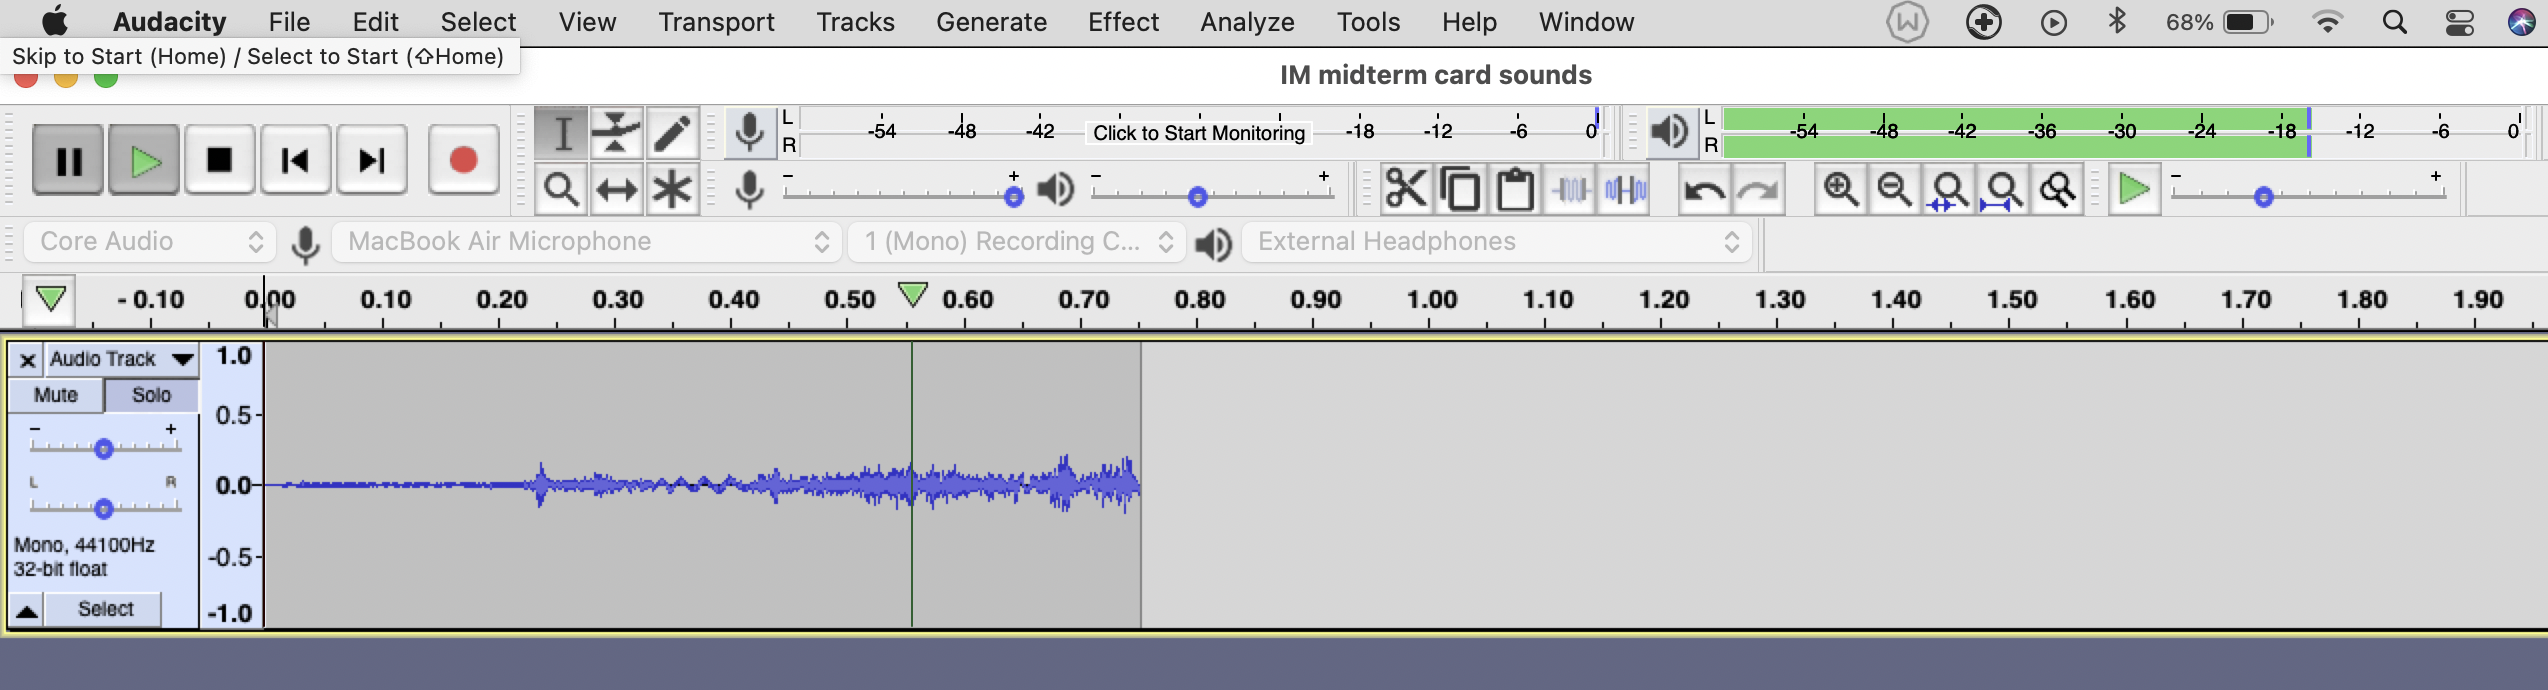
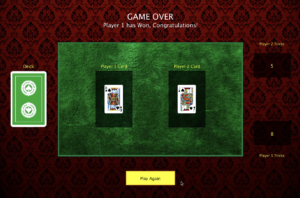
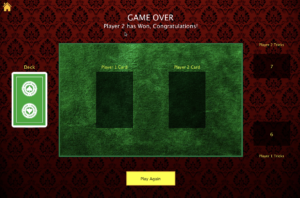

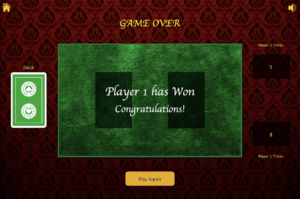

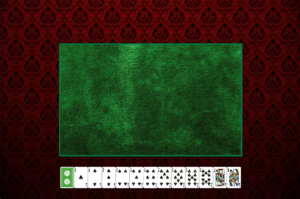
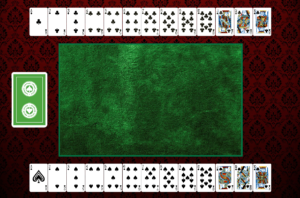
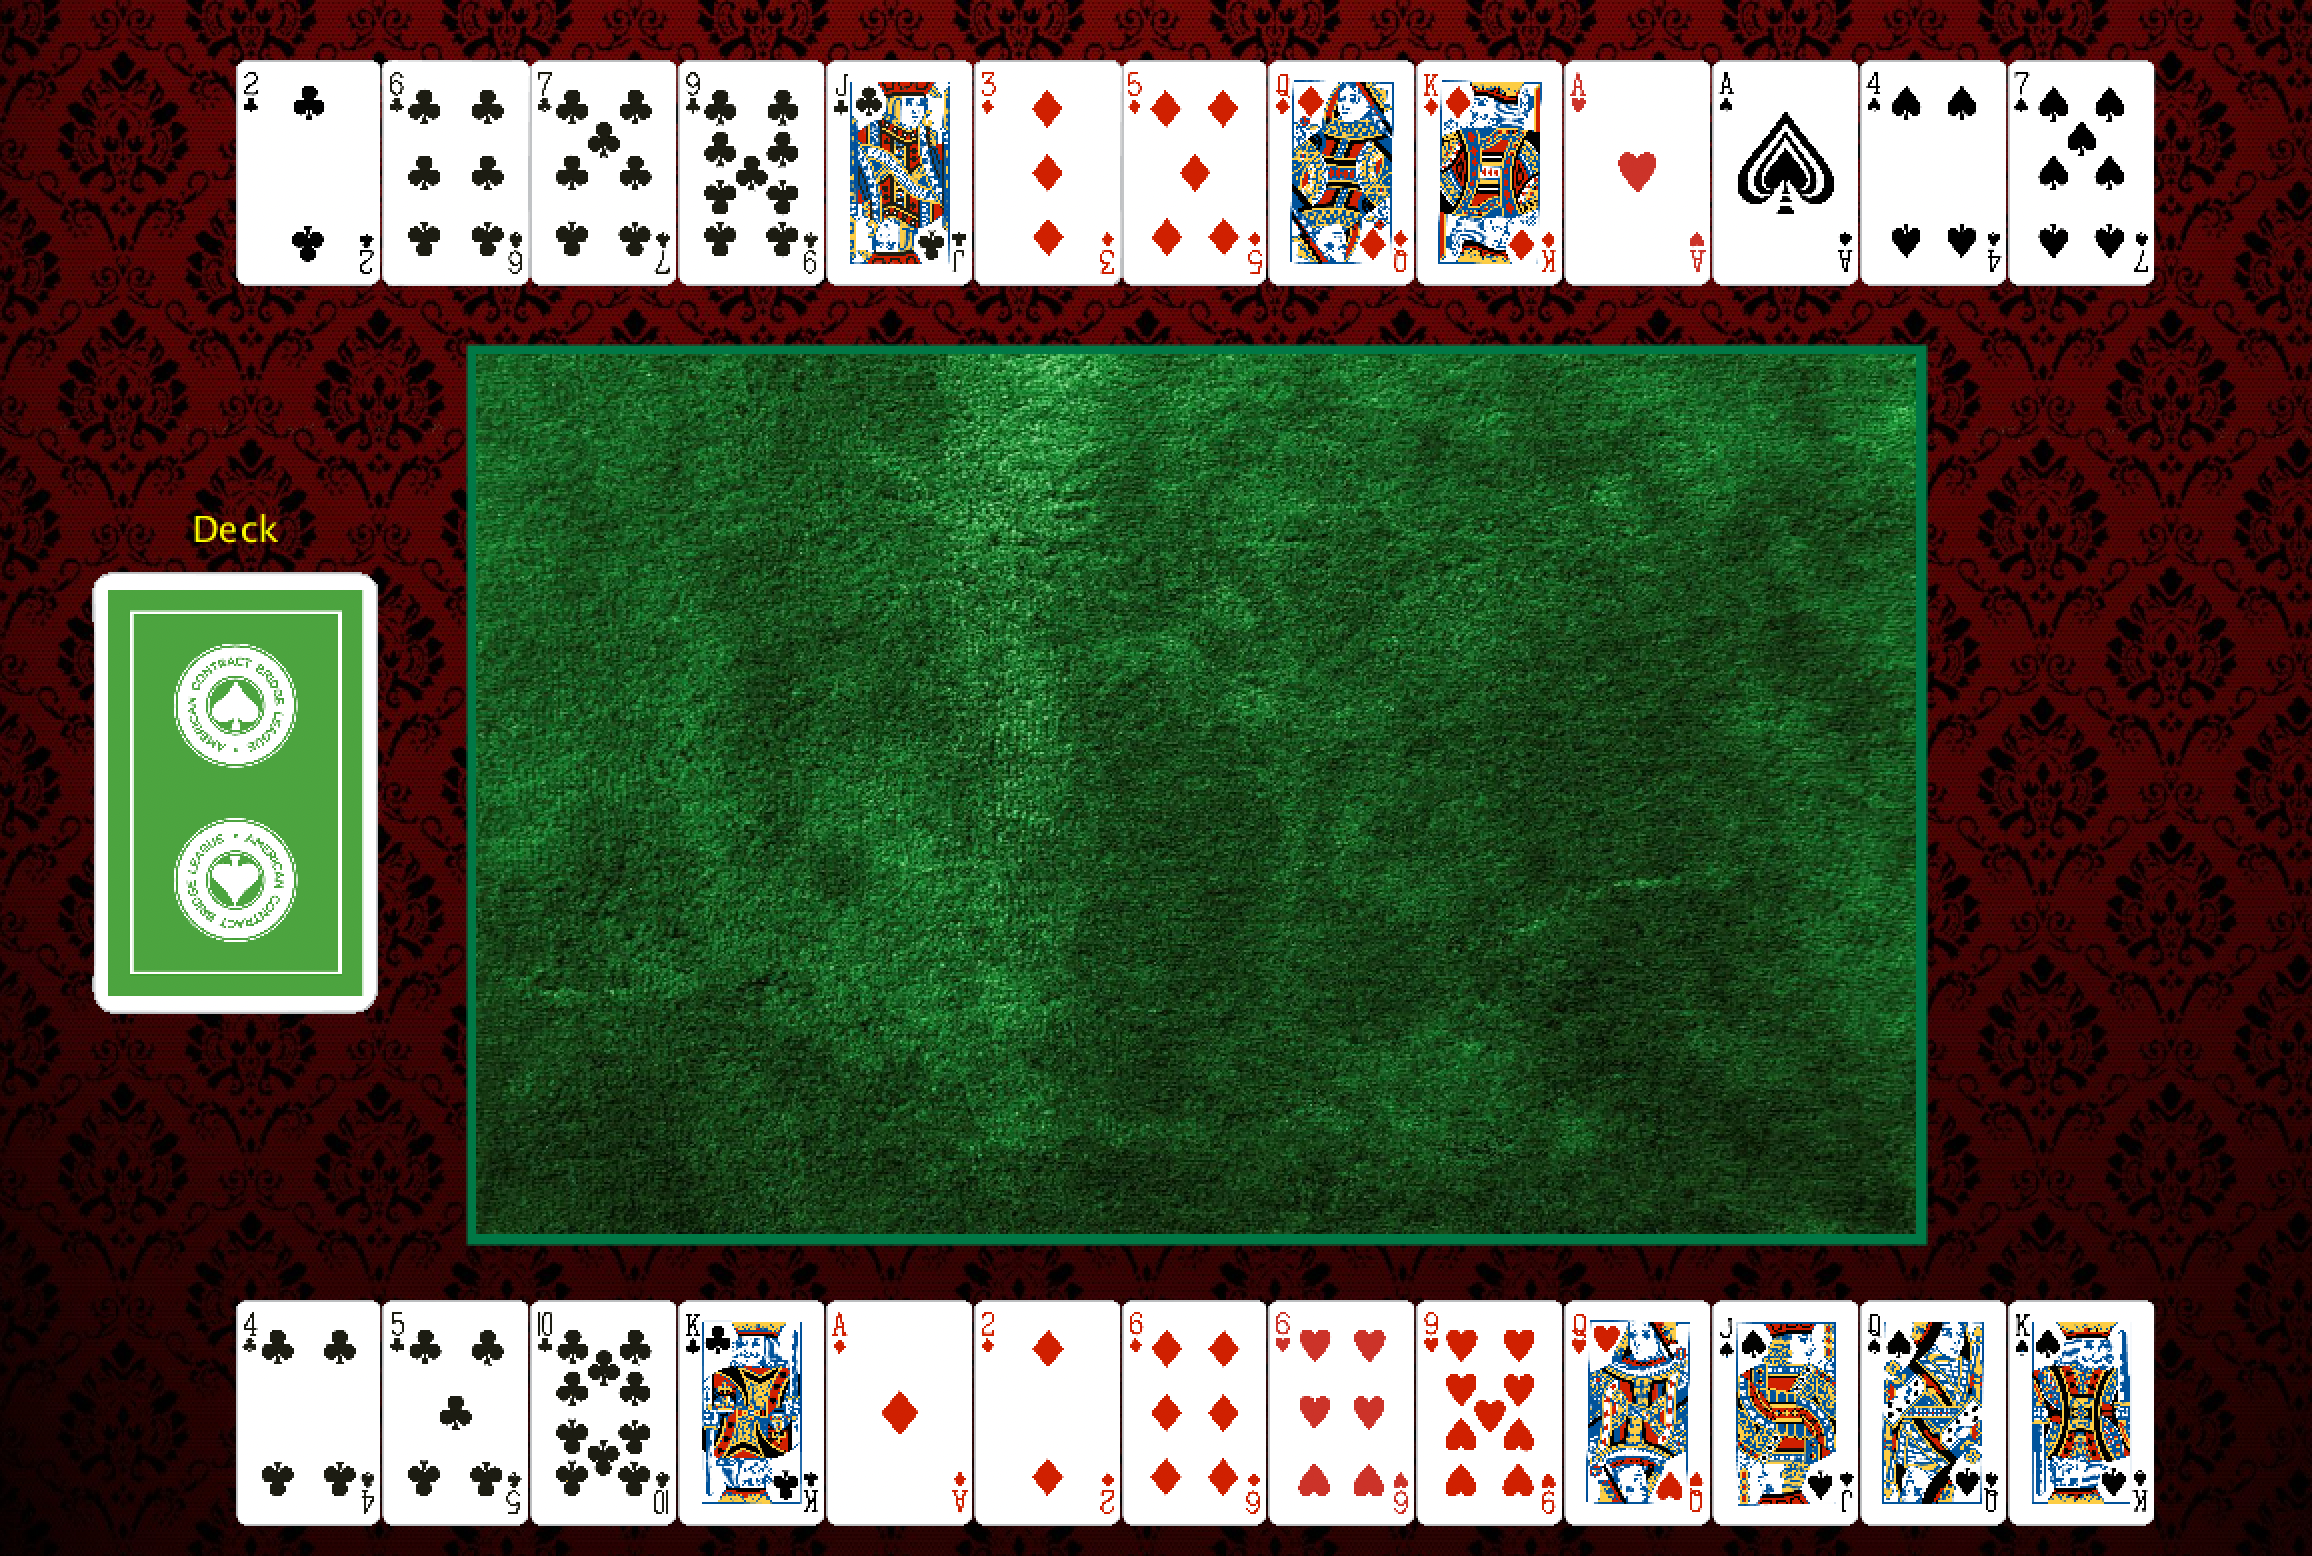
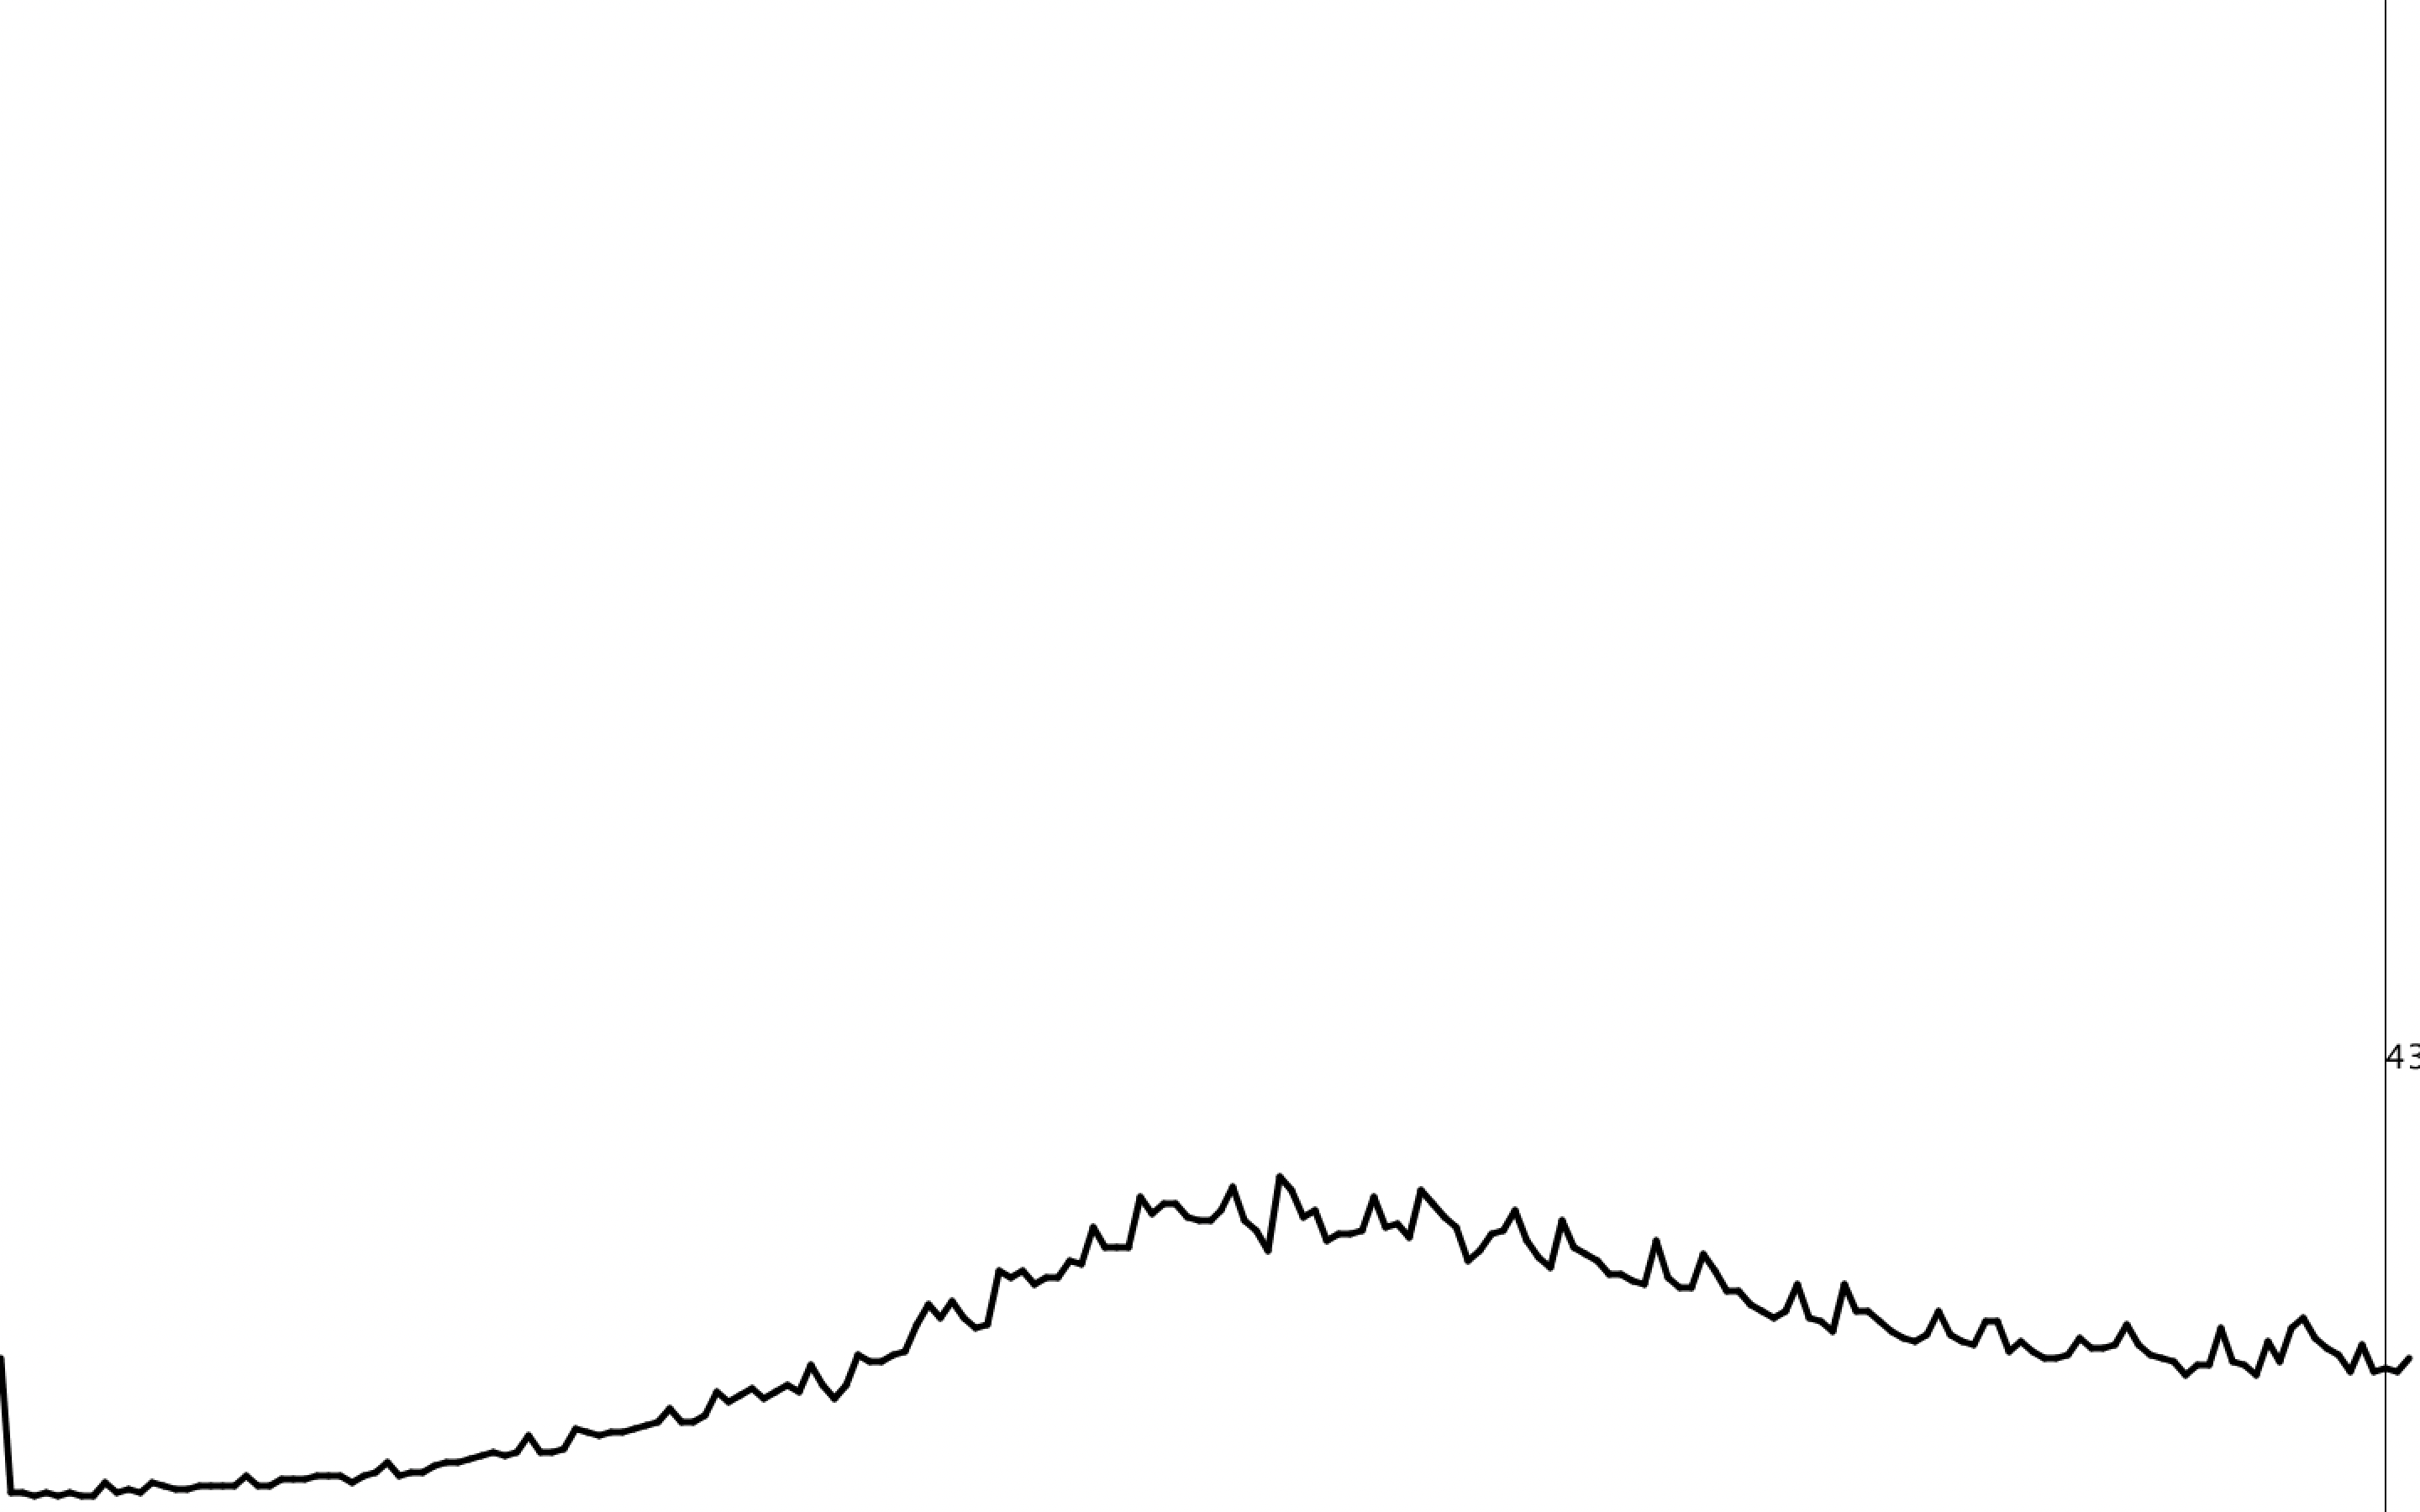
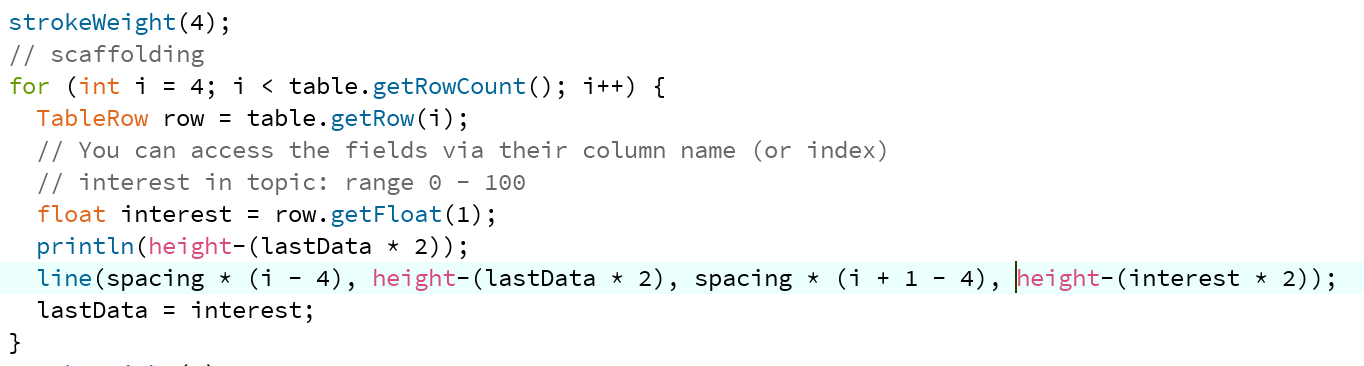
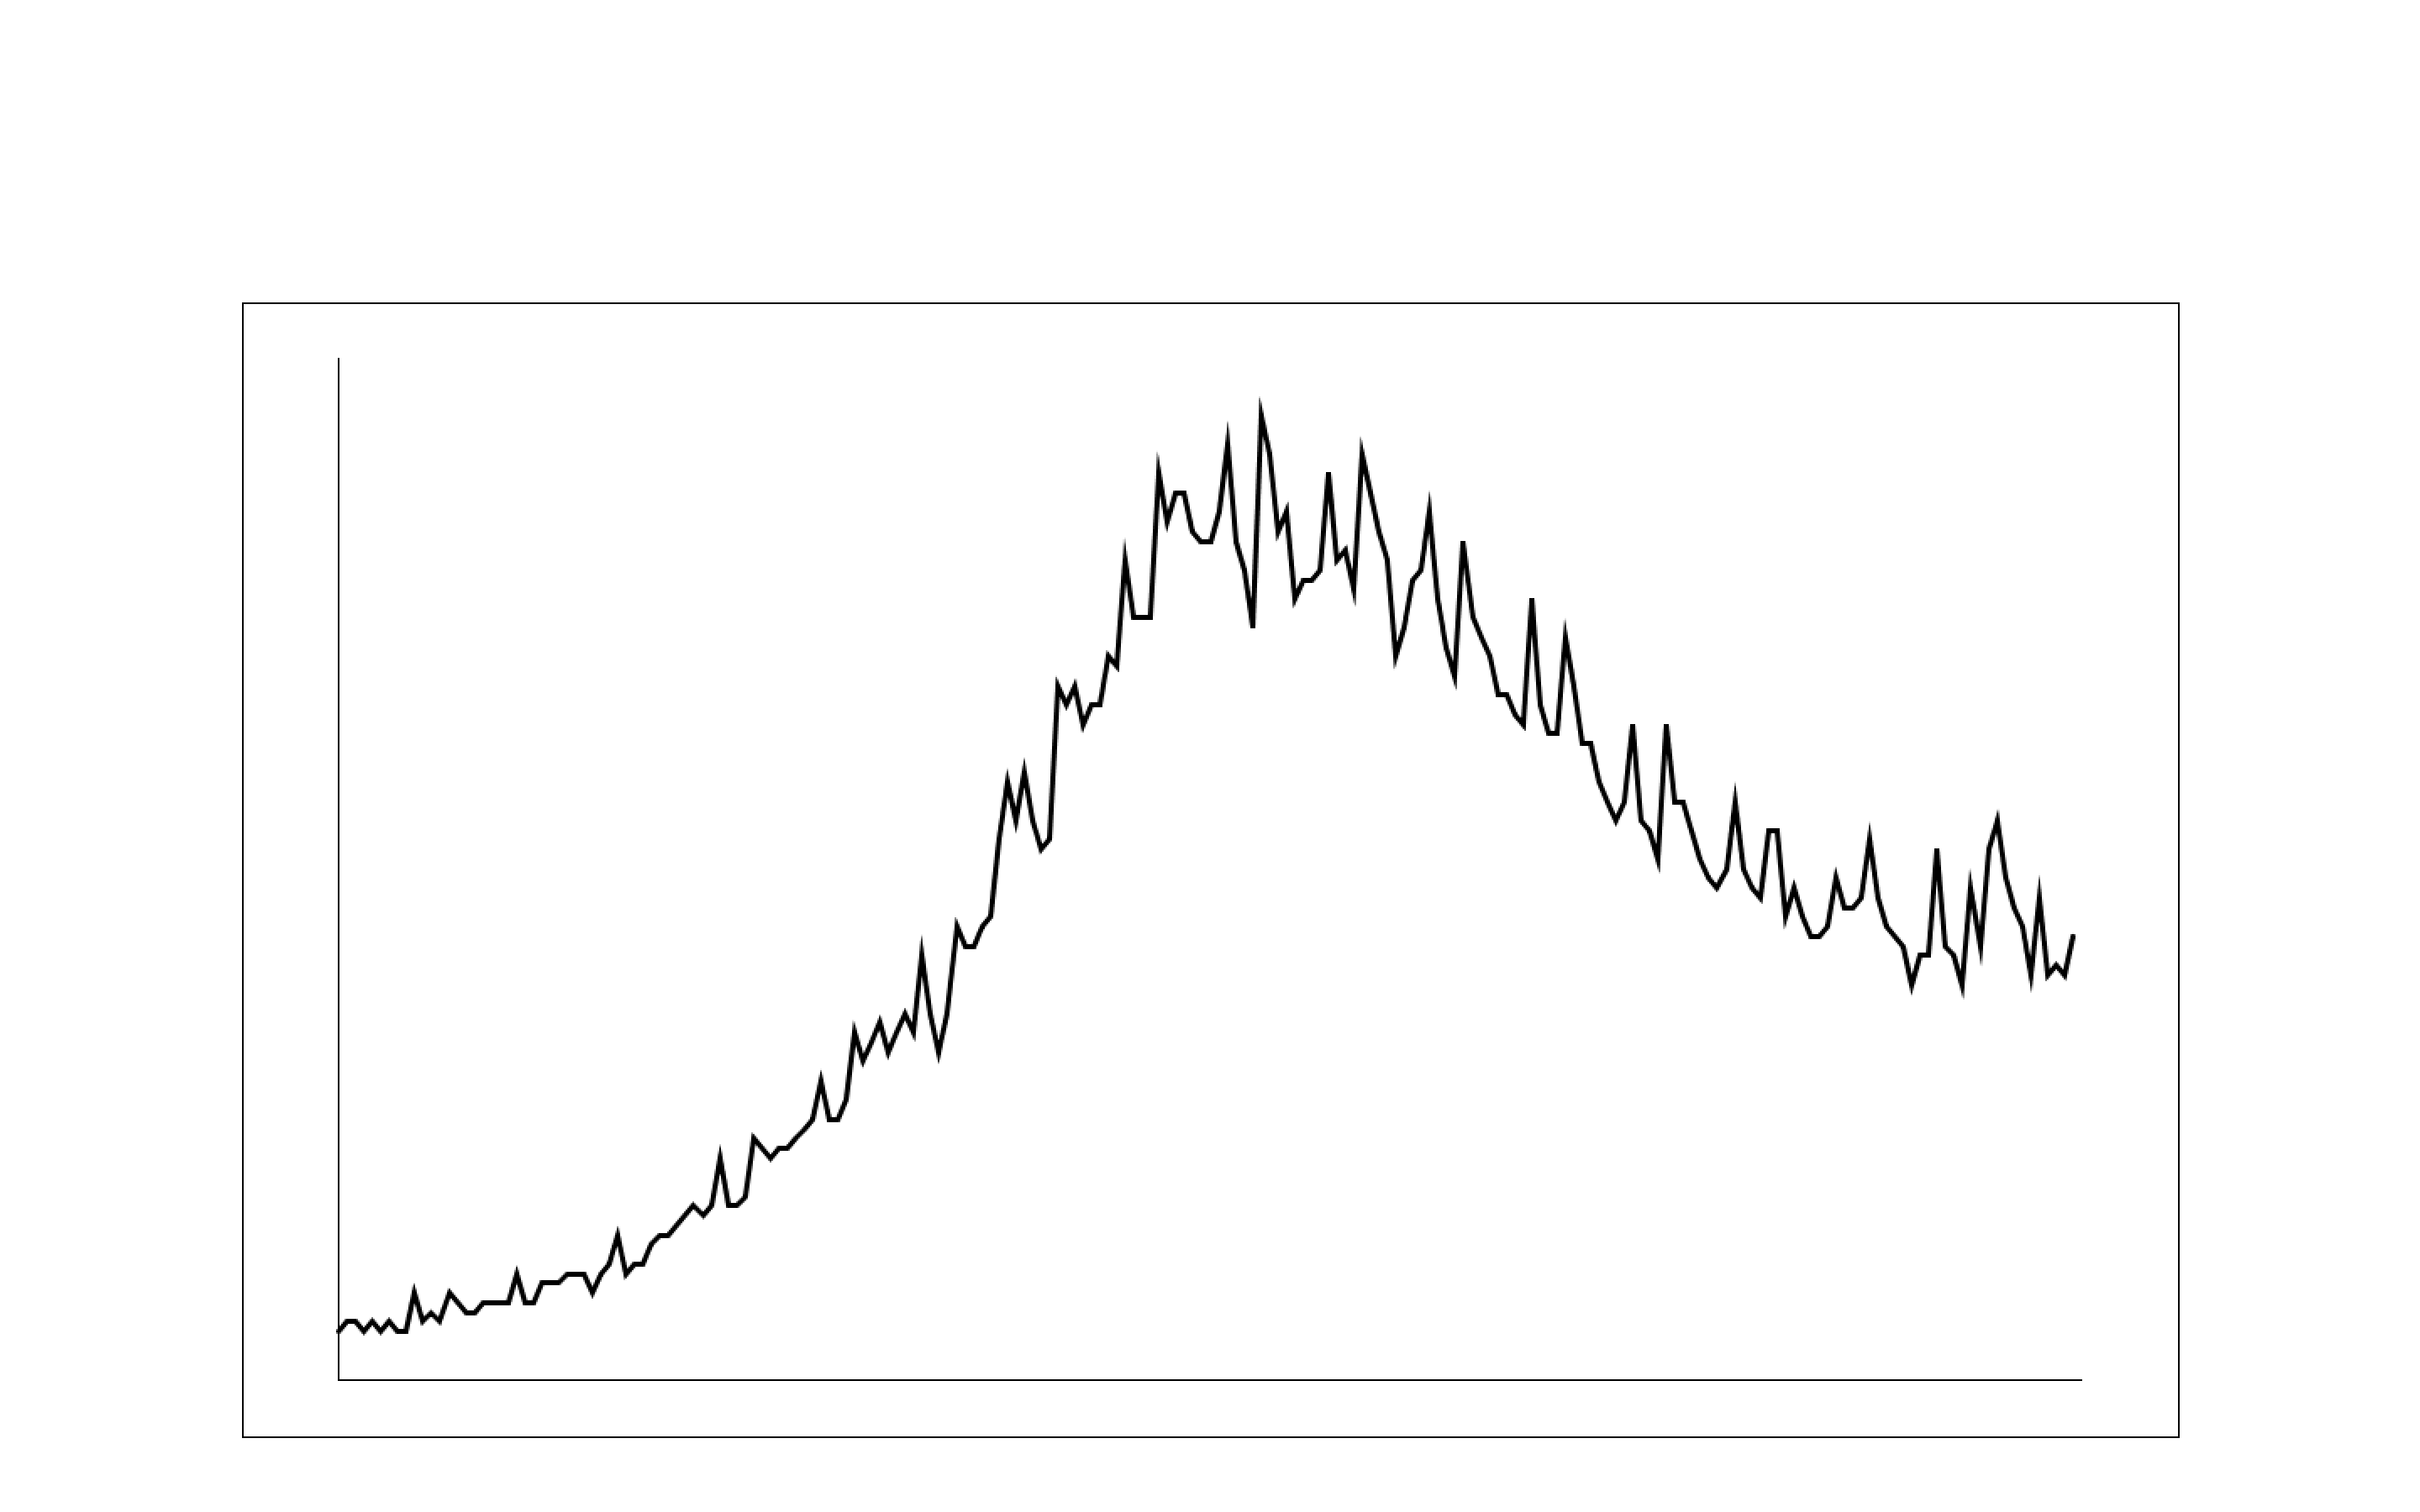
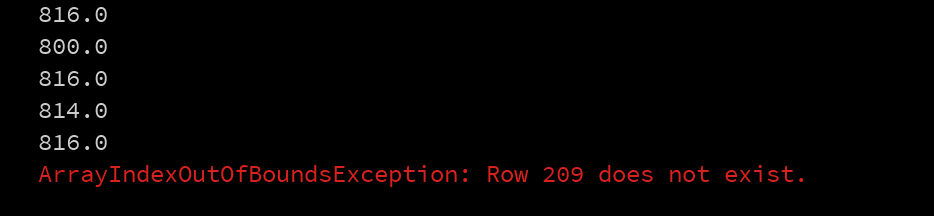
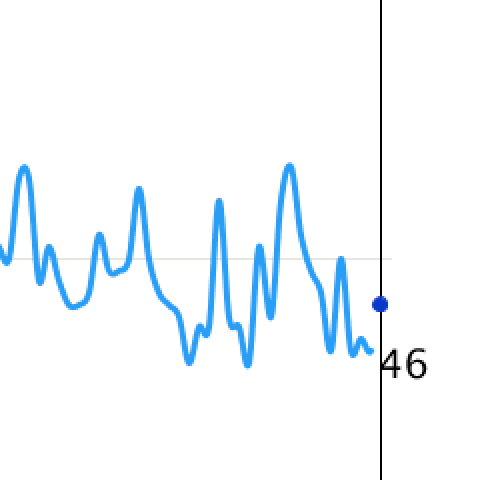

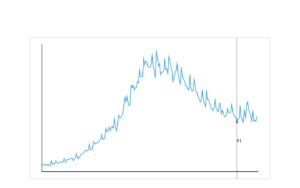
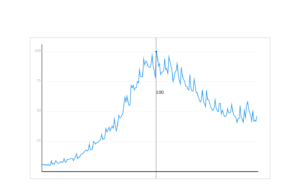
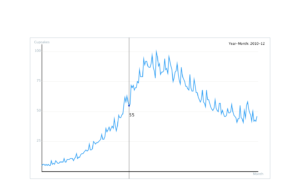

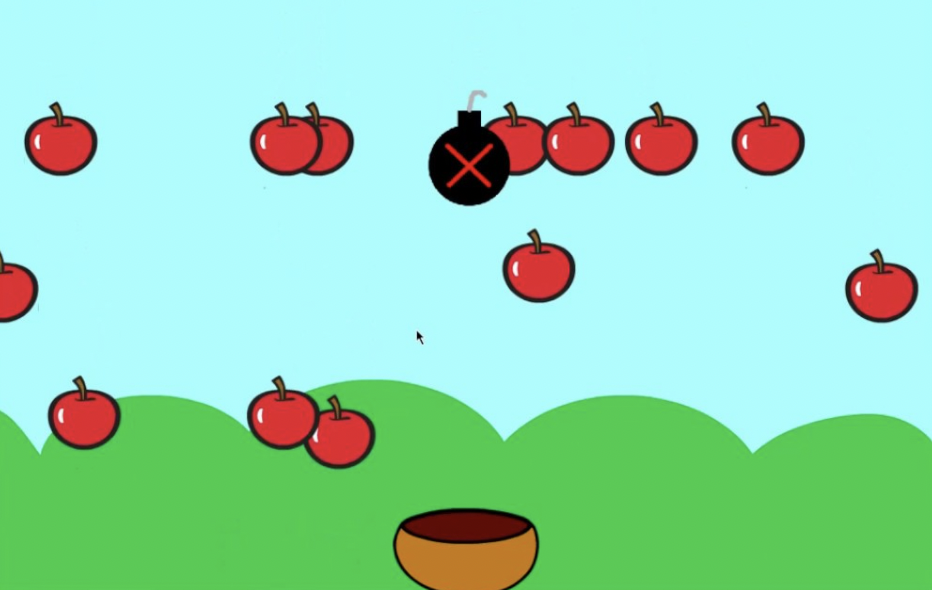
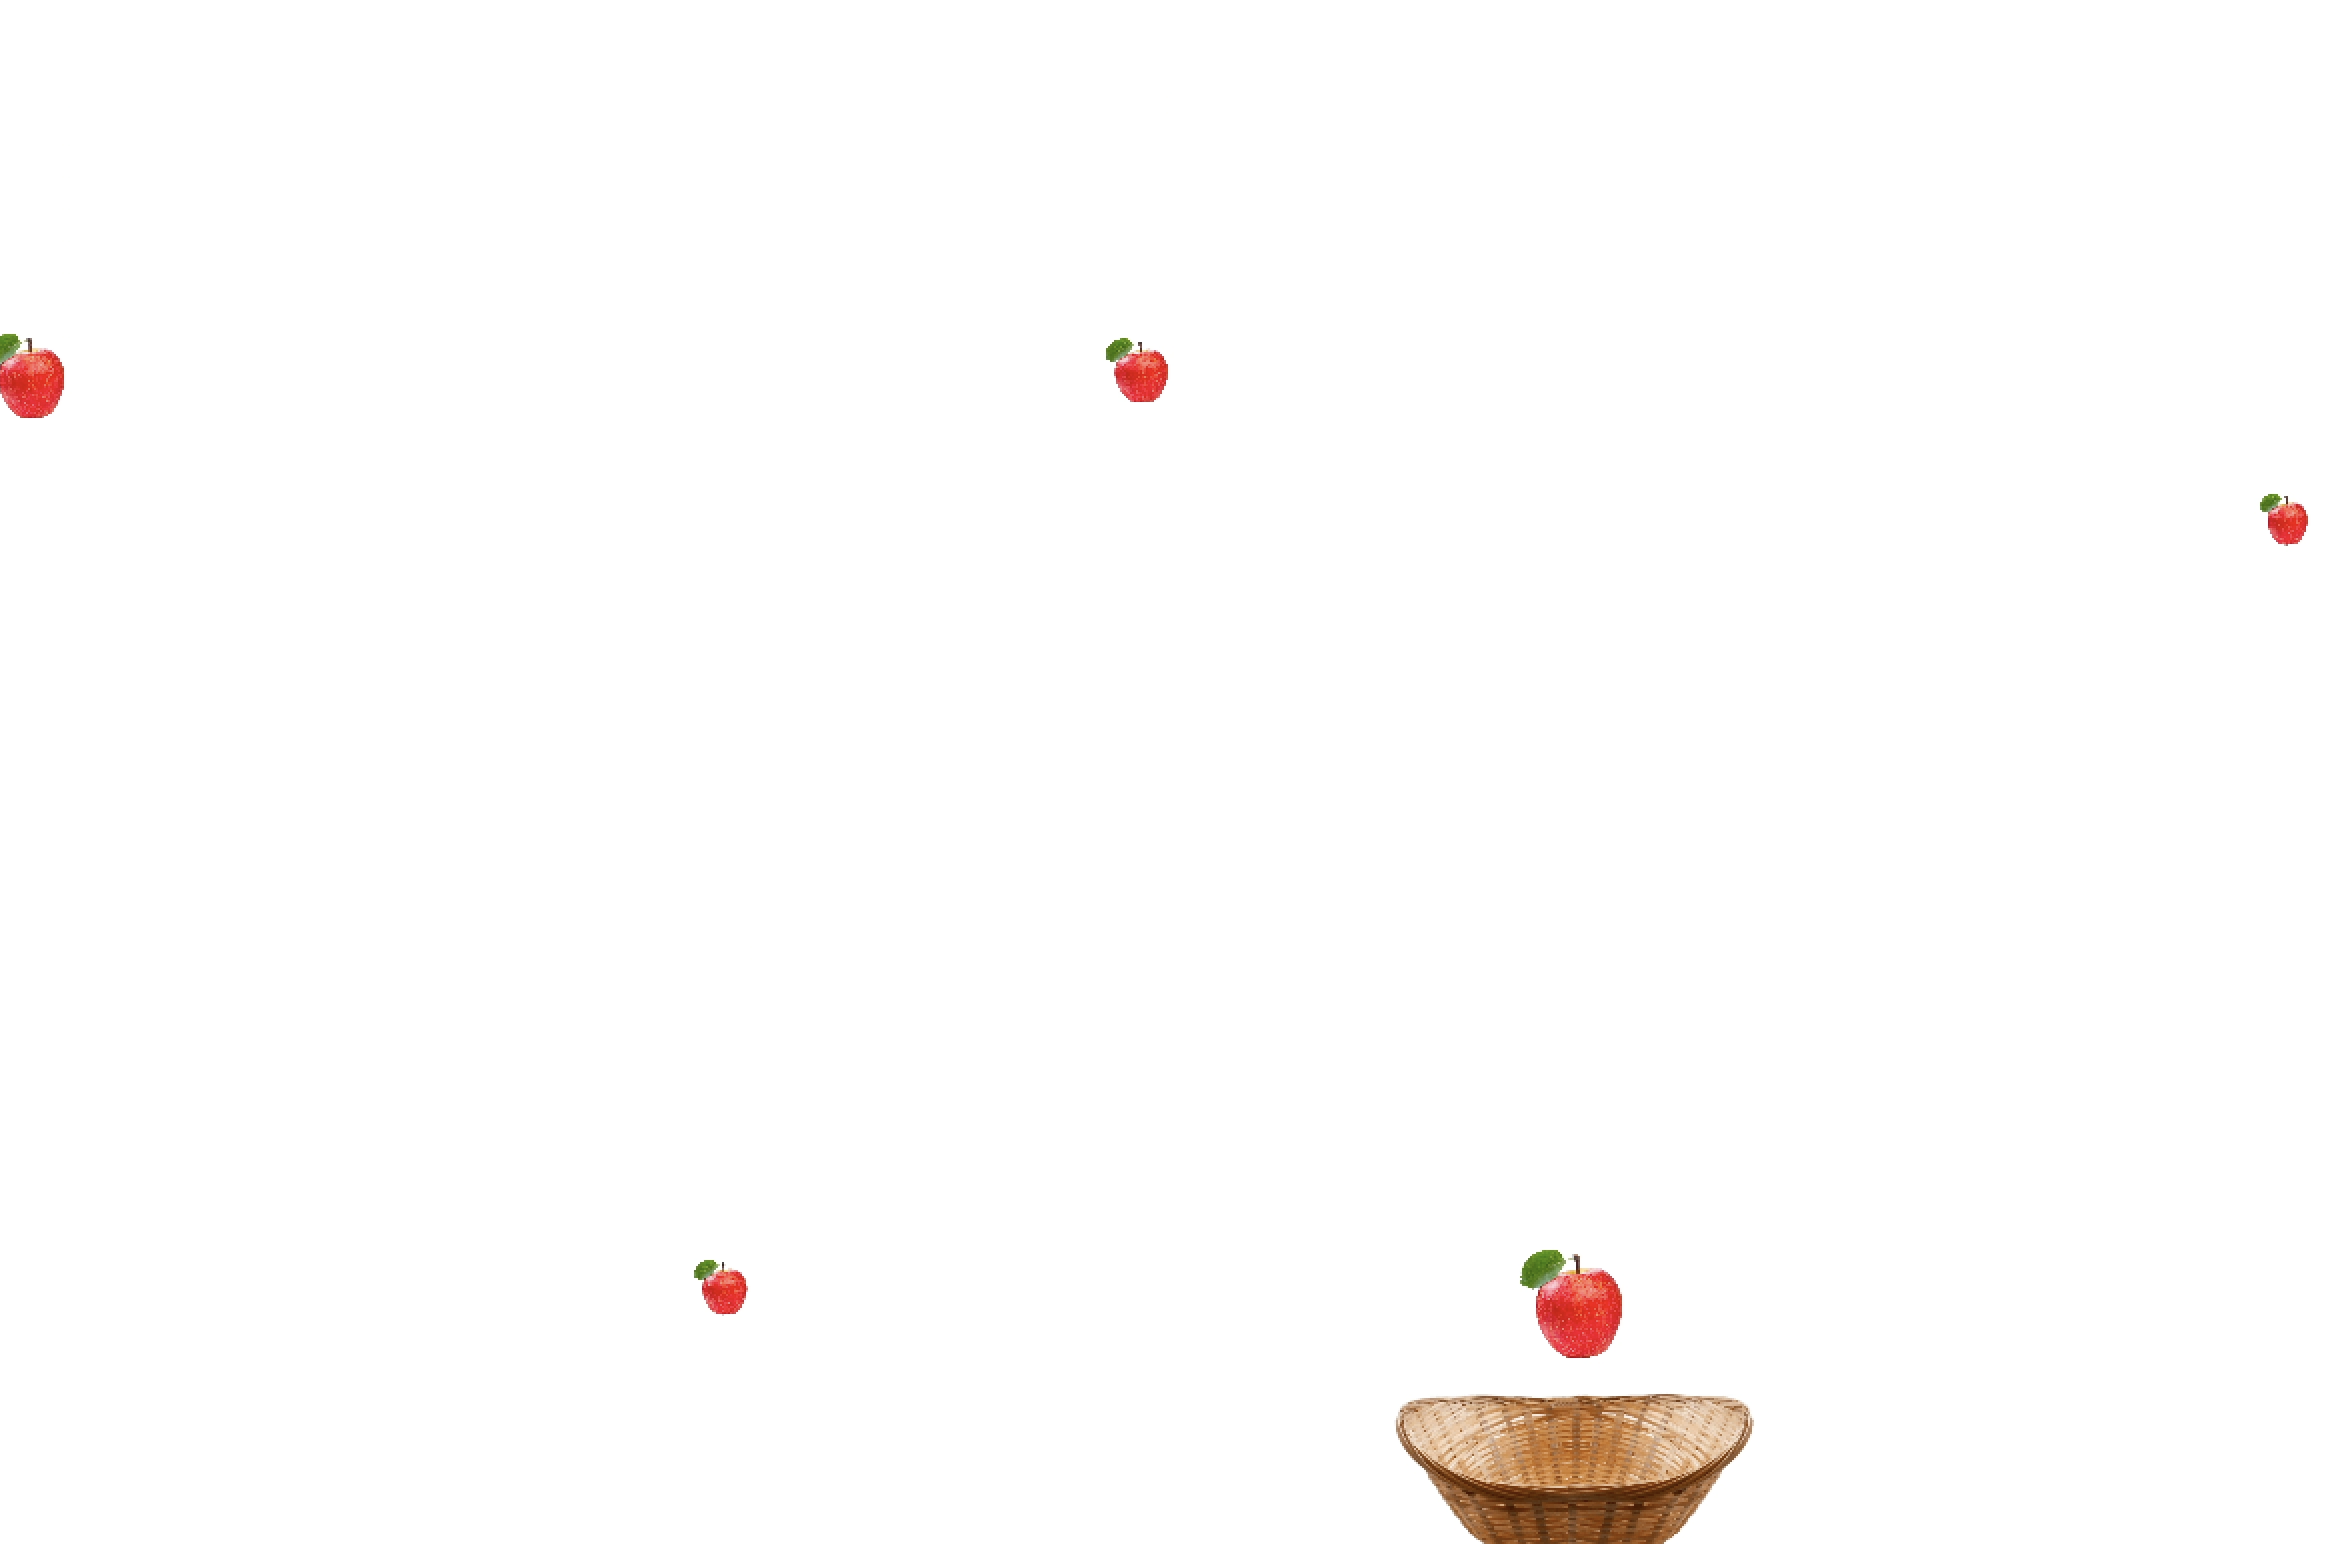
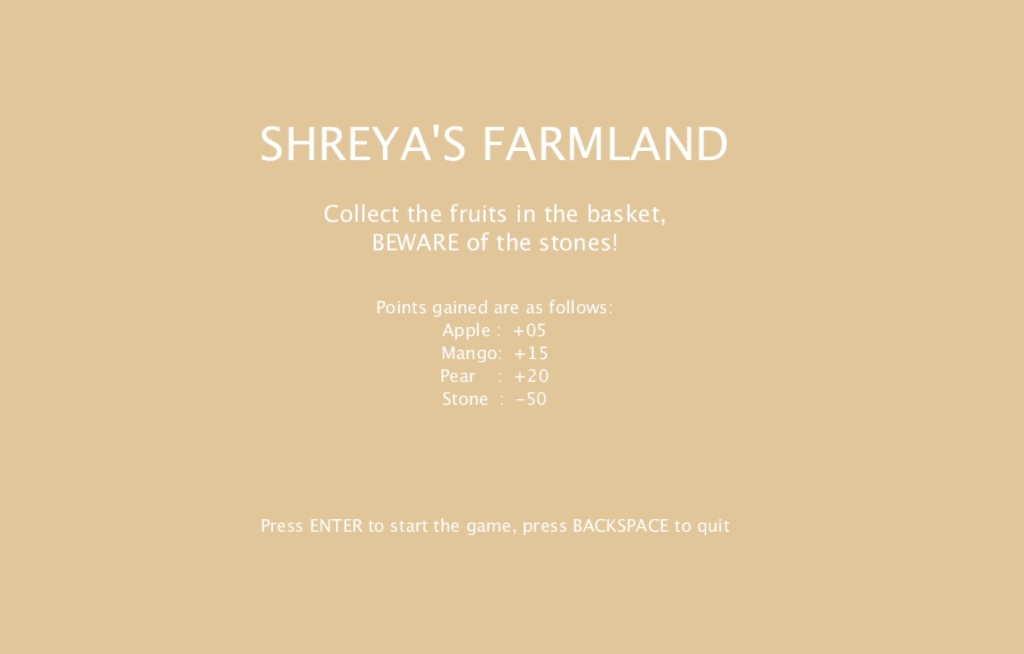
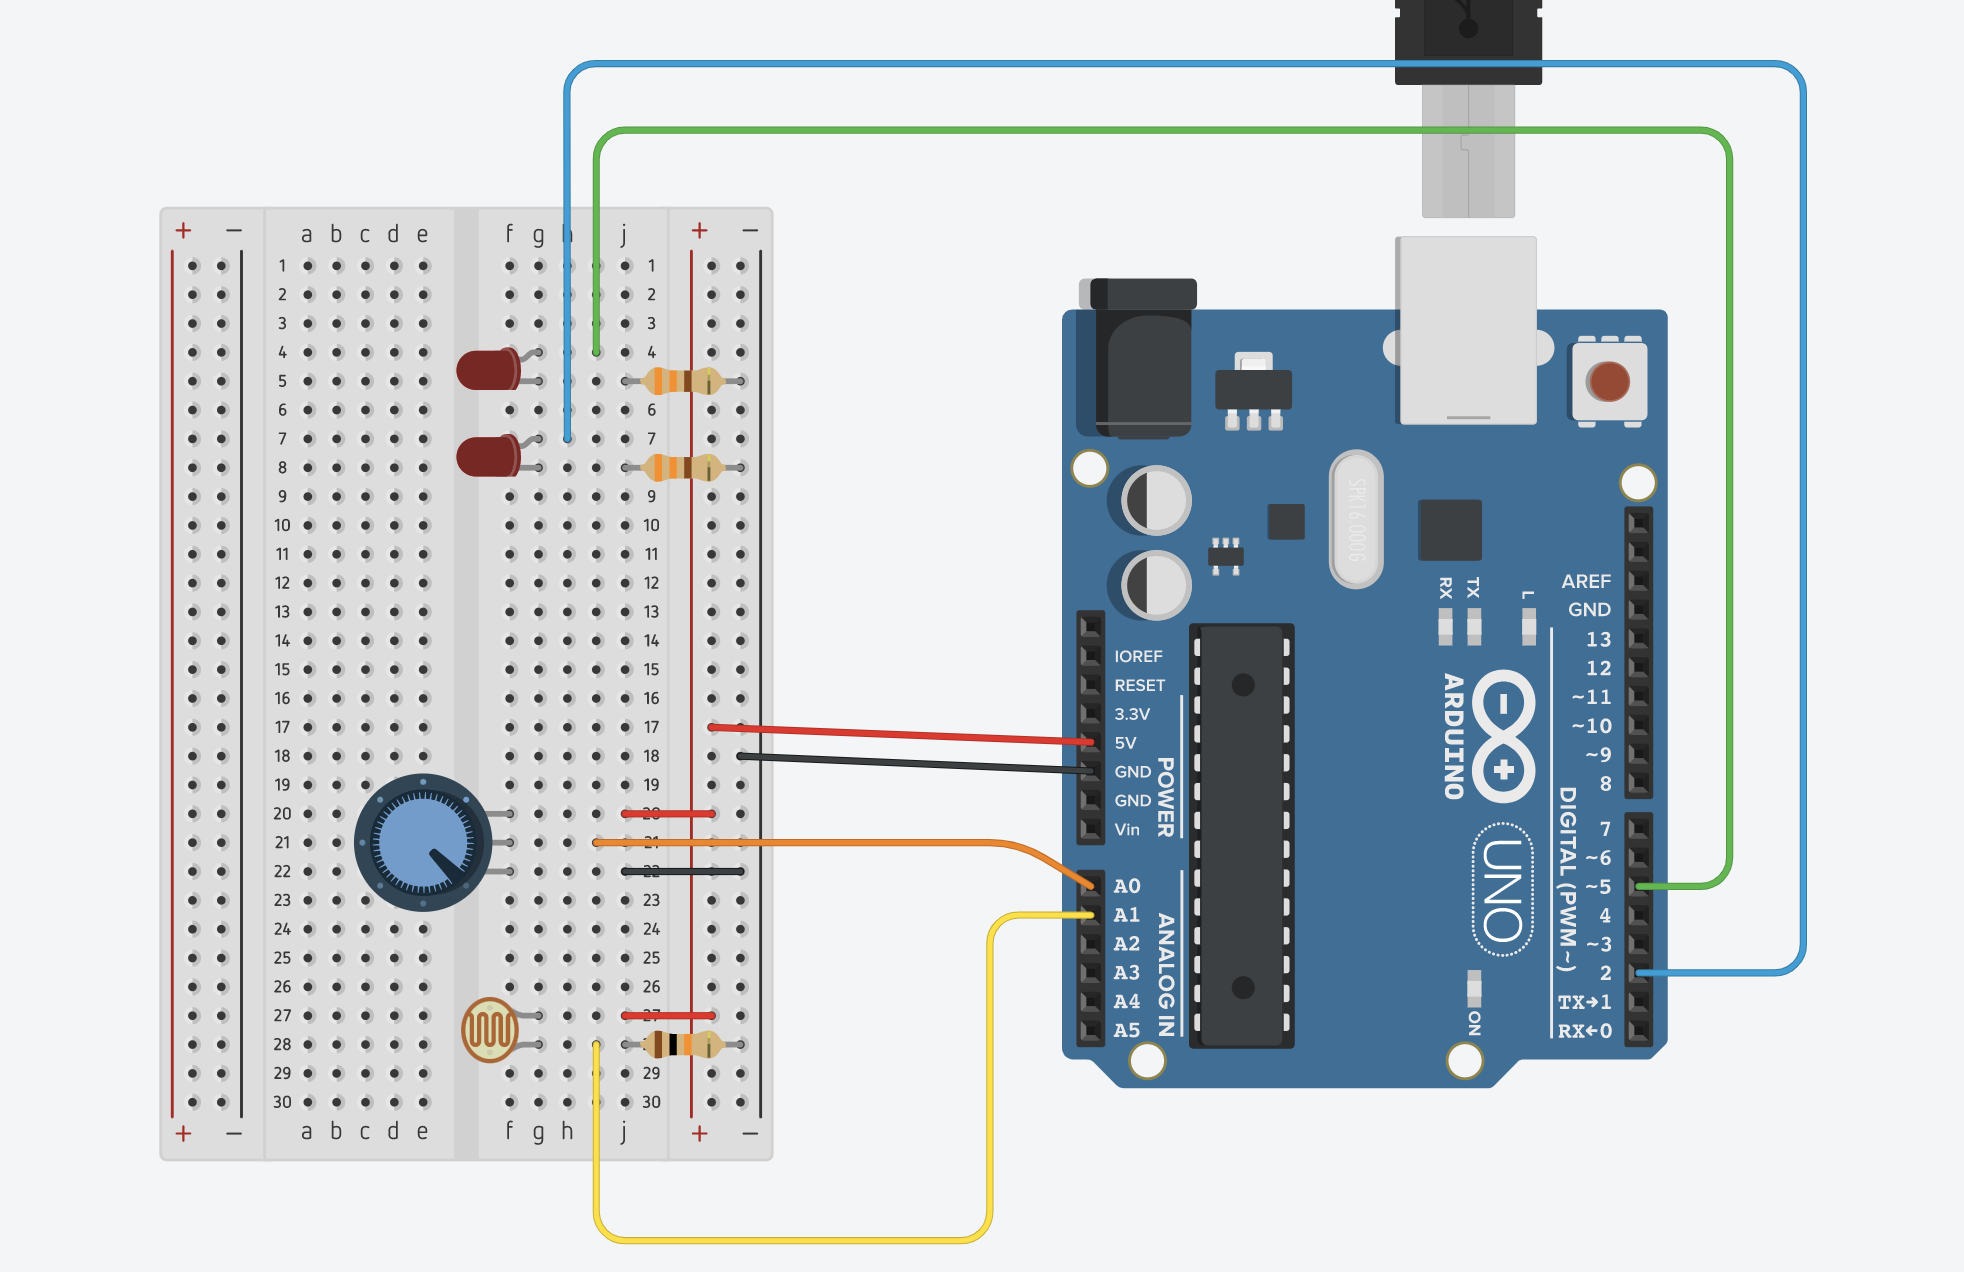