Final Project – Arcade

Describe your concept

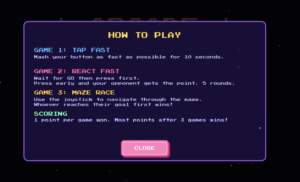
My project is an arcade-style multi-player game. The project consists of 3 mini-games, a tap fast game where the player who presses their button the most is the winner, react fast where the player who presses their button first after the LEDs light up is the winner, and finally a maze race where players race to the other side of the screen using joysticks.

My project is an Arduino + p5.js project. The users only interact with the Arduino components which includes a button and joystick for each player. There’s also an LED to support the games functionality. The p5.js sketch shows each player’s scores and displays the maze for the final game.

The final game has stayed mostly the same since my initial proposal, the main difference is that I did remove the memory game. This was because it required too many buttons, and the wires we’re getting really confusing to follow. It also did require at least 4 LEDs, and honestly I wasn’t even sure if there was enough pins on the Arduino Uno to include all these components. Hence, I ended up settling for the react fast game since I could reuse the same button from tap fast! I also came to be really really grateful that I made this decision early on because when I was trying to put my components into a cardboard box, the buttons were the most difficult and were constantly getting disconnected, so truly I would’ve lost it if I had to deal with FIVE buttons PER player.

Pictures & screenshots of my physical game and the p5.js sketch

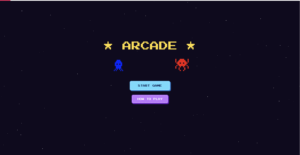
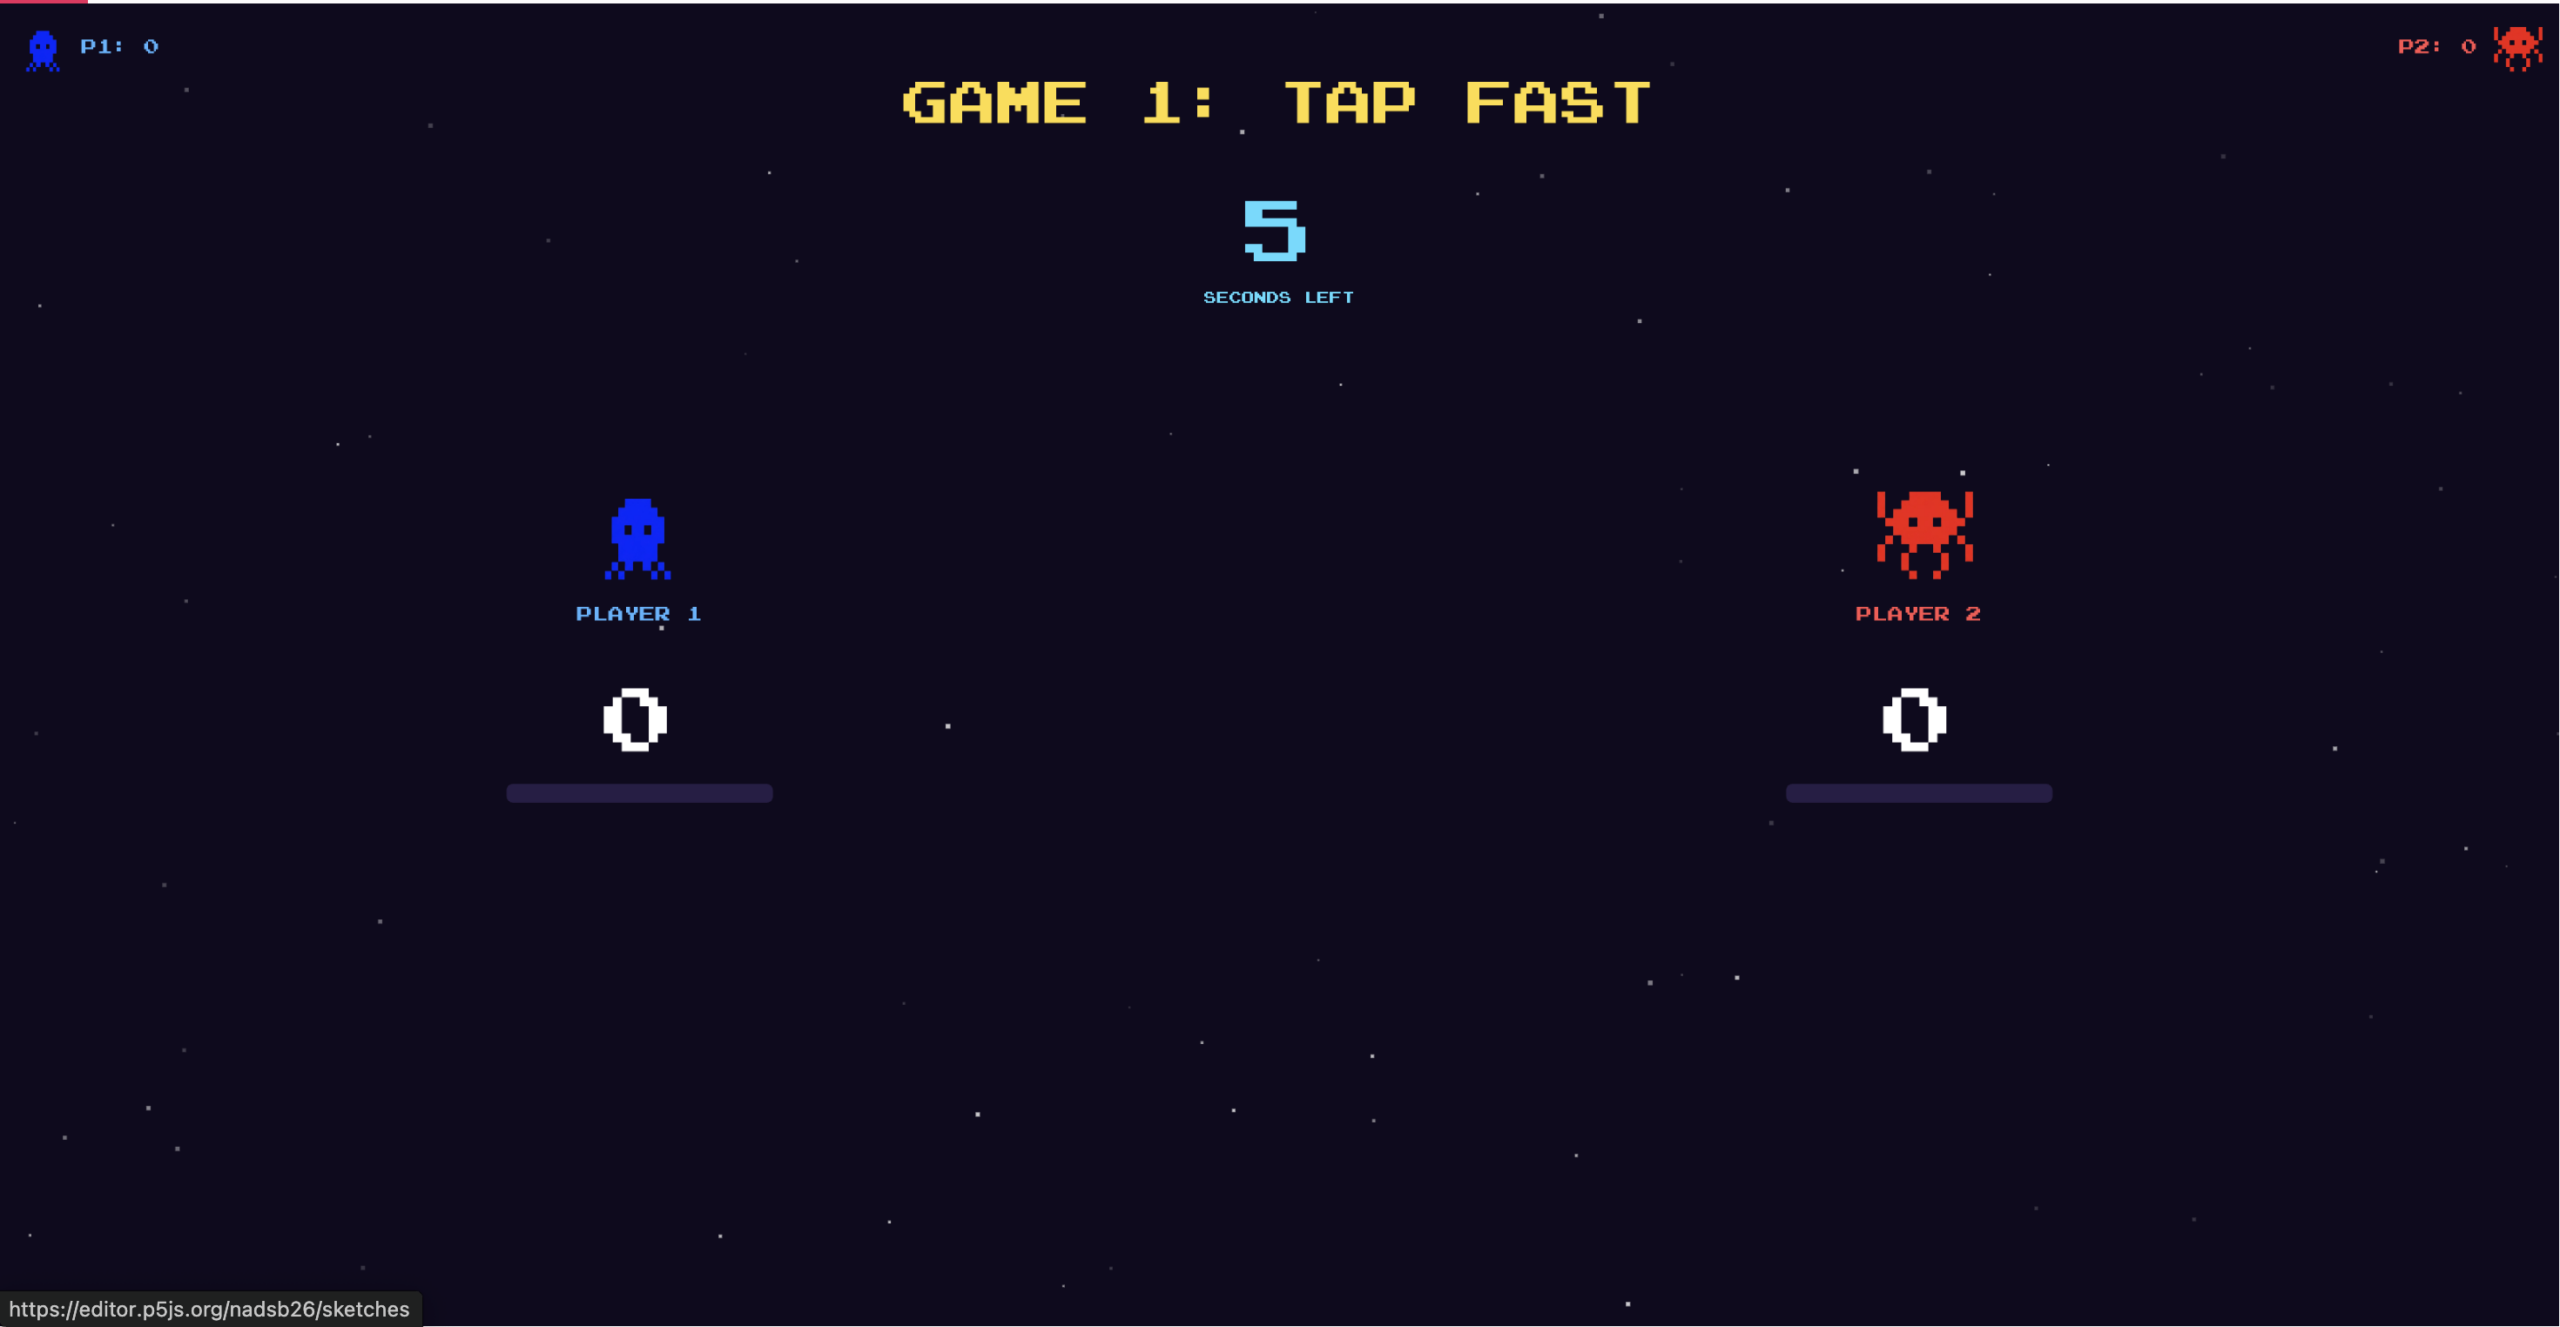
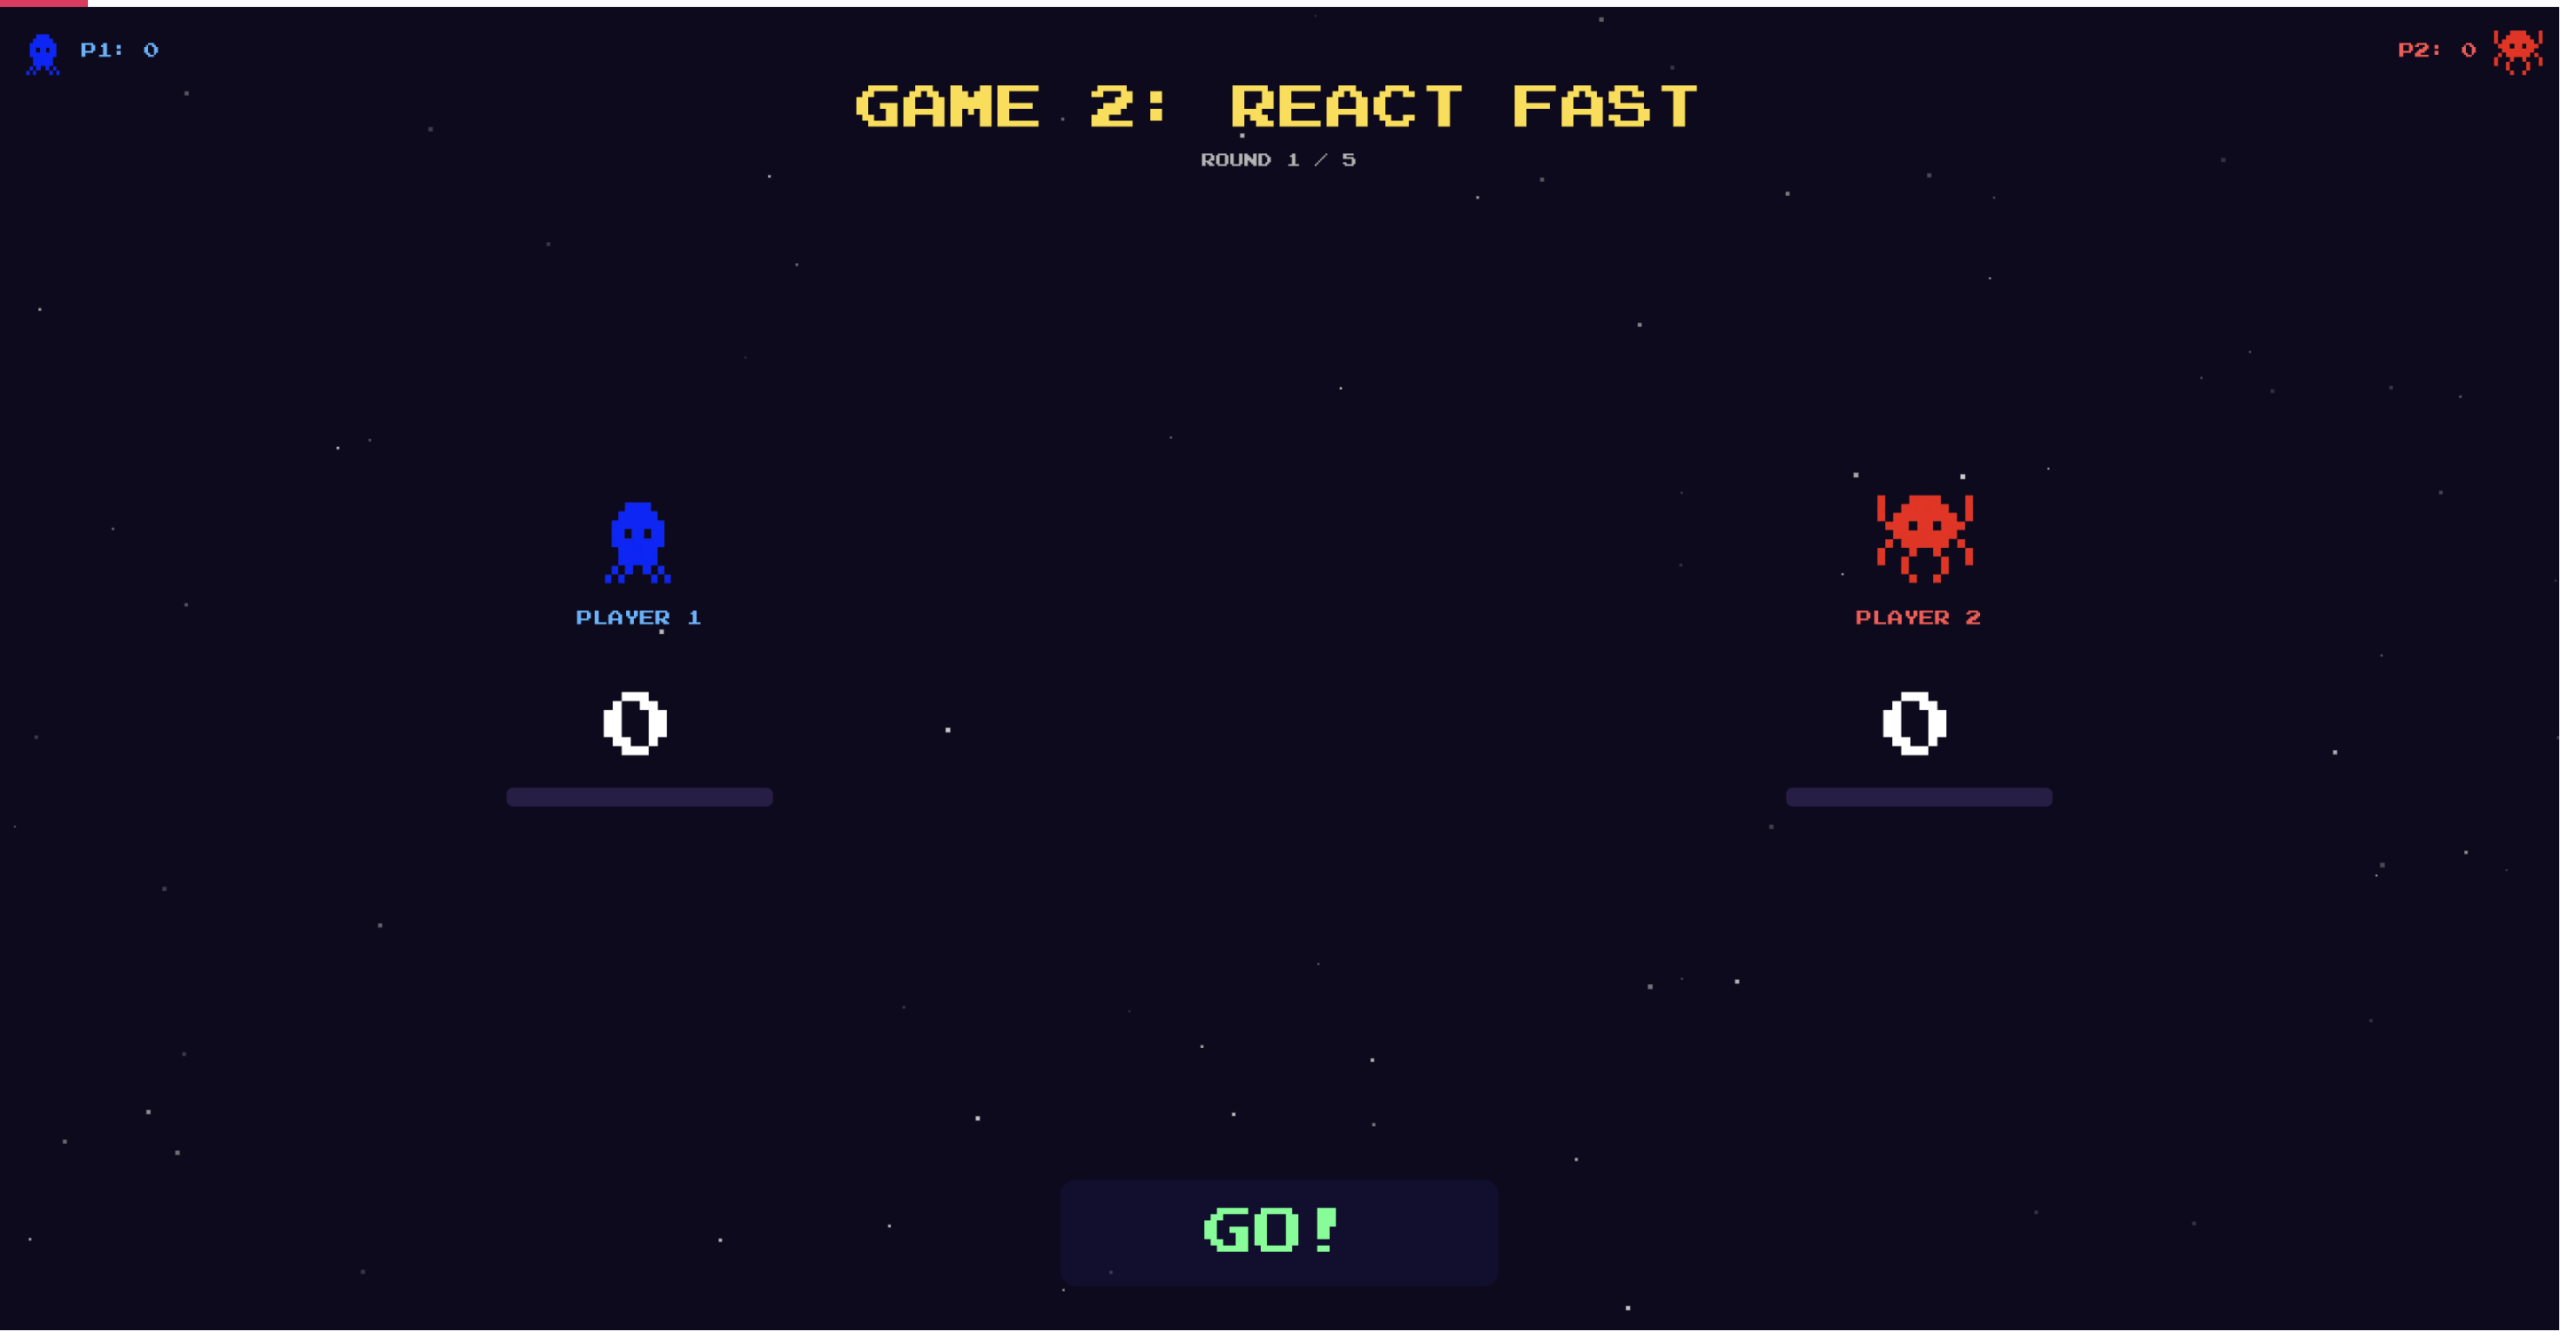
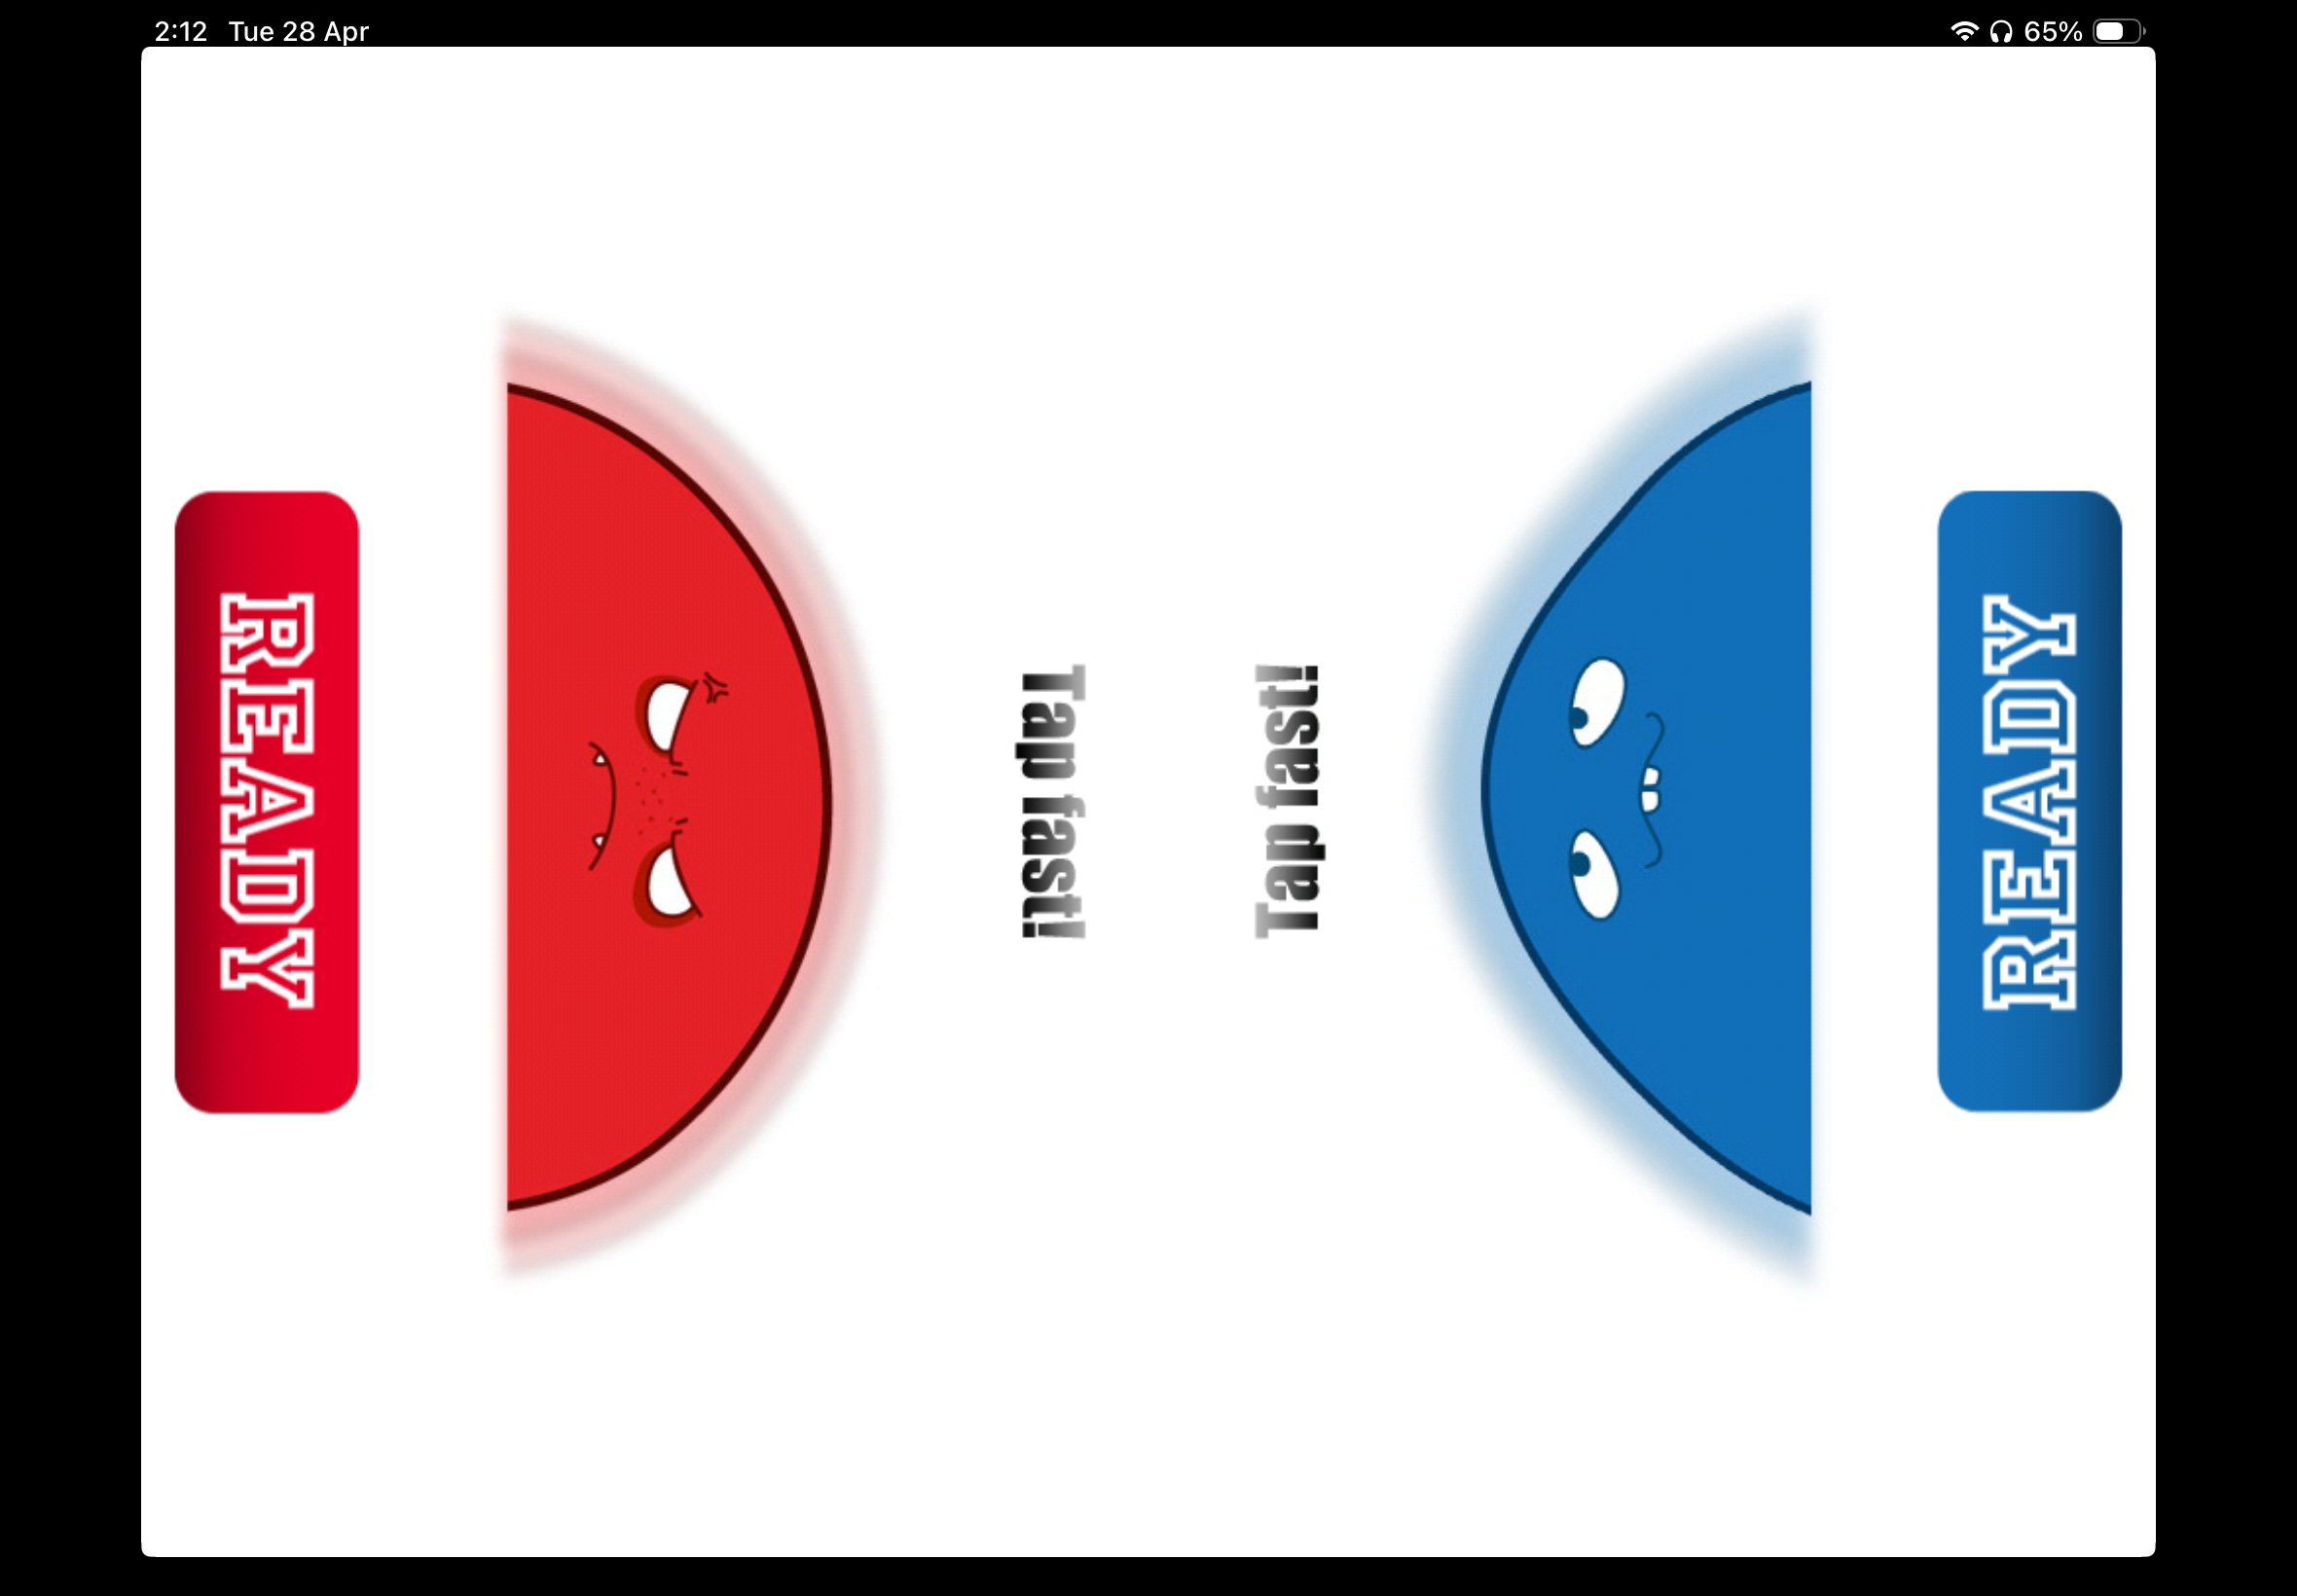
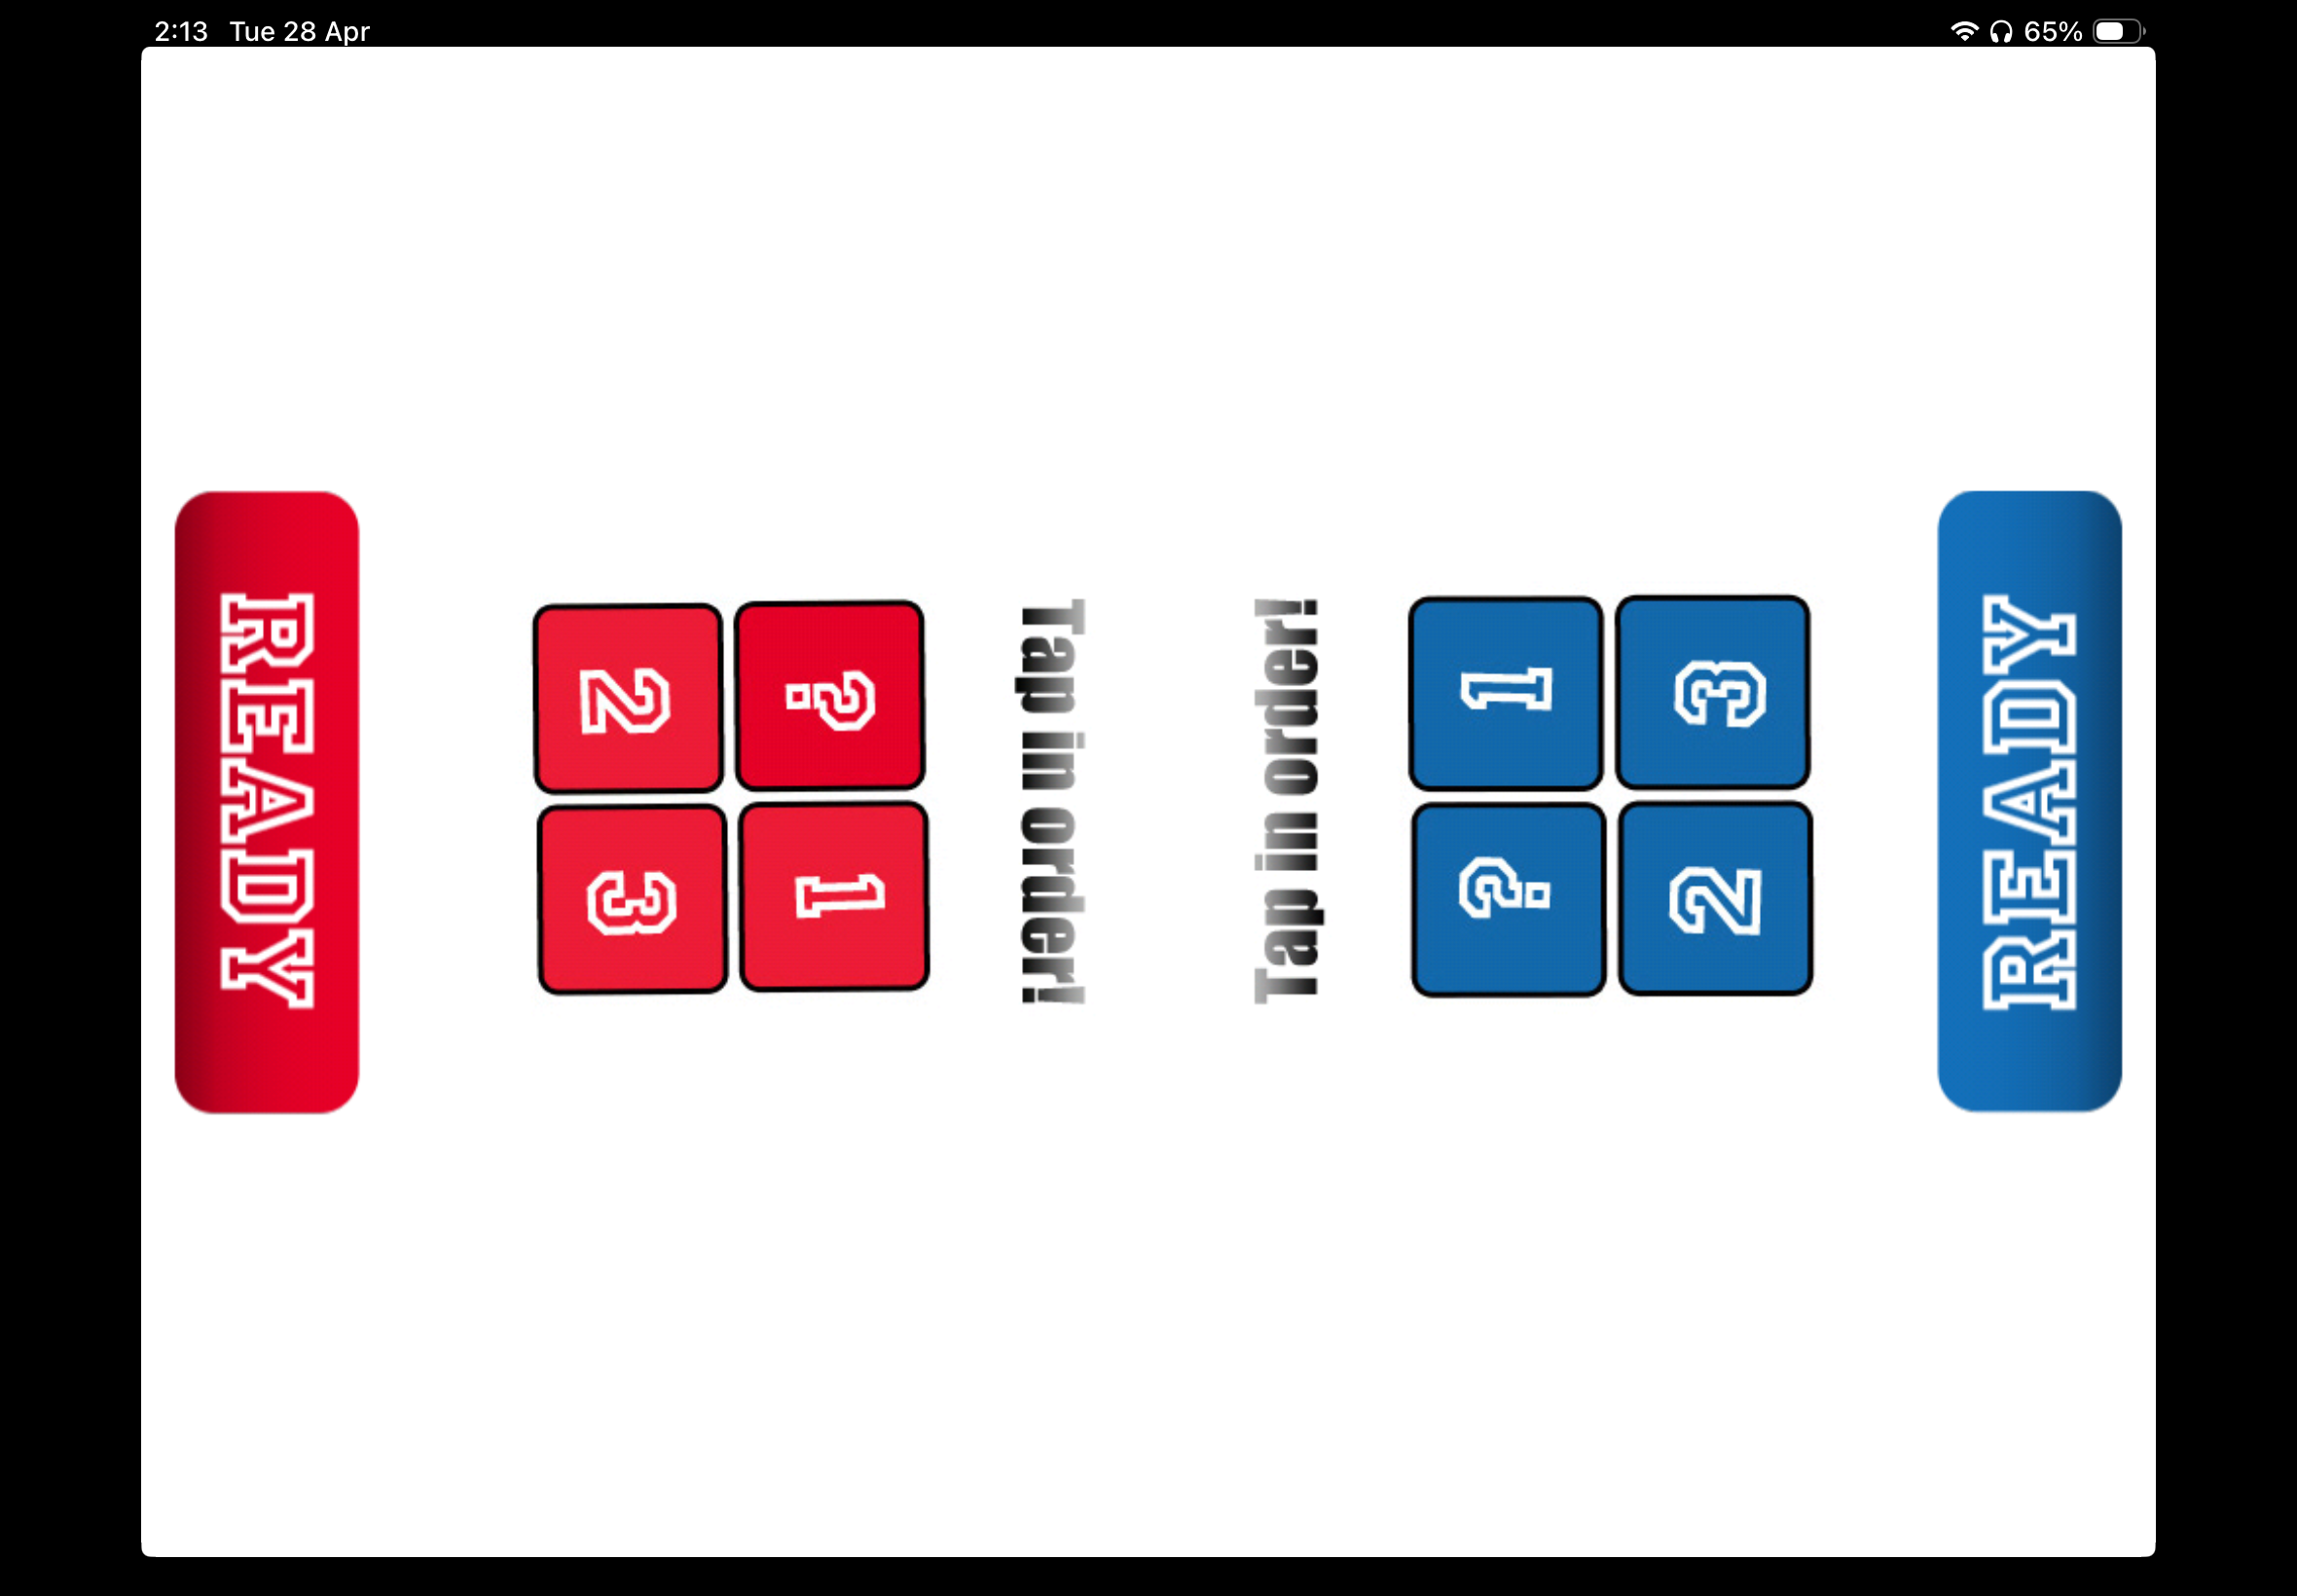
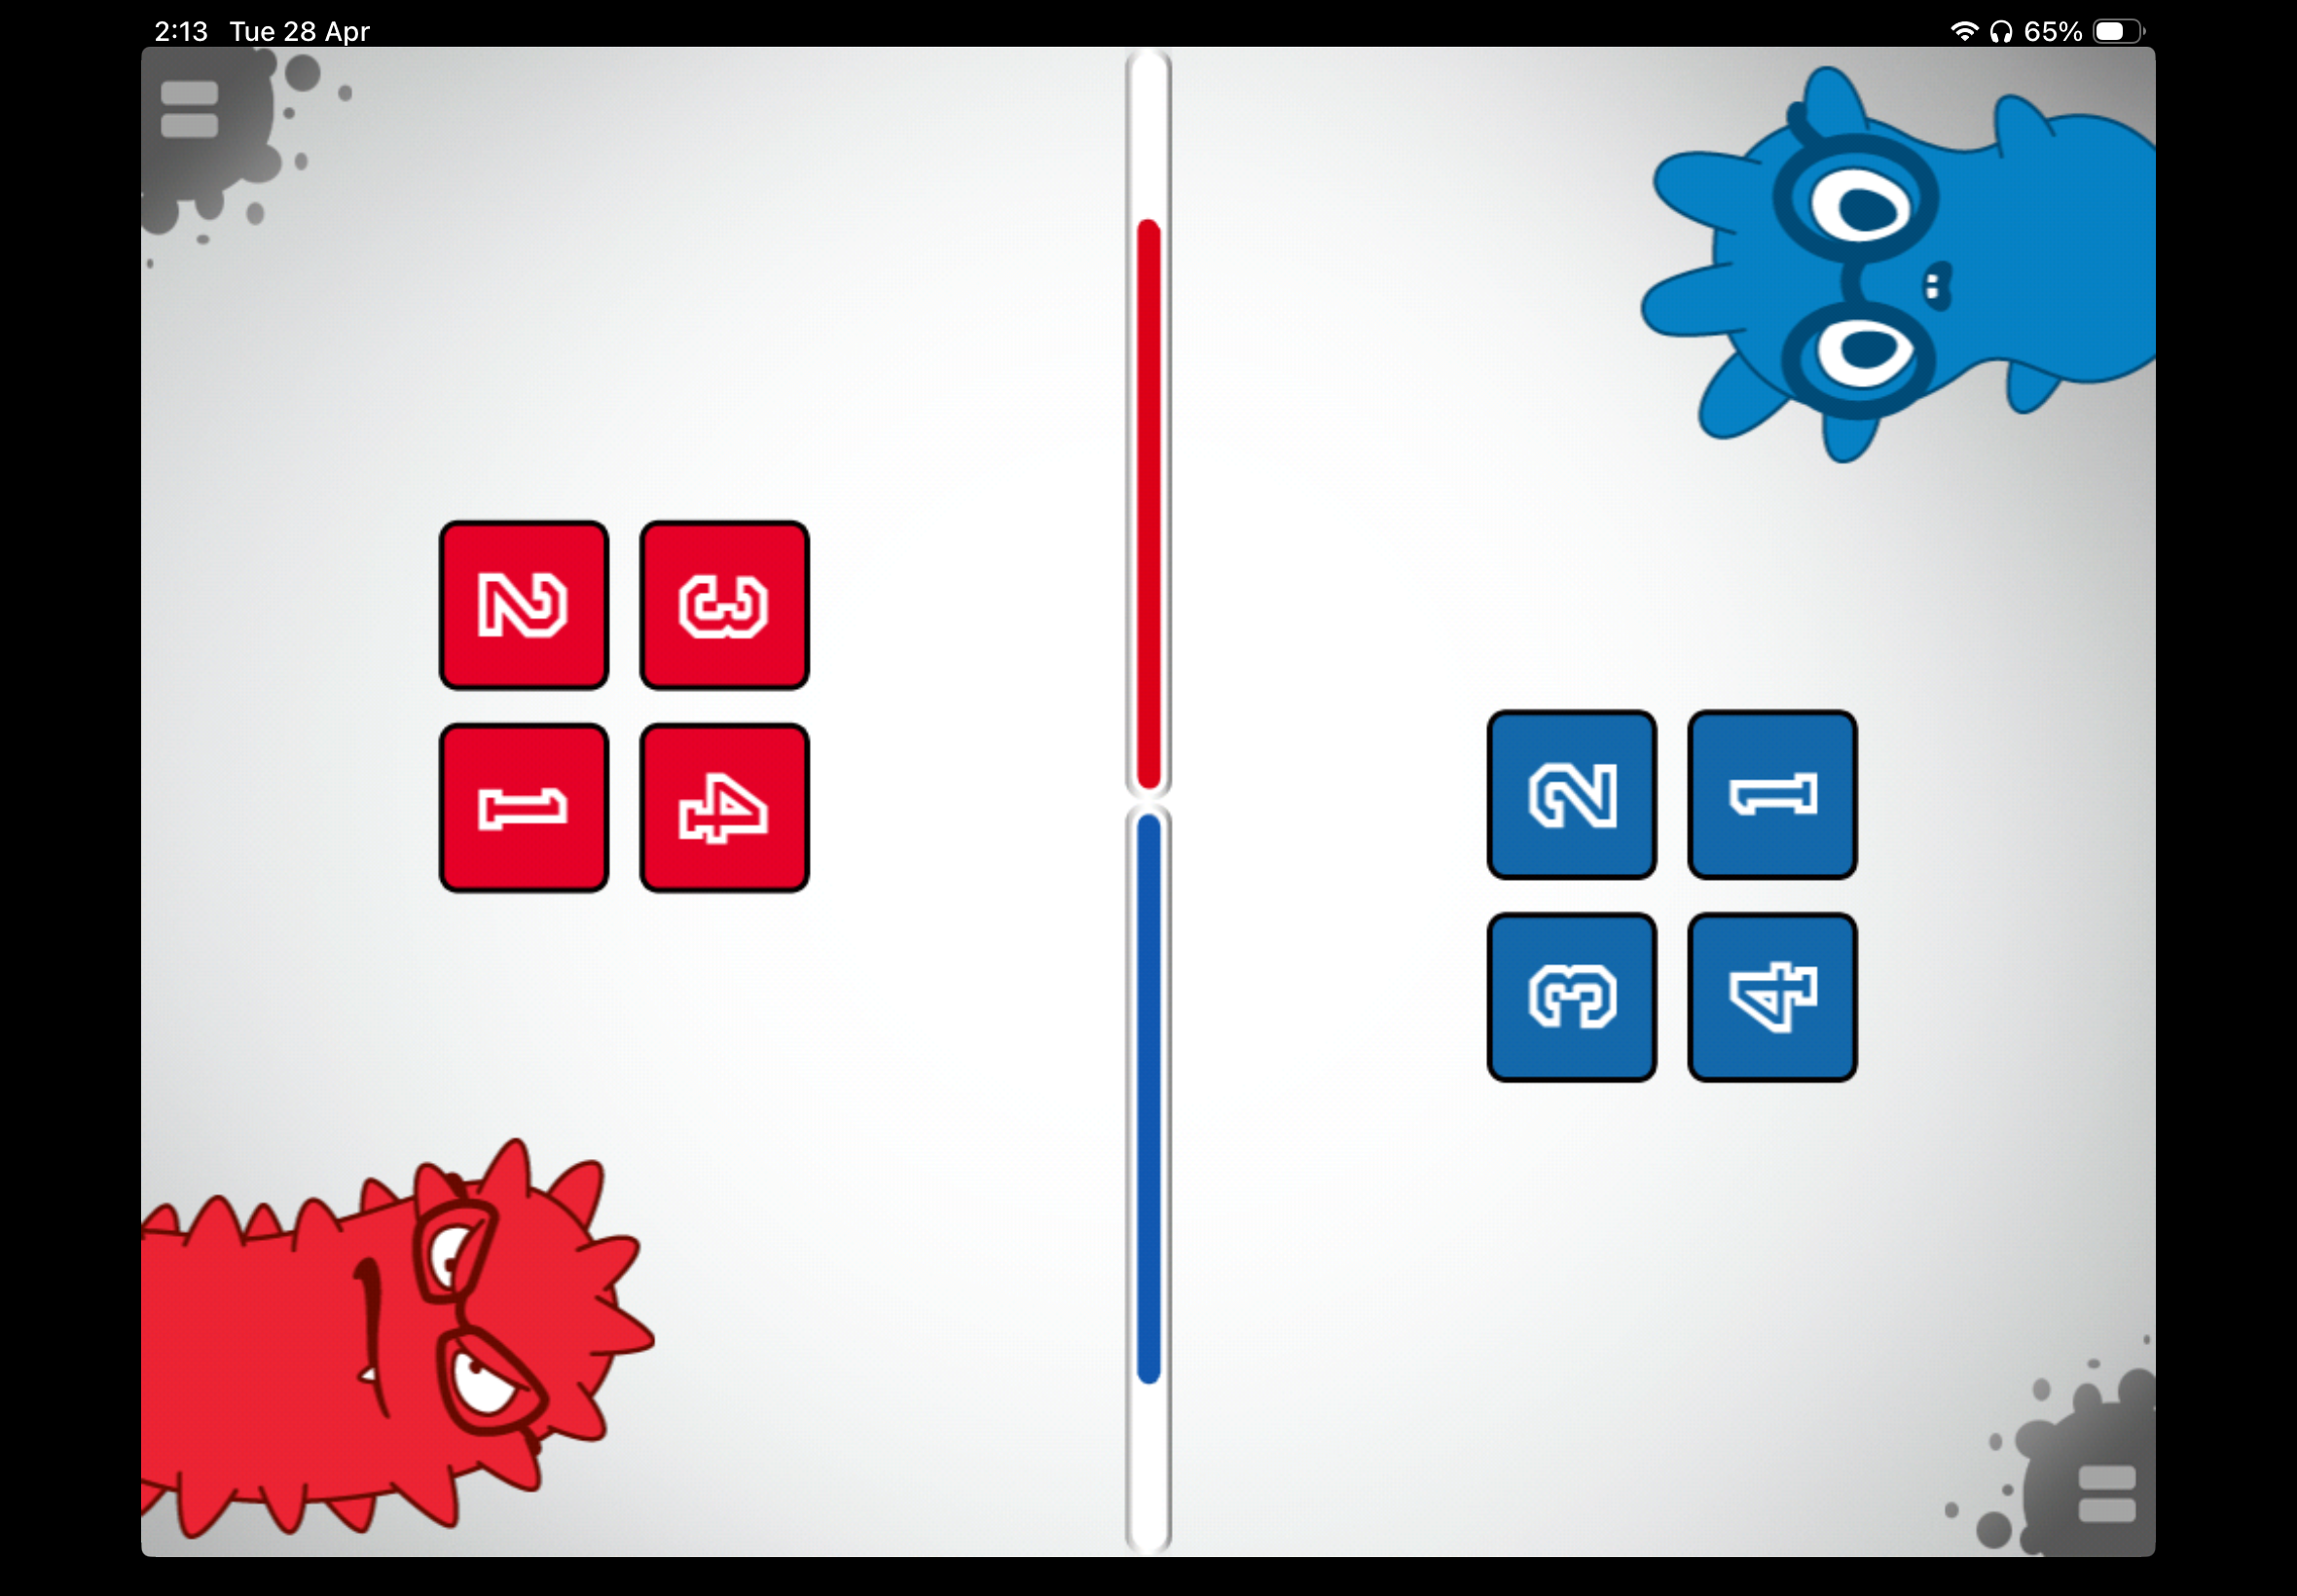
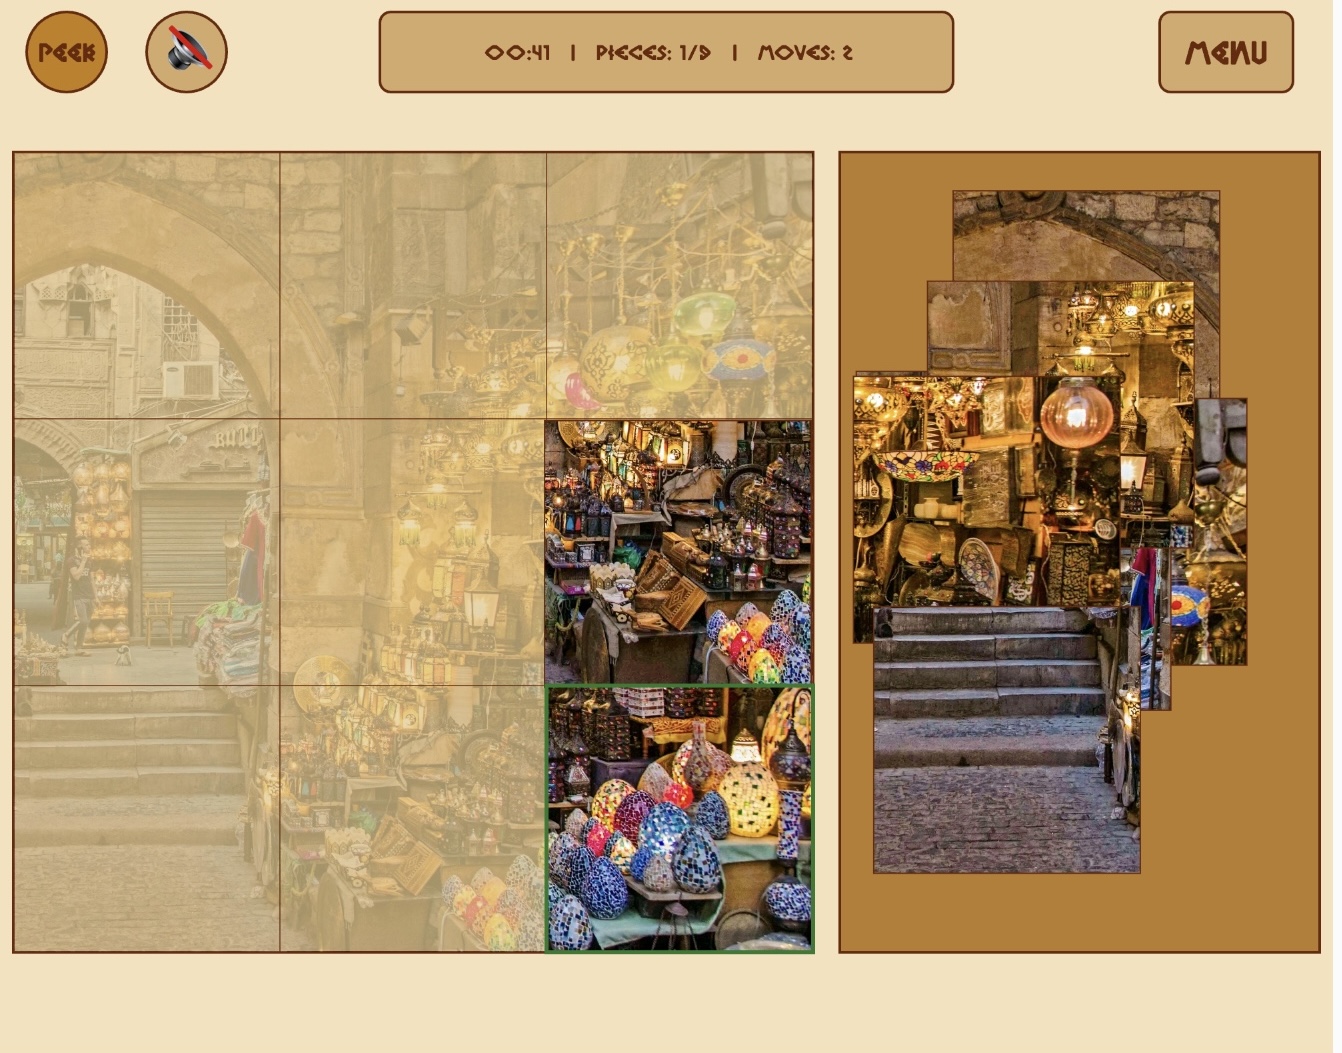
The layout for games 1 & 2 is very similar, however, there are few minor details (that are not very visible below but are more noticeable when you play the game). For game 1, there is a timer in top center that counts down from 10 seconds, when it reaches 3 seconds, the text color changes to red. In game 2, there is a signal box at the bottom that has instructions. When the LEDs are lit up, the signal box also says GO. There are a few other states such as, waiting, timeout (when neither player presses for 3 seconds), early (if either player presses before the LEDs light up), win, and gameover. In both games, there is a scorebar below the character figures that fill up when the players get points in each game.

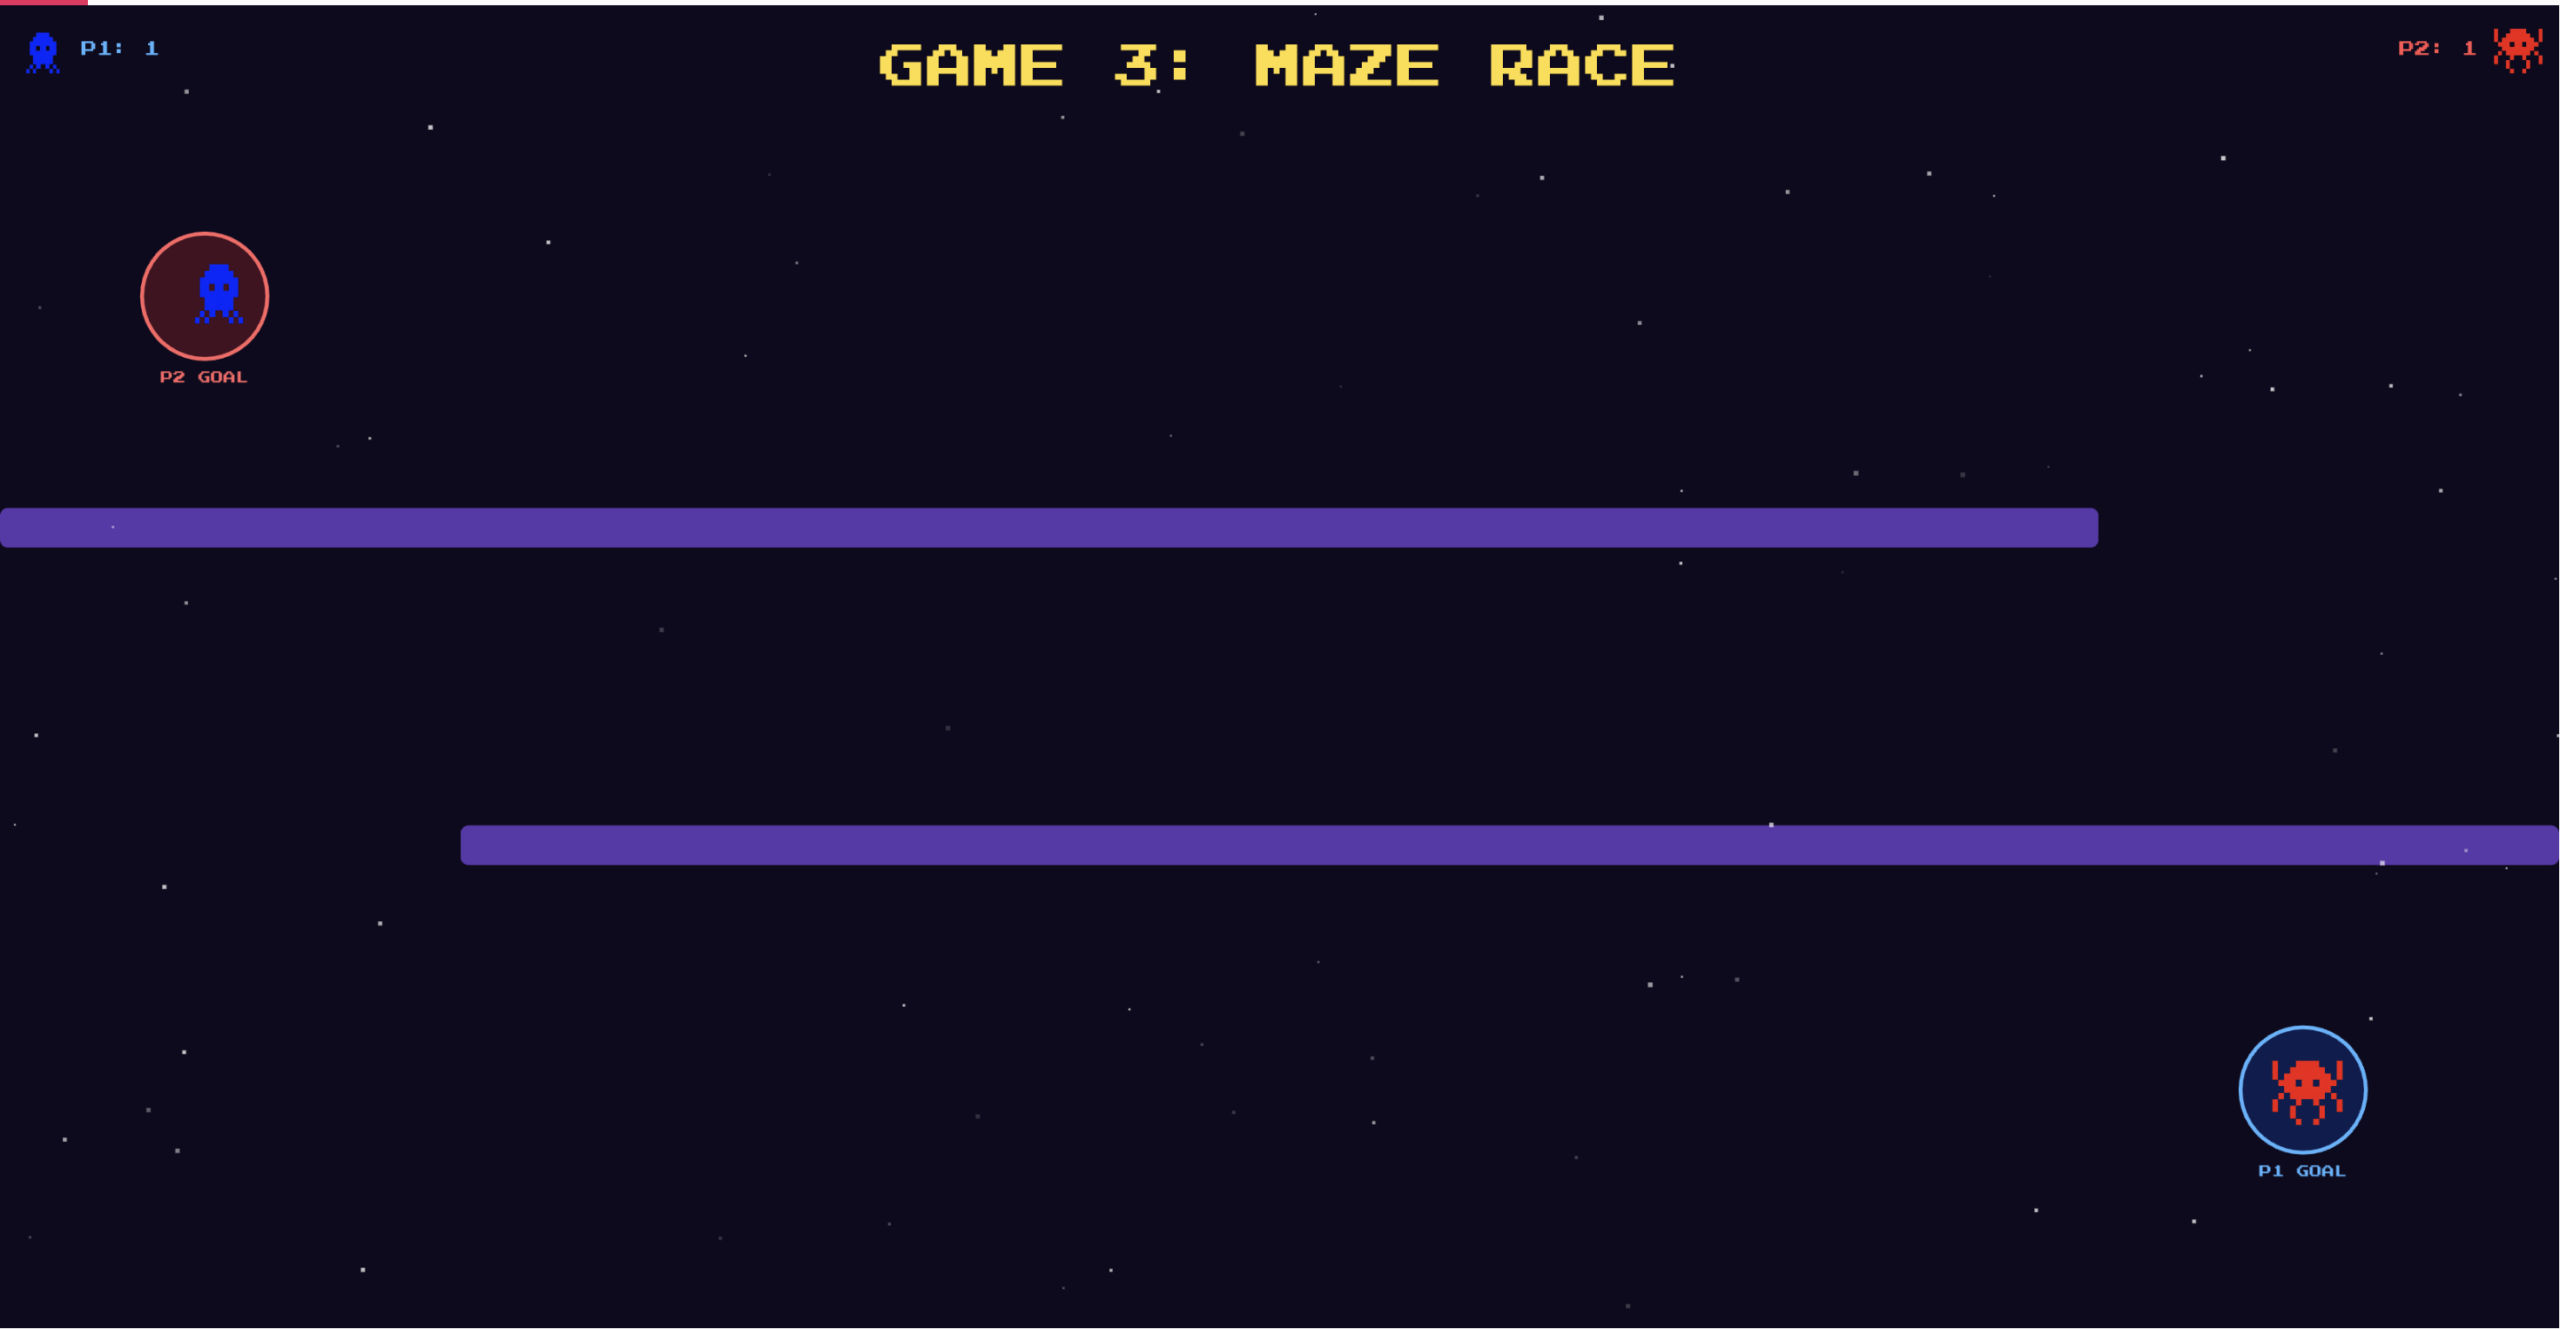
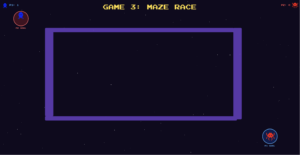
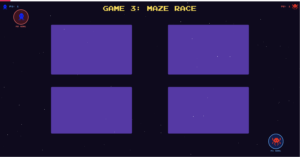
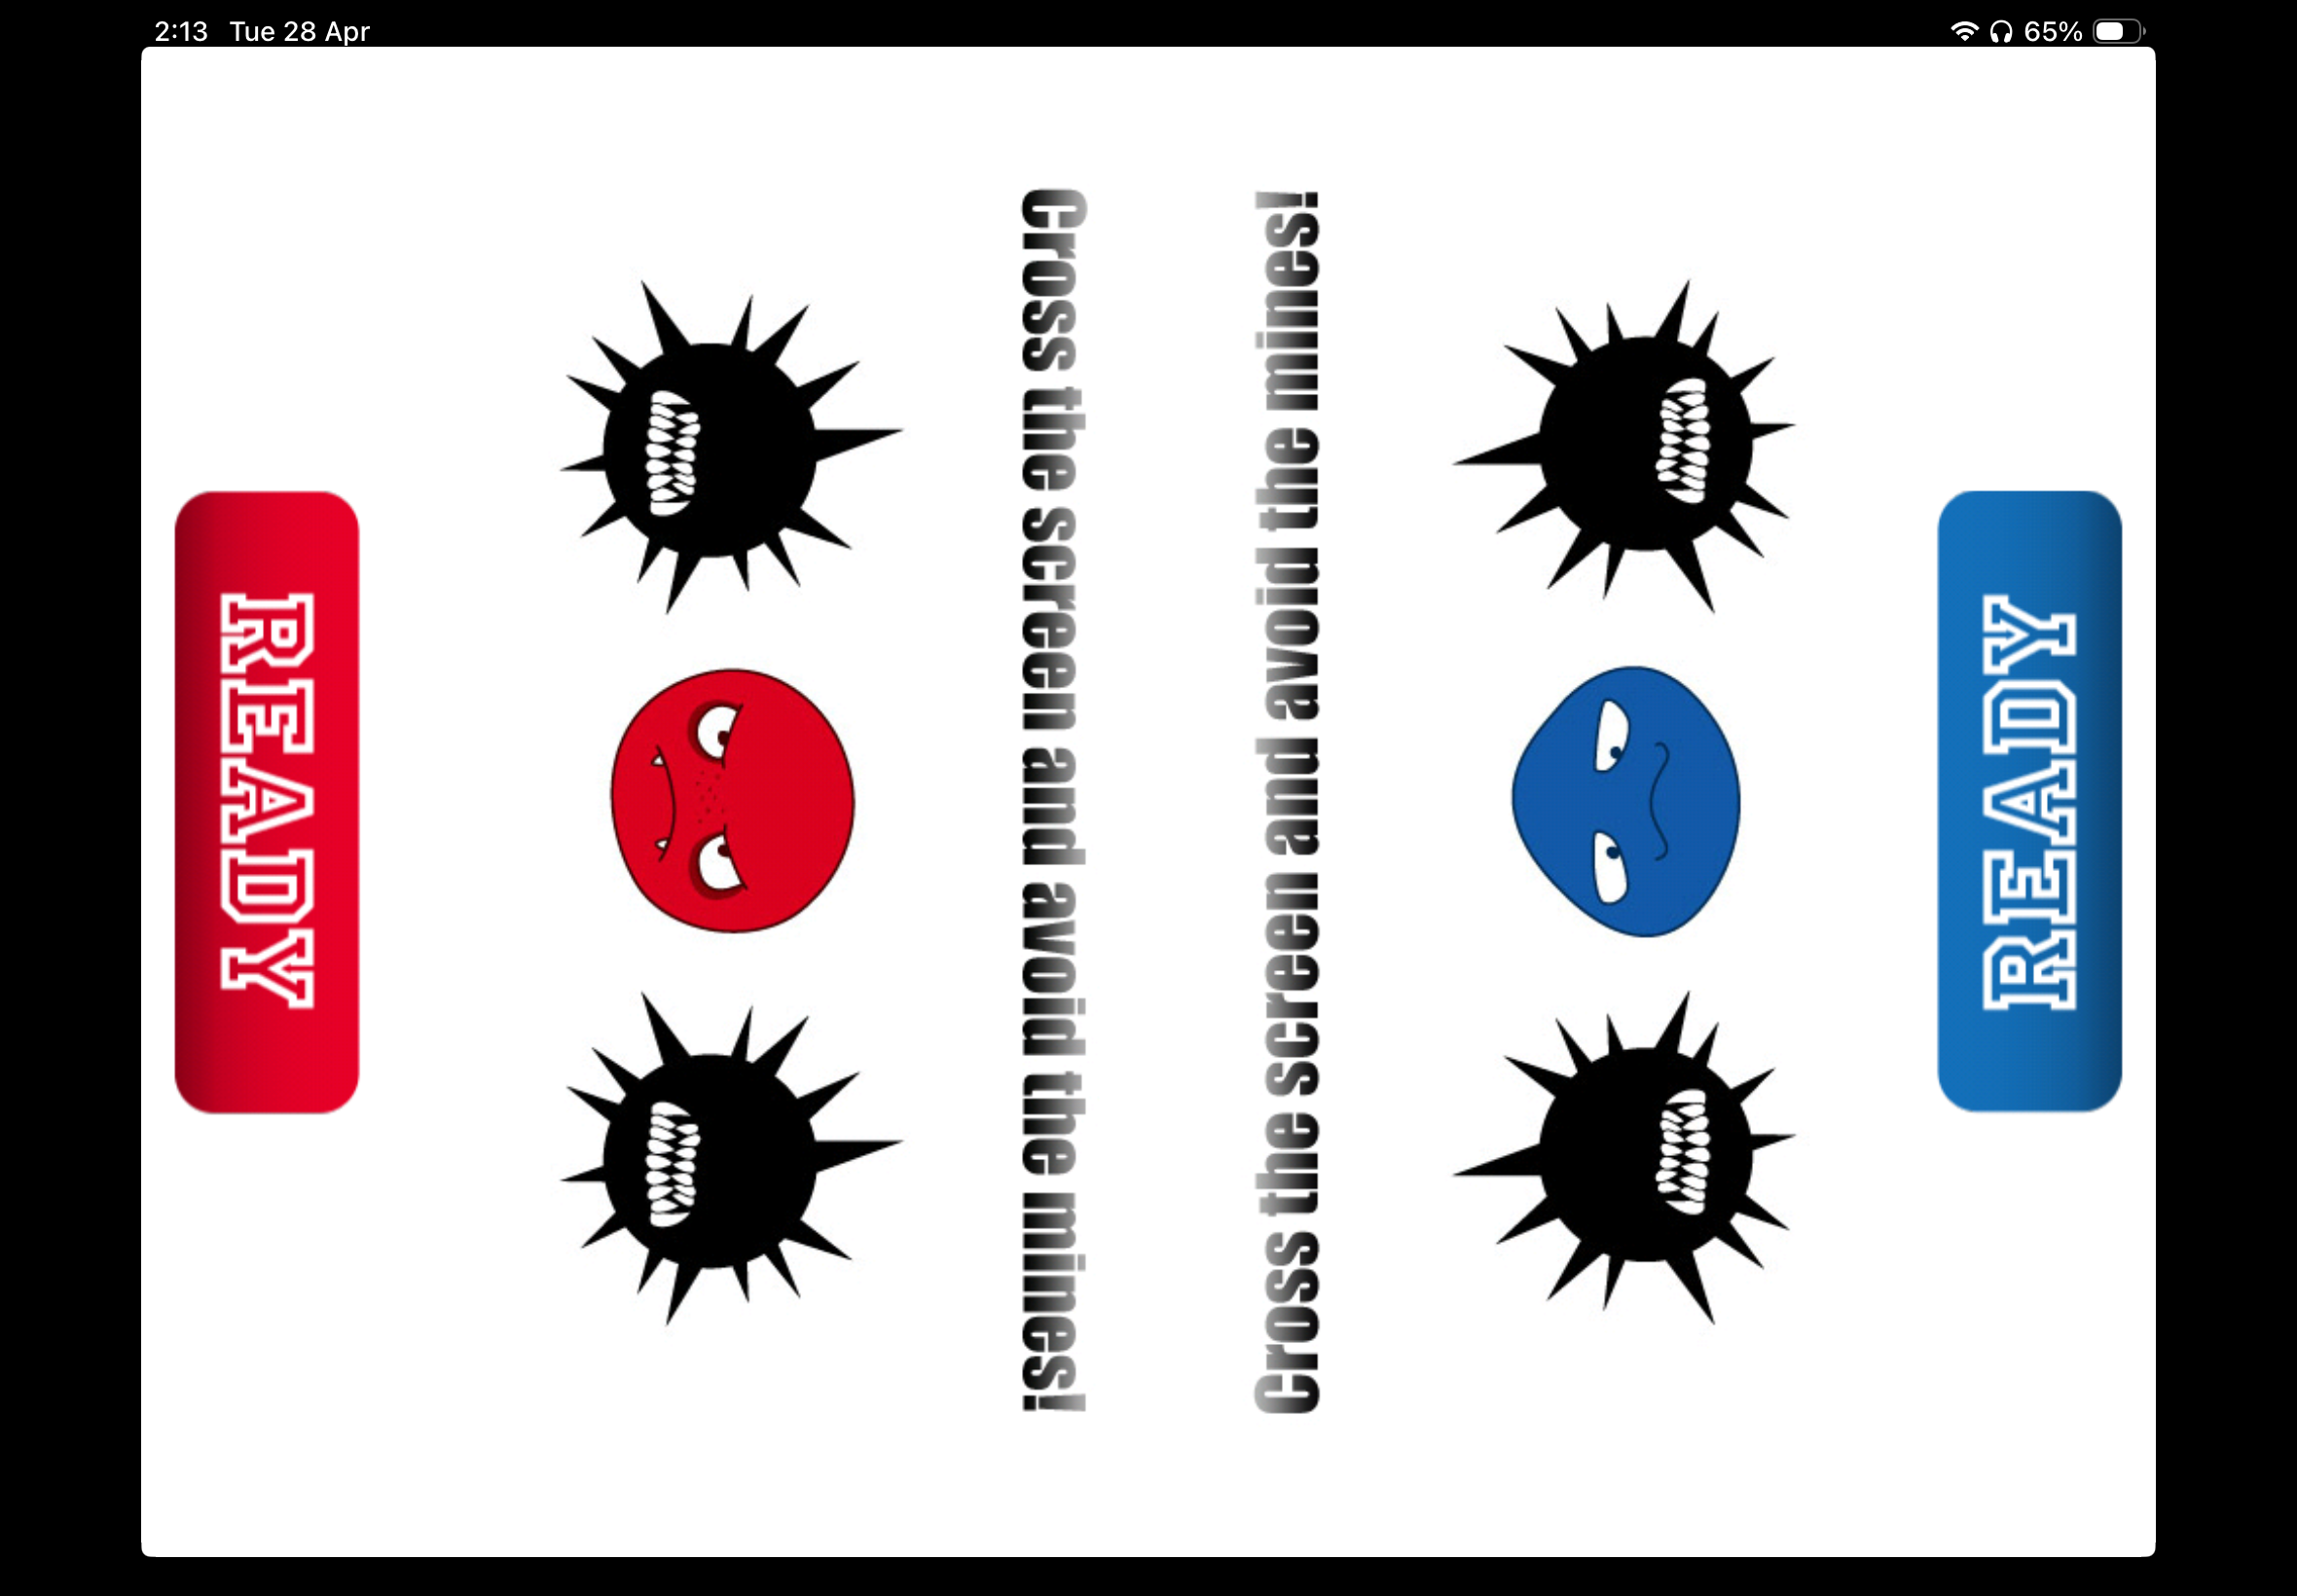
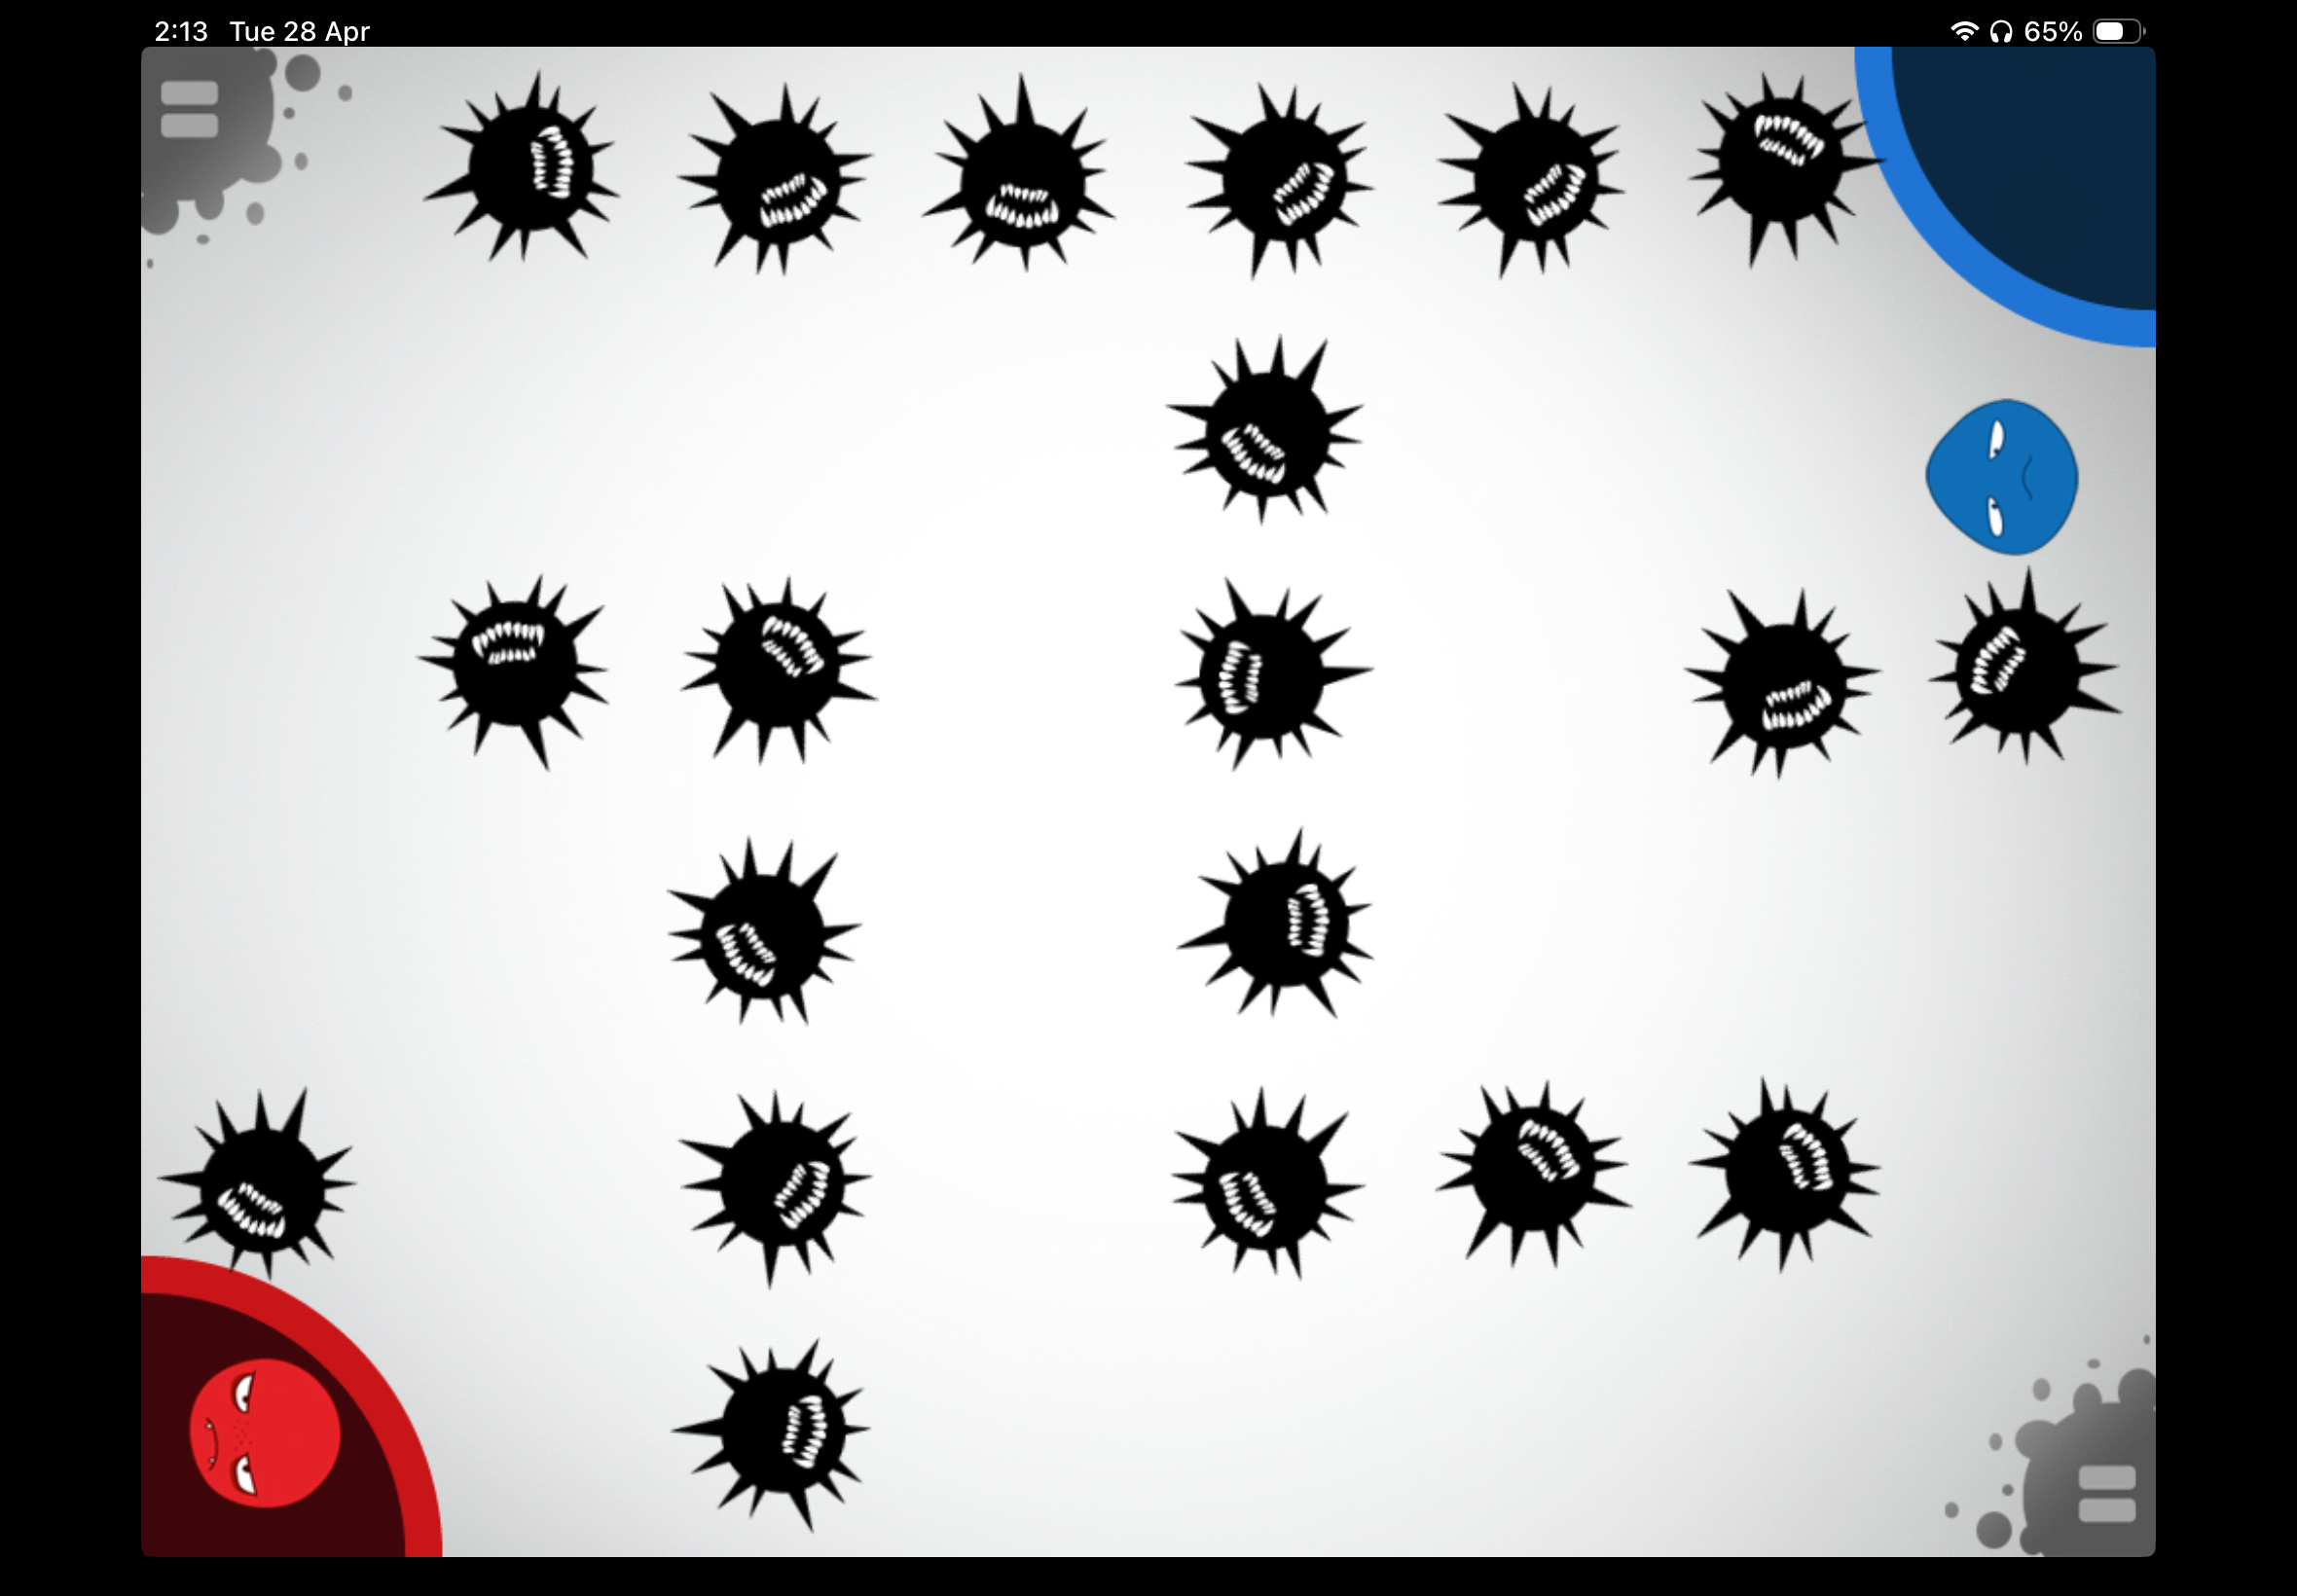
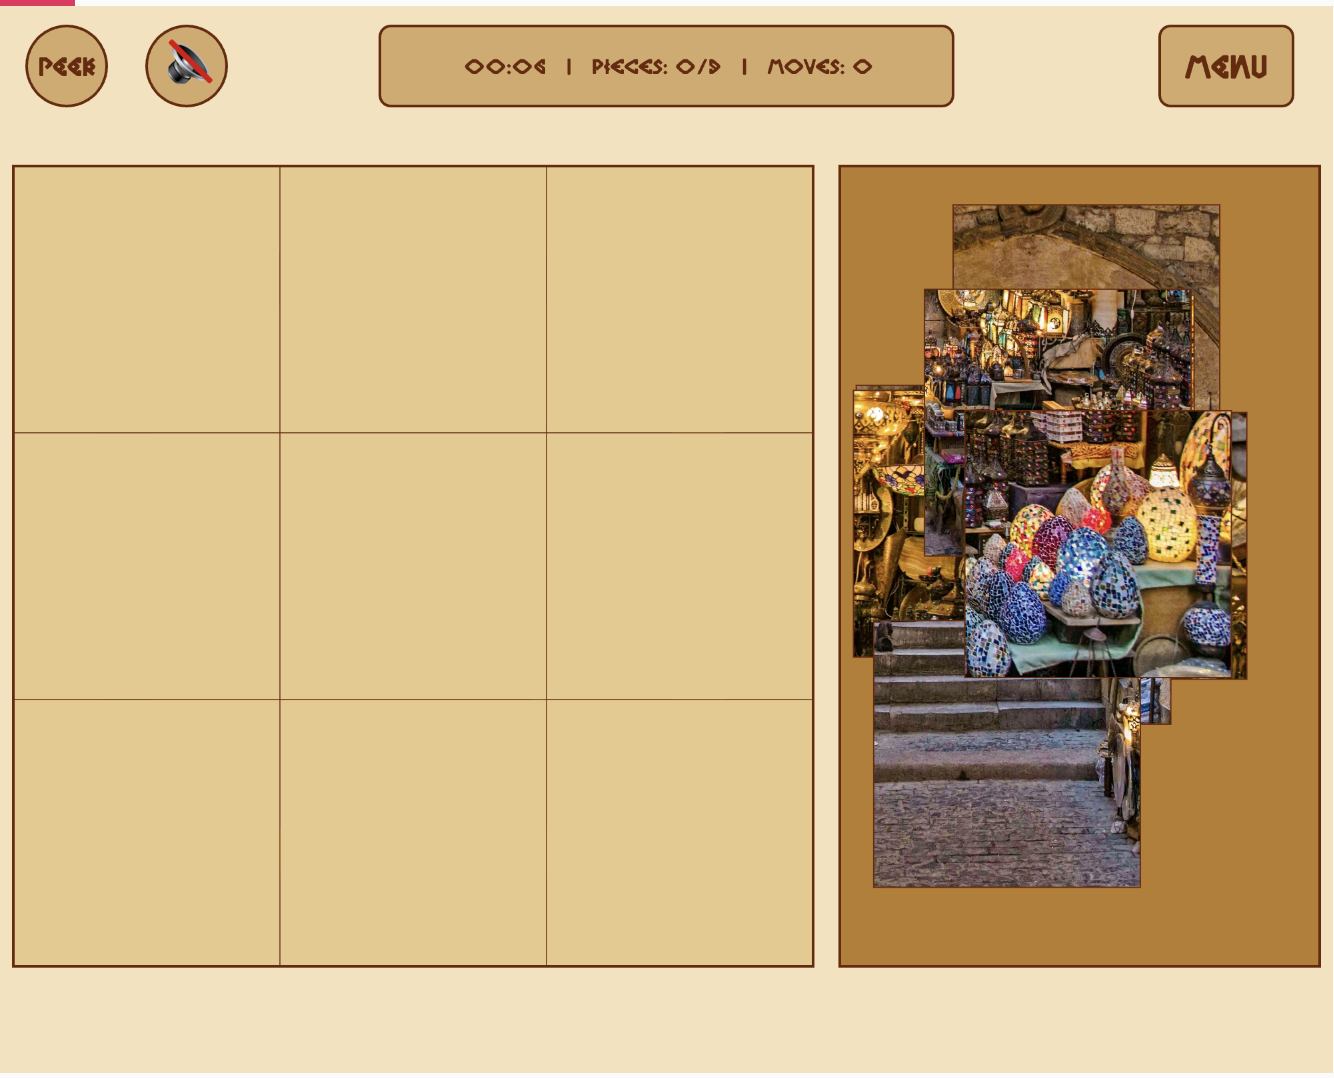
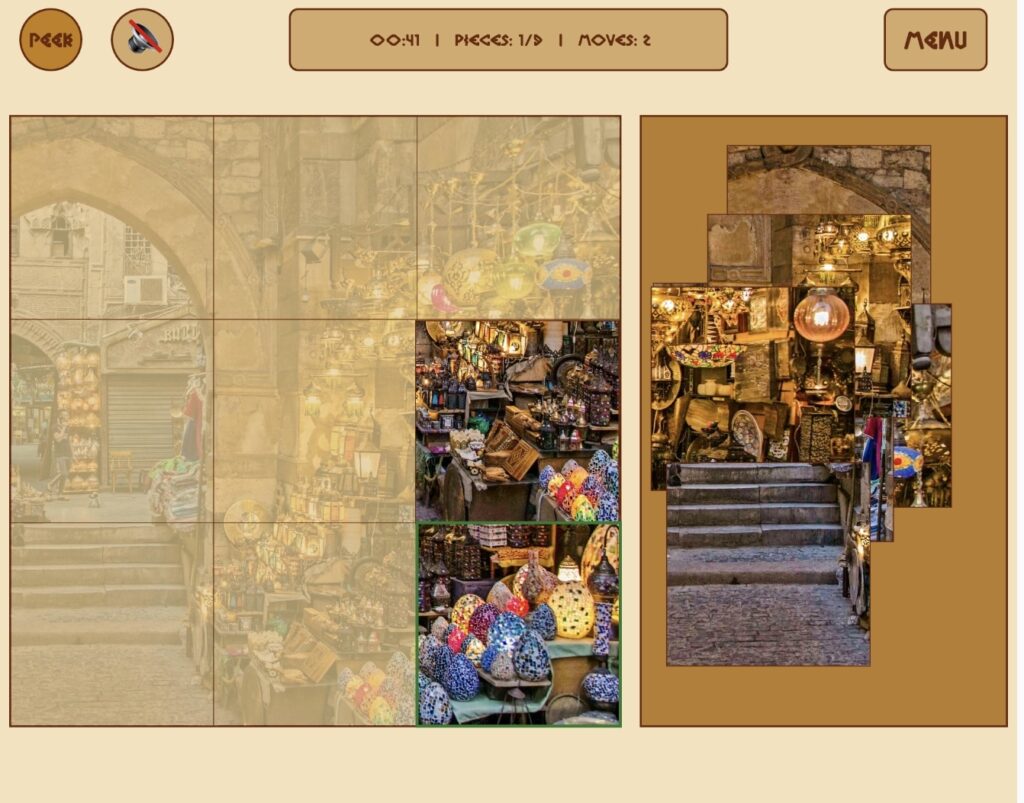
There are three different possible maze layouts, these are randomized each game. You can see how each one looks below:

You can see more of how the physical game works through the video demo
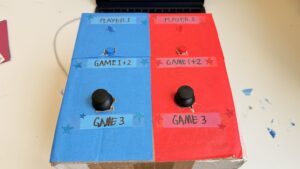
Video demo: https://stream.nyu.edu/media/IMG_8479.MOV/1_tv06av9s 
Full Arduino source code
// pins: 
const int button1 = 2; // blue 
const int led1 = 4; // blue

const int button2 = 3;  // red
const int led2 = 5; // red

const int joy1_x = A0;
const int joy1_y = A1;

const int joy2_x = A2;
const int joy2_y = A3;

// state
int gamePhase = 0;   // 0 = waiting, 1 = game1, 2 = game2, 3 = game3
int scoreP1 = 0, scoreP2 = 0;

// game 1
// number of presses of each player 
int countP1 = 0, countP2 = 0;

// last state of each button 
int lastP1 = HIGH;
int lastP2 = HIGH;

unsigned long g1Start = 0;
const unsigned long g1Duration = 10000;
bool g1Running = false;

// game 2
// score of each player
int g2ScoreP1 = 0, g2ScoreP2 = 0;
int g2Round = 0; // game 2 has multiple rounds
const int totalRounds = 5;
bool g2WaitingForPress = false;
bool earlyPress = false;   // if pressed before GO signal
unsigned long goTime = 0;

// game 3
// joystick data is just sent to p5.js every frame
// p5.js handles all game logic and sends WIN when done
bool g3Running = false;

void setup() {
  Serial.begin(9600);

  pinMode(button1, INPUT_PULLUP);
  pinMode(button2, INPUT_PULLUP);
  pinMode(led1, OUTPUT);
  pinMode(led2, OUTPUT);

  allOff();
  Serial.println("READY");
}

void loop() {
  // reads serial commands from p5.js
  if (Serial.available() > 0) {
    String cmd = Serial.readStringUntil('\n');
    cmd.trim();
    handleCommand(cmd);
  }

  if (gamePhase == 1 && g1Running) {
    runGame1();
  }
  if (gamePhase == 2 && g2WaitingForPress) {
    runGame2();
  }
  if (gamePhase == 3 && g3Running) {
    runGame3();
  }
}

void handleCommand(String cmd) {
  if (cmd == "START" && gamePhase == 0) {
    startGame1();
  }

  // RESET is sent by p5.js when the user clicks "play again"
  // resets all scores and puts Arduino back to the waiting state
  if (cmd == "RESET") {
    scoreP1 = 0;
    scoreP2 = 0;
    gamePhase = 0;
    g1Running = false;
    g3Running = false;
    g2WaitingForPress = false;
    allOff();
    Serial.println("READY"); // confirms reset to p5.js
  }

  // p5.js tells us game 3 is over
  if (cmd.startsWith("G3:WIN:") && gamePhase == 3) {
    int winner = cmd.substring(7).toInt();
    endGame3(winner);
  }
}

// helper functions:
void allOff() {
  digitalWrite(led1, LOW);
  digitalWrite(led2, LOW);
}

// used at the end of game 2 & 3
void flashLED(int times, int ms) {
  for (int i = 0; i < times; i++) {
    digitalWrite(led1, HIGH); 
    digitalWrite(led2, HIGH);
    delay(ms);

    digitalWrite(led1, LOW);  
    digitalWrite(led2, LOW);
    delay(ms);
  }
}

// game 1: tap fast
void startGame1() {
  gamePhase = 1;
  countP1 = 0; countP2 = 0;
  lastP1 = HIGH; lastP2 = HIGH;

  Serial.println("GAME:1");
  
  g1Start = millis(); // saves start time for game 1
  g1Running = true;
}

// this function runs repeatedly as long as game 1 is active
void runGame1() {
  // checks how much time has passed since game 1 started
  unsigned long elapsed = millis() - g1Start;
  if (elapsed >= g1Duration) {
    endGame1();
    return;
  }

  // current button states
  int s1 = digitalRead(button1);
  int s2 = digitalRead(button2);

  // if button was pressed, increase player's count and led is lit up
  // the logic is opposite since we are using INPUT_PULLUP, to avoid using resistors
  if (s1 == LOW && lastP1 == HIGH) {
    countP1++;
    digitalWrite(led1, HIGH);

    Serial.print("G1:A:"); 
    Serial.println(countP1);

  } else if (s1 == HIGH) {
    digitalWrite(led1, LOW);
  }

  if (s2 == LOW && lastP2 == HIGH) {
    countP2++;
    digitalWrite(led2, HIGH);

    Serial.print("G1:B:"); 
    Serial.println(countP2);
  } else if (s2 == HIGH) {
    digitalWrite(led2, LOW);
  }

  // save the current state for the next loop
  lastP1 = s1;
  lastP2 = s2;

  delay(8); // reduces button bouncing
}

void endGame1() {
  g1Running = false;
  allOff(); // turns leds off 

  int winner = 0;
  if (countP1 > countP2) {
    winner = 1;
    scoreP1++;
  } else if (countP2 > countP1) {
    winner = 2;
    scoreP2++;
  }

  // print winner
  Serial.print("G1:WIN:"); Serial.println(winner);

  // print score of each player
  Serial.print("SCORE:"); Serial.print(scoreP1);
  Serial.print(","); Serial.println(scoreP2);

  if (winner > 0) {
    // flash winner's LED
    for (int i = 0; i < 4; i++) {
      if (winner == 1) {
        digitalWrite(led1, HIGH);
        delay(150);
        digitalWrite(led1, LOW);
        delay(150);
      } else if (winner == 2) {
        digitalWrite(led2, HIGH);
        delay(150);
        digitalWrite(led2, LOW);
        delay(150);
      }
    }
  }

  flashLED(4, 150);
  delay(2000);
  startGame2();
}

// game 2: react fast
void startGame2() {
  gamePhase = 2;
  g2ScoreP1 = 0; 
  g2ScoreP2 = 0;
  g2Round = 0;

  Serial.println("GAME:2");
  delay(1000);
  nextReactionRound();
}

void nextReactionRound() {
  // game 2 ends when all rounds are complete
  if (g2Round >= totalRounds) {
    endGame2();
    return;
  }

  g2Round++;
  earlyPress = false;
  g2WaitingForPress = false;

  Serial.print("G2:ROUND:"); Serial.println(g2Round);

  // wait a random time before 'go'
  int waitMs = random(1500, 4000);
  unsigned long waitStart = millis();

  // during wait, check for early presses (penalty)
  while (millis() - waitStart < waitMs) {
    if (digitalRead(button1) == LOW || digitalRead(button2) == LOW) {
      earlyPress = true;

      // find who pressed early
      int earlyPlayer;

      if (digitalRead(button1) == LOW) {
        earlyPlayer = 1;
        g2ScoreP2++;
      } else if (digitalRead(button2) == LOW) {
        earlyPlayer = 2;
        g2ScoreP1++;
      }
      
      Serial.print("G2:EARLY:"); Serial.println(earlyPlayer); // who pressed early
      Serial.print("G2:SCORE:"); Serial.print(g2ScoreP1);
      Serial.print(","); Serial.println(g2ScoreP2);

      delay(1000);
      nextReactionRound();
      return;
    }

    delay(10);
  }

  // Fire GO signal
  digitalWrite(led1, HIGH); 
  digitalWrite(led2, HIGH);

  Serial.println("G2:GO");

  goTime = millis();
  g2WaitingForPress = true;
}

void runGame2() {
  // times out after 3 seconds if no one presses
  if (millis() - goTime > 3000) {
    allOff();
    g2WaitingForPress = false;
    Serial.println("G2:TIMEOUT");
    delay(500);
    nextReactionRound();
    return;
  }

  int s1 = digitalRead(button1);
  int s2 = digitalRead(button2);

  // if someone presses after go 
  if (s1 == LOW || s2 == LOW) {
    allOff();
    g2WaitingForPress = false;

    int winner;

    // if both press at the same time, Player 1 wins by default
    if (s1 == LOW && s2 == LOW) {
      winner = 1;
    } else if (s1 == LOW) {
      winner = 1;
    } else if (s2 == LOW) {
      winner = 2;
    }

    if (winner == 1) { 
      g2ScoreP1++; 
      digitalWrite(led1, HIGH); 
    }
    else { 
      g2ScoreP2++; 
      digitalWrite(led2, HIGH); 
    }

    Serial.print("G2:WIN:"); Serial.println(winner);
    Serial.print("G2:SCORE:"); Serial.print(g2ScoreP1);
    Serial.print(","); Serial.println(g2ScoreP2);

    delay(800);
    allOff();
    delay(600);
    nextReactionRound();
  }
}

void endGame2() {
  int winner = 0;
  if (g2ScoreP1 > g2ScoreP2) { 
    winner = 1; 
    scoreP1++; 
  }
  else if (g2ScoreP2 > g2ScoreP1) { 
    winner = 2; 
    scoreP2++; 
  }

  Serial.print("G2:GAMEOVER:"); Serial.println(winner);
  Serial.print("SCORE:"); Serial.print(scoreP1);
  Serial.print(","); Serial.println(scoreP2);

  flashLED(4, 150);
  delay(2000);
  startGame3();
}

// game 3: dodge
// p5.js handles all collisions/game logic, arduino just sends joystick values
// p5.js sends back G3:WIN:<#> when game ends
void startGame3() {
  gamePhase = 3;
  g3Running = true;
  Serial.println("GAME:3");
  delay(500);
}

void runGame3() {
  int x1 = analogRead(joy1_x);
  int y1 = analogRead(joy1_y);

  int x2 = analogRead(joy2_x);
  int y2 = analogRead(joy2_y);

  Serial.print("G3:JOY:");
  Serial.print(x1); Serial.print(",");
  Serial.print(y1); Serial.print(",");
  Serial.print(x2); Serial.print(",");
  Serial.println(y2);

  delay(33); // ~30fps
}

void endGame3(int winner) {
  g3Running = false;
  allOff();

  if (winner > 0) {
    if (winner == 1) {
      scoreP1++;    
    }
    else {
      scoreP2++;
    }
  }

  Serial.print("SCORE:"); Serial.print(scoreP1);
  Serial.print(","); Serial.println(scoreP2);

  int overall = 0;
  if (scoreP1 > scoreP2) {
    overall = 1;
  }
  else if (scoreP2 > scoreP1) {
    overall = 2;
  }

  flashLED(5, 200);

  Serial.print("OVERALL:"); Serial.println(overall);
  gamePhase = 0;
}
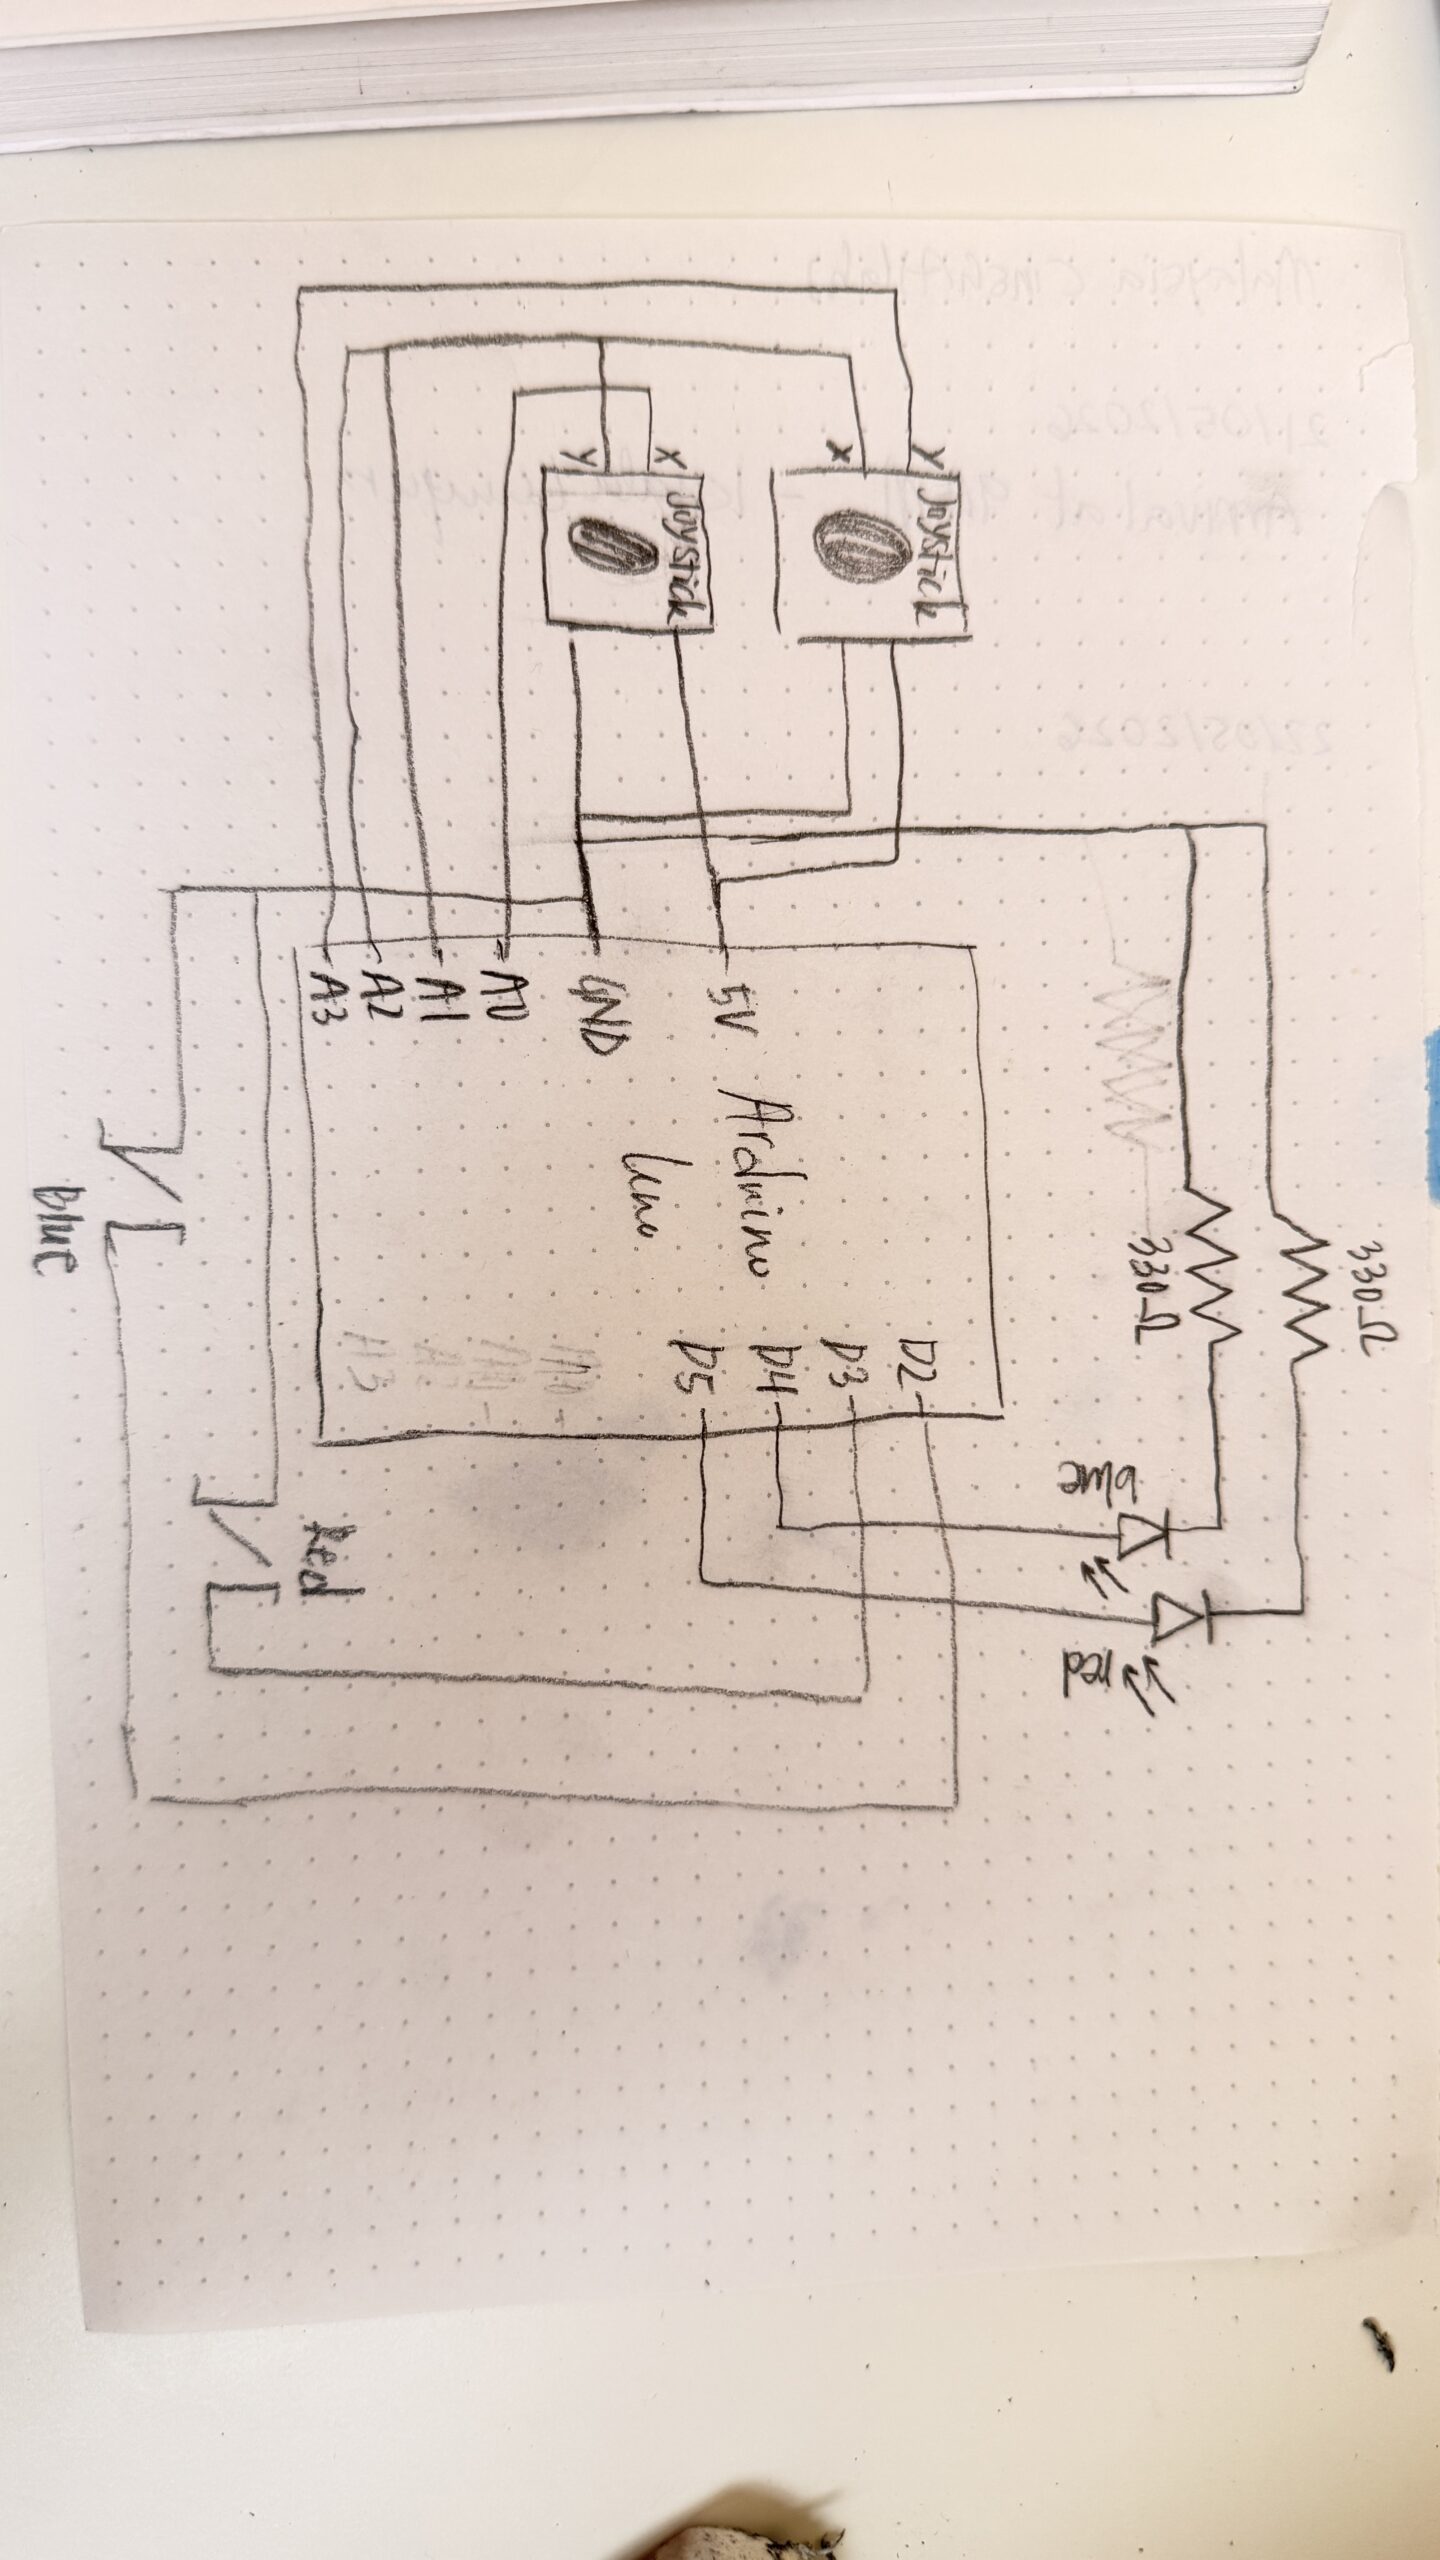
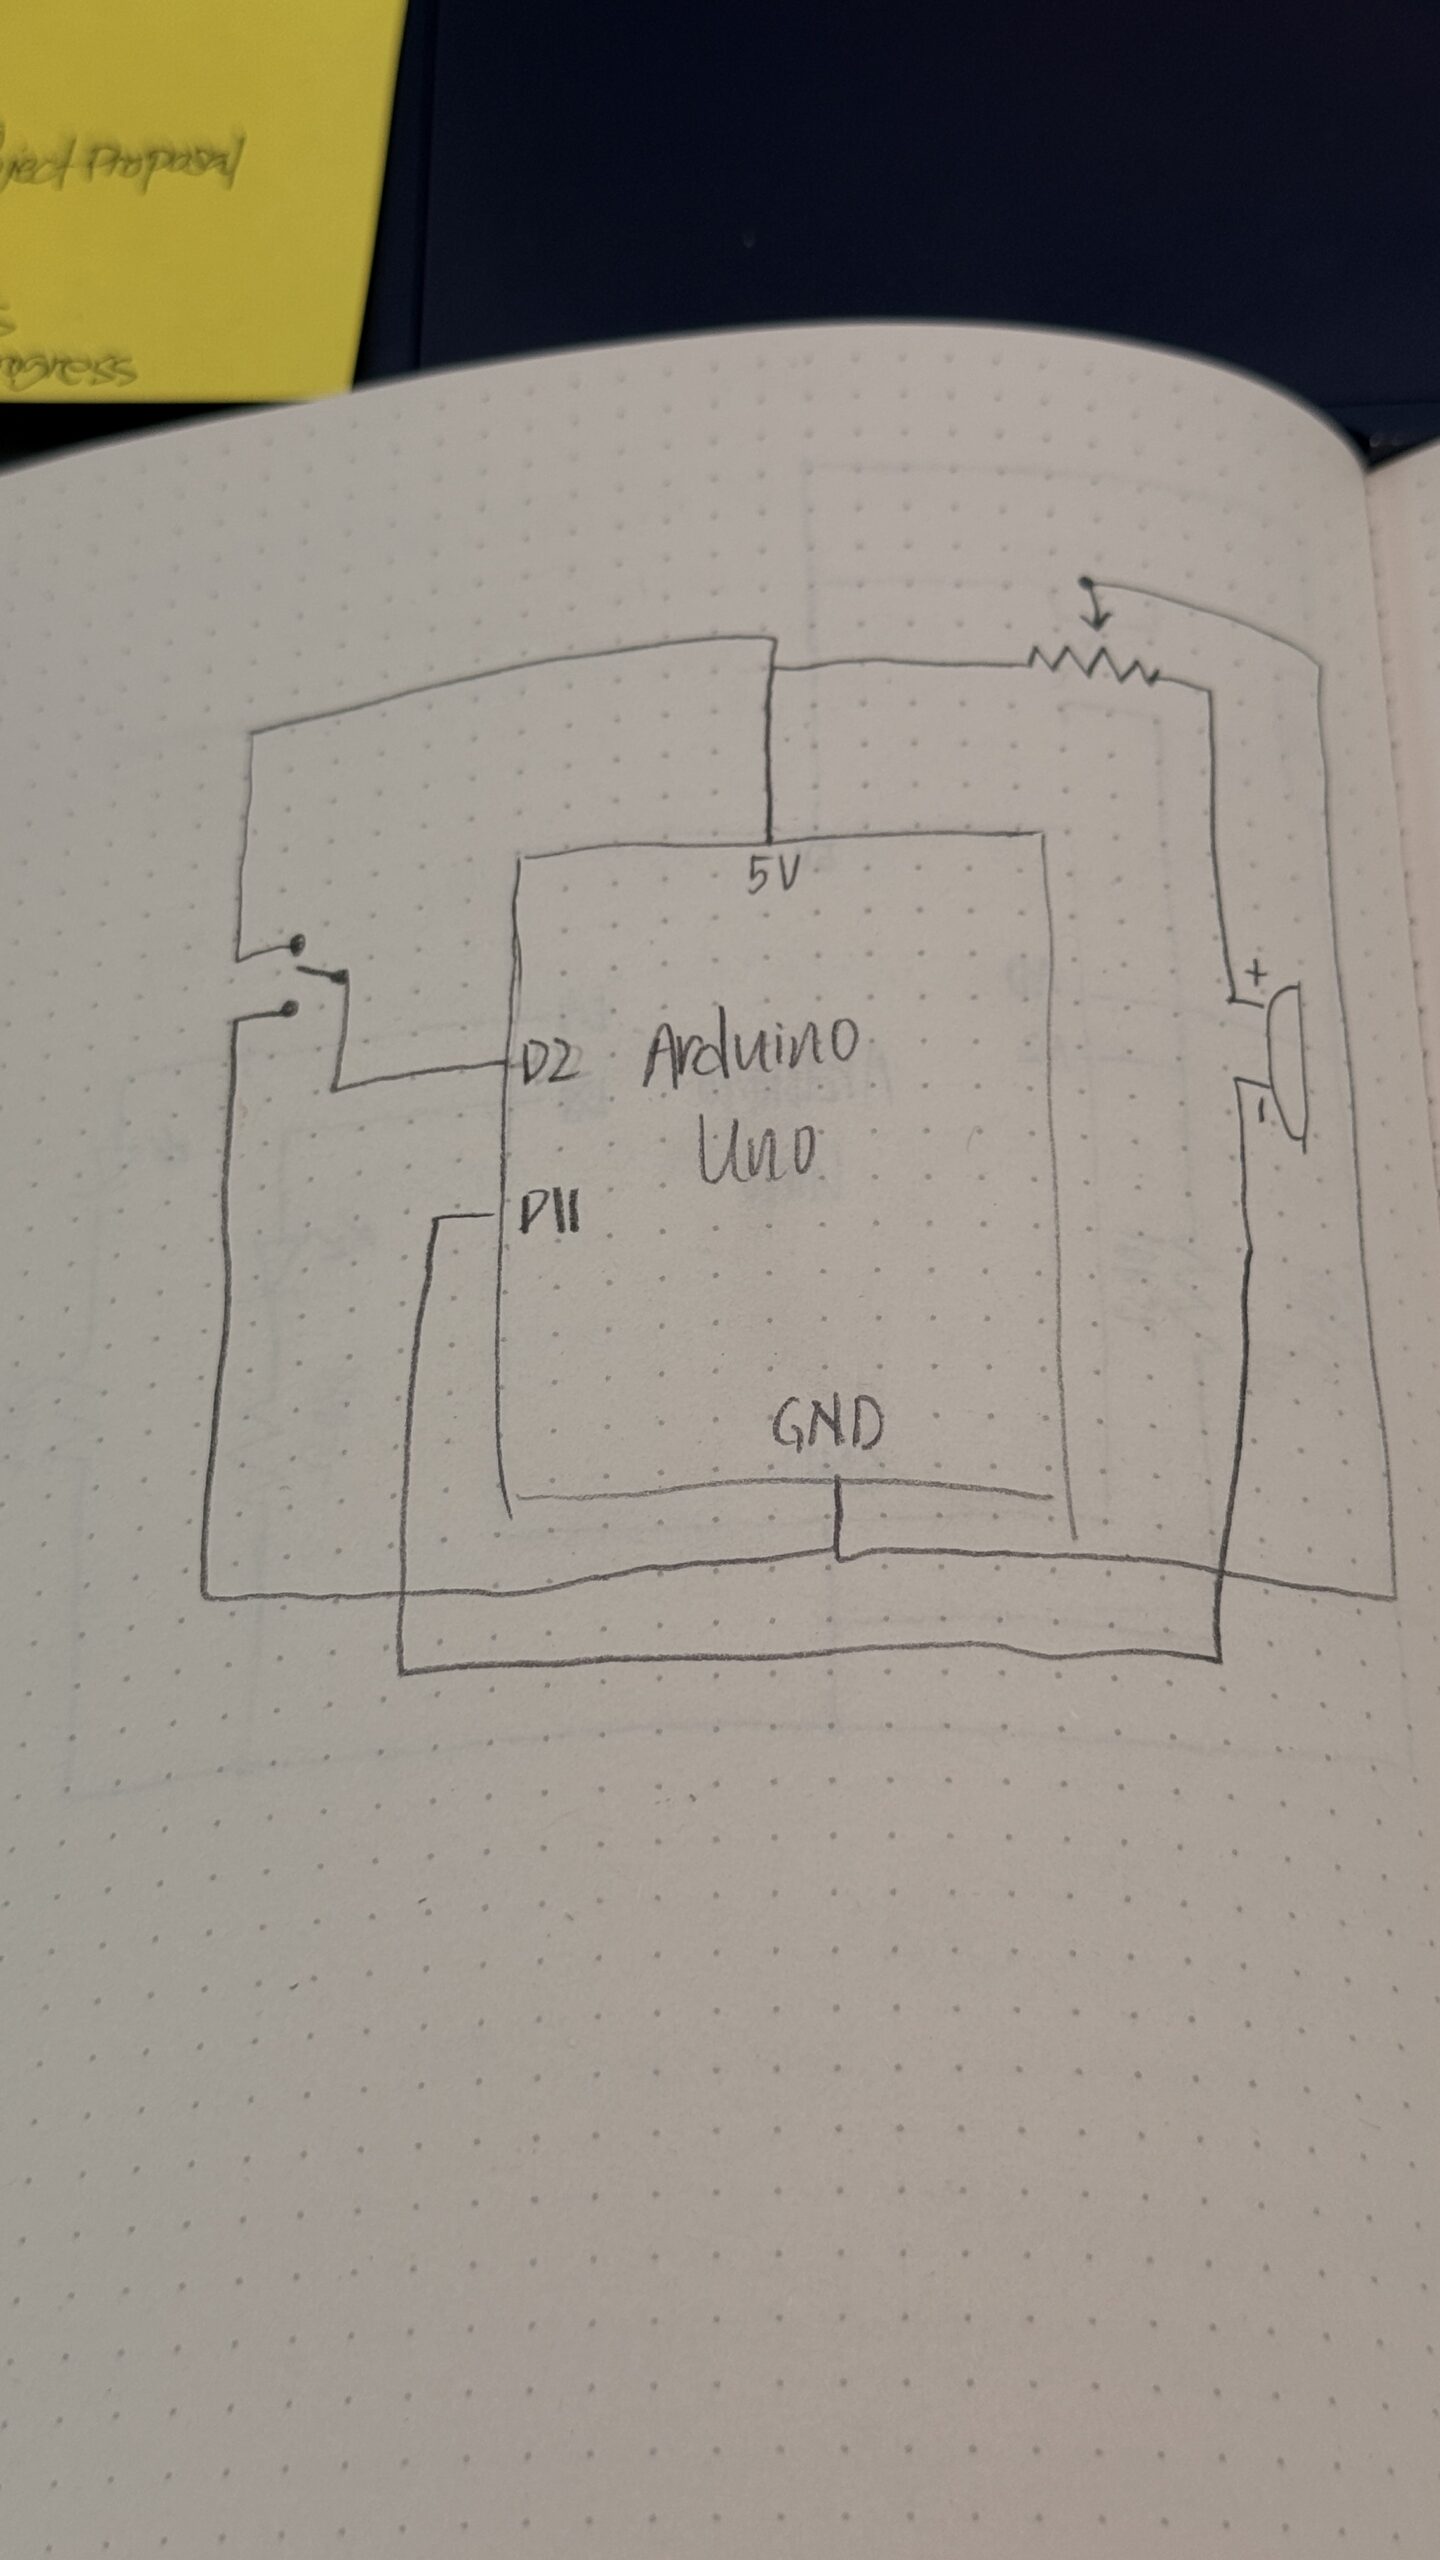
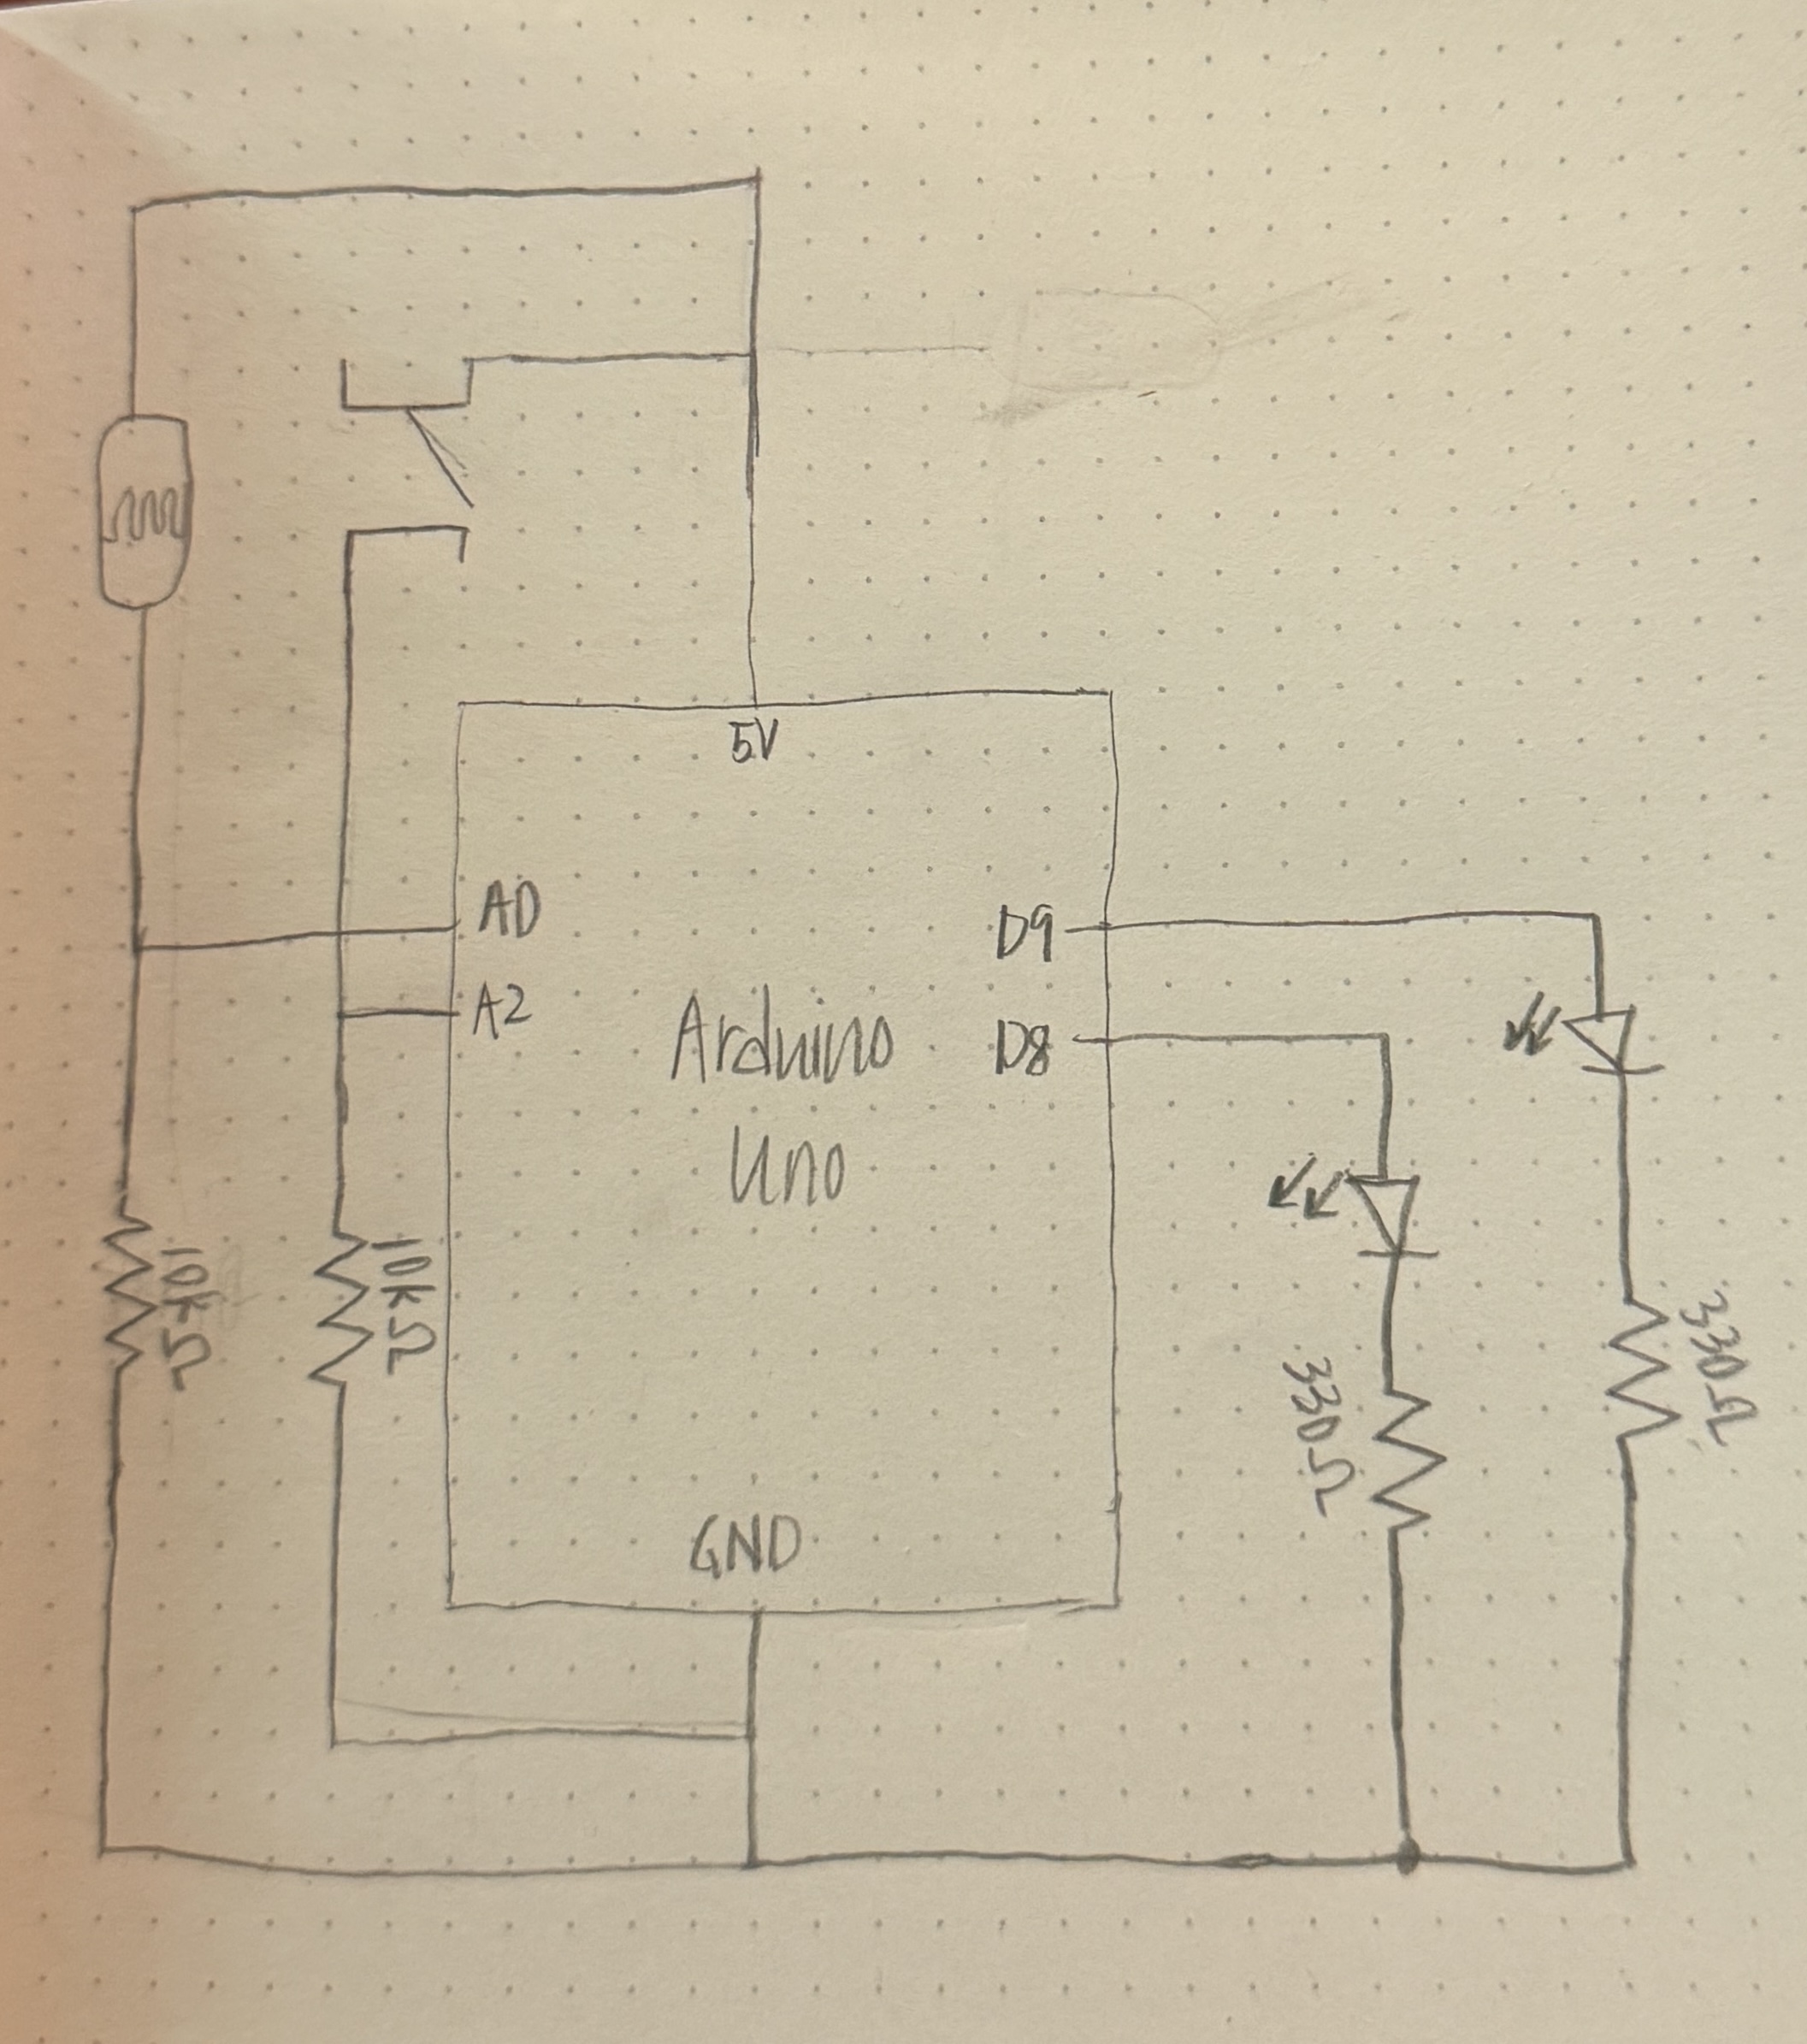
Hand-drawn schematic
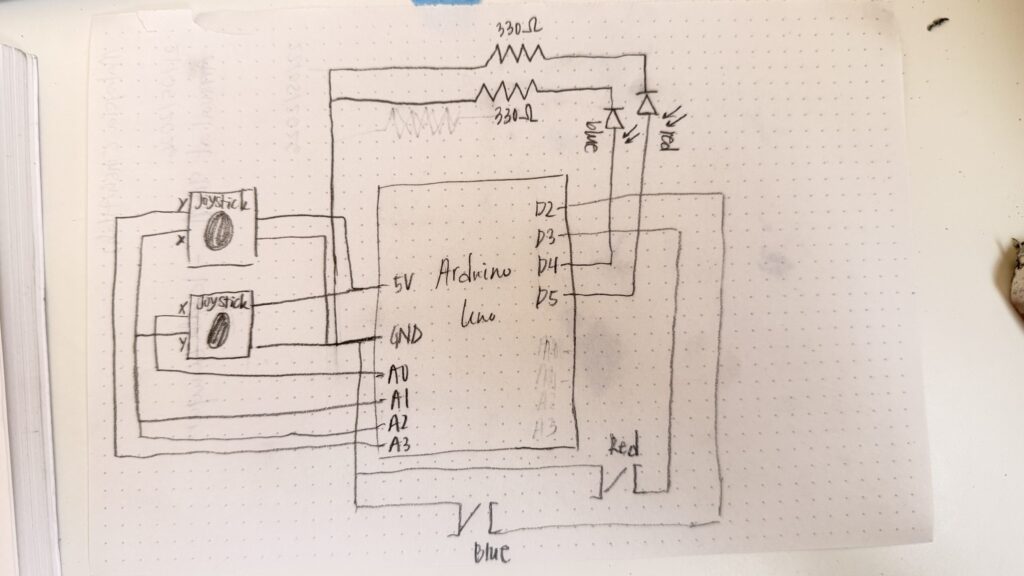
p5.js sketch

“How this was made” section explaining how the code was made and sources of media assets (i.e. use of tools, libraries, online sources, and AI)

I started working on the Arduino first. I experimented with different games, and followed online tutorials as well as the Starter Kit book to implement a few games to get me started.

To get familiar with the joysticks, I referred to this video. I referred to this to implement tap fast. There was probably a few other videos that I referred to here and there to resolve minor issues, however, I cannot find the links for them now.

Once I got the hang of each component individually and mastered a few games as one-player games, I started working on creating each game as a two-player game and connecting everything with p5.js. To get started with this, I followed the recording where you went over serial communication and made sure everything worked before jumping to my own games. Luckily, this wasn’t as difficult as I expected it to be!

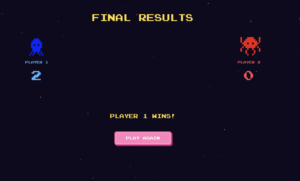
In my game, arduino handles all the physical inputs such as button presses, joystick movements, and runs the timing logic. These results are sent over serial to the p5.js sketch to be able to align the visuals, the different screens for each game, score updates, game states, and character movements. To manage the different phases of the game, I had an integer gamePhase which decided which screen to show at any point, 0 represents the main menu, 1,2,3 represents each mini-game, and 4 represents the final result screen. draw() checks the gamePhase variable at every frame and calls the right function to start that specific game, or switch to the main menu / final screen.

// current screen is based on the gamePhase
function draw() {
  
  // print(mouseX, mouseY);
  
  background(15, 10, 30);
  readSerial();

  if (gamePhase === 0) 
    drawMenu();
  else if (gamePhase === 1) 
    drawGame1();
  else if (gamePhase === 2) 
    drawGame2();
  else if (gamePhase === 3) 
    drawGame3();
  else if (gamePhase === 4) 
    drawOverall();

  if (gamePhase >= 1 && gamePhase <= 3) 
    drawScoreBar();
  if (showInstructions) 
    drawInstructions();
  
  // draw stars, each one pulses slightly using sin wave
  noStroke();
  for (let s of stars) {
    let alpha = 120 + 80 * sin(frameCount * 0.02 + s.x);
    fill(255, 255, 255, alpha);
    rect(s.x, s.y, s.s, s.s);
  }

  // serial communication
  function readSerial() {
    while (port.available() > 0) {

      let msg = port.readUntil("\n");
      if (msg) 
        handleSerial(msg.trim());
    }
  }
}

Also in the draw() function is the readSerial() function. This function reads any messages being send from the Arduino and sends it to handleSerial() which actually checks the text. Using JavaScript’s startsWith() and substring(), I extracted the needed data from each message.

// handles the serial messages between the arduino IDE and p5.js
function handleSerial(msg) {
  if (!msg || msg === "READY") 
    return;

  if (msg === "GAME:1") { 
    // assigns gamePhase to 1, and sets all related variables to starting values
    gamePhase = 1; 
    countP1 = 0; 
    countP2 = 0; 
    g1Winner = -1; 
    g1Start = millis(); 
    
    return; 
  }
  if (msg === "GAME:2") { 
    gamePhase = 2; 
    g2ScoreP1 = 0; 
    g2ScoreP2 = 0; 
    g2Round = 0; 
    g2Winner = -1; 
    g2State = "waiting";
    
    return; 
  }
  if (msg === "GAME:3") { 
    gamePhase = 3; 
    startGame3(); 
    
    return; 
  }

  // game 1 serial communication: 
  if (msg.startsWith("G1:A:"))     { 
    // gets the number after G1:A: which holds the player 1 count
    countP1 = int(msg.substring(5)); 
    return; 
  }
  if (msg.startsWith("G1:B:"))     { 
    // gets the number after G1:B: which holds player 2 count
    countP2 = int(msg.substring(5)); 
    return; 
  }
  if (msg.startsWith("G1:WIN:"))   { 
    // to store the winner of game 1 (1/2)
    g1Winner = int(msg.substring(7)); 
    return; 
  }
  
  // game 2 serial comms
  if (msg.startsWith("G2:ROUND:")) { 
    
    g2Round = int(msg.substring(9)); // gets round number
    g2State = "waiting";  
    
    return; 
  }
  if (msg === "G2:GO") { 
    
    g2State = "go"; // players can react now
    goTime = millis(); 
    
    return; 
  }
  if (msg.startsWith("G2:WIN:")) { 
    
    g2Winner = int(msg.substring(7)); // gets which player won
    g2State = "win"; 
    return; 
  }
  if (msg.startsWith("G2:EARLY:")) { 
    
    earlyPlayer = int(msg.substring(9)); // gets player who pressed early
    g2State = "early"; 
    return; 
  }  
  if (msg === "G2:TIMEOUT") { 
    
    g2State = "timeout"; // round timed out
    return; 
  }
  if (msg.startsWith("G2:SCORE:")) { 
    
    let s = msg.substring(9).split(","); // splits score into two values
    g2ScoreP1 = int(s[0]);  // first value is p1's score
    g2ScoreP2 = int(s[1]);  // second value is player 2
    return; 
  }
  if (msg.startsWith("G2:GAMEOVER:")) { 
    g2Winner = int(msg.substring(12)); // gets final winner for game 2
    g2State = "gameover"; // ends game 2
    return; 
  }
  
  // game 3 serial comms
  if (msg.startsWith("G3:JOY:")) { 
    
    let v = msg.substring(7).split(","); // splits joystick values
    
    // player 1 & 2 joystick values:
    joy1_x = int(v[0]); 
    joy1_y = int(v[1]); 
    joy2_x = int(v[2]); 
    joy2_y = int(v[3]); 
    
    return; 
  }
  
  // overall
  if (msg.startsWith("SCORE:")) { 
    let s = msg.substring(6).split(","); // splits total score
    scoreP1 = int(s[0]); // player 1 score
    scoreP2 = int(s[1]); // player 2 score
    return; 
  }
  if (msg.startsWith("OVERALL:"))  { 
    overallWinner = int(msg.substring(8)); // gets overall winner
    gamePhase = 4; // shows final screen
    return; 
  }
}

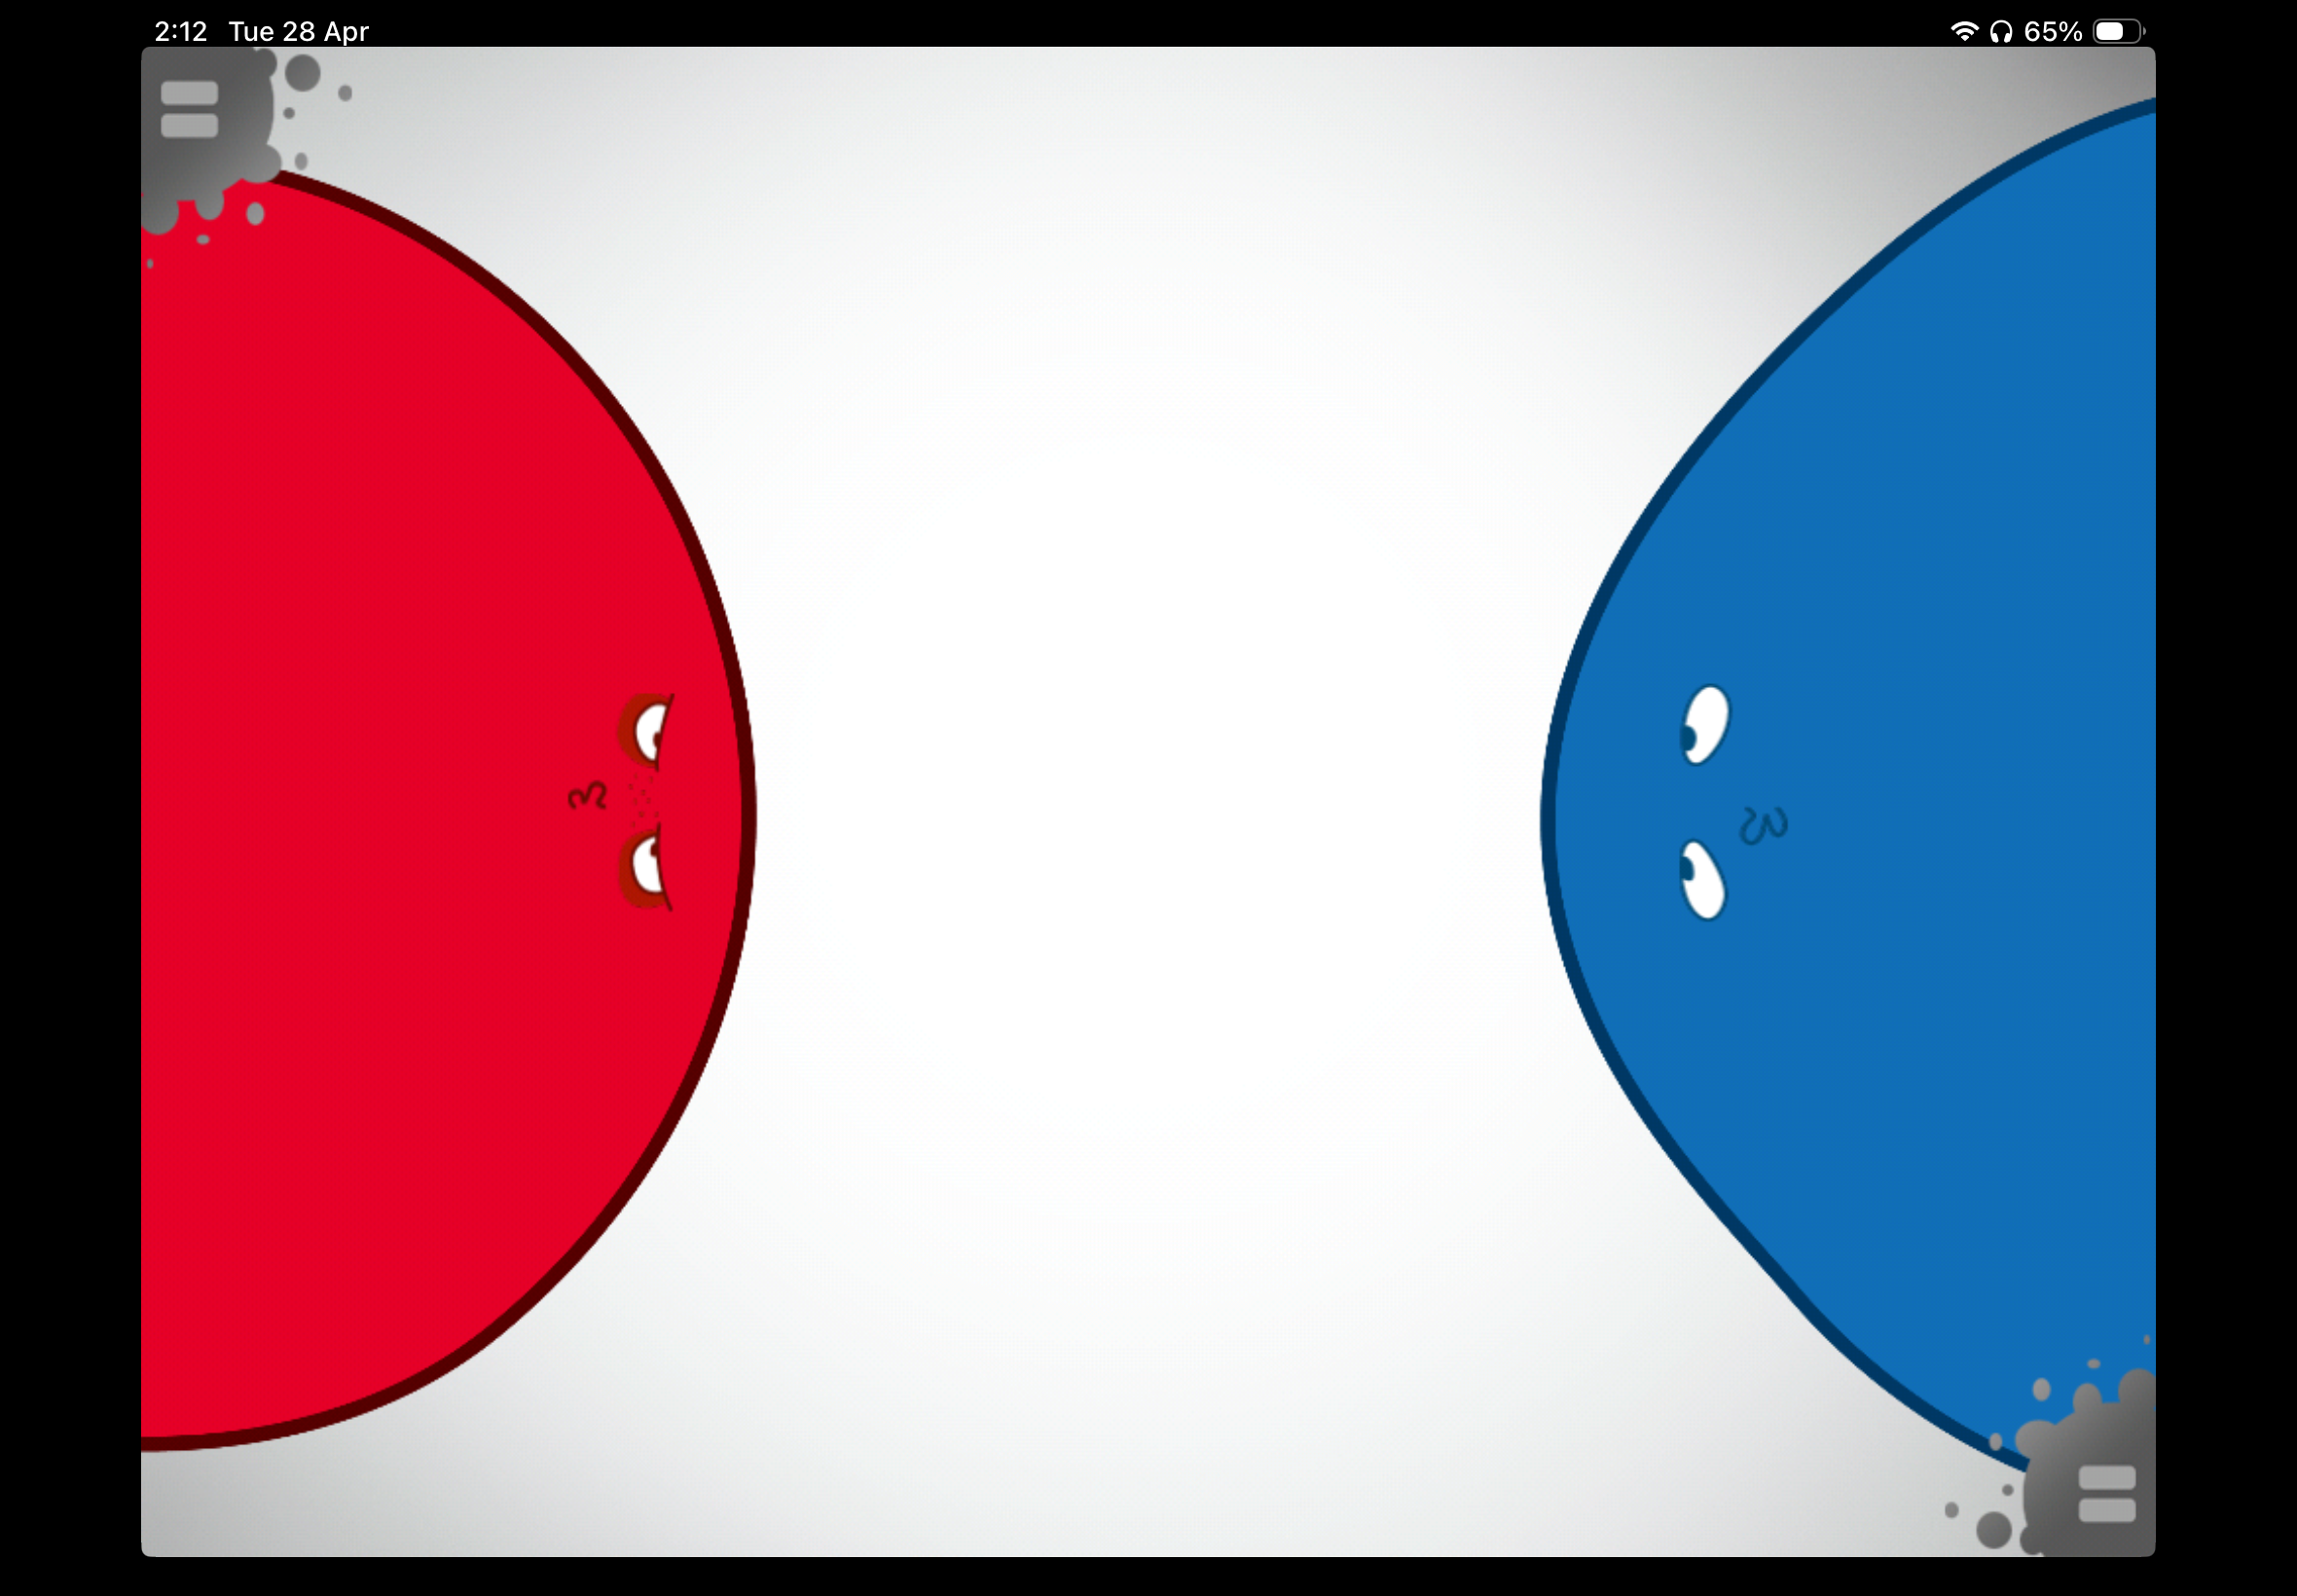
When the message “GAME:1” is sent, the game phase switches and shows each player’s character, their score, and the 10-second countdown begins. The Arduino reads button presses for each player and sends the updated score every time a button is pressed. p5.js displays these scores everytime it is updated.

The timer is calculated in p5.js using millis(); the start time of the game is stored in g1Start and then each frame the timeLeft is computed. When the time is up, the Arduino determines the winner and send the respective message. p5.js then displays the winner overlay and shows that winner.

// calculates how much time is left in the game
  // millis() gives the current time since the program started & g1Start is the time when game 1 started
  let timeLeft = max(0, g1Duration - (millis() - g1Start));
  
  // converts milliseconds to seconds
  let secs = ceil(timeLeft / 1000);

Game 2 starts when “GAME:2” is sent from the Arduino. Game 2 is a reaction time game played over 5 rounds. The Arduino controls the timing; it sends a “WAIT” state, and after a random delay sends “G2:GO” which updates the signal box. This matches up with the LEDs lighting up as well, so the players can look at either the LEDs or the p5.js sketch. Whoever presses first wins the round, however, if either player presses early, the other player gets the point (and if both players don’t press, neither player gets a point)

Game 3 probably took me the most time to build, and I did get some help from Claude for debugging purposes since it was getting a bit confusing. Almost all the functionality of game 3 is handled within p5.js. The players still use the physical joysticks to move their characters. The Arduino just sends the joystick values as four numbers (0-1023) and the p5.js handles the movements of the characters on the screen. Every frame, the joystick values are read converted to movement. To handle wall collision, I treated each character as a circle of 10 pixel radius. The circleRect() function checks if the closest point on the rectangle to the circle’s center is less than the radius of the circle. If so, then it calls resolveWalls() which handles the collision response. It checks horizontal and vertical movements separately. The goal zone for each player is the opposite player’s spawn point. I check if the players reach their goal using the dist() function, if the character is within 40 pixels of the goal’s centers, they win. If both players somehow reach at the same exact time, then it’s a draw.

// this function was written with some help from claude, mainly for debugging purposes
// checks the proposed new position (nx, ny) against all walls 
// returns [safeX, safeY] that doesn't overlap any wall
function resolveWalls(oldX, oldY, nx, ny) {
  let safeX = nx;
  let safeY = ny;

  // check the player against every wall
  for (let wall of walls) {

    // check horizontal movement
    // test new X, but keep the old Y
    if (circleRect(safeX, oldY, PLAYER_R, wall)) {
      // if nx > oldX, movement was to the right
      if (nx > oldX) {
        // places character back slightly to the left of the wall
        safeX = wall.x - PLAYER_R;
      } 
      else {
        // otherise, left movement; put player to the right of the wall 
        safeX = wall.x + wall.w + PLAYER_R;
      }
    }

    // checks vertical movement
    if (circleRect(safeX, safeY, PLAYER_R, wall)) {

      // downward movement
      if (ny > oldY) {
        // put the player just above the wall
        safeY = wall.y - PLAYER_R;
      } 
      else {
        // otherwise, upward movement; put the player just below the wall
        safeY = wall.y + wall.h + PLAYER_R;
      }
    }
  }

  // Return the corrected safe position
  return [safeX, safeY];
}
 
// returns true if a circle (cx, cy, radius r) overlaps rectangle w
function circleRect(cx, cy, r, w) {
  
  // closest point on wall to circle center
  let closestX = constrain(cx, w.x, w.x+w.w);
  let closestY = constrain(cy, w.y, w.y+w.h);
  
  let dx = cx - closestX;
  let dy = cy - closestY;
  
  // if distance is less than the radius, collision reported
  return (dx*dx + dy*dy) < (r*r);
}

I designed three different maze layouts, and the layout is randomized every game. Each layout uses fractional coordinates instead of fixed values to ensure it scales properly on any screen size. When the game starts, startGame3() converts the fractions to actual pixel sizes based on the current canvas size. If the user changes the screen-size during this specific game, the game restarts.

// convert fractional wall definitions to actual pixel rectangles
  walls = layout.walls.map(w => ({
    x: w.x * width,
    y: w.y * height,
    w: w.w * width,
    h: w.h * height,
  }));

As for the visual design of the project, the characters were inspired by the below image. I gave this image as a reference to Gemini and told it to generate just a red and blue character in a similar aesthetic (since I couldn’t remove the watermark).  Retro game characters Stock Photo - Alamy

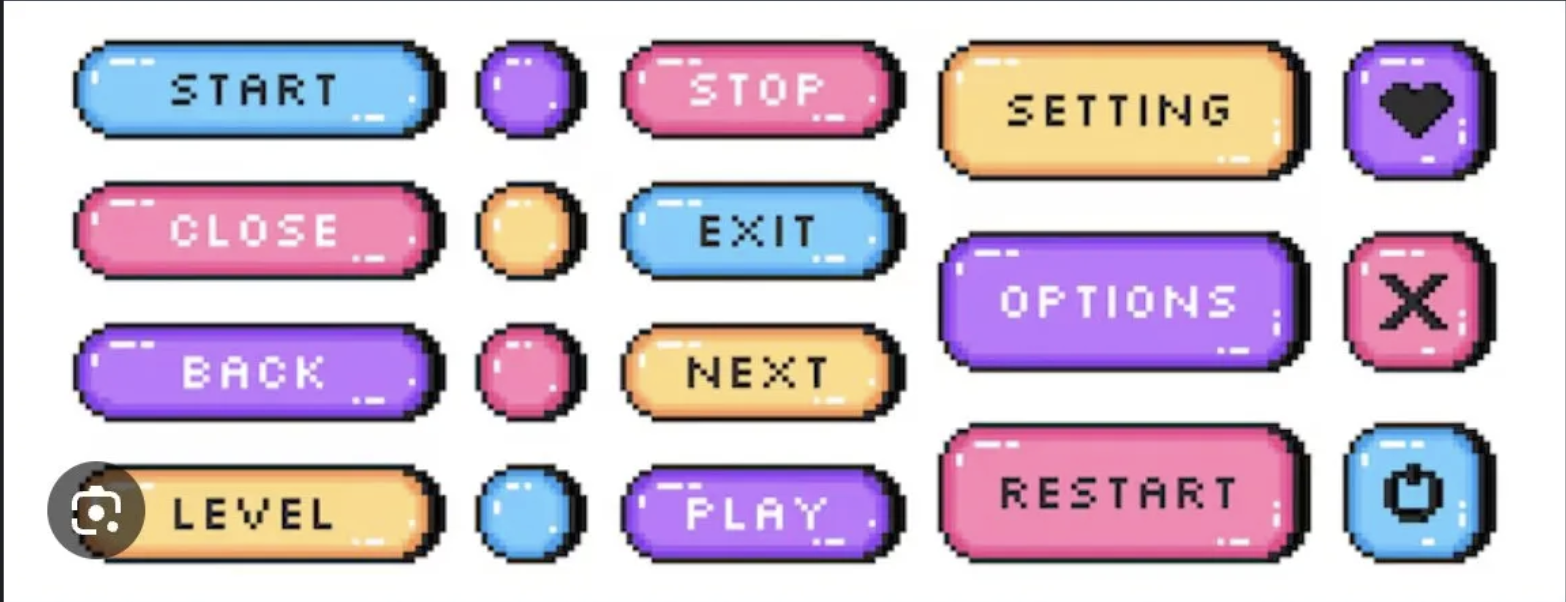
The font I used was from font space. The font, Press Start 2P, matched the arcade game aesthetic I was going for. For the buttons, I gave Claude an inspo pic from Google and it generated the buttons using code.

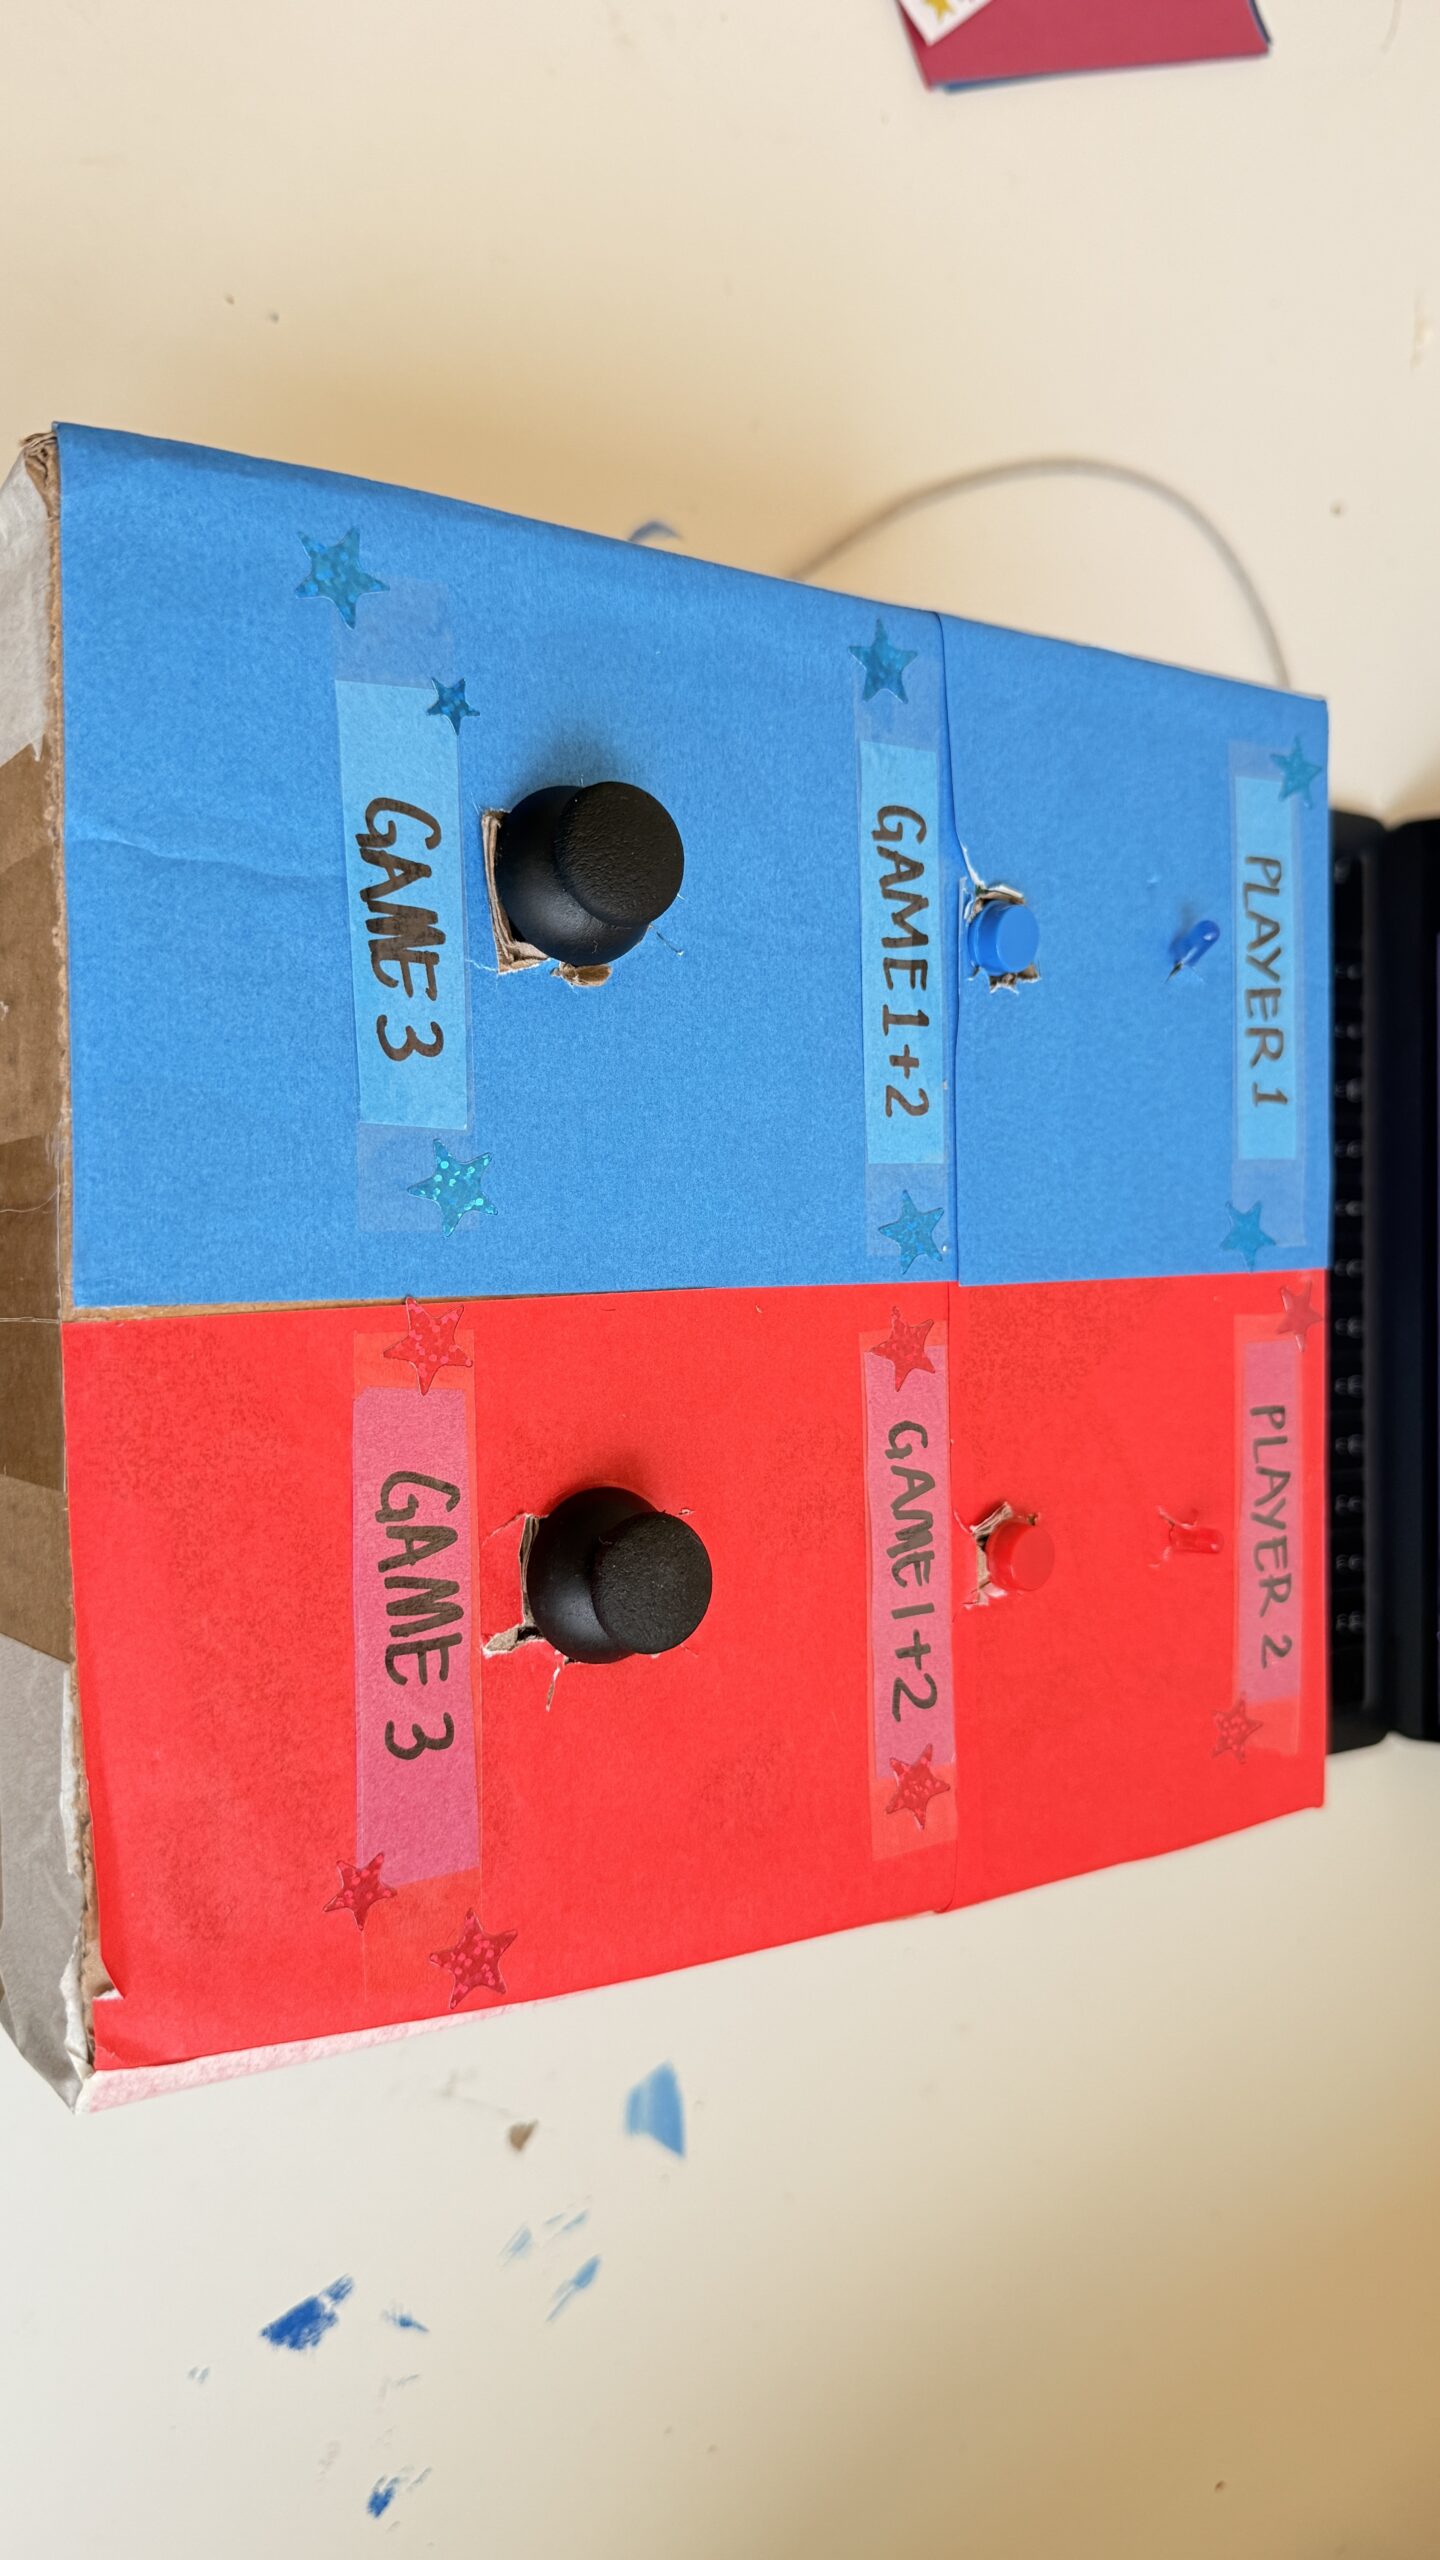
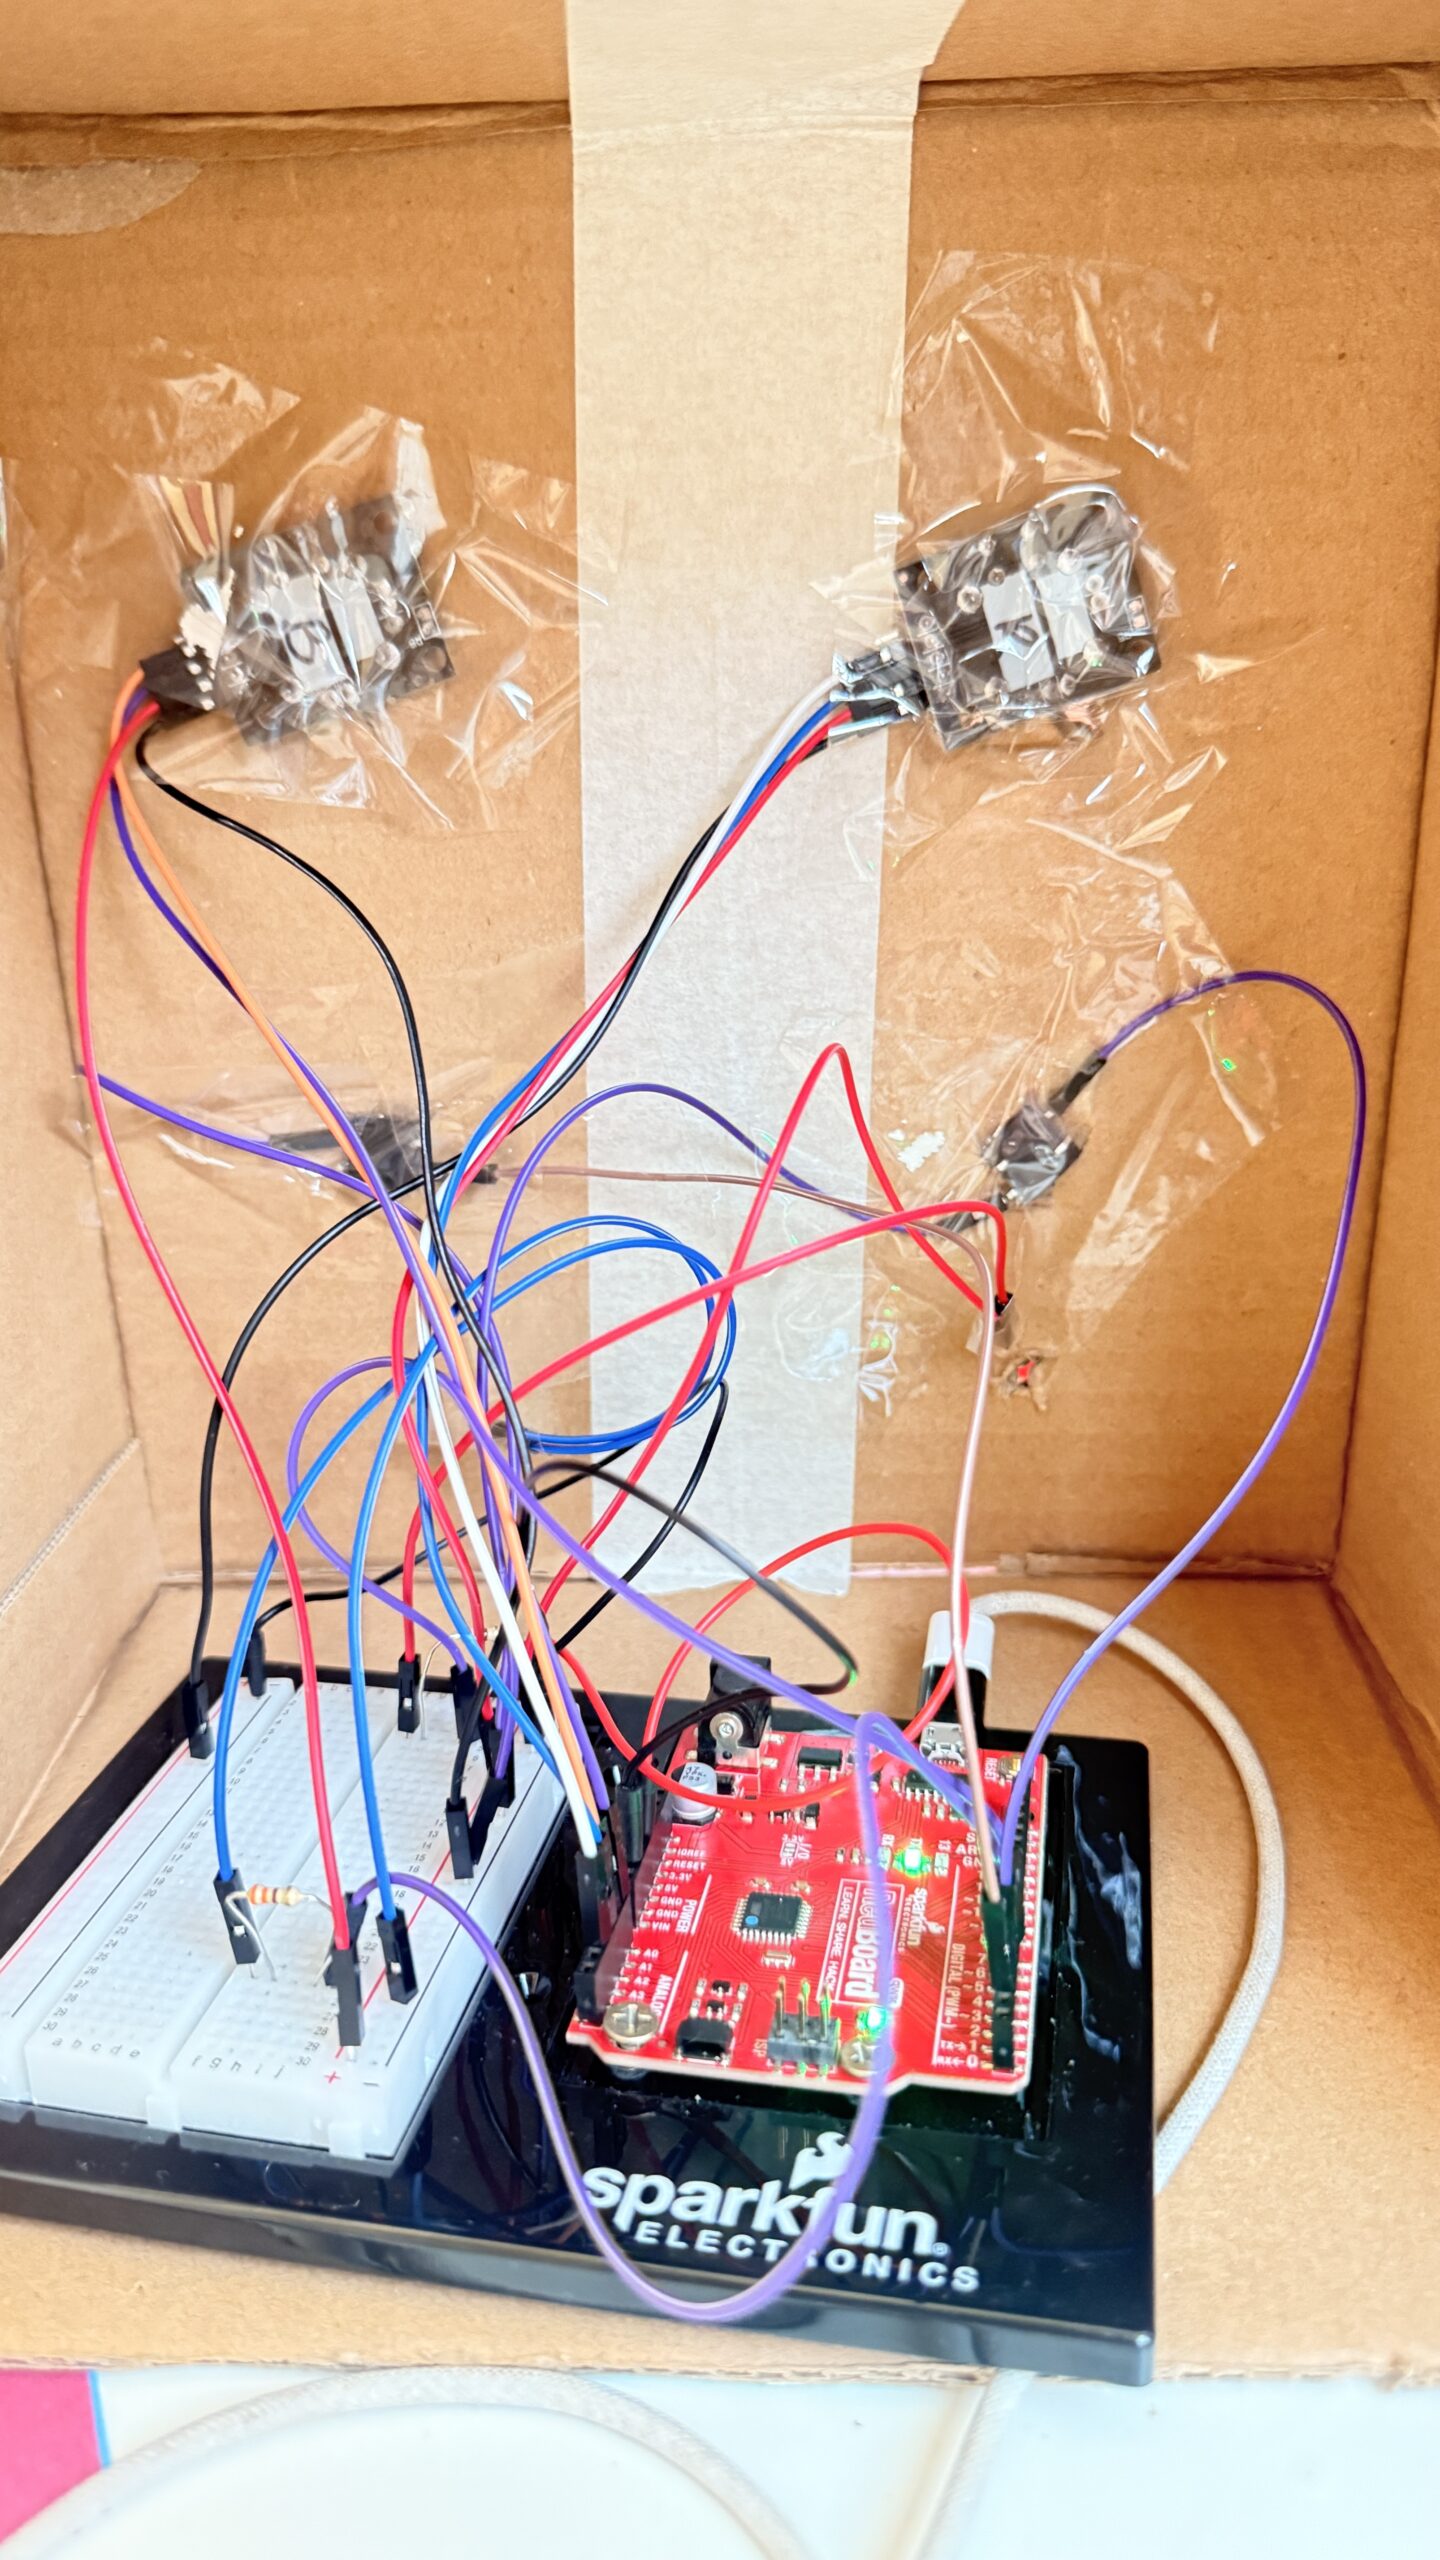
And for the physical aspect, I just used a cardbox I had at home, I used red paper on the right for player 1 and blue paper for player 2. I made “X” shaped cuts for each component that needed to be exposed and taped everything up from the back. I added labels to make it more intuitive and added some stars to match the faint stars in the background of my game.

This is what the box looks like from the back

What are some aspects of the project that you’re particularly proud of?

The main things I’m proud of for this project is the physical aspects. Arduino seemed really intimidating in the beginning, and I also really wanted to create a game that would actually be fun and easy to use. I expected the joystick component to be really difficult to work with, which it was in the start, but I was really excited when I got the hang of it and especially when everything connected to the p5.js sketch as well. Writing the code for so many components also felt intimidating but it actually turned out to be much easier than I thought, they’re all functions we’ve used individually before just combined into one game.

I was initially planning on just leaving my components on the breadboard with the wires exposed. However, the joysticks only working in a specific orientation motivated me to actually put all the components in a box to ensure the game is easy to use. Putting everything in the box was SO difficult, everything kept falling, the tape wouldn’t stick properly and it was a bit annoying to reconnect everything (I used male to female wires for this). However, I’m happy with how the final result came out and it definitely looks like something I would play in the IM Showcase!

What are some areas for future improvement?

I would’ve loved to also get the arcade look on my physical game to make everything look cohesive. I also had more ideas from my p5.js sketch to personalize the design more and maybe draw my own characters, allow the players to choose between different characters, and so on. I would also love to add more mini-games and the memory game! I was really excited about implementing the memory game when I did in as a one-player game, but it was too complicated for two-players. I also did initially have buzzer, which added to the experience since there was an audio feedback, however, unfortunately my buzzer broke at the last minute (one of the pins broke). I think this could be resolved by either adding another buzzer OR using audio on the p5.js sketch. However, for now, it was difficult to find different, appropriate audios in a short-time frame, but this could be something for future imrpovements.

Week 13 – User Testing

My game is a two-player game, so I tested it on my younger brother and my mom. I gave them only brief instructions to give them some context, I informed them that it’s a two-player game, that they would use the buttons for the first 2 mini-games and the joysticks for the last game. For the first game, I just read out the text on the screen (TAP FAST) and they found it easy from there. I think what helped here is the feedback from the LEDs as well as their score going up live on the screen. Having some kind of responsive feedback reassures the user that they’re doing it correct. For the second game, I also read out the text on the screen (REACT FAST) and explained what they were reacting to (the LEDs lighting up). This explanation was sufficient for them to get the idea of the game. In addition, the responsive feedback from the LEDs and the text on the screen did guide them through the game.

The final game, and the one that probably needs the most improvements, is the maze. For this game, I did have to explain a bit more, specifically that they would need to move their characters using the joystick. A problem I’ve been having with the joysticks is that when they’re not held correctly, the movement direction is all messed up. That’s something I hope to fix by fixing how my project is presented, and manually orienting the joystick correctly so that it works as expected. Despite this, my mom was able to cross the maze and get to the other side. One other thing that I need to fix is the p5.js sketch for this specific game, I think the maze needs to be a lot bigger in size and probably have just one valid path so that it’s a speed-based competition to match the vibe of the other games.

I think adding brief instructions on the p5.js screen would guide my users better. Overall, my p5.js sketch is not fully complete yet, I’m still planning to change the aesthetics of the game and make the whole experience more seamless. There’s also some miscoordination between the which player is on which side, depending on how I orient the breadboard. So, in addition, changing the presentation of my arduino would also solve a few issues and make the game look more fun and less intimidating.

Video of my mom and brother attempting my game, I’ve just included short clips from each mini-game: user testing

Week 12 – Final Project Proposal

Finalized concept for the project

My idea for the final project is inspired by a game I used to play a lot as a kid, Virus vs Virus. It’s not a very popular game and can only be played on iPad, so I’ll include some images & videos below of the gameplay to give an idea of my inspiration. To summarize, Virus vs Virus is a multi-player game that consists of many mini-games, the mini-games range from memory games, mazes games, and speed games. It has over 10 mini-games that are all pretty straightforward.

I want to reimagine the game in a physical way and integrate at least three mini-games into my final project. The general idea is still the same, it would be a multiplayer game and the winner is whoever wins the most mini-games.  I plan on re-creating 3-4 mini-games and probably edit them to match a physical implementation. I anticipate needing to order more components, such as a joystick controller. I also want to use different characters (not viruses!), and so far, the main idea I have in mind is inspired by an Instagram creator who creates mugs inspired by people’s faces. However, my game would probably not have customizable features but rather just 2-4 static characters to choose from.

The specific games I’m thinking of implementing are below. I would love to implement additional games, however, for now, I’m trying to narrow it down to keep it more achievable and less overwhelming. For each one, I’ve included a short description of what this would look like:

The first game consists of the users tapping as fast as they can on their virus for it grow to the largest size. The virus that fills up the full screen first is the winner. I hope to redesign this game using the Arduino by using either buttons or possibly, the ultrasonic sensor. 

The next game is a memory game. The players are shown number cards in a random order for a short amount of time, then, they are all flipped and the players must click on them in the right order. Everytime both players get it right, the number of cards increase. If either players get it wrong, the other player wins. And if both players get it wrong, that same level is just repeated again. I plan to simulate this using Arduino by using LEDs and buttons.

Finally, the last game is a maze. The players just have to get their virus to the other side in the fastest time and without touching the spiky black viruses. I hope to implement this in Arduino by using joystick controllers (which I would need to order).

The p5.js sketch would support the Arduino by showing the visuals for the players. Simply giving users the Arduino board would most likely be confusing, hence, I would use the p5.js screen to display instructions, as well as portray the movements the users are making using the Ardunio components. I’m planning to create a few prototypes on Canva to visualize my ideas and choose a style to go with for my final project.

At the moment, the most challenging part is the serial communication between the Arduino and the p5.js sketch. To overcome this, I’m planning to go through the notes on GitHub and complete the assignment that’s on WordPress to become more familiar with how it works.

Week 12 – Creative Reading Response

The first thing that came to mind from this reading is the designer, Destiny Pinto. She was diagnosed with rheumatoid arthritis which required her to wear compression gloves to manage the pain and swelling. However, this gloves looked too “medical” and implied that it should be hidden or that one should be ashamed to wore it. She decided to break this sterotype and redesign the gloves to make them look more stylish and personal. Eventually, she expanded this idea to other assistive devices and launched her label, By Destiny Pinto. She redesigned and reimagined widely used assistive devices such as compression gloves, ostomy bags, and hearing aids through a more fashion-oriented perspective.

The reading made me rethink her label and its purpose, is she trying to hide the disability through redesigning them? Or is she empowering people to be proud of their disabilities? In my opinion, I think her line allows people to feel more empowered and removes that restriction of having a medical devices that doesn’t match your style, but rather, that adds to your outfit. Instead of trying to hide your medical device, it becomes your unique statement piece.

Another discussion that I found interesting in the reading are glasses, and them being considered a disability device. Of course, as the reading states, this is not a disability device that stigmatised or honestly, even referred to as a disability device. Eyewear has also slowly become more and more of fashion piece and an accessory, even people who don’t need glasses wear them. Personally, I’m someone who does wear glasses and has been for almost my whole life. I still vividly remember being really excited about wearing glasses and then also getting mocked and called a nerd for wearing them. However, luckily as I’ve grown up, I’ve become more confident with my glasses and I really enjoy purchasing a new pair every few months. I have also recently started wearing contact lenses but I still find myself missing my glasses!

Week 11 – Reading Response

I really enjoyed this week’s readings, especially his response to people’s response as it was quite entertaining to read.

Firstly, I did find myself agreeing with the initial arguments. I personally think it’s sad to see technology taking over everything. For instance, in the video, the person’s glasses translates the announcements. While, of course, this is convenient, I think it takes away from the normal human experience of asking someone for directions, and struggling to understand one another, but still find that human bond. This might be a bit nit-picky, but I feel like if humans have lived till now without all this technology, then maybe not everything needs to be changed.

Another thing that I thought of, that can kind of be used for both sides of the arguments, is disability and accessibility. Blind and deaf people heavily rely on their sense of touch to do most everyday tasks, for example, when pouring water they can feel when the cup is getting lighter. However, on a similar note, technological advancements have also been essential for other disabilities, for instance, someone with limited hand dexterity can find it easier to user their voice to do some tasks, rather than using a keyboard or a screen. This isn’t an argument that the author brought up, however, it’s something that immediately came to mind for me and I was surprised it didn’t come up.

Overall, despite literally being a Computer Science major who’s whole career path is probably going to be linked to technological advancements and AI taking over the world, I still really feel like it’s important to take a step back and observe whether something really needs to be digitalized and technologized and AI-fied. I might have strayed away from the topic of the reading, but I feel it all is strongly linked.

Week 11 – Production Assignment

Your concept

For this assignment, I wanted to explore the switch that comes with our kit. Till now, I had only used the buttons as a digital sensor, and I wanted something that can allow the user to turn on/off the buzzer without needing to press on it continuously. I also wanted to use the potentiometer to explore how I can reduce and increase the volume of the buzzer.

Hence, the circuit I ended up with includes all these elements. I wasn’t sure how to go about making my own melodies, especially with no music experience. So I referred to this GitHub repo that included many popular songs, and then edited the melody to only play the chorus of Hymn for the Weekend by Coldplay.

Schematic & Circuit

Video: IMG_8249

Code
#include "pitches.h"

const int buzzerPin = 10;
const int switchPin = 2;

int switchState;

int melody[] = {
  NOTE_DS5, NOTE_D5, NOTE_DS5, NOTE_C5, REST,   
  NOTE_DS5, NOTE_D5, REST,
  NOTE_F5, NOTE_DS5, REST,
  NOTE_DS5, NOTE_D5, NOTE_DS5, NOTE_C5, REST,
  NOTE_DS5, NOTE_D5, REST,
  NOTE_F5, NOTE_DS5, REST,
  NOTE_DS5, NOTE_D5, NOTE_DS5, NOTE_C5, REST,
  NOTE_DS5, NOTE_D5, REST,
  NOTE_F5, NOTE_DS5, REST,
  NOTE_AS4, NOTE_C5, NOTE_AS5, NOTE_GS5, NOTE_G5, NOTE_G5,
};

int durations[] = {
  4, 4, 4, 2, 4,
  4, 2, 4,
  4, 2, 2,
  4, 4, 4, 2, 4,
  4, 2, 4,
  4, 2, 2,
  4, 4, 4, 2, 4,
  4, 2, 4,
  4, 2, 2,
  4, 4, 4, 2, 2, 1,
};

void setup() {
  pinMode(buzzerPin, OUTPUT);
  pinMode(switchPin, INPUT_PULLUP);
  pinMode(LED_BUILTIN, OUTPUT);
}

void loop() {
  
  switchState = digitalRead(switchPin);

  if (switchState == HIGH) {
    int size = sizeof(durations) / sizeof(int);

    for (int note = 0; note < size; note++) {
      // re-reads switch at every note
      switchState = digitalRead(switchPin);
      if (switchState == LOW) {
          noTone(buzzerPin);
          // digitalWrite(LED_BUILTIN, LOW); // used to debug
          break; // exit the loop immediately
    }

    // to calculate the note duration, take one second divided by the note type.
    int duration = 1000 / durations[note];
    tone(buzzerPin, melody[note], duration);

    // to distinguish the notes, set a minimum time between them.
    int pauseBetweenNotes = duration * 1.30;
    delay(pauseBetweenNotes);
    }
    // digitalWrite(LED_BUILTIN, HIGH);
  } 
  else if (switchState == LOW) {
    noTone(buzzerPin);
    // digitalWrite(LED_BUILTIN, LOW); 
  }

}
Code I’m proud of
if (switchState == HIGH) {
    int size = sizeof(durations) / sizeof(int);

    for (int note = 0; note < size; note++) {
      // re-reads switch at every note
      switchState = digitalRead(switchPin);
      if (switchState == LOW) {
          noTone(buzzerPin);
          // digitalWrite(LED_BUILTIN, LOW); // used to debug
          break; // exit the loop immediately
    }

I’m proud of this specific section of code as I was having trouble with ensuring that when the switch is in LOW state, the buzzer actually turns off. Initally, I didn’t have the code to check the switchState within the for loop for the notes. So, the buzzer would never stop (unless the switch was already on LOW in the start). Eventually, I figured out that I need to check the switchState between each note to check if the user has changed the switch.

“How this was made” section explaining how the code was made and sources of media assets

To understand how to use the switch and connect it in my breadboard, I referred to this video: https://youtu.be/0ZXYRU9KPG8?si=vtY1plmUuqMY7i48. Through this video, I also understood how to write the code so that I can have the buzzer be silent when the switchState is changed and vice versa.

For the melody and generating the music, I referred to https://projecthub.arduino.cc/tmekinyan/playing-popular-songs-with-arduino-and-a-buzzer-546f4a and the GitHub repo above for the specific song that I wanted. I only edited the melody to play just the chorus section sicne the whole song was a bit too long, and honestly, my favorite part of this song is the chorus.

Reflection and ideas for future work or improvements

One possible improvement I thought of after finishing my circuit was adding buttons to switch between songs. I guess like a mini radio station. I think this is probably feasible with buttons but that can be plan for another time.

Week 10 – Production Assignment

Your concept

I created an arduino that responds to light using the photolight sensor. When the room is dark, the LEDs automatically turn on. Alternatively, the user can also press on the button to turn on the LEDs, however, they only remain lit up as long as the user presses on the button.

Schematic

Video of the circuit
IMG_7822
How this was made

I referred to the class notes and schematics to create the photolight sensor part of the circuit. Similarly, for the switch, I also referred to class notes. In order to get the response of the LEDs when the room gets dark, I put a specific threshold in the code, and when the the sensor reading is below that threshold, the LEDs turn on. The switches responsiveness was similar to exercises we did in class.

Code
int photoresistor = 0;              // this variable will hold a value based on the brightness of the ambient light
int threshold = 500;                // if the photoresistor reading is below this value the the light will turn on

void setup()
{
  Serial.begin(9600);              // starts a serial connection with the computer
  pinMode(A2, INPUT);             
  pinMode(8, OUTPUT);
  pinMode(9, OUTPUT);             // set pin 8 & 9 as an output that can be set to HIGH or LOW
  pinMode(13, OUTPUT);            // used pin 13 to troubleshoot since sometimes my LEDs wouldn't be connected correctly
}

void loop()
{
  //read the brightness of the ambient light
  photoresistor = analogRead(A0);   // sets photoresistor to a number between 0 and 1023 based on how bright the ambient light is
  int switchPosition = digitalRead(A2);

  Serial.println(photoresistor);    // print the value of photoresistor in the serial monitor on the computer

  if (switchPosition == HIGH || photoresistor < threshold) {
    digitalWrite(8, HIGH);   // turn the LED on (high voltage)
    digitalWrite(9, HIGH); 
    digitalWrite(13, HIGH);
  } else  { 
    digitalWrite(8, LOW); // turn the LED off by making the voltage LOW
    digitalWrite(9, LOW);
    digitalWrite(13, LOW);
  }
}


Reflection and ideas for future work or improvements

I’m proud that I was able to get the circuit to actually work and be responsive! As simple as it seems, I was really struggling to do a simple circuit with a switch and one LED, my connections were all not working and it was not being responsive at all. Hence, I’m really happy I was able to incorporate multiple inputs and outputs in the end.

There are a few improvements I can think of for this circuit. For starters, I think I should’ve used different components and edited the code so that when the user presses on the switch, the LEDs stay on until user presses again. Another possible improvement is allowing the user to turn off the LEDs using the switch when they’re on due to the photoresistor. I think this would require me to play around with the code more and possibly user others components from the kit. I also hope to get more creative with my circuits and have more unusual interactions in the future.

Week 10 – Creative Reading Response

Physical Computing’s Greatest hits and misses

I really enjoyed going through the different themes of physical computing in this article. I felt that I got a lot of inspiration and ideas about possible project ideas, and the explanations provided for each concept really simplified how implementing this idea in practice would look like. Looking through these examples felt like when I would look through past student’s projects on this WordPress. And I’ve also felt that everytime I see an idea that’s been done, it feels like I can’t do that idea anymore either. However, as the author pointed it out, it’s always nice to re-imagine ideas in new contexts, think of new interactions, and as a lot of us did for our midterm projects, link it back to our identity and cultures.

Some themes especially stuck out to me from this article, and I hope to be able to implement them in some way in my work in the future. First, Floor Pads! I love it when a coding project goes way beyond the screen or the usual hardware of wires and buttons. Especially when something is more prominent and unusual, it definitely captures more attention. And something like Floor Pads where there’s movement and a lot of viewer interaction involved can be especially fun. Likewise, Body-as-cursor and Hand-as-cursor are two other themes that stuck out to me for similar reasons. Finally, Things You Yell At was another fun theme, and something I’ve seen a lot at previous IM Showcases. I feel like another common aspect among these themes is that there is no learning curve to understand how it works, you kind of just experiment with it till you get it, usually it’s pretty straightforward.

Making Interactive Art: Set the Stage, Then Shut Up and Listen

This article made some great points, throughout this class, we’ve spoken a lot about interactive art, what makes it interactive and how to guide users through these interactions. I really appreciated the points it made about allowing your viewers to experiment with the art, rather than force them into the interactions you’ve planned out, allowing them to discover it themselves can be more fun. As the author states, an important part of interactive art is to listen. I think it can be eye-opening to see how viewers look at your art. Especially as most artists spend hours and hours just looking at their work, editing every little detail, and creating everything from scratch, it can be hard to zoom out and see the bigger picture and experience the art through fresh eyes. Hence why it’s important to see how others interact with your work, take it as feedback, maybe just by watching how others interact, you can get new ideas and make edits to your work.

Week 9 – Reading Response

Her Code Got Humans on the Moon

I really enjoyed this reading, learning about Margaret Hamilton and her impressive contributions to the field of software engineering, especially at such a young age is truly inspirational. As someone who semi-aspires to be a software engineer, but sometimes feel that it’s not a welcoming environment for women, this reading really changed my perspective and gave me some hope and motivation. A few things stood out to me in this reading. First, Margaret felt a lot of pressure to avoid any mistakes. Mistakes are normal, but obviously, in such a high stakes environment, any mistake can be catastrophic. More than that, if she made a mistake, it would only worsen the image about women in “male-dominated fields,” and it would set a bad impression for future women scientists. For instance, the reading mentions a time where she suddenly remembered a bug in the code one late night, and immediately went to fix it, out of fear that any mistakes in the code would be blamed on her is a sad, but plausible scenario. Despite it being a team effort working on the Apollo software, any mistakes would’ve most likely pointed back to her. Luckily, that didn’t happen!

Another thing I found interesting is her attention to detail, implementing back-up plans for any scenario. Even when others on her team claimed that no astronaut would make such mistake, she still insisted on planning for every worst-case scenario. And it paid off. This reminds me of whenever I if-else statements, sometimes even though there are only two possibilities (true or false, for example), I still feel the need to write the second statement as an else if, JUST IN CASE. Obviously, this isn’t the same thing, but this two situations kind of related in mind.

Norman,“Emotion & Design: Attractive things work better”

This reading made me reflect on a lot of everyday things that we use. While I cannot think of any examples of the top off my head, I’m sure there are so many times where I’ve chosen the more aesthetic item, even when it is not functionally better. I think social media trends also contribute to these phenomena nowadays. Overall, I think Norman brings up some great points about how there sometimes always a trade-off between functionality and aesthetics, even though that is not necessary. His example about tools used during hazardous and stressful situations make sense, I guess that’s probably why emergency exits and fire extinguishers all look the same and work the same. Most emergency exit doors are “push” doors because that’s the fastest way to get everyone OUT, and it’s important that any tools needed to facilitate this escape are standardized and straightforward to use (fire extinguishers, ‘hammers’ in buses to break the window, etc.).

However, the balance between functionality and aesthetics still stands in calmer situations. Let’s say someone wants to pick up a new hobby and they buy a pottery kit. The packaging is aesthetic, the brand is well-known and trendy, and everything LOOKS good. Then, they go home and try to start working on their new pottery and nothing makes sense. The instructions are so short because they were trying to keep a minimalist aesthetic, and everything is organized really well but the user does not understand how to use anything. Now, this calm situation has become a frustrating one because what was supposed to be a relaxing, unwinding evening is now a confused, annoyed evening. This might not be what Norman meant by his explanations, but this is kind of what I understood. And this continues to apply in so many aspects of life, when an app developer makes a new app, the interactions should be built on user standards and shouldn’t require the user to think twice, or else the user will just delete the app and go back to what they know. The learning curve to adapt to something new shouldn’t be so high that the user abandons the experience.

Week 8 – Midterm Project

Sketch link!

Describe the overall concept of your project (1-2 paragraphs)

My project is a puzzle solving game with an “Ancient Egypt” theme. I wanted to have theme that related to me and since I’m Egyptian, this theme only made sense. Initially, I planned to use cartoon-like images of landmarks in Egypt, but I couldn’t find any images online of what I wanted or there wasn’t enough variety. I also can’t draw so I ended up just using realistic images instead (which I think I found through a website called freepik, but it was so long ago that I don’t even remember anymore). I had a rough plan of how I wanted the different screens within the game to look like in Canva (included in my midterm progress documentation), most things stayed the same in my final project. I found a font online called “khamenet,” which I decided to use throughout. I feel that this really added to the vibe of my project. 

As for the game aspect, I settled on having each piece just be a square, rather than actual puzzle shaped since that would’ve been too difficult to code. The user can move the pieces around using their mouse. I didn’t add any instructions for my game as I felt it was self-explanatory, I tested it with my siblings and they both were able to play the game without any instructions. The only thing that I needed to point out was the ‘peek’ button. The peek button allows the user to see a preview of what the image they’re putting together looks like on the board itself. Initially, I was planning to just have a small reference image at the bottom of the screen, however, the peek overlay option ended up being more helpful and looks more seamless than having something in the corner. While the user plays, there’s background music and a ‘ding’ whenever a piece is placed correctly, if the user turns of the sound, both of these audio elements are muted/stopped. In addition, while the user plays, the game keeps track of the time taken, number of pieces placed, and number of moves taken. Finally, at any point, if the user gives up, they can press the menu button at top right to go back to the main menu. If they do not give up and complete the puzzle successfully, there’s a victory cheer (called a zaghrouta) that plays as well as an ending screen with their time taken. They can press anywhere to restart.

Describe how your project works and what parts you’re proud of (e.g. good technical decisions, good game design) 2-3 paragraphs

For the start screen, the main interactions are choosing the image and the difficulty level. The user can select each of these elements by clicking on them using the mouse. If the user presses within the coordinates of the element, their choice is recorded and the game proceeds accordingly. By default, if the user does not click on anything, the first image is selected and the difficulty is easy. The user can see which option is selected as the selected image has a border around it and selected difficulty is darker in color. Finally, the user starts the game by pressing within the boundaries of the lines around the work “START”. As long as the user is on the start screen, there is some music in the background.

I’m really proud of the aesthetic and the look of my start screen, since I wasn’t sure how closely I would be able to match the idea I had put together on Canva. However, luckily everything came together really nicely. I was really happy with the visual feedback to the user selecting the image and difficulty.

On the game screen, there’s a puzzle board on the left where the user puts the pieces together, a piece tray on the right where all the pieces start out scattered, and a few buttons at the top to control different things. First, top left, there’s the peek button. This button (as described earlier) allows the users to see a light preview of the full image overlaid on the puzzle board. I’m really proud of this element since I didn’t really have a plan of how I wanted to display the preview, so the fact that in the end, it ended up being something so simple is really nice.

// shows a preview of the image being solved, as a background 
function drawPeekOverlay() {
  let img = getSelectedImage();
  if (img) {
    push();
    tint(255, 70);
    imageMode(CORNER);
    image(img, 10, 120, 600, 600);
    pop();
  }
}

Next to the peek button is the volume button which simply either toggles all the sound on or off, which includes the correct ding sound and the background music. A possible improvement is keeping the ding sound audible even when the user silences the music since I feel like that audible feedback can be more helpful.

In the middle at the top there’s an info bar that tracks the time elapsed, how many pieces have been placed out of the total, and the number of moves taken. The time elapsed is tracked by calculating the difference between millis() and the startTime that was recorded when the puzzle began, and counts placed pieces by looping through the pieces array each frame. Finally, on the top right, there’s a menu button which simply takes the user back to the start screen at any point.

As for the actual puzzle, when buildPuzzle() is called it creates a PuzzlePiece  object for every cell in the grid and scatters each one at a random position inside the tray using random(). Each piece stores which row and column it belongs to, so it knows its exact target position on the board. The drag and drop system uses three separate p5.js mouse functions working together: mousePressed() picks up the topmost unplaced piece the user clicked on by looping backwards through the array, mouseDragged() updates the piece’s position to follow the mouse every frame, and mouseReleased() drops it and calls trySnap() which checks if the piece landed within 30 pixels of its correct target — if it did, it locks into place exactly and the border around it turns green. The dragged piece is always moved to the end of the pieces array so it draws on top of everything else. When all pieces are placed, the background music stops, the zaghrouta audio plays, and the state switches to WIN which triggers the win screen on the next frame.

class PuzzlePiece {

  constructor(id, col, row, cols, img) {
    this.id = id;
    this.col = col;
    this.row = row;
    this.cols = cols;
    this.img = img;
    
    // calculate piece size based on the no. of cols and board size
    this.w = 600 / cols;
    this.h = 600 / cols;

    // current position, updated in buildPuzzle
    this.x = 0;
    this.y = 0;
    
    // target position (where the piece actually belongs on the board)
    this.targetX = 10 + col*this.w;
    this.targetY = 120 + row*this.h
    this.isPlaced = false;
}
draw() {
    push();
    // draw the actual image slice
    if (this.img) {
      let sliceW = this.img.width / this.cols;
      let sliceH = this.img.height / this.cols;
      let sliceX = this.col * sliceW;
      let sliceY = this.row * sliceH;

      imageMode(CORNER);
      // draw slice at current this.x and this.y
      image(this.img, this.x, this.y, this.w, this.h, sliceX, sliceY, sliceW, sliceH);
    }
    // draw border based on 'state'
      noFill();
      if (this.isPlaced) {
      stroke("#2a7a2a"); // green, if correct
      strokeWeight(3);
    } else if (this === dragging) {
      stroke("#e59828"); // orange, if being moved
      strokeWeight(3);
    } else {
      stroke("#6b2705");
      strokeWeight(1);
    }
      rect(this.x, this.y, this.w, this.h);
      pop();
    }

    // check if the mouse is touching this specific piece
   contains(mx, my) {
    return mx > this.x && mx < this.x + this.w && my > this.y && my < this.y + this.h;
  }
// snap logic
  trySnap() {
    let d = dist(this.x, this.y, this.targetX, this.targetY);
    if (d < 30) {
      this.x = this.targetX;
      this.y = this.targetY;
      this.isPlaced = true;
      return true;
    }
    return false;
  }
}
Describe some areas for improvement and problems that you ran into (resolved or otherwise) (1-2 paragraphs)

I think one main area for improvement is having actual puzzle shaped pieces rather than just squares. I think that would’ve definitely my idea across more, however, considering my skill set and based on tutorials and p5.js reference page, square seemed more feasible. I think adding instructions to clarify what the peek button does would’ve also been helpful, but my hope was that the user would just play around with the buttons and eventually discover it themselves (or ask me how to view a preview and I would guide them to use the button). I also would’ve loved to add some visual animations associated with the background music and also have different music/audio for each picture, but I completely forgot about the sound requirement till the last minute so there was a bit of a time constraint there.

I ran into a few problems throughout writing the code for this project, however, at this point, most of the problems have slipped my mind. One thing that I do remember since it was added last minute is that when I added audio files, my code was stuck in an endless loading loop. I was stuck on that for around 10 minutes, thinking maybe the files are just taking longer than usual to load, before I checked back through our class notes and realized I needed to add the sound library to my index.html file. Luckily, that wasn’t too big of an issue. Whenever I did run into any problems with my code (debugging) or was stuck with how to begin or how to proceed with specific features, I did get some help from Gemini as it would guide me on what topics to cover, give me links to videos to refer to, and what pages would helpful from the p5.js reference so I felt that I learnt a lot more that way.