Final Project: Repeat After Me

Finally, we reached the end of the semester, and with it came the submission of the final project. I had decided to make a Simon-Says style game, using lights and buzzers to interact with the user and test their recall skills. An interesting thing I’ve found throughout this course that I seem to really enjoy memory-style games, as with my midterm, and now this.

Like with my midterm, I began by creating a prototype to make sure I got the basic features down before I integrated any fancy features or graphics. Looking back on it now, the initial version worked, but it just looked, in simple terms, boring.


The initial gameplay didn’t feel like anything I would be excited to play at all.

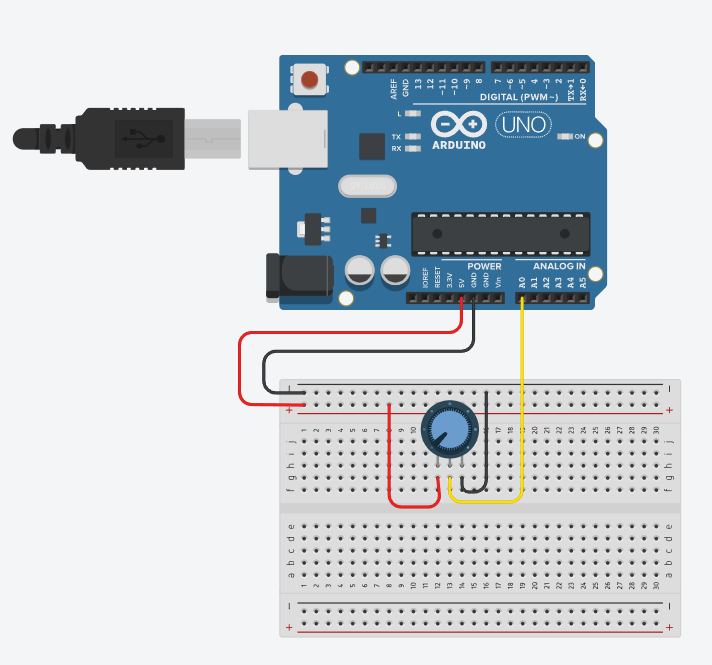
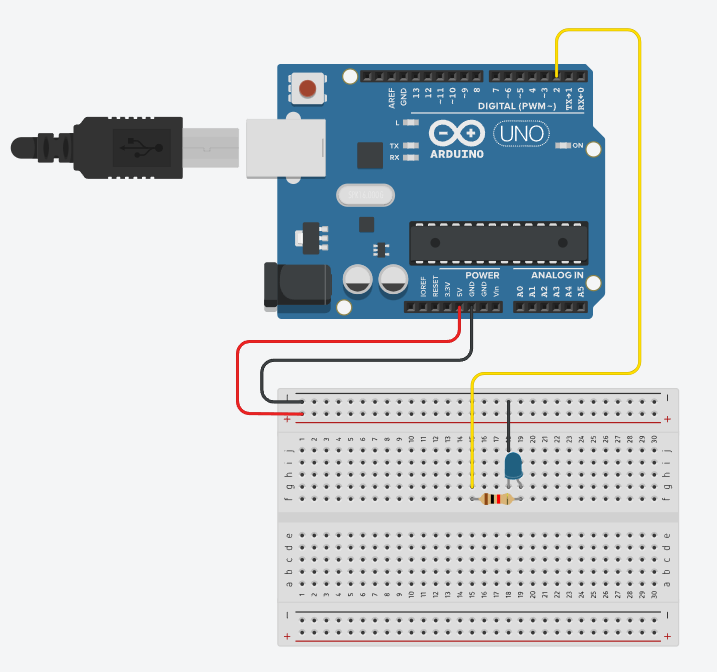
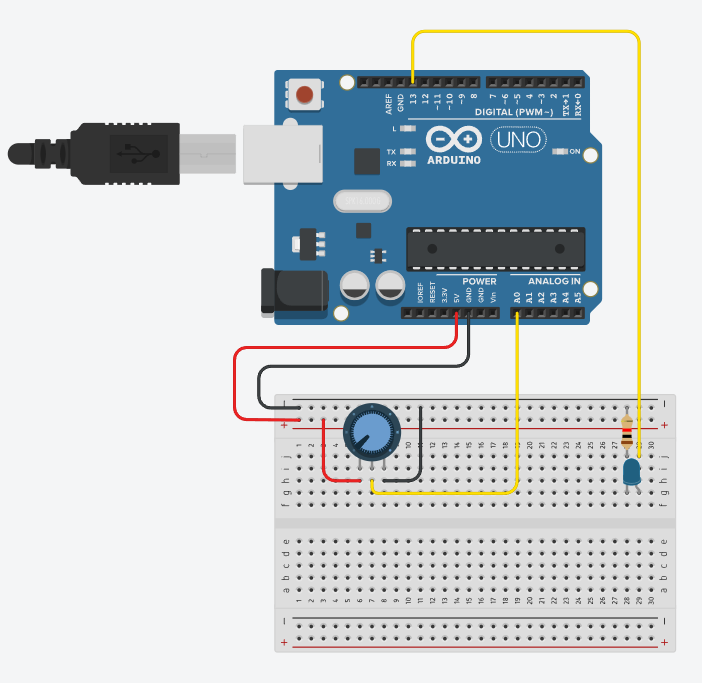
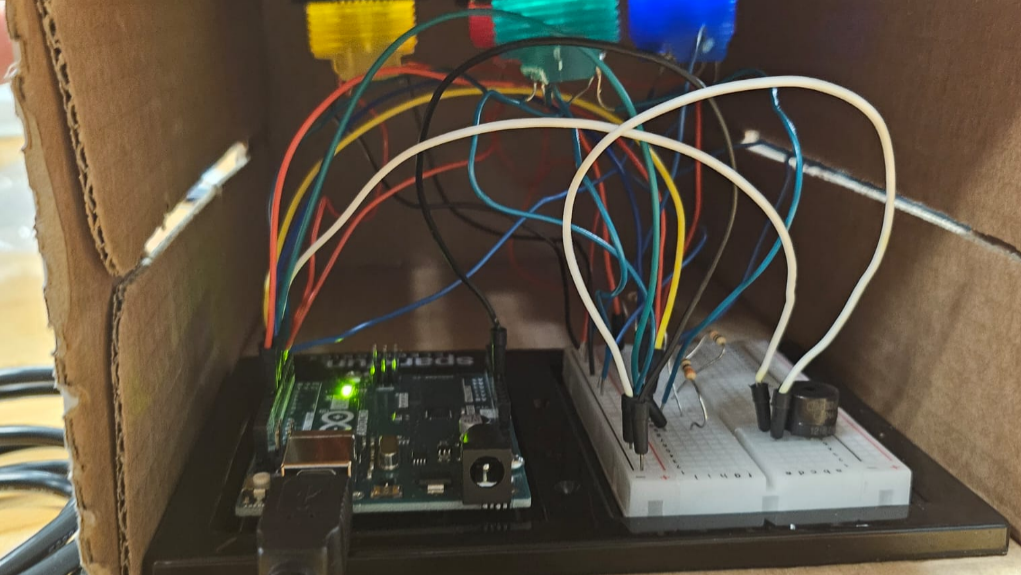
The initial wiring setup didn’t inspire much confidence either.

But that’s the great part of a prototype. It didn’t need to look good, so long as it functioned well. I was able to nail down the game states with the prototype, then I began working on graphics.

I wanted to go for a retro style with my game, and so I tried to make the backgrounds and the board match a cohesive neon-arcade-esque vibe.

In the end, we arrived at the final submission. I ended up soldering many of the wires inside my box to hide them as much as possible, because attractive things work better (reading reference!).

After carrying out user-testing, I ended up integrating more features within my code, including an instructions screen, and more interactivity between the buttons (a shorter debounce delay, the buttons lighting up, etc).

And here we are. With the final submission! I had  both  a great  and  frustrating  experience  making  it,  but I’m  really  glad  with the  final result.

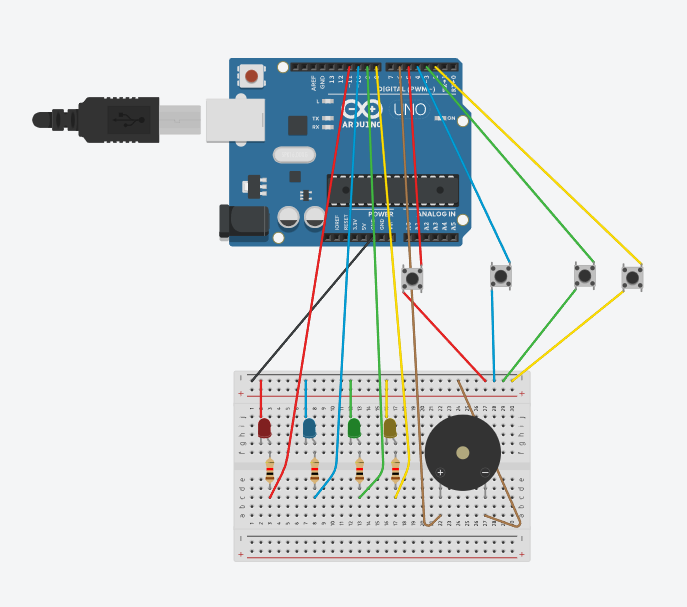
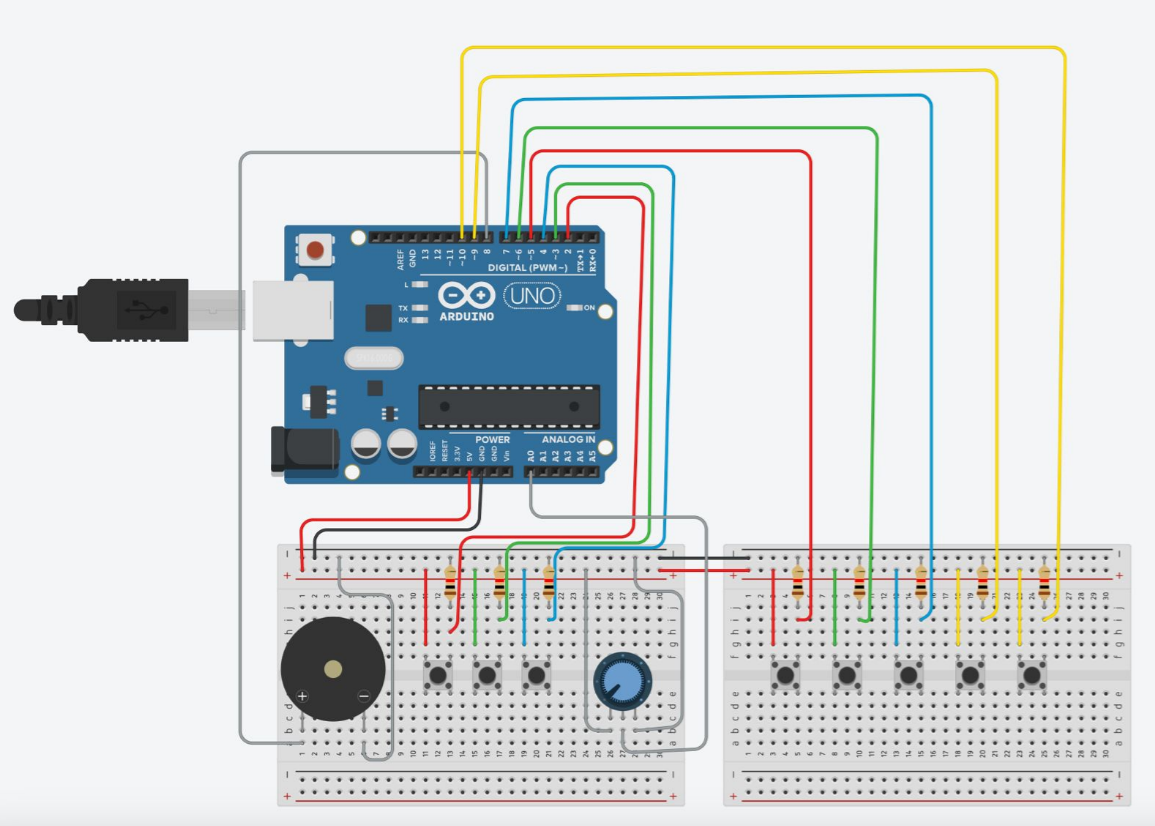
Schematic of my circuit (though I used arcade buttons)

// establishing variables
const int buttonPins[] = {2, 3, 4, 5}; // Yellow, green, blue, and red
const int ledPins[] = {8, 9, 10, 11}; // Yellow, green, blue, and red
const int buzzerPin = 6; // Buzzer set on pin 6

bool ledBlinking = false; // Checks whether the LEDs are blinking or not
unsigned long lastBlinkTime = 0; // Tracks when the LEDs were last blinked
bool blinkState = false; // Toggles between on and off when the LEDs are blinking

void setup() {
  // Setting up serial communication
  Serial.begin(9600); // Buad rate of 9600
  for (int i = 0; i < 4; i++) {
    // Setting the pin modes for the buttons, LEDs, and buzzer
    pinMode(buttonPins[i], INPUT_PULLUP);
    pinMode(ledPins[i], OUTPUT);
  }
  pinMode(buzzerPin, OUTPUT);
}

void loop() {
  // Handle blinking mode
  if (ledBlinking && millis() - lastBlinkTime > 500) { 
    blinkState = !blinkState; // Alternates between the LED being on and off every 500ms
    for (int i = 0; i < 4; i++) {
      if (blinkState) {
        digitalWrite(ledPins[i], HIGH); // Turn the LED on if blinkState is true
        } 
      else {
        digitalWrite(ledPins[i], LOW); // Turn the LED off if blinkState is false
        }
       }
    lastBlinkTime = millis();
  }

  // Check button presses
  for (int i = 0; i < 4; i++) {
    if (digitalRead(buttonPins[i]) == LOW) {
      Serial.println(buttonPins[i]); // Send button pin number to p5
      delay(100); // Debounce delay
    }
  }

  // Handle serial input from p5
  if (Serial.available()) {
    String command = Serial.readStringUntil('\n');
    command.trim();

    if (command.startsWith("ALL")) { // if the p5 command sends "ALL", all LEDs must be on
      int mode = command.substring(3).toInt();
      handleAllLEDs(mode);
    } 
    else if (command == "WRONG") { // if the p5 command sends "WRONG", play the sound
      tone(buzzerPin, 100, 500); // Wrong answer sound
    } 
    else {
      int pin = command.toInt(); // lights up the corresponding LED and plays the sound
      if (pin >= 8 && pin <= 11) {
        playColorFeedback(pin);
      }
    }
  }
}

// Turns on the LED corresponding to the button, and plays the sound
void playColorFeedback(int pin) {
  digitalWrite(pin, HIGH);
  playToneForPin(pin);
  delay(300);
  digitalWrite(pin, LOW);
  noTone(buzzerPin);
}

// Plays a specific tone based on the button pressed
void playToneForPin(int pin) {
  switch (pin) {
    case 8: tone(buzzerPin, 262); break; // Yellow is C4
    case 9: tone(buzzerPin, 330); break; // Green is E4
    case 10: tone(buzzerPin, 392); break; // Blue is G4
    case 11: tone(buzzerPin, 523); break; // Red is C5
  }
}

void handleAllLEDs(int mode) {
  ledBlinking = false;
  for (int i = 0; i < 4; i++) {
    digitalWrite(ledPins[i], LOW); // the LEDs are off
  }

  if (mode == 1) {
    for (int i = 0; i < 4; i++) {
      digitalWrite(ledPins[i], HIGH); // if the mode is 1, it turns on all the LEDs
    }
  } else if (mode == 2) { // if the mode is 2, it blinks the LEDs
    ledBlinking = true;
    lastBlinkTime = millis();
  }
}

My Arduino Code

Link to the full screen version

Thanks for a great semester!

Assignment 13: Final Project User Testing

As we neared the due date of our final project, we were asked to conduct user testing prior to our submission.

I had two of my friends play my game, after which I had them give me feedback on what they liked, what they disliked, and any other features.

User Testing 1

User testing 2

From their experience, I was able to gain valuable insight into what I could improve in my game.

What I needed to add:

  • An Instructions Screen: the gameplay mechanic wasn’t immediately obvious to anyone who played, so I implemented an instructions screen within my game that the user would have to go through if they wanted to play the game.
  • Faster turnout time between rounds: Each new “round” of the game was taking a really long time to load, so I shortened the time between the pattern displaying
  • User Interactivity: Another thing I noticed was that there was a slight delay between when the user clicked the button connected to my Arduino and the button lighting up and playing a sound, so I had to go back to my Arduino code and integrate a debouncing delay, so that the experience felt more seamless

I plan to integrate these within my game for a more polished and complete feeling, taking into account their criticisms to improve.

Assignment 12: Final Project Proposal (Repeat After Me)

For my final project, I am making an interactive reaction and memory game. The game will use physical components connected to an Arduino to play the game. It is inspired by retro games like Dance Dance Revolution. The project will challenge users to memorize and repeat increasingly complex light patterns using a diamond-shaped controller layout (similar to a DDR board). With each round, the sequence will grow longer, which will test the user’s memory and reaction speed.

Arduino Input/Output:
Inputs:

  • Four Arcade buttons, arranged in a diamond shape (UP, DOWN, LEFT, RIGHT)
  • Buttons are read using digitalRead(). When they are pressed, a keyword  corresponding to that button (UP, DOWN,…etc) is sent to P5 via serial communication

Output:

  • During the pattern display, P5 will send commands to the Arduino to light up the arcade button LEDs in a way that mirrors the on-screen pattern

P5:

Design:

  • A retro-looking DDR-inspired interface
  • Each direction will be animated (highlighted) when it is part of the pattern

Game Logic:

  • It will generate and store a random pattern of directions each round
  • Will animate the pattern both on the screen, and through the Arduino
  • It will wait for the player input, then compare it to the stored pattern
  • If the sequence is correct, it will increase the score, add a new step to the pattern, then begin the next round
  • If the sequence is incorrect, it will end the game and show the “Game Over” screen

Serial Communication:

  • It will recieve inputs (“UP”, “DOWN”, “LEFT”, “RIGHT”) according to the button that the user presses on the Arduino
  • Send directions to the Arduino during the pattern animation so it’s LEDs match the screen

Whats yet to be done:

Making the graphics to be used on the P5 screen (start screen, end screen, arrows), and finalising the code for each of the game states

Assignment 11 – Reading Response (Design Meets Disability)

Reading Design Meets Disability really made me rethink the way we approach assistive devices and design in general. We often talk about design in terms of making things beautiful, sleek, and desirable, but when it comes to tools meant for disabled individuals, the conversation suddenly shifts to pure function. This reading flips that on its head. It challenges the idea that products like hearing aids, prosthetic limbs, and wheelchairs should be discreet or invisible. Instead, it argues that they deserve the same thoughtful, creative attention as a pair of glasses or a smartphone. Why shouldn’t a wheelchair be stylish? Why can’t a prosthetic leg be a bold expression of identity? Nowadays, this sort of mindset has become even more relevant, where people are proud to talk about and display their disabilities; they are no longer a matter of stigma.

What stood out to me most was how this reading doesn’t see disability as something to hide or fix, it sees it as a space full of untapped potential for design. The reading uses real-world examples and poses fascinating questions that got me thinking: what if hearing aids were designed with the same care and flair as high-end earphones? What if voice synthesizers had more emotional range and didn’t all sound like robots? This vision of inclusive design isn’t just about making things accessible; it’s about making them desirable. That’s a big difference. It’s not about helping people fit into a narrow idea of “normal”, but rather it’s about expanding what we think is normal to include a wider range of human experience and expression.

Final Project Proposal: Repeat After Me

For my final project, I’m creating a game called Repeat After Me”, a retro-themed memory and reaction game where the player has to copy a sequence of flashing lights using physical buttons. It’s inspired by classic toys like Hasbro’s Simon Says, which I was obsessed with as a child, but I’m adding my own twist with pixel-style visuals, fun audio feedback, and progressively faster, more challenging rounds.

Video to the original Hasbro Simon Says

I’ve always enjoyed games that involve rhythm, timing, or quick reactions, and I wanted to build something that feels tactile and engaging but also visually playful.

Arduino will handle the hardware side:

  • Lighting up colored LEDs in random sequences

  • Reading button presses from the player

  • Using a buzzer for physical feedback

p5.js will handle the visual and audio feedback:

  • Displaying the current score and level

  • Giving real-time responses to player input with sound and screen effects

  • Showing a title screen, countdown, and game over screen

Overall, I want this project to feel playful, fast-paced, and satisfying to interact with.

Assignment 11: Serial Communication

For this week’s assignment, we were asked to complete the three examples we had been tasked with during class. This week’s work was a learning curve on its own. It took a while to get the hang of connecting P5.js and Arduino together after using them both as seperate entities, but seeing them connected was really exciting.

Task 1 – make something that uses only one sensor on Arduino and makes the ellipse in p5 move on the horizontal axis

For this task, I used a potentiometer to get analogue values, then mapped them onto my P5 canvas to make the ellipse move

P5 code:

let serial; // variable for the serial object
let latestData = "waiting for data"; // variable to hold the data

function setup() {
  createCanvas(400, 400);
  // serial constructor
  serial = new p5.SerialPort();

  // serial port
  serial.open('COM6');

  // what to do when we get serial data
  serial.on('data', gotData);

}

// when data is received in the serial buffer

function gotData() {
  let currentString = serial.readLine(); // store the data in a variable
  trim(currentString); // get rid of whitespace
  if (!currentString) return; // if there's nothing in there, ignore it
  console.log(currentString); // print it out
  latestData = currentString; // save it to the global variable
}

function draw() {
  background(255, 255, 255);
  fill(0, 0, 0);
  text(latestData, 10, 10); // print the data to the sketch

  // using the recieved data to change the x value of the circle 
  let moveHorizontal = map(latestData, 0, 1023, 0 , width);
  ellipse(moveHorizontal, height/2, 100, 100);


}

Arduino code:

const int ledPin = 3;      // the pin that the LED is attached to

void setup() {
  // initialize the serial communication:
  Serial.begin(9600);
  // initialize the ledPin as an output:
  pinMode(ledPin, OUTPUT);
}

void loop() {
  int brightness;

  // check if data has been sent from the computer:
  if (Serial.available() > 0) {
    // read the most recent byte (which will be from 0 to 255):
    brightness = Serial.read();
    // set the brightness of the LED:
    analogWrite(ledPin, brightness);
  }
}

Arduino schematic:

Task 2 – make something that controls the LED brightness from P5

For this task, I created a gradient background on P5, then used the mouseDragged() function to map it onto the LED connected on the Arduino

P5 code:

let serial; // variable for the serial object
let bright = 0; // variable to hold the data we're sending
let dark, light; // variables to hold the bgcolor

function setup() {
  createCanvas(512, 512);
  // colors for a blue gradient
  dim = color(0, 191, 255 );  // light blue
  bright = color(0, 0, 128);  // dark blue

  // serial constructor
  serial = new p5.SerialPort();

  // serial port
  serial.open('COM6');
}

function draw() {
  // Create a vertical blue gradient
  for (let y = 0; y < height; y++) {
    // Directly map the y position to the blue color
    let c = map(y, 0, height, dim.levels[2], bright.levels[2]);  // Map blue values from dark to light
    stroke(c, c, 255);  // Set color to blue, vary based on y position
    line(0, y, width, y);
  }

  stroke(255);
  strokeWeight(3);
  noFill();
  ellipse(mouseX, mouseY, 10, 10);
}

function mouseDragged() { // mapping the brightness level based on the position of the mouse
  brightLevel = floor(map(mouseY, 0, 512, 0, 255));
  // ensuring the brightness level does not exceed the level possible for the LED
  brightLevel = constrain(brightLevel, 0, 255);
  serial.write(brightLevel);
  console.log(brightLevel);
}

Arduino code:

const int ledPin = 13;  // Pin where the LED is connected
const int windSensorPin = A0;  // Pin for the analog wind sensor
int sensorValue = 0;

void setup() {
  pinMode(ledPin, OUTPUT);  // Set LED pin as an output
  Serial.begin(9600);  // Start serial communication
}

void loop() {
  // Check if there is incoming serial data
  if (Serial.available() > 0) {
    char incomingByte = Serial.read();  // Read incoming byte

    if (incomingByte == 'O') {
      digitalWrite(ledPin, HIGH);  // Turn LED ON
    } else if (incomingByte == 'F') {
      digitalWrite(ledPin, LOW);  // Turn LED OFF
    }
  }

  // Read the wind sensor value (adjust if needed)
  sensorValue = analogRead(windSensorPin);
  // Optionally, print the sensor value for debugging
  Serial.println(sensorValue);
  delay(100);
}

Arduino schematic:

Task 3 – take the gravity wind example (https://editor.p5js.org/aaronsherwood/sketches/I7iQrNCul) and make it so every time the ball bounces one led lights up and then turns off, and you can control the wind from one analog sensor

For this task, I used a potentiometer on the Arduino to send analogue values for the wind in the P5 example. I struggled with having the LED light up in time with the ball bounces, but I ended up using an IF statement within the draw() function which would then send a HIGH or LOW voltage value back to the Arduino

P5 code:

let velocity;
let gravity;
let position;
let acceleration;
let wind;
let drag = 0.99;
let mass = 50;

// new variables added
let windSensorValue = 0;
let serial; 
let latestData = "0"; 
let ledState = false; // true = on, false = off

function setup() {
  createCanvas(640, 360);
  noFill();
  position = createVector(width / 2, 0);
  velocity = createVector(0, 0);
  acceleration = createVector(0, 0);
  gravity = createVector(0, 0.5 * mass);
  wind = createVector(0, 0);

  // setting up the serial port
  serial = new p5.SerialPort();
  serial.open('COM6'); 
  serial.on('data', serialEvent);
}
// Arduino data is stored inside the variable latestData
function serialEvent() {
  let incoming = serial.readLine();
  if (incoming.length > 0) {
    latestData = incoming; 
  }
}

function draw() {
  background(255);

  // reading the Potentiometer value
  // mapping the potentiometer value to wind (either left or right)
  let sensorValue = int(latestData);
  wind.x = map(sensorValue, 0, 1023, -5, 5);

  applyForce(wind);
  applyForce(gravity);
  velocity.add(acceleration);
  velocity.mult(drag);
  position.add(velocity);
  acceleration.mult(0);

  ellipse(position.x, position.y, mass, mass);

  // Ball hitting ground
  if (position.y >= height - mass / 2) {
    position.y = height - mass / 2;
    velocity.y *= -0.9;

    // If touching ground and LED not already on
    if (!ledState) {
      serial.write('H');  // Turn LED on
      ledState = true;
    }
  } else {
    // If in air and LED is on, turn it off
    if (ledState) {
      serial.write('L');  // Turn LED off
      ledState = false;
    }
  }
}

function applyForce(force) {
  let f = p5.Vector.div(force, mass);
  acceleration.add(f);
}

function keyPressed() {
  if (keyCode == LEFT_ARROW) {
    wind.x = -1;
  }
  if (keyCode == RIGHT_ARROW) {
    wind.x = 1;
  }
  if (key == ' ') {
    mass = random(15, 80);
    position.y = -mass;
    velocity.mult(0);
  }
}

Arduino code:

const int ledPin = 13;  // LED on pin 13
const int sensorPin = A0; // analog sensor connected to A0

void setup() {
  Serial.begin(9600);
  pinMode(ledPin, OUTPUT);
}

void loop() {
  // Read analog sensor
  int sensorValue = analogRead(sensorPin);
  Serial.println(sensorValue);
  delay(50); // small delay 

  // Check for incoming commands
  if (Serial.available() > 0) {
    char command = Serial.read();
    if (command == 'H') {
      digitalWrite(ledPin, HIGH);
    } else if (command == 'L') {
      digitalWrite(ledPin, LOW);
    }
  }
}

Arduino schematic:

Link to Video

Assignment 10 – Reading Response (A Brief Rant On the Future Of Interaction Design, and it’s Follow-up)

Reading this response made me think about how much and how little has changed since 2011. At the time, touchscreens were really starting to take over. The iPhone was still kind of shiny and new, and starting to set a trend, and the iPad had just started making its way into homes, schools, and workplaces. It was exciting. And yet, looking back from 2025, it’s almost prophetic how spot-on this rant was about where things might go. We did, in many ways, double down on the flat, glassy rectangles.

What really struck me was how much of this still applies today. In fact, it’s even more relevant now. Since 2011, we’ve added smart speakers, VR headsets, and now AI tools like ChatGPT and image generators like DALL·E. The author says Monet couldn’t have painted by saying “Give me some water lilies,” but with generative AI, that’s suddenly a real thing, and has become increasingly more relevant in debates on human participation; it’s both exciting and a little unsettling. It made me wonder: are we making creativity more accessible, or are we distancing ourselves from the hands-on, exploratory process that gives creative work its depth and meaning?

The rant also touched on something deeper, the idea that our tools shape how we think, learn, and grow. When we limit interaction to just tapping a screen or giving voice commands, we risk becoming passive users instead of active thinkers. Especially now, when so much of daily life is mediated by screens and digital assistants, it’s easy to forget how valuable physical engagement really is. In the end, this wasn’t just a rant about interface design; it was a call to imagine more ambitious, embodied futures for how we use technology. It made me reflect on my own habits and what kind of tech I want to see (and use) going forward.

Assignment 10: Musical Instrument

For this week’s assignment, we were tasked with using Arduino to create a musical instrument. Working in pairs, Kashish and I decided to create a piano based on the tone() function we had explored earlier in class. In our project, we wanted each button switch to correspond to a different note from a piano, so that it could be “played”.

We were asked to use both an analogue and digital component for the assignment; while the digital component was simple enough with the buttons, we decided to use a pontentiometer as our analogue component, and used it to control the pitch of the notes being produced by each button.

The components we used were:

  • Arduino Uno
  • Breadboards
  • Jumper cables
  • 10k Ohm resistors
  • Push buttons
  • 5V speaker

Here is an image of our project, and the schematic:

Our code:

#include "pitches.h"

const int potPin = A0;          // Potentiometer on A0
const int buzzerPin = 8;        // Speaker on D8
const int buttonPins[] = {2, 3, 4, 5, 6, 7, 9, 10}; // C4-C5 buttons
const int baseNotes[] = {NOTE_C4, NOTE_D4, NOTE_E4, NOTE_F4, NOTE_G4, NOTE_A4, NOTE_B4, NOTE_C5};

void setup() {
  // Keep external 10k resistors
  for (int i = 0; i < 8; i++) {
    pinMode(buttonPins[i], INPUT); 
  }
  pinMode(buzzerPin, OUTPUT);
}

void loop() {
  // potentiometer value
  int potValues[5] = {0};
  int potIndex = 0;
  potValues[potIndex] = analogRead(potPin);
  potIndex = (potIndex + 1) % 5;
  int octaveShift = map( // mapping potentiometer values as a shift in octave
    (potValues[0] + potValues[1] + potValues[2] + potValues[3] + potValues[4]) / 5,
    0, 1023, -2, 2
  );

  // Check buttons to play notes
  bool notePlaying = false;
  for (int i = 0; i < 8; i++) {
    if (digitalRead(buttonPins[i]) == HIGH) {  
      int shiftedNote = baseNotes[i] * pow(2, octaveShift);
      tone(buzzerPin, constrain(shiftedNote, 31, 4000)); 
      notePlaying = true;
      break;
    }
  }

  if (!notePlaying) {
    noTone(buzzerPin);
  }
  delay(10); 
}

Videos of our project:

Playing Happy Birthday

Adjusting the Potentiometer

A challenge we faced was definitely our lack of musical knowledge. Neither Kashish or I are musicians, and as such, we had to do a lot of research to understand the terminology and theory, such as the notes, and how to adjust the octave using the potentiometer. We then also had to figure how to reflect these findings within our code.

Overall though, we had a great time making this project, and then executing our idea.

Assignment 9 – Reading Response 2 (Physical Computing’s Greatest Hits (and misses))

Reading this text made me realize that creativity in physical computing doesn’t always mean coming up with a brand new idea, it can be just as interesting to take something familiar and make it your own. Projects like theremin-style instruments or drum gloves keep showing up repeatedly, but each version reflects the person who built it. I used to worry that picking a common idea would make my work seem unoriginal, but now I see that it’s more about how you approach it. Even if something’s been done before, there’s always room to add your own twist or explore a new angle. That actually feels kind of helpful, knowing I don’t have to reinvent the wheel to make something meaningful.

What also stood out to me was how these projects go beyond just being technical, they’re about how people interact with them. Whether it’s something playful like a tilty table or something more emotional like a remote hug device, each project invited a different kind of connection. Even the ones that seemed purely visual, like video mirrors or waving grass, sparked curiosity. It made me think that physical computing is really about creating experiences, not just building stuff. That realisation was exciting, because it means there’s room for personality, emotion, and fun in the work I create.

Assignment 9 – Reading Response 1 (Making Interactive Art: Set the Stage, Then Shut Up and Listen)

Reading this peice made me pause and rethink how I approach interactivity. I’ve definitely been guilty of overexplaining my work, or failing to consider what an inexperienced user might try to do with, most notably in our midterm projects for this very course. It was easy to tell the audience of these projects exactly what they were supposed to do as opposed to watching them actually use it and naturally interact with it. But this reading reminds me that interactive art isn’t about controlling the outcome. It’s about inviting possibility. The idea that the artwork is just the beginning of a conversation really stuck with me. It shifts the focus away from self-expression and toward shared experience, which honestly feels more generous, and more exciting.

What stuck with me the most was the reminder to “listen”. To actually observe what people did, how they interacted, what they didn’t do, and keep that in mind for future projects. We can’t control how people will react to things, but we can control our reactions to them. Letting go of control isn’t easy, but it might be the most meaningful part of the process overall.