3,2,1…Goooo Ichi-Go!!!
I can’t believe this is finally my final project. That was such an insane ride.
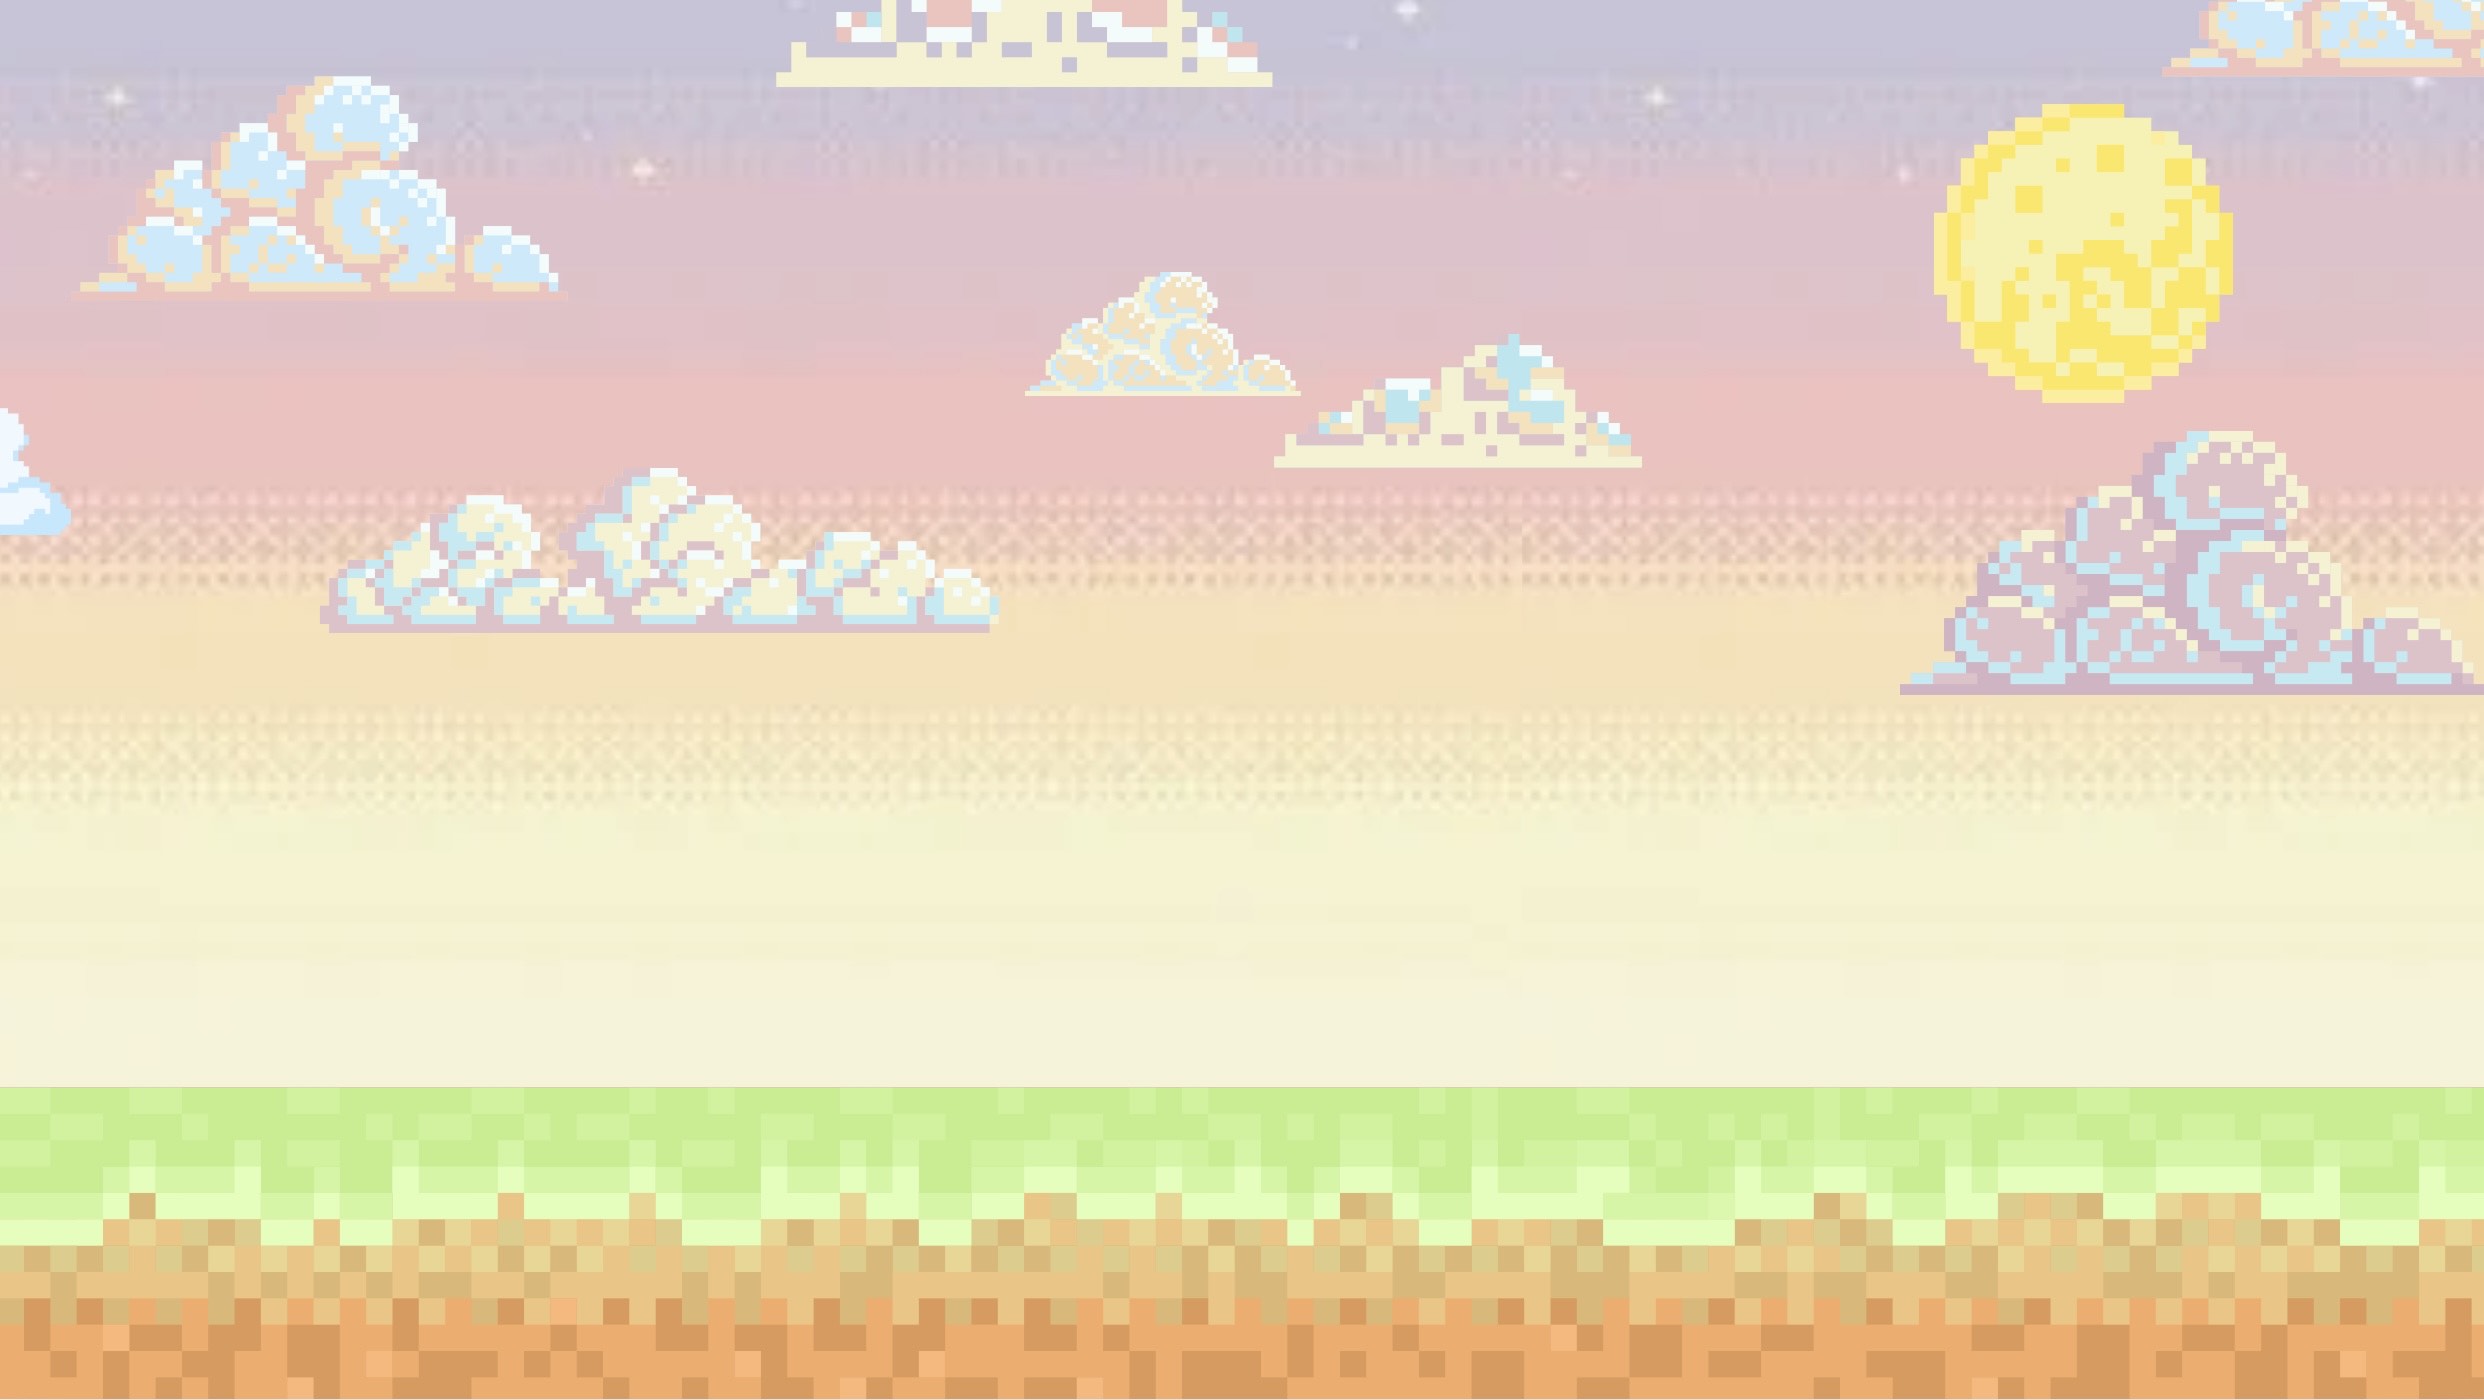
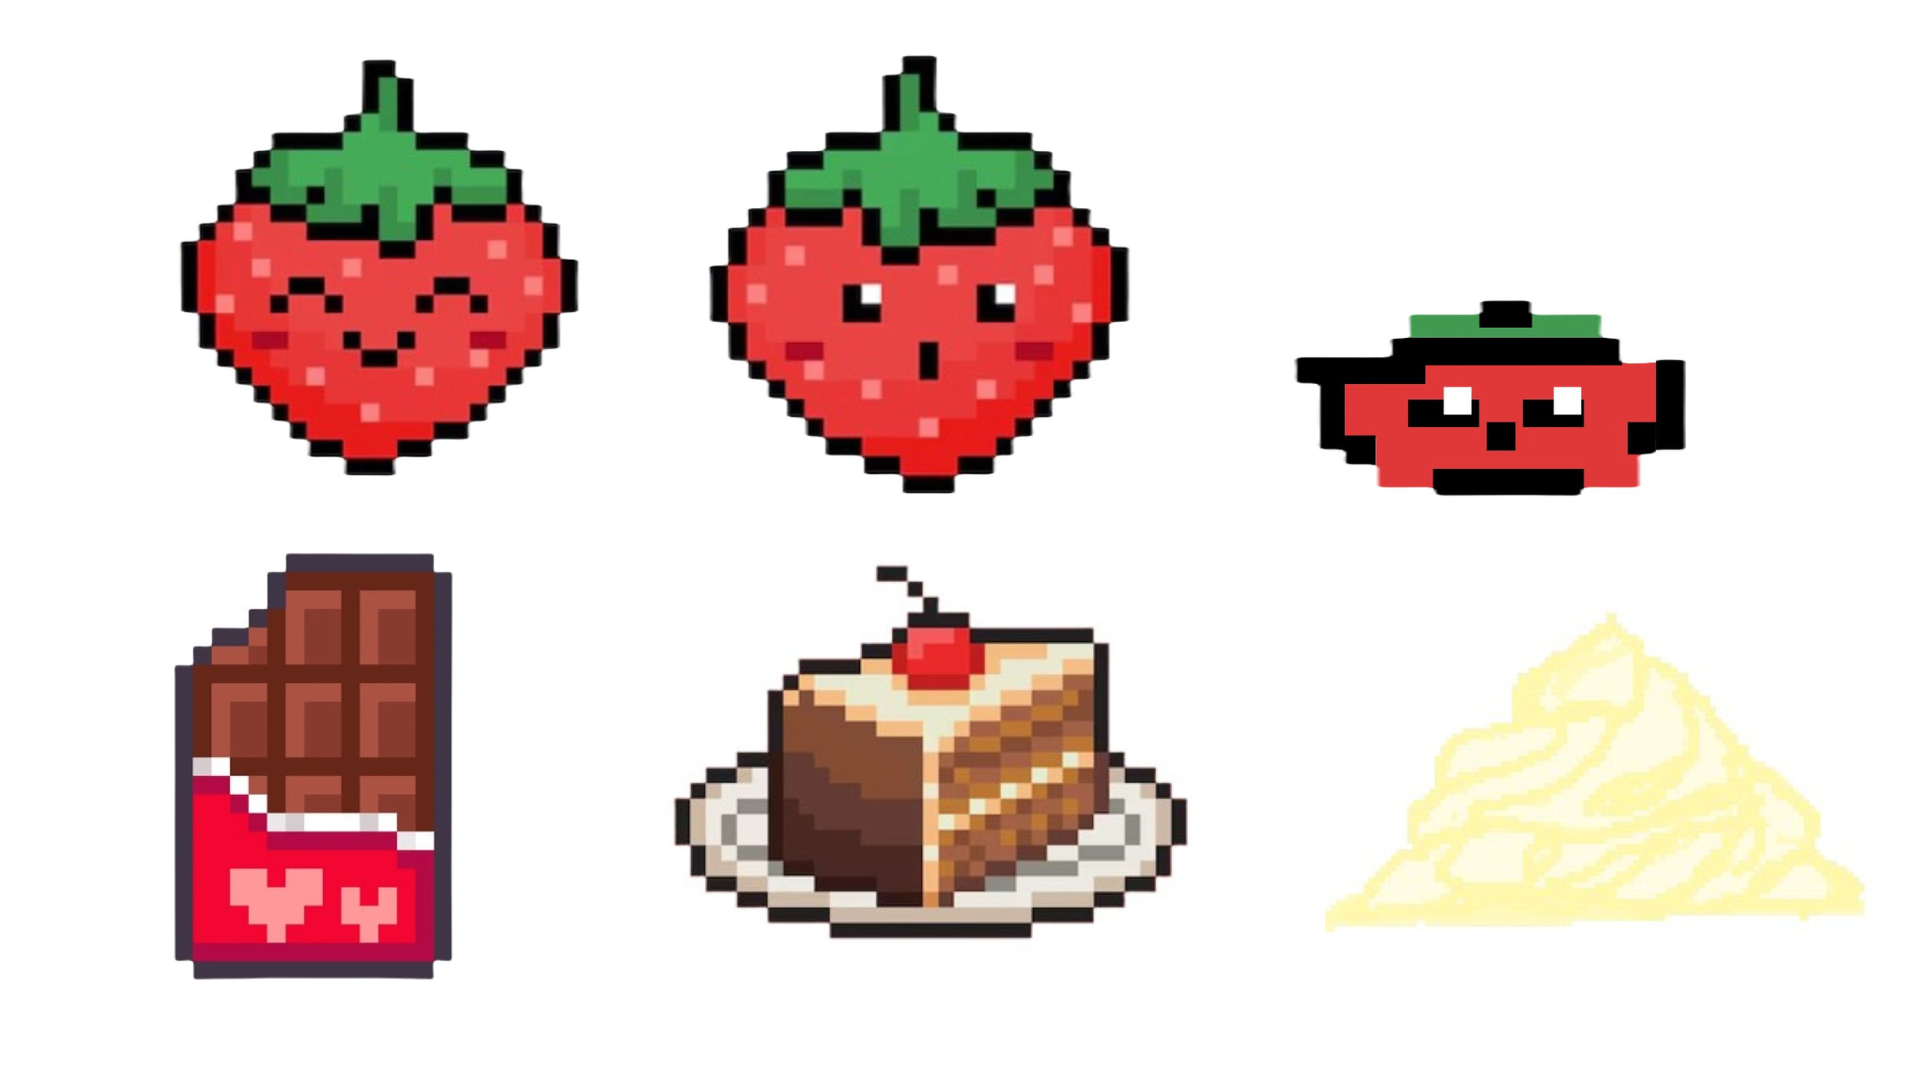
For my final project, I want to create a game called “Go Ichi-Go!”. The game features a character called Ichigo (Japanese for strawberry), who runs and has to jump over obstacles like jumping puddles of whipped cream, and towers of chocolate, and slide under floating slices of cake, to avoid being part of the sweet treat!. After each jump/dive, randomised text gives out cute strawberry themed puns. Once the player successfully finishes 10 obstacles, getting faster with each obstacle, and they win a sweet surprise- a strawberry candy, which is dispensed from a servo-motor operated candy dispenser.
VIDEO DOCUMENTATION :
USERS DOCUMENTATION FROM IM SHOWCASE :
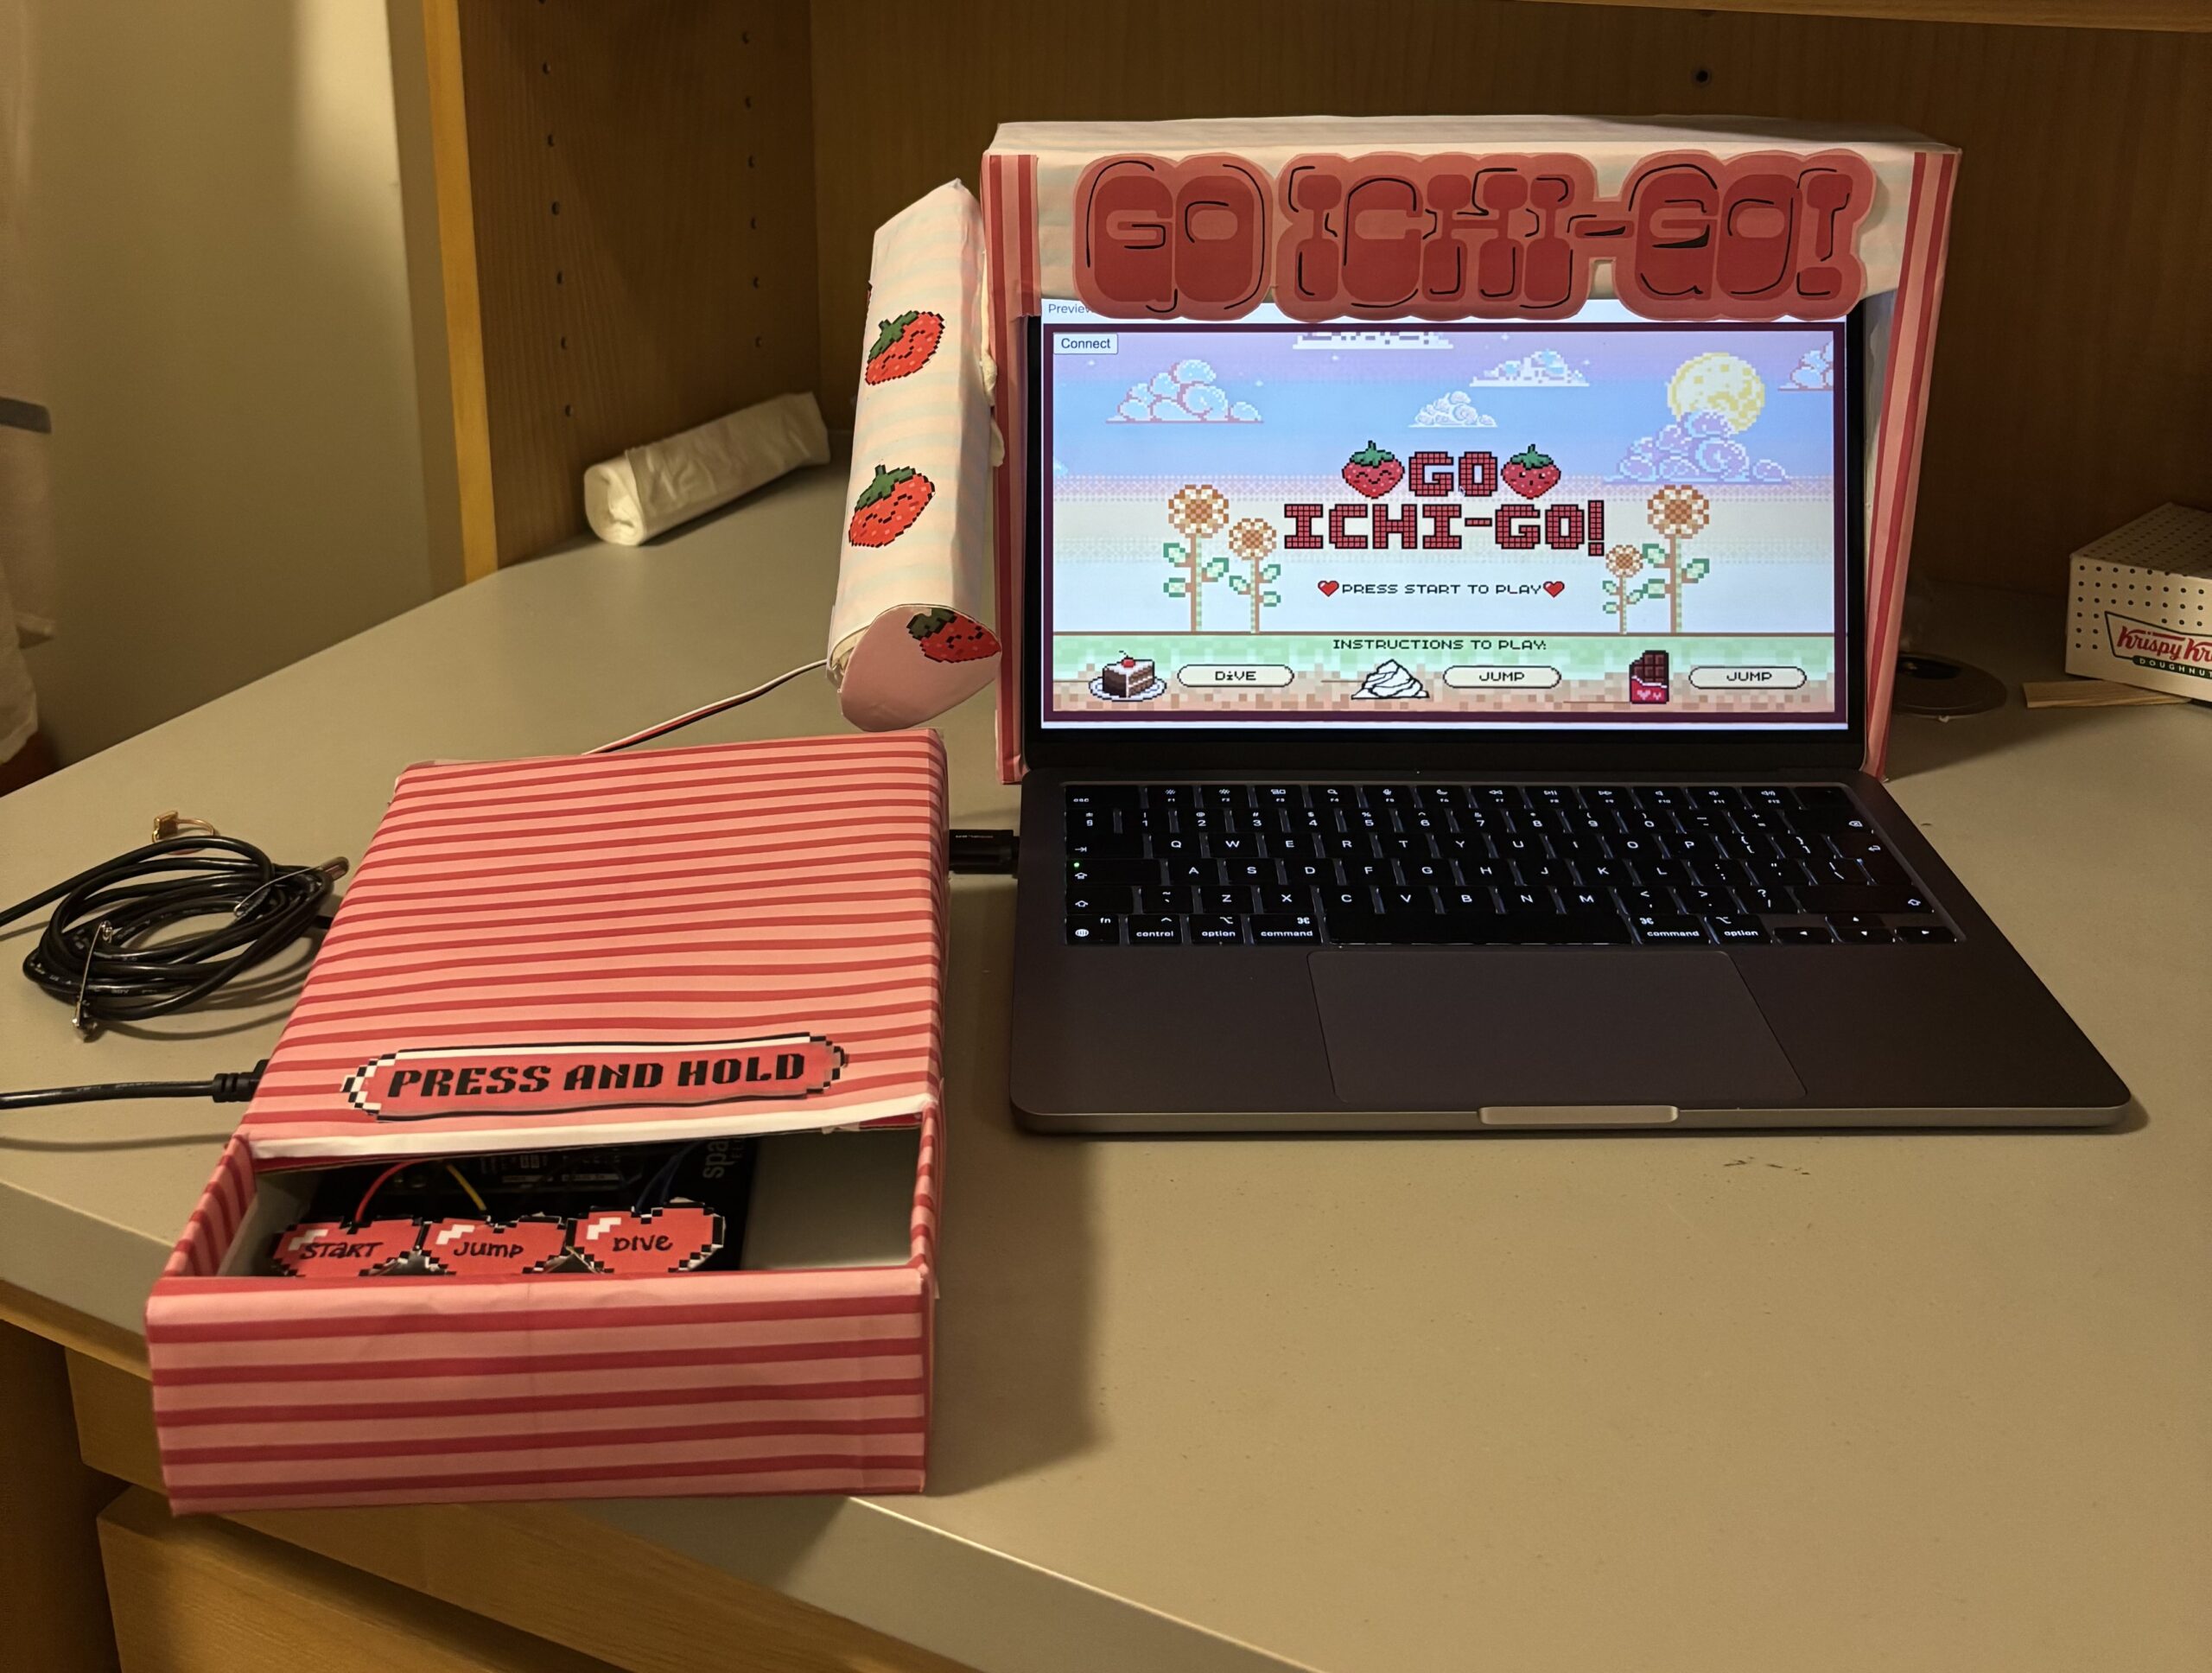
INTERACTION DESIGN:
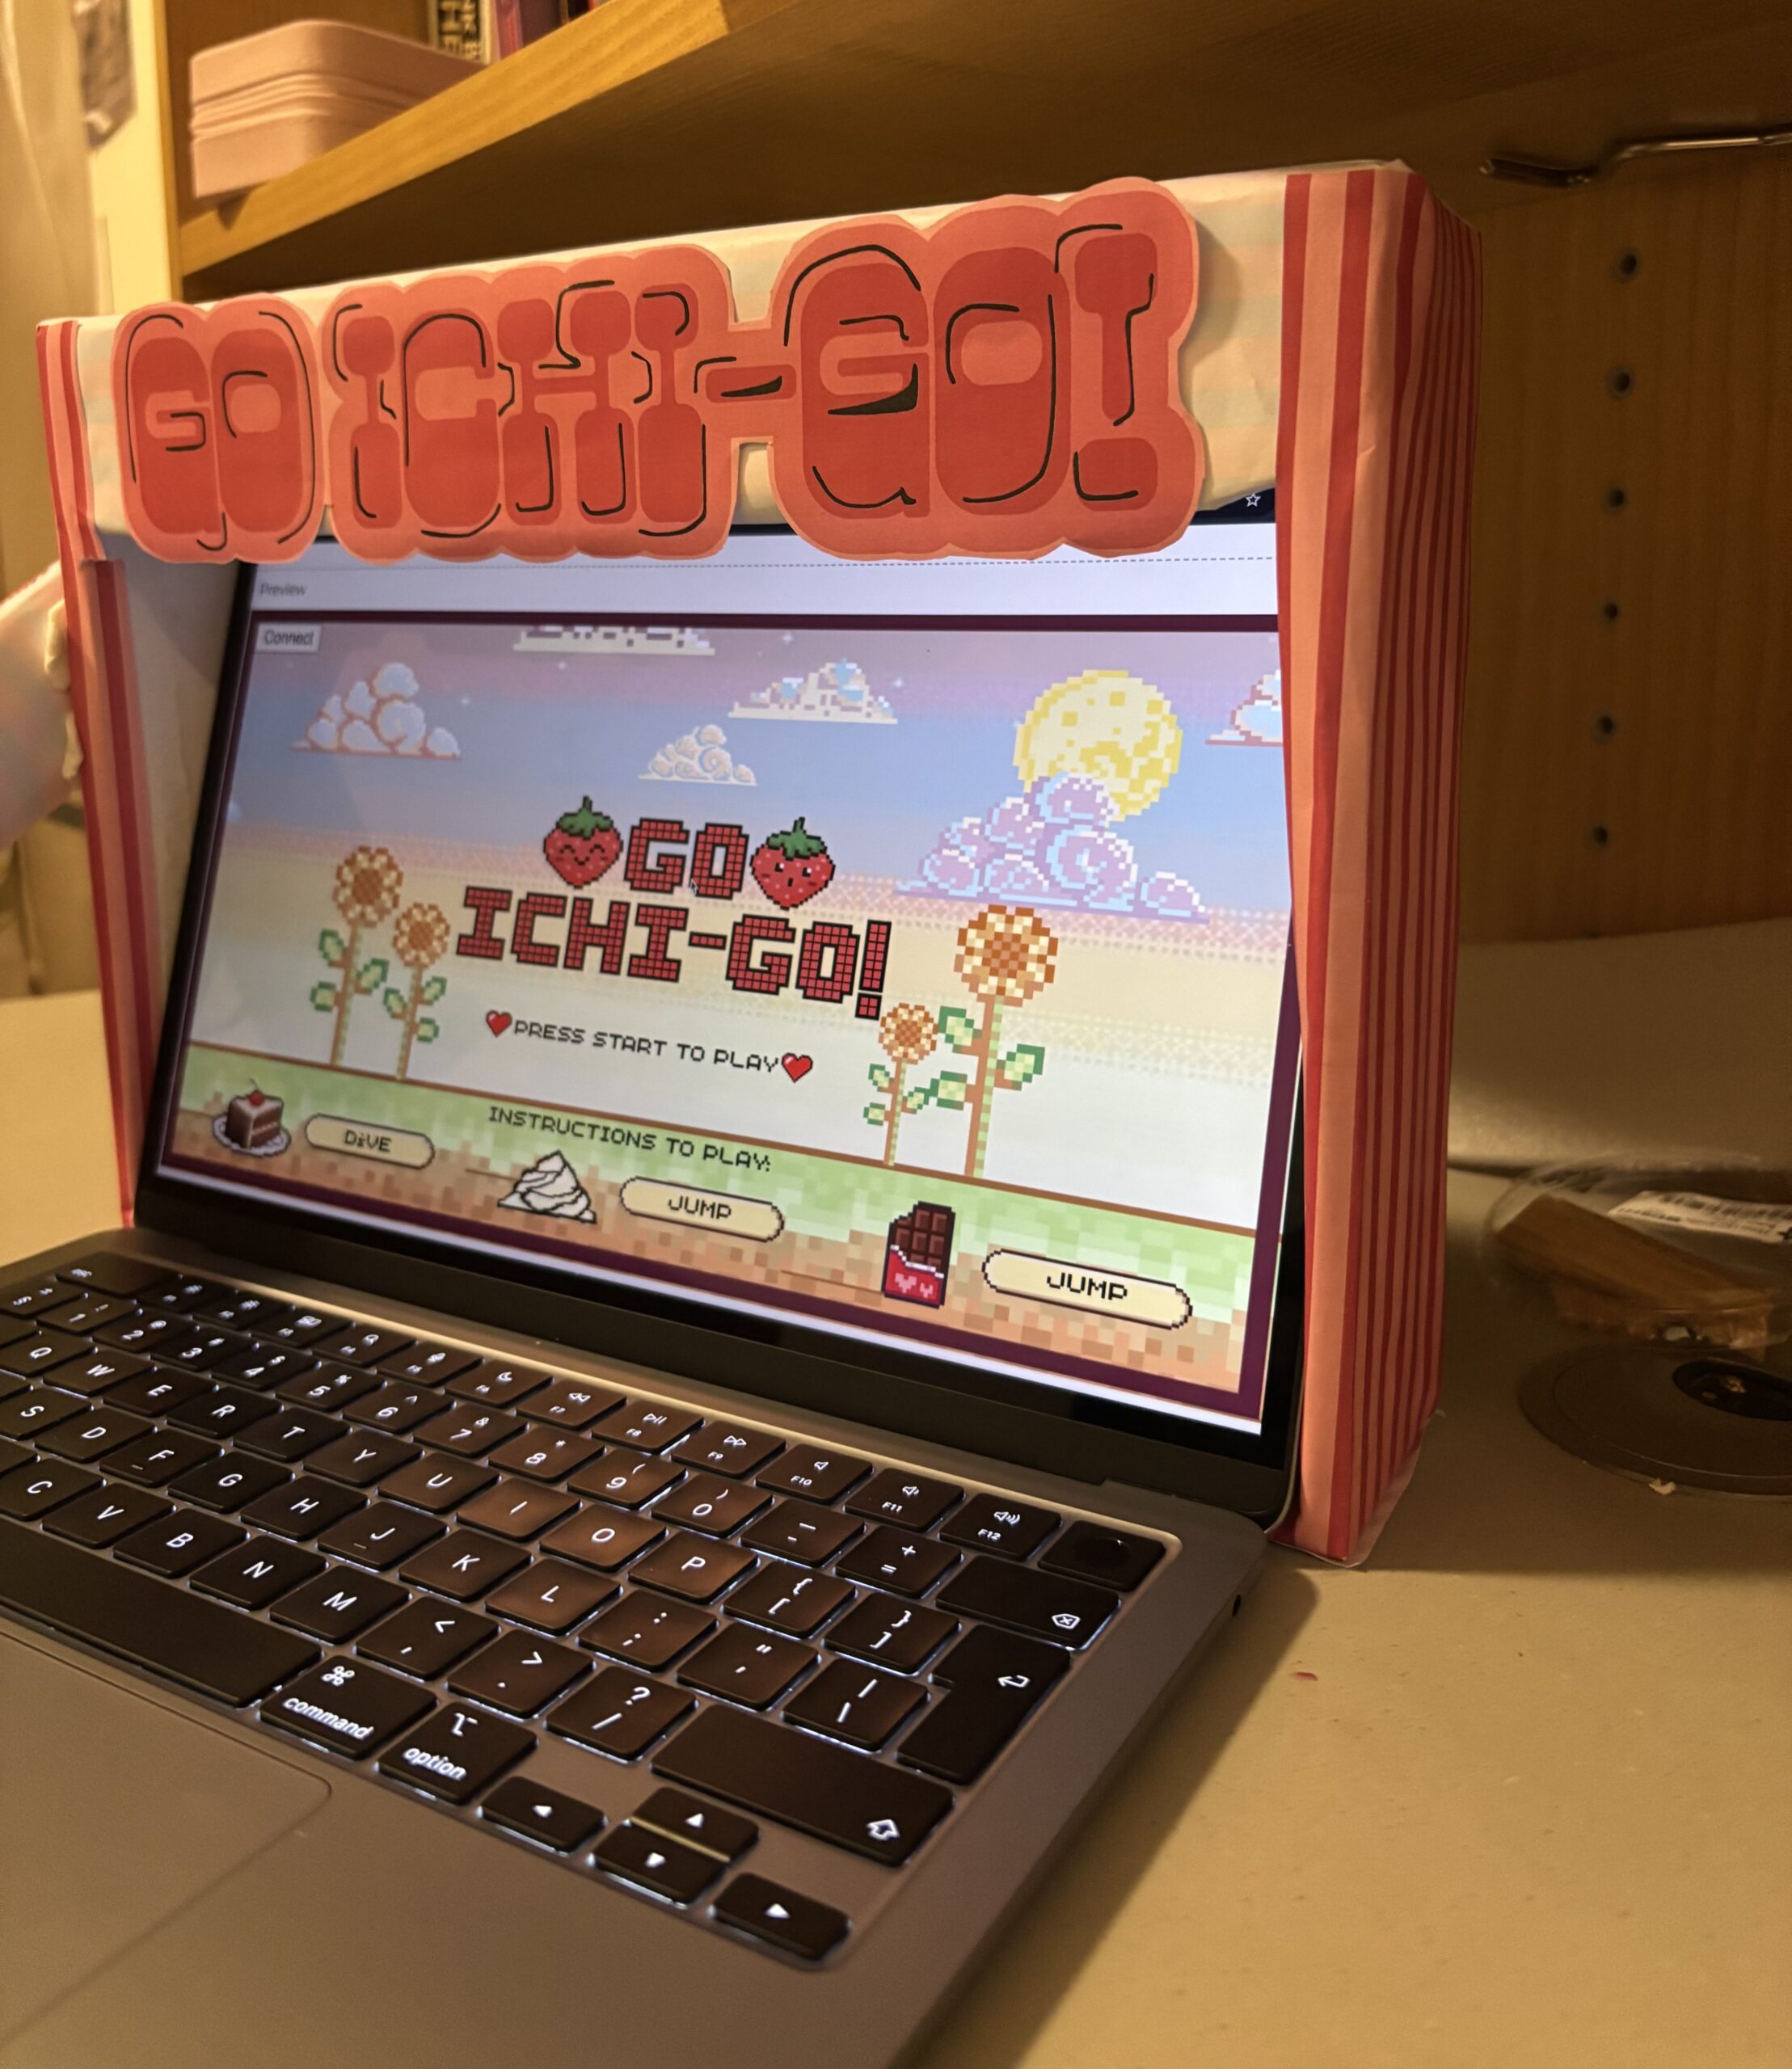
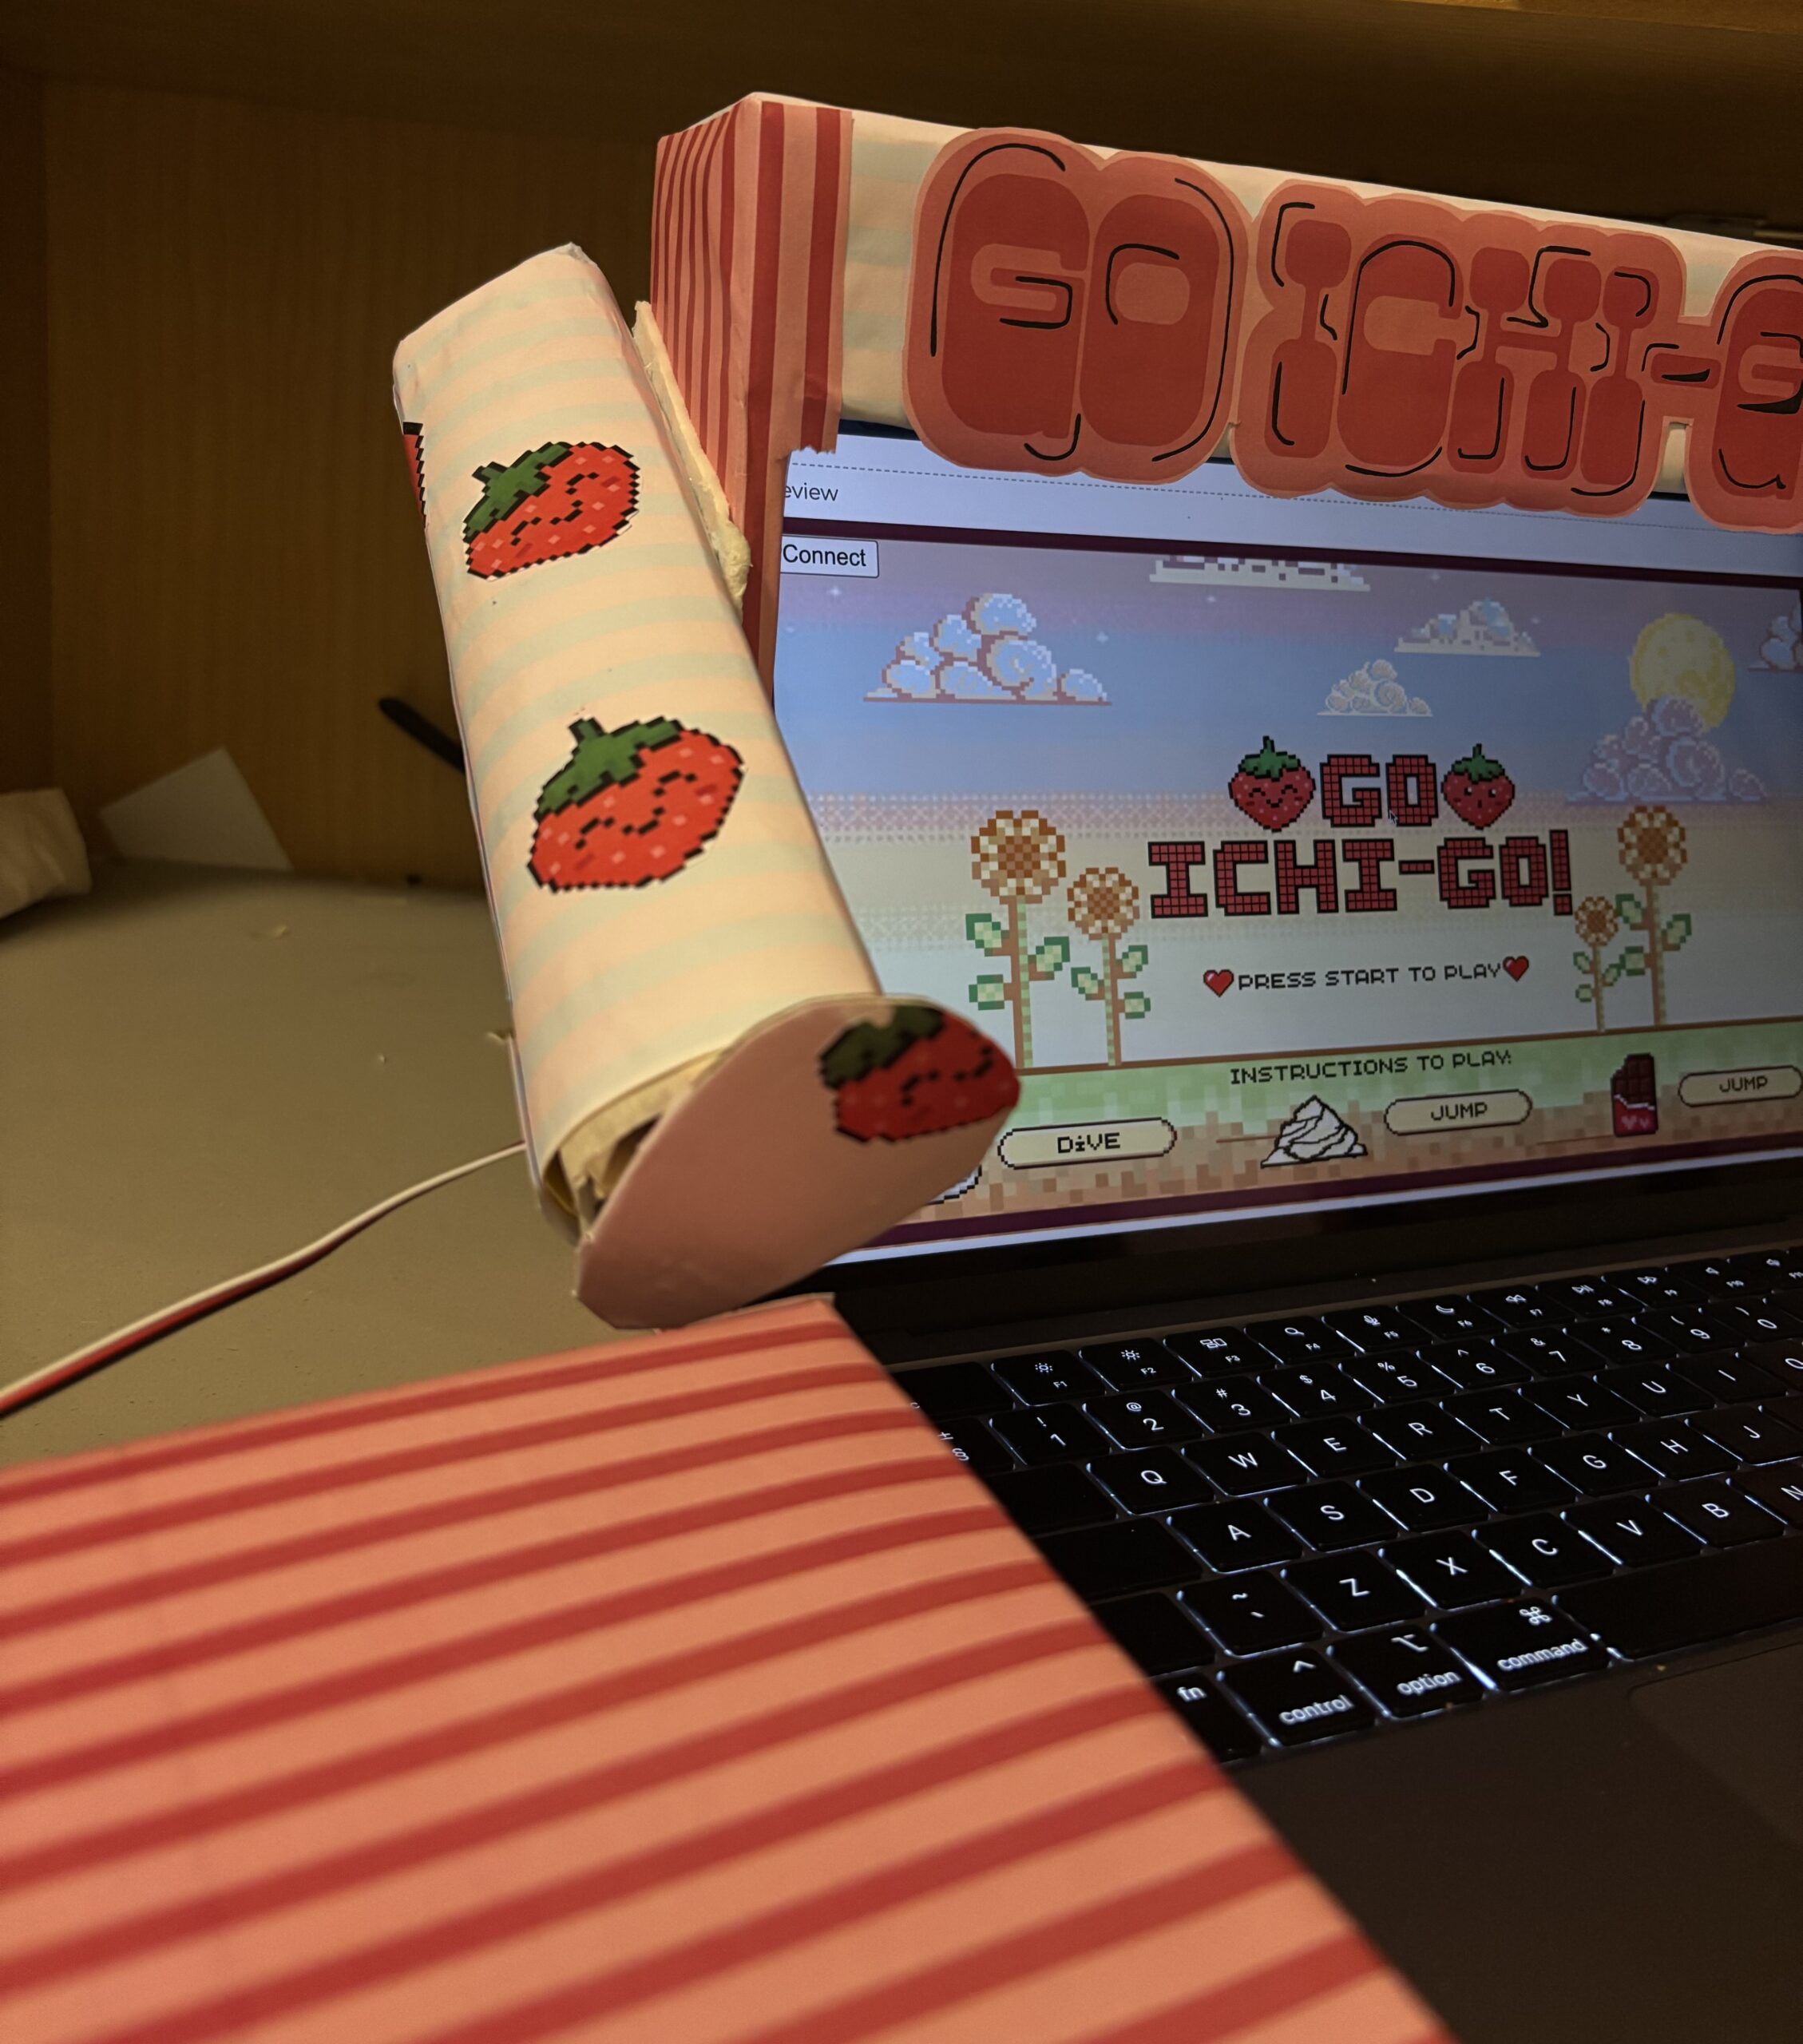
The user is first greeted by a cute, pink kawaii style arcade set-up. A small console board shows three buttons – Start, Jump and Dive. The screen shows a short instruction guide and the title of the game. To start, we click the Start button, which takes us to the main game page. Here, Ichigo has to jump over a puddle of whipped cream or chocolate towers, and dive over floating cake slices. These obstacles are randomised, and after each succesfull pass, a strawberry/sweet themed pun is displayed. With each obstacle, the speed of the game increases, and the obstacles attack Ichigo faster. After the user finishes 10 obstacles, the screen shows a win page with the text to “Enjoy your candy”. Simultaneously, our servo motor candy dispenser turns its knob to shoot out a rain of sweet candy, rewarding the player for winning the game. If the player doesn’t win the game, the game over screen allows them to restart it by pressing the start button again.
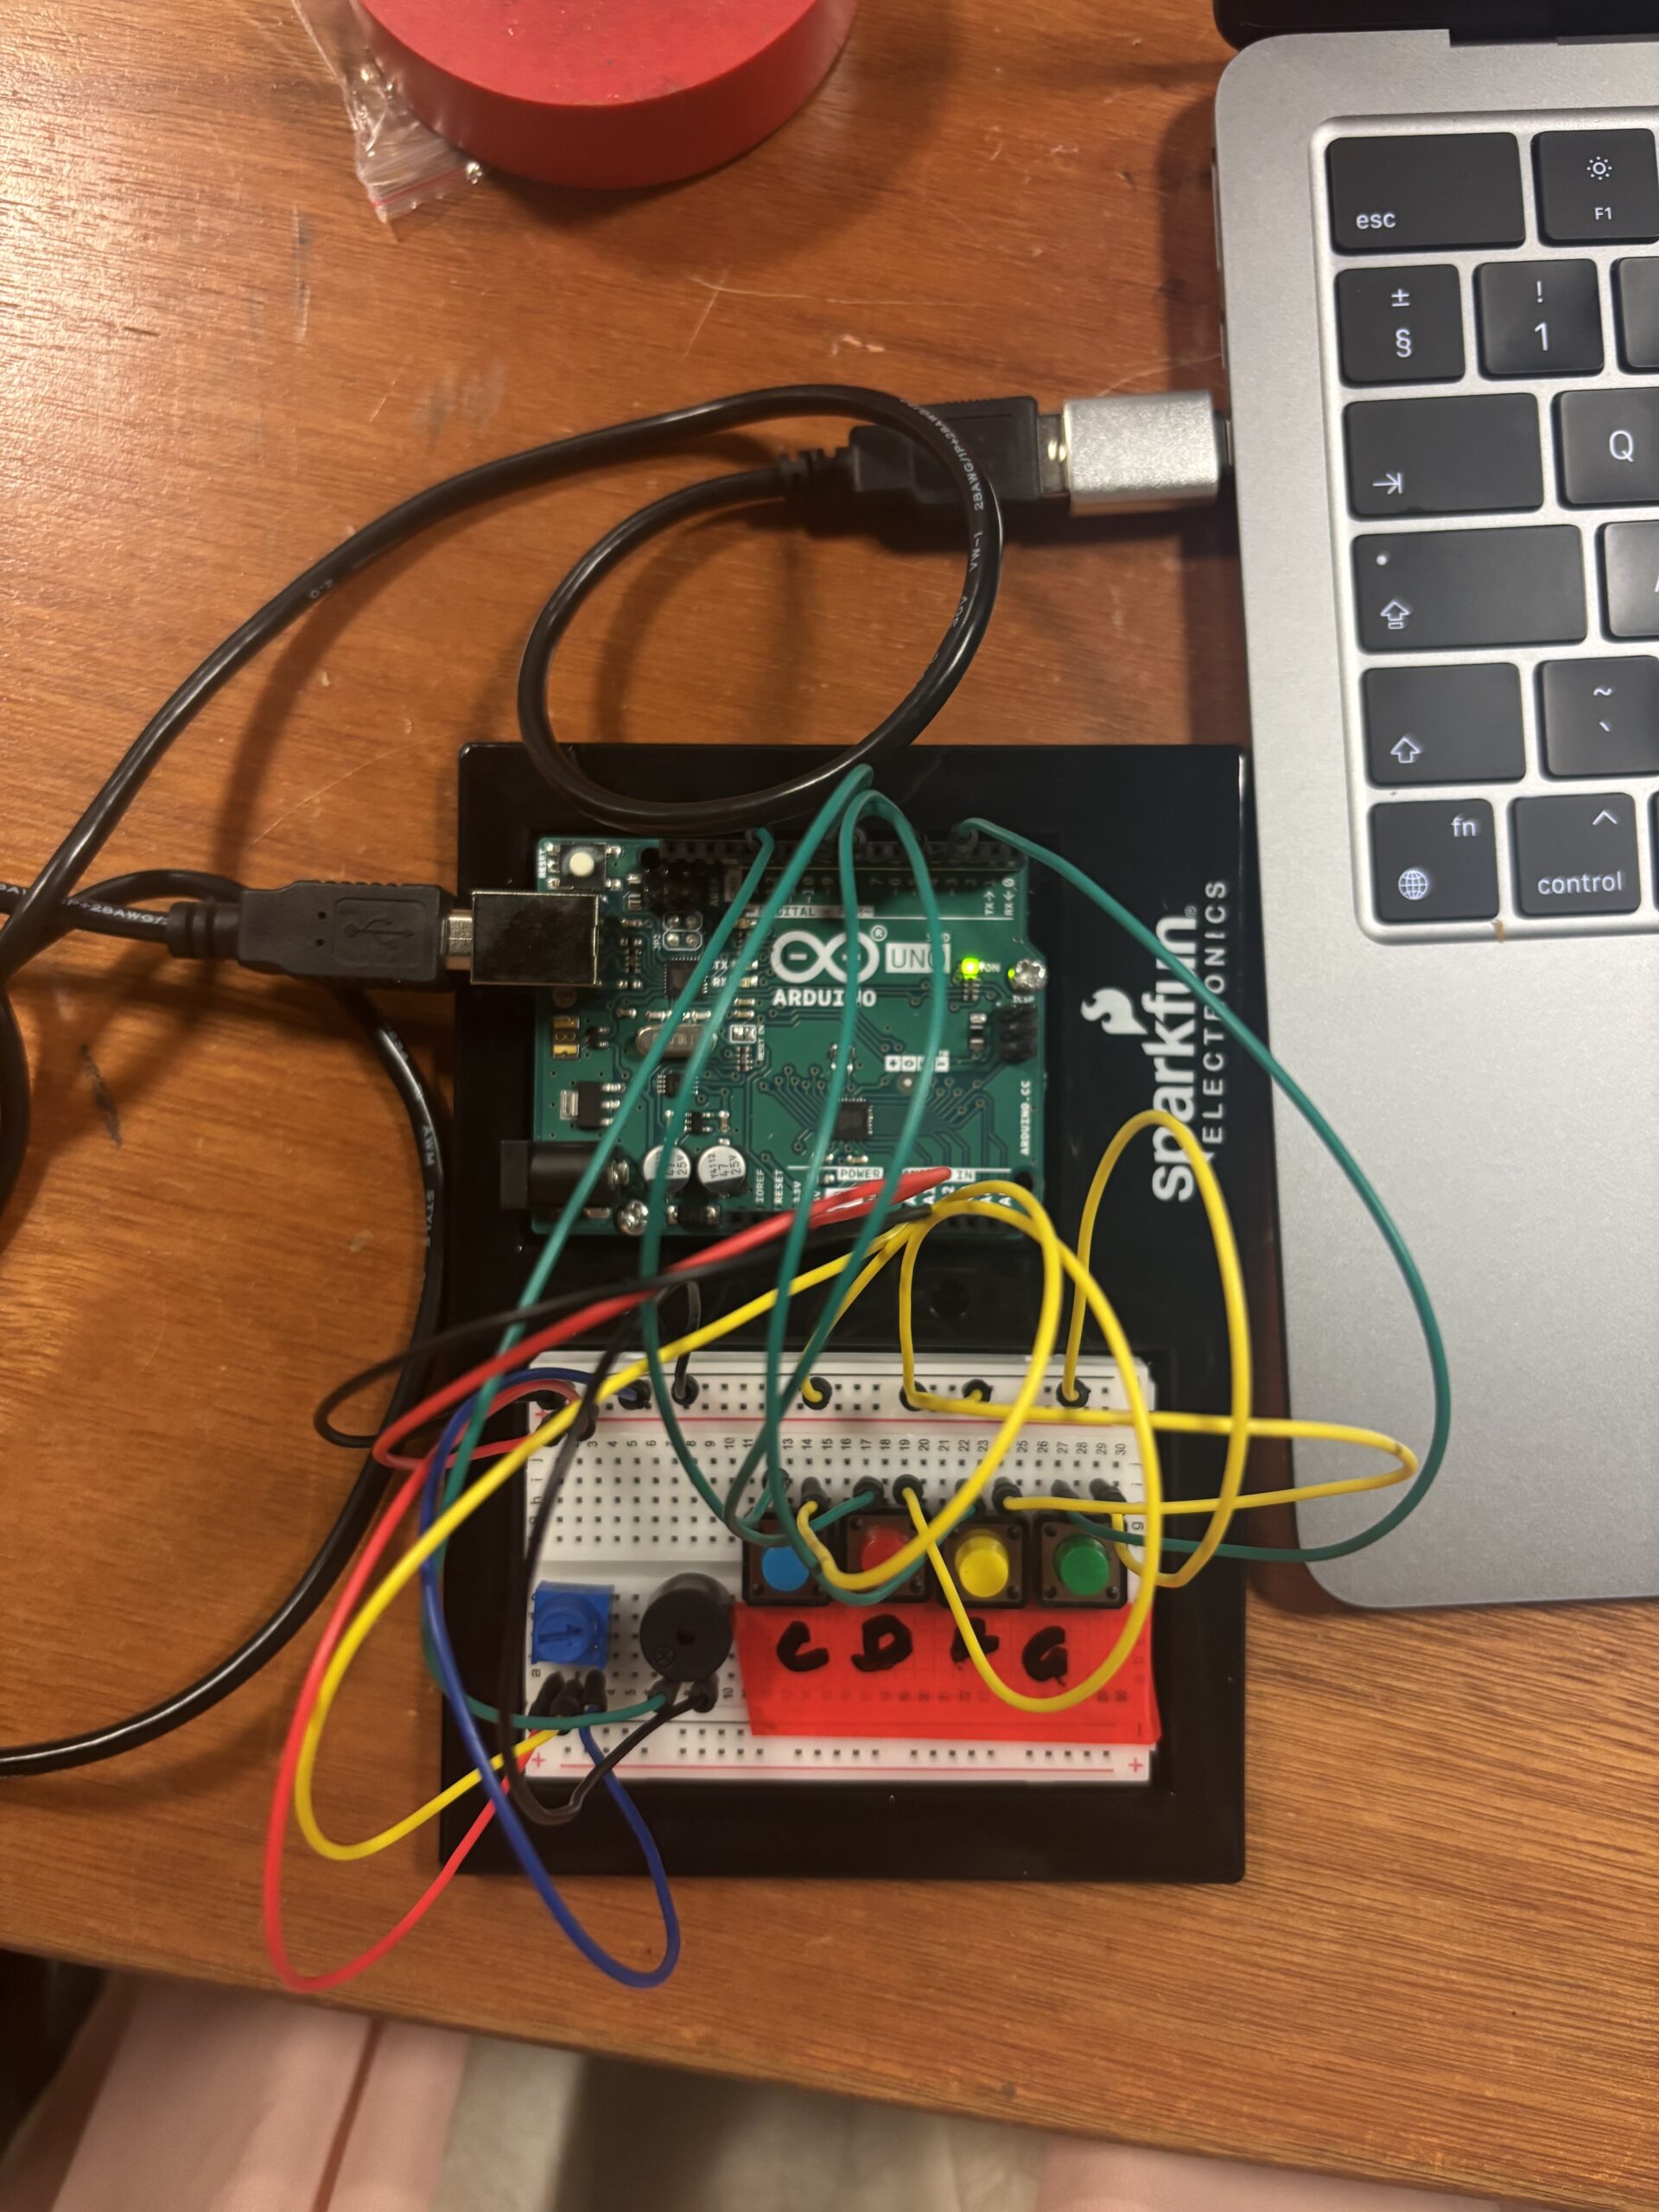
ARDUINO CODE:
#include <Servo.h>

const int startBtn = 2;
const int jumpBtn = 3;
const int diveBtn = 4;

Servo candyServo;

void setup() {
  pinMode(startBtn, INPUT_PULLUP);
  pinMode(jumpBtn, INPUT_PULLUP);
  pinMode(diveBtn, INPUT_PULLUP);

  candyServo.attach(9);
  candyServo.write(0);

  Serial.begin(9600);
}

void loop() {
  if (digitalRead(startBtn) == LOW) {
    Serial.println("S ");
    delay(200);
  }
  if (digitalRead(jumpBtn) == LOW) {
    Serial.println("J ");
    delay(200);
  }
  if (digitalRead(diveBtn) == LOW) {
    Serial.println("D ");
    delay(200);
  }

  if (Serial.available()) {
  char cmd = Serial.read();
  Serial.println(cmd);  // Debug line
  if (cmd == 'C') {
    candyServo.write(180); //rotate servo cover
    delay(3000); //3 second delay
    candyServo.write(0); //reset
    delay(1000);
  }
  }

}
P5.JS CODE:
let serial;
let start;
let youWin;
let gameOver; //bg images
let font;
let bgImages = []; //game time bg images
let bgm;
let ichigoNormal, ichigoJump, ichigoDive; //ichigo images
let obstacleImages = [];
let obstacles = [];
let ichigoY;
let ichigoState = "normal";
let jumpTimer = 0;
let diveTimer = 0;
let obstacleCount = 0;
let currentState = "start";
let currentPun = "";
let bgIndex = 0;
let bgTimer = 0;
let obstacleSpeed = 5;
const maxObstacleSpeed = 12;

let puns = [
  "Berry sweet move!",
  "Shortcake success!",
  "Jam-tastic",
  "Berry nice move!",
  "Sweet! Just like Ichigo!",
  "Go Ichi-Gooooooal",
  "ICHI-WOWWWWW",
  "Sweet Strawberry WOW"
]; //puns array for each win


function preload() {
  font = loadFont('Minecraft.ttf');
  start=loadImage('start.png');
  youWin=loadImage('win.png');
  gameOver=loadImage('gameover.png');
  bgImages[0] = loadImage('1.png');
  bgImages[1] = loadImage('2.png');
  bgImages[2] = loadImage('3.png');
  bgImages[3] = loadImage('4.png');
  ichigoNormal = loadImage('ichigo.png');
  ichigoJump = loadImage('jump.png');
  ichigoDive = loadImage('dive.png');
  bgm = loadSound('bgm.mp3');
  obstacleImages[0] = loadImage('cream.png');
  obstacleImages[1] = loadImage('choc.png');
  obstacleImages[2] = loadImage('cake.png');
}

function setup() {
  createCanvas(800, 400);

  bgm.loop();

  //create serial connection
  serial = createSerial();
  serial.open(9600);
createButton("Connect")
  .position(10, 10)
  .mousePressed(() => serial.open(9600));

  ichigoY = height - 100;
  imageMode(CENTER);
  textFont(font);
  textAlign(CENTER, CENTER);
  textSize(24);
}

//serial events
function serialEvent() {
  if (serial.available()) {
    let input = serial.readUntil('\n').trim();
    handleInput(input);
  }
}

function handleInput(input) {
  if (input === 'S') {
    startGame(); //starting the game after creating Start button
  } else if (input === 'J' && currentState === 'game') {
    ichigoState = "jump";
    jumpTimer = 20;
    checkObstacle("jump"); //making ichigo jump after pressing Jump button
  } else if (input === 'D' && currentState === 'game') {
    ichigoState = "dive";
    diveTimer = 20;
    checkObstacle("dive");
  } //make ichigo dive after clicking Dive button
}

function startGame() {
  currentState = "game";
  obstacleCount = 0;
  obstacles = [];
  obstacleSpeed = 5; //set initial speed slow
  nextObstacle();
  currentPun = "";
}

function nextObstacle() {
  let type = random(["jump", "dive"]); //randomise type of obstacle
  let y;
  if (type === "jump") {
    y = height - 80;
  } else {
    y = height - 140;
  } //set position of obstacle on canvas based on type

  obstacles.push({
    img: type === "jump" ? random([obstacleImages[0], obstacleImages[1]]) : obstacleImages[2],
    type: type,
    x: width + 100,
    y: y,
    cleared: false
  });
}

//check if player matches obstacle to jump/dive correctly
function checkObstacle(action) {
  if (obstacles.length > 0) {
    let obs = obstacles[0];
    if (obs.x < 150 && obs.x > 50) {
      if (obs.type === action) {
        if (!obs.cleared) {
          obstacleCount++;
          obstacleSpeed = min(obstacleSpeed + 0.5, maxObstacleSpeed);
          currentPun = random(puns);
          obs.cleared = true;

          if (obstacleCount >= 10) {
            winGame(); //show win screen if 10 obstacles over
          }
        }
      } else {
        currentState = "gameover"; //game over screen
      }
    }
  }
}

//win state
function winGame() {
  currentState = "win";
  serial.write('C\n');
  console.log('Sent C to Arduino');

}

function draw() {
  background(255);

  serialEvent();

  if (currentState === "start") {
    image(start, width/2, height/2, width, height);
  }
  else if (currentState === "game") {
    updateGame();
  }
  else if (currentState === "win") {
    image(youWin, width/2, height/2, width, height);
  }
  else if (currentState === "gameover") {
    image(gameOver, width/2, height/2, width, height);
  }
}


function updateGame() {

  //to change the background sky occasionally
  bgTimer++;
  if (bgTimer > 200) {
    bgIndex = (bgIndex + 1) % bgImages.length;
    bgTimer = 0;
  }

  if (bgImages[bgIndex]) {
    image(bgImages[bgIndex], width / 2, height / 2, width, height);
  }

  moveObstacles();

  let ichigoTop = ichigoY - 40;
  let ichigoBottom = ichigoY + 40;
  let ichigoLeft = 100 - 40;
  let ichigoRight = 100 + 40;

  if (ichigoState === "jump") {
    ichigoTop -= 120;
    ichigoBottom -= 120;
  } else if (ichigoState === "dive") {
    ichigoTop += 50;
    ichigoBottom += 50;
  }

  if (obstacles.length > 0) {
    let obs = obstacles[0];
    let obsLeft = obs.x - 30;
    let obsRight = obs.x + 30;
    let obsTop = (obs.type === "dive") ? height - 200 : height - 110;
    let obsBottom = (obs.type === "dive") ? height - 100 : height - 50;

    //check if ichigo and obstacle collide or not
    if (ichigoRight > obsLeft && ichigoLeft < obsRight &&
        ichigoBottom > obsTop && ichigoTop < obsBottom) {
      currentState = "gameover";
    }
  }

  if (ichigoState === "jump") {
    image(ichigoJump, 100, ichigoY - 50, 80, 80);
    jumpTimer--;
    if (jumpTimer <= 0) ichigoState = "normal";
  } else if (ichigoState === "dive") {
    image(ichigoDive, 100, ichigoY + 40, 80, 80);
    diveTimer--;
    if (diveTimer <= 0) ichigoState = "normal";
  } else {
    image(ichigoNormal, 100, ichigoY, 80, 80);
  }

  fill(0);
  text(`Obstacle ${obstacleCount + 1} / 10`, width / 2, 30); //display obstacle count
  fill(255,0,0);
  text(currentPun, width / 2, 100);
}

//move obstacles across screen
function moveObstacles() {
  for (let i = obstacles.length - 1; i >= 0; i--) {
    let obs = obstacles[i];
    obs.x -= obstacleSpeed;
    image(obs.img, obs.x, obs.y, 60, 60);

    if (obs.x < -50) {
      obstacles.splice(i, 1);
      if (currentState === "game") nextObstacle();
    }
  }
}
SERIAL COMMUNICATION:
From Arduino to p5:
Pressing the “Start” button sends an “S” to p5, to start/restart the game.
Pressing the “Jump” button sends a “J” to p5, triggering the character to jump.
Pressing the “Dive” button sends a “D” to p5, triggering the character to jump.
From p5 to Arduino:
At the end, when they win, P5 sends a “C” to Arduino, triggering the movement of the servo motor.
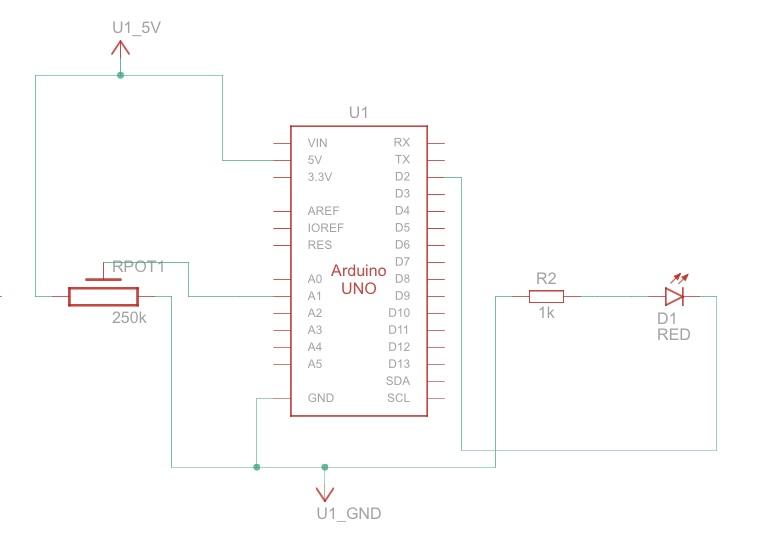
SCHEMATIC:

SOME ASPECTS OF THE PROJECT I’M PARTICULARLY PROUD OF
CANDY RAAAAAIN!
(i was so ready to say that during presentation time!)
I am very proud of the candy dispenser. It was very hard to create but it gave a sweet treat at the end (pun intended). I enjoyed implementing it, and definitely think that it gives the game a more interactive and fun vibe. I also love the overall aesthetic of the game and setup, and am very pleased with how it turned out. I also love how the game gets faster with each obstacle, which is something I added in after the user testing feedback. I really do think that added to the whole game experience.
I also am very proud of the project in itself with these aspects, especially seeing the user feedback after the showcase. Everyone loved playing the game, loved the graphics and was very shocked and happy to get candy at the end! Seeing the players interact with my game allowed me to see how fun and engaging the game was, especially towards at the end with “CANDY RAAAAAAAIN”!!!!
CHALLENGES:
This project was a ride of nervous excitement. I was all set and prepared with an arcade like setup, a whole board with arcade buttons and a connected box for the candy. However things quickly took a sharp turn when my arcade buttons mysteriously decided to malfunction (at midnight wow). A few hundred debugging attempts later, I realised that it was too late to try and fix it and had to start from scratch all over again.
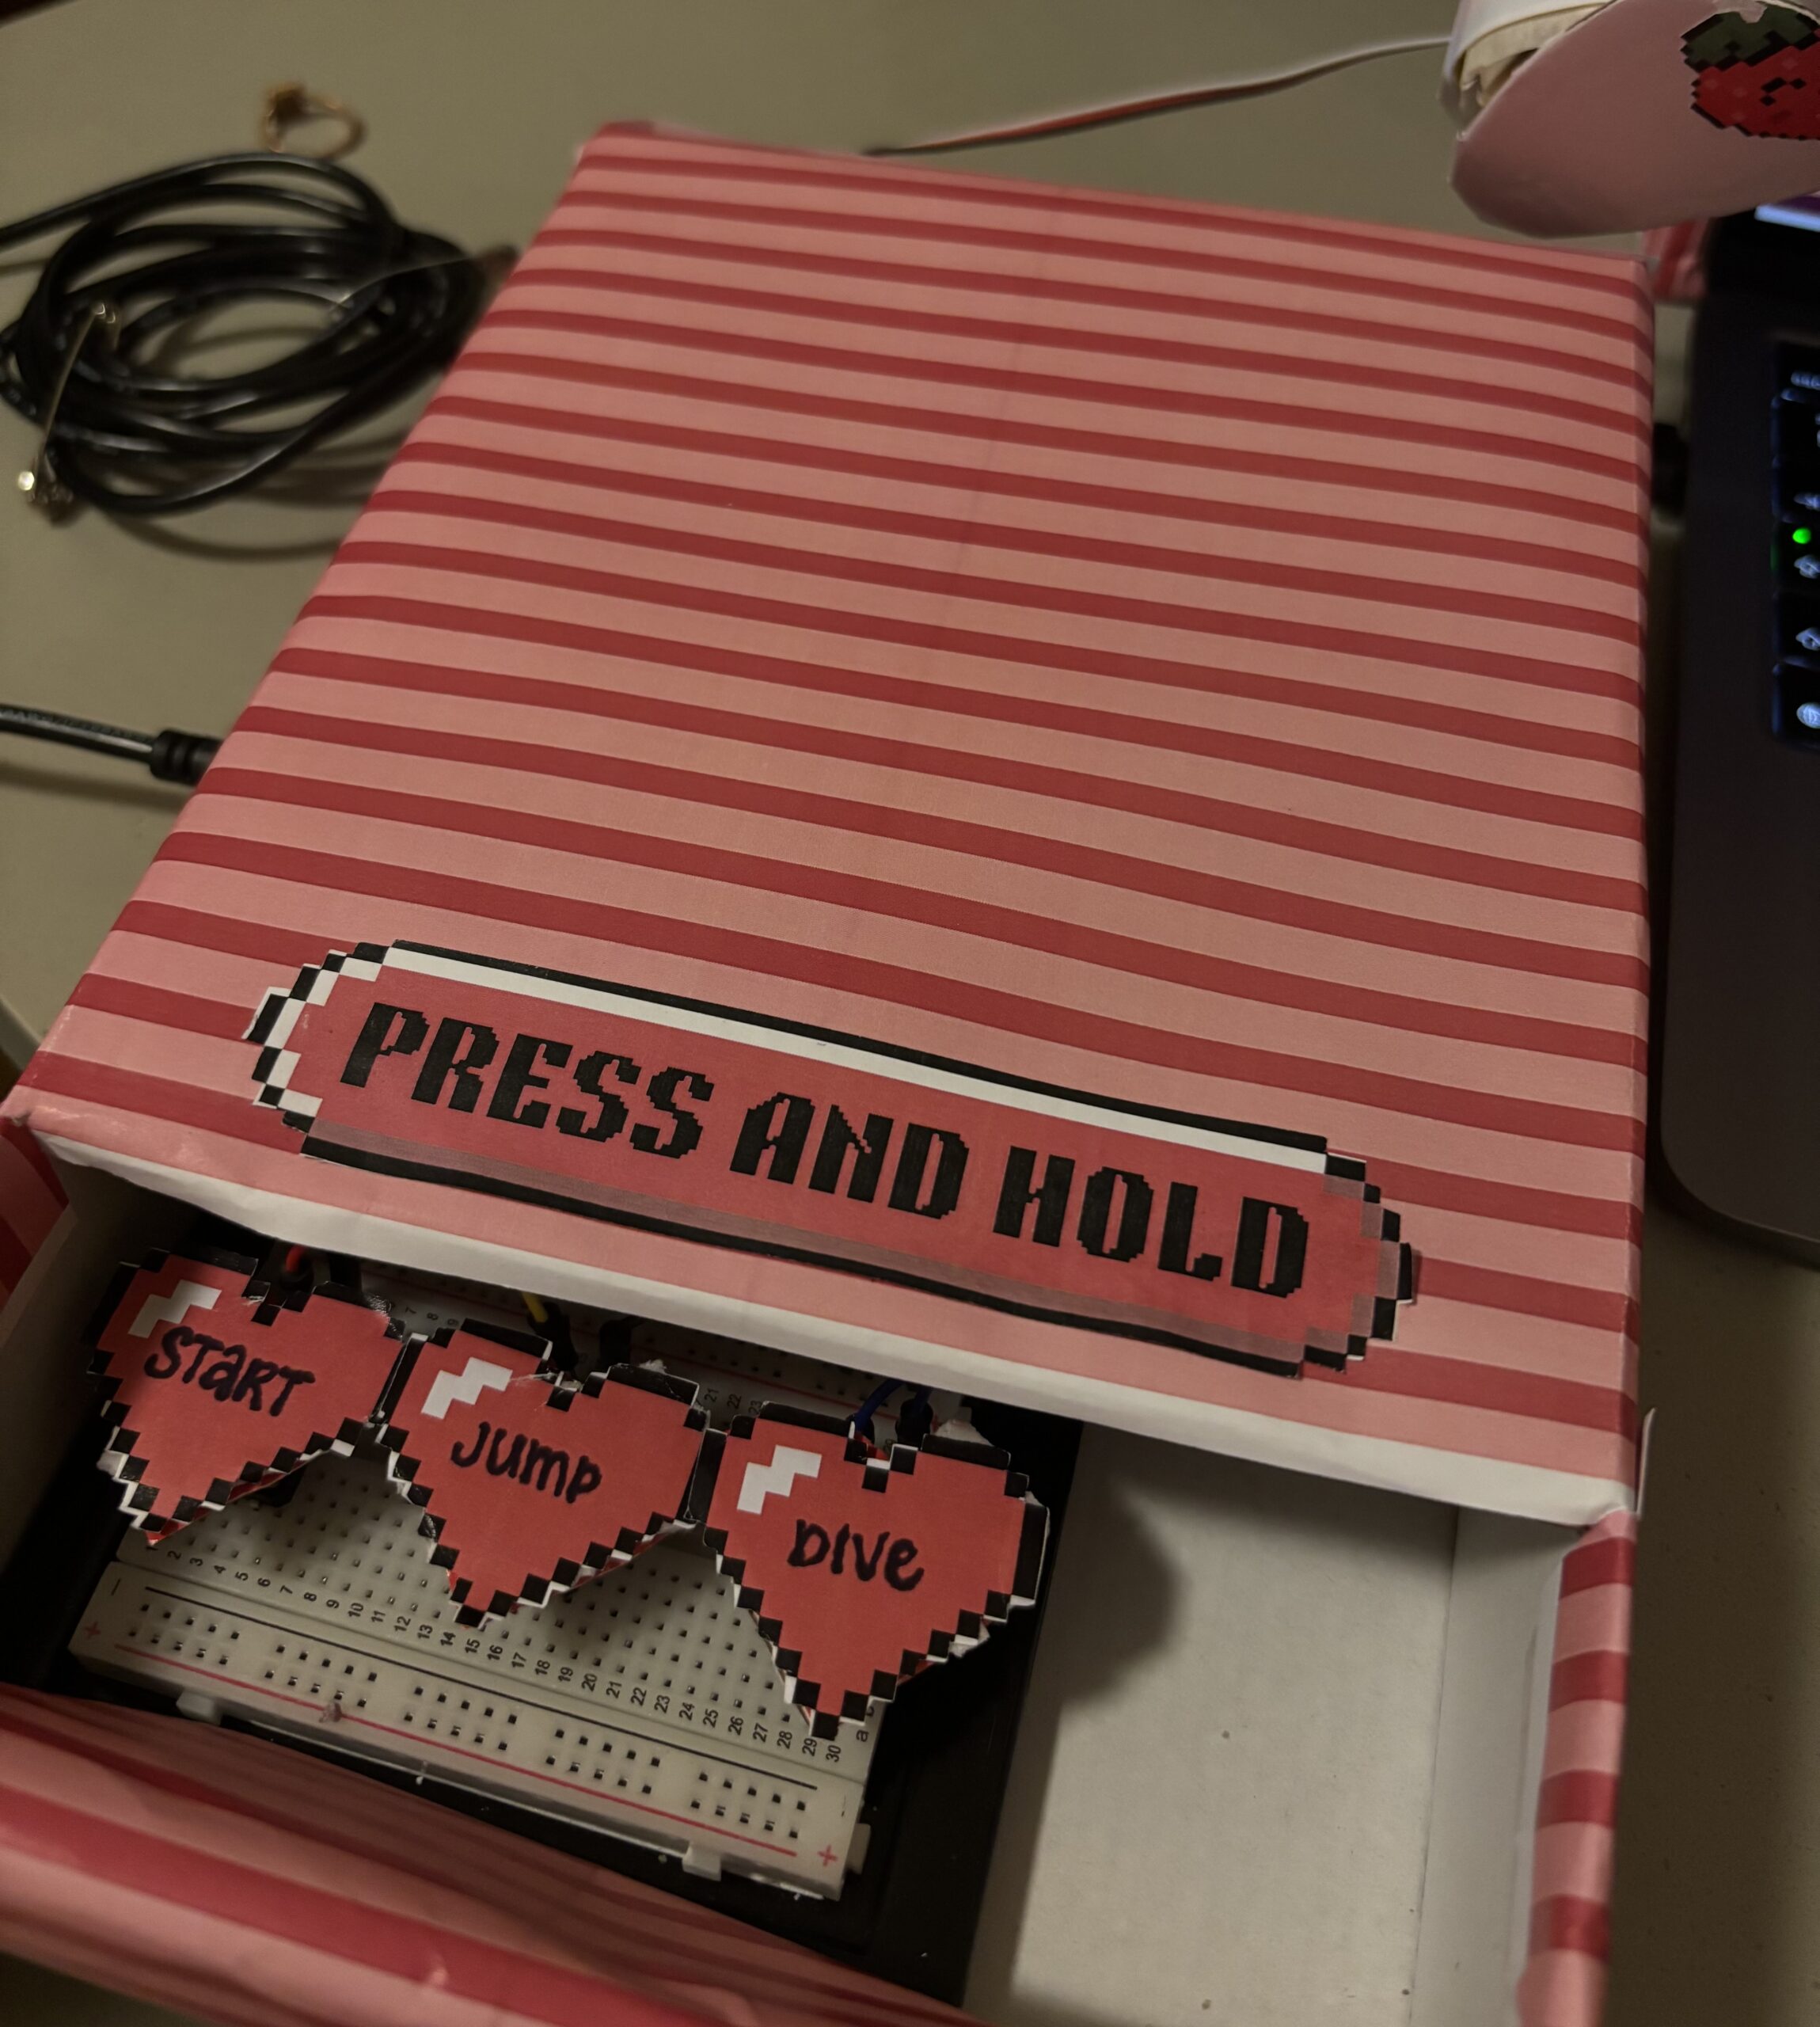
However, in this whirlwind of chaos on the final day I learnt how to stay calm under pressure and focus on solving the problem. I quickly resolved the situation by fabricating a board by recycling my Arduino box and decorating it. While it wasn’t as big or cool as my initial arcade button setup, I managed to focus on the outcome of the project, and have fun making it. It also turned out super cute at the end (bonus)!
IMPROVEMENTS:
If I could make improvements to my project, I’d definitely try and get the candy dispenser to store more candy and shoot it out into a certain place, rather than the “candy rain” situation (although its super fun to see). I also think I should have made the “PRESS AND HOLD”instruction in the screen and not the box, because there were a few people who didn’t see it at first, and then noticed iut above the buttons. I would also try and use sound effects in the game itself, when Ichigo jumps or dives, like a boing! sound. I would also like to explore adding themes to the game, like Space Ichigo in a different planet, or chef Ichigo with other fruits.
All in all, I’m super happy with how this project turned out, and Introduction to Interactive Media was super super fun!! Sending lots of love and Ichigos to this amazing class <3