Concept & Goals
Inspiration: Give a plant a “voice” through digital animation and sound, fostering empathy and care.
The idea was to monitor ambient light and human touch on the plant, translate those signals into a friendly digital avatar’s mood, color-changing lamp, moving leaf, and background music.
-
-
Goals:
-
Awareness of plant wellbeing via playful tech.
-
Interaction through capacitive touch (DIY sensor) and light sensing.
-
Empathy by giving the plant a way to “talk back.”
-
-
Video
Avatar
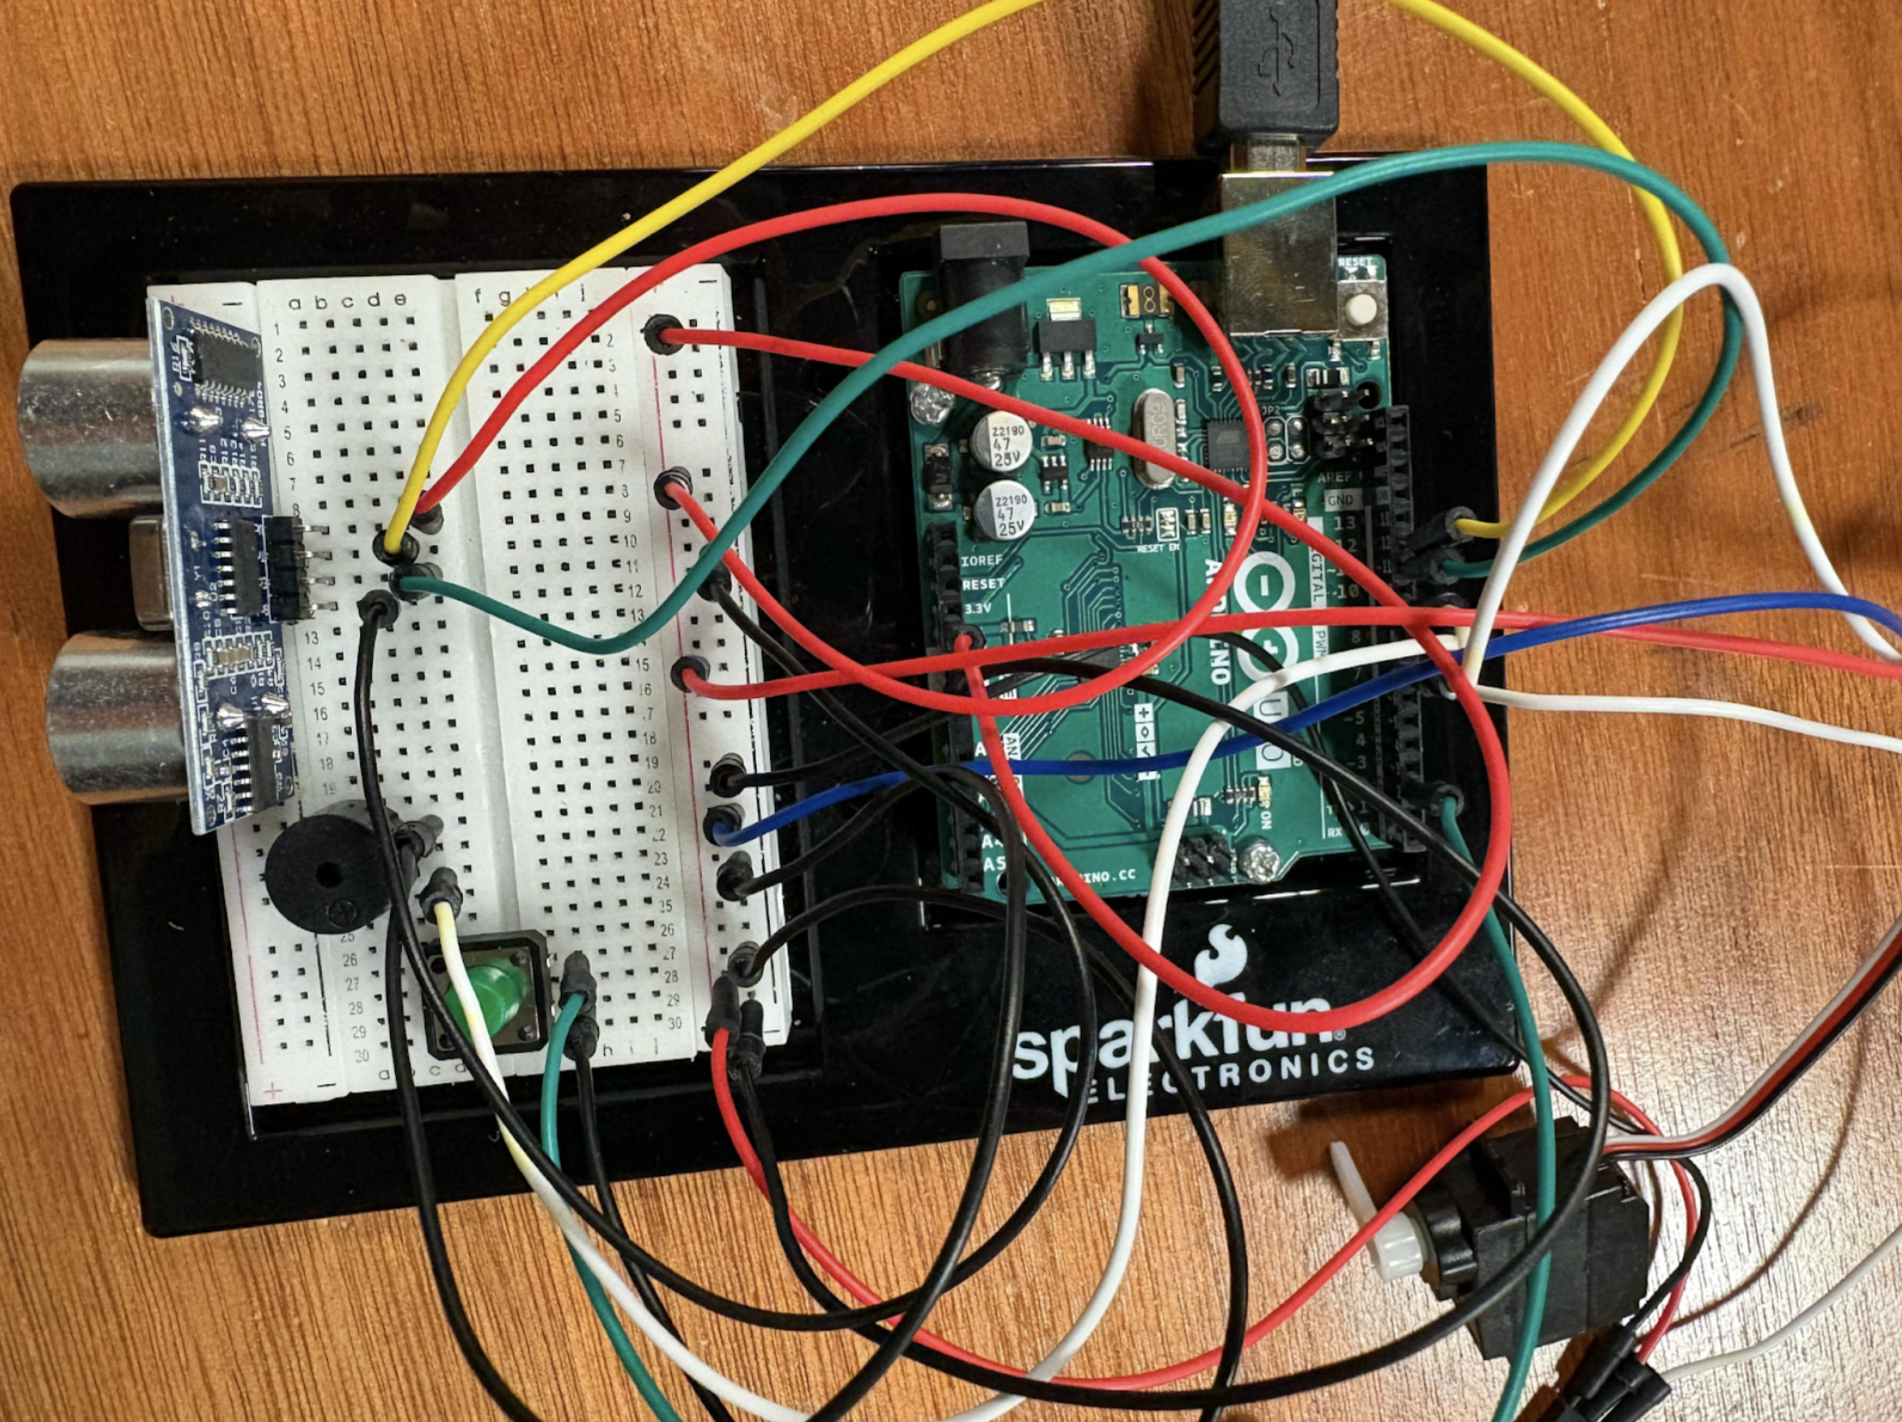
Setup


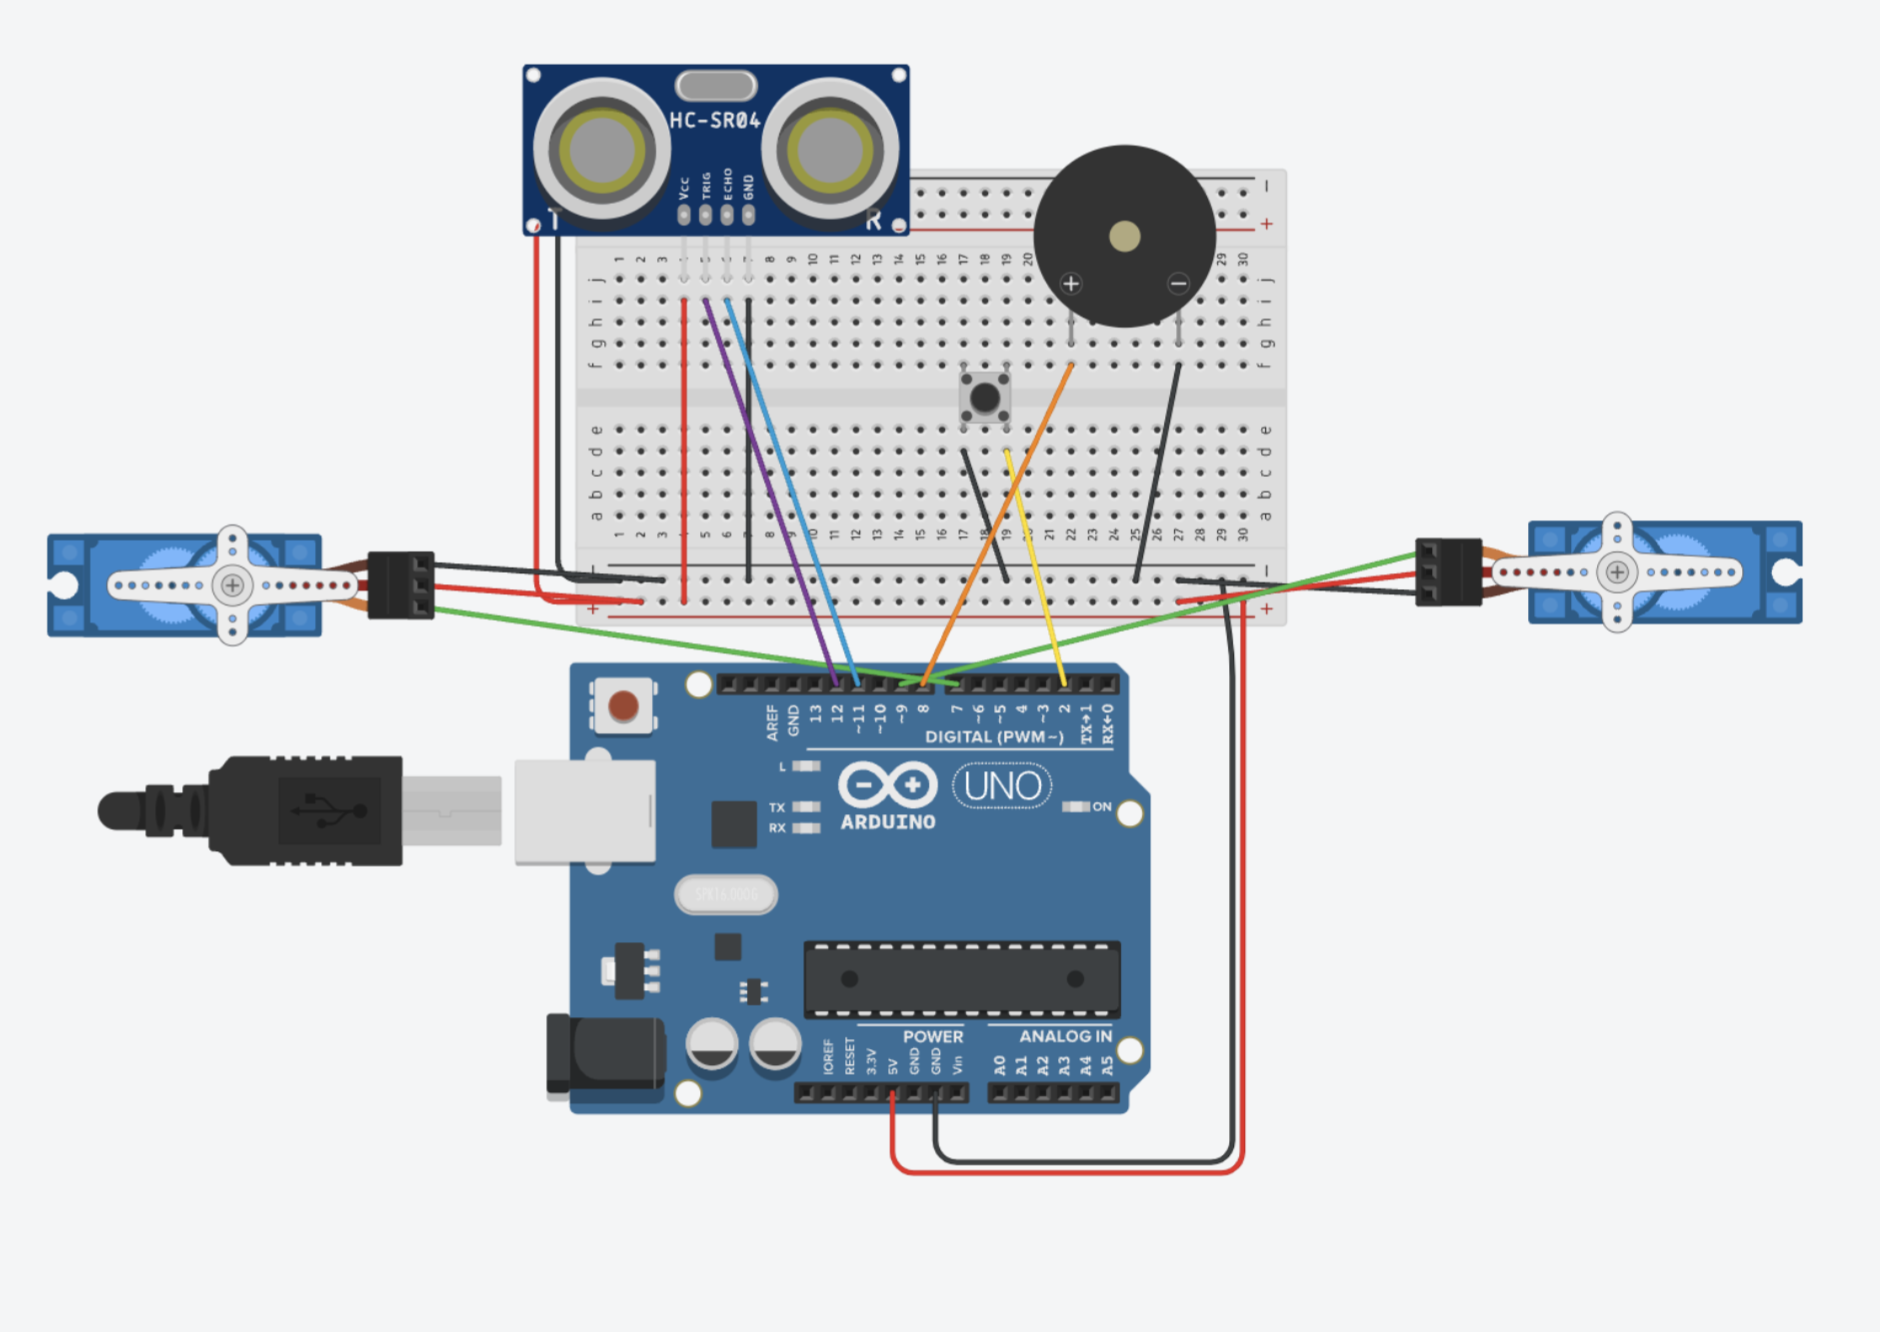
Hardware Overview

1. Capacitive Touch Sensor (DIY)
-
-
Pins: D4 (send) → 1 MΩ resistor → D2 (receive + foil/copper tape).
-
Library: Paul Badger’s CapacitiveSensor. Downloaded for the Arduino code.
-
Assembly:
-
Connect a 1 MΩ resistor between pin 4 and pin 2.
-
Attach copper tape to the receiving leg (pin 2) and wrap gently around the plant’s leaves.
-
In code:
CapacitiveSensor capSensor(4, 2);
-
-
2. Photoresistor (Ambient Light)
-
-
Pins: LDR → +5 V; 10 kΩ → GND; junction → A0.
-
Function: Reads 0–1023, mapped to 0–255 to control lamp intensity.
-
3. Push-Button (Music Control)
-
-
Pins: Button COM → D7, NO → GND (using
INPUT_PULLUP).
-
4. Mood LEDs
-
-
Pins:
-
Green LED1: D12 → 330 Ω → LED → GND
-
Red LED2: D13 → 330 Ω → LED → GND
-
-
Behavior:
-
Red LED on when touch > high threshold (indicates that the plant does not like the touch).
-
Green LED on when touch < low threshold (the plant is calm and likes the touch).
-
-
Arduino Code
#include <CapacitiveSensor.h>

// Capacitive sensor: send→ 4, receive→ 2
CapacitiveSensor capSensor(4, 2);

// Mood LEDs
const int ledPin   = 12;
const int ledPin2  = 13;

// Photoresistor
const int photoPin = A0;

// Push-button + button LED
const int buttonPin    = 7;  // COM→7, NO→GND


// Hysteresis thresholds
const long thresholdHigh = 40;
const long thresholdLow  = 20;

// Debounce
const unsigned long debounceDelay = 50;
unsigned long lastDebounceTime    = 0;
int           lastButtonReading   = HIGH;

// State trackers
bool musicOn = false;
bool led1On  = false;

void setup() {
  Serial.begin(9600);
  delay(100);

  // Let p5.js know we start OFF
  Serial.println("MUSIC_OFF");

  // Mood LEDs
  pinMode(ledPin,   OUTPUT);
  pinMode(ledPin2,  OUTPUT);

  // Capacitive sensor raw
  capSensor.set_CS_AutocaL_Millis(0);

  // Button LED off
  pinMode(buttonLedPin, OUTPUT);
  digitalWrite(buttonLedPin, LOW);

  // Push-button with pull-up
  pinMode(buttonPin, INPUT_PULLUP);
}

void loop() {
  // Button toggle (only prints MUSIC_ON / MUSIC_OFF)
  int reading = digitalRead(buttonPin);
  if (reading != lastButtonReading) {
    lastDebounceTime = millis();
  }
  if (millis() - lastDebounceTime > debounceDelay) {
    static int buttonState = HIGH;
    if (reading != buttonState) {
      buttonState = reading;
      if (buttonState == LOW) {            // you pressed
        musicOn = !musicOn;
        Serial.println(musicOn ? "MUSIC_ON" : "MUSIC_OFF");
        digitalWrite(buttonLedPin, musicOn ? HIGH : LOW);
      }
    }
  }
  lastButtonReading = reading;

  // Capacitive
  long sensorValue = capSensor.capacitiveSensor(30);
  Serial.println(String("TOUCH:") + sensorValue);

  // Mood LED hysteresis
  if (!led1On && sensorValue > thresholdHigh) {
    led1On = true;
  } else if (led1On && sensorValue < thresholdLow) {
    led1On = false;
  }
  digitalWrite(ledPin,  led1On ? HIGH : LOW);
  digitalWrite(ledPin2, led1On ? LOW  : HIGH);

  // Photoresistor
  int raw       = analogRead(photoPin);
  int mappedVal = map(raw, 0, 1023, 0, 255);
  Serial.println(String("LAMP:") + mappedVal);

  delay(50);
}
Serial messages:
-
-
MUSIC_ON/MUSIC_OFF(button) -
TOUCH:<value>(capacitive) -
LAMP:<0–255>(light)
-
P5js Code
let port;
const baudrate = 9600;
let connectButton;
let bgMusic;
let interactionStarted = false;
let isTouched = false;
let lampBrightness = 0;


let plankCount = 6;
let cam;
let myFont;
let waveAngle = 0;
let isWaving = false;
let waveStartTime = 0;


function preload() {
  myFont = loadFont('CalligraphyFLF.ttf');
  bgMusic = loadSound('musica.mp3');  // load  MP3
}
  // Works for clicks, touches, and fullscreen events
  const unlockAudio = () => {
    if (!audioUnlocked) {
      getAudioContext().resume().then(() => {
        console.log('AudioContext unlocked');
        audioUnlocked = true;
        if (musicOn && bgMusic.isLoaded()) bgMusic.loop();
      });
    }
  };
  // Mouse/touch unlock
  window.addEventListener('mousedown', unlockAudio);
  window.addEventListener('touchstart', unlockAudio);
  // Also unlock on fullscreen change
  document.addEventListener('fullscreenchange', unlockAudio);

function setup() {
  createCanvas(windowWidth, windowHeight, WEBGL);

  connectButton = createButton("Connect to Arduino");
  connectButton.position(20, 20);
  connectButton.mousePressed(() => {
    port.open(baudrate);
  });

  port = createSerial();
  const used = usedSerialPorts();
  if (used.length > 0) {
    port.open(used[0], baudrate);
  } else {
    console.warn("No previously used serial ports found.");
  }

  setInterval(onSerialData, 50);

  textFont(myFont);
  textSize(36);
  textAlign(CENTER, CENTER);

  cam = createCamera();
  const fov = PI / 3;
  const cameraZ = (height / 2.0) / tan(fov / 2.0);
  cam.setPosition(0, 0, cameraZ);
  cam.lookAt(0, 0, 0);
  frameRate(60);
}
function onSerialData() { //serial data
  if (!port || !port.opened()) return;
  while (port.available() > 0) {
    const raw = port.readUntil('\n');
    if (!raw) break;
    const line = raw.trim();
    console.log('Received:', line);

    if (line.startsWith('LAMP:')) {
      lampBrightness = int(line.split(':')[1]);
    } else if (line.startsWith('TOUCH:')) {
      const t = int(line.split(':')[1]);
      // ignore baseline zero readings
      if (t > 0) {
        isTouched = true;
        isWaving = true;
        waveStartTime = millis();
      }
    } else if (line === 'START') {
      interactionStarted = true;
    } else if (line === 'MUSIC_ON') {
      musicOn = true;
      if (bgMusic.isLoaded()) {
        console.log('MUSIC_ON → play');
        bgMusic.play();
      }
    } else if (line === 'MUSIC_OFF') {
      musicOn = false;
      if (bgMusic.isPlaying()) {
        console.log('MUSIC_OFF → stop');
        bgMusic.stop();
      }
    }
  }
}

//Draw
function draw() {
  background(210, 180, 140);
  ambientLight(10);
  pointLight(255, 200, 150, 200, -300, 300);
  pointLight(255, 150, 100, 400, -300, 300);

  drawWarmGradientBackground();
  drawWarmLamp();
  drawWoodDeck();
  drawWoodenBase();
  drawShadow();
  drawPot();
  drawBody();
  drawFace();
  drawPetiole();
  drawInstructionFrame();

  if (!interactionStarted) {
    drawInstructionFrame();
  } else {
    drawScene();
    pointLight(lampBrightness, lampBrightness * 0.8, 100, 200, -300, 300);
  }

  if (isWaving) {
    waveAngle = sin((millis() - waveStartTime) / 2000) * 0.5;

    if (millis() - waveStartTime > 400) {
      isWaving = false;
      waveAngle = 0;
    }
  }

  push();
  rotateZ(waveAngle);
  drawLeaf(0, -140, 0, 1, 4);
  pop();

  push();
  rotateZ(-waveAngle);
  drawLeaf(0, -140, 0, -1, 4);
  pop();

}

function windowResized() {
  resizeCanvas(windowWidth, windowHeight);
  const fov = PI / 3;
  const cameraZ = (height / 2.0) / tan(fov / 2.0);
  cam.setPosition(0, 0, cameraZ);
}


function drawWarmLamp() {
  push();
  translate(250, -250, 0);

  // glow — modulate alpha by lampBrightness
  for (let r = 300; r > 50; r -= 20) {
    push();
    noStroke();
    // fade alpha between 0 and 150
    let a = map(lampBrightness, 0, 255, 20, 150);
    fill(255, 180, 90, a);
    ellipse(0, 10, r, r * 1.2);
    pop();
  }

  // stand
  fill(100, 70, 50);
  translate(0, 200, 0);
  cylinder(5, 400);

  // base
  translate(0, 200, 0);
  fill(80, 60, 40);
  ellipse(0, 0, 80, 16);

  // lampshade (inverted cone)
  push();
  translate(0, -400, 0);
  fill(225, 190, 150);
  cone(50, -100, 24);
  pop();

  pop();
}

function drawWoodDeck() {
  push();
    rotateX(HALF_PI);
    translate(0, -2, -170);
    // static plank color
    fill(160, 100, 60);
    stroke(100, 60, 40);
    const plankHeight = -50;
    for (let i = 0; i < plankCount; i++) {
      box(width, plankHeight, 10);
      translate(0, plankHeight, 0);
    }
  pop();
}

function drawWoodenBase() {
  push();
    rotateX(HALF_PI);
    translate(0, 150, -200);
    // static plank color
    fill(160, 100, 60);
    stroke(100, 60, 40);
    const baseCount = 8;
    const plankWidth = (width * 1.2) / baseCount;
    for (let i = 0; i < baseCount; i++) {
      push();
        translate(-width * 0.6 + i * plankWidth + plankWidth / 2, 24, 0);
        box(plankWidth, 400, 20);
      pop();
    }
  pop();
}


function drawShadow() {
  push();
  translate(0, 150, -10);
  rotateX(HALF_PI);
  noStroke();
  fill(80, 70, 60, 30);
  ellipse(0, 0, 190, 30);
  pop();
}

function drawPot() {
  push();
  translate(0, 100, 0);
  fill(170, 108, 57);
  stroke(120, 70, 40);
  strokeWeight(1);
  cylinder(60, 80);
  translate(0, -50, 0);
  fill(190, 120, 70);
  cylinder(80, 20);
  pop();
}

function drawBody() {
  push();
  translate(0, 20, 0);
  noStroke();
  fill(150, 255, 150);
  sphere(75);
  translate(0, -90, 0);
  sphere(70);

  // highlights
  fill(255, 255, 255, 90);
  translate(-30, -10, 50);
  sphere(10);

  pop();
}

function drawPetiole() {
  push();
  translate(0, -110, 20);  // start from top of head
  rotateX(radians(200));  // slight backward tilt
  fill(100, 200, 100);
  noStroke();
  cylinder(8, 100);
  pop();
}


function drawLeaf(x, y, z, flip = 1, scaleFactor = 1) {
  push();
  translate(x, y, z);
  rotateZ(flip * QUARTER_PI); // tilt outwards
  rotateX(HALF_PI - QUARTER_PI * 0.5); // add a slight backward curve
  scale(flip * scaleFactor, scaleFactor); // flip + scale


  fill(100, 200, 100);
  stroke(60, 160, 80);
  strokeWeight(1);

  beginShape();
  vertex(0, 0);
  bezierVertex(-35, -90, -70, -10, 0, 0); // left curve
  endShape(CLOSE);

  // Center vein
  stroke(90, 150, 80);
  strokeWeight(2);
  line(0, 0, -40, -29);
  pop();
}

function drawFace() {
  push();
  translate(0, -100, 70);

  stroke(10);
  strokeWeight(2);
  noFill();
  arc(-20, 0, 20, 10, 0, PI);
  arc(20, 0, 20, 10, 0, PI);

  // blush
  noStroke();
  fill(255, 200, 200, 100);
  ellipse(-35, 10, 15, 8);
  ellipse(35, 10, 15, 8);

  // smile
  stroke(30);
  noFill();
  arc(0, 15, 30, 10, 0, PI);

  pop();
}
function drawWarmGradientBackground() {
  push();
  translate(0, 0, -500); // move far behind the scene
  noStroke();
  beginShape();
  fill(250, 230, 200); // top (warm cream)
  vertex(-width, -height);
  vertex(width, -height);
  fill(210, 170, 130); // bottom (warm brownish-orange)
  vertex(width, height);
  vertex(-width, height);
  endShape(CLOSE);
  pop();
}


function drawInstructionFrame() {
  push();
    // move to a spot on the back wall
    translate(-width * 0.25, -height * 0.25, -490);

    // outer frame (landscape)
    fill(120, 80, 40);
    box(430, 300, 10);

    // inner “paper” canvas inset
    push();
      translate(0, 0, 7);
      fill(255, 245, 220);
      box(390, 260, 2);
    pop();

    // text
    push();
      translate(0, 0, 12);
      fill(60, 40, 30);
      textSize(40);
      textAlign(CENTER, CENTER);
      text("Make the Plant Happy\n- Press to play Music\n- Control the Lighting\n- Pet the plant", 0, 0);
    pop();
  pop();
}
Functionality Flow
-
-
Startup
-
Arduino sends
MUSIC_OFF. p5.js opens port, waits forSTART(button press on avatar).
-
-
Interaction
-
Touch: Plant touch →
TOUCH:<value>→ leaf animation. -
Light: Ambient changes →
LAMP:<0–255>→ lamp glow intensity. -
Music: Physical push-button →
MUSIC_ON/MUSIC_OFF→ background music.
-
-
Challenges & Solutions
-
-
Serial Fragmentation: Split messages were mis-parsed → switched to single
println("TOUCH:"+value)calls. -
Sensor Hysteresis: Capacitive values vary → implemented high/low thresholds to avoid flicker.
-
Full-Screen Behavior: Music wouldn’t play in full screen → tied audio unlock to
fullscreenchangeevent.
-