Final Project Documentation

Concept

I created this project to introduce the viewers to 4 regions in the Northern Caucasus: Adyghea, Dagestan, Ingushetia, Checnya.

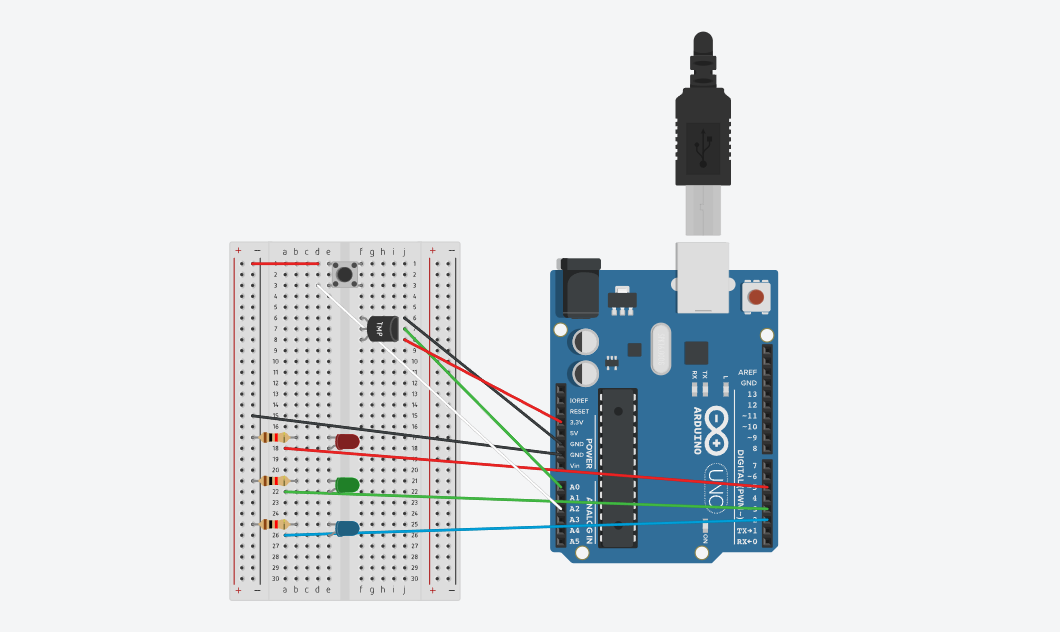
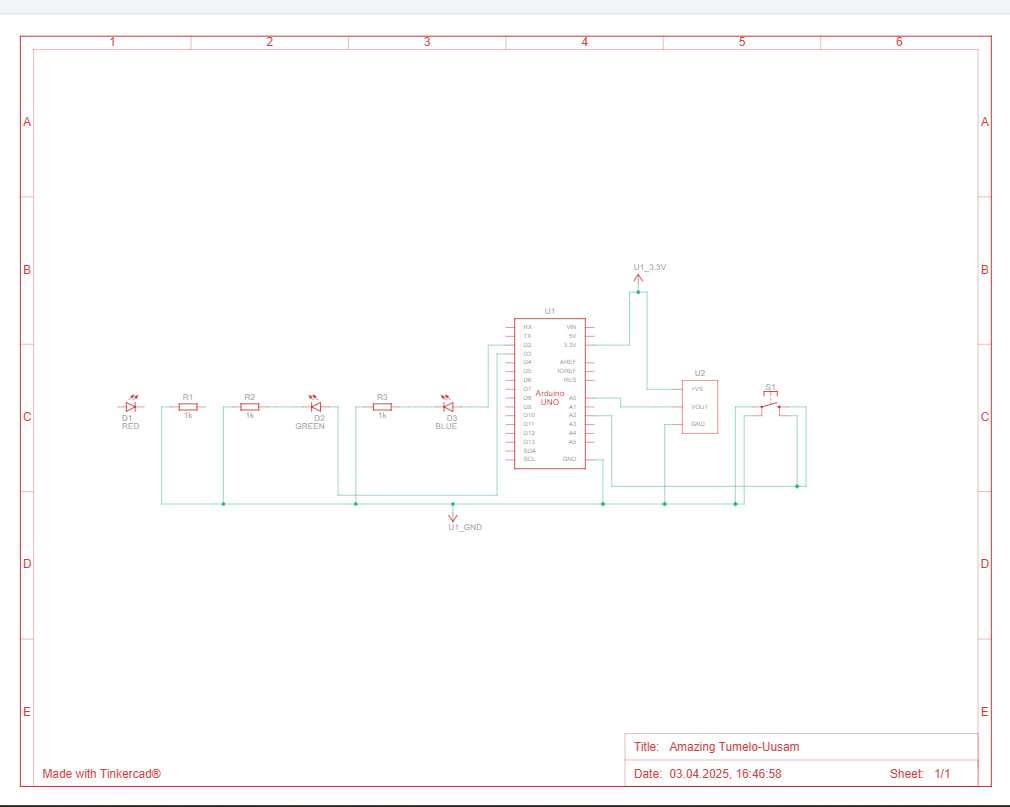
As a physical object, i pivoted and decided to build with four distinct doors, each representing one of the regions. Each door is embedded with a color-coded button, inviting the user to press and explore a region.

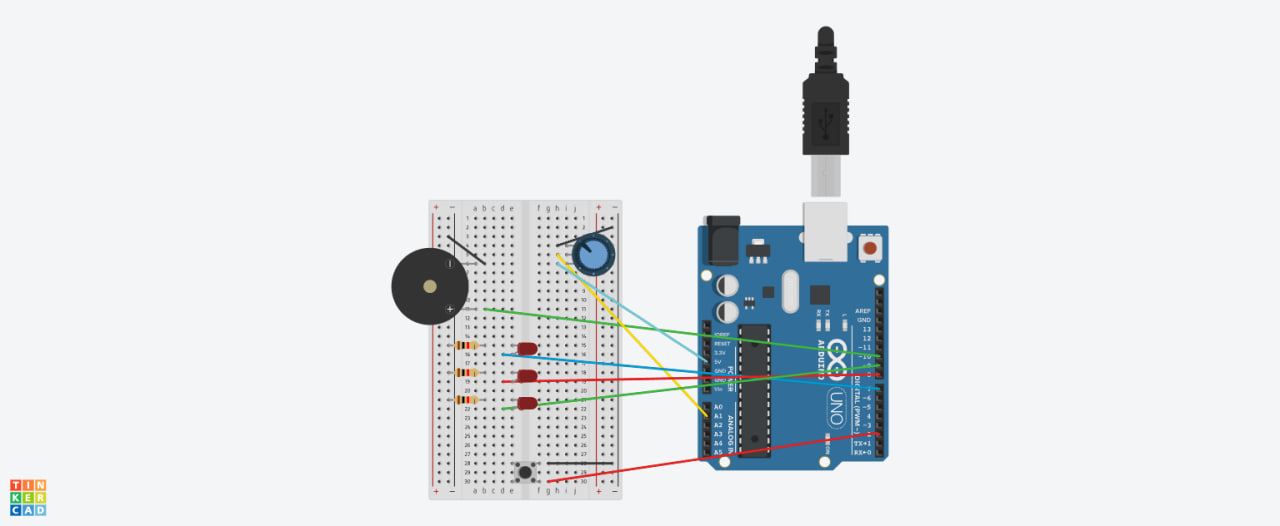
  • Red Button – Ingusheita

  • Green Button – Dagestan

  • Blue Button – Chechnya

  • Yellow Button – Adyghea

This interaction was designed to make the user feel like a traveler stepping into a new cultural experience. Upon pressing a door button, users are “teleported” to a selected region. Each region features:

  • Must-See Spots: Highlighted landscapes, canyons and mountains

  • Traditions: Rituals, dances, or cultural practices—some of which are interactive

  • Taste of Region: Food visuals

Code

P5: Link to no arduino version

Arduino code:

const int buttonPin1 = 4;  // Dagestan button
const int buttonPin2 = 2;  // Adyghea button
const int buttonPin3 = 5;  // Checnya button
const int buttonPin4 = 3;  // Ingushetia button

int buttonState1 = 0;
int buttonState2 = 0;
int buttonState3 = 0;
int buttonState4 = 0;

int lastButtonState1 = HIGH;
int lastButtonState2 = HIGH;
int lastButtonState3 = HIGH;
int lastButtonState4 = HIGH;

void setup() {
  Serial.begin(9600);
  pinMode(buttonPin1, INPUT_PULLUP);
  pinMode(buttonPin2, INPUT_PULLUP);
  pinMode(buttonPin3, INPUT_PULLUP);
  pinMode(buttonPin4, INPUT_PULLUP);
}

void loop() {
  // Read button states
  buttonState1 = digitalRead(buttonPin1);
  buttonState2 = digitalRead(buttonPin2);
  buttonState3 = digitalRead(buttonPin3);
  buttonState4 = digitalRead(buttonPin4);

  // Check for button presses and only send once on press
  if (buttonState1 == LOW && lastButtonState1 == HIGH) {
    Serial.println("DAGESTAN");
  }    
  
  if (buttonState2 == LOW && lastButtonState2 == HIGH) {
    Serial.println("ADYGHEA");
  }
  
  if (buttonState3 == LOW && lastButtonState3 == HIGH) {
    Serial.println("CHECNYA");
  }
  
  if (buttonState4 == LOW && lastButtonState4 == HIGH) {
    Serial.println("INGUSHETIA");
  }
  
  // Save current button states for next comparison
  lastButtonState1 = buttonState1;
  lastButtonState2 = buttonState2;
  lastButtonState3 = buttonState3;
  lastButtonState4 = buttonState4;
  
  delay(50); // Debounce delay
}

Reflections:

This project cost me a lot of all nighters, confusion and frustration. At the same time, it taught me so much both in technical and non-technical aspects and became one of the most rewarding learning experiences I’ve had so far.

Originally, my idea was to create a compass-based interaction, but I struggled to get the p5.js and Arduino integration to work properly. After a whole night night of troubleshooting and brainstorming, I pivoted the concept and fully committed to building a physical house. To bring that idea to life, I had to learn Adobe Illustrator from scratch to design the house structure, prepare it for laser cutting, and assemble it manually. I also learned how to solder and wire hardware components, connecting each button to the Arduino and ensuring smooth communication with the p5.js interface.

Even though my project wasn’t a game or something instantly engaging for everyone, I was quite surprised by the positive reactions at the showcase. Many visitors had never heard of the Caucasus before, yet they showed genuine curiosity to learn about its culture through an interactive format. Several people commented on the effort it must have taken to build the physical installation and to research and create the digital content for each region.

Overall, this project and the entire class had its highs and lows, but I truly loved the creative process—from just having an idea to actual execution of it. Even when it seemed impossible at times, the process pulled me into a state of creative flow and i enjoyed it.

Final Project: Preliminary Concept

My final project is an interactive experience that allows users to explore the North Caucasus region (Adyghea, Chechnya, North Ossetia, and Dagestan) as if they are preparing for a journey—whether for university break, a future trip, or just curiosity.

Concept Overview:

The physical part of the project will be a laser-cut/3D printed compass embedded with a potentiometer (or potentially an angle detector) connected to an Arduino. As users physically rotate the compass, it sends data to a P5.js sketch, where the selected region is visually highlighted on a map of the Caucasus.

After selecting a region, users will be presented with a digital menu, which will be the same for each region, with categories like tourist destinations, cuisine, music, what each region is famous for etc. Clicking each category will reveal visuals, audio clips, or text lated to that region and topic.


Current Progress:

I’m currently working on designing the digital side of the project in Canva, so i haven’t started writing the code yet. As for the physical part of the project – compass – i’m planning on doing it later as i think it’s better to visualise the layout of my project first.

Week 11: Reading Response

Design Meets Disability

Reading this article made me reconsider how we think about assistive devices. The author argues that the way we design things like hearing aids, prosthetic limbs, or wheelchairs often focuses only on function without paying attention to design or how it makes people feel. He suggests that assistive technologies should be treated the same way we design phones, clothes etc.

One of the examples that stood out to me was how eyeglasses used to be seen as purely medical devices, but now they’re fashion statements. In contrast, hearing aids are still often designed to be hidden, as if there’s something wrong with having them.

He also talks about prosthetics and how some people prefer high-tech or artistic designs over realistic-looking limbs. I really liked the idea that people should have choices between and stylish and not purely functional options too. That feels way more empowering than just trying to hide the fact that someone uses an assistive device.

Personally, this reading made me think about how design can either reinforce stigma or break it. If we design assistive tech as something to be hidden, we’re basically saying that disability is something to be ashamed of. But if we treat it as a space for personal expression, that makes people with disabilities feel more confident.

Week 11: Serial Communication

Task 1

Prompt: Make something that uses only one sensor on Arduino and makes the ellipse in p5 move on the horizontal axis, in the middle of the screen, and nothing on Arduino is controlled by p5.

Code P5:

let circleX;
function setup() {
    createCanvas(600, 600);
    noFill();
}
function draw() {
     background("rgb(248,238,249)");
  stroke("purple");
 ellipse(map(circleX, 0, 1023, 0, width), height / 2, 100, 100);
   
     if (!serialActive) {
    background("#CE41E6");
    stroke("#white");
    textSize(50);
    text("Press Space Bar to select Serial Port", 20, 30, width - 30, 200);
  }
}
function keyPressed() {
    if (key == " ")
        setUpSerial();
}
function readSerial(data) {
    if (data != null) //
        circleX = int(data);
}            
   

Arduino Code:

int lightPin = A0;  

void setup() {
  Serial.begin(9600);       
  pinMode(lightPin, INPUT);  
}

void loop() {
  int sensorValue = analogRead(lightPin);  
  Serial.println(sensorValue);            
  delay(5);                             
}

Task 2

Prompt: Make something that controls the LED brightness from p5

For this project, I decided to imitate the sun: as the mouse moves from left to right across the screen, the brightness level on the screen and the connected LED both increase.

Code P5:

let ledBrightness = 0;

function setup() {
  createCanvas(600, 400);
  textSize(20);
}

function draw() {
  background(240);

  if (!serialActive) {
    fill(0);
    text("Press SPACE to select serial port", 20, 30);
  } else {
    // Display mapped brightness
    fill(0);
    text("LED Brightness: " + ledBrightness, 20, 30);

    fill(255, 150, 0);
    ellipse(mouseX, height / 2, map(ledBrightness, 0, 255, 10, 100));
  }

  // Update brightness based on mouseX
  ledBrightness = int(map(constrain(mouseX, 0, width), 0, width, 0, 255));

  // Send brightness to Arduino
  if (serialActive) {
    writeSerial(ledBrightness + "\n");
  }
}

function keyPressed() {
  if (key == ' ') {
    setUpSerial(); 
  }
}

Arduino Code:

int ledPin = 9; 
void setup() {
  Serial.begin(9600);
  pinMode(ledPin, OUTPUT);

  while (Serial.available() <= 0) {
    delay(300);
  }
}

void loop() {
  while (Serial.available()) {
    int brightness = Serial.parseInt();
    if (Serial.read() == '\n') {
      brightness = constrain(brightness, 0, 255);
      analogWrite(ledPin, brightness);
    }
  }
}

Task 3:

Prompt: take the gravity wind example (https://editor.p5js.org/aaronsherwood/sketches/I7iQrNCul) and make it so every time the ball bounces one led lights up and then turns off, and you can control the wind from one analog sensor. 

I connected Arduino to p5.js so the potentiometer controls the wind of the bouncing ball, and whenever the ball hits the ground, the LED blinks. Everything talks to each other through serial communication.

Link to task 3 video 

Code P5:

let velocity;
let gravity;
let position;
let acceleration;
let wind;
let drag = 0.99;
let mass = 50;
let serial;
let connectBtn;
let ledTriggered = false;
function setup() {
  createCanvas(640, 360);
  noFill();
  position = createVector(width / 2, 0);
  velocity = createVector(0, 0);
  acceleration = createVector(0, 0);
  gravity = createVector(0, 0.5 * mass);
  wind = createVector(0, 0);
  // setup serial connection
  serial = createSerial();
  let previous = usedSerialPorts();
  if (previous.length > 0) {
    serial.open(previous[0], 9600);
  }
  connectBtn = createButton("Connect to Arduino");
  connectBtn.position(10, height + 10); // button position
  connectBtn.mousePressed(() => serial.open(9600));
}
function draw() {
  background(255);
  // check if we received any data
  let sensorData = serial.readUntil("\n");
  if (sensorData.length > 0) {
  // convert string to an integer after trimming spaces or newline
    let analogVal = int(sensorData.trim());
    let windForce = map(analogVal, 0, 1023, -1, 1);
    wind.x = windForce; // horizontal wind force
  }
  applyForce(wind);
  applyForce(gravity);
  velocity.add(acceleration);
  velocity.mult(drag);
  position.add(velocity);
  acceleration.mult(0);
  ellipse(position.x, position.y, mass, mass);
  if (position.y > height - mass / 2) {
    velocity.y *= -0.9; // A little dampening when hitting the bottom
    position.y = height - mass / 2;
    if (!ledTriggered) {
      serial.write("1\n");   // trigger arduino LED
      ledTriggered = true;
    }
  } else {
    ledTriggered = false;
  }
}
function applyForce(force) {
  // Newton's 2nd law: F = M * A
  // or A = F / M
  let f = p5.Vector.div(force, mass);
  acceleration.add(f);
}
function keyPressed() {
  if (key === ' ') {
    mass = random(15, 80);
    position.y = -mass;
    velocity.mult(0);
  }
}

Arduino Code:

int ledPin = 9;
void setup() {
  Serial.begin(9600);
  pinMode(ledPin, OUTPUT);
}
void loop() {
  // send sensor value to p5.js
  int sensor = analogRead(A0);
  Serial.println(sensor);
  delay(100);
  // check for '1' from p5 to trigger LED
  if (Serial.available()) {
    char c = Serial.read();
    if (c == '1') {
      digitalWrite(ledPin, HIGH);
      delay(100);
      digitalWrite(ledPin, LOW);
    }
  }
}


Week 10: Reading

A Brief Rant on the Future of Interaction Design

“A tool addresses human needs by amplifying human capabilities.” – this quote made me think of how I’ve always thought of tools as things that help us get stuff done, but I never really considered how they’re supposed to work with what we’re already capable of.

The author talks about how a good tool fits both sides: what we can do and what we want to do. But he mentions that most tech today is designed without really thinking about what people can physically do with their bodies, especially their hands. We’ve kind of reduced all interaction down to tapping on a screen, and we’ve just accepted that as a regular thing. But when we try building something physical, there’s a sense of control that I never feel when I’m just doing something digitally.

I also thought about how this idea connects to creativity. So many creative tools like musical instruments, or painting tools are great because they respond to human movement., but a lot of digital tools don’t really do that.

Responses: A Brief Rant on the Future of Interaction Design

Reading through the responses made me notice how many people immediately started to defend current technology, saying things like “We just need better gestures!”. I really liked how the author responded: not defensively, but by clarifying that he’s not against touchscreens or gestures. His point isn’t that modern tools are useless, but that they’re incomplete.

There was a line in the article about the two-year-old who can use an iPad but can’t tie his shoes, which made me think of how humanity made digital interfaces so simple that even toddlers can swipe around. However, this also proves that people don’t see a lot of value in developing actual physical skills.

Another moment that  stood out was when the author said “We’ve almost given up on the body already.” He points to how much of our lives are spent sitting: at work, during leisure, and even while commuting. As a result, we’ve had to create artificial forms of physical activity just to stay healthy. This all just emphasized how our environment  and the tools we design are not supporting our physical well-being

Overall, these responses helped reinforce the author’s main argument: that really effective tools should be designed to serve not just our cognitive abilities, but our physical ones too.

Week 10: Group Musical Instrument

Our Concept

For our musical instrument, we were inspired by DJ sets and how DJs interact with their equipment during live performances. We wanted to bring that experience into a smaller format, so we built a mini DJ controller using an Arduino board.

Our DJ set includes:

  • A potentiometer to control the volume, just like DJs do when they’re mixing tracks

  • LEDs that react to the sound changes, creating a responsive visual effect

  • A piezo buzzer that produces the sound itself

Set-up

Code

GitHub

Reading Reflection: Week 9

Physical Computing’s Greatest Hits (and misses)

One idea that really resonated with me is the reminder not to give up on a project just because it’s been done before. I’ve done it myself in the past when i would get excited about an idea for an IM project, only to do my research and see that someone else had already made something similar. That would make me feel like it wasn’t “original enough,” so I’d opt out to do something different.

The reading made me realize that two people can execute the exact same concept in totally different ways. The author mentions how even common topics in physical computing can still offer surprises through personal variation. I especially liked the example of using your body or hand as a cursor as no two drawings will ever be the same, and that kind of interactivity can’t be duplicated.

I also really agree with his implication that what’s important is not what the computer can do, but what the person can do. It is more about how people respond, interact, and express themselves through interacting with technology.

Making Interactive Art: Set the Stage, Then Shut Up and Listen

The main idea that the artist shouldn’t interpret their own work reminded me of how some painters intentionally choose not to add descriptions to their works – they leave it up to the viewer to decide on their own meaning. In terms of Interactive Media, this made me think about how the project has to be self-explanatory, as all elements should guide the user without any extra instructions.

Another idea that creators should listen to how people respond to their work is something I don’t think I’ve ever done intentionally. I’ve tested projects to see if they work, but I haven’t truly observed how people feel or what unexpected things they do with it. It also reminded me of another reading we had earlier about interaction being a conversation, not just a monologue from the author. I think I would like to try building projects that leave room for interpretation and do unexpected things.

Week 9: Sensor Assignment

My Concept

The project is a thermometer system that uses an analog temperature sensor and a button switch to control three LEDs: blue for cold (22°C and below), green for moderate temperatures (24°C to 27°C), and red for warmer temperatures (27°C and above).

The button works as a power switch, making the LED that matches the current temperature light up. At first, I wanted all the LEDs to turn on when the button was pressed and then, after touching the temperature sensor, have only the LED for the detected temperature stay on. But that didn’t work out, so I adjusted the setup to make the button directly activate the correct LED based on the sensor’s reading.

Set-up


Code

Github Code

Highlight:

As the temperature sensor doesn’t directly give the temperature, I had to convert the initial number (an ADC reading) into volts, then into millivolts  and then use a formula to calculate the temperature in Celsius. After that, I converted it into Fahrenheit

reading = analogRead(sensorPin);  
volts = reading * aref_voltage / 1023.0;
millivolts = 1000 * volts;
degreesC = (millivolts - 500) / 10;
degreesF = (degreesC * 9 / 5) + 32;

Reflections

This project taught me how important it is sometimes to start completely from scratch. In my first attempts, the TMP sensor got overheated, which was most likely because I positioned some components in a way that caused issues in the circuit. I ended up having to rebuild everything a few times. It was frustrating at first, but ultimately a great learning experience. To refine my future projects, i’d love to experiment with more sensors in our kit and see how it goes. Overall, i enjoyed the creation of this project.


Reading Reflection – Week 8

Her code got humans on the mood

Before reading this article, I didn’t know anything about Margaret Hamilton, even though she is the person who basically laid the foundation for software engineering. She literally wrote the code that made Apollo 11’s Moon landing possible, and yet people didn’t realize how groundbreaking that was at the time.

It wasn’t just because she was a woman in tech, but because no one had really seen software engineering as a real discipline yet. It made me think about how when something revolutionary happens for the first time, people often don’t give it much credit because they have no prior knowledge/understanding.

One moment from the article that i remember the most was when Hamilton insisted on including error-handling in the code, even though others thought it wasn’t necessary. During the actual Moon landing, those systems kicked in and saved the mission from being cancelled. It made me think about how forward-thinking she had to be planning for what could go wrong. It also reminded me how invisible certain kinds of work can be. Her code wasn’t  visible like the rocket itself, but without it, none of it would’ve worked.

Attractive things work better

In the entire design industry, one area I’ve always had the most interest in was human-centered design. The idea that “products designed for use under stress follow good human-centered design” as stress makes people less good at problem-solving stood out to me. It made me think of when I myself am doing something in a hurry, and if something isn’t designed for ease of access, it forces me to slow down and spend extra effort on something that could be simplified. Whereas products designed for relaxed occasions can enhance usability through aesthetic design. So, it means that if we were to compare those two, usability would prevail over attractiveness.

However, after reading Norman’s article, my perspective shifted. He argues that attractive things work better, not because they have superior functionality, but rather because their visual appeal creates positive emotions that improve cognitive performance, especially in problem-solving.

So, aesthetic appeal can directly support usability, especially under stress. For instance, when I use confusing interfaces (especially when I’m in a hurry), I feel frustrated and mentally over the place. In contrast, using a clean, beautifully designed app like Notion makes tasks feel manageable, even enjoyable, despite any pressure. This made me think about the psychological aspect of good design and that it’s not just about how things work, but how they make us feel.

Unusual Switch: Break Reminder Book Switch

My Concept

For a while, I couldn’t come up with a creative idea. As I sat at my desk, I looked over at my surroundings and saw some books piled up from hours of studying, realizing I could use them as a switch.

A “Break Reminder Switch” activates when I close my books, triggering LED light to remind me to take a well-deserved break. And if you’re too tired, you can also use your head to activate the switch by resting it on top of the books.

Watch the video here

When thinking about the idea of my switch, it reminded me of a Pomodoro Studying Technique. I could improve this project by adding a timer that lets users take breaks for a set amount of time, like 5 minutes, before an alarm reminds them to get back to studying. This way, they can study for as long as they like and use the switch to manage their own breaks without losing track of time.

Set-up

I attached jumper wires to the covers of two books — one connected to GND, the other to a digital pin on the Arduino. When the books close, the wires touch and make the LED light up.

Book Switch Model
This set-up + 2 wires on Arduino Board that light up LED once connected

Initially, the wires didn’t always make good contact, so I adjusted the wire positions by twisting and aligning them at the center and opposite to each other to ensure they touch properly and trigger the switch.

Coding


int switchPin = 10;    
int ledPin = 6;        

void setup() {
  pinMode(switchPin, INPUT_PULLUP);  
  pinMode(ledPin, OUTPUT);
}

void loop() {
  if (digitalRead(switchPin) == LOW) { 
    digitalWrite(ledPin, HIGH);      
  } else {
    digitalWrite(ledPin, LOW);          
  }
}

Reflections

At first, I struggled for hours trying to get the external LED to light up. The issue was that I didn’t plug the short leg of the LED into the negative rail on the breadboard — this made only the internal LED light up. Then, it was the way I set up my project that kept causing problems.

I also learned that wire contact must be firm, so I tried different taping angles and even thought about using multiple wires for a better chance of contact.

Through all the trial and error, I realized how small details can cause big issues and that paying attention to them can save hours of frustration. Most importantly, I learned that good ideas often come from your surroundings, even something as simple as a stack of books.