
My Concept
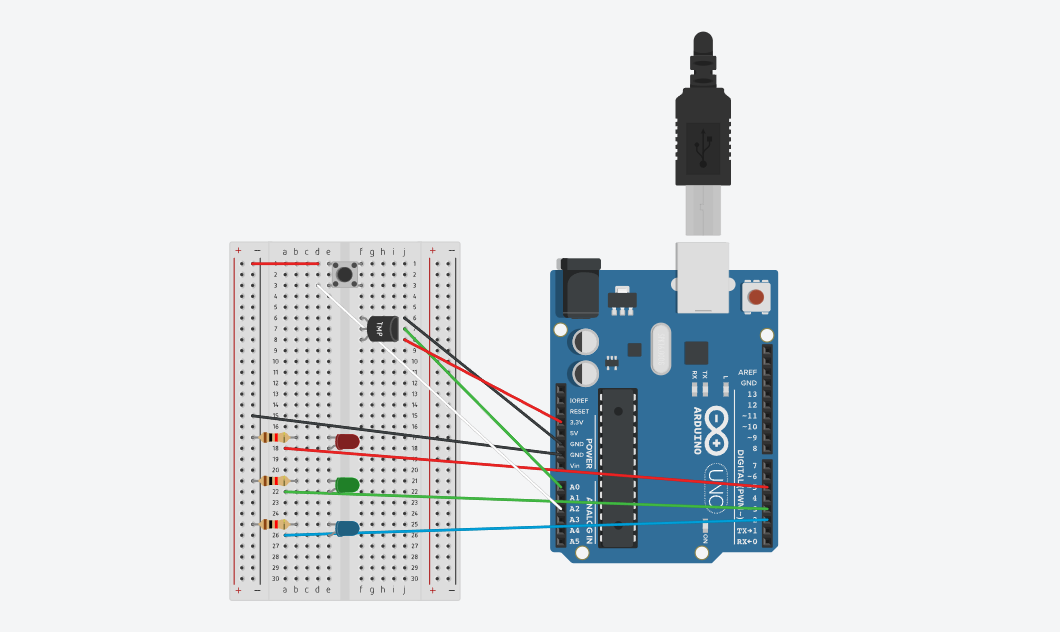
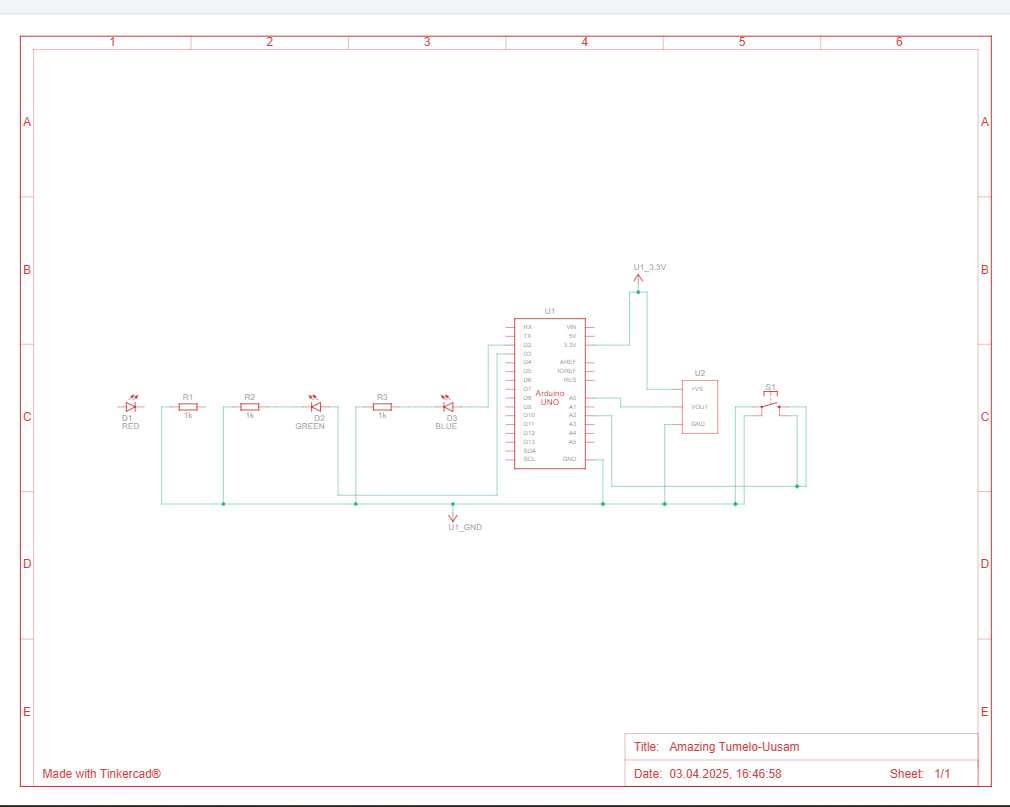
The project is a thermometer system that uses an analog temperature sensor and a button switch to control three LEDs: blue for cold (22°C and below), green for moderate temperatures (24°C to 27°C), and red for warmer temperatures (27°C and above).
The button works as a power switch, making the LED that matches the current temperature light up. At first, I wanted all the LEDs to turn on when the button was pressed and then, after touching the temperature sensor, have only the LED for the detected temperature stay on. But that didn’t work out, so I adjusted the setup to make the button directly activate the correct LED based on the sensor’s reading.
Set-up
Code
Highlight:
As the temperature sensor doesn’t directly give the temperature, I had to convert the initial number (an ADC reading) into volts, then into millivolts and then use a formula to calculate the temperature in Celsius. After that, I converted it into Fahrenheit
reading = analogRead(sensorPin);
volts = reading * aref_voltage / 1023.0;
millivolts = 1000 * volts;
degreesC = (millivolts - 500) / 10;
degreesF = (degreesC * 9 / 5) + 32;
Reflections
This project taught me how important it is sometimes to start completely from scratch. In my first attempts, the TMP sensor got overheated, which was most likely because I positioned some components in a way that caused issues in the circuit. I ended up having to rebuild everything a few times. It was frustrating at first, but ultimately a great learning experience. To refine my future projects, i’d love to experiment with more sensors in our kit and see how it goes. Overall, i enjoyed the creation of this project.