Week 14: Persian Rug Design

For my final project, I created an interactive textile pattern generator called Persian Rug Machine. The project lets the user create decorative rug-like compositions using a custom Arduino controller connected to p5.js. Instead of drawing directly on the screen, the user changes the design through six physical arcade buttons. I wanted the project to feel like a small textile machine where the user can build a visual composition through touch.


Github link
game demoTinkercad schematic
The project changed a lot while I was developing it. I first planned to use buttons, potentiometers, and a joystick. I also tested a fighting stick controller, but I eventually returned to Arduino because it matched the assignment better and made the physical communication with p5.js more central. I also decided not to use the joystick because the rug looked stronger when the center medallion stayed centered. Simplifying the controller made the interaction clearer and more intentional.

The final controller uses six buttons. Each button sends a command from Arduino to p5.js through serial communication. The buttons control motif shape, color palette, background color, line style, center medallion style, and finish/save. This gave the user enough creative control without making the interface too confusing.

The visual inspiration came from Persian rugs, embroidery, floral textile motifs, geometric ornament, and tiled decorative systems. I focused on repetition, symmetry, borders, central medallions, and controlled color palettes so the patterns would feel intentional instead of random. I wanted the final compositions to feel decorative and textile-like, not just like shapes moving on a screen.

The Arduino side reads the buttons using Input_Pullup. When a button is pressed, Arduino sends a text command such as “motif”, “palette”, or “finish” to p5.js. Then p5 reads the command and changes the rug design.

if (command === "motif") {
  patternMode = (patternMode + 1) % 3;
}

if (command === "background") {
  bgColorIndex = (bgColorIndex + 1) % bgColors.length;
}

if (command === "finish") {
  state = "final";
  setTimeout(() => {
    saveCanvas("DIY-Persian-rug", "png");
  }, 300);
}

One part of the code I am proud of is the repeated motif system. I used nested loops to place motifs across the screen in a structured grid, which helped the rug feel more like a textile composition.

for (let i = 0; i <= cols; i++) {
  for (let j = 0; j <= rows; j++) {

I also used distance from the center medallion to scale the motifs, which made the composition feel more layered and less flat.

let d = dist(x, y, centerX, centerY);
let s = map(d, 0, width * 0.7, tileSize, tileSize * 0.45);

I separated the motifs into different functions, such as drawDiamondMotif(), drawFloralMotif(), and drawStarMotif(). This made the code easier to organize and allowed the user to switch between motif styles in real time. I also included borders, straight lines, and zigzag lines to make the composition feel closer to woven or embroidered designs.

I added oud background music using p5.sound and a custom font to make the project feel more complete. I also removed the bottom instruction panel from the studio screen because the physical buttons are already labeled, so the screen can focus more on the rug itself.

The biggest challenge was balancing creative freedom with visual cohesion. At first, adding too many controls made the results feel chaotic. Simplifying the controller to six clear buttons made the project easier to use and made the final rug designs feel more intentional. Another challenge was making the Arduino-to-p5 communication clear, so I used labeled text commands instead of only sending numbers.

Overall, I am proud of how the project became a small custom textile machine. The user physically presses buttons to shape the rug, and the final button presents and saves the completed design. I like that the final version connects the physical controller and the digital pattern in a clear and direct way.

references:

Pinterest inspiration:

https://pin.it/T0fnQGXuC

https://pin.it/4DNaWlxmq

https://pin.it/1tYDm2dmi

https://pin.it/4xp7tjsH0

https://pin.it/30hUjJpG9

Week 13: Final project and User testing

For my final project, I focused on user testing. At that stage, my original Arduino circuit was not working properly, and the joystick I had first planned to use also did not work as intended. Because of that, I carried out the user testing using the fighting stick controller together with p5 through the Gamepad API. This meant that the testing phase focused mainly on the p5 interaction and the overall mapping of the controls, instead of the final Arduino-to-p5 system I had originally planned.

Even though I still wanted the final version of the project to include an Arduino component, the fighting stick allowed me to continue testing the interaction design and visual system instead of stopping the project completely. The main goal of the testing was to see whether users could understand how the controls changed the rug composition, whether the mapping felt clear, and whether the overall experience felt exploratory and engaging without needing much explanation.

user testing video

Overall, the p5 side of the project was working well during testing. My sister was able to press different controls and see clear visual changes in the textile composition. She could tell that different controls were changing things like the motif, palette, and other visual properties. The strongest part of the interaction was that the visual response happened immediately, so she understood that her input was directly affecting the rug design.

The main issue was not with the visual response itself, but with the text at the bottom of the screen. I had included button hints there to explain which control was mapped to what action, but that part was not working clearly enough. Because of that, my sister had to guess which button did what before she fully understood the system. Once she started experimenting, she was able to figure it out, but the labels and hint text were not as clear or reliable as they should have been for a first-time user.

This testing helped me understand that the p5 interaction and visual system were already strong enough to support the project, since my sister could still explore and generate designs successfully. It also showed me clearly which part needed more work, which was fixing the control mapping and the guidance text on screen. After the testing, I continued developing the project by fixing the interaction and working on a version that included Arduino, since the fighting stick was helpful as a temporary workaround for testing, but it was not the final interaction system I wanted for the project.

References:

https://developer.mozilla.org/en-US/docs/Web/API/Gamepad

https://developer.mozilla.org/en-US/docs/Web/API/Gamepad_API/Using_the_Gamepad_API


game_final_FINAL2.zip (the final_v2 project: proposal & documentation)

I’m putting my proposal, user testing and documentation in one post, for the primary reason that when we were supposed to come up with our proposal, I knew that my next two weeks were too unpredictable (traveling, moving back in with my family, somehow catching a fever last week, the campus going on lockdown again just the day after I emailed if I could pick up my Arduino kit, being forced into babysitting during classes? etc.) for me to come up with a fixed project idea, and hence, changed my project far too many times to count before finally deciding on one.

The Final Project 

(I recommend playing on the link above, on a laptop. I didn’t put a demo, because the microphone settings wouldn’t work, so please do play!) (And, also, please be a bit patient with some parts. The game kind of lags, but not as much as it did in the first few attempts of coding.)

Proposal (and preface… and concept… etc.):

I originally wanted to make a video game that could be controlled by a physical Arduino, but I wasn’t able to get my kit, because 1) when I was in India, by the time I got the money in my card, I found out I was traveling back home and all the shipping dates shown were after I would have already left India and 2) the day I was available to go to campus, campus shut down. Hence, I had to change my mind very late about making my project completely on P5.js.

Since I was relying only on P5.js, I realized I had to go above and beyond for my project to fit the criteria (and extend beyond my midterm). Thus, I decided to make a visual novel with mini games inside. If this hasn’t been established already from my other documentation posts, I’m a huge visual novel fan. I originally was conflicted between different ideas for what the game should be about, but eventually settled on making a game that goes through a day in a random college student’s life. I also wanted to draw a lot of parts of this game (especially sprites), so settled on a more animated art style with some parts that weren’t as animated (due to 1) time constraints and 2) my own limited knowledge of coding some parts).

I saved up for and bought a Nintendo Switch Lite for my birthday this month and got to play some of my favorite games (esp. Persona 4 Golden), which helped me understand what I wanted my gameplay to be like (compared to just watching the run-through on YouTube).

There were several scenes and mini-games I wanted to be included:

(* = idea that changed from original plan , * = first run-through , * = second run-through, * = final project)

  1. Wake up scene (no action)*
    1. Waking up to an alarm which you stop with a sound trigger (input)*
  2. A dress-up game * (this was modified to become much more simple: I originally intended to do a mechanism similar to my midterm and tragically realized that the file would explode if I overwhelmed it this much)
    1. Turned into picking an outfit from a selection of fixed outfits. *(clicking) *(scroll mechanism)
  3. Skip Breakfast*
    1. Mention in passing that you ate an apple *
    2. Computer Vision, grab any of the fruits on the table*
  4. Running to class, Subway Surfers edition?*
  5. Sit in Math class *
    1. Play a game! In math class.*
  6. Lunch, Subway Surfers edition?*
  7. Art Class, recreate MS Paint/digital painting softwares*
  8. Library Dash – run to find a seat *
    1. Don’t run, but click to find a seat *
    2. Scrap the library completely and just mention you spent time there *
  9. Vending Machine: pick a snack, if you can’t afford it then ask people around you to lend you some money *
  10. Get dinner, make a noodle bowl (drag and drop)*
  11. Get some social interaction, 3 different conversation options*
  12. Forget you have a submission and submit assignment by drag and drop*
  13. Sleep*
    1. Pick a plushie*
    2. Pick a lighting*
    3. Pick a sleep song*

When coming up with this, I knew the hardest part would be finishing everything on time. To overcome this, I made sure to plan out everything before and start drawing + coding the aspects I knew wouldn’t be affected by any changes in plans.

Process:

After writing down the skeleton of my game onto a word document (with whatever dialogue I had to put in), I drew all my animated assets out and found images for whatever assets I wasn’t drawing or coding. Some of the sprites had multiple expressions, so I had around 2-4 expressions per sprite.

Some of the assets I drew out… arghhhhhhh.

After assembling all my assets (backgrounds, characters, items (e.g. snacks, fruits etc.), I uploaded & preloaded them into my P5.js file. I started with a scene manager and creating a fixed style for the text box for most of the dialogue and main character’s internal thoughts. I also built a shared fade system for all of the scene transitions. I used ml5.js handPose for the breakfast scene, and implemented speech recognition for the alarm dismissal. I coded each scene individually (made the mistake of starting with the first scene because then that meant that I needed to play the whole run-through every time just to check for errors at the very END. I think a lot of my time was spent on this). There were a lot of times where I had to change the location of assets, which I felt took the most amount of time while making the game. I added sound at the very end, because I was more focused on finishing the game first. After adding sound (after the presentation in class), the game seemed a lot more put-together. You can find the full code here. (I would add it directly here but it’s over a 1000 lines of code…) I wanted to break down each part but it might take me a while, so my code has small //notes on what each section shows on the game.

Parts I’m proud of:

I wouldn’t say I’m most proud of any part of the project, but there were parts I was happiest with. I was very happy with the Art Class Paint Tool, and I do think that’s also my favourite part. It turned out the cleanest aesthetically, and all the functions worked well. It’s also cool that I could get it to download the image (like in my midterm!).

I’m also very happy with the submission scene, and I like the drag drop mechanism I came up with for it. When you release the file, the code checks whether the file landed inside the portal rectangle, and only correct files disappear and stack up as a checklist.

if(mouseX>p.x&&mouseX<p.x+p.w&&mouseY>p.y&&mouseY<p.y+p.h){
  if(f.correct&&!sub.submitted.includes(sub.dragging)){
    sub.submitted.push(sub.dragging);
    f.gone=true;
    if(sub.submitted.length>=SUB_CORRECT_COUNT) sub.state="submitted";
  } else if(!f.correct){
    f.shake=30;
    sub.shakeTimer=30;
  }
}
if(!f.gone){ f.x=f.ox; f.y=f.oy; }
User Testing:

Unfortunately I do not have videos for user testing but I do have notes app testimonies from my sister. My only option available was her, as the rest of my family have been busy and she lives right next to my room (haha), but she played the game while I was either doing house chores or helping my mom and here’s what she had to say for the three run-throughs, TL;DR-ed from her testimonies. (This is vaguely reminding me of Goldilocks):

First run-through

is this supposed to be slow or is it just loading (fixed the size, she was right because the game had started lagging a LOT) / what if i want to eat breakfast hello (I added the apple option after) / the run scene is bad (a nicer word for what she originally said) pls remove it (I did agree with her, so I did remove it). / color of bg in dress up game is weird (I changed it from peach to blue-white gradient, which fit the game much better) / there’s too many parts so the game gets too long (removed things mentioned in list at the top)

Second run-through (the short-er version):

this is so much better. / the colors of the dining dash scene isn’t good, and feels off (this is the version I showed in class, and changed the general vibe of it) / i think you should completely remove the library scene. I don’t get it and it doesn’t add anything (That made sense, so I removed it. I didn’t like it much while playing it as well.) / I know you said you were gonna add song but you should REALLY add song (Thanks for letting me know. Again.)

note: I also realized after editing and adding and removing some scenes during class that the art style wasn’t consistent, but I couldn’t change it until class ended so I showed a version that I wasn’t 100% happy with in class and changed some parts while waiting in the hospital for my sister. 

Third run-through (the current final version), post glue-gun burn incident:

the game’s length is okay but dining dash takes WAY too long (and she is correct. I should probably add a skip button.) / can I play again but pick different things? (If I had more time, I would definitely add more options :/) / some of the instructions aren’t that clear to read (I realized this a bit too late as well) 

Pictures and Screenshots from the game:


Reflection:
  • This project was a good way for me to figure out how I can build larger projects of my own. I wanted to experiment with making a video game like this so I can spend more time coming up with better storylines and illustrations (to make better games).
  • I liked the scene-per-mechanic structure, I think giving each moment of the day its own interaction meant no single mechanic overshadowed anything else. I liked how the visuals turned out, but I feel it would have been better if I drew things for dining dash rather than just coding the elements.
  • The dining dash game still loads quite slowly. So does the computer vision part for the fruits (and it’s not consistent). If I had more time, I would definitely look into those, because it affects user experience.
  • I would want to add more pathways (similar to the social scene). This game still feels quite safe in the sense that it is predictable, and you end up on the same outcomes each time.
  • What I learnt from this is that interaction design is stressful! Aaaaaaah! I need to be more mindful of what interactions to put where. I feel like I could have added more meaningful ones.
  • I need to make sure I write clearer instructions on the screen. I kept forgetting to do this.

Credits To: Freesound (for all audio files) | Claude (for help in the Dining Dash part, helping me figure out my errors while creating the paint part, and helping me figure out why some parts weren’t working) | Pinterest (for image assets) | My Sister (for begrudgingly helping with user testing not once, or twice, but thrice)

STEER_OS34 v1.2 – Final Project

Concept

My initial concept was an Arduino hardware controller pad paired with a generative audio-visual system in p5, where physical input through knobs and buttons shape a particle world that produces atmospheric jazz sound in real time.

However, as I made the serial communication working, and started experimenting with sound, the synth music ambient was so good I fell in love with it. This type of music I also really like, and I immediately had an idea for the visual p5.js part, so I changed my concept a little bit.

An interactive audio-visual installation with a control panel based on Arduino and a generative p5.js audio and visual system that continuously produces synth ambient sound and visuals in real time. The system is autonomous, so the user just “steers” it since it can already exist on its own. Through knobs and buttons, the user shapes the conditions of the system: changing tension, density, speed, tone, and other behaviors that simultaneously affect both the soundscape and the visual particle environment. The interaction is more like a conducting and not performing or creating.

Recording


Implementation & Proccess
Serial Communication

My serial communication was built on the code we reviewed in class, so I can’t say much about this implementation other than that I adjusted the speed of serial communication from 9600 to 115200 baud, and that I added controls for all of my buttons and knobs.

const int BTN1 = 7;
const int BTN2 = 8;
const int BTN3 = 9;
const int BTN4 = 10;

void setup() {
  Serial.begin(115200);

  pinMode(BTN1, INPUT_PULLUP);
  pinMode(BTN2, INPUT_PULLUP);
  pinMode(BTN3, INPUT_PULLUP);
  pinMode(BTN4, INPUT_PULLUP);
  pinMode(LED_BUILTIN, OUTPUT);
}

void loop() {
  // read all sensors and buttons
  int knob1 = analogRead(A1);
  delay(1);
  int knob2 = analogRead(A2);
  delay(1);
  int knob3 = analogRead(A3);
  delay(1);
  int b1 = !digitalRead(BTN1);
  int b2 = !digitalRead(BTN2);
  int b3 = !digitalRead(BTN3);
  int b4 = !digitalRead(BTN4);

  // send 7 values
  Serial.print(knob1);
  Serial.print(',');
  Serial.print(knob2);
  Serial.print(',');
  Serial.print(knob3);
  Serial.print(',');
  Serial.print(b1);
  Serial.print(',');
  Serial.print(b2);
  Serial.print(',');
  Serial.print(b3);
  Serial.print(',');
  Serial.println(b4);
  
  delay(50);
}


Audio

The audio system is built entirely in p5.sound, and honestly it was the part of this project I liked the most.

The core is a drone layer made of two sawtooth oscillators running at slightly different frequencies (73.42 Hz and 73.86 Hz). The tiny gap between them creates a natural beating effect that makes the sound feel more alive and warm instead of flat. Both oscillators feed into a shared lowpass filter, which then goes into a reverb. This routing includes everything: knob controls, button effects, so it hits the whole sound at once.

On top of the drone, there’s a triggered note system with three layered oscillators: a triangle wave at the base frequency, another triangle slightly detuned (*1.005), and a sawtooth an octave up (*2). All three fire together on every collision event, with slightly different envelope timings so the sound blooms rather than stabs. The notes are constrained to D Dorian scale, which is why nothing sounds random even though the note selection itself is random — the scale does the harmonic work let dorianScale = [146.83, 164.81, 174.61, 196.00, 220.00, 246.94, 261.63, 293.66];

Each physical control maps to a certain audio parameter:

    • SCAN RADIUS (knob 1) — shape size, which directly affects collision frequency, which affects how often notes fire
    • CLARITY (knob 2) — lowpass filter cutoff, from more muffled (60 Hz) to open (6000 Hz)
    • DEPTH (knob 3) — reverb decay time, from dry (0.5 sec) to full cathedral (8 sec)
    • ALERT (btn 1, hold) — overrides the filter to a narrow cutoff with high resonance, adding tension
    • HOLD POSITION (btn 2, hold) — slows particle movement so notes fire less, also mutes new note triggers entirely
    • AMBIENT MUTE (btn 3, toggle) — fades the drone down to near-silence
    • INTERFERENCE (btn 4, hold) — pushes osc1 and osc2 apart by 15 Hz each, causing beating/wobble

One thing I learned that made a big difference: the reverb can’t be re-processed every frame or it crashes the audio engine. I had to track the previous knob value and only update reverb when the knob moved by more than a threshold:

if (audioStarted && abs(knob3 - lastKnob3) > 30) { 
    let decayTime = map(knob3, 0, 1023, 0.5, 8); 
    reverb.process(filter, decayTime, 2); 
    lastKnob3 = knob3; 
}
Visual

Visual part came to me after I heard the audio, so I immediately had a clear idea of what I wanted to see on screen. I already had a debug panel just to figure out if the Arduino sends anything to my p5 sketch, so I just played around with colors, and some other effects, and left it be.

The shapes is basically the integration of my previous project (Week 2 assignment) with shapes connections. I copied the class inside this sketch, deleted the connection-building parts so only the shapes are floating around the screen with coordinates. I decided to use this sketch because it fit in the style really well and made my life with developing this project a little bit easier with that solid visual foundation.

One fun thing I use there is the CRT scanlines, and it is a really easy built that was a nice detail of the overall design. Basically it just moves a line depending on the y-variable that is changing each frame inside the draw() loop.

scanY += 1.5;
if (scanY > windowHeight) scanY = 0;


stroke(0, 174, 64, 80);
strokeWeight(1);
line(0, scanY, windowWidth, scanY);

stroke(0, 0, 0, 60);
strokeWeight(1);
for (let y = 0; y < windowHeight; y += 3) {
  line(0, y, windowWidth, y);
}

The trail effect tied to DEPTH (knob 3) was actually just changing the background opacity. Instead of background(10)which clears the canvas completely, I use background(10, 10, 10, trailAlpha)where the alpha is mapped from knob 3. Low alpha means the background barely paints each frame, so old shapes linger as ghostly trails. It’s a really simple trick that makes a big visual difference.

Other than that, all the visual responses from the Arduino knobs and buttons was pretty simple and was achieved just by substituting hardcoded values for strokeWeight, backgroung opacity, size etc. for the value received from Arduino.

Hardware Setup & Schematic

The setup first was made on breadboard and then mounted on the box. I used hobby-knives to crave out the holes for buttons and knobs, I painted the box, and used POSCO market to write on top.

The Arduino board is hidden under the lid, and is wired to the components in 2 ways:

    • Big external modular knobs are connected with alligator wires and regular jumper wires with each other; as well as some of the jumper wires (mostly the ground wires) are also connected to one ground jumper wire via both parts of the alligator clip.
    • Other than that, the buttons are connected to digital pins via the jumper wire being bent like a hook around the button’s leg, and sticked together with all different types of insulating tape I found in my dad’s instruments. One of the biggest challenges was to maintain good contact of wires and it took me literally HOURS to make it work. Since my cardboard box is quite dense and thick, the button’s legs sticking out were really tiny, so actually connecting them properly with the jumper wires from Arduino kit with thick cap was really hard. The contact was constantly disappearing and it was really annoying and it wasn’t working even with a lot of tape. This is why I switched it with alligator wire where I could, but I ran out of them so I found a stronger tape so it held all the buttons together properly so they were actually working

References
Parts I’m proud of

The part I’m SO PROUD of is actually the physical setup.

I don’t really like how it look, I believe I could have made it look 10 times better, but with the scarce amount of time and resources it turned out pretty well.

First of all, even though that the overall box is not really neat, I think the way I managed to cover something is actually successful; and the handwritings with my shaky hands are also not the best but it all look together quite well. Also, I felt like I managed to maintain the aesthetic I was striving to achieve in the beggining with the design of the panel too. I intentionally left out the buttons on top, and ordered the caps that look very tech-y because it was a great alignment with Teenage Engineering designs, especially their PO series with buttons out.

Also, the part I actually think I did very good job is what hidden inside the box. The wiring and making everything have contact with each other, working consistently and not crashing, as well as not being just super-glued to the surface was extremely hard. I spend almost 10 hours on just doing this setup. I had to give up on a lot of features that would elevate the design and idea but the hardware part just didn’t allow it.

I managed to wire it all up somehow, so it doesn’t even look bad, works consistently okay and is responsive at all times, has some management inside, and is not too messy, and is hidden from the user’s eyes! It was the hardest task throughout this semester for me and I’m happy I managed to do this all by myself with literally no help.

This is how the box looks inside and outside, and I think it’s pretty impressive how something so simple and minimalistic has that huge messy wired system inside.


Reflection

I am happy that I managed to experiment with physical sound control, and built such a “synth”. I think it turned out quite good, with coherent style, and the music works really well with the visuals on p5. I feel like the vibe and style I wanted to see was maintained so I’m happy. I’m also proud about the fact that I managed to make the music sound not random but actually in one scale, style, and proper music-like sound with just notes and layering of a few oscillators.

I believe there’s a lot of room for improvement, with visuals mostly. First of all, the physical panel can be much neater and stable, and probably the LEDs as response could be implemented if I had more time. The box can be moved from cardboard box to wooden/plastic one and it would certainly eleveate the project’s overall vibe. Another idea that I’m sad I gave up on is the photoresistor impact of dark/light room, I think it would bring a different edge to the project, especially with that agent/CIA vibe the p5 sketch has.

I also think I could have added more response to the screen. Right now it is not obvious that the note is triggered on the collision of the shapes, so maybe having some feedback like a slight vibration animation or a different color outline would make it more clear.

Final Project Documentation


The Concept

Unlike my midterm project, which featured complex textures and physics, I opted to make something significantly simpler in terms of its physical appearance and functionality, though it has far surpassed the midterm in lines of code.

I created a pixel-art-style infinite driving game, where the player weaves between two lanes of traffic through a highway in the middle of a desert.  Occasionally, the player may come across stops, such as a garage or a pizzeria.

Design & Interfaces

The project titled “The Passive Road Game”, uses a variety of elements and perspective shifts to create a subtle depth perception of the background environment in contrast to the player and the car. Every element of the game is a pixel art image made by me in Paint3D. (Exceptions below). Additionally, the game features a soft ambient hum of the car’s engine, and several other audio features for some other interactions.

All UI interfaces scale for any device, though the game will not run unless you enable full-screen, for optimal UX. Exit prompts show up on the top whenever you are able to exit the highway to interact with a building nearby.

The Parts I Liked

I really enjoyed conceiving of a solution that is scalable across a variety of devices. It was interesting and challenging in a good way implementing the UI in this manner.

Additionally, I really enjoyed designing the cars and scripting them in game. Working with depth perception was also a really cool part of the overall project.

The Parts Where All Hell Broke Loose

Firstly, I had to manually write each and every line for marking up, positioning, adding functionality, sizing, and ordering the UI/UX features. Every object within the game took dozens of lines of code just to markup, let alone the 2k+ lines the actual functionality of these objects took.

Additionally, my initial plan of integrating this with Arduino failed due to connection and debugging issues emerging repeatedly. I decided to abandon Arduino entirely for the interest of putting forward a complete project.

An interest that itself was nearly sabotaged by P5JS itself, when the P5 environment ceased to load in my sketch at all, to the extent where I couldn’t make copies of it. With refreshing not working, overcoming this was a grand waste of time.

Exceptions to Asset Creation

I fetched all Audio assets from pixabay for free, and used CanvaAI to generate only the sky backdrop in-game. Everything else was done by me.

https://editor.p5js.org/rk5260/sketches/4M5f2ndbW

Final Project

  1. Concept Description

For my Arduino final project, I made a smart temperature and humidity monitor with a buzzer alarm. This project uses a DHT11 sensor to read the room temperature and humidity. The numbers are shown on a small OLED screen, so the user can clearly see the current condition of the room. When the temperature goes above 32°C, the buzzer will start making sound as a warning. When the temperature goes back below 32°C, the buzzer will stop.

This project is designed for simple everyday use. It could be used in a dorm room, bedroom, classroom, or small workspace. The user does not need to press any buttons or change any settings. They only need to plug in the device, and then it starts working by itself. I wanted the interaction to feel simple and automatic, because the user can understand the information just by looking at the screen and hearing the alarm.

  1. System Diagram & Component Layout

This project uses four main parts: an Arduino UNO board, a DHT11 temperature and humidity sensor, a 128×64 OLED display, and an active buzzer. The Arduino is the main controller. The DHT11 sensor collects temperature and humidity data. The OLED screen shows the data. The buzzer gives sound feedback when the temperature is too high.

3. Vimeo Video

4. How it works

The way this project works is not very complicated. The Arduino keeps reading data from the DHT11 sensor. If the sensor gives a valid temperature and humidity value, the Arduino saves the data and sends it to the OLED screen. The screen then refreshes and shows the newest temperature and humidity numbers.

The program also checks the temperature in every loop. I set the warning temperature to 32°C. If the temperature is below 32°C, the buzzer stays off. If the temperature is higher than 32°C, the Arduino turns on the buzzer. When the temperature drops again, the buzzer turns off automatically.

I had to fix the code several times. One problem was that the buzzer kept making sound even when the temperature was not high enough. Another problem was that the OLED screen stopped showing after a few seconds. I changed the code so the buzzer can turn on and off correctly, and I also added settings to make the OLED screen more stable.

I learned how to build this project from different resources. I watched YouTube videos to understand how the DHT11 sensor and OLED screen work. I also used online courses from the store where I bought my Arduino kit. The store also gave me a beginner Arduino book, and I used that book to understand the basic wiring, pins, and code structure. These resources helped me a lot because I am still learning Arduino and physical computing. I wrote the code in the first place, however, I founf it a bit messy, so I put them in to AI to oragnize and be more clear. Since I wrote some code about the sensor, however it is conflicted to the screen. And I tried to fix it by asking GPT.

#include <Wire.h>
#include <Adafruit_GFX.h>
#include <Adafruit_SSD1306.h>
#include <DHT.h>

#define SCREEN_WIDTH 128
#define SCREEN_HEIGHT 64

#define DHTPIN     3
#define DHTTYPE    DHT11
#define BEEP       8

Adafruit_SSD1306 display(SCREEN_WIDTH, SCREEN_HEIGHT, &Wire, -1);
DHT dht(DHTPIN, DHTTYPE);

float temp = 25.0;
float humi = 50.0;

void setup() {
  Serial.begin(9600);

  Wire.begin();
  Wire.setClock(100000);   // Slower I2C speed, more stable for OLED

  dht.begin();

  pinMode(BEEP, OUTPUT);

  // Active-LOW buzzer: HIGH = OFF, LOW = ON
  digitalWrite(BEEP, HIGH);

  // Start OLED
  if (!display.begin(SSD1306_SWITCHCAPVCC, 0x3C)) {
    Serial.println("OLED failed to start");
    while (true); // Stop here if screen is not found
  }

  display.clearDisplay();
  display.setTextSize(1);
  display.setTextColor(SSD1306_WHITE);
  display.setCursor(5, 10);
  display.println("System Starting...");
  display.display();

  delay(1000);
}

void loop() {
  // Keep OLED awake
  display.ssd1306_command(SSD1306_DISPLAYON);

  float t = dht.readTemperature(); // Celsius
  float h = dht.readHumidity();

  if (!isnan(t)) {
    temp = t;
  }

  if (!isnan(h)) {
    humi = h;
  }

  Serial.print("Temp: ");
  Serial.print(temp);
  Serial.print(" C   Humi: ");
  Serial.print(humi);
  Serial.println(" %");

  display.clearDisplay();

  display.setTextSize(1);
  display.setTextColor(SSD1306_WHITE);

  display.setCursor(5, 5);
  display.println("DHT11 Monitor");

  display.setCursor(5, 25);
  display.print("Temp: ");
  display.print(temp, 1);
  display.println(" C");

  display.setCursor(5, 45);
  display.print("Humi: ");
  display.print(humi, 1);
  display.println(" %");

  display.display();

  // Temperature warning
  if (temp >= 32.0) {
    digitalWrite(BEEP, LOW);    // buzzer ON
  } else {
    digitalWrite(BEEP, HIGH);   // buzzer OFF
  }

  delay(2000);
}

5. Reflection

At the beginning, this project was much harder than I expected. The OLED screen did not show anything at first. After searching on Google, I learned that I needed to download the correct libraries, like Adafruit SSD1306 and Adafruit GFX. After installing them and changing the code, the screen finally worked.

Then I had problems with the DHT11 sensor. At first, I thought the sensor was broken because it could not read temperature or humidity. I watched YouTube videos, took photos of my circuit, and asked AI for help. Later, I found a test code on a Chinese website to check the sensor. After uploading it, I found out the sensor was not broken. The real problem was my code. I had written the wrong sensor type, so Arduino could not read it correctly.

The buzzer also did not work well at first. The breadboard connection was unstable, so I changed many wires before it worked. Most of my code came from the Arduino tutorial book from the kit, and I also learned from YouTube videos and online courses from the store where I bought the Arduino. When I got stuck, I asked AI to help me find the problem. This project taught me that Arduino work needs patience, testing, and debugging step by step.

Final Project: Sorbetes Hero

Concept

My concept is a rhythm game called Sorbetes Hero and it is heavily influenced by the game “Guitar Hero.” In the game, you are a Sorbetes (Filipino-style ice cream) vendor, trying to earn as much money as possible. There’s four lanes that are different ice cream flavor and you have to catch the falling “ice cream” (circles) to earn more points and the longer you play, the more bonuses/multipliers you get. There’s an easy and a hard mode that is dependent on the photoresistor/LDR sensor. The easy mode is just a regular game play of one ice cream falling down at a time, while the hard mode has multiple ice creams falling down. The game has a 90-second timer that triggers the game and the ice cream falls faster as more time goes on, the player gets three strikes for missing, and the end shows how much money they earned.

Project Demo | Arduino Code | p5.js Code | Schematics

What I’m proud of

I’m quite proud of the photoresistor/LDR sensor interaction that I have. I was debating what type of interaction to have with it and I just landed on having it be the “mode indicator.” I took quite a while thinking of how to add this in the physical controller without needing to use a flashlight on it or cover it with my hand yet still have the player interact with it in a natural way. So, I used the mini umbrellas that are usually used for drinks. Umbrellas are used quite often in the Philippines because of both the heat and rain and especially by street vendors. I thought this was a clever and also relevant way to integrate the sensor.

Reflections & Future Improvement

Some things I wanted to include was music and sound effects but I ran into some issues uploading them on p5.js, maybe next time I’ll try using the piezo buzzer for that. I also think I could’ve added more obstacles and challenges in the actual game, something like long presses or like the “bombs” in Fruit Ninja. For the actual Arduino, I like how it turned out but I would like to try to use arcade buttons to have a bigger surface and more satisfying feel. Nevertheless, I’m really proud of this project because I felt like I applied all that I have learned throughout the semester. Though the semester unfortunately became only, I still feel like I was able to learn as much as I could.

Week 14 – Final Project “Harmonic Market”

Concept

Harmonic Market is a fun interactive project I built in p5.js. It takes real-time crypto prices (Bitcoin, Ethereum, or Solana) and turns them into sound and light. I chose exactly this idea because I am a finance major and very passionate about crypto. The main idea is quiet simple: the market has its own voice and you get to decide how to listen to it. Instead of just staring at numbers on a chart, this project lets you actually feel what the market is doing through sound. What does a calm market sound like? What about a super volatile or crashing day?

When you use it you become like a performer. You move your mouse around the screen to tune in to the market. Moving left and right changes how nice or tense the sound feels, it can sound smooth and beautiful when you’re in the right spot, or rough and weird when you’re not. Moving the mouse up and down changes how loud and intense everything gets. The live market data controls the base pitch and how wild the sound is, while you control the harmony on top of it. Every session sounds different and every market condition feels completely unique.

Pictures

How does the implementation work?

I mapped the mouse controls to musical ideas so it feels natural. Moving the mouse left and right changes how “in tune” the sound is. When you go left, the sound gets very tense: noise gets louder and the waveform on screen starts shaking. When you move right, everything snaps into nice harmony: the wave smooths out and green particles float up from the center. It just makes sense to me: left = tension, right = resolution. Moving the mouse up and down controls how loud and intense everything feels. Up = louder and bigger visuals. Down = quieter. If you hold SPACE, it gives a temporary 50% boost and makes particles orbit.

I made the feedback to be strong and responsive so you always know what’s happening. There’s a harmony meter on the left and an intensity meter on the right that show live numbers and colored bars. The labels “DISSONANT” and “CONSONANT” fade in and out depending on where your mouse is. I also replaced the normal cursor with a growing circle that gets bigger when intensity is high because it feels more like playing an instrument than just pointing.

How This Was Made

The whole idea and main structure came from me. I wanted to make financial data feel emotional and musical instead of just showing numbers on a chart. The concept of using mouse X to control consonance/dissonance was my original idea since I got very inspired by how people talk about markets in musical terms.

I used separate functions:

  • drawOrb() — draws the glowing center orb that pulses and reacts to market volatility
  • drawWaveform() — draws a three-layer wave across the screen that shows the harmony
  • drawConnectorLines() — draws lines from your mouse to the orb (more lines = more harmony)
  • updateSound() — controls the three oscillators and makes the sound change smoothly
  • spawnAndUpdateParticles() — creates green sparks when it sounds good, red when it sounds tense
  • fetchMarketData() — gets live prices from CoinGecko every 9 seconds

So, I wanted to smooth the mouse movement so the sound and visuals don’t jump and I had a very hard time with it, so I used ClaudeAI in lines 97-102. Also, I used ClaudeAI to make the harmony sound much more musical and intentional. It picks a musical interval from the scale based on mouse position, then multiplies the base pitch by that ratio (lines 107-114).

What I’m Proud Of

I’m most proud of the left/right harmony mapping. It’s not just turning volume up and down, it actually changes the musical relationship between the sounds, and you can really feel and see the difference. When you’re far left it feels chaotic and clashing. When you’re far right it feels calm and beautiful.

I’m also happy that it’s pretty easy to understand without reading instructions. The intro screen explains the controls clearly, the meters give constant feedback, and most people figure out the mapping within about 30 seconds.

Areas for Future Improvement

There are a few things I’d like to add later:

  • Use more market data (like trading volume or market cap) to control reverb, rhythm
  • Add touch support so it works nicely on tablets with two fingers
  • Maybe let the user sing into the microphone and have the market data affect their voice instead of just synthesized sounds

Live Demo:

Click inside the frame to start • Move mouse to harmonize with the market

Week 13: Final Project

My concept is a cat feeder that uses a remote control to dispense cat food. I 3D printed the cat feeder as well as the gear attached to the servo.

This is the gear I also 3D printed to release the food attached to the servo motor:

Video 1: This is a 360 video of the final product

The implementation works using an IR remote sensor, servo, Arduino Uno, LCD display, and battery. It works by using an Arduino Uno to communicate with the IR sensor, which then controls the servo to rotate the gear and release the food. The battery allows it to operate away from the laptop, making it more portable and accessible for the cats while keeping my laptop safe.

The interaction design creates a cat feeding experience. The user can press the “OK” button on the IR remote to activate the feeder, and the Arduino Uno responds by rotating the servo motor to dispense food. The LCD display provides feedback by showing messages such as the time, dispensing status, and feeding information, making the system easier to understand and interact with. The portable battery-powered design allows the feeder to be placed anywhere, giving the cats easier access to food. The interaction is designed to be quick, convenient, and stress-free for both users and cats. I also designed the 3D model inspired by bows, cats, and cute aesthetics.

Full Arduino source code

#include <Servo.h>

#include <LiquidCrystal.h>

#include <IRremote.h>

Servo myServo;

LiquidCrystal lcd(4, 5, A1, A2, A3, A4); // the connections from LCD //Display to UNO board

const int SERVO_PIN = 6; //servo connection to UNO

const int BUTTON_PIN = 2; //button connection to UNO, it was used as a //test before adding IR sensor and Remote 

const int IR_PIN = 8; //IR sensor connection to UNO

const unsigned long IR_OK = 0xE31CFF00; // This is the signal the UNO receives when I click 'OK' on the remote. So, I saved it so UNO remembers it as use it to turn the sensor when clicked

//initialising variables; time, IR sensor cooling time, button, LCD //display 16*2

int currentHour = 23;

int currentMinute = 13;

int currentSecond = 30;

unsigned long lastMillis = 0;

unsigned long lastDisplay = 0;

unsigned long feedStart = 0;

unsigned long lastDebounce = 0;

unsigned long lastIR = 0;

const unsigned long DEBOUNCE_DELAY = 50;

const unsigned long IR_COOLDOWN = 300; // prevent repeat firing from held button

bool lastButtonState = HIGH;

bool stableButton = HIGH;

bool isFeeding = false;

void setup() {

Serial.begin(9600);

myServo.attach(SERVO_PIN);

pinMode(BUTTON_PIN, INPUT_PULLUP);

myServo.write(0);

lcd.begin(16, 2);

lcd.clear();

IrReceiver.begin(IR_PIN, DISABLE_LED_FEEDBACK);

}
//Time update

void updateTime() {

if (millis() - lastMillis >= 1000) {

lastMillis += 1000;

currentSecond++;

if (currentSecond >= 60) { currentSecond = 0; currentMinute++; }

if (currentMinute >= 60) { currentMinute = 0; currentHour++; }

if (currentHour >= 24) { currentHour = 0; }

}

}

//LCD display showing the time, specifically Doha Time, I manually //added it 
void showTime() {

lcd.setCursor(0, 0);

lcd.print("Doha Time ");

lcd.setCursor(0, 1);

if (currentHour < 10) lcd.print("0");

lcd.print(currentHour); lcd.print(":");

if (currentMinute < 10) lcd.print("0");

lcd.print(currentMinute); lcd.print(":");

if (currentSecond < 10) lcd.print("0");

lcd.print(currentSecond);

lcd.print(" ");

}
//LCD display showing that the food is releasing or loading food

void showFeeding() {

lcd.setCursor(0, 0);

lcd.print("** FOOD ** ");

lcd.setCursor(0, 1);

lcd.print("RELEASING! ");

}
//LCD display showing that the food is being released

void startFeeding() {

if (!isFeeding) {

isFeeding = true;

feedStart = millis();

myServo.write(180);

lcd.clear();

showFeeding();

Serial.println("FEEDING");

}

}
//LCD display showing that the food has stopped 
void stopFeeding() {

isFeeding = false;

myServo.write(0);

lcd.clear();

Serial.println("STOPPED");

}

// same with LCD and remote, but instead button, but when you release your finger from the button it immediately stops feeding 
void handleButton() {

bool reading = digitalRead(BUTTON_PIN);

if (reading != lastButtonState) {

lastDebounce = millis();

lastButtonState = reading;

}

if (millis() - lastDebounce >= DEBOUNCE_DELAY) {

if (reading != stableButton) {

stableButton = reading;

if (stableButton == LOW) startFeeding(); // press

if (stableButton == HIGH) stopFeeding(); // release

}

}

}
//The IR sensor when a button is clicked it shows its code on the //serial monitor that I could later saved to use to move the servo to //release the food when button 'OK' is clicked

void handleIR() {

if (IrReceiver.decode()) {

unsignedlong code = IrReceiver.decodedIRData.decodedRawData;

Serial.print("IR CODE: 0x");

Serial.println(code, HEX);

// Cooldown to prevent repeated triggers from one press

if (millis() - lastIR >= IR_COOLDOWN) {

if (code == IR_OK) {

if (!isFeeding) startFeeding(); // first OK = start

elsestopFeeding(); // second OK = stop

lastIR = millis();

}

}

IrReceiver.resume();

}

}

void loop() {

updateTime();

handleButton();

handleIR();

if (Serial.available()) {

String msg = Serial.readStringUntil('\n');

msg.trim();

if (msg == "DISPENSE") startFeeding();

if (msg == "STOP") stopFeeding();

}

if (isFeeding && millis() - feedStart >= 3000) {

stopFeeding();

}

if (!isFeeding && millis() - lastDisplay >= 1000) {

lastDisplay = millis();

showTime();

Serial.print("TIME:");

Serial.print(currentHour); Serial.print(":");

Serial.print(currentMinute); Serial.print(":");

Serial.println(currentSecond);

}

}

Image 1: Hand-drawn schematic

Demo with Oreo: They understood how it worked and whenever she wants food from it she meows at me and takes me to the cat feeder to give her the food.

Reminder from my user demo: Bella refused to interview

Final Project Documentation

Inside Your Mind – Interactive Fluid Typography Experience

Introduction

Imagine how many thoughts are running through your mind every day. How many memories are replaying without your permission. How many feelings are sitting quietly beneath the surface, waiting. How many processes – conscious and unconscious – are happening all at once, shaping how you see the world, how you move through it, how you feel.

We talk about the mind constantly, but we rarely feel it. We describe it in words but what if you could actually move through it?

That’s what this project asks. Let’s have a look – together.

Project Description

Inside Your Mind is an interactive fluid typography experience built in p5.js. It is not a game. There are no rules, no score, no way to win or lose. It is a guided journey through four psychological stages of the mind rendered through particle-based text and cursor interaction and sound. The experience opens with a cinematic intro sequence: a personal greeting, a typewriter reveal of my name, a search bar that slowly types “inside your mind”  before the background fades to black and the particle world begins. From there, users navigate four chapters by scrolling:

Stage 1 – Noise: The state of mind this stage represents is the one most people know intimately but rarely name: moment when there are too many thoughts happening at the same time. Not anxiety exactly just overwhelm. The cognitive noise of existing. Everything arriving at once with equal urgency.

The design decision for this stage was to make the particles rain. They fall from above, guided by Perlin noise so their path is irregular and organic rather than mechanical each particle taking a slightly different route down, bumping and drifting as it descends. Once they land and form the text, they don’t rest. A constant random jitter force kicks each particle slightly every single frame, meaning the text is technically legible but permanently restless. It holds its shape just enough to be read, but never settles. You can feel it trying to stay coherent and failing slightly, constantly.

The cursor scatters particles on approach, because that is exactly what external input feels like in this state one more thing arriving, breaking whatever fragile order existed. The soundscape is a deep. It is the sound of pressure. Of weight. The cursor sound is wind: a pink noise burst filtered through a bandpass, airy and formless. You are moving through something thick.

The color palette is deep violet and soft lavender, the color of a headache, of overstimulation, of a mind working too hard at the wrong hour.

Stage 2 – Overthink: “you replay every moment”

Overthinking is not the same as noise. Where noise is chaotic and arriving, overthinking is circular. It is the experience of returning, repeatedly and involuntarily, to the same thought, the same conversation, the same moment, unable to leave it behind or fully process it.

The particle behavior for this stage is orbit. Every single particle loops a small ellipse around its home position continuously, the orbit radius and speed are randomized per particle, but the character is circular. Going around. Coming back. Going around again. The ambient sound is a slow pad chord progression. It is not unpleasant, but it is repetitive by design. You start to recognize it coming around again. The cursor sound is a soft water drop. Small. Like a single thought landing. And then another. And another.

The color palette shifts to ice blue cooler, more cerebral than Stage 1.

Stage 3 – Break:

“it’s too much you shatter”

Every state of overthinking and overwhelm eventually reaches a threshold. Stage 3 is that threshold. The design principle here was simple and deliberate: before the breaking, I thought there must be stillness. Tension requires silence before it can release.

When you arrive in Stage 3, nothing moves. The particles sit perfectly at their home positions, forming the text with complete stillness. The spring force in this stage is the strongest of all four as particles snap back to home almost instantly if disturbed. The text holds. Then the user clicks and the wave fires from the cursor position. An expanding ring of force radiates outward, hitting each particle as it passes through them and sending them flying. In the wave,  particles at different distances react at different times, which created an effect of shattering rather than a single simultaneous blast. The spring forces pull everything home afterward, so the text reforms. It always reforms.

I think this stage is the most interactive because breaking is an active thing. You have to choose to do it. You have to click. The experience gives you the tension and then waits for you. The cursor sound is distorted white noise. The color palette is deep crimson and warm pink. The only warm colors in the entire experience, and they are the color of something going wrong.

Stage 4 – Quiet:

“finally silence”

After noise,  after breaking – quiet. Quality of silence that follows intensity. The silence that has weight because of what came before it.

The particle behavior in this stage is breathing. Each particle oscillates slowly outward and inward along the radial vector from the canvas center to its home position pushed by a wave timed with a personal phase offset so the motion feels organic. The result is that the entire text gently expands and contracts, like a chest rising and falling feeling. It is the only stage where the motion is cyclical. The cursor behavior inverts here. In every other stage, the cursor repels particles, In Stage 4, the cursor gently attracts nearby particles toward it. You can gather them. Hold them. A warm golden glow appears under the cursor. The relationship between the user and the text changes from conflict to softness.

The cursor sound is a bell chime. The color palette is amber and warm white. After the cool blues and violent reds of the earlier stages, I wanted to design and show the warmth of silence.

For full experience click the embed </> for audios to work,

Demo Video Link:

https://drive.google.com/file/d/1pU6o5wXnE2DPwy-biGNz1qMbYGnZOFqN/view?usp=sharing

Process

The Idea – Fluid Typography

My starting point was my new obsession: fluid typography. I had come across a tiktok video examples of text that showed letters that flow and that was fluid typography and I was completely drawn to it. I wanted to make my own version. But as I started building it, I realised that fluid typography on its own, as beautiful as it is, is like a visual demo and for my project it needed a reason to exist, a stpry.

what story would make this feel necessary?

The mind. A mind felt like the most honest container for this kind of experience. Thoughts scatter when you try to hold them. They orbit obsessively. They shatter under pressure. They eventually go quiet. I wrote 4 stages once I had that theme. And, the theme meant that the fluid text was a tool of metaphor. The particles are the thoughts.

Adding Sound

Once the visual system was working, I experimented with adding sound and  it was the right decision. Without sound, the experience was impressive but slightly cold . With sound, it gave a feelinf you were inside something.

I built the audio system using Tone.js, giving each stage its own soundscape and its own cursor sound. The cursor sounds were particularly important wind for Stage 1 (the noise, the overwhelm), water drops for Stage 2 (the repetition, the dripping thought), glitch crackle for Stage 3 (the breaking point), and bell chimes for Stage 4 (the clarity, the resonance after silence). Every time you moved the cursor you were making sound specific to where you were in the emotional journey. The sounds definetenly deepened the preoject at some point.
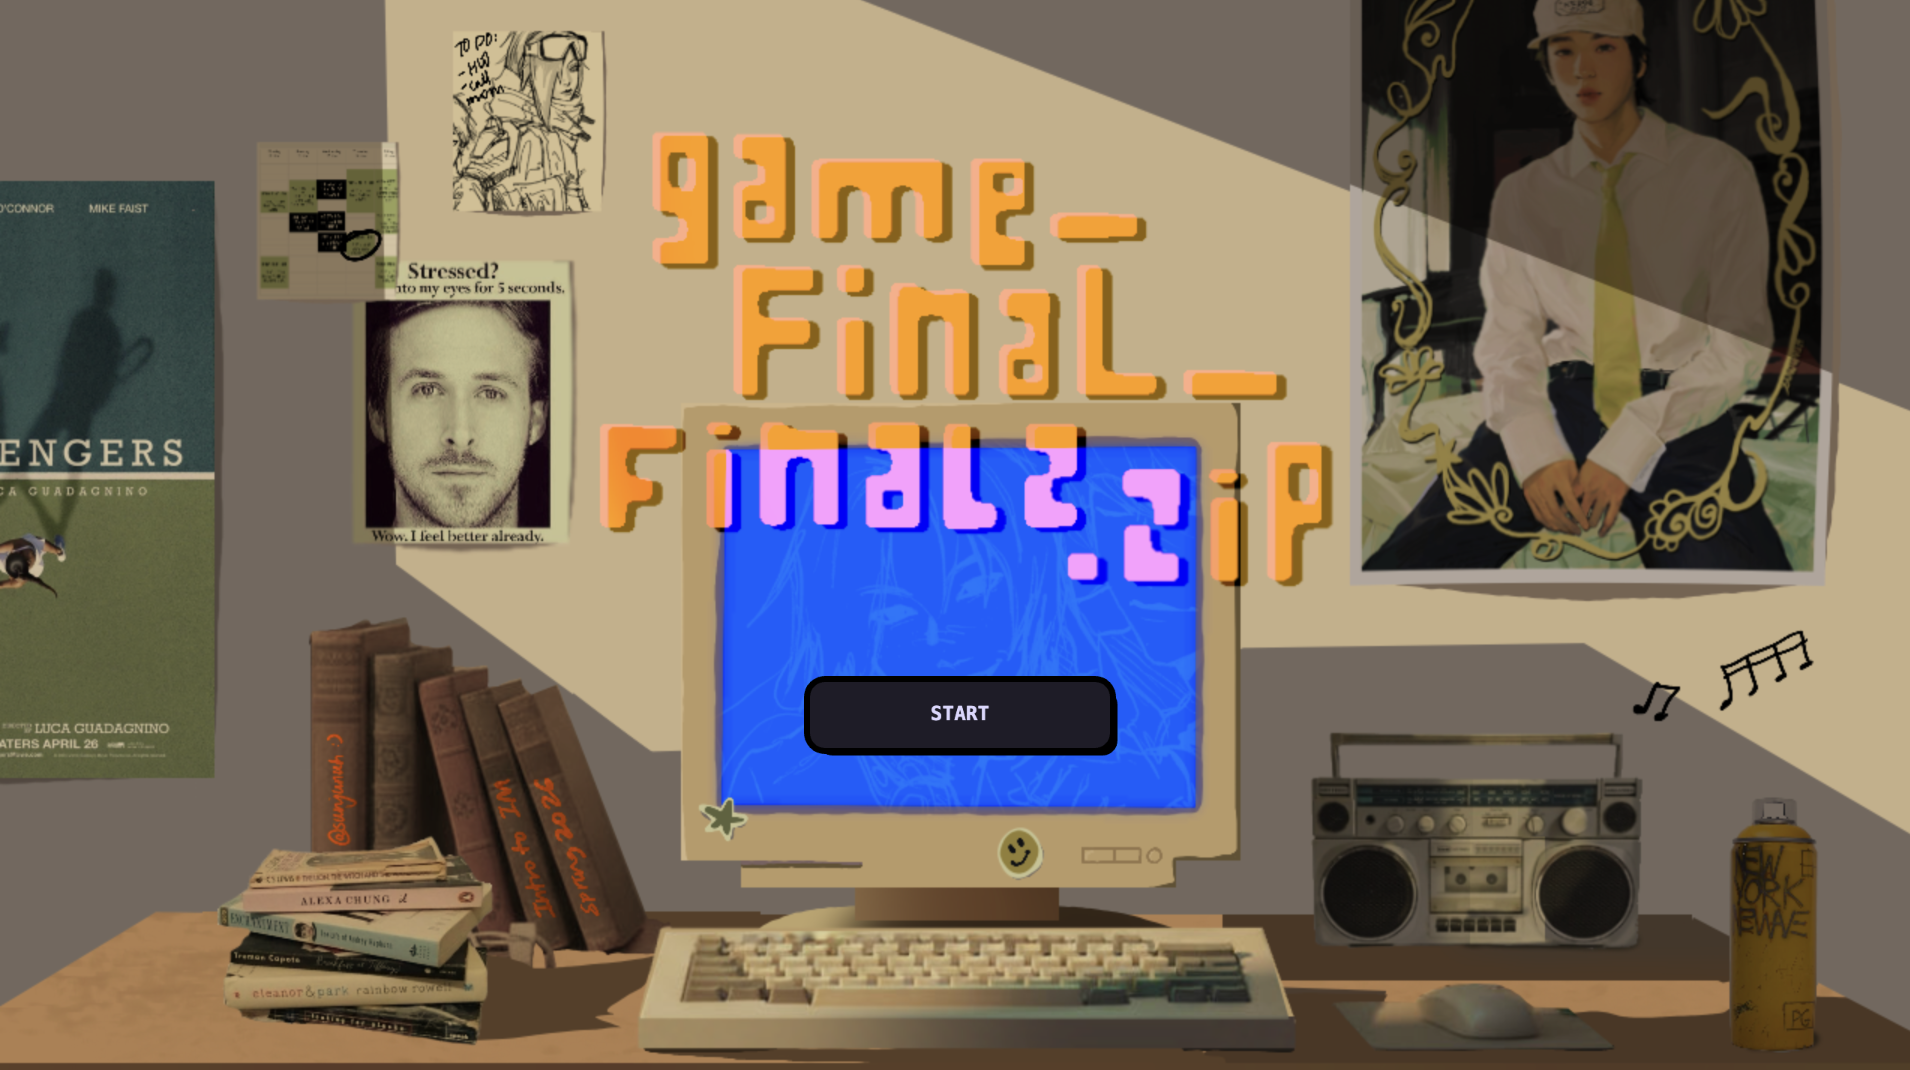
The Intro Sequence

As I was developing the project, I noticed a pattern on my social media feeds, motion design ads for brands, cinematic, typographic intro sequences that brands and motion designers were using to create instant atmosphere and identity. I was watching a lot of these and I thought: this is what my project needs. I don’t want just a start button, but an experience that begins before the experience begins.

So I built a full kinetic typography intro using a separate canvas: a large “hi!” that scales into view, a medium line  “first lemme introduce myself” that slides up, then a typewriter effect that slowly reveals “madina” letter by letter with a blinking cursor, and finally a minimal search bar that expands from the center and types “inside your mind” before the whole screen fades to black and the landing screen unfurls. That intro turned my sketch into an authored experience and i liked it.

The Result

And then there it was.  Four stages, a full narrative arc, a kinetic intro, generative sound, and 7000 particles all moving with intention. I was genuinely proud of it.

Code Deep-Dive

How the Fluid Typography Works

The core technique behind the fluid text is particle-based font sampling. it works like this:

  1. The text is rendered invisibly onto an offscreen p5.js graphics buffer at full canvas size
  2. Every pixel of that buffer is scanned, and any pixel that is lit (part of the rendered letter) becomes a target point a “home position” for a particle
  3. Each of the 7,000 particles is assigned one of these home positions
  4. Every frame, physics forces are applied, and then a spring force pulls each particle back toward its home. It took my quite time to understand the physics of it, hah.

The text only exists as the collective shape of 7,000 individual points, each with their own velocity and position.

function sampleText(lines) {
  var W  = sk.width;
  var H  = sk.height;
  var pg = sk.createGraphics(W, H);
  var lh, sy, pts, y, x;
  
  pg.pixelDensity(1);
  pg.background(0);
  pg.fill(255);
  pg.noStroke();
  pg.textAlign(sk.CENTER, sk.CENTER);
  pg.textStyle(sk.BOLD);
  pg.textSize(FONT_SZ);
  
  // render each line of text centred on the canvas
  lh = FONT_SZ * 1.32;
  sy = H / 2 - (lines.length - 1) * lh / 2;
  lines.forEach(function(l, i) { pg.text(l, W / 2, sy + i * lh); });
  
  pg.loadPixels();
  pts = [];
  
  // scan every 4th pixel — lit pixels become home positions
  for (y = 0; y < H; y += STEP) {
    for (x = 0; x < W; x += STEP) {
      if (pg.pixels[(y * W + x) * 4] > 128) {
        pts.push({ x: x, y: y });
      }
    }
  }
  
  pg.remove(); // clean up offscreen buffer
  return pts;
}

The next piece of code is what I’m proud of. Each stage changes the physics personality of every particle. Four different motion systems, selected by a r string:

Particle.prototype.update = function(mx, my, t) {
  var beh = CHAPTERS[currentCh].beh;

  // ── NOISE: rain from top, then constant random jitter ──
  // Feels overwhelming — particles never fully settle
  if (beh === 'noise') {
    if (this.falling) {
      this.y += 3.6 + sk.noise(this.x * 0.005, t) * 2;
      this.x += (sk.noise(this.y * 0.004, t + 99) - 0.5) * 1.2;
      if (this.y >= this.hy) { this.falling = false; }
      return;
    }
    // random kick every frame — text is alive but unstable
    this.vx += (Math.random() - 0.5) * 0.50;
    this.vy += (Math.random() - 0.5) * 0.50;
    this.vx += (this.hx - this.x) * 0.018; // very weak spring
    this.vy += (this.hy - this.y) * 0.018;
    this.vx *= 0.88; this.vy *= 0.88;

  // ── ORBIT: each particle loops a small ellipse around home ──
  // Feels obsessive — thoughts that won't stop circling
  } else if (beh === 'orbit') {
    this.orbitAngle += this.orbitSpd;
    var tx = this.hx + Math.cos(this.orbitAngle) * this.orbitR;
    var ty = this.hy + Math.sin(this.orbitAngle) * this.orbitR * 0.55;
    this.vx += (tx - this.x) * 0.055;
    this.vy += (ty - this.y) * 0.055;
    this.vx *= 0.82; this.vy *= 0.82;

  // ── FRACTURE: completely still — tension before the click ──
  // Strong spring, high damping: text holds its shape perfectly
  } else if (beh === 'fracture') {
    this.vx += (this.hx - this.x) * 0.10;
    this.vy += (this.hy - this.y) * 0.10;
    this.vx *= 0.78; this.vy *= 0.78;

  // ── BREATHE: slow radial sine pulse from canvas centre ──
  // The entire text expands and contracts like breathing
  } else if (beh === 'breathe') {
    var pulse = Math.sin(t * 0.62 + this.breathePhase) * 6.5;
    var cx2   = sk.width  / 2;
    var cy2   = sk.height / 2;
    var dhx   = this.hx - cx2;
    var dhy   = this.hy - cy2;
    var dhLen = Math.sqrt(dhx * dhx + dhy * dhy) + 0.001;
    // target = home position + outward pulse along radial direction
    var btx   = this.hx + (dhx / dhLen) * pulse;
    var bty   = this.hy + (dhy / dhLen) * pulse;
    this.vx  += (btx - this.x) * 0.026;
    this.vy  += (bty - this.y) * 0.026;
    this.vx  *= 0.88; this.vy *= 0.88;
  }

  this.x += this.vx;
  this.y += this.vy;
};

Reflections

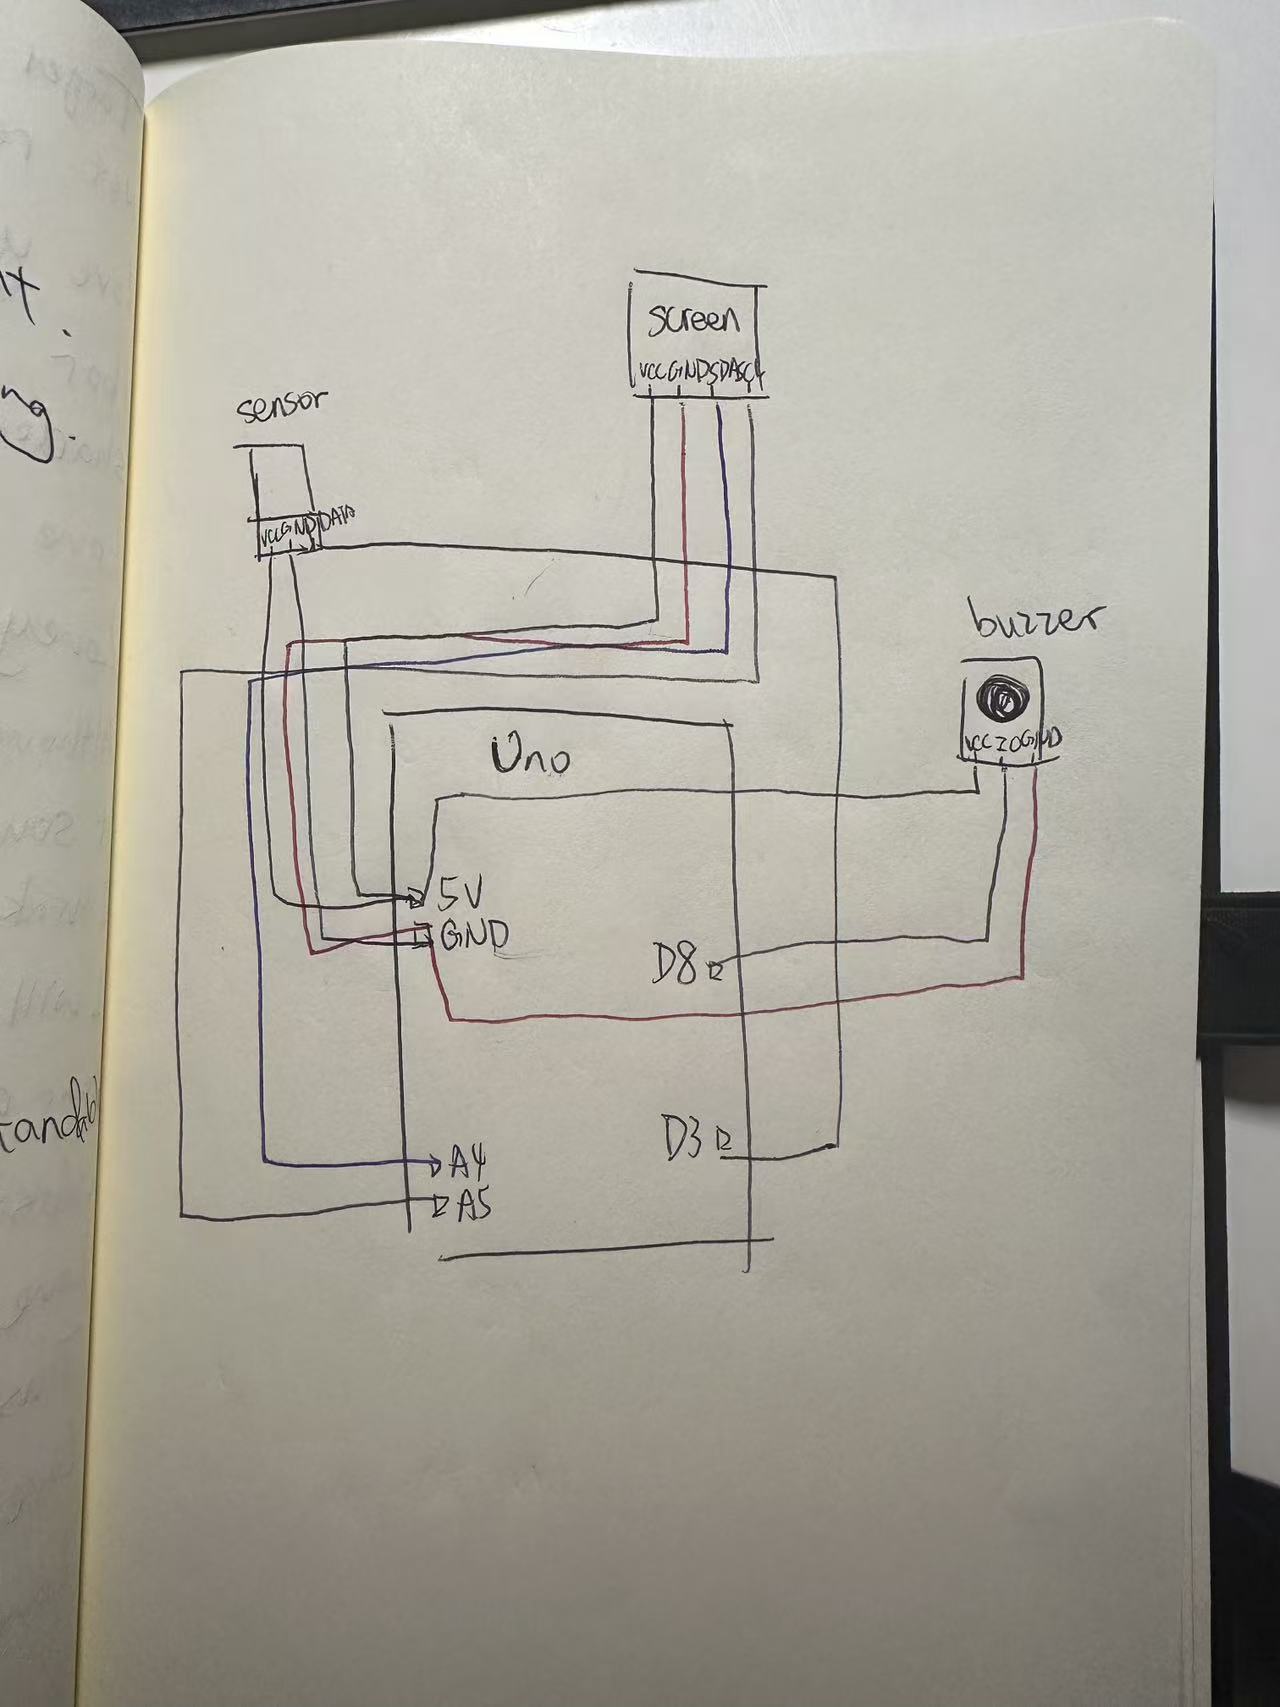
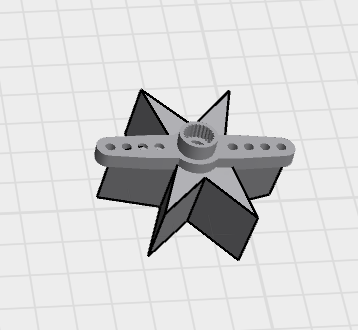
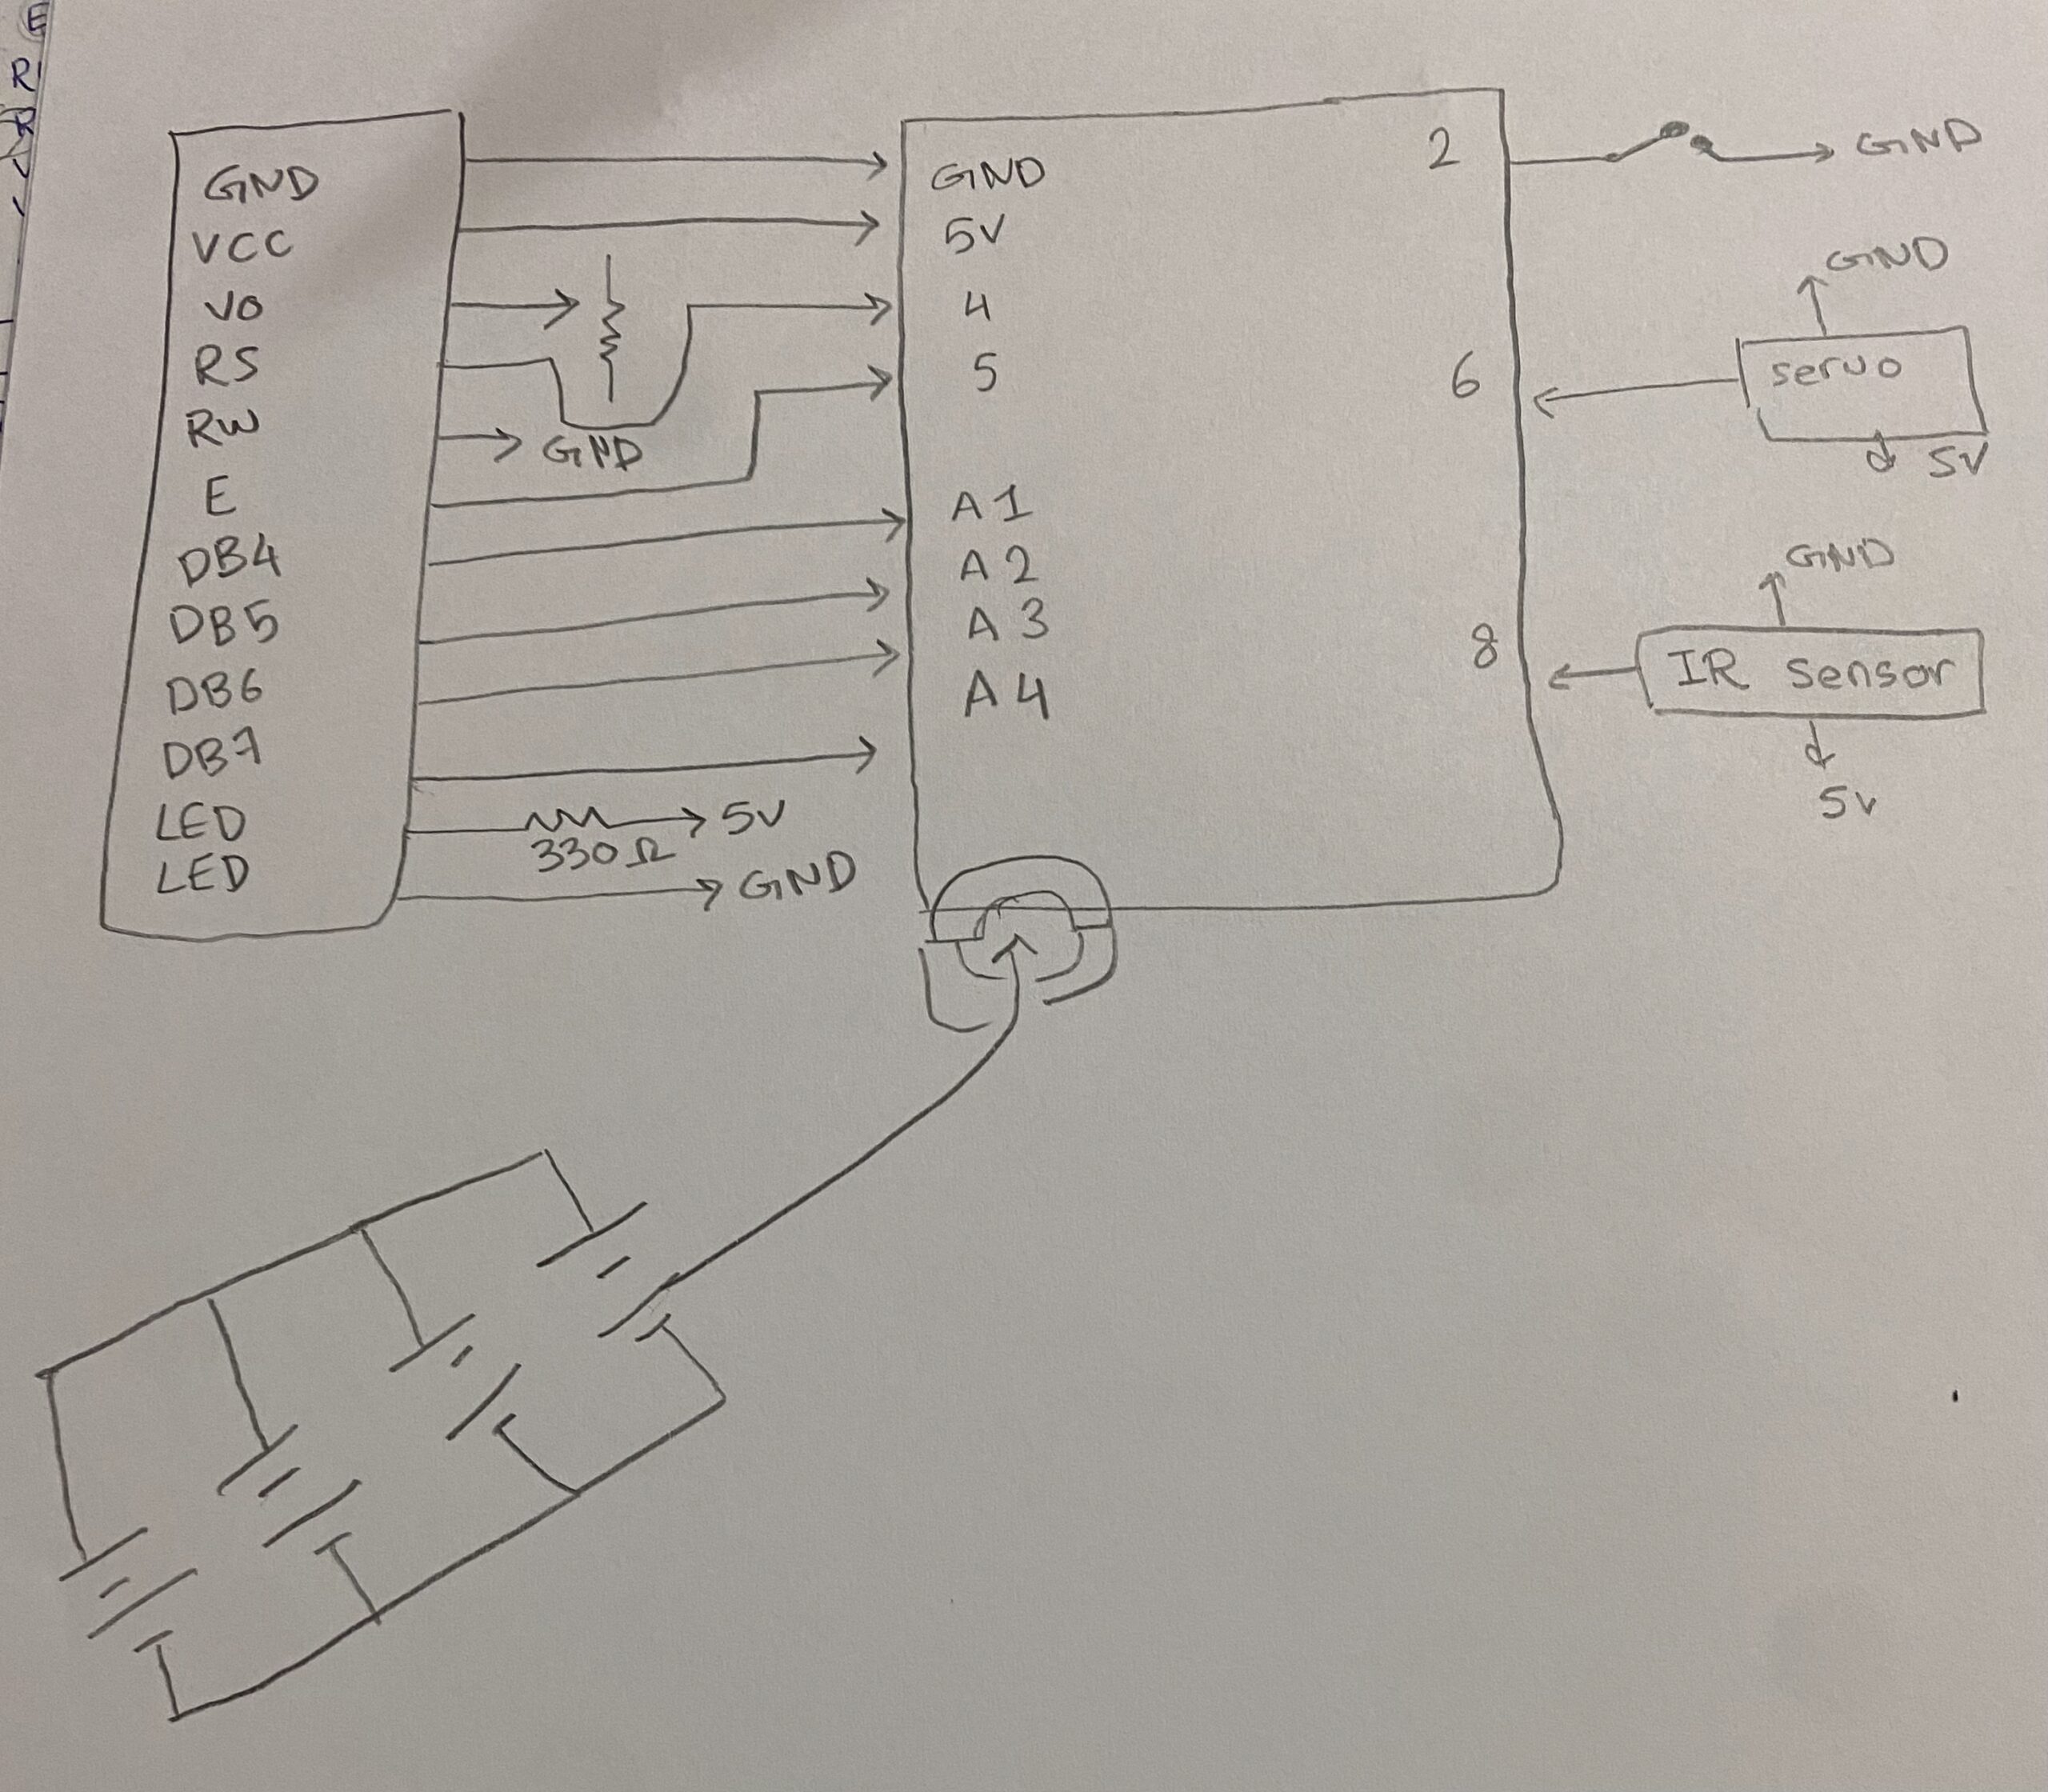
I actually didn’t start with this idea. My original plan was to build my final project in Tinkercad – a 3D interactive game. I started the initial stages of it and then stopped: what is this going to feel like? And I didn’t love the answer. A game in Tinkercad felt too rigid for me, and I realized that what I actually care about in design is feeling. Evoking something. Making someone feel.

Aaaand this led me to p5. And once I chose it, I never looked back. Not once did I regret the pivot.

The Hard Parts

The hardest technical challenge was the fluidity itself, figuring out how to decompose text into a particle system that still read as text, while also having enough physical personality to feel alive. Getting the balance between spring force (which pulls particles home) and behavioral force (which gives each stage its character) took a lot of iteration. Too much spring and the particles snap back robotically. Too little and the text becomes unreadable. The current values are the result of many hours of tuning.

The second major challenge was performance. After building the full experience with 10,000 particles and the Tone.js audio system running simultaneously, I noticed the experience would start to lag particularly in the final Quiet stage, which has the most computationally gentle motion but was hitting the limit of what a standard laptop could handle. I solved this with two techniques: reducing the particle count from 10,000 to 7,000, and implementing a frame-rate adaptive physics system that skips physics updates on alternate frames if the frame rate drops below 40fps.

What I Learned

This project taught me that the most powerful interactive experiences are the ones where the interaction means something where what you do with your cursor is narrative. Every movement in Inside Your Mind is part of the story. That’s the principle I want to carry forward.

References