Week 4 – Displaying Text

My Concept:
My concept was to do something with the poem “Stopping by Woods on a Snowy Evening” by Robert Frost. Since the assignment was to try displaying text, I thought it’d be good opportunity to go a step further and experiment with something new, and a lot more advanced than what I’m used to.

In the poem, there are certain lines such as “My little horse must think it queer/To stop without a farmhouse near/Between the woods and frozen lake/ The darkest evening of the year.” so I thought it’d be fun to create an image of a man with a horse at night, just like in the poem. Due to the assignment being about displaying text, I thought it’d be fun to have the image be created by text.

Poem:

Stopping by Woods on a Snowy Evening
by Robert Frost

Whose woods these are I think I know.
His house is in the village though;
He will not see me stopping here
To watch his woods fill up with snow.

My little horse must think it queer
To stop without a farmhouse near
Between the woods and frozen lake
The darkest evening of the year.

He gives his harness bells a shake
To ask if there is some mistake.
The only other sound’s the sweep
Of easy wind and downy flake.

The woods are lovely, dark and deep,
But I have promises to keep,
And miles to go before I sleep,
And miles to go before I sleep.

A highlight of code I’m proud of:

function preload(){ 
  winter = loadImage('winter0.jpg');
  txtFile = loadStrings('winter.txt'); //loads in the txt file 
  newFont = loadFont('ArchivoBlack-Regular.ttf'); //loads in new font
}

This feels silly to admit, but I’m honestly most proud of myself for actually figuring out the preload function. Obviously the assignment as a whole was difficult, but I had a lot of videos and resources in order to guide me through most of it. The preload function was the one thing I did not have much information on (I originally tried to put the text file and font directly onto the code without preloading it).

The worst part came after I followed the tutorial for uploading an image. For  some reason, it did not work. I spent a full hour tinkering with the code and growing frustrated because no one else seemed to have the same problem I was. The code itself was perfectly fine, but no matter what I did, the program still found an error.

In the end, after looking through countless reddit posts, I learned that the reason why I couldn’t upload an image was because the current version of p5js couldn’t upload images that well, so I had to go back to version 1.4.0 in order to even begin coding. It feels stupid that that’s the part I struggled with most, but its true.

Embedded Sketch

How this was made
The code was made from, of course, a ton of youtube videos. I first began with watching The Coding Train’s video on how to upload images, and then his video on ASCII Text Images. I used both videos as a jumping off point to tweak the image and code itself. I watched Patt Vira’s tutorial on the same thing, where she revealed to me the image resize code (I had been changing it using a whole other website the entire time before this). I watched Acerola’s video titled “I Tried Turning Games into Text” where I learned that smaller text is probably better. I then also watched Jason Erdreich’s video called ”
How to program custom text and fonts in P5.js” to find a good font for the image (New Courier just didn’t look that great). Lastly, I found The Coding Train’s code about coding a specific text into ASCII in order to turn the poem into the text. (Words are spelt downwards in case you struggle to read the poem. Additionally, the image being resized also makes it hard to read).

I also had some help from random reddit posts that were struggling with the same problem as me. They weren’t the most helpful considering it took me hours to find a solution for the image thing, and also did not help me find a solution as to why the code kept being considered an infinite loop, but it was at least a nice resource to have.

Reflection:
As fun as this was to make, I wish I wasn’t so reliant on tutorials when making it. Obviously it would be harder considering I was making something a little more advanced, but it just felt annoying that anytime I wanted to try something new with the code I couldn’t because of fear I’d mess it up too much. I enjoy actually exploring things with the code, and this specific code felt too complex for me to even try tweaking it too much. It was a fun experience overall though.

Reading Response – Week 4

I was surprised at just how many parts of design I was not considering! The reading makes so many things a lot clearer. Logically, I know that machines can be difficult to use, and that there is a learning curve when it comes to them. But for so long, I had just dismissed difficult to work with machines as something humans just had to deal with. Professionals are more likely to understand how to use certain machines, and older people may not understand how to use newer technologies. That’s understandable, and feel like simple facts of life, some people are just not capable of understanding machines. But of course, that shouldn’t be true! Machines should be designed with user experience in mind, engineers should not be dismissing people’s confusion.

I am curious about what the line is though. At what point should humans understand machines and devices. If we follow this logic, should I not know how to fix my devices if they break? Does it not make sense for me to have the tools available in order to not be reliant on anybody else when it comes to my own devices? Should I leave repairs such as this to the professionals? There’s just a ton to consider when it comes to how much we do and should understand about devices.

The reading had me thinking about certain designs I may struggle to use or find myself continuously frustrated with, and something that came to mind was sinks. I always felt that sinks are, for some reason, the one thing hotel bathrooms cannot get right (hotel bathrooms as a whole are designed badly, but I am specifically referring to sinks now). Which is crazy to me, considering there are so many sinks out there that work perfectly fine. What some hotels do however is they decide to make their sink have a fancier design. This usually means changing the sink’s faucet to look more fancy and ‘clean’, or by changing the bowl that collects the water (see the picture below). This ends up creating a few problems, the one I am used to encountering is when a sink’s faucet is too far back for the bowl. So the water is only falling in the very back of the bowl, and you have to stretch your arms over the unreasonably big bowl that serves no purpose other than to block your way. Additionally, some sinks have the bowl be on the table rather than embedded into it. This not only makes the sink uncomfortable to use, but it also puts the soap at an awkward place. Now you can’t place the soap near where the faucet is, it has to be put at the side, which means anytime you need to use it, you will naturally be getting water onto other part of the table.

I don’t think the design for sinks needs to be that crazy. If hotels really did want sinks to look fancy, then they should just change the countertop and maybe the color of the faucet, but leave the actual sink alone. Any designs to improve on the look only harms the design.

When it comes to interactive media, the main thing to think about is obviously, the interactions with technology, so it makes sense to focus on the connection between humans and how to make technology more accessible to them. If you want to create something that people can interact with, they need to know exactly how to interact with it. First of all, human-centered design (HCD) should be a priority, if the entire point is for people to interact with it, then we need to keep the people in question in mind. Additionally, if people are not able to figure out the design, then that ruins the experience of using the design. No matter how cool it is, if people deems it too annoying to try out, they will be less likely to care for it. A good way to do this is by introducing signifiers to designs, just to make the overall experience of using them much simpler. All other principles he mentions are also important in the general sense, things like affordances, mapping, signifiers, feedback, etc. all should just be a normal part of the design process, especially when it comes to interactive media.

Reading Response – Week 3

I find the concept of interactivity pretty interesting. The author of the book chapter made it very clear that he despises how the meaning of the word has been skewed recently, and I agree with him. The thing is though, at what point is something just my reaction vs at what point am I actually interacting with the thing? I’m wondering because I believe the writer is correct in his assumption that a lot times when people refer to interactivity, they actually mean normal reactions. However, are interactions and reactions not connected in that sense? Reaction is a form of engaging with something you see, not at the level of actual interactivity the author is seemingly looking for, but still, you are engaging with the material in some matter.

When it comes to movies are you just reacting or are you interacting with the creator. If it is just your reaction, then, does that inherently mean there wasn’t a degree of interactivity even through the reaction ? Again, I am not saying the writer is wrong in what he claims, but I just can’t help but wonder what’s the line between reactions and interaction. Does interaction have to entail the characters in the story should hear you when going in a scary house? Is part of the interactivity not your own reaction? Looking beyond the characters of the screen, could we not say there was a level of interactivity when it came to audience and the creator’s hope in bringing in causing your anger and fear to happen?

When I think of strongly interactive systems, I tend to think of systems in which your input can actively change what is happening in a piece of media. Additionally, I think a good way to improve user interaction in my p5 sketches is by having the use play into the piece. Maybe by giving them something to click or by having their addition change the piece in some way.

Week 3 – Object-Oriented Programming

My Concept:
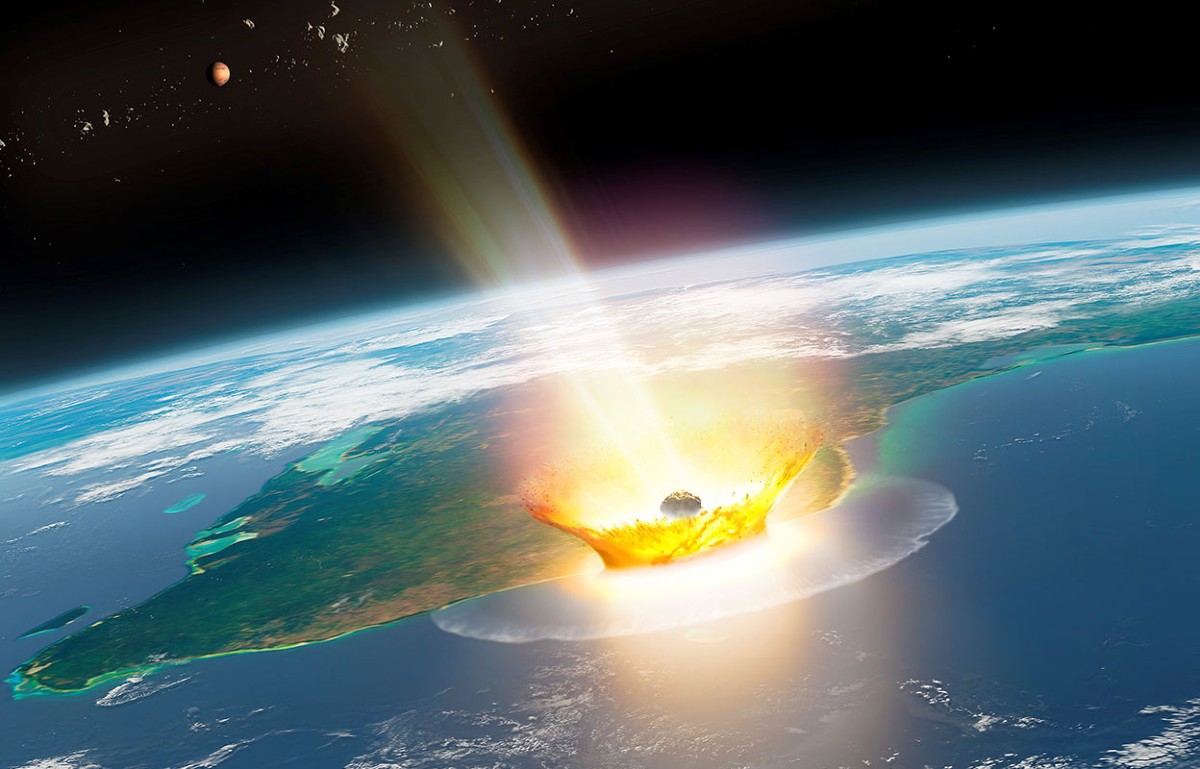
For some reason, the one thing in my head when I was making the code was the meteor that killed the dinosaurs, so I knew I  wanted to make something with that concept. I tried to stack the circles on top of each other and really liked how they looked when they were put together, and wanted to see what would happen if they started out from the same place but separated as part of the animation. Thus, my little art piece was born. And as I was playing around with the radius size, I managed to figure out the bursting effect.

Of course, the warm sun-like colors of the animation is meant to depict the fiery meteor, and the burst effect is the explosion when it reached earth.

Code I’m proud of

for (let i = 0; i< 100; i++){
  sun[i].move();
  sun[i].show();
  frameRate(25);
}
//second circle is smaller, is the inner layer
for (let i = 0; i< 90; i++){
  sun[i].move();
  sun[i].show();
  frameRate(15);
}

I was honestly really happy when I figured out how to do the bursting animation, and then adding to it by making a second loop so the impact feels bigger. Even if this isn’t the main part of the code, I was still happy with how it made the animation look.

Embedded Sketch

How this was made:
All of it was done by watching the Coding Train’s video. I watched the entirety of his lessons from 6.1 to 7.3. Anything that wasn’t explained in those videos I came up with myself (like the warm coloring and the explosion effect)

Reflection:
I wish I could’ve made the background a lot more fun! I was so focused on the animation itself that I couldn’t think of what the background should look like, so it is unfortunately just plain black.

I also wanted to add in a mouse clicked feature that would reset the animation, but I couldn’t figure out how to do it, and am very frustrated with my lack of progress with that specific function. Hopefully I’ll be able to add it into the next assignment.

Week 2 – Generative Art

My concept
Of all the things we were shown in class, the moment in which I felt the most intrigue came from the showcase of colors moving using the mouse. The idea of movement changing the artwork got me really excited, and I dove straight into trying to find a way to do that with some code. Sure the assignment itself required randomness to be used, but the idea of having randomness be controlled, both human and machine working in tandem to make something new, was really interesting to me!

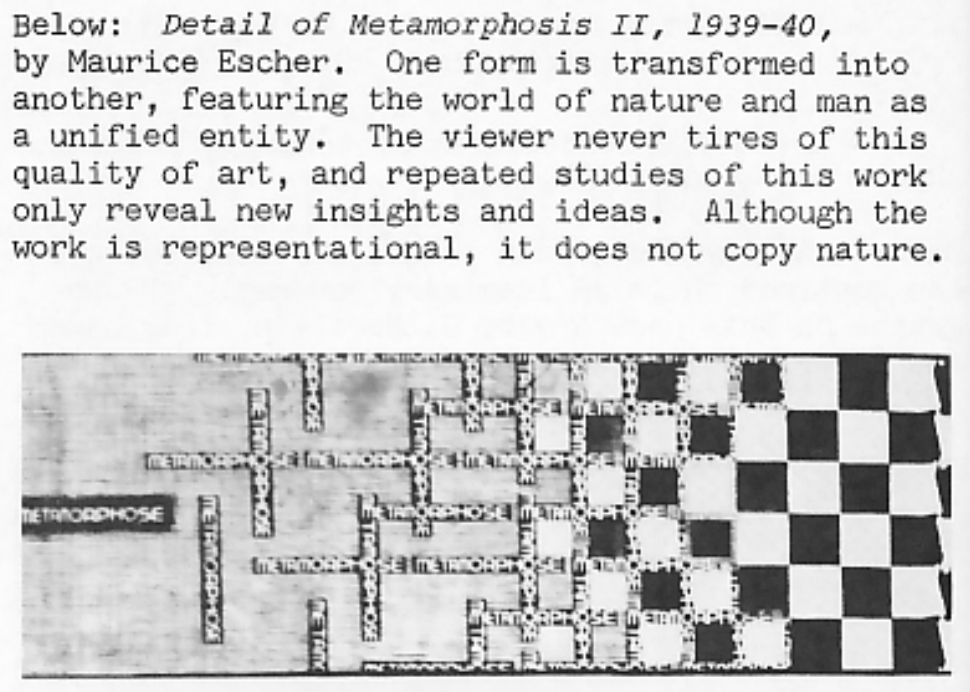
For inspiration I went ahead and looked at computer generated art examples and ended up picking this piece in specific.

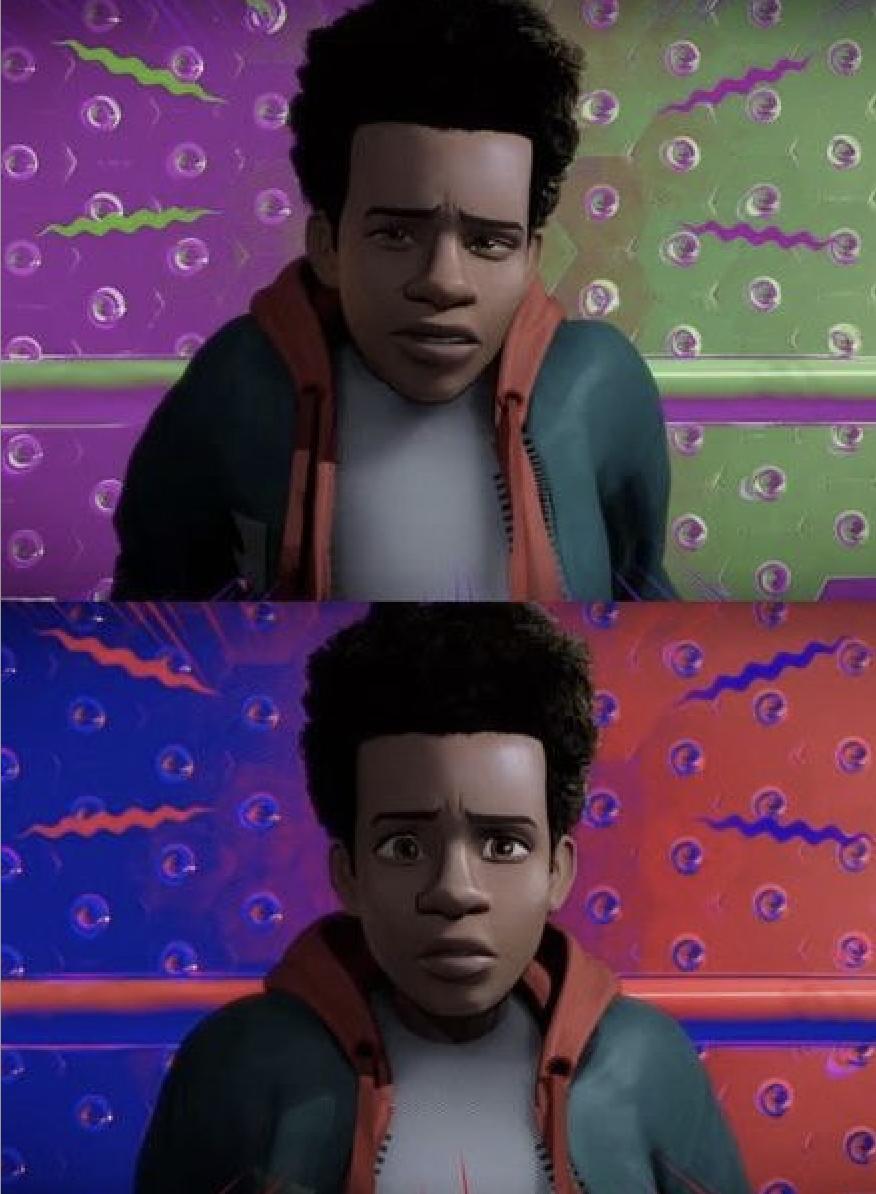
As said here, in this art piece, one form is transformed into another. I wanted that element to be an aspect of the art I made. Your input transforms the piece into something else. Though in my case, I wanted the input to be due to color rather than changing the shape of the piece. For my inspiration of that, I looked at movies I watched, and decided on one particular scene from the first  Spider-verse movie.

In this scene, the animators showcase the main characters switch in his story through colors. We understand at this point that the character of Miles Morales is officially on the road to becoming, well, Spider-man (as seen by the blue and red colors). I wanted my piece to have that complete flip from ordinary colors to something bright and flashy. Just so that I could get the same type of excitement from the change in colors.

A highlight of some code that I’m particularly proud of

for (var x = 5; x <= width; x = x + 50) {
  for (var y = 5; y <= height; y = y + 50) {
    fill(0, random(255), mouseX); //green is random, blue is dependent on the x-value of the mouse
    rect(x, y, 25, 25);
  }
}

I’m honestly surprised I even understood how to do a nested loop, and what exactly were the parts I put inside the blank [for ()]. The video I watched  showed a ‘while’ loop first then crunched it all up in a ‘for’ loop, which made me pretty confident when it came to writing this particular loop. Additionally, I didn’t have to search anything up to do the mouseX & mouseY thing to do the colors. I tried it out and was shocked it worked out! So I was really happy about that.

Embedded sketch

‘How Was This Made’ section 

Like 99% percent of this was made because I watched a ton of ‘The Coding Train’ videos. It was recommended to watch the 4 videos about functions, but I went ahead and watched lessons 4, 5, and 6 just in case. I didn’t want to use any AI to figure it out, so I forced myself to learn from the videos. The specific video that helped the most were:

2.5 The random() Function

4.1 while and for Loops

4.2 Nested Loops

5.2 Function Parameters and Arguments

Other than, the rest came from trial and error. I would switch the colors around, change the frame rate (which I learned from class), tried to figure out how I wanted the mouse to play into the piece (it was originally a mouseClicked function), and so on.

Reflection and ideas for future work or improvements

I really wanted to add a mouse click function! And also wanted to make it so that the colors only changed for like 4-5 squares surrounding the mouse. I found a video showcasing how to draw with the mouse, but couldn’t figure out how to do exactly what I wanted, which was unfortunate. But I at least understood (through much trial and error) why I couldn’t do the feature I wanted to add. I also think I’d like to add a bit more variety in the piece, rather than just having the color change be a feature.

Week 2- Reading Reflection

The idea of randomness in art is an interesting concept. On one hand, art in itself does already incorporate random elements (ex. watercolor painting). On the other hand, computer art and algorithms provide a new kind of ‘randomness’. You are pretty limited in what kind of artworks you can do in code, but the code you do make you tend to have a good amount of control over. The random elements in the code have to be inserted by your hands.

In that case, how much of the piece is true randomness and chance? How much of the piece comes from your own hand, and how much of it comes from the machine?

These two questions showcase my main worry when approaching randomness in art. I personally tend to agree with Rosalind Krauss’s critique of grid art. “It is not just the sheer number of careers that have been devoted to the exploration of the grid that is impressive, but the fact that never could exploration have chosen less fertile ground.” When Casey Reas bring this quote up, they explain Krauss’s stance against this type of art. “She sees it as the moving away from humanity, moving away from the narrative, and basically making art of its own, rather than our largest intellectual and social discourse.” This art moves away from humanity and becomes its own thing.

I find myself agreeing with this idea, because when art is considered to be random, how much of the art is of the artist and how much is it of the machine? Is it all the artist because the artist is the one typing the code, and controlling what parts of it is random and what isn’t? Or is it the machines’ because the machine brings in the most crucial element of the art– the random aspect of it.

With all that being said, I’m not against the idea of randomness in this sense. I do think that there is still a human hand in the process when creating art such as this. There is still intent in the piece, there is still effort, and there is still discourse to be said about it. My thoughts are just a bit too complicated, and I don’t have an exact answer to the question. I find myself critiquing this art but also not having that big of a problem with it.

When I approach my piece, I honestly want the random elements in my work to be limited. I don’t want my piece to get away from me, it still needs to be my piece. That thought alone implies there needs to be a certain balance between randomness and control in this kind of art. What that would be I am not sure, since despite my worry over control in art, of all the pieces in the reading, I did not at any point think a piece could not be considered art. Maybe its because of intent, or maybe it is because the act to make art is in itself, the best showcase of humanity.

Week 1 – Self Portrait by Ghaya Algurg

My Concept
For our first assignment for IM, we had to make a self portrait of ourselves using some skills we learned in class. I was originally planning to do just a normal self portrait of me outside, maybe with the sun or grass. But, due to the pure amount of time spent coding, I thought it’d be fun to portay myself working on the computer. Almost as if the self-portrait is really just me sitting at the desk coding myself.

Highlight of Code I’m Proud of: 

//mouth
noStroke();
fill (0)
arc(200, 240, 60, 50, TWO_PI, PI);
//inside mouth 

fill(1000)
rect(200, 242, 40, 5)
//teeth
fill(255, 105, 180)
arc(200, 260, 25, 15, PI, TWO_PI);
//tongue

The reason why I was so proud of the mouth is because it was the last thing I worked on, so it ended up being a good showcase of everything I had learned. It took me so much less time to do compared to every other facial feature and it made me happy to see that I had gotten somewhat comfortable with the coding process.

Other parts of the sketch may have been harder to do but this one felt important to highlight because it was so easy. I was incredibly happy to see myself improve.

Embedded Sketch

How This Was Made:
The code was made by looking at the references page on p5js and by watching the first four videos on Youtube by The Coding Train. The videos were extremely helpful since they gave me a good starting point when I got on the website. The videos also helped explain some things I was a bit unsure about (specifically how to do the the order of the code, but also helped with pointing out certain features that ended up being incredibly helpful and made the program so much easier to work on [such as the high contrast feature!])

There were some times when I couldn’t figure something out so I tried searching on google or reddit to see if they had an answer, but those didn’t really help much so I wouldn’t consider them a part of the process. All of the credit should be attributed to the youtube videos and the references on p5js.

Reflection:
Truthfully, I struggled a bit when it came to how I wanted to portray myself. A part of me considered pulling out all the stops and trying to do a full pixel art rendition of myself as a challenge. However, I realized that going that route would be more limiting than challenging. I wanted my portrait to have a multitude of shapes and colors. I wanted to play around with code I couldn’t figure out in class and make sure I properly understood every line of code I was typing. Pixel art would only limit me to squares and squares only.

So I decided to do a very simplified version of myself. The more I coded the more I stopped caring about how I looked and the more I cared about what code I was learning and whether I was actually retaining the information. A lot of emphasis was put on understanding what exactly the numbers represented in each shape. I didn’t want to just insert multiple numbers together and pray they worked out in the end, I wanted to prove I actually understood what I was doing.

While maybe not obvious at a first glance, there are a few parts of the portrait I can attribute to my exploring. The bit of hair under the hijab was my way of playing around with arcs since I did not understand how they worked at all. Meanwhile the eyelashes were me figuring out how lines worked and whether I could easily move them around if I so please. I even got the colors from learning about RGB and playing around till I saw a color that fit. Overall, I’m pretty happy with the end result!

However, a part of me does wish I also tried my hand at adding an interactive section, but I was worried that doing so would cause me to stress out over the assignment rather than use it as an opportunity to learn. Hopefully I’ll be able to add a bit of interaction and movement in the next assignment!