Midterm Project – Critical Mass
Final sketch:
Play my game here
My Concept:
I made a two player strategy game called Critical Mass. It is played on a 5×5 grid. On your turn you drop a grain into a cell, and when a cell gets full it “topples”, which means it empties out and shoots one grain into each of its neighbors. The twist is that every grain you send out flips that neighbor to your color, so you can steal your opponent’s cells. If a cell you steal becomes full too, it topples as well, and you can get these satisfying chain reactions going off across the board. You win by owning more cells than your opponent when the turns run out, or by wiping them off the board completely.
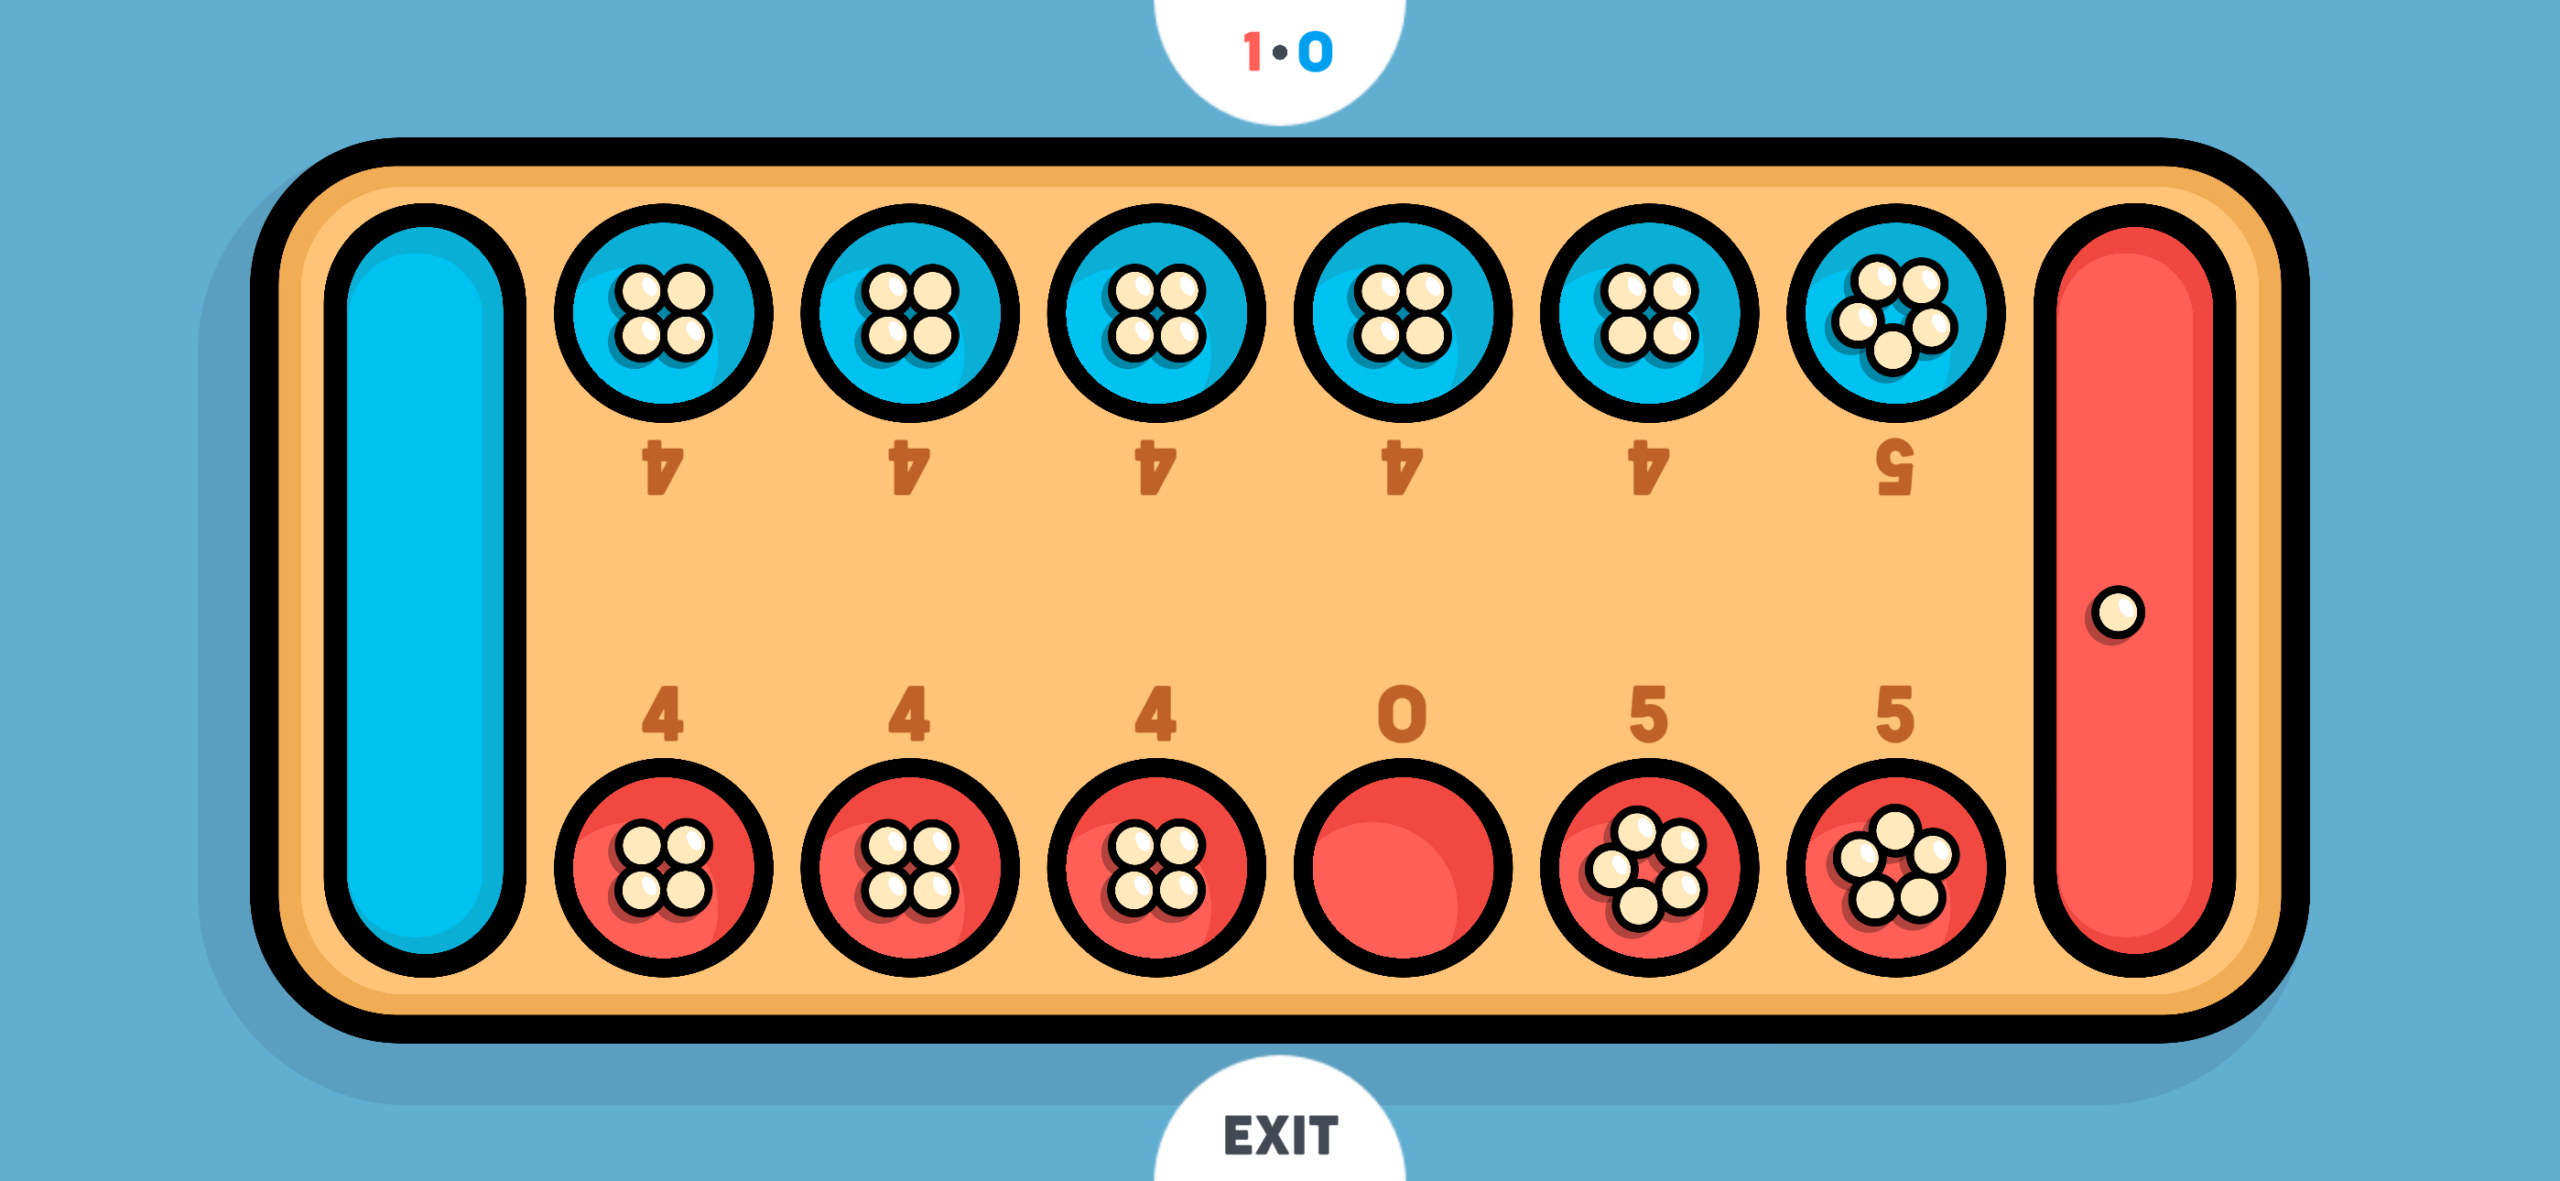
The idea came from Mancala. I always liked how in Mancala you pick up stones and drop them one by one into the next pits, and how a single move can set off a bigger result down the line. I did not want to copy Mancala exactly though, so I turned that “spreading” feeling into a grid battle where the whole point is stealing territory from the other player. I think the chain reaction is what makes it fun because one well placed grain can flip a big chunk of the board at once.
I also wanted it to have a lot of personality instead of looking like a plain school project. So I gave it a neon arcade look, a glowing board, a space background, and I used two meme cats as the two players which I thought would be funny.
How it works:
The game moves through a few different screens, and I keep track of which one we are on with a single variable I called gameState. Figuring that out was the thing that made the whole project make sense to me, because once I had it, adding a new screen was easy.
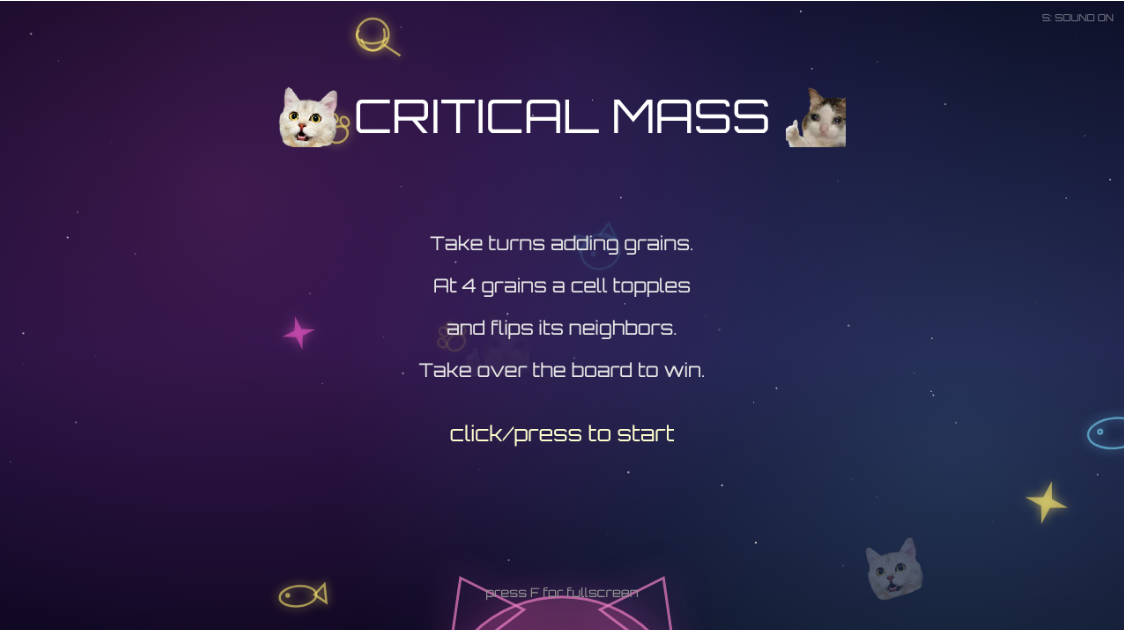
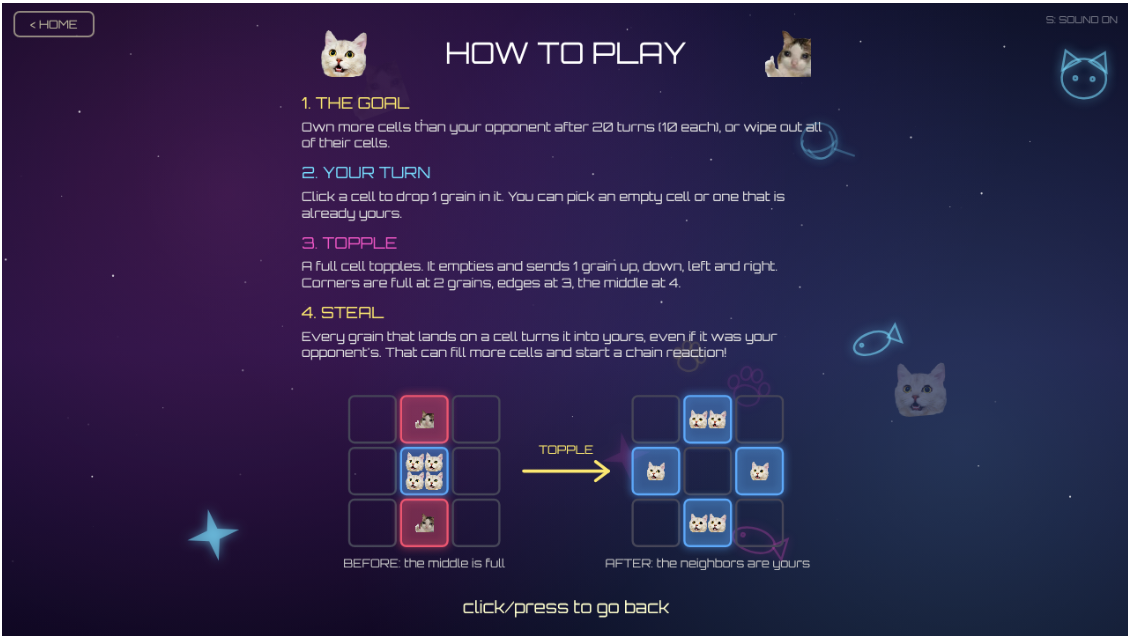
It starts on an intro screen with the title and the two cats. From there you go to a mode select screen where you choose 1 Player or 2 Players. In 1 Player you play against a simple computer opponent, and in 2 Players two people share the same screen and take turns. There is also a How To Play page with the full rules and a little diagram showing a topple happening, because when I tested it on my friends they did not get the rules right away.
During the game there is a HUD (heads up display) at the top showing each player’s cat and their score, the turn counter in the middle, and a message at the bottom telling you whose turn it is. When a chain reaction happens the screen shakes a little, the background bursts with paws and sparkles, and a sound plays for each topple. When the game ends a result panel shows who won, and you can click to play again or press M to switch modes. I also added fullscreen with the F key, a mute toggle with the S key, and a little HOME button in the corner to go back to the start.
Visual improvements
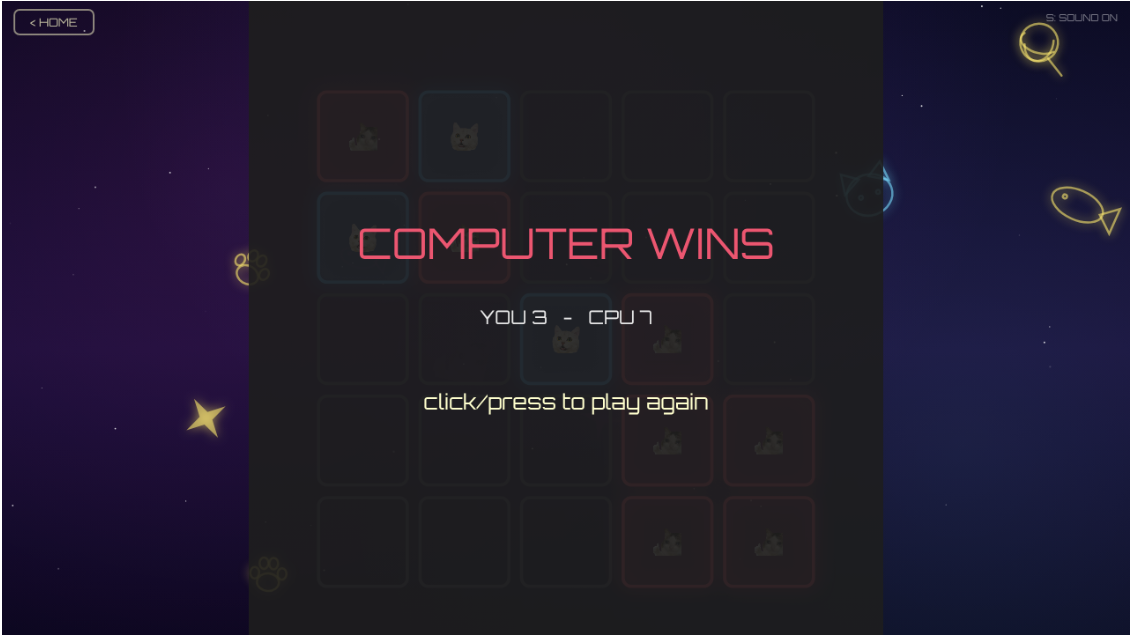
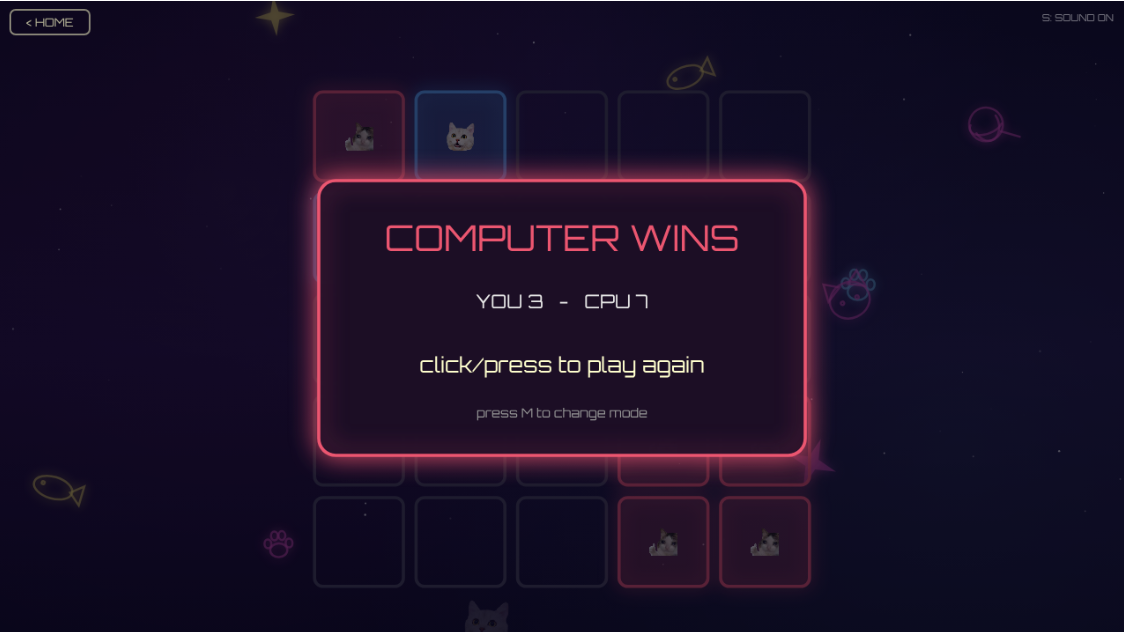
The game over screen. At first my game over screen just drew a flat grey square over the board, and because my game area is centered with empty space on the sides, you could see the hard edges of the square and it looked broken. I changed it so it dims the whole window instead, and put the result inside a glowing panel in the winner’s color so the text is easy to read.
Before:
After:
Making the rules clearer. My first version only had a tiny bit of text on the intro. People kept asking me how toppling worked, so I made a separate How To Play page with four numbered rules and a small before and after picture of a full cell toppling and stealing its neighbors.
Before:
After:
Code I am proud of:
The part I am most proud of is the chain reaction, because it was the hardest thing to get right. The problem was that when a cell topples it can fill up its neighbors, and those can topple too, and if I did it all at once the game would try to topple the same cell twice and everything broke. I fixed it by using a queue, which is basically a waiting line of cells that need to topple. I take one cell off the front, topple it, and if that fills up a neighbor I add the neighbor to the back of the line. It keeps going until the line is empty.
let cell = this.queue.shift(); //take the first cell out of the line
    let owner = cell.owner; //remember who owned it because the grains it sends out keep this color
    cell.topple();
    this.cascadeSize++;
    this.lastToppled = cell; //i save this so the background knows where to make its burst

    //one grain shoots out to each neighbor
    let neighbors = [
      [cell.row - 1, cell.col],
      [cell.row + 1, cell.col],
      [cell.row, cell.col - 1],
      [cell.row, cell.col + 1]
    ];

    for (let n of neighbors) {
      let r = n[0];
      let c = n[1];
      //if the neighbor is off the edge of the board the grain just disappears
      if (r < 0 || r >= this.size || c < 0 || c >= this.size) continue;

      let neighbor = this.grid[r][c];
      neighbor.addGrain(owner);

      //okay so if this neighbor just got full too, it needs to topple later i add it to the
      //line but the includes() check is important i kept adding the same cell twice at first
      //and it toppled double which broke everything lmao. so only add it if its not already waiting
      if (neighbor.shouldTopple() && !this.queue.includes(neighbor)) {
        this.queue.push(neighbor);
      }
    }
  }
The other thing is that any grain that gets sent off the edge of the board just disappears, and I like that because it is actually the reason a chain reaction always stops eventually instead of going forever.
I am also proud of the computer opponent in 1 Player mode. I did not want some unbeatable genius, I wanted a “medium” opponent you can actually beat. So I gave it a few simple rules and some randomness. Most of the time it will set off a chain reaction if it can, sometimes it grabs an empty cell to spread out and otherwise it just plays andomly so it is not predictable.
//rule 1: most of the time 0.7, if it can set off a chain reaction, do it.
    //chains are how you steal cells so this is the smart move
    if (ready.length > 0 && random() < 0.7) {
      return random(ready);
    }

    //rule 2: otherwise half the time grab an empty cell to spread out and claim more space
    if (empty.length > 0 && random() < 0.5) {
      return random(empty);
    }

    //rule 3: if neither of those happened, just play any random cell its allowed to.
    //this little bit of randomness is what keeps it from being predictable
    return random(playable);
  }
Problems I ran into:
The biggest design problem was that at first, chain reactions almost never happened. I originally made every cell topple at 4 grains but when I tested it the game felt dead because in 20 turns you barely ever filled a cell up. I tested a bunch of games and a chain reaction was really rare. So I changed the rule so a cell topples based on how many neighbors it has, which means corners topple at 2 grains edges at 3 and the middle at 4. That made chains happen way more often and the game got a lot more fun.
let limit = 4;
        if (this.edgeRule) {
          //takes away 1 for each edge of the board this cell is touching.
          //a corner touches 2 edges so it ends up at 2 an edge touches 1 so its 3 middle stays 4
          if (r === 0 || r === this.size - 1) limit--;
          if (c === 0 || c === this.size - 1) limit--;
        }
The other problem that took me way too long was the background music. I load it as a sound file and I wanted it to loop forever, but after about ten seconds it would just stop. I found out that p5’s built in loop() was not playing anything in my version the isPlaying() check kept telling me the song was still playing even after it had finished, so my code never restarted it. I fixed it by not trusting isPlaying() at all. Instead I remember the exact time the song will end and once we pass that time I just play it again.
//start it if it isnt going or restart it when this loop has finished
    if (!this.musicPlaying || millis() >= this.musicEndsAt) {
      this.music.amp(MUSIC_VOLUME);
      this.music.play();
      this.musicPlaying = true;
      this.musicEndsAt = millis() + this.music.duration() * 1000;
    }
Areas for improvement:
If I kept working on this I would make the computer opponent a bit smarter (maybe have options to set difficulty) so it actually tries to protect its own cells instead of just attacking. I would also like to add a short tutorial that makes you do one practice topple, since even with the rules page some people still learn better by doing. And I think it would be cool to add different board sizes, like a bigger grid for longer games.
References:
Classes and objects (Cell, Board, ComputerPlayer):
https://p5js.org/reference/p5/class/
https://thecodingtrain.com/tracks/code-programming-with-p5-js/code/6-objects/3-constructor
Arrays and loops for the grid:
https://thecodingtrain.com/tracks/code-programming-with-p5-js/code/7-arrays
Loading images:
https://p5js.org/reference/p5/loadImage/
Timing things with millis():
https://p5js.org/reference/p5/millis/
The neon glow and background gradients (drawingContext / canvas):
https://p5js.org/reference/p5/drawingContext/
https://developer.mozilla.org/en-US/docs/Web/API/CanvasRenderingContext2D/createLinearGradient
Fullscreen:
https://p5js.org/reference/p5/fullscreen/
Font (Orbitron):
https://fonts.google.com/specimen/Orbitron
Cat images: just memes I took from the internet
Use of AI:
I only used Claude on this project both to help me build and debug things. I came up with the concept, the cat theme, the rules and the design decisions myself and then worked through the code with it only when I was stuck or needed help.
The main things I used it for were getting the chain reaction queue to work without toppling cells twice and building the 1 Player computer opponent. I also used it to make my sound. I had Claude generate souund effects for me. It wrote a small script that builds each note as a sound wave and saves them as mp3 files. I picked the style I wanted (simple arcade beeps and a soft background loop) and it matched that.
I used it for debugging too. The music that kept stopping after about ten seconds was the big one, and it helped me figure out that p5’s isPlaying() was giving me wrong information so I needed a different way to loop it.