Week 4 – Reading Response

1. What’s something (not mentioned in the reading) that drives you crazy and how could it be improved?

Something that drives me crazy is using sinks in public toilets because I can never tell if they are motion activated or if I’m supposed to press something down to turn the water on. Sometimes I put my hands under the sink waiting for the water to come out and nothing happens, so then I realize I have to press the top down. I think they could be improved by making it more obvious how the sink works, like having a small symbol or indicator showing whether you need to use the sensor or press the button.

It is such a simple thing, but I always get confused by it but i think its important to note that now after covid-19 almost everything is motion activated which i find super interesting. But even then there are issues with where to put your hands and if the sensor is broken i have to just keep wiggling my hands under it making it an awkward moment, then the person next to you says “That one doesn’t work”.

2. How can you apply some of the author’s principles of design to interactive media?

I can apply Norman’s principles of design to interactive media by making things easier for people to understand and use without having to guess what they are supposed to do. For example, if I make a button on a website, it should actually look like something that can be clicked instead of just looking like normal text. I can also use feedback, like changing the color of a button or showing something on the screen after it is clicked, so the user knows that their action worked.

I think this is similar to the public sink example because when I cannot tell if I need to use a sensor or press something, the design is not making the interaction clear enough. In interactive media, I want to make sure that users can understand what they can interact with, what will happen when they interact with it, and whether their action actually worked. This would make my projects feel less confusing and more natural to use.

Week 4 – Text Art

Concept

For this project, I wanted to make something related to music because I liked the idea of using lyrics as part of the artwork. I decided to make a digital record player inspired by the song “Stupid Song” by Olivia Rodrigo. I wanted the lyrics to move around the record while it spins, almost like the lyrics are physically part of the vinyl. I used light blue colors to match the album and kept the design simple so the main focus would be on the lyrics. I also made the lyrics curve by placing each letter at a different position around the record.

My Artwork

Click on the screen!

Code I’m Proud Of

//separate function because curving every letter would make the draw() function hard to read
function drawCurvedText(words, radius, startAngle) {

  let spacing = 0.035;

  let totalWidth = words.length * spacing;

  let firstAngle = startAngle - totalWidth / 2;

  for (let i = 0; i < words.length; i++) {

// Calculates the position of each letter around the circle
    let letterAngle = firstAngle + i * spacing;

    let x = cos(letterAngle) * radius;
    let y = sin(letterAngle) * radius;

I am most proud of this part of my code because it was the part I struggled with the most. At first I didn’t understand how I could make the lyrics curve around the record without manually placing every letter. I was confused about what sin(), cos(), radius, and spacing were doing together. After experimenting with it, I understood that the for loop goes through each letter and the sin() and cos() calculate a different position for each one. I also made it a separate function so my draw() function would not become too messy. I am proud of this because the curved lyrics are the main part of my artwork and getting them to work made the project finally look how I imagined it.

Resources that helped me:

https://p5js.org/examples/Angles-And-Motion-Sine-Cosine/

https://youtu.be/O5wjXoFrau4?si=XUTff14jizVeiGJ6

https://p5js.org/reference/p5/text/

https://p5js.org/reference/p5/pop/

https://p5js.org/reference/p5/push/

Debugging & Reflection

The curved text was definitely the hardest part for me because I had no idea how to make the lyrics go around a circle at first. I was really confused about what sin() and cos() were even doing and why I needed both x and y. I also thought I would have to write code for every single letter, which would have been horrible. Eventually I understood that the for loop does that for me and gives each letter a slightly different position. I also had to keep changing the radius because at first the lyrics were too close to the record and were hard to read. I looked back at some of the p5.js examples we did in class and used the p5.js references when I got stuck. I had to keep going back and forth with the code and changing numbers until it looked right.

This project made me realize that I actually like experimenting with text and movement in p5.js. I still have a lot to learn and making things move around a specific shape. If I continued working on this I would want to make the record feel more interactive instead of just having it spin. I could make the lyrics change as the record moves or have the user interact with different parts of the record and in the future i definitely want to learn how to include sound in this!

Week 3 – Functions, Arrays, and Object-Oriented Programming

Concept

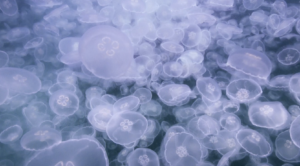
For this project, I was honestly feeling a little lost at first because I did not know what I wanted to create. I was staring at my laptop wallpaper, which has jellyfish that slowly move around, and that gave me the idea to make my own version of it. I wanted to create a simple underwater scene with jellyfish floating upward. I made each jellyfish slightly different by giving it a random position, size, speed, and color. I also added a small interaction where clicking the screen creates another jellyfish.

(My wallpaper)

My Artwork – Jellyfish

Click the screen!

Code I’m Proud Of

I am most proud of the code I made for the jellyfish tentacles. At first, I was confused about how to place the lines so they would stay connected to the jellyfish when it moved. I used this.x and this.y with different numbers to place the three tentacles under the body. I like this part because it makes the jellyfish actually look like jellyfish instead of just being a circle.

// Draw the three tentacles underneath the body
  stroke(this.jellyColor);
  line(this.x - 8, this.y + 10, this.x - 8, this.y + 30);
  line(this.x, this.y + 10, this.x, this.y + 30);
  line(this.x + 8, this.y + 10, this.x + 8, this.y + 30);
}

Debugging

I struggled a lot with understanding how the class, objects, and array were connected because this was still pretty new to me. At first, I understood how to make one jellyfish, but I did not really understand how to make multiple jellyfish from the same class and have each one be different. I also got confused by this.x and this.y and what the numbers like +8, +10, and +30 were doing when I was making the tentacles. To help me, I went back to the car sketch code we did in class and looked at the way the class was structured. I also used the Ball Class Example 2 – using a class (p5editor) and Ball Class Example 3 – multiple instances using a class (p5editor) to understand how classes can be used to create objects and how multiple objects can exist at the same time. Looking at these examples helped me understand that each jellyfish can use the same class while still having its own position, size, speed, and color. I had to keep going back to the examples while coding because I am still getting used to this way of programming and it was quite frustrating.

Reflections

This project helped me understand objects and classes more because before this I was confused about how one class could create multiple things that are still different from each other. The bouncing ball example from class helped me understand how this.x and this.y belong to each individual object. I also struggled a little with understanding the array and how it connects to the objects, but once I understood that the array holds all the jellyfish it made more sense. I kept the artwork simple because I am still getting comfortable with coding, but I like that it still has movement, randomness, and interaction. If I continued working on it I would probably make the jellyfish look more realistic or add more interaction to their movement especially the tentacles.

Week 3 – Art Of Interactive Design Response

After reading The Art Of Interactive Design , I think a strongly interactive system is something that actually feels like a exchange between the user and the computer. The part that stood out to me most was the idea of listening, thinking, and speaking. I usually think of something as interactive if I can click on it or move something around, but the reading made me realize that this does not necessarily mean it is strongly interactive.

For example, if I click somewhere and a shape immediately appears there, the system is listening to me, but it is not really doing much with what I gave it. A stronger system would take my action, process it in some way, and then give me a response that makes me want to interact with it again. I think the most important part is that the user’s actions actually change what happens next. It should feel less like I am controlling a button and more like the system is responding to me.

This made me think about my own p5 sketches because most of the interaction I have made so far is pretty simple like clicking to change size and color or adding new objects or using the mouse to control an object. I think I could make my sketches more interactive by making the computer remember what I do instead of just responding to one action at a time.

For example in my previous laser sketch, I could make the lasers change depending on where I move my mouse including the speed of it or how many times I interact with the sketch. I could also make the lasers slowly react to my previous movements instead of immediately following the mouse. Another idea would be having the colors or movement change after I interact with the sketch a certain number of times. This would make it feel like the sketch is actually responding and changing over time.

I also think I could experiment with sound or other types of input eventually. I like the idea that the sketch could react to something I do without me just clicking a button. I want my sketches to feel like the computer is actually responding to me and giving me a reason to keep interacting with it.

Week 2 – Simple Work of Art

Concept

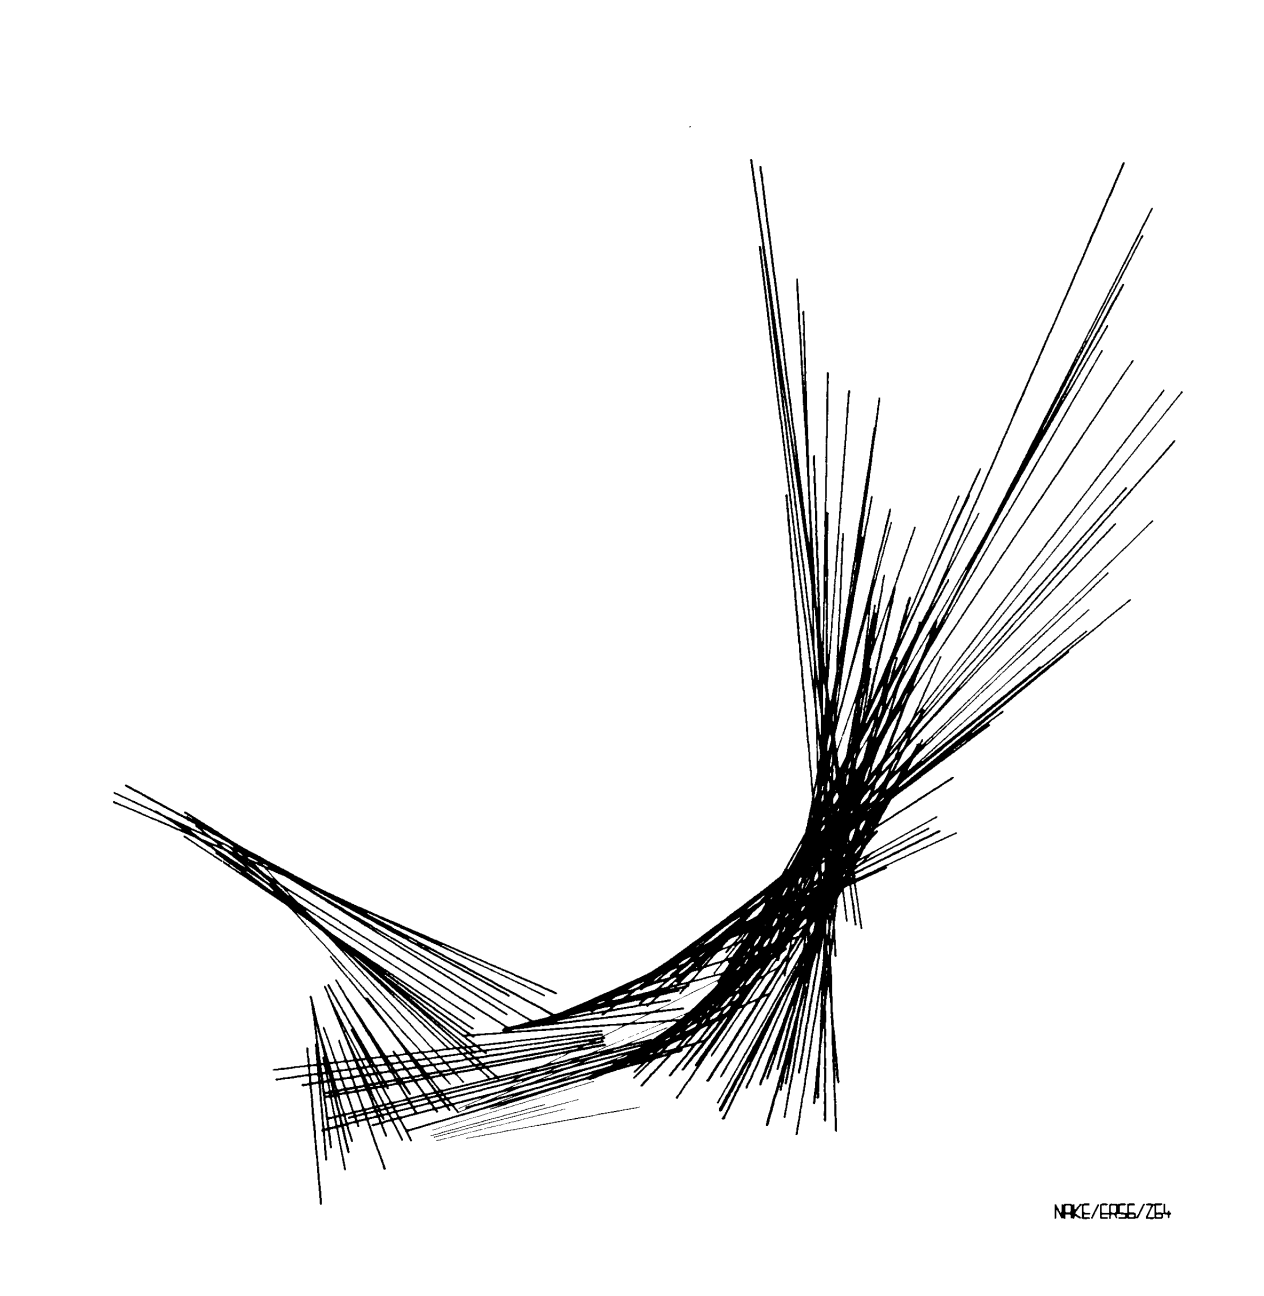
For this artwork, I was inspired by one of the art pieces from our reading. When I looked at the work, I noticed all the thin lines coming from different central points and spreading out in different directions. It reminded me of laser beams that I have seen at TeamLab. I liked how the lines overlap and create a kind of chaotic but interesting pattern. I wanted to recreate that feeling in p5.js, but instead of using black and white, I used bright colors to make it feel more like the laser lights I remember from TeamLab. I also used random() so the lines change and move each time the artwork runs.

My Artwork!

Code I Am Proud Of

// blue lasers
for (let i = 0; i < 40; i++) {
  stroke(0, 255, 255);
  line(250, 250, random(50, 230), random(100, 400));
}

The part of my code that I am most proud of is the for loop because it helped me create many lines without having to write every single line myself and it was essentially muplitple loops for each color. Its my first time creating a loop so I was very proud of myself. The loop repeats the “laser beam” 40 times. I also used random () so that each line goes to a different place. I think this is cool because I learned how a small amount of code can create a lot of different results.

How This Was Made

I started with a 500×500 canvas with a black background because I wanted the colored lines to look like lasers in a dark space. To create a laser beam artwork meant that I had to use for loops to create multiple laser lines without having to write the same line() code over and over again (I wish I knew this in my first p5 art piece!). This was one of the parts I struggled with because I was still getting used to understanding how loops repeat code and how changing the numbers inside the loop affects the artwork.

I used stroke() to give the lasers different colors and line() to create the actual laser beams. I also used random() for the ending points of the lines so that each laser would go in a slightly different direction. I found random() confusing at first because I had to understand that the numbers I put inside it control the range of possible positions. Even changing the numbers a little could make the lasers look different. I also used ellipse() to make the small white light in the center where all the lasers start. Getting the lines to start from the same point was another part where I had to pay attention to the coordinates. I had to think about the x and y positions and how changing them would change the direction and length of the lasers.

I used the p5.js examples and what we learned in class to understand how to use for loops. I also used the p5.js reference to look up line(), stroke(), random(), and ellipse() when I was unsure about how the coordinates worked. I mostly learned by changing the numbers and seeing what happened, which helped me understand the code better than reading about it.

Reflections & Future Work

I found the process of this art piece a little frustrating at first because I had to keep changing the code and testing it to understand what each number was actually doing. I realized that coding an artwork is a lot of experimenting and making small changes until something works the way I want, especially because at first I wasn’t feeling inspired by anything. It also made me more comfortable with using loops and coordinates, which I was not very confident with before.

For my future works I want to experiment more with movement and interaction instead of only making something that stays on the screen. I think adding mouse interaction would be a good next step for me because it would make the viewer part of the artwork and it would definitely be more fun to interact with.

Week 2 – Reading/video Response

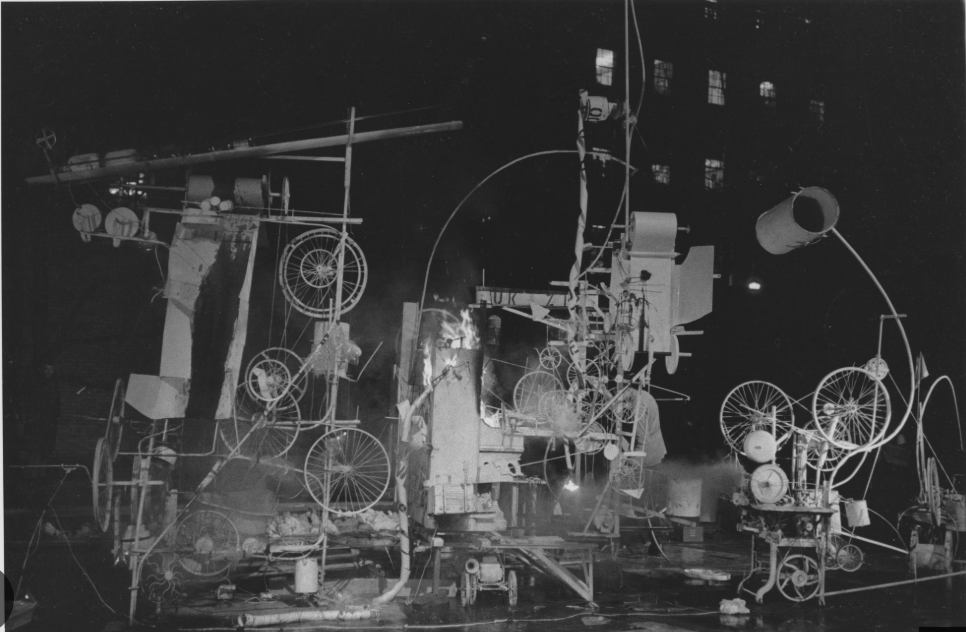
Casey Reas’ talk about chance operations made me think about the relationship between control and power. One example that stood out to me was the massive structure he talks about called “Homage to New York” that was designed to destroy itself through a performance. The structure ended up catching on fire, which was not completely expected, but I found this interesting because the idea behind the work came from the Atomic Age and the huge amount of power that machines and technology can have. It made me think about how we react to things that we create but cannot completely control.

(Homage to New York by Jean Tinguely)

He also mentioned the mistrust of machines and systems of power which i found interesting. Machines are usually made to create order and follow specific rules, but they can also create chaos when something unexpected happens. There’s also a difference between the person creating the system and the machine following through with it. We can give machines instructions but we can’t always predict exactly what will happen. This makes me question how much control we should give machines (especially Ai nowadays), especially when they are connected to systems of power that can affect people.

I also liked the contrast between drawing by hand and making art through a computer. When I draw something myself, it feels more personal because I am controlling every line and decision. With a computer, I can create the rules but then allow chance to take over some of the decisions. For my updated p5.js self-portrait , for example, I learned how to create a set palette of colors and let the computer randomly choose a color whenever I click. I would still control the choices and the overall design, but I would not completely control the final result.

For me, the best balance is somewhere between complete control and complete randomness. I still want my work to feel intentional and personal, but I think adding chance can make it less predictable and more interesting. Reas’ talk changed how I think about randomness because I used to see unexpected results as mistakes. Now I see that they can become part of the artwork itself. It also leaves me wondering how much control an artist should give up and whether a machine can become part of the creative process without taking away the personal side of making art.

Week 1 – Self Portrait by Aljazei Alkaabi

Concept

For this project, I created a self-portrait using p5.js that represented some of my main physical features. Since this was my first time creating a portrait completely through code, I decided to keep the design relatively simple and use basic shapes to build up the different parts of my face. I focused on features that make the portrait recognizable as me, such as my brown hair, glasses, eyelashes, eyebrows, and the pink color of my clothes and lips, i also added glasses to draw the part of me that I don’t usually show to others (I wear contacts). I also chose a bright cyan background because its one of my favorite colors. What I found interesting about this project was having to think about my face differently. Instead of drawing normally, I had to break each feature down into shapes and coordinates with colors.

How this was made

I made this self-portrait using p5.js and JavaScript. I started by creating a 500 × 500 canvas and then built the portrait step by step using basic shapes such as ellipses, rectangles, triangles, and lines. I mainly worked by changing the coordinates, sizes, stroke weights, and colors of each shape until they were positioned correctly and looked like the features I wanted to include. For learning how to work with colors in p5.js, I used The Coding Train’s YouTube videos as a reference. I also used Google to look up specific color values, especially for the brown tones in my hair and eyes and the colors that were closest to my skin tone.

While working on the code, I ran into an issue where changing the strokeWeight() for my eyelashes was also making all of the other lines in the portrait bold. I wasn’t sure why this was happening, so I used AI to troubleshoot the problem and understand how the stroke settings were affecting the rest of the code. This helped me realize that strokeWeight() continues to apply to the shapes and lines that come after it unless it is changed again. I then adjusted where I placed the stroke weight so that the thicker lines were only used for the eyelashes and glasses.

Code I’m proud of

//glasses
noFill()
stroke(0)
strokeWeight(4);
line(237, 233, 263, 233);
ellipse(300, 233, 75, 75);
ellipse(200, 233, 75, 75);
line(163, 233, 133, 225);
line(337, 233, 367, 225);

One part of my code that I am particularly proud of is the code I used to create my glasses. Although the code itself is quite simple, I found making the glasses symmetrical and positioning them correctly on my face surprisingly difficult. I had to think a lot more about the math and coordinates than I expected, which was challenging for me because math is not something I am very good at. Since everything is based on coordinates, I had to think about how far each part should be from the center of the canvas and from each other. I spent a lot of time changing the numbers and checking how the glasses looked until I finally got them to line up properly.

Reflection

I really enjoyed making this project, especially because it was my first time using p5.js and actually creating a drawing through code. At first, I found it a little confusing having to use coordinates and numbers for basically everything, especially because I am not very good at math. However, the more I changed the numbers and saw how they affected the portrait, the more I understood how everything worked. For my next project, I would like to make something more interactive instead of just having a static image. I think it would be really interesting to have something on the screen change when the user clicks or moves their mouse especially since I’ve mostly understood the basics now.