Assignment 3 – One Piece Map

One Piece Map

Concept:

I’m a really big one piece fan and have been watching it for many years and I think its one of the shows and Anime in general that’s stuck with me out of anything I’ve watched so when we got this assignment I knew that I needed to do something to do with One Piece.

Straw Hats - Wikipedia
Reference: One Piece. Eiichiro Oda, Toei Animation.

So I thought about what the series actually about underneath it all, and its a sea that nobodys really mapped. Thats the entire premise, theres islands that nobody have been to and a route that nobody has really like made, and one of Luffy’s Crew, Nami, is literally a navigator who’s entire purpose is to draw maps of places they go and make a map of the entire world which at the time did not exist.

And it turned out to fit this assignment pretty well, because a map essentially has a set of rules if you kind of think about it. Like land goes in some places and water goes in others and a line joins one places to another. So if I can just get those rules set up, I can keep making a new map everytime.

I think what I liked most about this is how it turned out to be honest, its that there isnt one coordinate thats in my code that says where an Island goes, its all just rules for how an Island should work and what its made out of and that makes the picture itself.

Highlighted Code:

for (let i = 0; i < 12; i++) {
  let thisWidth = random(islandSize * 0.55, islandSize * 1.25);
  this.lumpX.push(random(-islandSize * 0.7, islandSize * 0.7));
  this.lumpY.push(random(-islandSize * 0.5, islandSize * 0.5));
  this.lumpWidth.push(thisWidth);
  this.lumpHeight.push(thisWidth * random(0.55, 0.95));
}

This is how an island gets the shape it needs to look like an Island and I think out of all the code I’ve done so far, I think I’m really proud of this one. Theres no function no nothing for drawing like a blob like thing, so an Island cant just be a circle or else it looks pretty stupid, so what I did instead make each island out of a pile of about twelve elipses and they are all different sizes and nudged off centre from eachother. If you overlap enough of the circles as well you can also make a kind of like coastline and I didn’t expect this to work as well as I did.

Then the same pile of those like small lumps get drawn around four times over, and each bit of its pass a little bit smaller than the last one and in a different color, and thats what makes the rings of thes shallow water and then the deeper insides of the island like the beach, then the grass andthen the forest.

Stuff we didn’t do here in class:

So in class what we learned from the ball and the bubble examples that we got was that they can only ever hold single number like this.x or this.xspeed but mine so while I was trying to figure out how to actually get this idea across, I used AI to help me figure out how to make the classes hold whole arrays, teach me the whole process of arrays because I still needed to figure it out and explain to me the commands and from there I stated working. So in this code, this.lumpX is an array thats inside an object. I also used them as something called parallel arrays which is essentially several seperate arrays where like the same position in each and every one is talking about the exact same thing. So there’s an array of like X positions, an array of Y positions, an array of widths and an array of heights. Its like columns in a table, atleast thats how I understood it, where the columns and the index number is the row.

How was this made?

So the way I made this and organized it is that theres four files. So sketch has all the arrays, the draw and the three classes are of course in their own files. The island draws itself everytime its called upon, the Route works out the curved path but doesnt’ draw anything directly and ship is the only one that does anything over the course of time.

For placing the islands I used dist() from class but I used it backwards so it picks like a random spot and measures how far it is from every island thats already there, and throws it out if anythings too close to that spot.

In terms of references, I kind of just went for like an old like map kind of vibe kind of like the one from one piece, like the hand drawn ones.

In terms of AI, I did use AI alot to help me make this dream come to fruition but mostly in terms of explaining concepts and how I can get to my goal, they didnt input code for me directly. Code is all mine.

Reflection

The main thing I took away from this is that a class is the way I guess of thinking about the problem before that its a way of writing code, I love problem solving and when I saw it that way it made me enjoy it alot more. So once I could see it as like three kinds of a thing, the land, the path and something travelling the path, I could see the structure like all come together.

If I kept going honestly I think Id’ ‘want more things in the sea, like maybe whirlpools or sea monsters even that would cause the ship to crash and restart or maybe find a different path? Who knows, theres always room for more.

Reading Reflection 02

What do you consider to be the characteristics of a strongly interactive system? 

When the both parties are considered when making the interactive system.

What ideas do you have for improving the degree of user interaction in your p5 sketches?

Integrating more functions related to the mouse.

Are rugs interactive? Explain in your own words why or why not.

No, because they don’t answer to your actions nor do they listen.

Come up with your own damn definition of interactivity.

When two or more entities continously analyze and receive feedback between each other.

Reading Reflection 2

Reflection:

I think the biggest thing I took from Crawford’s reading is that I shouldn’t just make my sketches react to an input I think I want them to feel alive. Like, he kind of talked about interactivity and that it was almost like a conversation and he said that one side thinks and responds and that the other side does the same thing back. I think this idea meant a lot to me especially because I used to make games on roblox and other things is that it kind of changed what a strong interactive system actually is.

To me now, interactive systems or interactivity in general are ones where the user feels actually noticed not just oh I clicked the circle so the circle moved but more like the system understood what the player or the user or anyone waas doing and gave something meaningful right back at you. So I think a strong interraction needs alot of responsiveness, alot of variety and a feeling that your choices like actually matters like Telltale games with their story games and wide variety of choices you can do and how those choices actually affect the endings you get and you actually feel like you made your own path, your apart of your own story not just a pre-set thing, even if these choices do lead to a pre-set thing, it does not feel that way to me.

W3 – OOP

Concept

It’s really hot outside, and I can’t help but think about relaxing in a pool, resting on a floatie with a popsicle in my hand. That, and my love for ducks, inspired the rubber ducky floaties popping around, with the background color representing a swimming pool.

Highlighted code

// beak
fill(255, 115, 25);
triangle((this.x - 195), (this.y - 140), (this.x - 130), (this.y - 180), (this.x - 105), (this.y - 140));
triangle((this.x - 195), (this.y - 140), (this.x - 130), (this.y - 125), (this.x - 105), (this.y - 140));

While the shape of the duck looks simple, there are actually a lot of different shapes that make up the object. When it comes to creating a shape that moves, it becomes difficult to make sure all the shapes have the correct coordinates so that they look like they are “stuck” together instead of floating around, because then it would no longer look like a duck. That is why I am most proud of this part of the code. It required a lot of time to figure out what to add or subtract from the x and y variables in order to keep the whole object together as it moves.


How this was made

I used what we learnt in class and the p5.js reference to create this project. I first started off with creating shape of the rubber duck floatie and then proceeded to add the shadows to add some more depth to it.

I also made sure to picks specific colors to add another layer of realism, that background color was picked to simulate a pool and I used this color guide to pick it.

Reflection

I am happy with what I was able to achieve. However, in the future I would like to learn how to create an actual hole in the shape rather than filling it in with the background color, so I can create a more realistic floatie.

However, I faced a small step back when I realized that the floatie was too big and one floatie took up the whole canvas. Instead of going back and trying to scale down every coordinate manually, I used the reference to learn how to use the scale()function. It was a bit challenging to understand at first, but once I experimented with different values and learned how to stop the function from repeating with the use of the resestMatrix() function, I was able to scale the floatie down only once.


Reading Reflection

I found it very interesting when Crawford talked about how in a conversation you need to apply all three steps (listening, thinking, and speaking) in order to have a successful interaction. What stood out to me was the idea that if one of these is missing, doing well in the other two does not really make up for it. As Crawford explains it “is like a weak link in a chain. The chain breaks regardless of the strength of the rest of the links.” I liked this comparison because it makes the idea very simple and easy to understand.

I also really liked the way he describes the difference between interaction and reaction. He uses the idioms “apples and oranges, horses of different colors, tigers of different stripes,” which I thought was a very interesting and memorable way of showing that the two are completely different things.

Week 3 Reading Assignment – M7md

Before reading Crawford’s The Art of Interactive Design, I already thought of interaction as some form of two-way communication, where both sides depend on each other for the interaction to continue. Because of this, his idea of interaction as a process of listening, thinking and speaking felt somewhat self-explanatory to me rather than completely changing how I understood it. However, I agree with his argument that interaction can exist at different degrees. Two systems might both respond to a user, but one can offer much more interaction depending on how it processes and responds to what the user does. I don’t think every interaction has to necessarily be meaningful either. Some interactions can feel pointless, even if they technically involve communication. What interests me more is whether the interaction actually contributes to what the creator is trying to achieve.

This made me think differently about the sketches I have created so far in this class. I haven’t really designed them around the people interacting with them. Most of my decisions have been based on my own interests and what I wanted the sketch to show. For future sketches, I would like to experiment more with interactions that can produce unexpected results rather than having every user action lead to the exact same response. For example, the program could respond differently depending on what the user does or how they interact with it. If I’m creating something specifically for another person to interact with, I think I would want their actions to lead to something that encourages them to continue experimenting with the sketch or even makes them think about what is happening. This makes me question whether an interaction can be considered successful even if it works, but fails to get further response from the user.

Week 3 Production Assignment – M7md

Concept

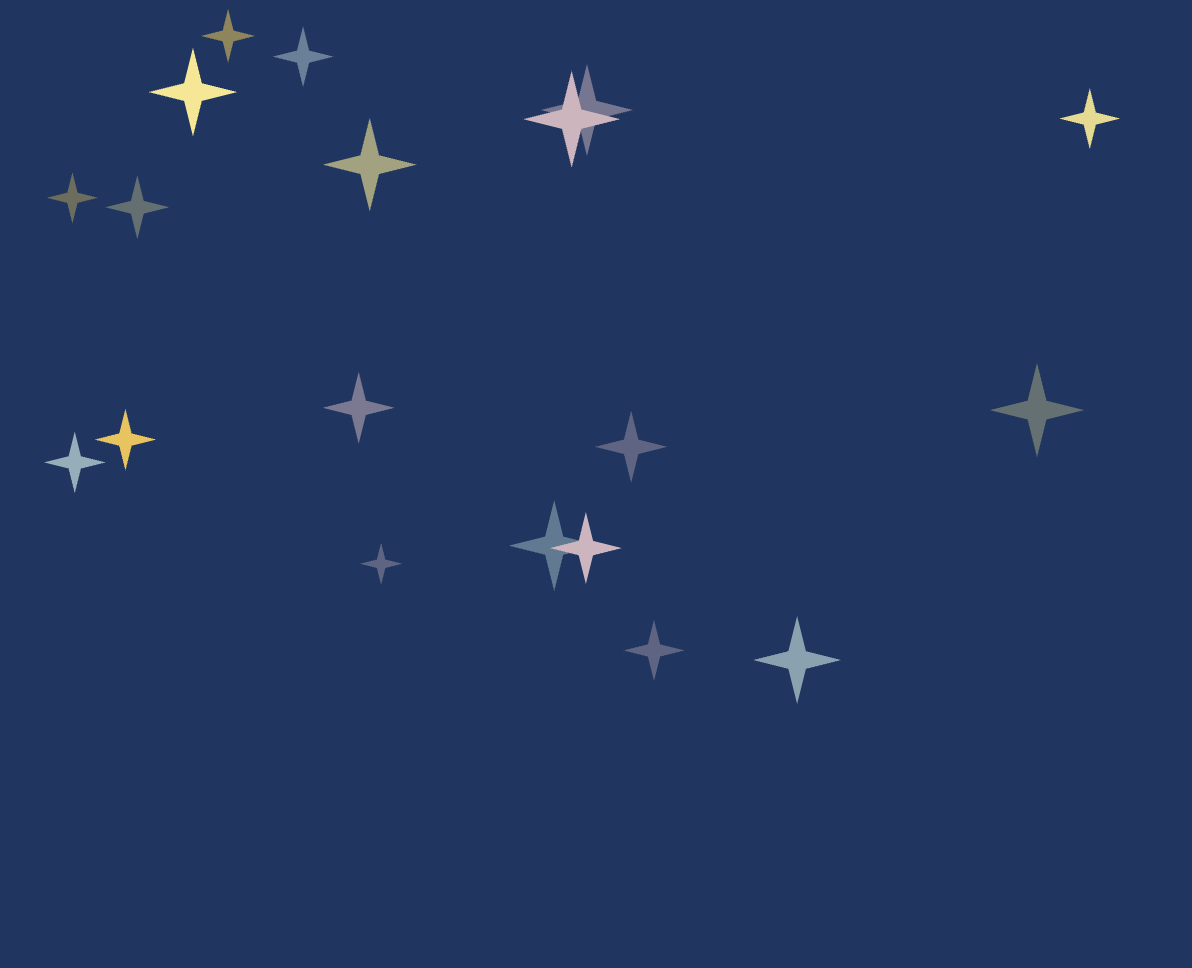
For this assignment, I wanted to create a generative night sky using objects and arrays. My main inspiration was Rosalina’s Storybook from Super Mario Galaxy. I liked the soft, hand-drawn look of the scenes, especially the textured blue backgrounds and glowing stars. I was not trying to recreate the image itself, but I wanted my sketch to have a similar storybook feeling. The bigger stars are created using a Star class. Each star has its own position, size, color, glistening speed, and texture. I also added smaller stars and small colored points in the background so the sky would not feel too flat or empty.

Every 10 seconds, the main stars move to new random positions, so the composition keeps changing while the sketch is running.

Rosalina’s Storybook from Super Mario Galaxy. image taken from a fan-compiled PDF shared on Reddit.


Code I Like

glisten() {
    // Move through the glistening animation at this star's own speed
    this.sparkleTime += this.sparkleSpeed;

    // Turn the sine value into a transparency value from 80 to 255
    this.brightness = map(sin(this.sparkleTime), -1, 1, 80, 255);
  }

How Was This Made?

For the main part of the assignment, I created a Star class that acts as a blueprint for the stars. Each object stores information such as its position, size, color, and glistening speed. I then created 30 different Star objects and stored them inside an array:

let stars = []; 
for (let i = 0; i < 30; i++) {
 let star = new Star( random(20, width - 20),
 random(20, 350),
 random(6, 28),
 random(starColors) ); 

stars.push(star);

This array lets me go through all of the objects using one loop:

for (let i = 0; i < stars.length; i++) {
    stars[i].glisten();
    stars[i].display();
  }

This made it easier to control many stars without writing separate code for each one.

Functions I Used

I used a few functions that we have not really covered in class yet.

I used sin() together with map() to create the glistening effect. sin() gives a value that smoothly moves back and forth, while map() converts that into the transparency range I wanted.

I used color() and setAlpha() so I could keep the original color of each star while changing its transparency.

To make the custom four-point star, I used beginShape(), vertex(), and endShape(CLOSE). These let me create my own shape by choosing where each point should be.

I also used push(), pop(), and translate(). I had used .push() and .pop() before with arrays, but these versions are different. push() saves the current drawing settings and transformations, while pop() restores them. I used them with translate() so each star could be moved to its own position without affecting the other stars.

For the glow, I reused:

drawingContext.shadowColor

drawingContext.shadowBlur

I had used these before in my previous assignment. shadowColor controls the color of the glow, while shadowBlur controls how soft and spread out it is.

For the background, I used randomSeed(). The background uses random points for texture, but without randomSeed() they would move every frame. Using randomSeed(5) makes the same random pattern repeat, so the texture stays still.

I later used randomSeed(millis()) when changing the star positions. Since millis() keeps changing, this gives the stars a new random arrangement instead of repeating the same one.

I also reused millis() from a previous assignment. This time I used it to check when 10 seconds had passed, and then I called a function that gives all of the stars new random positions.

Reflection

The visual side of this assignment changed quite a bit while I was working on it.

At first, I tried using lines and many small marks to make the background look more like crayon, but some versions looked more like digital scanlines or like I had scribbled over the whole background.

I eventually changed the texture to smaller points and reduced how many there were. This kept some texture without making it too distracting.

I also made a simple mistake at one point where I forgot to redraw the background inside draw(). Since the stars were animated, their old frames stayed on the screen and created trails.

After fixing that, I had another problem where the randomly generated texture changed every frame. I solved this using randomSeed() so the same random texture would be redrawn each time.

Later, I noticed that the stars changed position after the first 10 seconds but then seemed to keep returning to the same arrangement. This happened because the fixed randomSeed() used for the background was also affecting later uses of random(). I fixed this by using randomSeed(millis()) before generating new star positions, which gives it a different seed each time.

The sky also felt too empty at first. I increased the number of main stars from 20 to 30, gave them a wider range of sizes, and added smaller stars in the background instead of filling the screen with even more large stars.

For future improvements, I would probably try to make the stars themselves look even more hand-drawn so they match the Storybook inspiration more closely. I also think sound or some kind of interaction could be interesting, but I wanted to keep this version focused on the visual side.

Assignment 3 – The Tunnel

Concept 

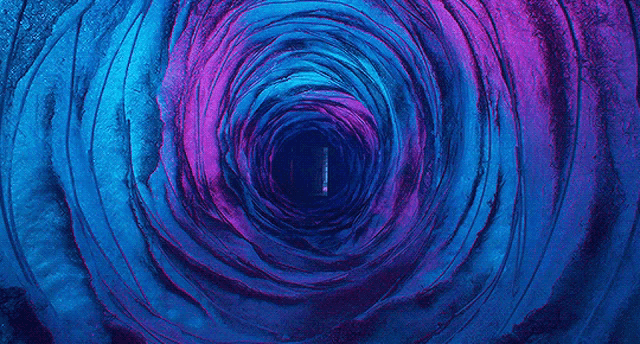
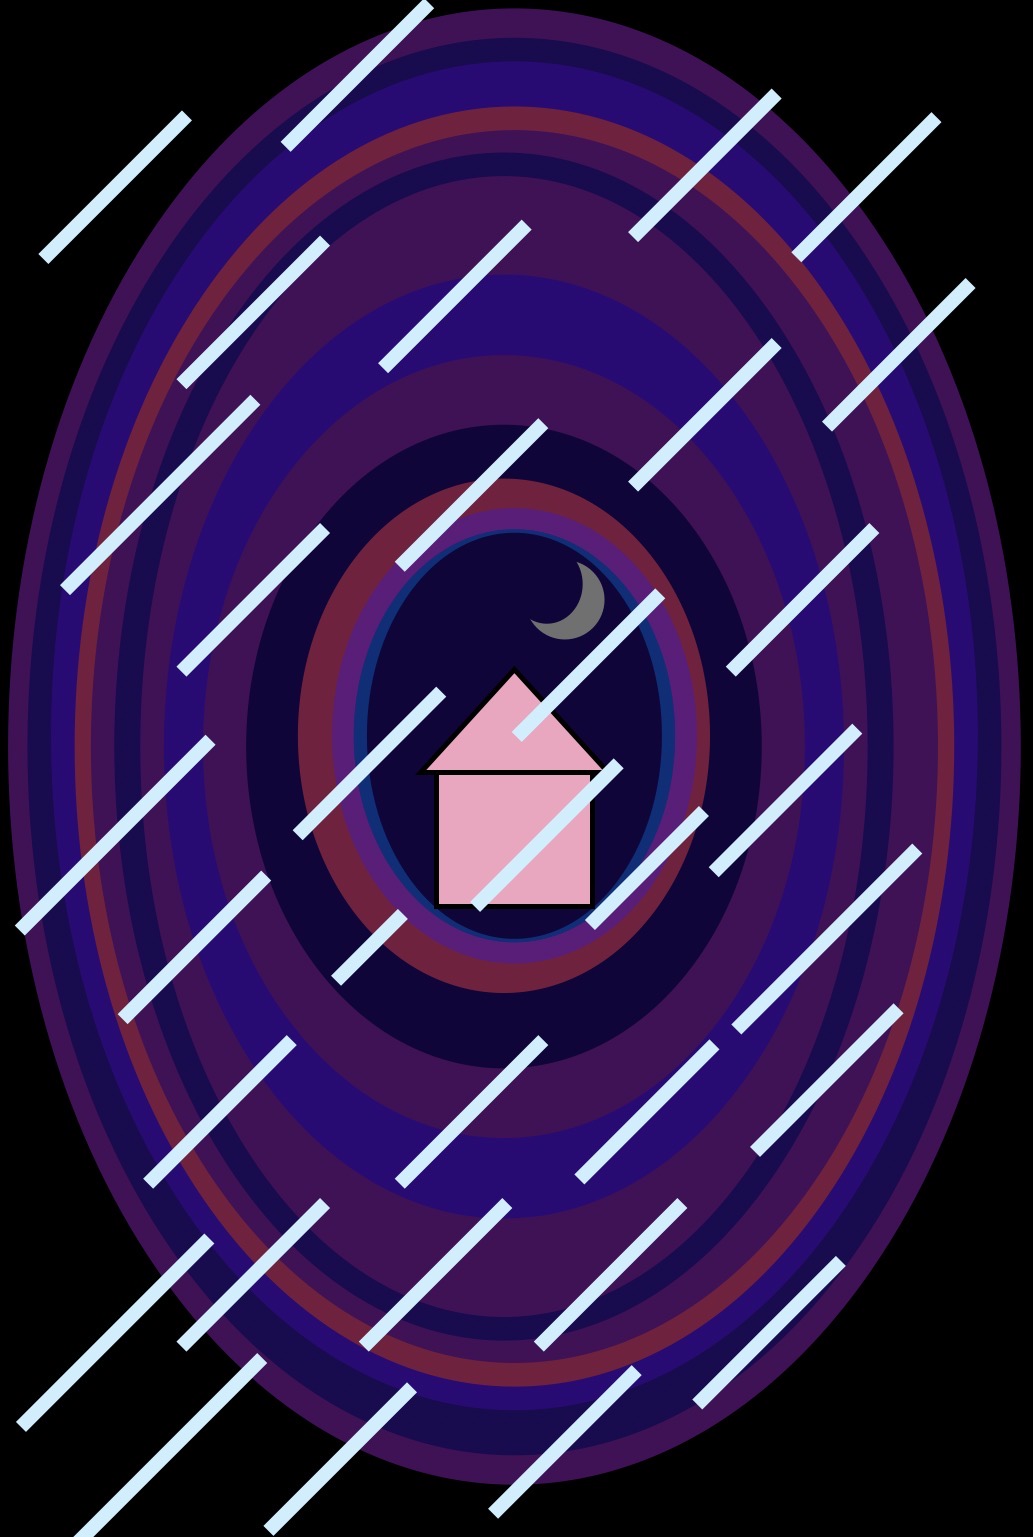
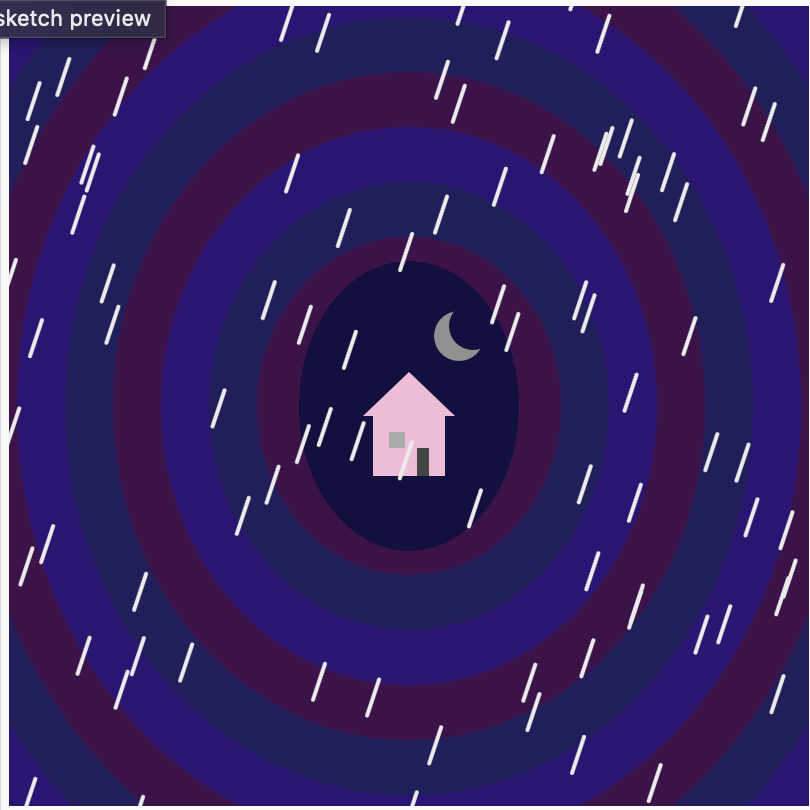
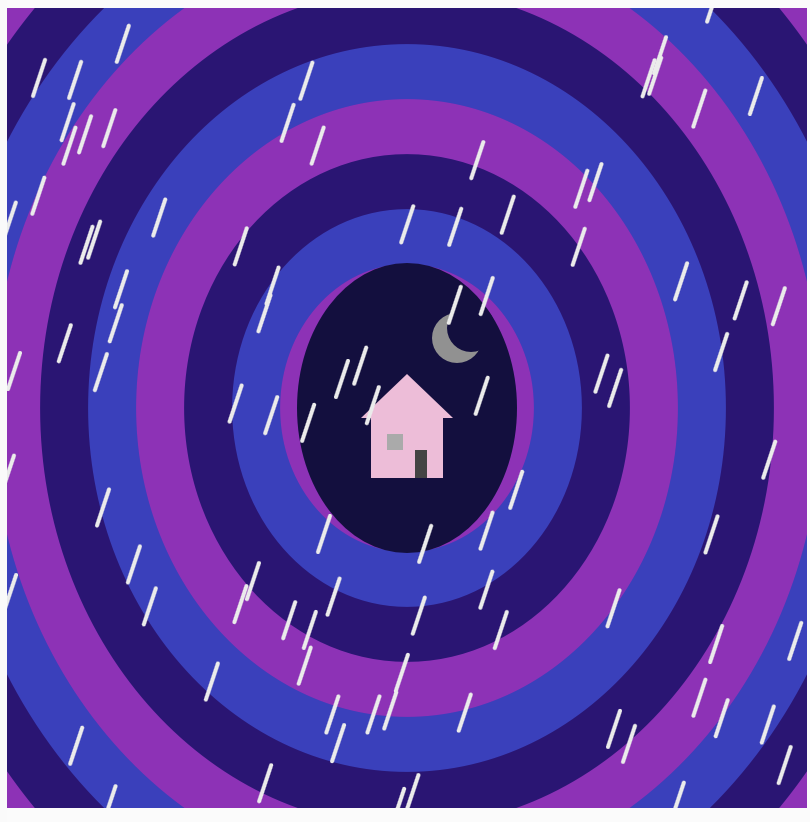
The movie ‘Coraline’ was my inspiration behind this project. Particularly the tunnel that leads from Coraline’s real house to the other world. I liked the dark and mysterious vibe of the tunnel in the movie, so I wanted to get that in my sketch. I used dark purple and blue colors to match the mood of the movie, and I added rain to make the scene feel more eerie. I added the small pink house at the end of the tunnel, because it is such an important and recognizable piece of Coraline. I also made the tunnel expand and contract. So it feels as if you are being pulled deeper into the other world.

Inspiration for my tunnel:
Image from: https://tenor.com/view/coraline-blue-gif-21532661

*idea of how I wanted it to look like

Final Sketch:


Code I’m Proud Of:

The part of the code I am most proud of is the rain as it helped me use Object Oriented Programming in a way that made sense with my idea. I created a RainDrop class:

class RainDrop {

  constructor(x, y) {
    this.x = x;
    this.y = y;
  }

  move() {
    this.y = this.y + 5;

    if (this.y > height) {
      this.y = random(-100, 0);
      this.x = random(0, width);
    }
  }

  display() {
    stroke("#ebebeb");
    strokeWeight(2);

    line(
      this.x,
      this.y,
      this.x - 6,
      this.y + 18
    );
  }
}

In this part every raindrop becomes its own object. Each has its own x and y position, and methods that tell it how to move and how to look. Then I put all the raindrops in an array and used a loop to move and display them.

Another code I am proud of is the tunnel since I used an array of colors and loop instead of just drawing every layer separately.

for (let i = 0; i < 11; i++) {

  let w = 540 - i * 48 + tunnelSize;
  let h = 620 - i * 55 + tunnelSize;

  fill(tunnelColors[i % 3]);

  ellipse(200, 200, w, h);
}

This made the code shorter and let the tunnel animate as one whole shape.

Reflection:

Problems I ran into

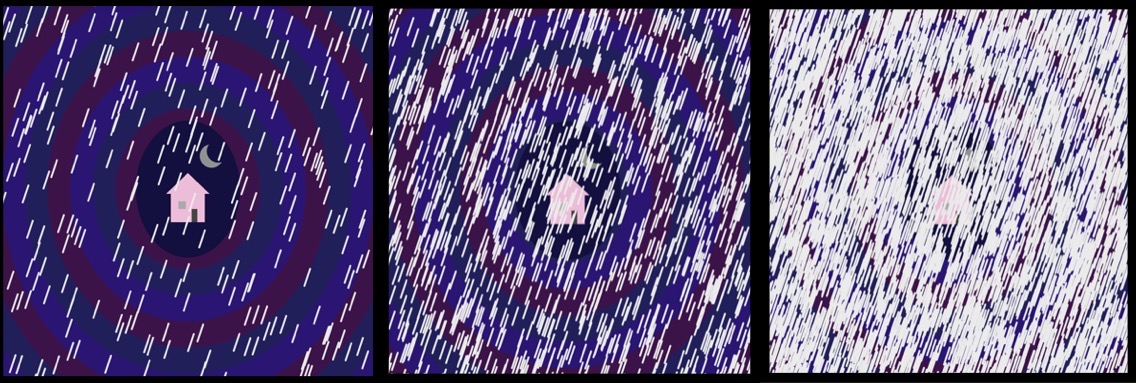
I had trouble with the rain, since I was creating a new raindrop every frame, after a while there were way too many raindrops on the screen. I fixed this by limiting the number of objects added to the rainDrops array.

How it used to be:

if (doorOpen == true) {
  rainDrops.push(
    new RainDrop(
      random(0, width),
      random(-100, 0)
    )
  );
}
how it started and how it ended up looking like

How it is now:

if (doorOpen == true && rainDrops.length < 100) { 
  rainDrops.push( 
   new RainDrop( 
    random(0, width), 
    random(-100, 0) ) ); }

Changing this basically meant that it should only add another raindrop if the door is open and if there’s fewer than 100 raindrops.

Another problem was getting used to object-oriented programming. Initially I understood how to draw rain with simple lines, but making each raindrop an object with a constructor, move() method and display() method was a little confusing. When I realized that the class was pretty much a template for every raindrop it all made much more sense.

As well as little mistakes with capitalization. I kept getting mixed up between uppercase and lowercase letters in my variable and class names and this meant parts of the code stopped working so I had to keep going back and checking that the names matched exactly.

Another change I did, I changed the colors of the tunnel so that the movement is more visible:

How it was:

How it is now:

Improvement:

Through trial and error I learned how useful loops and arrays are to organize code in this project. I could have repeated the same idea again and again, and kept the code more organized, instead of drawing each tunnel layer, each raindrop. I’m also happy with the interaction, as opening the door makes the sketch feel more like a connected piece to my Coraline inspiration, rather than just a static image.

If I continued working on it I would probably add different versions of the scene, like daytime, sunset or even a darker night scene so every time the door opens it could reveal different atmosphere, and adding more interaction to my sketches.

References:

https://p5js.org/reference/p5/mousePressed/

https://p5js.org/examples/Animation-And-Variables-Conditions/

8.1 class and objects – p5.js Tutorial

13: Basics of Arrays in p5.js: How to Code Generative Art

For Loop – Creative Coding with p5.js

Assignment 03 – Object

Birds on the Beach

CODE

The following code is for the bird’s wings and body, I had to use the custom shape in order to make the wings. I really like how it ended up looking, but I did have a hard time making it symmetrical.

 //Body
 fill("#3f3737");
 ellipse(200,200,60,100,10);
// Left Wing
 beginShape();
 vertex(176,215);
 vertex(140,225);
 vertex(125,245);
 vertex(120,200);
 vertex(125,180);
 vertex(140,170);
 vertex(155,160);
 vertex(183,160);
 endShape();
 //Right Wing
 beginShape();
 vertex(222,215);
 vertex(260,225);
 vertex(270,245);
 vertex(275,200);
 vertex(265,180);
 vertex(260,170);
 vertex(230,160);
 vertex(214,160);
 endShape();

For the code that makes it move, I had a bit of a harder time…

class Bird{
    constructor(x,y,yspeed) {
    let nums = [1,2,3,5,10,25,50];
    this.x = x;
    this.y = y;
    this.yspeed = random(nums);
    }

    move() {
  this.y -= this.yspeed;
  }
    show() {
push();
 translate(this.x,this.y);

As it can be seen, I only wanted it to move in the “y” axis, so there’s no “xspeed”. For the movement speed, I used an array of numbers, so it can go quite slow or super fast. Now, the most complicated thing was moving the whole bird, since when I first tried it, all the shapes that made up the bird simply merged. I spent no less than an hour trying to make it work, but I wasn’t successful. So I just googled “how to move shapes together in p5” and it led me to “translate”, and when I looked it up on the p5 guide, it gave me all the answers that I needed (kinda). I’m not really sure how it worked, I was just trying different combinations until I added the “this.x” and “this.y” values and it suddenly worked.

INSPIRATION

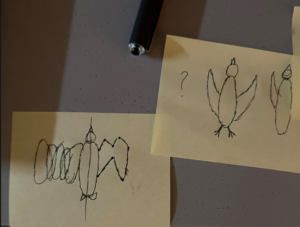
It isn’t based on anything specific, I just made the background look like a regular beach and tried my best to do a regular bird, although for this, I did have to sketch with a pen and paper how I could do the wings:

WHAT WOULD I IMPROVE?

For the next time, if I had more time, I´d like to be able to implement the pop function, as well as more randomness (maybe the bird’s color) into it, and I’d also add more detail to everything.

REFERENCES I USED

https://p5js.org/examples/Transformation-Translate/

https://p5js.org/reference/p5/beginShape/

Week 3 A journey through the universe

Concept


My idea was to create a universe, representing the night sky. I wanted the user to “discover” planets in space by clicking somewhere and I wanted to add something personal to it. Additionally, using the new skills from class I decided to have the option to remove planets by pressing a key. Each planet has a 50/50 % of having a ring (an ellipse). This is decided through a Boolean – it it returns true then the planet has a ring. To complete the whole galaxy theme, I made the cursor a rocket by removing it and putting and emoji with the same coordinates.

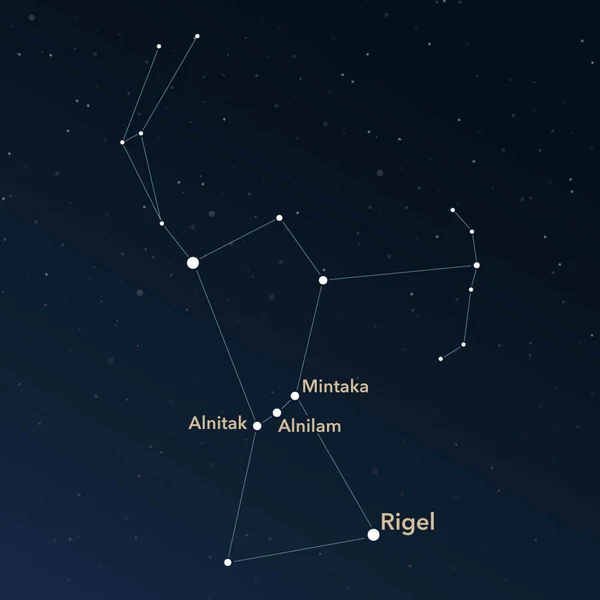
The background is a dark blue sky with stars and the concept behind it was my favourite star constellation – Orion.

Code I am Particularly Proud of

//when one clicks with the mouse a new planet appears (adds element to the array)
function mousePressed(){
  let newPlanet = new Planet (mouseX, mouseY, random(8,40));
  planets.push(newPlanet);
}
//when one touches a key the last element of the array diappears
function keyPressed (){
  planets.pop();
  }

Applying the knowledge I gained from class I was able to create new planets and using the .push and .pop I could add to the array or delete the last element from the array. Now I feel more confident using array functions and am willing to explore more of them in my next coding assignments.

How Was This Made

First, I made a class called Planet, which served as my guide until the end. Each of my planets is stored in the planets array.

After this, I specifically chose a color palette that complemented my idea of space. Then, I had to decide on the variety of planets and for this purpose I chose a random size between 8 and 40. Each celestial body has a range of motion and to imitate the constant movement in space, I did this:

move(){
    this.x=this.x+ random (-5,5);
    this.y=this.y+random (-6,6);

I tried adding more or less range to the random motion but decided on this as the perfect amount of randomness. I also added text to let people know how to interact with it.

I took inspiration from the technical readings and:

https://happycoding.io/tutorials/p5js/array-functions

https://p5js.org/reference/p5/noCursor/

No AI was used in the making of this.

Reflection

I have a few thing in mind that I would like to explore. After adding rings to some of my planets I thought “what would happen if I add different patterns to others?”. I think it’d be cool to see a variety of planets. Also, I believe it would be interesting to include more than just mousePressed and keyPressed options to interact with it. For instance, I am thinking of adding a separate action for a few buttons, so it gets closer to game-like feel.

Assignment 3: Nostalgia in Bubbles

Concept:

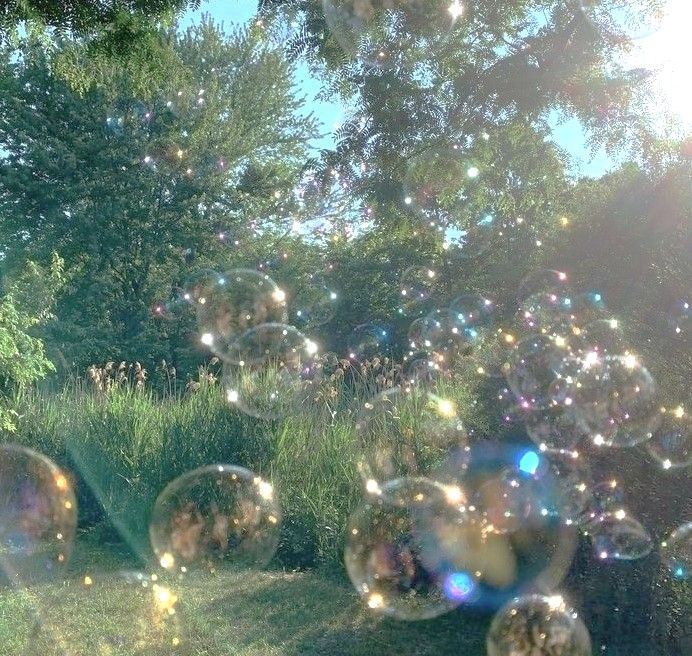
For this artwork, I wanted to capture the childhood memory and experience of when we would go outside to play with bubbles. My aim is to be able to relay that nostalgic, hazy, dreamy feeling using soft colors and a gradient background of the sky and grass but in a blur just like the memories. I did not want it to be too complex but simple, carefree, and fun instead because that is how life was, where popping bubbles was the highlight of our day and running out of the bubble soap was our low.

If you press a key, bubbles spawn. If you mouse click, a bubble pops. I intentionally did it this way because the press of a key reminded me of when we would press on a bubble machine to blow out more bubbles, and the click of the mouse reminded me of how we would run, jump, and reach out with our hands to pop the bubbles as fast as we can before it flies too high or pops on its own.

Highlighted Code:

// "pops" the bubble
function mousePressed(){
  for (let i = bubbles.length - 1; i >= 0; i--){
    let distance = dist(mouseX, mouseY, bubbles[i].x, bubbles[i].y);
    if (distance < bubbles[i].size / 2){
      bubbles.splice(i, 1);
    }
  }
}

I am proud of this function because it creates the main interactive feature: popping the bubbles. I had to do some research in order to figure out how to get it to pop but also used previous dist() knowledge from Week 2 to calculate the distance between the mouse and the center of the bubble. The code splice() was used to remove the bubble from the array when clicked. I think I am most proud of it because it wasthe code that had the most trial and error, which I explain more in depth in the “How This Was Made?” section.

How This Was Made?

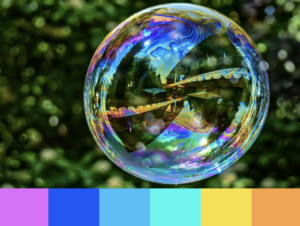
The majority of the code was made using what we learned in class. In the Bubble class, I added this.size in order to produce many different sizes of bubbles to match realistically how it is. To add to that, I also created an array of different colors that picks between them randomly  using this.color for that very same reason. I searched for a bubble color palette on Google and scrolled till I found the one that matched the vision in my head and used those colors.
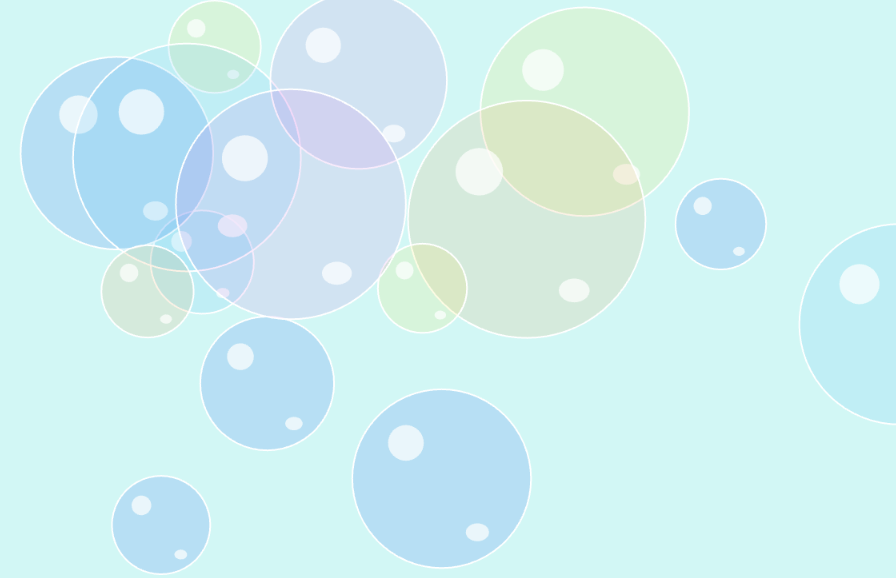
For the bubbles it is just one perfect ellipse based on this.size, which is a random number between 50 and 150. The two small reflection spots are also ellipses but multiplied by + or – 0.1-0.3 to make it smaller. Though small, this is what adds dimensions and makes the bubble look like a bubble.

I let keyPressed() create a new bubble instead and mousePressed() to pop it. For keyPressed() I ran into an issue where the bubbles would almost disappear because they would go out of the canvas, so I had to subtract the radius (this.size / 2) from the width and height in order for it to bounce off immediately as it touches the canvas borders.

For the bubble popping part, I knew I needed dist() as wherever mouseX, mouseY, and the x and y values of the certain bubble[i] in the array is, but I was unsure how to have it “pop” because when I actually used bubbles.pop() it deleted the last bubble that was made regardless of where I clicked. I noticed that the previous student’s example used splice(), but she also had other variables and codes that made it confusing to understand. So, a simpler way was just searching up “bubbles popping p5.js” on google. I ended up finding an example made by someone and noticed they used splice() as well. I asked Gemini to explain how their code works and then I implemented it on my own. Their code had the distance in a separate function, so I just combined it in the same mousePressed() function because it felt unnecessary and simpler.

I did the gradient background last because initially I was just going to leave it as a plain light blue; however, I did not think it encapsulated the nostalgic, hazy, childhood memory feeling, so I thought a gradient from light blue to green would be better. It matched my bubble reference image where you see the sky above then the greenery below it. I searched for “gradient background p5.js” and found a simple example. I recognized lerpColor from a classmate’s palleteLerp() code but wanted to know more about how map works, so I looked for the reference. It learned that it converts the coordinates to numbers between 0-1 as a the percent lerpColor needs to blend c1 and c2.

Reflection:

Overall, I am pretty happy with how it turned out because I think that I achieved that nostalgic, childhood feeling I was going for. I feel like this assignment definitely helped me understand classes more and allowed me to explore new things that we have not learned. In the future, I could maybe do more with the background like having the gradient flow and move around from top to bottom like an actual hazy memory. For improvements, I also found a p5.js example where they actually installed a bubble pop sound that plays when the user “pops” a bubble, which I thought could have been a fun interaction and addition to complete the experience.

References:

Bubble reference image: https://www.pinterest.com/pin/112027111108718506/

WK13 Bouncing ball example: https://editor.p5js.org/Aya_Riad/sketches/Wky6-ythQ

Previous student example: https://editor.p5js.org/AyshaSalma/sketches/09cZh8SDk

Bubble pop example: https://editor.p5js.org/haydencarey/sketches/4Jksy0Odg

map(): https://www.geeksforgeeks.org/javascript/p5-js-map-function/

Gradient background example: https://editor.p5js.org/evebdn/sketches/O9G35ueZv

Bubble color palette: https://www.schemecolor.com/colors-of-a-soap-bubble.php