Week 2 – Assignment (Animation, Conditionals, Loops)

My Concept
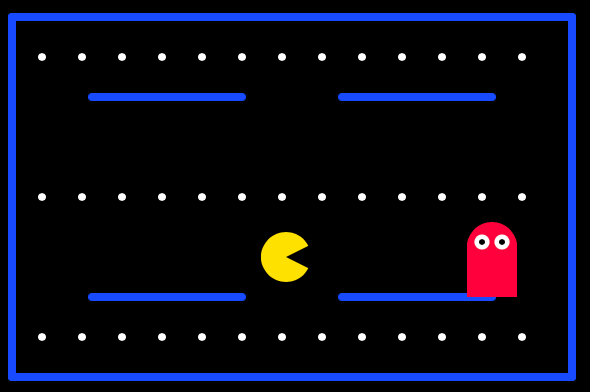
When I thought about making a good piece of art using a for loop, the first idea that came to my mind was a Pac-Man design map. Pac-Man maps contain many repeated dots, so I thought a loop would be a useful way to create something similar without drawing every dot separately. My goal was not to recreate the original game exactly. I wanted to make my own simple maze-chase artwork inspired by it. I used blue lines for the maze, repeated white dots, a yellow player, and a simple red enemy. The yellow character follows the mouse, which makes the artwork interactive.


Code Highlight
The code I am particularly proud of is the loop that creates the dots:

for (let x = 50; x <= 550; x += 40)
circle(x, 60, 8);
circle(x, 340, 8);

I am proud of this part because I did not need to write a separate circle() command for every dot. The variable x starts at 50 and increases by 40 every time the loop repeats. This places the dots across the canvas with equal spaces between them. I used another similar loop to create the row of dots in the middle:

for (let x = 50; x <= 550; x += 40)
circle(x, 200, 8);

function setup() {
  createCanvas(600, 400);
}

function draw() {
  background(0);

  // Maze walls
  stroke(0, 100, 255);
  strokeWeight(8);

  line(20, 20, 580, 20);
  line(20, 380, 580, 380);
  line(20, 20, 20, 380);
  line(580, 20, 580, 380);

  line(100, 100, 250, 100);
  line(350, 100, 500, 100);
  line(100, 300, 250, 300);
  line(350, 300, 500, 300);

  // the top and bottom dots
  noStroke();
  fill(255);

  for (let x = 50; x <= 550; x += 40) {
    circle(x, 60, 8);
    circle(x, 340, 8);
  }

  // another loop to draw dots through the middle
  for (let x = 50; x <= 550; x += 40) {
    circle(x, 200, 8);
  }

  // Player
  circle(mouseX, mouseY, 50);

  // Player's mouth
  fill(0);
  triangle(
    mouseX,
    mouseY,
    mouseX + 30,
    mouseY - 15,
    mouseX + 30,
    mouseY + 15
  );

  // The Enemy
  fill(255, 60, 80);
  circle(500, 250, 50);
  square(475, 250, 50);

  // Enemy eyes
  fill(255);
  circle(490, 245, 15);
  circle(510, 245, 15);

  fill(0);
  circle(490, 245, 6);
  circle(510, 245, 6);
}

Embedded Sketch

How Was This Made?

I first made a black background and used blue line() commands to create the outside border and the simple walls of the maze. I used for() loops to repeat the small white circles across the map. The player was made with a yellow circle() and a black triangle() for its mouth. I used mouseX and mouseY as its coordinates, allowing it to follow the mouse. I also used an “if” and “else” statement to change the player from yellow to orange when it moves from one side of the canvas to the other. The enemy was created from a red circle and square, with smaller circles for its eyes. I referred to the loop and conditional examples from our class materials, specifically from the class Power Points from Week 2. I also used the official p5.js reference to understand the basic drawing commands.


Reflection and Future Improvements

This project helped me understand why loops are useful. Drawing every dot with a separate command would take a long time, but the loop made it shorter and easier to adjust. I also learned that changing the starting position, ending condition, or increment changes how many dots appear and how far apart they are. A challenge I would like to mention is when choosing the coordinates for the maze walls and making sure the dots stayed inside the canvas. I kept the maze simple because I just wanted to use the basic techniques that we covered in class. However, in the future I would like to make the player stay inside the maze walls instead of moving anywhere on the canvas. I could also make the enemy move, add more paths, or make the dots disappear when the player touches them. Chiefly I would like to make it a more realistic and applicable game and theme 
Week 2: Reading Reflection

As a perfectionist, the word “chaos” would always evoke negative emotions in me. It is a word that feels like the direct antonym of my favorite word, “perfection,” and so it never quite sat right with me. However, listening to Casey Reas’ speech made this word more tolerable, as the examples of work he showed made me see a certain beauty in randomness.

For me, the most meaningful takeaway was that adding elements of randomness can sometimes help keep a work alive and dynamic. Previously, when I tried to incorporate randomness into my work, it would usually result in a messy, overwhelming chaos. But now I realize that to avoid that kind of mess, you need to set certain limits and keep a balance, something like 75% control and 25% chaos. My mistake was that I overemphasized and exaggerated the chaos, turning my work into an uncontrollable mess.

In a recent assignment for this class, I ran into something similar. I created a perfect grid of squares, but that perfection made the sketch look dead and homogenous. Then I experimented with spacing and movement, and eventually found my ideal ratio of randomness to order, something I’d call “controlled mess.” This change made the sketch look more alive and visually interesting.

In my future projects, I plan to expand my use of chaotic elements, but with the same rules in mind. I am eager to experiment and discover ways in which I can add random elements to parameters like size, rotation, or even frameRate to create unorthodox projects that still feel ordered and meaningful.

Week 2 – Reading Reflection

After watching Casey Reas talk, it made me think deeper into randomness in art. At 27:25 Casey Reas says something in the lines of “somewhere in between here is the space from order to chaos.” This made me stop and think that randomness does not always mean completely uncontrolled, but instead that I can set the rules in my work and let parts of it change or behave unexpectedly.

I specifically found how he mixes structure with variation, what I mean by this is that he makes the shapes move or appear in ways that are so unpredictable but still it feels connected and put together because it follows a specific system. I loved that the work could look random but not messy.

This made me really think about randomness and that with a good system it could flow really well. I wanted my work to look organized but at the same time not predictable. So I used this idea mainly through the colors and shapes, so when I move my mouse to the left side the design changes to cool colors but if I moved it to the right side it changes to warm colors. I still control the colors which appear in both sides, so even if the appearance changes it’s still organized. As well as the shapes, I used repeated shapes and a clear pattern to give the design structure. I found out the best designs comes from a clear plan and then as I’m working I can leave space for unexpected changes but still making sure the final design looks intentional and not messy.

Assignment 2: Animation, Conditionals, Loops

Sketch

Concept

Fun fact: my work was unintentionally inspired by Georg Nees’ “Schotter“.
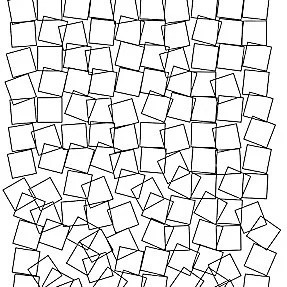
My first Idea was to recreate colorful bathroom tiles, like the ones in old style houses, and I built a grid of squares in perfect order. But as I worked through the project, that perfect order started to feel boring to me. So I decided to add some chaos by making the squares move and rotate. Later, I realized that I had subconsciously taken inspiration from one of the artworks I had reviewed earlier before starting my sketch. Once I noticed that, I began taking inspiration from that work on purpose. Obviously, it is not a 1 to 1 copy of Georg Nees’ work, but my own version with animation that resembles the flow of a waterfall.

George Nees “Schotter”

Code Highlight

for (let x = 0; x <= width; x += 25) {
  for (let y = 0; y <= height; y += 25) {
    
    push();
    //The lower it gets, the more it moves
    translate(x + random(-y / 30, y / 30), y + random(-y / 30, y / 30));

    // The lower it gets, the more it rotates
    rotate(radians(random(-y / 10, y / 10)));
    
    stroke(random(150, 255), 100, 220);
    strokeWeight(random(1, 2.5));
    rect(0, 0, 22, 22);
    pop();
  }
}

The hardest part was creating a falling effect where the movement increases as the squares go down. To do that I used:

translate(x + random(-y / 30, y / 30), y + random(-y / 30, y / 30)) rotate(radians(random(-y / 10, y / 10)));

So as the Y axis value increases, the range of movement gets larger too. As you can see the first row squares are not moving at all. But the squares further down drift and rotate randomly.

How was this made

First, I set up a basic grid with two nested for loops, one for x and one for y, and spaced the squares 25 pixels apart across the whole canvas. Next, to create the progressive breakdown effect, I used translate() and rotate(), and divided my y value inside the random() functions. Because y value is small at the top of the canvas, those squares barely move at all. But as y increases going down the canvas, the range passed into random() gets wider, so the lower squares shift and rotate more. To accomplish this I had to look up translate() and rotate() functions on p5js reference page.

Reflection

Looking back, this project turned out quite different from what I initially planned. At the start, my idea was simply to make an artwork similar to colorful bathroom tiles. But as I kept working on my code, my plan swerved in a direction I wasn’t expecting. If I had more time, I would definitely experiment more with the color palette and add some sort of fading effect as the squares “fall down.” It would also be interesting to add elements of interactivity, like letting the mouse position affect how the squares fall apart.

Week 2 Reading Assignment

Original video: https://vimeo.com/45851523
Quotes and ideas referenced from the video comes with a timestamp in purple: (MM:SS)

When I first started making things in code…every line of code was precisely determined by myself and it produced something exactly as I wanted it to be.
– Casey Reas, (0:22)

I connect to this so incredibly well and in fact, it’s quite visible in my Week 2 assignment (hehe). I feel like randomness and chaos often comes with the feeling of “uncontrollable mess” which is intimidating. However, after watching this video, I have the impression that with art, perhaps randomness can produce what is beyond (and even better than) my imagination.

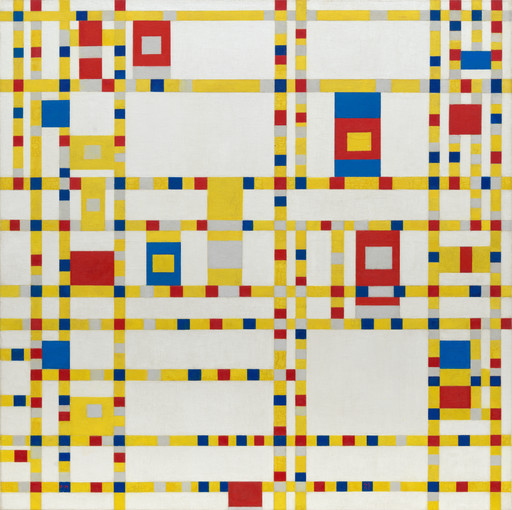
Piet Mondrian. Broadway Boogie Woogie. 1942–43

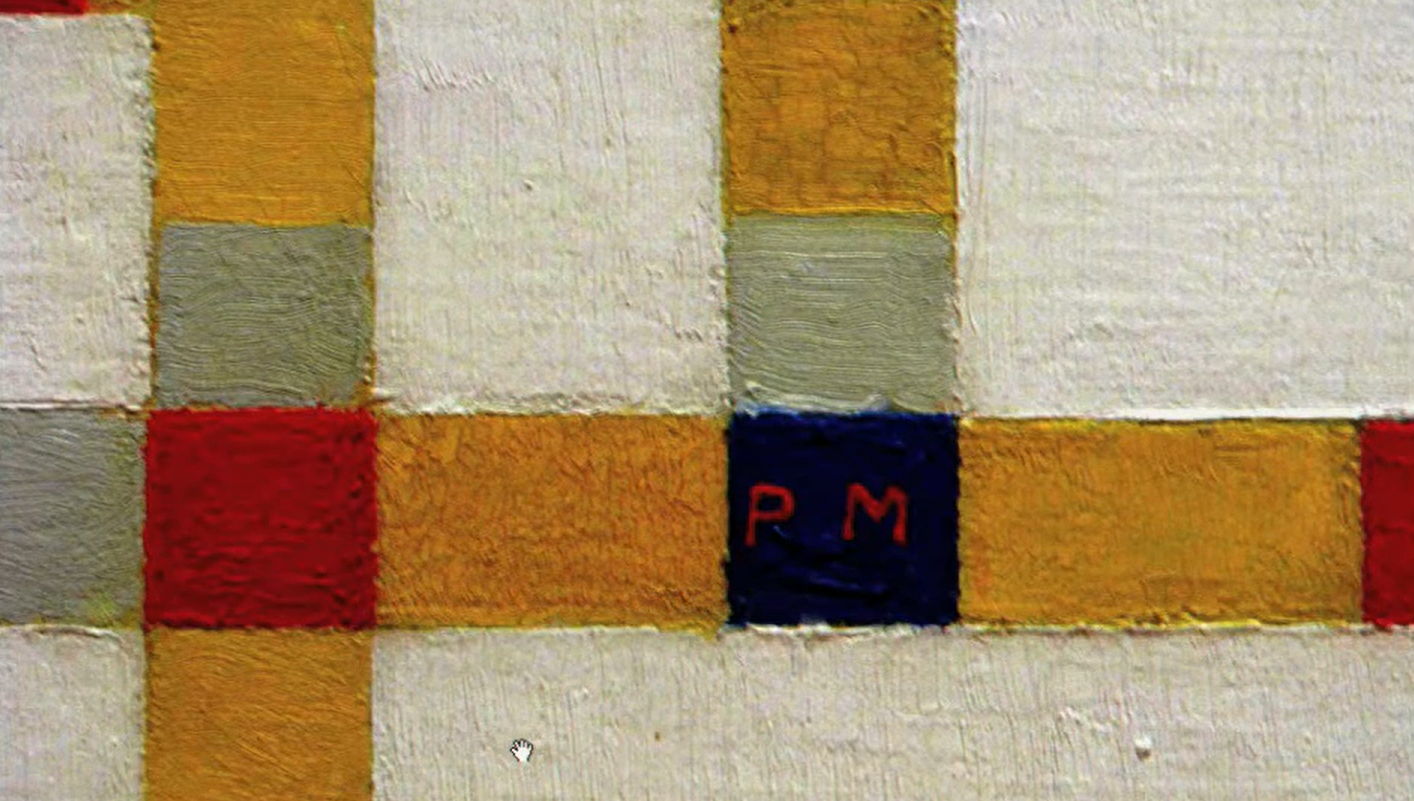
One of the most eye-opening and interesting facts I learned from the video is on Piet Mondrian’s grid paintings. I’ve come across these so many times, and they look like one of those “anyone can do that” paintings at first. I, personally, felt emotionless every time I saw them, so I was surprised when Reas said that these paintings contain brush strokes of “emotional, human-quality (21:54).”  I learnt that Mondrian was indirectly inspired by boogie-woogie music, a repetitive, persistent, and repeating bass on the piano.

texture of Mondrian’s painting; screenshot from video

Yet, if looked closely in person, one can notice the visible and thick brush strokes, and the wobble at the edges of the line (21:10). When I learned that Mondrian did not use masking tape for clean edges and wanted to, instead, retain the human texture, my view of his grid paintings completely changed. 

Listening to the lecture also reminds me of something I was told as a kid: that real artists don’t use erasers, rulers, or drawing compasses. I never really understood why, but as a child, I thought that it’s because professionals don’t make drawing “mistakes.” After this video lecture, I’m reminded that art is more about embracing humanness, the imperfections, the nuanced and delicate strokes.

Above all, it’s never a blind chance; it’s a chance that is always planned but also always surprising.
– Gerhard Richte (18:30)

On to the guiding question of “where is the optimum balance between total randomness and complete control,” I think it’s difficult and arguably impossible to come up with the “optimum balance,” since it varies by artists and what they’re comfortable with. However, with me personally, I think incorporating random elements would certainly add some “spice” to my work, as it provokes curiosity and excitement. Some of the ideas I came up with ironically involve controlling the randomness:

  • Random combinations of colors from a list/array of colors that are on-themed.
  • Shapes/elements appearing/moving at random coordinates/speeds within the canvas boundaries
  • Random number of shapes/elements but there is a lower limit and upper limit.

This way, I can have some “randomness” within my sketch without making them total chaos.

Resources I Used

[photo] https://www.moma.org/collection/works/78682

Reading Reflection – Week#2

Before watching Casey Reas’ talk, I only ever recognized randomness in things like code (random() function), dice, throwing a coin, etc. Even when looking at abstract art, I always felt there was still some form of structure and order despite attempting to look random. However, after watching the video, I was surprised to see that not only can code be used to create random art, but how simple it can be.  The pieces that particularly stood out to me were Process 18 and the “Tissue” work. Process 18 describes a set of instructions related to an element. This element consisted of a couple lines resulting in random movement. As for Tissue, it was made up of many different types of vehicles that also had random movement. However after watching both artworks, we notice that both elements eventually tend towards a certain pattern or behavior. As a result, I started to question how truly “random” these artworks were as Reas still defined a set of rules and instructions. Although the outcome is unpredictable, the boundaries of what can happen are still controlled by the artist. I believe this reflects how no matter how “random” we try to be, we subconsciously always try to find order even in the chaos.  

This is something I will particularly struggle with in the assignment as I tend to enjoy things that have more structure and control. I believe that in order for me to create a bit of chaos in my work, I must find a middle ground between randomness and control. I believe the best way to do this is by having a strong concept or set of rules for my work, while allowing the random elements to influence the final outcome rather than controlling every detail. Reas’ talk has made me realize that randomness does not necessarily mean giving up all control, but instead it can mean controlling the rules while allowing the outcome to develop on its own.

Assignment 2 – Animation, Conditionals, Loops

Concept:

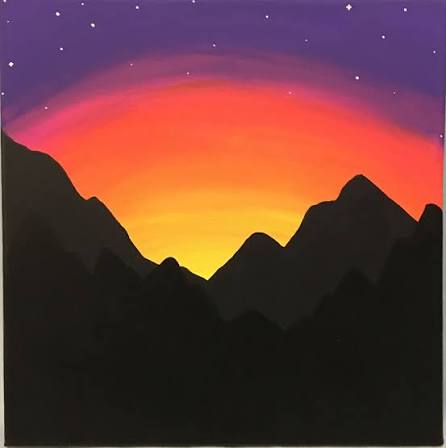
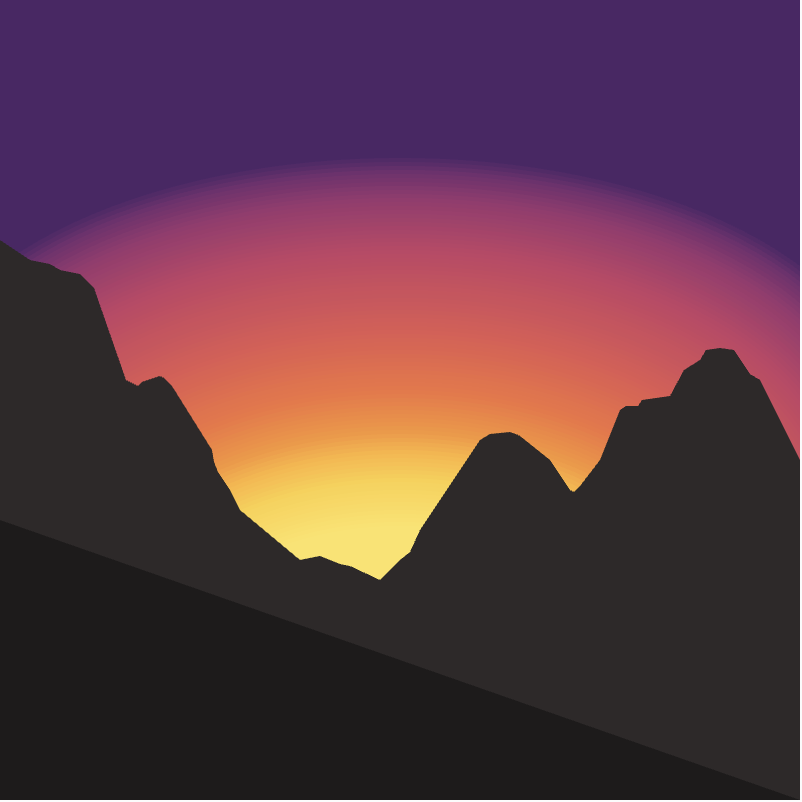
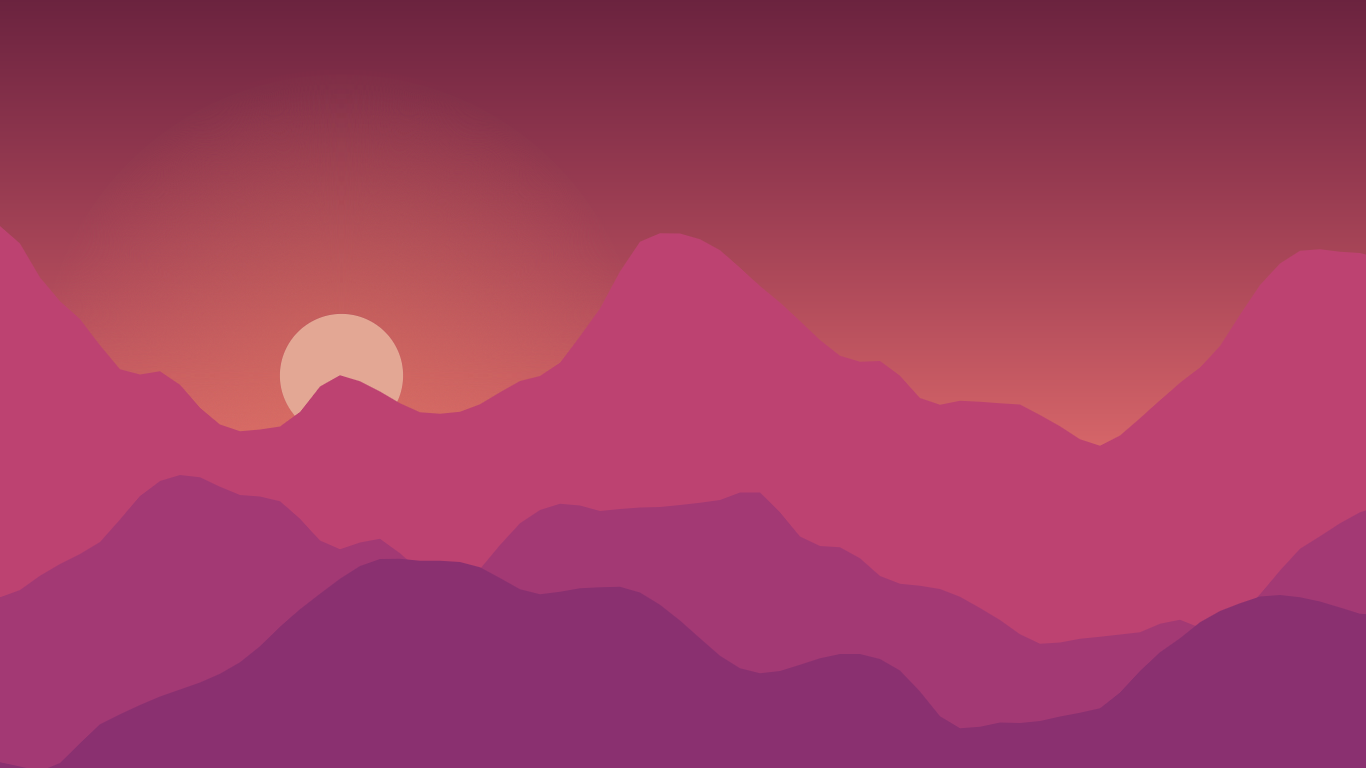
For my concept, I wanted to create a backdrop of a sunset whilst also incorporating animations and loops. For this, I started by looking for inspiration pictures and landed on this. I used this image as my reference.

How this was made:

I initially started with finding colors for the sunset. I created an array of 15 colors – these colors were found by searching: hex colors for sunset gradient 15 colors. I then used these colors in a for loop to draw 15 circles that slightly overlap and have varying opacities to create a gradient. I will be honest, I was not happy with the result as you can see below.


So, I looked on p5 reference and found a function called ‘paletteLerp’ which blends multiple colors to find a color between them. So i created another array called palette with each index containing an array with two elements. The first is the color, and the second is position of that color along the gradient -> usually in a gradient the positions are equal, however I wanted certain colors to take up more of the gradient compared to the others (in the end I had 10 colors). Next in my loop, instead of drawing 15 circles, I drew 100 and used paletteLerp to blend the colors.

Here is the resultAs you can see, the gradient is much more seamless.

As for the code:

//colors for sunset
let colors = [ '#4d2667', '#742e6f', '#9c366f', '#c44265', '#e25852', '#f2733f', '#f89535', '#fdb338', '#fccf43', '#fee464'];

//palette to blend colors
let palette = [[colors[0],0.06],[colors[1],0.10],[colors[2],0.17],[colors[3],0.30],[colors[4],0.50],[colors[5],0.65],[colors[6],0.75],[colors[7],0.80],[colors[8],0.87],[colors[9],1]];

 //drawing sunset

let diameter = 500;
let y = 190;
for (let i = 0; i < 100; i++){
noStroke()
fill(paletteLerp(palette, i / 100));
ellipse(200, y, diameter, 250);
y += random(4);
diameter -= 2;
}

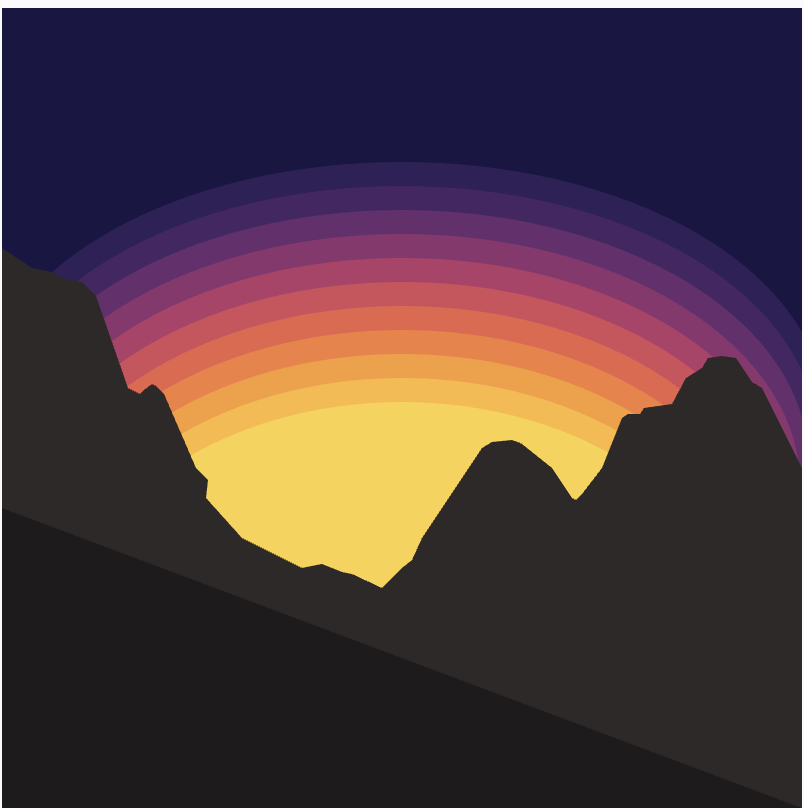
Next, I moved onto the mountains. This also took some trial and error. At first, I tried using the primitive shapes discussed in class (lines, arcs, triangles, etc) however I was very unhappy with the result, and filling it in would be difficult this way. So I searched online ‘mountains p5.js’ to see how other people made mountains and I came across this.


Since I was unsure of how this was made, I pasted the image into ChatGPT and was told that they used: beginShape(), vertex(), endShape(). So thats what I did. This was very time consuming since I had to dictate every vertex, the mouseX and mouseY made this easier, but I would say the end result was worth it!

I then made the stars, I did this by creating a similar for loop to the sunset to draw each star and used random() for the x position, y position and size, as well as for opacity to mimic twinkling (this was only feasible since I had reduced the frameRate to 4, otherwise the twinkling would be too quick).

Finally, I wanted more movement in the diagram, so I also varied the movement of the circles to create the illusion that the sunset is moving (this is why frameRate is 4, so that the movement is slower and more animated).

Randomness was used in two places: the stars were assigned random positions, sizes, and opacities to create twinkling, while the sunset circles used random vertical offsets to create subtle movement.

Final result

Reflection

Overall, I am quite happy with the result, much more so than the first assignment. Although it took a lot of trial and error as well as extra research, I now have a stronger foundation and appreciation for p5. In the future I would want to add more animations like shooting stars for example as well as interactivity for the user. In addition, although I added my own features and animations to the reference image, I would want to challenge myself in the future to create something completely from scratch, rather than basing it on a specific reference image. I would still use other artwork as inspiration, however.

References:

https://p5js.org/reference/p5/paletteLerp/

https://www.google.com/search?q=hex+colors+for+sunset+gradient+15+colors&sca_esv=424538866ee42d06&sxsrf=APpeQnssm4SWbFMRWSRBGqA4Tr2fGDoWYA%3A1788940216991&ei=uA-haq-APN3k7_UPi-_y8QE&biw=1512&bih=857&ved=2ahUKEwivvKHRgeGWAxVd8rsIHYu3PB4Q4dUDegQIBhAM&uact=5&oq=hex+colors+for+sunset+gradient+15+colors&gs_lp=Egxnd3Mtd2l6LXNlcnAiKGhleCBjb2xvcnMgZm9yIHN1bnNldCBncmFkaWVudCAxNSBjb2xvcnMyBRAhGKABMgUQIRigATIFECEYoAFIzyFQqApY0CBwAXgBkAEAmAGoAqAB4hKqAQMyLTm4AQPIAQD4AQGYAgagAoIKwgIKEAAYRxjWBBiwA8ICBxAhGAoYoAGYAwCIBgGQBgiSBwUxLjAuNaAHrxGyBwMyLTW4B_sJwgcFMS40LjHIBwyACAE&sclient=gws-wiz-serp


Week 2 Assignment: Artworks, patterns, and loops

My Sketch

My concept

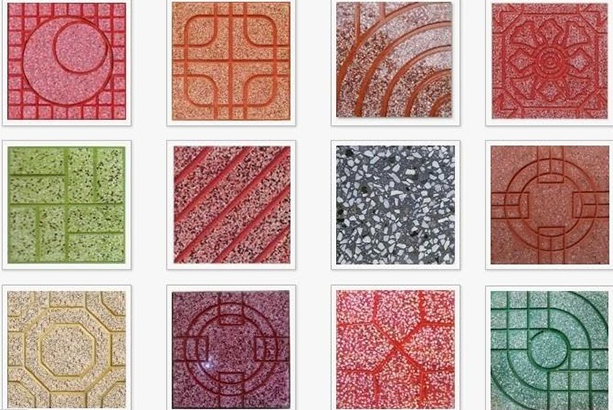
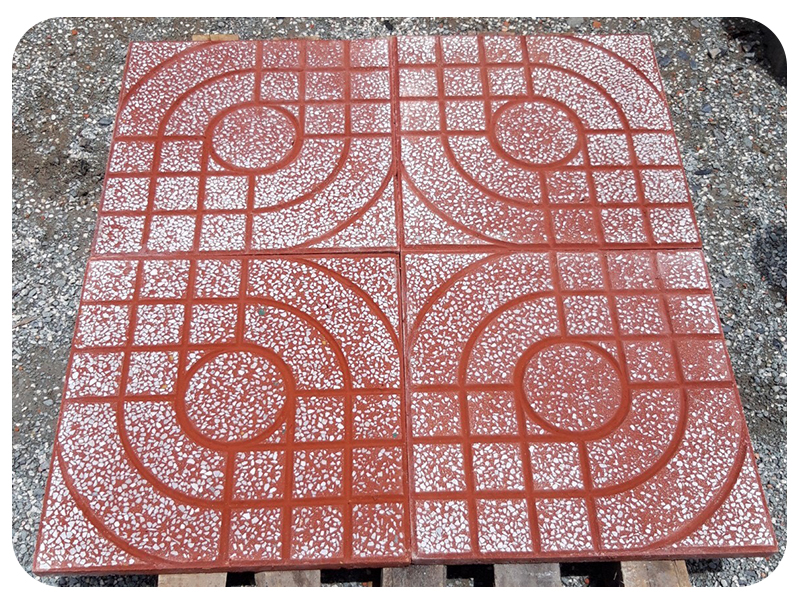
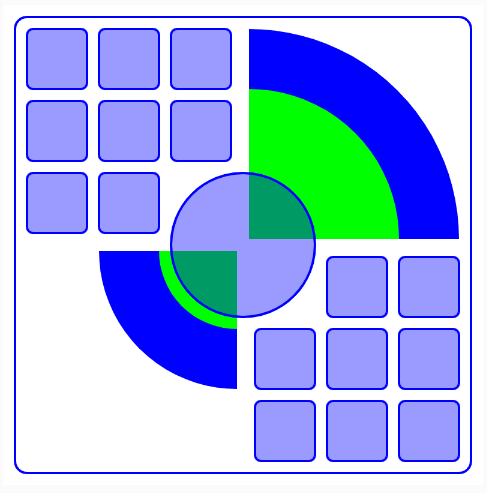
When I first heard that the artwork can use loops to create a pattern, my mind jumps straight to the iconic terrazzo tiles that are used on the sidewalks of the streets in Hanoi, my home city. These tiles come in different patterns, and every Vietnamese, including myself, strangely finds nostalgia in these tiles because it is what we grew up with. Vietnam’s terrazzo tiles have a much deeper history than I could ever imagined: In the early 1990s, a project was set out to get rid of the bumpy concrete pavements. Inspired by the European, particularly Venice’s floral tiles, tile designers and suppliers decided to simplify them into designs of geometrical shapes. There are so many designs, each iconic in their own way, and I decided that for this assignment I wanted to draw one of these patterns on p5.

there are many terrazo tiles designs!
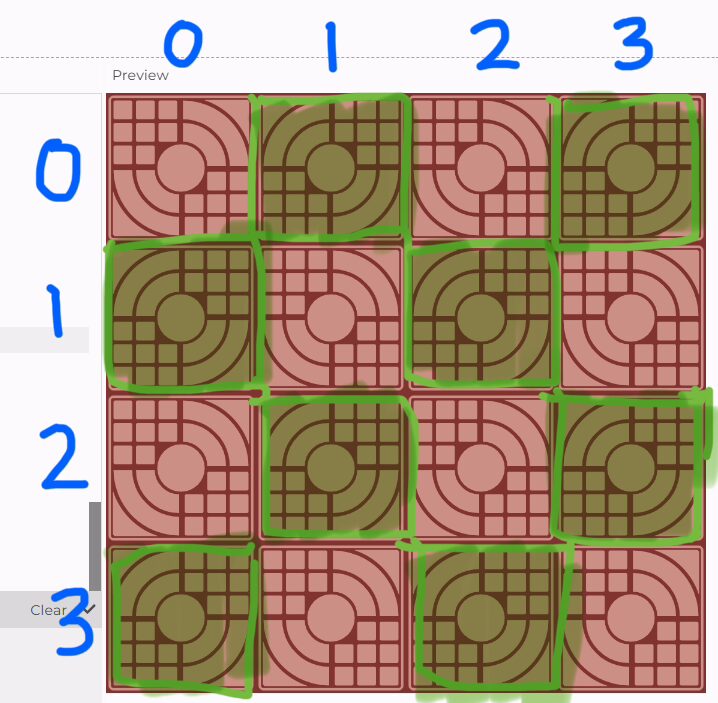
4 tiles together


My highlight code

for (let col = 0; col < numOfTiles; col++) {
    for (let row = 0; row < numOfTiles; row++) {

      push();
      if ((col%2==1 && row%2==0)||(col%2==0 && row%2==1)) {
        translate((col+1)*tileSize, row*tileSize);
        scale(-1, 1);
      } else {
        translate(col * tileSize, row * tileSize);
      }
      drawTile(numOfTiles);
      pop();
    }
  }

I draw each individual tile in the function drawTile() then in the main draw() function, I call drawTile() for a total of 16 times to create the 4×4 grid as shown above. I was especially proud of this section of code because instead of having to manually call drawTile() 16 times, I used a nested for loop to optimize the process! Within each iteration, I use a conditional statement to check whether I should flip the tile (basically creating a mirrored version of it) based on its position in the grid. The next section, “How this was made,” goes into detail of the algorithm and why I used certain functions. It also links to the tutorials and reference pages I used.

How this was made

This assignment was way harder than I had initially expected! I first explored on a default 400×400 canvas, where I created one single tile. I have also embed the sketch for it here, as this was a crucial step in my process. I tried to be as accurate as possible, while also challenging myself to use the different p5 primitives. While I could have just drawn the indented lines, I decided to challenge my approach and draw the shapes and blocks instead. I primarily used squares and arcs to create the geometric shapes.

Sketch for 1 single tile (hardcoded on 400×400 canvas):

One of the things I was being super cautious about was with the numbers and math. Symmetry is an important feature, so I had to make actual calculations with the coordinates to ensure everything aligns. I used nested for loops to create the small squares in the top-left and bottom-right, and also gave them some border-radius (this is different from the actual tiles).

the blue part is the stroke; the green part is the fill. (I put green for demonstration but in the actual sketch I set it to noFill())

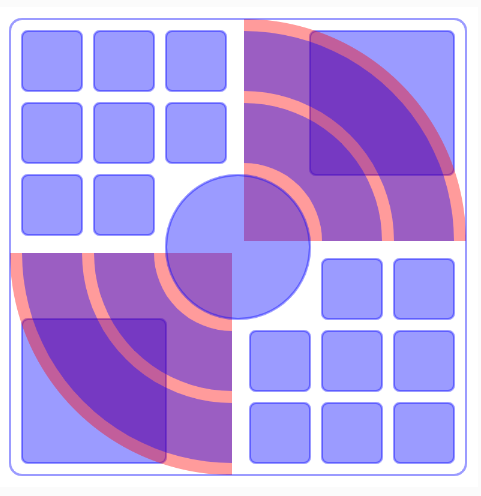
Then, for the curves in the top-right and bottom-left, I used arcs that are one quarter, make them transparent in the middle (noFill) and gave them a big stroke to create the curves.
For the curved triangle in the corners, they are actually squares, but an arc sits on top of each square, basically hiding half of it and giving it a curve hypotenuse. Overall, since the single tile is mirrored over y=-x, it was not difficult, I just had to be careful with the placement and order of the primitives.

the red arcs sit on top of the top-right and left-bottom squares. later I set it to match the color of the background, hence “covering” half of the square

However, the real challenge really came when I wanted to put multiple tiles together to make a pattern. When I was drawing the single tile, I was hard-coding the coordinates for a 400×400 canvas. Therefore, I won’t be able to resize or place them next to each other easily. Then, I had to create a duplicate file of my single tile, and manually change the values to be responsive to the width and height of the canvas (it was a tedious process but the code wasn’t extremely long because I had used for loops to avoid redundancy). You can find the sketch for the responsive tile here. The hard-coded and responsive tile looks exactly the same on a 400×400 canvas, but they are massively different in the numbers and variables I used to draw them.

Once I have made the single tile responsive to the canvas dimensions, the next thing on the checklist is to put several of them together to create a pattern. I put all the primitives in a function drawTile(), then in draw(), I call drawTile() when I need to draw a tile. Notice that the pattern is created with the tiles and its flipped version (symmetry at y=-x and y=x). In order to create the flipped variations, I used scale(-1,1) to flip the tile over the y-axis. I watched The Coding Train’s “How to use scale() in p5.js” tutorial and also referenced the corresponding p5 reference. I also notice a pattern with the tiles that are to be flipped. If we do a 4×4 grid of the tiles, and have columns and rows numbered from 0-3, the flipped tiles would either:
– have even-numbered row + odd-numbered column; or
– have odd-numbered row + even-numbered column
I used an if statement here, evaluating odd/evenness using modulus 2. If it is one of the 2 scenarios above, I call scale(-1,1) before I call drawTile().

In order to place the tiles at the correct spots on the grid, I used the translate() function which allows me to set a new origin of (x,y) instead of the default (0,0). I watched this tutorial and looked at the p5 reference page for this function. One thing I noticed in the Youtube tutorial is that you have to use push() and pop() before and after translate(). While I haven’t fully understood how these 2 functions work, it appears that they sort of “resets” the origin to (0,0) after every tile is drawn, otherwise the next time I call translate(), it would be relative to the (x,y) arguments I last passed. I used nested for loops to create the 4×4 grid, then calls drawTile() after translating the origin.

Reflection

This tile is one of the more complicated designs but what made it especially so difficult is the diagonal symmetry. I took a lot more time than I had initially expected, but ultimately in the end, I think the pattern turned out really nice.

I basically had to do 3 steps: a tile on 400×400 canvas, making the coordinates relative & dynamic to the canvas dimensions, and printing the pattern. I feel like my current approach is definitely over-complicated and takes more time and effort than it needs to be. However, my experience with p5 is quite limited, so I tried my best with the knowledge and resources I have.

Also, if I had more time, I would want to play around with the colors. Maybe I can make the pattern changes color every couple seconds or when the end-user clicks on the canvas. I think that would add a very cool layer of interactivity to this otherwise static pattern.

Resources I Used

https://www.youtube.com/watch?v=pkHZTWOoTLM&t=56s
https://p5js.org/reference/p5/scale/
https://www.youtube.com/watch?v=maTfm84mLbo
https://p5js.org/reference/p5/translate/
[photo] https://topmatstore.vn/gach-terrazzo-p4501.html
[photo] https://gachngoihanoi.com/gach-via-he-terrazzo/gach-via-he-terrazzo-mat-nai-do-post239.html
all other screenshots and figures are my own

No Artificial Intelligence was used in the making of this sketch or its documentation.

Reading Reflection – Week 2

Before watching this weeks lecture, I thought randomness meant that something was completely uncontrolled and involved no human interactive but this reading changed my mind because I realized that randomness can actually be controlled through decisions and rules. I found it interesting how randomness can be used to create art and how adding a small amount of noise to certain rules and code can make it look better. I especially liked the example of Reas and his wife incorporating randomness into clothing because it showed me that interactive media and random art can be applied in everyday life, even to something as simple as clothing. This made me realize that randomness is used much more widely than I originally thought. It also made me think about my own work because I usually create things that are more repetitive and less random however I could add some randomness to my p5.js work to make the outcome more unique while still keeping the overall structure of my design.Also a key thing is that randomness can be mixed into different subjects, such as biology and embedded into daily life I didn’t expect it to be a option, and it was something that surprised me as I never taught of this.

I think the optimum balance between complete control and total randomness is somewhere is a mix and depends on the situation. I think having a purpose and knowing what want the artwork to look like, and then deciding where randomness could improve it. I think too much randomness could make an artwork look messy or take away from its purpose, while a small amount can make it more interesting and not overstimulating. However in the process 18 example the complete randomness did make the overall art work look good so the extent of randomness is depends on the case. I also think testing is important because you can change the amount of randomness and see what works best instead of trying to control every detail. This connects to the work we did this week because for example I repeated shapes as I was were creating using rules and loops, but adding random changes to the colors, sizes, or positions could create more variation. I don’t think complete control is given to the person creating it as the computer has a certain degree of control and thats what creates the art and randomness. Overall, the talk showed me that using randomness does not mean giving up control. Instead, the artist can control how much randomness is within the art and use it as another creative decision.

Week 2 – Animation, Conditionals, Loops

Concept

This week in class, we learned about conditionals, and I really wanted to incorporate this new concept into my assigment, One of the examples we looked at in class showed us how we could change color when the mouse interacted within a certain area of the screen in that case it was a sqaure turning pink. I wanted to take this and make the color change happen across 50% of the screen.

My canvas is 600 x 600 pixels, so I knew that 50% of the width would be 300 pixles and once the mouse went past 300, the colors would change, and if the mouse was before 300, the colors would change back. This created an effect where the colors appear to swap between the two sides of the canvas as i moved the mouse from right to left.

I also incorporate the last weeks color and shapes we learnt and i mixed that with this weeks for loop. I used the for loops to help with the squares repeating every 50 pixels i did this with the + 50. This created a repeating pattern that filled the entire canvas. By combining the repeating sqaures with the conditional color change i was able to create an interactive pattern that changes when i move the mouse.

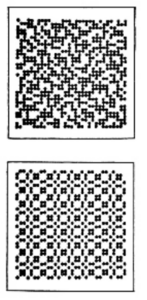
Overall I wanted my artwork to demonstrate new concepts we learnt this week while also the inspiration behind the look of the art work was from the compute graphics art work i saw in the article August 1977 issue of ComputerGraphics and Art as seen in the figure to the left  . (Hertlein, 1977)


Code particularly proud of

// Left half
     if (x < 300 && mouseX < 300) {
       fill('#ed0763');
     }
     // Right half
     else if (x >= 300 && mouseX >= 300) {
       fill('#ed0863');
     }
     // original colour
     else {
       fill('#f41aba');
     }

I was particularly proud of this code as it enabled for the color change to take place. In this code it says when the mouse are is on the left and the squares on the left side then the color  will change however if its on the right change again but if its neither it will stay the otherwise, keep the original color. This code also allowed me specifically to practice carrying out conditional code .

How this was made

I started by setting the screen to 600 × 600 pixels. Then I created a for loop, which allowed the squares to repeat across the screen every 50 pixels. After that, I added conditional statements. The if checks if the square is on the left half of the screen, meaning its squares are positioned where the x is less than 300, and if the mouse is also on the left half. If both things are true, the square change the color. I did the same thing for the right half of the screen.I also added an else  code so that when the mouse is not on the same side as the square, the square stays its original color. I used AI only to help me figure out why my else was not working, and I realized that I needed to include the else to keep the original color.

Reflection

In the future, I would like to create more complex designs, use different shapes, and incorporate animation, as that is something I did not do this time. However, I am overall impressed by how such simple code was able to create an interactive design. Next time, I would also like to learn how to repeat squares in specific parts of the screen instead of having them cover the whole screen. This would allow me to create more complex and interesting patterns.

Reference

Hertlein, G. C. (Ed.). (1977, August). Computer graphics and art (Vol. 2, No. 3). Berkeley Enterprises, Inc. https://doubleobelisk.s3.amazonaws.com/COMPUTER_GRAPHICS_AND_ART_Aug1977.pdf