
My Concept
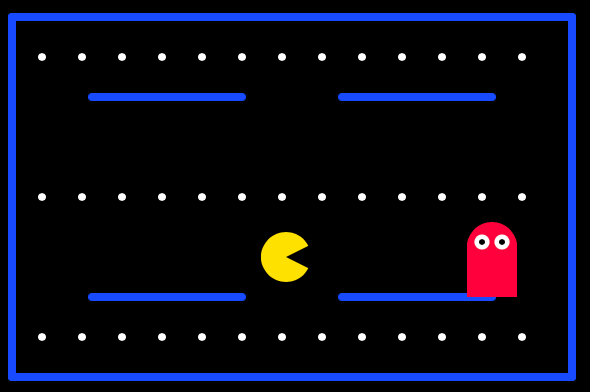
When I thought about making a good piece of art using a for loop, the first idea that came to my mind was a Pac-Man design map. Pac-Man maps contain many repeated dots, so I thought a loop would be a useful way to create something similar without drawing every dot separately. My goal was not to recreate the original game exactly. I wanted to make my own simple maze-chase artwork inspired by it. I used blue lines for the maze, repeated white dots, a yellow player, and a simple red enemy. The yellow character follows the mouse, which makes the artwork interactive.
Code Highlight
The code I am particularly proud of is the loop that creates the dots:
for (let x = 50; x <= 550; x += 40)
circle(x, 60, 8);
circle(x, 340, 8);
I am proud of this part because I did not need to write a separate circle() command for every dot. The variable x starts at 50 and increases by 40 every time the loop repeats. This places the dots across the canvas with equal spaces between them. I used another similar loop to create the row of dots in the middle:
for (let x = 50; x <= 550; x += 40)
circle(x, 200, 8);
function setup() {
  createCanvas(600, 400);
}

function draw() {
  background(0);

  // Maze walls
  stroke(0, 100, 255);
  strokeWeight(8);

  line(20, 20, 580, 20);
  line(20, 380, 580, 380);
  line(20, 20, 20, 380);
  line(580, 20, 580, 380);

  line(100, 100, 250, 100);
  line(350, 100, 500, 100);
  line(100, 300, 250, 300);
  line(350, 300, 500, 300);

  // the top and bottom dots
  noStroke();
  fill(255);

  for (let x = 50; x <= 550; x += 40) {
    circle(x, 60, 8);
    circle(x, 340, 8);
  }

  // another loop to draw dots through the middle
  for (let x = 50; x <= 550; x += 40) {
    circle(x, 200, 8);
  }

  // Player
  circle(mouseX, mouseY, 50);

  // Player's mouth
  fill(0);
  triangle(
    mouseX,
    mouseY,
    mouseX + 30,
    mouseY - 15,
    mouseX + 30,
    mouseY + 15
  );

  // The Enemy
  fill(255, 60, 80);
  circle(500, 250, 50);
  square(475, 250, 50);

  // Enemy eyes
  fill(255);
  circle(490, 245, 15);
  circle(510, 245, 15);

  fill(0);
  circle(490, 245, 6);
  circle(510, 245, 6);
}
Embedded Sketch
How Was This Made?
I first made a black background and used blue line() commands to create the outside border and the simple walls of the maze. I used for() loops to repeat the small white circles across the map. The player was made with a yellow circle() and a black triangle() for its mouth. I used mouseX and mouseY as its coordinates, allowing it to follow the mouse. I also used an “if” and “else” statement to change the player from yellow to orange when it moves from one side of the canvas to the other. The enemy was created from a red circle and square, with smaller circles for its eyes. I referred to the loop and conditional examples from our class materials, specifically from the class Power Points from Week 2. I also used the official p5.js reference to understand the basic drawing commands.
Reflection and Future Improvements
This project helped me understand why loops are useful. Drawing every dot with a separate command would take a long time, but the loop made it shorter and easier to adjust. I also learned that changing the starting position, ending condition, or increment changes how many dots appear and how far apart they are. A challenge I would like to mention is when choosing the coordinates for the maze walls and making sure the dots stayed inside the canvas. I kept the maze simple because I just wanted to use the basic techniques that we covered in class. However, in the future I would like to make the player stay inside the maze walls instead of moving anywhere on the canvas. I could also make the enemy move, add more paths, or make the dots disappear when the player touches them. Chiefly I would like to make it a more realistic and applicable game and theme