Week 4 Text Output Work

let colorData;
let positionData;

async function setup() {
  createCanvas(400, 400);

  // start up information from the 2 CSV files
  colorData = await loadStrings("colors.csv");
  positionData = await loadStrings("positions.csv");

  // pick one color by random
  let myColor = random (colorData);

  // pick one position by random
  let myPosition = random(positionData);

  // keeping the X and Y coordinates separate
  let coordinates = myPosition.split(",");
  let x = Number(coordinates[0]);
  let y = Number(coordinates[1]);

  // Making sure background color is set and understood
  background("gray");

  // Chosen text customization
  textFont("Georgia");
  textSize(50);
  textAlign(CENTER, CENTER);
  fill(myColor.trim());

  // Make sure text is displayed
  text("HHN", x, y);
}

For this assignment, I figured this would be the perfect moment to create a generative output based on a characteristic trait of mine that I often don’t tell too many people about. What is this characteristic trait in question that I speak of? Well, to answer that question, let’s just say that it has something to do with a Halloween event over in Florida, USA, that goes by the name of Halloween Horror Nights or HHN for short; this is an event that i personally adore with each fragment of my heart because of how it gives me the thrilling adrenaline rush of going through its haunted houses based on famous horror films. With this trait of mine mentioned, this is what has fueled me into thinking a way to have this assignment serve as a refreshing reference to what I adore; all while under the idea of presenting this trait of mine in the style of those old DVD screens on the TV where the DVD logo would bounce around the screen and how it would change color whenever it hit a corner. As someone who has grown up with a few memorable enough childhood moments of watching the DVD logo go all over the place and change color each time it hit the TV corners, i knew that i should have the name of my favorite halloween event be displayed within my sketch but in the form of this type of generative text output where each time you run it, the text itself would not only choose to “teleport” to a random spot by random, but also change color by random also!


To make this sketch of mine, i have had to use some of our previous classwork as inspiration for my sketch; this includes the “Hello Amazing Class” sketchwork as well as our other sketchwork that had those two CSV files (“colors.csv” and “circle.csv”) connected to the main sketch in order for the main circle to cycle in changing into colors/appearances if clicked by our mouse. This is how I had the bright idea to try creating two CSV files that were to be connected to my main sketch file, with those two being the “positions.csv” file and “colors.csv” file. Those two would be responsible for not only setting up the colors that are supposed to be the cycle the text is supposed to follow by random, but also the positions that the text too must cycle through randomly but in terms of different spots with the sketch canvas. Once those files were set up, that’s when I had to write in a way that can be described as this: x & y -> coordinates, myPosition -> myColor -> colorData + positionData -> colors.csv + positions.csv. It has simply been about connecting the files with the instructions of my code so that it can be ensured that the text would not only be able to pick a random color and position each time i run my sketch, but also that the coordinates of its x and y are exactly specified if they are to randomly move to an exact spot as intended without sparking confusion. One more thing to mention, is that i need indeed had to ask Ai to assist me in checking my code to see if it shall work; sure enough, it was able to help confirm that my code was indeed ready to go, but not without making a few minor adjustments (i.e. making that the text would be aligned to being centralized on each random spot it goes to rather than drip to the other side unnaturally). Honestly, looking back at this, I honestly feel a little bit happy that I was able to figure out how to create two new files to connect to my main sketch in order to have it operate as it should. It simply felt as if it saved me the trouble of having to figure out where to write the values of the colors and positions on my actual sketch instructions..


All in all, I should consider myself glad with how this sketch seems to look in my eyes. It is able to make its output look different with each time I press the play button to run it, whether it be through color or choice of alternate positions! Since that is the case, then perhaps what I may consider for a few more of my sketch works is the need to create some files of my choosing depending on what I’m working on and how I choose to organize things out without letting them be all over the place. It’s kind of like cable TV, where it’s your obligation to figure out how to organize each cable into connecting to their respective outlets so that the TV will be able to operate as it should be operating. Overall, this is all what I just needed to say about my generative text output workpiece.

Week 4 – Displaying Text

My Concept:
My concept was to do something with the poem “Stopping by Woods on a Snowy Evening” by Robert Frost. Since the assignment was to try displaying text, I thought it’d be good opportunity to go a step further and experiment with something new, and a lot more advanced than what I’m used to.

In the poem, there are certain lines such as “My little horse must think it queer/To stop without a farmhouse near/Between the woods and frozen lake/ The darkest evening of the year.” so I thought it’d be fun to create an image of a man with a horse at night, just like in the poem. Due to the assignment being about displaying text, I thought it’d be fun to have the image be created by text.

Poem:

Stopping by Woods on a Snowy Evening
by Robert Frost

Whose woods these are I think I know.
His house is in the village though;
He will not see me stopping here
To watch his woods fill up with snow.

My little horse must think it queer
To stop without a farmhouse near
Between the woods and frozen lake
The darkest evening of the year.

He gives his harness bells a shake
To ask if there is some mistake.
The only other sound’s the sweep
Of easy wind and downy flake.

The woods are lovely, dark and deep,
But I have promises to keep,
And miles to go before I sleep,
And miles to go before I sleep.

A highlight of code I’m proud of:

function preload(){ 
  winter = loadImage('winter0.jpg');
  txtFile = loadStrings('winter.txt'); //loads in the txt file 
  newFont = loadFont('ArchivoBlack-Regular.ttf'); //loads in new font
}

This feels silly to admit, but I’m honestly most proud of myself for actually figuring out the preload function. Obviously the assignment as a whole was difficult, but I had a lot of videos and resources in order to guide me through most of it. The preload function was the one thing I did not have much information on (I originally tried to put the text file and font directly onto the code without preloading it).

The worst part came after I followed the tutorial for uploading an image. For  some reason, it did not work. I spent a full hour tinkering with the code and growing frustrated because no one else seemed to have the same problem I was. The code itself was perfectly fine, but no matter what I did, the program still found an error.

In the end, after looking through countless reddit posts, I learned that the reason why I couldn’t upload an image was because the current version of p5js couldn’t upload images that well, so I had to go back to version 1.4.0 in order to even begin coding. It feels stupid that that’s the part I struggled with most, but its true.

Embedded Sketch

How this was made
The code was made from, of course, a ton of youtube videos. I first began with watching The Coding Train’s video on how to upload images, and then his video on ASCII Text Images. I used both videos as a jumping off point to tweak the image and code itself. I watched Patt Vira’s tutorial on the same thing, where she revealed to me the image resize code (I had been changing it using a whole other website the entire time before this). I watched Acerola’s video titled “I Tried Turning Games into Text” where I learned that smaller text is probably better. I then also watched Jason Erdreich’s video called ”
How to program custom text and fonts in P5.js” to find a good font for the image (New Courier just didn’t look that great). Lastly, I found The Coding Train’s code about coding a specific text into ASCII in order to turn the poem into the text. (Words are spelt downwards in case you struggle to read the poem. Additionally, the image being resized also makes it hard to read).

I also had some help from random reddit posts that were struggling with the same problem as me. They weren’t the most helpful considering it took me hours to find a solution for the image thing, and also did not help me find a solution as to why the code kept being considered an infinite loop, but it was at least a nice resource to have.

Reflection:
As fun as this was to make, I wish I wasn’t so reliant on tutorials when making it. Obviously it would be harder considering I was making something a little more advanced, but it just felt annoying that anytime I wanted to try something new with the code I couldn’t because of fear I’d mess it up too much. I enjoy actually exploring things with the code, and this specific code felt too complex for me to even try tweaking it too much. It was a fun experience overall though.

Week 4 – Generative Text Output

Concept:

For this week’s assignment, I found myself being more drawn towards using Arabic text, not only because it was something new, but because in my Intro to Digital Humanities class we discussed how different languages can be difficult to represent within digital systems, which can cause certain meanings to get lost in translation. This made me think about how different languages have their own meanings and ways of expressing ideas, especially Arabic. I noticed that in Arabic, one broader concept can be connected to multiple words, each with slightly different meanings and associations, but still relating back to the same overall idea. I wanted to show some of these connections through generative text, so I decided to take three values that are deeply rooted in Emirati culture and display three different Arabic words connected to each one. Through this, I wanted to show how meaning can go beyond a single word.


My Artwork:

Code I am proud of:

function mouseClicked() {
  wordNumber += 1;

  if (wordNumber > 2) {
    wordNumber = 0;
    groupNumber += 1;
  }

  if (groupNumber > 2) {
    groupNumber = 0;
  }
}

The part of my code that I am proudest of would definitely be the mouseclicked() function. I used wordNumber to move through the three Arabic words in each group every time the user clicks. After clicking through all three words, wordNumber resets back to 0 and  groupNumber moves to the next value. I also made groupNumber reset after the final group so that the interaction continues in a loop. I am honestly really proud of this part because I was able to learn and use variables and if statements to control how the whole sketch changes by interacting with it, and it took a lot of trial and error.


How this was made:

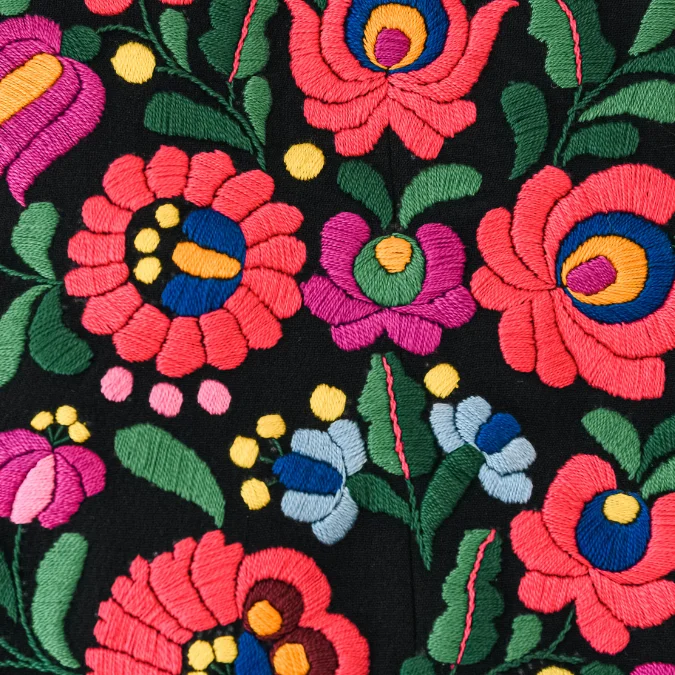
I first created three different arrays to store the Arabic words related to each value: generosity, determination, and unity. I then used wordNumber to keep track of which word was currently being displayed and groupNumber to keep track of which value the user was on. Using the mouseClicked() function and if statements, I made each click move to the next word, and after the three words were displayed, the sketch would move to the next value. I also used different colors and Sadu inspired geometric patterns for each group to visually separate the three values while still connecting the overall design to the UAE.

A lot of the coding for this project was inspired by things we had already covered in class. I kept going back to the lecture notes and previous assignments whenever I got stuck, especially when working with arrays, variables, if statements, and mouseClicked(). Since I had already used arrays and interaction in previous sketches, I tried to take those concepts and apply them in a different way for this project.

One of the biggest challenges I had was getting the Arabic font to display properly. At first, the font I wanted to use was not working correctly with the Arabic text in p5.js. I used the CSS method provided in class and downloaded Noto Kufi Arabic from Google Fonts, then added the font file to my sketch and used textFont(“Arabic”) when displaying the Arabic words. This was something I had never done before, so it took some trial and error to understand how the font file, CSS, and p5js code worked together.

I also wanted the sketch to feel more generative rather than only changing when the user clicked. I experimented with adding faded copies of the current Arabic word into the background and making their size grow. At first, I tried using random() for the text size, but because it was being called continuously inside draw(), the words changed size extremely quickly and looked more like they were flickering. Instead, I created a wordSize variable and gradually increased it using wordSize += 0.5. Once it becomes too large, it resets back to its original size. This gave me a much smoother growing effect while still keeping the generative aspect of the sketch.

Reflections & Future work:

All in all, I am honestly really happy with how the final artwork came out. I thought a lot about the different aspects of the piece and tried to incorporate my culture where possible, while still keeping the meaning behind it clear and easy to understand. I learned a lot through the process, one of the biggest things being how much trial and error is involved in coding. There were multiple times where something as small as a bracket being in the wrong place would stop the interaction from working completely, and figuring out the Arabic font was also much more difficult than I expected. However, I think working through these problems helped me understand my code better rather than just getting it to work.

I also enjoyed experimenting with the visual side of the sketch. At first, the interaction was quite simple, with the words only changing when clicked, but adding the growing words in the background made the final result feel much more dynamic and generative. In the future, I would probably experiment with more ways for the user to interact with the words and patterns, rather than only clicking through them. I would also like to explore more Arabic words and values, since there are so many words that carry meanings and associations that cannot always be represented by a single English word.

Week 4 – Text Art

Concept

For this project, I wanted to make something related to music because I liked the idea of using lyrics as part of the artwork. I decided to make a digital record player inspired by the song “Stupid Song” by Olivia Rodrigo. I wanted the lyrics to move around the record while it spins, almost like the lyrics are physically part of the vinyl. I used light blue colors to match the album and kept the design simple so the main focus would be on the lyrics. I also made the lyrics curve by placing each letter at a different position around the record.

My Artwork

Click on the screen!

Code I’m Proud Of

//separate function because curving every letter would make the draw() function hard to read
function drawCurvedText(words, radius, startAngle) {

  let spacing = 0.035;

  let totalWidth = words.length * spacing;

  let firstAngle = startAngle - totalWidth / 2;

  for (let i = 0; i < words.length; i++) {

// Calculates the position of each letter around the circle
    let letterAngle = firstAngle + i * spacing;

    let x = cos(letterAngle) * radius;
    let y = sin(letterAngle) * radius;

I am most proud of this part of my code because it was the part I struggled with the most. At first I didn’t understand how I could make the lyrics curve around the record without manually placing every letter. I was confused about what sin(), cos(), radius, and spacing were doing together. After experimenting with it, I understood that the for loop goes through each letter and the sin() and cos() calculate a different position for each one. I also made it a separate function so my draw() function would not become too messy. I am proud of this because the curved lyrics are the main part of my artwork and getting them to work made the project finally look how I imagined it.

Resources that helped me:

https://p5js.org/examples/Angles-And-Motion-Sine-Cosine/

https://youtu.be/O5wjXoFrau4?si=XUTff14jizVeiGJ6

https://p5js.org/reference/p5/text/

https://p5js.org/reference/p5/pop/

https://p5js.org/reference/p5/push/

Debugging & Reflection

The curved text was definitely the hardest part for me because I had no idea how to make the lyrics go around a circle at first. I was really confused about what sin() and cos() were even doing and why I needed both x and y. I also thought I would have to write code for every single letter, which would have been horrible. Eventually I understood that the for loop does that for me and gives each letter a slightly different position. I also had to keep changing the radius because at first the lyrics were too close to the record and were hard to read. I looked back at some of the p5.js examples we did in class and used the p5.js references when I got stuck. I had to keep going back and forth with the code and changing numbers until it looked right.

This project made me realize that I actually like experimenting with text and movement in p5.js. I still have a lot to learn and making things move around a specific shape. If I continued working on this I would want to make the record feel more interactive instead of just having it spin. I could make the lyrics change as the record moves or have the user interact with different parts of the record and in the future i definitely want to learn how to include sound in this!

Week 4 Reading Response

Something that I have discovered recently which drives me crazy is installing EditShare on a machine running MacOS. Installing it is a confusing process as it isn’t a straightforward download like any other application. The installer is usually inconsistant and doesn’t display weither you have completed a certain step or if it needs to restart. The lack of feedback is confusing and directly proves Norman’s point. Norman describes feedback as a way for a system to communicate the result of an action to a user. EditShare can improve on this by clearly showing the status of each step and giving specific error messages when something goes wrong. It could also make the installation steps more visible so the user knows what they are expected to do next.

I can apply these principles to interactive media and my projects by making it clear what the user needs to do to get interactivity. One of the main ways I could achieve that is by using signifiers such as changes in color, movement, text, or symbols to indicate interaction. Norman explains that signifiers communicate where an action should take place. I can also give immediate feedback by having an object change appearance to signify that the action has been successfully completed.

Week4_Artwork

Concept

My inspiration for this piece came from the Joker. I wanted to take a twist from his personality, that mix of humor and fear where you never know what he’s going to do next, and put it into an artwork. At first I wanted to draw him and have his iconic HAHA laugh be the center of the piece. Then I changed my mind and turned it into a question-and-answer mystery. The piece looks calm and professional at first, with a clean box that says “ASK ME ANYTHING… if you dare.” The moment you ask something, the input disappears, the screen flickers, and a creepy grin with glowing red eyes takes over, laughing that it’s not answering anything. I wanted it to catch people by surprise, because they expect an answer and instead get laughed at, which is exactly the kind of trick the Joker would pull.

Code I am proud of

let t = frameCount - start;
  if (t < 70) drawAsk("Hmm... let me think...");
  else if (t < 100) random() < 0.4 ? background(0) : drawAsk("..."); 
    // flicker
  else drawScary(t);

When the user asks a question, I save the frame it happened on. By subtracting that from the current frame, I always know how long it’s been. First it pretends to think, then it glitches between the box and a black screen, and then the scary face takes over. It’s only a few lines, but it builds the whole suspense of the piece. I also like that the input box hides itself with input.hide(). The user can’t type anymore, which makes it feel like the program has taken control away from them.

How this was made

I made this in the p5.js web editor using JavaScript, and the sketch is split into a few functions that each do one job. In setup(), I create the canvas and build the text box and ASK button with createInput() and createButton(). I styled both with .style() so they match the black and red theme. The ask() function runs when the user presses Enter or clicks ASK. It checks that the box isn’t empty, saves the current frameCount as the start time, switches the mode from “ask” to “scary”, and hides the input and button so the user can’t type anymore.

The draw() function uses that saved start time to move through the stages. For the first 70 frames it shows “Hmm… let me think…”, then it flickers randomly between the box and a black screen, and after that it switches to the scary scene. After a few seconds it resets and shows the input again. The drawAsk() function draws the title and the rectangle and makes the message type out letter by letter. It does this by increasing a counter each frame and using substring() to show only part of the text. Finally, drawScary() draws the glowing red eyes with ellipse() and the jagged grin with a loop of vertices using sin() to curve it. It also shakes the whole screen with translate() and random values and fades everything in by raising the transparency over time.

Reflection

This project connected a lot to the Don Norman reading. I used signifiers on purpose, like the placeholder “Type your question…” and the ASK button, so the user knows exactly what to do. Then I broke the feedback they expect, because instead of an answer, they get laughed at. It made me realize that knowing the rules of good design also lets you break them on purpose to create a feeling, in this case fear and surprise. If I had more time, I would add sound, like an actual laugh playing when the face appears, and make the grin animate so it slowly stretches wider. I’d also like the face to react differently depending on what the user typed, so the piece feels more alive and personal.

Week 4 – Generative Text Output

Concept

For this project, I decided to create a Football Player Stats program because I really love football and I am also really interested in individual player statistics. I wanted to make something that was not only interactive but also connected to something I personally enjoy. The program allows the user to click on different football players and view their all-time goals, assists, and appearances.

I used a CSV file to store the player information and then displayed the information in p5.js. My goal was to make the program simple to use while still making it interactive. Instead of displaying every player’s statistics at the same time, I made buttons for each player so the user can select the player they are interested in.

Code I Am Proud Of

The part of the code I am most proud of is the mousePressed() function because it is what makes the player buttons actually work.

function mousePressed() {
  // Check each player button to see if it was clicked
  for (let i = 0; i < players.length; i++) {
    
    let x = 50 + i * (buttonWidth + spacing);

    // Check if mouse is inside the rectangle(current button)
    if (
      mouseX > x &&
      mouseX < x + buttonWidth &&
      mouseY > buttonY &&
      mouseY < buttonY + buttonHeight
    ) {
      // Store the index of the clicked player
      selectedIndividual = i;
    }
  }

I am proud of this because I had to understand how the mouse position relates to the position and size of each button. The program checks whether the mouse is inside the boundaries of a button and then stores the index of that player. This index is later used to display the correct statistics.

Using a loop made things a bit easy because I did not have to write separate code for every player. The same code works for all of the players in the CSV file.

Implementation

I first created an array called players to store the information from the CSV file. But it was hard getting the CSV file to load correctly. It was really tough to find a method that worked with the latest version of p5.js. I searched online and watched YouTube videos, but I could not get the methods I found to work. I kept getting error messages. To solve this, I thought to asked ChatGPT “How to load things from a CSV file on the latest version of p5.js?” I pasted the error message I was getting when I used one of the methods I found online. From this, I learned how async, await, and fetch can be used together to load an external file. I also learned that “await response.text()” takes the contents of the CSV file and converts them into text that the program can use. This experience taught me that sometimes the code from an older tutorial may not work exactly the same way with a newer version of a library.

I then used .split() to separate the CSV into rows and values. After loading the data, I created a button for each player using a for loop. The position of each button is calculated based on its index, which allows the buttons to be placed next to each other without manually positioning every button. When a player button is clicked, selectedIndividual is changed to that player’s index. The draw() function then uses that index to find the player’s information and display their name, goals, assists, and appearances.

Reflection

Another challenge I faced was making the buttons actually select the correct player. At first, I thought I would have to manually set the values and positions of each button and then check whether the mouseX and mouseY were over each individual button. However, I realized that this would make the code much longer and more complicated. Then it clicked that I could use the same calculations I was already using to create the buttons. Since the for loop already calculates the x-position of each button using the player’s index, I could use that same x-position in mousePressed() and check whether the mouse was inside the button’s boundaries. I used mouseX and mouseY to compare the mouse position with the button’s x and y positions. Once I detected which button was clicked, I stored its index in selectedIndividual, which allowed the program to display the correct player’s statistics.

Overall, I am happy with this project because I was able to create something based on one of my interests while also learning more about arrays, loops, mouse interaction, and external data. If I continued developing this project, I would add more players and statistics and improve the visual design. I could also add player photos, positions, teams, or a feature that allows the user to compare two players. This would make the program more interactive and give the user more ways to explore the football statistics.

Week 4 – Reading Response – The Design of Everyday Things

What stuck with me most about Norman’s chapter isn’t the terminology itself but his point that struggling with a simple object like a door is a design failure, not personal stupidity. That felt oddly validating because I think most of us walk around quietly blaming ourselves for these tiny daily failures, when really we’re just reacting normally to objects that were never designed to communicate clearly with us in the first place.

What’s something that’s not mentioned in the reading but drives me crazy is the motion sensors in soap dispensers in public bathrooms. There’s no signifier at all, no marked spot to wave your hand under, no light indicating the sensor even exists, so you end up doing this awkward hovering ritual in front of a sink hoping something happens. Half the time people assume it’s broken and move to the next one, when really the person standing in the exact invisible zone the sensor is calibrated to detect. It’s a perfect example of an affordance (motion detection) existing with basically zero signifier attached to it. I think this issue could be fixed by putting a small laser light that always points where your hand should go. This would

Applying this to interactive media, I feel that usability isn’t just about clear individual buttons, it depends on whether the user builds an accurate mental model of how the entire system is organized. Take an app with swipe versus tap gestures: if swiping left archives an email but swiping right deletes it, and there’s no visual cue distinguishing the two outcomes beforehand, users are essentially relying on trial and error. That means even if each gesture technically works fine, the app still feels confusing unless the user has a clear, accurate picture of how all the gestures fit together. So Norman’s principles apply here too: good design isn’t just about signifiers on individual elements, it’s about making sure the whole system builds a conceptual model the user can actually predict and rely on.

Week 4_Data Visualization

Concept

As a big movie lover, I decided to visualize the popularity of movies released this year by creating a movie theater. I used worldwide box-office gross as a measure of popularity, with each audience member representing a fixed amount of revenue. Therefore, the higher the movie’s gross, the larger the audience in the theater.

Progress

I started by splitting the data into the movie name and its gross revenue, then adding them to the movies array I created. After that, I began working on the visuals, such as the seats and projector. I also added yellow light coming from the projector to make it more cinematic. I then created the circles that represent the audience and had them spawn on random seats. I did not want the audience to look too messy, so I used specific Y-coordinates that are chosen randomly, which keeps the circles organized while still making their positions feel random.

To make it easier to distinguish the large number of audience members, I also changed the color range of the circles instead of having them all be the same color. Finally, I calculated the number of circles based on each movie’s gross revenue by dividing it by 10 million. I felt that this was a reasonable scale because it allowed the differences in revenue to be visible without creating an overwhelming number of circles.

My Code Highlight

What I am most proud of is the interactive part of the project. It was a bit tricky, especially figuring out the calculations and making the number of audience circles change depending on which movie is selected. I used conditions based on where the mouse was clicked to determine which movie was selected. To make the interaction more obvious, I also changed the button color when it was clicked so it is clear which movie is currently selected.

One cool thing I learned was how to add my own font. I had to add the font link to the index.html file, and then I was able to use the font in my p5.js project.

//////CHANGE NUMBER OF AUDIENCE WHEN CLICKING ON A MOVIE//////
function mouseClicked() {
  for (let i = 0; i < movies.length; i++) {
    let x;
    let y;

    if (i < 3) {
      x = 45 + i * 185;
      y = 40;
    } else {
      x = 140 + (i - 3) * 185;
      y = 140;
    }
    if (mouseX > x && mouseX < x + 140 && mouseY > y && mouseY < y + 70) {
      selectedMovie = i;
/////RESET CIRCLES AND DRAW NEW ONES WHEN CLICKING ON A MOVIE//////
audience = [];
drawAudience();
    }
  }
}

Reflection

I’m really proud of this project, and I think I utilized the things I learned in a good way. If I were to improve it in the future, I would spend more time making the visuals more detailed, such as adding more realistic theater elements and improving the layout and typography. I would also like to give the user more options, such as adding more movies to choose from or allowing them to interact with the audience in different ways.

Generative Text Output – Week 4

Concept:

The idea of generating a sketch from text intimidated me at first. I started playing around with random text movements and then came across a cool spiral design (link). This inspired me to create a text spiral. For this project, I used a (‘cringy’) poem called “Middle” that I had written when I was fourteen. It is about a woman trapped in stasis: rooted in place, silenced, and stuck “in the middle of it all” while everything around her keeps changing. I thought that it really fits the spiral imagery, as this shape never closes into a loop. It can keep extending outward indefinitely. Then, I wanted to incorporate this idea of constant change, which is why I added a text box where the user could add words that they want. The user can reset the spiral with the reset button.

Embedded Sketch:

Process:

To make the spiral, I referred to this link as well as the p5 reference page. Following my reference image,


I tried to change the colours of each word slightly in order to create a rainbow effect. I also added some movement by using frame rate. For the buttons, I was inspired by the work of a previous student, Adit Chopra) on the IM website (Link). In my code, I managed to allow the user to add however many words they would like, and it would still appear as a spiral not going outside the canvas. Here is some code I am really proud of:

let newWords = raw.split(/\s+/); //supports adding more than one word at once!!
for (let i = 0; i < newWords.length; i++) {
let wordHue = (words.length * 27) % 360;
words.push(new WordModel(newWords[i], words.length, wordHue));
HueShift = (HueShift + 22) % 360; //Shifts the color of every word already present as the new word is added
}
input.value("");
}

I catered for the user entering multiple words at once. I used Claude’s help to be able to do this. But, to be honest, I am happy to have been able to even do a spiral with changing hues.

//The words are smaller at the start and grow progressively bigger
let h = (this.hue + HueShift) % 360;

noStroke();
fill(h, 55, 92);

if (this.index < ShrinkCount) {
  BaseSize = map(this.index, 0, ShrinkCount, 4, 9)
}
textSize(BaseSize * this.scale);
text(this.txt, 0, 0);
pop();

In the beginning, the words at the center were overwriting each other because of how little space they had. Then, I used ShrinkCount to make the ones at the center smaller and allowed the words to grow bigger towards the end of the spiral.

Reflection:

I like what I did for this assignment, especially that it reminded me of young Leyanah. I am grateful that I have been able to “interact” with her through my work. Still, on a more technical basis, next, I would work on ensuring that none of the words overlap. Right now, some very long words are slightly overlapping with others. On a side note, I am glad that I have tried to apply Norman’s signifiers (adding a reset and add button) to my work, since none of my previous work prompted the user. I hope that some people play around with my spiral and add in words that could continue the poem, or really just be experimental and make something cool (maybe entering many $ signs to make a design? Why not?)