The main concept of “I See Sound” is to create an immersive experience with users and music by visualizing their favorite songs. By using 2 sensors, users are able to switch shapes and colors giving them a stylistic hand in the visualization. The aim is to put I See Sound in settings where upbeat music is played, for example in concerts, musical installations, parties, etc.
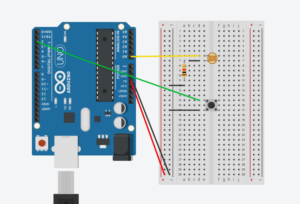
Arduino and p5.js scripts work together to create a dynamic audio-visual experience that responds to audio inputs via a photocell and a button. The Arduino script continuously monitors the environment through a photocell and a button. The photocell measures the light level and this data is read and printed. This value is then printed and sent to P5.js via serial communication. Additionally, the Arduino script checks for the state of a button. When pressed, it sends a specific command (“changeShape”) to the p5.js script. The combination of these sensors act as the main communication medium between users and the visualization.
The Arduino sends data values that include light levels and control commands, which the p5.js script reads and implements in different functions. This script is designed to respond to these inputs by altering visual and audio outputs accordingly. For example, higher light levels can result in brighter visuals, while pressing the button changes the visual form, demonstrating a real-time interactionbetween the user’s physical environment and the digital representation.
Arduino Code:
int photocellPin = 0;
int photocellReading;
int buttonPin = 2;
int buttonState = 0;

void setup() {
  Serial.begin(9600);
  pinMode(buttonPin, INPUT);
}

void loop() {
  photocellReading = analogRead(photocellPin);
  photocellReading = 1023 - photocellReading;
  Serial.println(photocellReading);

  buttonState = digitalRead(buttonPin);
  if (buttonState == HIGH) {
    Serial.println("changeShape");
    delay(200);
  }
  delay(100);
}
p5.js Code:
let dj =0;

let sound, amplitude;
let currentShape = 'ellipse';
let currentState = 'startScreen';
let photocellData = 0;

function preload() {

  sound = loadSound('sounds/aroundme.mp3');
  startScreenImage = loadImage('P5 DJ.gif');
}

function setup() {
  let cnv = createCanvas(700, 600);
  amplitude = new p5.Amplitude();
  noiseSeed(millis());

}

function draw() {
  if (currentState == 'startScreen') {
    displayStartScreen();
  } else if (currentState == 'running') {
    runVisualization();
  }
}

function displayStartScreen() {
  background(startScreenImage);
}

function runVisualization(){
  let level = amplitude.getLevel();
  photocellBackground();

  let numShapes = int(map(level, 0, 5, 15, 30));


  for (let i = 0; i < numShapes; i++) {
    let angleOffset = TWO_PI / numShapes * i;
    let x = width / 2 + 4 * (sin(frameCount * 0.02 + angleOffset) * 100 * noise(0.001 * frameCount + i));
    let y = height / 2 + 4 * (cos(frameCount * 0.02 + angleOffset) * 100 * noise(0.001 * frameCount + 100 + i));
    let size1 = map(sin(frameCount * 0.1 + angleOffset), -1, 1, 10, 100);

    let myColor = color(255 * noise(i), 255 * noise(i + 10), 255 * noise(i + 20), 200);
    fill(myColor);
    let colors = ['red', 'blue', 'green', 'purple', 'maroon'];
    let chosenColor = random(colors)
    stroke(chosenColor);
    strokeWeight(map(level, 0, 1, 10, 100));

    switch (currentShape) {
      case 'ellipse':
        ellipse(x, y, size1, size1);
        break;
      case 'rectangle':
        rect(x, y, size1, size1);
        break;
      case 'triangle':
        triangle(x - size1 * 0.4, y + size1 * 0.4, x, y - size1 * 0.4, x + size1, y + size1 * 0.4);
        break;
      case 'star':
        drawStar(x, y, 5, size1 * 0.8, size1 * 0.4);
        break;
      case 'spiral':
        drawSpiral(x, y, size1 * 0.8);
        break;
    }
  }
}

function photocellBackground() {
  background(map(photocellData, 0, 1023, 0, 255));

}

function togglePlay() {
  if (sound.isPlaying()) {
    sound.pause();
  } else {
    sound.loop();
    amplitude.setInput(sound);
  }
}

function changeShape() {
  const shapes = ['ellipse', 'rectangle', 'triangle', 'star', 'spiral'];
  let index = shapes.indexOf(currentShape);
  currentShape = shapes[(index + 1) % shapes.length];
}

function drawStar(x, y, points, radius1, radius2) {
  let angle = TWO_PI / points;
  let halfAngle = angle / 2.0;
  beginShape();
  for (let a = 0; a < TWO_PI; a += angle) {
    let sx = x + cos(a) * radius2;
    let sy = y + sin(a) * radius2;
    vertex(sx, sy);
    sx = x + cos(a + halfAngle) * radius1;
    sy = y + sin(a + halfAngle) * radius1;
    vertex(sx, sy);
  }
  endShape(CLOSE);
}

function drawSpiral(x, y, maxRadius) {
  let angle = 0;
  let endRadius = 0;
  beginShape();
  while (endRadius < maxRadius) {
    let sx = x + cos(angle) * endRadius;
    let sy = y + sin(angle) * endRadius;
    vertex(sx, sy);
    angle += 0.1;
    endRadius += 0.5;
  }
  endShape();
}


function keyPressed() {
  if (key == " " && currentState == 'startScreen') {
    setUpSerial();
    waitForSerial();
  }
}

function waitForSerial() {
    if (serialActive) {
        currentState = 'running';
        togglePlay();
    } else {
        console.log("Waiting for serial connection.. Press Space to Connect.");
        setTimeout(waitForSerial, 10);
    }
}

  ////////////////////////////////////
  //READ FROM ARDUINO HERE
  ////////////////////////////////////
function readSerial(data){
if (data != null) {
    let fromArduino = data;
    if (fromArduino.length >= 1) {
      dj = int(data);
      print(dj)
      // Echo = int(fromArduino[1]);
      console.log(data);  // Print data for debugging
      if (data.trim() === "changeShape") {
        changeShape();  // Change the shape if the correct command is received
      }
      if (data.trim() === "photocellReading")
        photocellBackground();
    }

    // //////////////////////////////////
    // //SEND TO ARDUINO HERE (handshake)
    // //////////////////////////////////
    let sendToArduino = -1;
    writeSerial(sendToArduino);
}
}
Overall, I am particularly proud of myself because I really did try my best, as a beginner I found it hard to even wrap my head around most of the stuff and I am honestly very proud of myself. During the process, I didn’t feel as confident at some point however I seeked out different resources such as Berney Codes, asked some of my classmates for help (Thank You Sarah), and used ChatGPT to help me understand serial communication and revise errors in codes, as well as in creating shapes. In the future, however, I would definitely work on the interaction part more, as well as stylistic choices. I did adapt this project from the p5.Amplitude library.
During user testing, while understanding the visualization was easy, users found it hard to figure out how to interact with the visualization.
The point of error was that there was no clear indication of what to do, a major design aspect I’ve overlooked. Eventually, however, the users understand that in the arduino circuit, the photocell is able to switch the colors of the beat in accordance with the light. And, to some I had to explain exactly what the sensor did since it isn’t clear when you first try it.
The p5.Amplitude library enabled the visualization consistency with any audio input, my friends who have tested this asked to add their own music and the code worked very well 99% of the time, the remaining 1% is that this only works well with upbeat music with heavy drums.
There is definitely more area for improvement in a number of things. It would be nice if the interactivity experience was elevated to a couple of sensors which would make the experience more inclusive to the users. Also another aspect would be the color palette for the overall look, while the rainbow is definitely beautiful a color palette that is consistent would be calmer and less disturbing for the eye. Additionally, I am still in the process of designing a cover page rather than the instructions in the top left corners.
For my final project, I delved into graphic design, culminating in the creation of a cooking game called “Mansaf Teta.” This game is a symbol of Palestinian culture, centered around the preparation of a traditional dish. Named after the colloquial term for “Grandma’s Mansaf,
” it aims to encapsulate the essence of Palestinian culinary heritage.
The gameplay involves a series of interactive cooking actions, each tied
to a physical component controlled by an Arduino board. The first step is cooking the lamb, where players gauge the ideal temperature using a potentiometer. Next, stirring the “laban” (fermented dried yogurt) is simulated using one button to create a stirring motion. Finally, the addition of garnish is triggered by another button, offering players a holistic cooking experience.
My favorite part of the code involves programming the potentiometer and working with images to create a visualization of the stove, shown below:
  if (typeof val1 !== 'undefined') {
    //console.log("val1:", val1);
    // Respond to temperature
    if (val1 < 500) {
      image(toocold, 0, 0, w, h);
      print("checking here: "+valInRangeTime)
      valInRangeTime += deltaTime; // Add the time elapsed since the last frame to the timer
      if (valInRangeTime >= 2000) { // Check if val1 remains in range for more than 3 seconds
        print("going to next image")
        background(next1); // Display the image
        if (mouseIsPressed && mouseIsPressed && mouseX > w / 4 && mouseY > h / 2) {
          gameState = 3; //go to first part
        }
      }
    } else {
      // If val1 goes out of range, reset the timer
      valInRangeTime = 0;
    }
  }
}
Throughout the game-making process, I encountered challenges, especially with establishing a stable serial connection and some game logic. However, with help and guidance from professor and problem-solving skills, I managed to overcome these obstacles and bring my thoughts into a final product.
Looking ahead, I would add more to this project. This includes expanding the variety of sensors on the Arduino board to introduce more nuanced interactions and incorporating additional audio effects to heighten immersion.
Despite these challenges, I take pride in the design and color palette of the game, which I believe enhances the overall experience for players, immersing them in the rich tapestry of Palestinian culinary culture.
It was easy to come up with an overall abstract direction for the final project as I had set my mind early on to revisit the butterfly motif in different ways throughout the course. As for the actual concept behind the final, I wanted to experiment with something more centered around interaction and visuals in an installation-like manner and explore a new mode of design that I have not tapped into yet. After iterations and iterations of deliberations and conversations with Professor Aaron, I settled on creating a small piece centered around a mechanical butterfly that flutters when touched. The butterfly would be mounted atop a physical canvas, onto which p5-generated animations would be mapped and projected. The idea was to create a cohesive piece, with the hardware and the software working hand-in-hand to bring some life to a butterfly.
The mechanical butterfly is constructed out of two servo motors, with one moving at an angle supplementary to that of the other. The butterfly wings are printed on paper, laminated, cut, and attached to the servo motor blades. The butterfly “senses” touch through its antennas. My mechanical butterfly’s antennas are made of wires stripped, twisted to shape, and connected to a touch capacitive sensor. I used a box, which I wrapped with multiple layers of white paper and decorated with flowers (to look like the butterfly is in a flower field), with an opening for the Arduino and the circuit.
Interaction Design
For this piece, I wanted to emphasize designing a relatively simple interaction optimally well. The name I chose for the piece, “Pet-A-Butterfly” would be displayed to the user and would act as a signifier to touch the butterfly. The placement of the butterfly antennas opposite the user is intentional to maximize the probability that a user strokes the wires in the chance that they do not realize the antennas are to be touched. The user can interact with the piece by touching the butterfly antennas. Once touched, the butterfly wings flap, and a kaleidoscope of small p5-generated/projected butterflies emerge from beneath the butterfly and move outward in a synergistic, spiral motion.
Implementation
Arduino
The Arduino program gets the input from the sensor through the touched()method, which returns an 8-bit value representing the touch state of all pins, and sends it to the p5 sketch through serial communication. The program also gets the current status of the butterfly movement from the p5 sketch program. If the status is 1 (the butterfly is moving), the servo motor positions are updated every interval seconds. The angles of the motors are constrained to the range [25,50] and the direction of each motor’s movement alternates after each range span to achieve the flapping movement. The Arduino program also sends the current servo position to the p5 sketch to ensure the sketch only stops the butterfly animation if the servos are in the maximum angle position, ensuring the flapping stops when the wings are maximally spread.
Below is the full Arduino sketch:
/***************************************************
  This is a library for the CAP1188 I2C/SPI 8-chan Capacitive Sensor

  Designed specifically to work with the CAP1188 sensor from Adafruit
  ----> https://www.adafruit.com/products/1602

  These sensors use I2C/SPI to communicate, 2+ pins are required to
  interface
  Adafruit invests time and resources providing this open source code,
  please support Adafruit and open-source hardware by purchasing
  products from Adafruit!

  Written by Limor Fried/Ladyada for Adafruit Industries.
  BSD license, all text above must be included in any redistribution
 ****************************************************/

#include <Wire.h>
#include <SPI.h>
#include <Adafruit_CAP1188.h>
#include <Servo.h>

// Reset Pin is used for I2C or SPI
#define CAP1188_RESET  9

// CS pin is used for software or hardware SPI
#define CAP1188_CS  10

// These are defined for software SPI, for hardware SPI, check your
// board's SPI pins in the Arduino documentation
#define CAP1188_MOSI  11
#define CAP1188_MISO  12
#define CAP1188_CLK  13

#define CAP1188_SENSITIVITY 0x1F
// For I2C, connect SDA to your Arduino's SDA pin, SCL to SCL pin
// On UNO/Duemilanove/etc, SDA == Analog 4, SCL == Analog 5
// On Leonardo/Micro, SDA == Digital 2, SCL == Digital 3
// On Mega/ADK/Due, SDA == Digital 20, SCL == Digital 21

// Use I2C, no reset pin!
Adafruit_CAP1188 cap = Adafruit_CAP1188();

// Or...Use I2C, with reset pin
//Adafruit_CAP1188 cap = Adafruit_CAP1188(CAP1188_RESET);

// Or... Hardware SPI, CS pin & reset pin
// Adafruit_CAP1188 cap = Adafruit_CAP1188(CAP1188_CS, CAP1188_RESET);

// Or.. Software SPI: clock, miso, mosi, cs, reset
//Adafruit_CAP1188 cap = Adafruit_CAP1188(CAP1188_CLK, CAP1188_MISO, CAP1188_MOSI, CAP1188_CS, CAP1188_RESET);

// make a servo object
Servo servoRight;
Servo servoLeft;

// servo pposition
int position=50;
// direction of wing movement
boolean direction = true;

unsigned long previousMillis = 0;
const long interval = 100;  // interval between each wing flap in milliseconds

void setup() {
  Serial.begin(9600);
  Serial.println("CAP1188 test!");

  // Initialize the sensor, if using i2c you can pass in the i2c address
  if (!cap.begin(0x28)) {
  if (!cap.begin()) {
    while (1);
  }
  cap.writeRegister(CAP1188_SENSITIVITY, 0x5F);
  // attach the servo to pin 9
  servoRight.attach(11);
  servoLeft.attach(5);
  // write the position
  servoRight.write(180- position);
  servoLeft.write(position);
  // // start the handshake
  while (Serial.available() <= 0) {
    digitalWrite(LED_BUILTIN, HIGH); // on/blink while waiting for serial data
    Serial.println("0"); // send a starting message
    delay(300);            // wait 1/3 second
    digitalWrite(LED_BUILTIN, LOW);
    delay(50);
  }
}
}

void loop() {
  // wait for data from p5 before doing something

  while (Serial.available()) {
    uint8_t touched = cap.touched();
    int isMoving = Serial.parseInt(); // check if butterfly is still moving
    Serial.print(touched);
    Serial.print(',');
    if (isMoving == 1) {
        unsigned long currentMillis = millis();
        // check if it's time to update the wing position
        if (currentMillis - previousMillis >= interval) {
            // move servos to simulate wing flapping motion
            if (direction) {
                position += 10;
                if (position >= 50) { // flip direction twhen max angle is reached
                    direction = false;
                }
            } else {
                position -= 10;
                if (position <= 25) {
                    direction = true;
                }
            }
            // move servos in opposite directions
            servoRight.write(180-position);
            servoLeft.write(position);

            previousMillis = currentMillis;
          }
      };
    Serial.println(position); // send servc position to p5 sketch
  }
  digitalWrite(LED_BUILTIN, LOW);
}
P5
The p5 sketch is mainly responsible for triggering the animation of the smaller butterflies and for performing projection mapping which is essential for ensuring that the canvas of the sketch can always be calibrated to fit the surface of the physical box. For the latter, I made use of the p5.mapper library to create a quad map that could be calibrated to match the aspect ratios of the box’s surface dynamically. By pressing the ‘c’ key, the map’s points can be toggled and moved appropriately. This eliminated the challenge of having to align the projector height consistently across locations and manually configuring the sketch’s canvas dimensions to match the surface. After calibrating the map, the p5 program can save the map in a json file to be loaded with every program run by pressing the ‘s’ key. This code snippet of the setup()function shows how to initialize a map object and load an existing map configuration.
function setup() {
  createCanvas(windowWidth, windowHeight, WEBGL);

  // create mapper object
  pMapper = createProjectionMapper(this);
  quadMap = pMapper.createQuadMap(mapWidth, mapHeight);

  // loads calibration in the "maps" directory
  pMapper.load("maps/map.json");

  // initialize objects
  bigButterfly = new Butterfly(
    centerX,
    centerY,
    null,
    null,
    null,
    null,
    null,
    false,
    false,
    null,
    null,
    false
  ); // dummy butterfly object simulating the state of the physical butterfly
  interaction = new Interaction(); // an interaction object that handles all interaction-related animations

  // play background music in loop
  backgroundMusic.loop();
}
To implement the animation, I created an Interaction class that would start and display the animation of the butterflies in a method called play(). This method would be the argument to a function of the pMapper object called displaySketch that would handle displaying the sketch only within the map’s bounds.
// class that controls the animation trigger by the interaction
class Interaction {
  constructor() {
    this.bigButterfly = bigButterfly; // the butterfly object containing information about the physical butterfly in the center
    this.smallButterflies = []; // array that stores the smaller butterflies whose animation is triggered and displayed when signal is received from arduion
    this.numButterflies = 100; // number of small butterflies
    this.inTheCenter = this.numButterflies; // number of butterflies in the center
    // initialize randomly colored butterfly objects and append to the smallButterflies array
    let randomNum;
    for (let i = 0; i < this.numButterflies; i++) {
      randomNum = random([1, 2, 3]);
      if (randomNum == 1) {
        this.smallButterflies.push(
          new SmallButterfly(
            centerX,
            centerY,
            smallButterflySpritesheet2,
            4,
            10,
            0,
            3,
            true,
            false,
            null,
            null,
            false
          )
        );
      }
      else if (randomNum == 2){
        this.smallButterflies.push(
        new SmallButterfly(
            centerX,
            centerY,
            smallButterflySpritesheet1,
            4,
            10,
            0,
            5,
            true,
            false,
            null,
            null,
            false
          )
        );
      }
      else if (randomNum == 3){
        this.smallButterflies.push(
          new SmallButterfly(
              centerX,
              centerY,
              smallButterflySpritesheet3,
              4,
              10,
              0,
              13,
              true,
              false,
              null,
              null,
              false
            )
          );
      }
    }
  }

  play(pg) {
    /* function that controls that controls the sketch
    display -> passed to mappper object's displaySketch function
    */
    pg.clear();
    pg.push();
    pg.background(color("#B2D2A2"));
    // display instructions text only before connecting to serial
    if (textShow){
        pg.push()
        pg.fill(color("#2c4c3b"))
        pg.textFont(font);
        pg.textAlign(CENTER);
        pg.textSize(16)
        pg.text(textString, centerX+20, centerY+150);
        pg.pop()
    }

    // display butterflies
    for (let i = 0; i < interaction.numButterflies; i++) {
      pg.push();
      let angle = radians(180);
      pg.translate(
        interaction.smallButterflies[i].x,
        interaction.smallButterflies[i].y
      );
      pg.rotate(angle); // rotate butterflies 180 degrees --> better visibility for the user
      if (interaction.smallButterflies[i].moving) { // display the small butterfly if it's moving
        pg.image(interaction.smallButterflies[i].show(), 0, 0, 40, 40);
        interaction.smallButterflies[i].move(); // update movement of butterflies
      }
      pg.pop();
    }

    pg.push();

    // ellipse enclosing projected surface area of the physical butterfly
    pg.fill(color("#B2D2A4"));
    // pg.fill(color("black"))
    pg.noStroke();
    // pg.ellipse(215, 180, butterflyWidth, butterflyHeight)
    pg.pop();

    // stop butterfly from moving after a set time has elapsed and only if the
    // position of the servo is in the right direction
    if (millis() - movementTime >= interval && servoPos == 50) {
      bigButterfly.moving = false;
    }
  }
}
The movement of the butterflies follows a spiral-like path, originating outward and around the physical butterfly. It is implemented in a method of thesmallButterflyclass which inherits from a parent Butterflyclass. Here is a code snippet showing the implementation of the path movement in the smallButterflyclass :
move() {
  // update the step of the animation
  if (frameCount % this.animationSpeed == 0) {
    this.step = (this.step + this.animationDir * 1) % this.numSpritesCol;
  }

  // control the direction of the sprite movement as spritesheet must be traversed back and forth to display correct movement
  if (this.step == 0) {
    this.animationDir = 1;
  } else if (this.step == this.numSpritesCol - 1) {
    this.animationDir = -1;
  }
    // update the x and y positions based on the current angle and radius
    this.x = centerX + cos(this.angle)* this.radius + random(-0.5,0.5);
    this.y = centerY + sin(this.angle)* this.radius + random(-0.5,0.5);
    this.angle += this.angleSpeed; // increment angle to move the butterfly along a circular path
    this.radius += this.radiusSpeed; // increment the radius to move the butterfly outward


  // move back to center if butterfly exceeds the bounds
  if (this.x < minX || this.y < minY || this.x > maxX || this.y > maxY) {
    this.x = centerX;
    this.y = centerY;
    interaction.inTheCenter += 1; // butterfly is now counted as being in the center
    this.moving = false; // stop butterfly from moving

  // update angle and radius speed parameters to random values
    this.angleSpeed = random(-0.02, 0.02);
    this.radiusSpeed = random(0.5,1.2);
    this.angle = 0;
    this.radius = 0;
  }
  // flip butterfly direction depending on location in the sketch
  if (this.x < centerX && this.sprites.length > 1) {
    this.dir = 1;
  } else {
    this.dir = 0;
  }
}
When the p5 sketch receives the touch state and servo position from Arduino, it sets the moving attribute of both the butterfly object simulating the physical butterfly in the sketch and the small butterflies to true. It also starts the timer, as the physical butterfly should only stop moving after 6 seconds have elapsed and if the servos are in the right position:
function readSerial(data) {
  ////////////////////////////////////
  //READ FROM ARDUINO HERE
  ////////////////////////////////////

  if (data != null) {
    // make sure there is actually a message
    let fromArduino = data;
    // if the right length, then proceed
    if (fromArduino.length > 0) {
      // get value only when data sent from arduino is greater than 0
      fromArduino = split(trim(fromArduino), ",");
      touchSensorVal = int(fromArduino[0]); // get touch sensor val
      servoPos = int(fromArduino[1]); // get servo pos
      if (touchSensorVal >= 1) { // if sensor is touched, set the bigButterfly moving attribut to true
        interaction.bigButterfly.moving = true;

        movementTime = millis(); // record starting movement time
        interaction.inTheCenter = 0;
        // move smaller butterflies
        for (let i = 0; i < interaction.numButterflies; i++) {
          interaction.smallButterflies[i].moving = true;
        }
      }
    }

    //////////////////////////////////
    //SEND TO ARDUINO HERE (handshake)
    //////////////////////////////////
    let sendToArduino;
    if (interaction.bigButterfly.moving == true) {
      sendToArduino = 1 + "\n"; // send 1 to Arduino if the butterfly is moving
    } else {
      sendToArduino = 0 + "\n"; // send 0 to Arduino if the butterfly is done with its animation
    }
    writeSerial(sendToArduino);
  }
}
Here is an embedding of the full sketch (you can press the ‘d’ key to play the animation without the signal from Arduino):
Reflections and Parts I am Proud of
My biggest concern going into this, especially as I was going to employ projection mapping, was that I would be unable to align the p5 sketch and the physical butterfly together in a cohesive manner that still looks visually pleasing. I am, thus, proud that the final product resembles what I had envisioned. I also spent a lot of time thinking of the proper mechanism to automate the wing flapping motion and where/how to place the wings. I experimented with a lot of methods, such as attaching a vertical straw/wooden stick from the middle of the wings to the servo blades, and tugging on the wings when moving down to move the wings up and down. When that proved to be unhelpful, I switched to simply attaching each wing to a blade, which, in hindsight, should have been what I experimented with first. I also love the detail of having the connection between the butterfly and the sensor be through antenna-looking sensors, resembling the sense mechanisms of an actual butterfly (thanks to Professor Aaron for pointing this out). Finally, I am proud that I managed to properly calibrate the sensitivity of the touch sensor, as it initially was too sensitive, sometimes even detecting signals even when untouched. Keeping the sensitivity in check was a major challenge that I thankfully was able to overcome to keep the interaction consistent.
Areas for Future Improvements
I think the project could definitely be enhanced in a lot of ways. Because I spent a lot of time putting the interface together, an area of future improvement could be the p5-generated animation itself. I could have different path movements triggered with every touch, for example. I had initially wanted to map an actual animated butterfly from p5 onto a blank silhouette cutout of a butterfly, controlled by the servos in the same way. Because of difficulties in mapping the software animations to the movement of the hardware, I decided to pivot toward having the central butterfly be completely in hardware form. One improvement to explore is going in that direction, where I effectively add physical objects, like flowers, on the surface of the box and map simpler, more limited animations onto them.
And here it is, the last project of the semester. Before saying anything about the project, I just want to express my gratefulness to all the students, instructors, professors and especially Professor Aaron for having an amazing, fun and challenging time during this class.
Concept
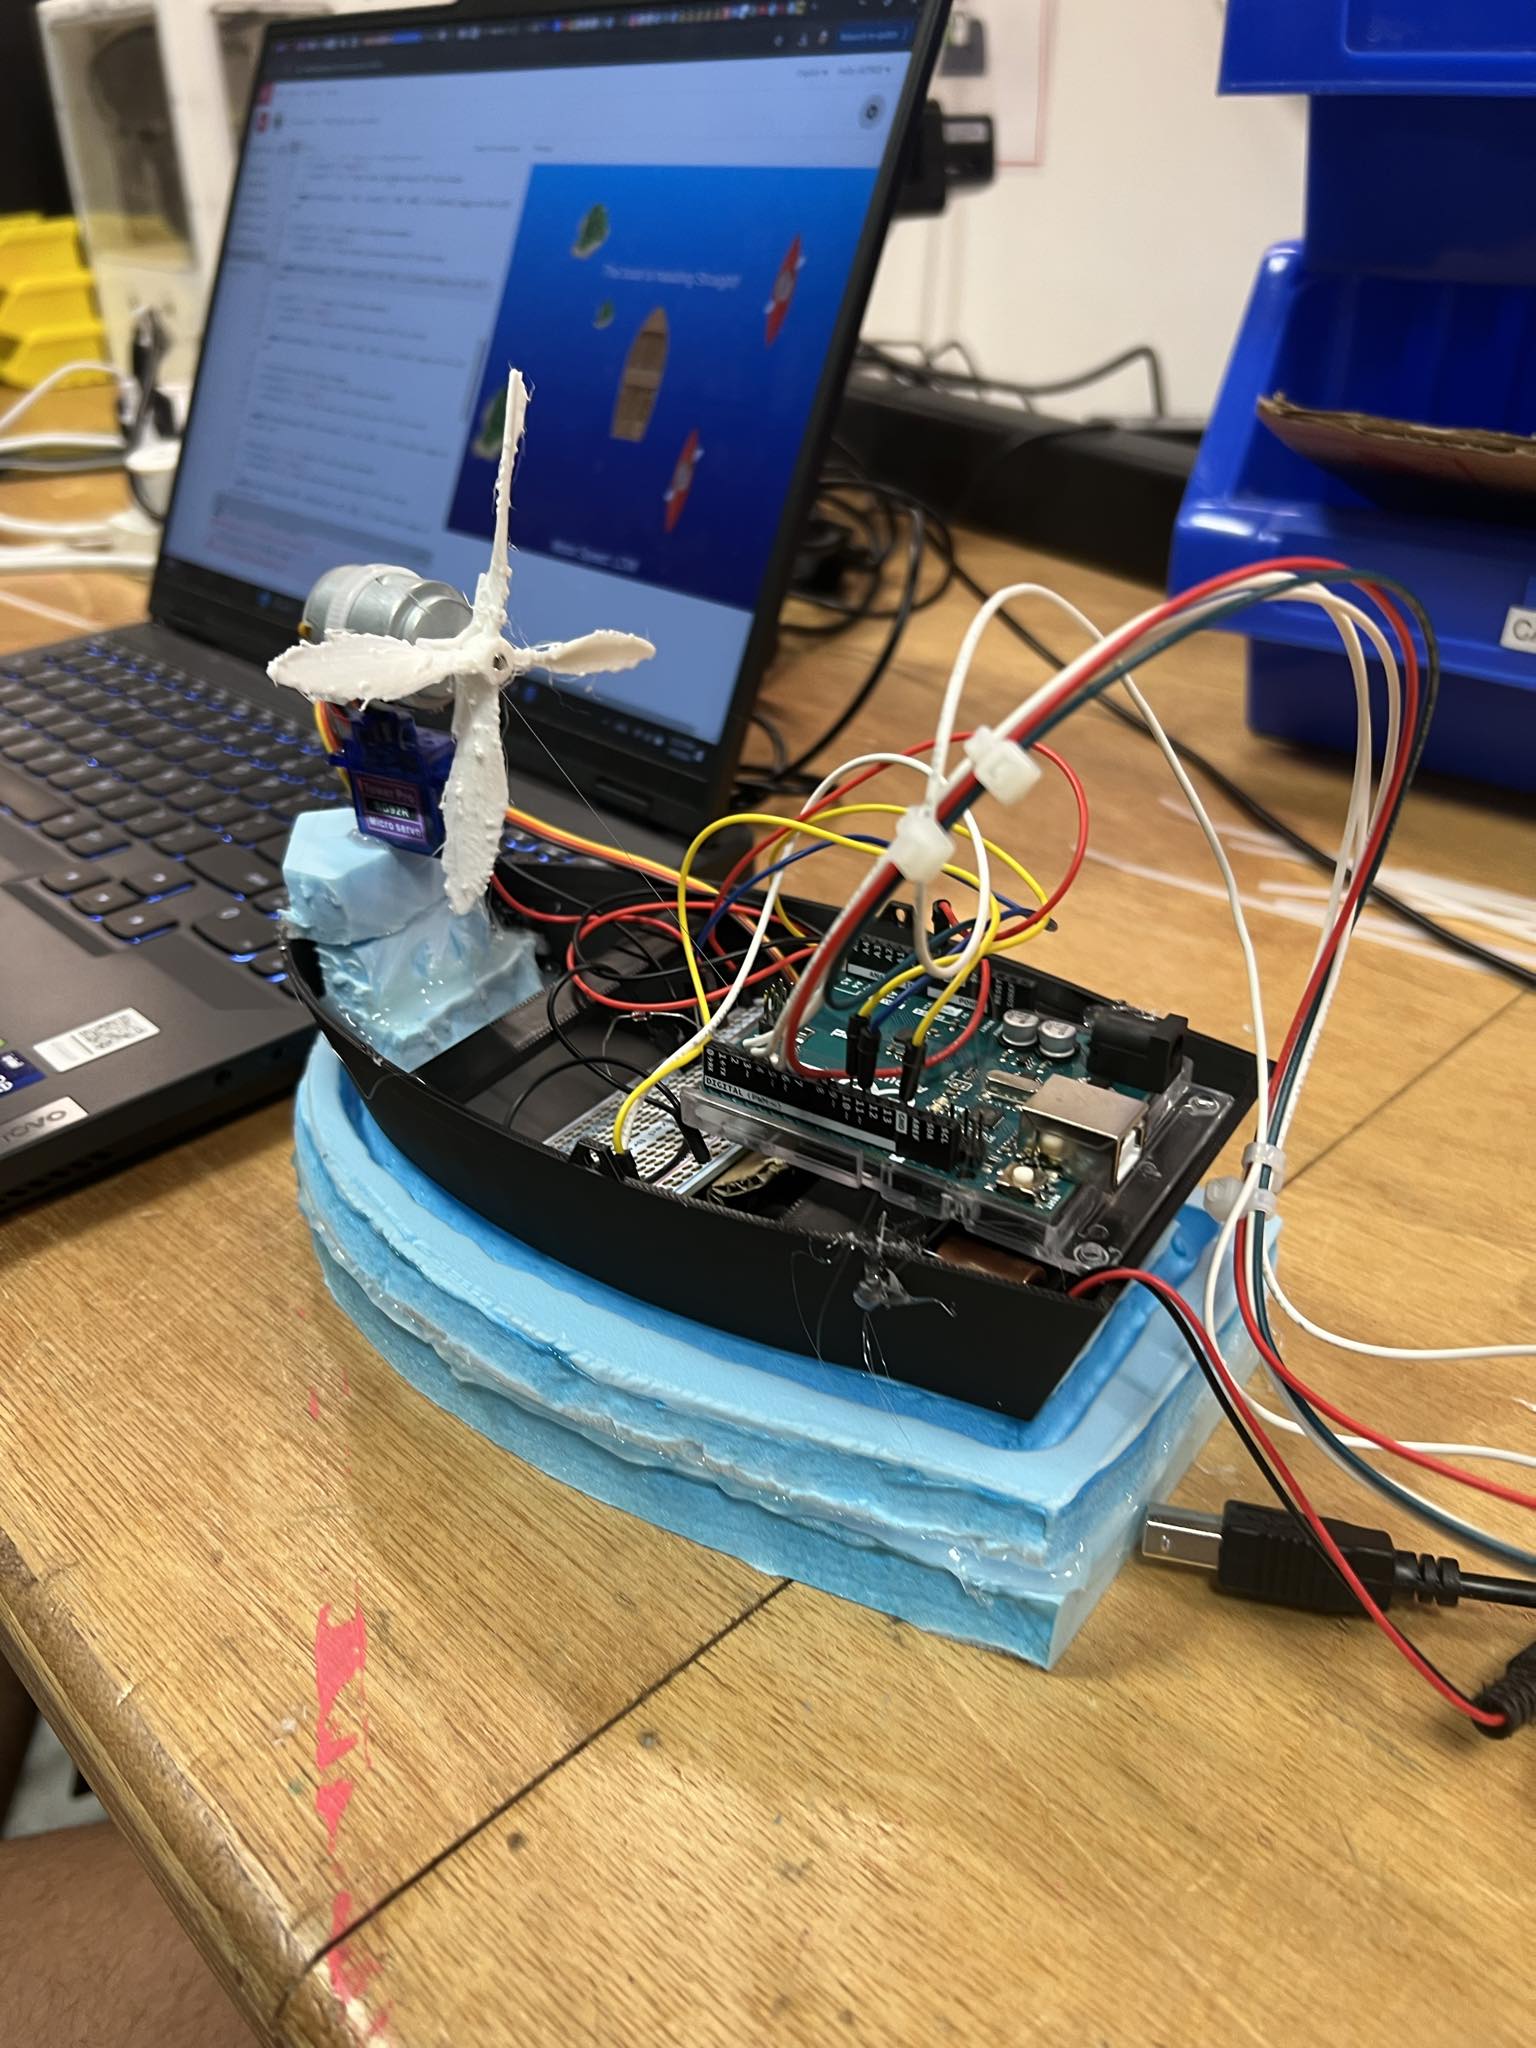
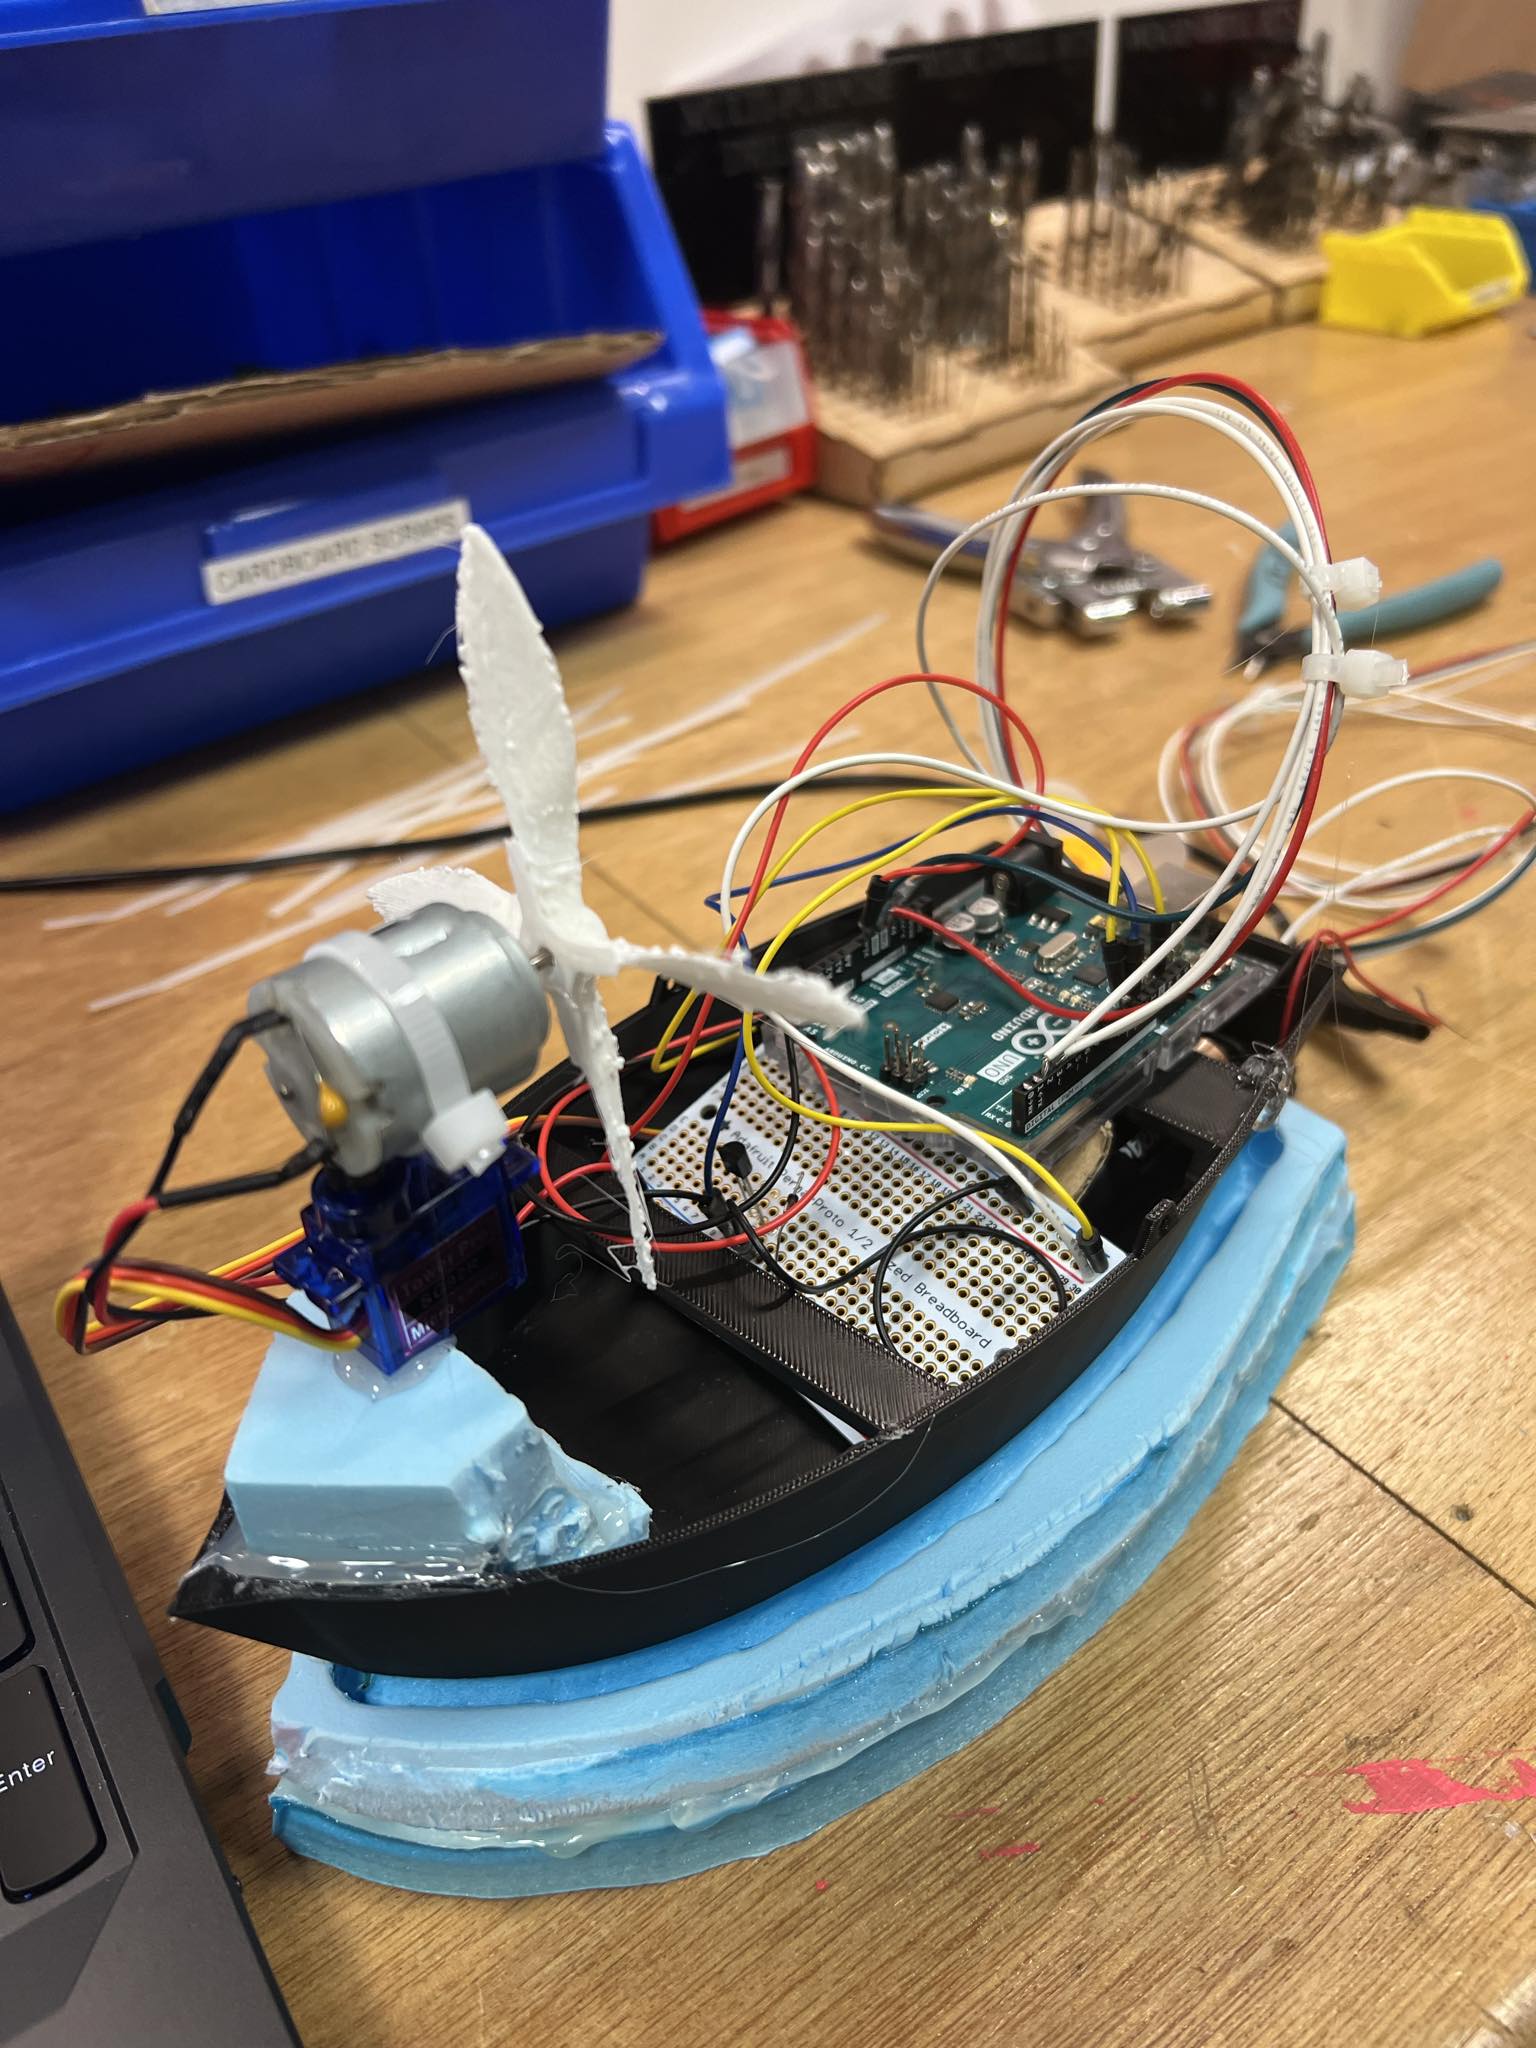
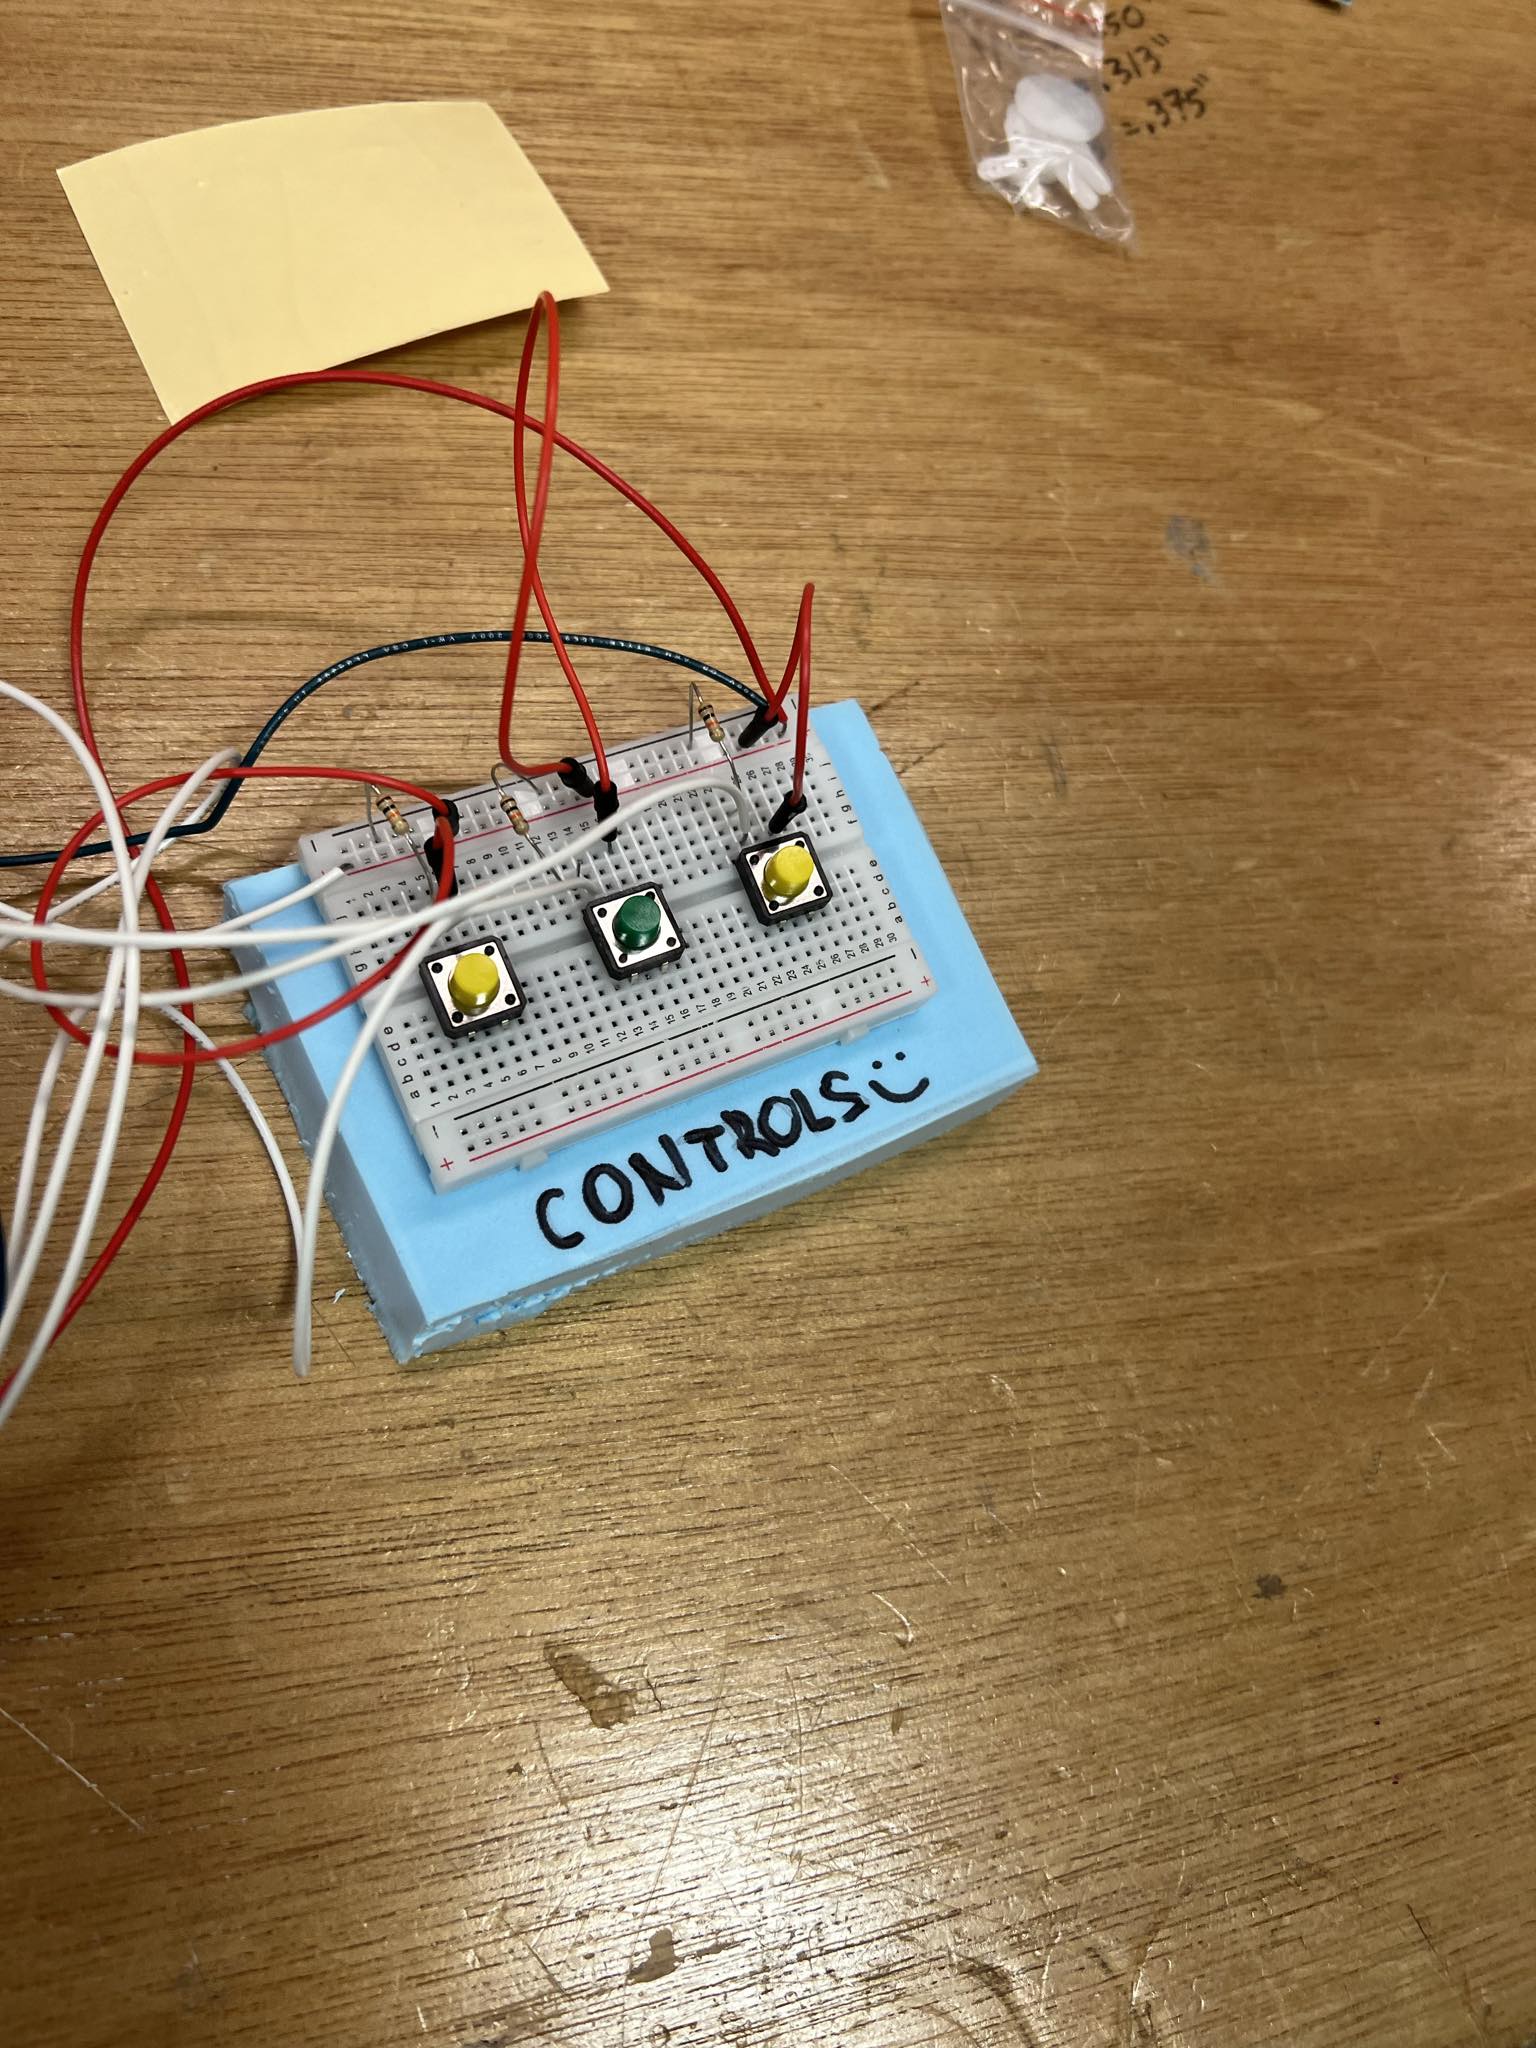
The concept of this project is pretty simple. I’m going to make you a captain of a boat for a day. SPOILER ALERT: You don’t need a license! To make this dream come true, I decided to conceptualize for the controls to be very simple, you just click to go left, right and to turn the motor boat on and off. This really takes us into intuitive design, and I believe that users would adapt very simply to this. Other that that I would need to think about the bed of the boat, the DC Motor, the Propeller, the Physics behind it and the whole placement of the Arduino. The rough sketch looked something like this:
Production:
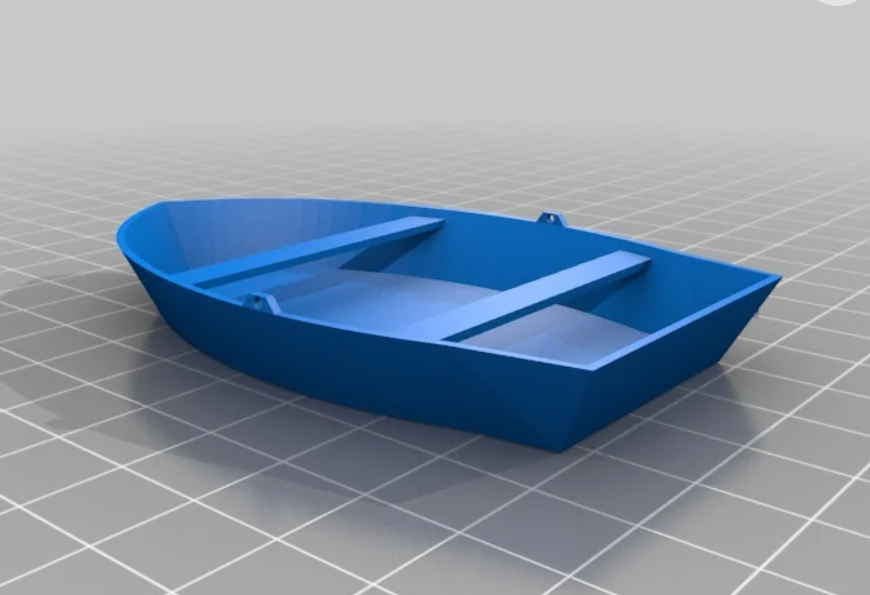
For the boat model, I found this boat bed on Thingy Verse and adjusted the dimensions so that it can find the Arduino and the breadboard, as well as the batteries. Here is how the model looked before printing:
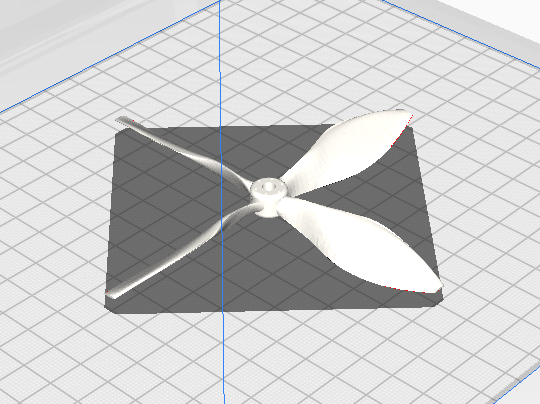
After printing it out, I looked into 3d printing a propeller which would actually be strong enough to pull the boat so I found this 3d model:
After that I placed all the parts and coded my logic for the user interaction. The code can be seen below:
#include <Servo.h>

int serialVal0 = 0;
int serialVal1 = 1;
int previousButton2State = LOW;

// Define pins for buttons, servo, and DC motor
const int button1Pin = 2; // Pin for the first button
const int button2Pin = 3; // Pin for the second button
const int button3Pin = 4; // Pin for the third button
const int servoPin = 10;  // Pin for the servo motor
const int motorPin = 11;  // Pin for the DC motor

// Define variables to store the state of buttons and motor
int button1State = 0;
int button2State = 0;
int button3State = 0;
bool motorState = false; // Motor state flag

// Create a servo object
Servo myServo;

void setup() {
  // Initialize serial communication
  Serial.begin(9600);

  // Attach servo to its pin
  myServo.attach(servoPin);

  // Set motor pin as output
  pinMode(motorPin, OUTPUT);

  // Set button pins as inputs
  pinMode(button1Pin, INPUT);
  pinMode(button2Pin, INPUT);
  pinMode(button3Pin, INPUT);

  // Start the handshake
  while (Serial.available() <= 0) {
    Serial.println("0,0"); // Send a starting message
    delay(50);
  }
}

void loop() {
  // Read the state of buttons
  button1State = digitalRead(button1Pin);
  button2State = digitalRead(button2Pin);
  button3State = digitalRead(button3Pin);

  // If button 1 is pressed, turn servo left
  if (button1State == HIGH) {
    myServo.write(120);
    serialVal0 = 80;
    delay(100); // Add a delay to avoid sending data too fast
  }

  // Toggle motor based on button 2 state
  if (button2State == HIGH) {
    if (previousButton2State == LOW) {
      motorState = !motorState; // Toggle motor state only once when the button is released
      digitalWrite(motorPin, motorState); // Set motor state
    }
  }

  // Update serialVal1 based on motor state
  serialVal1 = motorState ? 1 : 0;

  // Update previous button state
  previousButton2State = button2State;

  // If button 3 is pressed, turn servo right
  if (button3State == HIGH) {
    myServo.write(80);
    serialVal0 = 140;
    delay(100); // Add a delay to avoid sending data too fast
  }

  // Return servo to neutral position if no buttons are pressed
  if (button1State == LOW && button3State == LOW) {
    myServo.write(100); // Neutral position
    serialVal0 = 115;
    delay(100); // Add a delay to avoid sending data too fast
  }

  // Send the values of serialVal0 and serialVal1
  Serial.print(serialVal0);
  Serial.print(',');
  Serial.println(serialVal1);
}
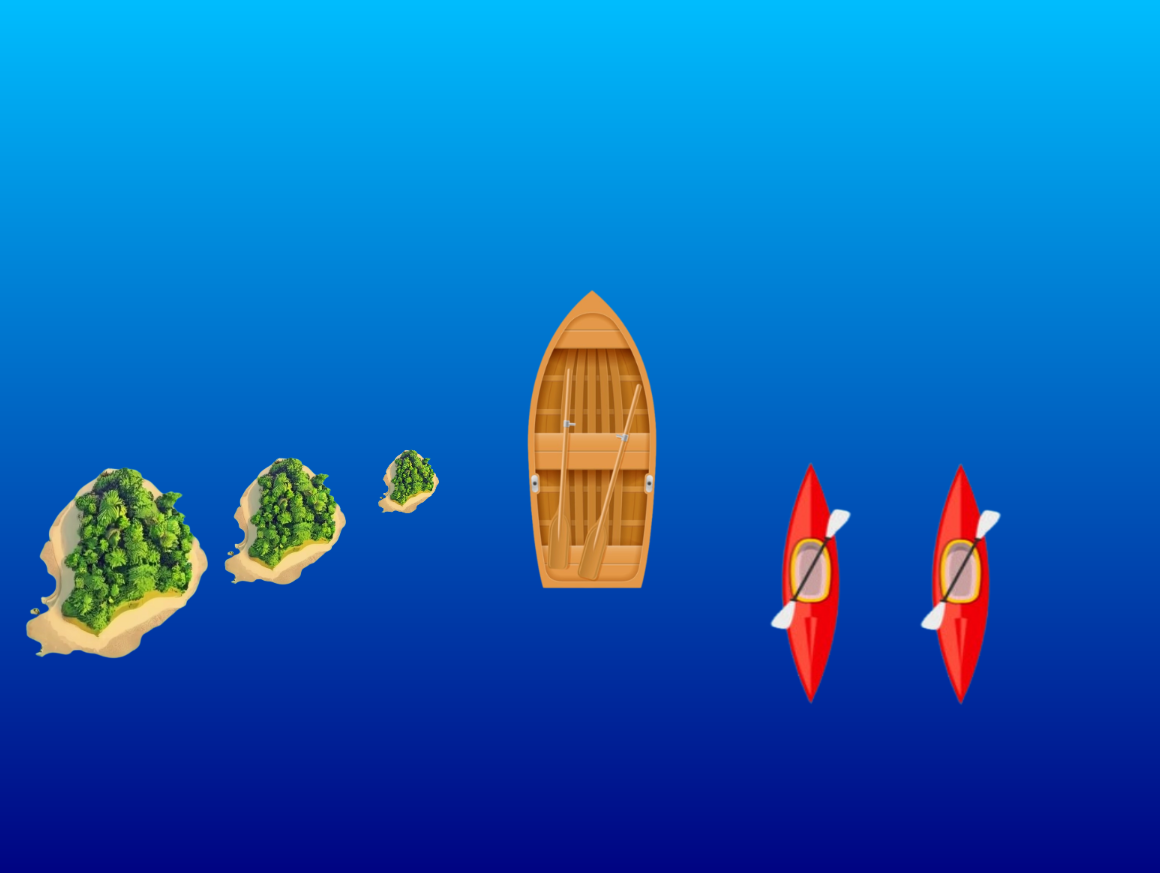
Of course this had to be connected to p5.js so I made a sketch which would provide a nice interface showing the speed and direction of where the boat is headed, it looks like this:
The p5.js code looks like this:
let servoPos; // Variable to store servo position
let motorSpeed; // Variable to store motor speed
let boatImage; // Variable to store boat image
let islandsImage1, islandsImage2, islandsImage3; // Variables to store islands images
let otherBoatsImage; // Variable to store other boats image
let serialSetUp = false; // Variable to track if serial setup is done

// Variables to store positions of objects
let islands1Y, islands2Y, islands3Y, otherBoats1Y, otherBoats2Y;

function preload() {
  // Load boat, islands, and other boats images
  boatImage = loadImage('boat.png');
  islandsImage1 = loadImage('islands.png');
  islandsImage2 = loadImage('islands.png');
  islandsImage3 = loadImage('islands.png');
  otherBoatsImage = loadImage('otherboats.png');
}

function setup() {
  createCanvas(800, 600); // Larger canvas size
  textSize(24); // Bigger font size
  // Display initial message centered on the canvas
  textAlign(CENTER, CENTER);
  setGradient(0, 0, width, height, color(0, 191, 255), color(0, 0, 128)); // Background gradient
  fill(255); // White text color
  text("Press spacebar to turn the boat motor on", width / 2, height / 2);

  // Initialize positions of objects
  islands1Y = height / 2;
  islands2Y = height / 2;
  islands3Y = height / 2;
  otherBoats1Y = height / 2;
  otherBoats2Y = height / 2;
}

function readSerial(data) {
  if (data != null) {
    // Split the incoming data by comma
    let dataArray = split(trim(data), ",");
    // If the right length, then proceed
    if (dataArray.length == 2) {
      // Parse the values as integers and store them in servoPos and motorSpeed
      servoPos = int(dataArray[0]);
      motorSpeed = int(dataArray[1]);
      console.log("Servo position: " + servoPos + ", Motor speed: " + motorSpeed);
    }
  }

  //////////////////////////////////
    //SEND TO ARDUINO HERE (handshake)
    //////////////////////////////////
    let sendToArduino = 0 + "\n";
    writeSerial(sendToArduino);
}

function draw() {
  // If serial setup is not done, return
  if (!serialSetUp) return;

  // Background gradient resembling water
  setGradient(0, 0, width, height, color(0, 191, 255), color(0, 0, 128));

  // Display boat heading status centered above boat


  // Move and draw islands images
  islands1Y += 1; // Speed of islands movement
  if (islands1Y > height) {
    islands1Y = 0; // Reset when islands moves off the screen
  }
  image(islandsImage1, 140, islands1Y, 100, 100); // Islands image on the left side

  islands2Y += 1.5; // Speed of islands movement
  if (islands2Y > height) {
    islands2Y = 0; // Reset when islands moves off the screen
  }
  image(islandsImage2, 250, islands2Y, 50, 50); // Islands image on the left side

  islands3Y += 2; // Speed of islands movement
  if (islands3Y > height) {
    islands3Y = 0; // Reset when islands moves off the screen
  }
  image(islandsImage3, 0, islands3Y, 150, 150); // Islands image on the left side

  // Move and draw other boats images
  otherBoats1Y += 1.2; // Speed of other boats movement
  if (otherBoats1Y > height) {
    otherBoats1Y = 0; // Reset when other boats moves off the screen
  }
  image(otherBoatsImage, 500, otherBoats1Y, 90, 180); // Other boats image on the right side

  otherBoats2Y += 1.8; // Speed of other boats movement
  if (otherBoats2Y > height) {
    otherBoats2Y = 0; // Reset when other boats moves off the screen
  }
  image(otherBoatsImage, 600, otherBoats2Y, 90, 180); // Other boats image on the right side

   fill(255); // White text color
  textAlign(CENTER);
  if (servoPos == 115)
    text("The boat is heading Straight!", width / 2, boatImage.height / 2 - 20); // Adjusted position
  else if (servoPos == 80)
    text("The boat is heading to the Right!", width / 2, boatImage.height / 2 - 20); // Adjusted position
  else if (servoPos == 140)
    text("The boat is heading to the Left!", width / 2, boatImage.height / 2 - 20); // Adjusted position

  // Draw boat image with rotation based on servo position
  push();
  translate(width / 2, height / 2); // Center of the screen
  rotate(radians(-90)); // Rotate to point upwards
  if (servoPos == 80) {
    rotate(radians(20)); // Rotate slightly to the right
  } else if (servoPos == 140) {
    rotate(radians(-20)); // Rotate slightly to the left
  }
  imageMode(CENTER);
  image(boatImage, 0, 0, 250, 150); // Draw boat image
  pop();

  // Display motor speed centered below boat with larger font size
  textSize(24); // Larger font size
  textAlign(CENTER);
  if(motorSpeed ==0)
    text("Motor Speed: HIGH ", width / 2, height - 20);
  else if(motorSpeed == 1)
    text("Motor Speed: LOW ", width / 2, height - 20);
}

// Function to draw a gradient background
function setGradient(x, y, w, h, c1, c2) {
  noFill();
  for (let i = y; i <= y + h; i++) {
    let inter = map(i, y, y + h, 0, 1);
    let c = lerpColor(c1, c2, inter);
    stroke(c);
    line(x, i, x + w, i);
  }
}

function keyPressed() {
  if (key == " ") {
    if (!serialSetUp) {
      setUpSerial();
      serialSetUp = true;
    }
  }
}
I also added some styrofoam padding on the bottom for added support and easier floating.
Here are some pictures from the production process:
And finally, here is the final video Presentation of it working:
Conclusion:
Overall this project was very fun challenging and I really think I learned a lot during the making.
Even though this is the end of the road for this class, this is only the beginning for me in exploring this area and I’m really excited of what happens next!
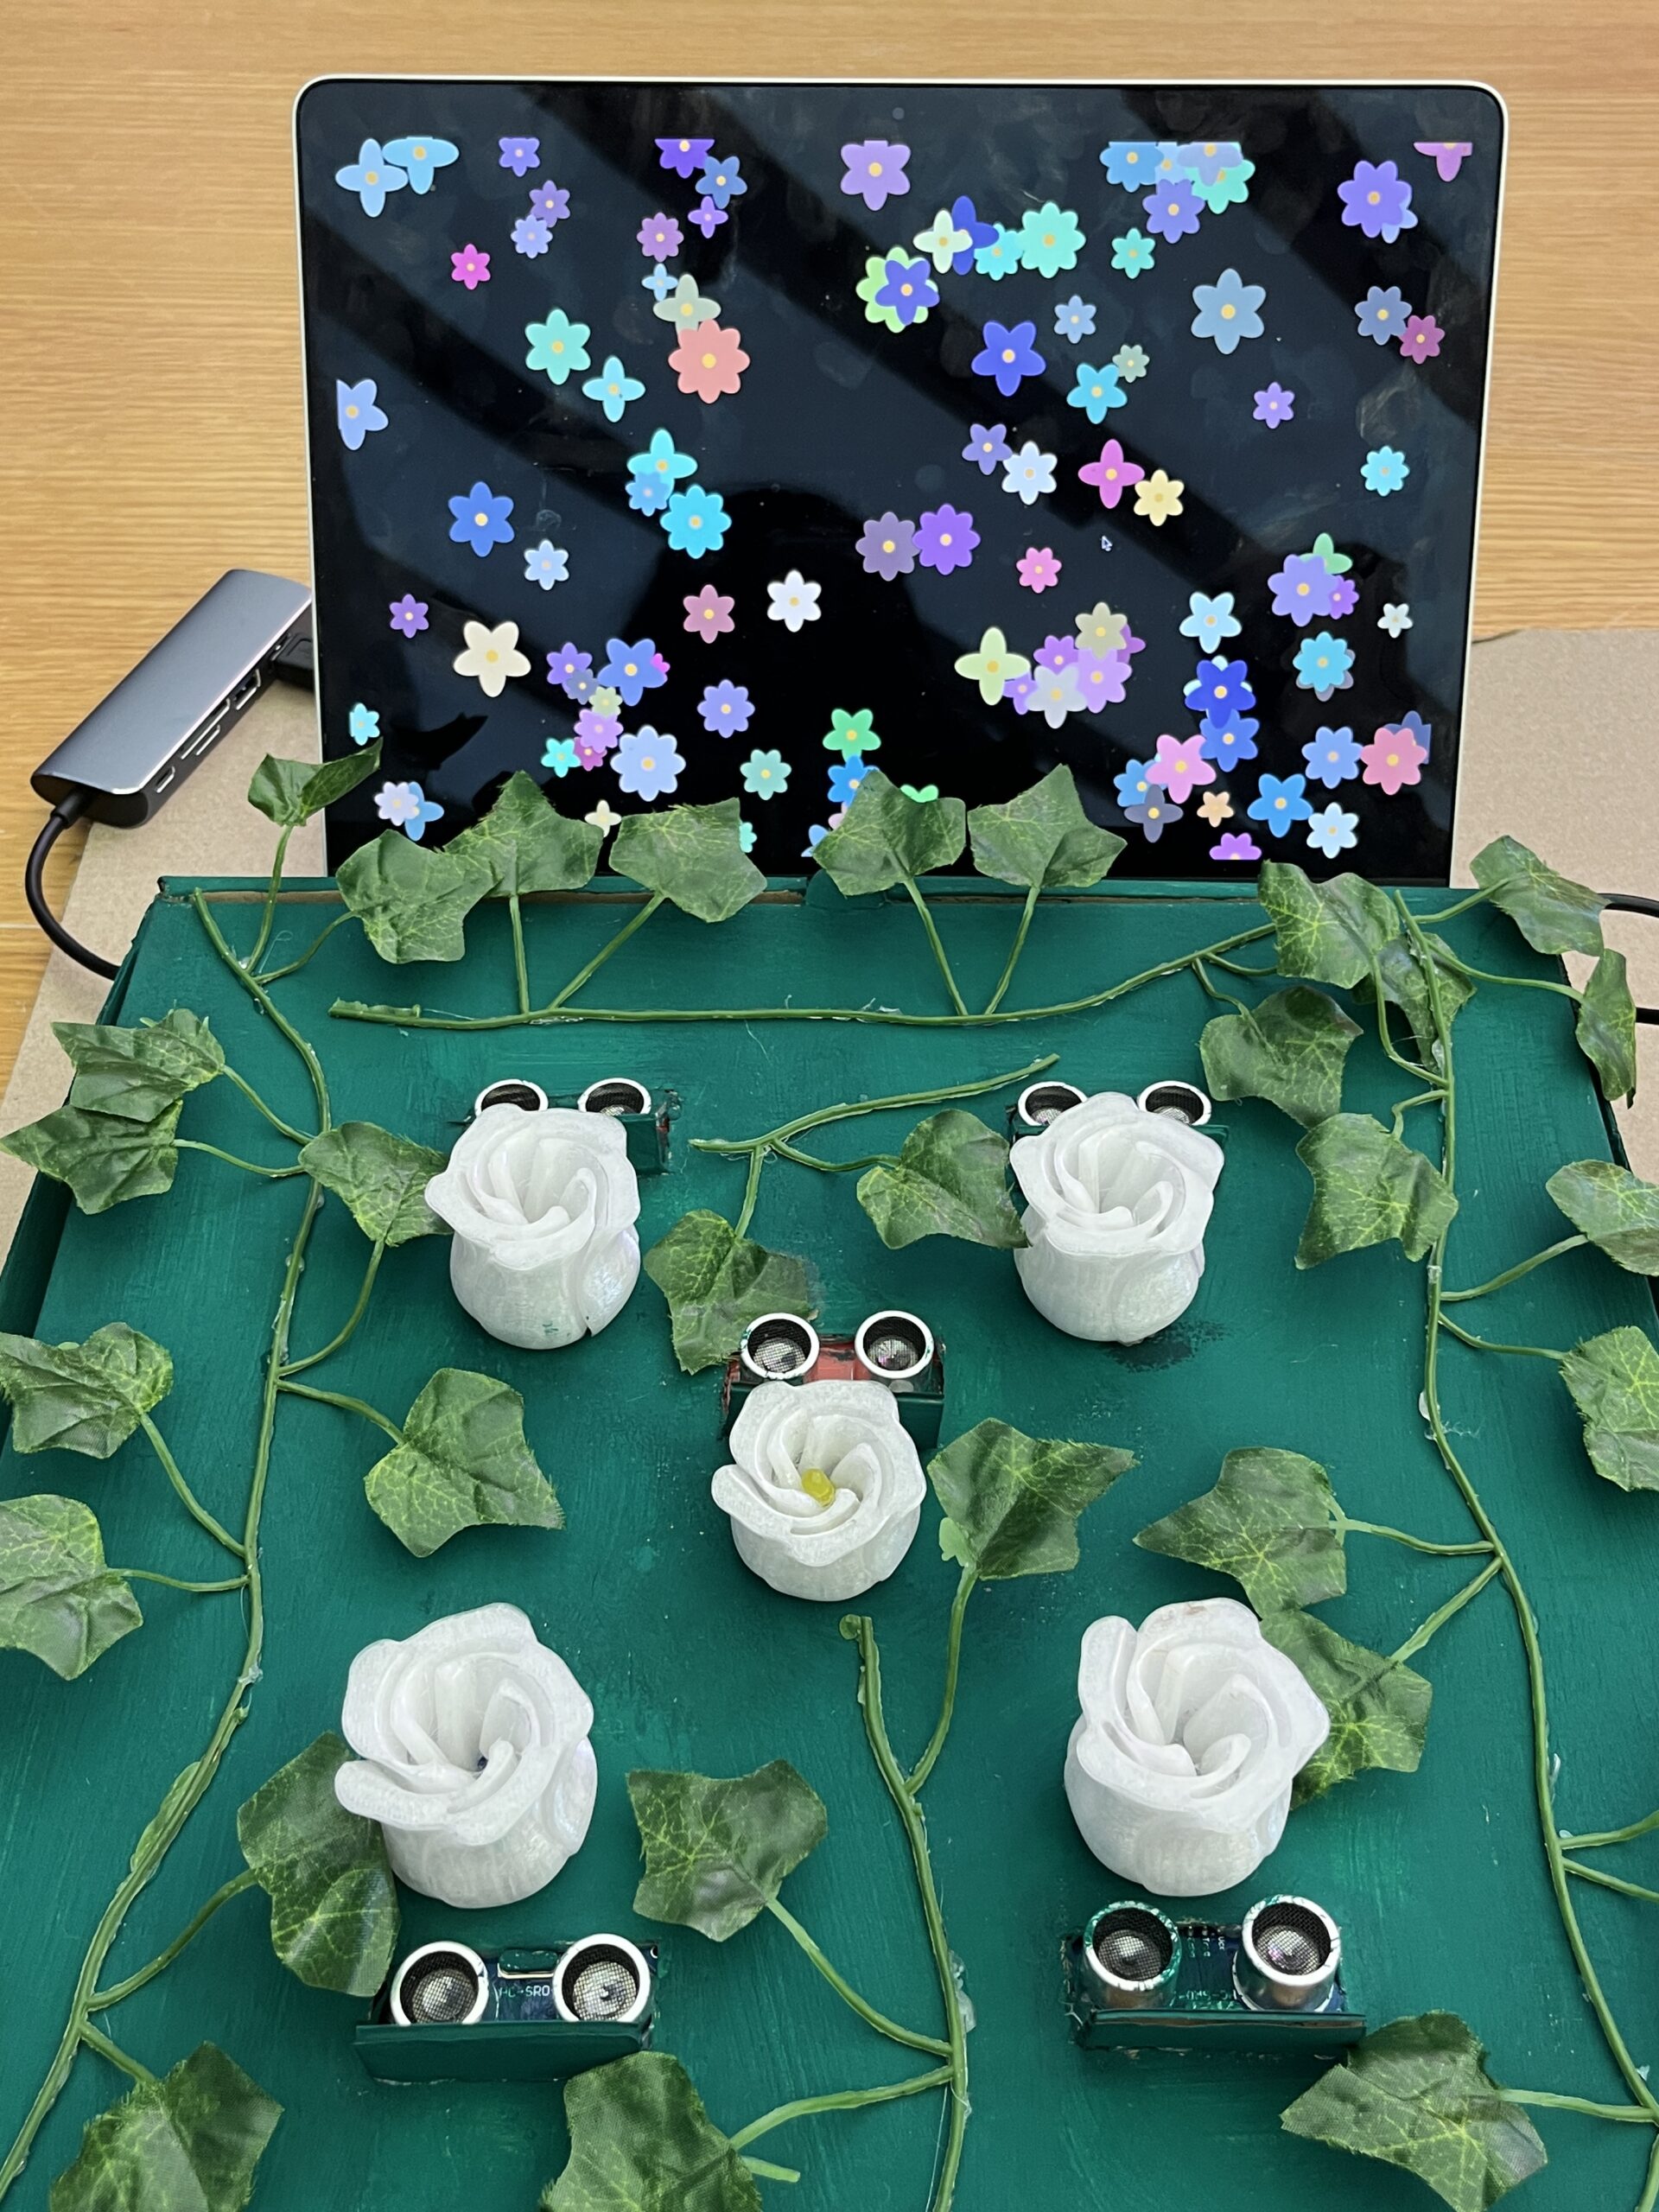
Concept:Interactive Musical Garden is an innovative interactive art installation that marries technology with natural aesthetics. It incorporates ultrasonic sensors embedded with 3D-printed transparent roses, allowing each rose to respond to user interaction by lighting up, playing music, and spawning a digital flower on a p5.js canvas. This project aims to create a communal yet personalized musical and visual experience where each interaction contributes to a growing digital garden.
Arduino Code Overview: The Arduino code controls the ultrasonic sensors and LEDs. It reads the distance measurements from the sensors and turns on an LED if an object (e.g., a user’s hand) is detected within a specified range. It also sends a signal to the p5.js application via serial communication when a flower should be spawned.
#include <Arduino.h>

// Define pins for the ultrasonic sensors and LEDs
#define NUM_SENSORS 5
int trigPins[NUM_SENSORS] = {2, 3, 4, 5, 6};
int echoPins[NUM_SENSORS] = {7, 8, 9, 10, 11};
int ledPins[NUM_SENSORS] = {12, 13, A0, A1, A2};

// Function to measure distance
long readDistance(int triggerPin, int echoPin) {
    digitalWrite(triggerPin, LOW);
    delayMicroseconds(2);
    digitalWrite(triggerPin, HIGH);
    delayMicroseconds(10);
    digitalWrite(triggerPin, LOW);
    long duration = pulseIn(echoPin, HIGH);
    return duration * 0.034 / 2; // Convert to distance in cm
}

void setup() {
    Serial.begin(9600);
    for (int i = 0; i < NUM_SENSORS; i++) {
        pinMode(trigPins[i], OUTPUT);
        pinMode(echoPins[i], INPUT);
        pinMode(ledPins[i], OUTPUT);
    }
}

void loop() {
    for (int i = 0; i < NUM_SENSORS; i++) {
        long distance = readDistance(trigPins[i], echoPins[i]);
        if (distance < 20) {
            digitalWrite(ledPins[i], HIGH);
            Serial.print("Bloom ");
            Serial.println(i + 1); // Send sensor number to p5.js
        } else {
            digitalWrite(ledPins[i], LOW);
        }
    }
    delay(100); // Debouncing
}
p5.js Code Overview: The p5.js application runs in a web browser and uses the serial communication data to create flowers on the screen each time a sensor is triggered. It also manages the playback of sound for each interaction.
// Define the Flower class for visual representation
class Flower {
    constructor(x, y) {
        this.x = x;
        this.y = y;
        this.size = 5;
        this.growthRate = random(0.05, 0.2);
        this.fullSize = random(30, 70);
        this.petals = floor(random(4, 9));
        this.petalSize = this.fullSize / 2;
        this.color = [random(100, 255), random(100, 255), random(100, 255)];
    }

    grow() {
        if (this.size < this.fullSize) {
            this.size += this.growthRate;
        }
    }

    show() {
        push();
        translate(this.x, this.y);
        noStroke();
        fill(this.color[0], this.color[1], this.color[2]);
        for (let i = 0; i < this.petals; i++) {
            rotate(TWO_PI / this.petals);
            ellipse(0, this.size / 4, this.petalSize, this.size);
        }
        fill(255, 204, 0);
        ellipse(0, 0, this.size / 4, this.size / 4);
        pop();
    }
}

let flowers = [];
let serial;
let flowerSound;

function preload() {
    flowerSound = loadSound('bells.wav');
}

function setup() {
    let canvas = createCanvas(windowWidth, windowHeight);
    canvas.style('display', 'block');
    background(0);

    serial = new p5.SerialPort();
    serial.open('/dev/tty.usbmodem1101');
    serial.on('data', serialEvent);
}

function draw() {
    background(0);
    flowers.forEach(flower => {
        flower.grow();
        flower.show();
    });
}

function serialEvent() {
    let data = serial.readStringUntil('\n').trim();
    if (data.startsWith("Bloom")) {
        let parts = data.split(" ");
        if (parts.length === 2) {
            let index = parseInt(parts[1]) - 1;
            if (!isNaN(index) && index >= 0 && index < 5) {
                createFlower();
            }
        }
    }
}

function createFlower() {
    let x = random(width);
    let y = random(height);
    let flower = new Flower(x, y);
    flowers.push(flower);
    playSound();
}

function playSound() {
    if (flowerSound.isPlaying()) {
        flowerSound.stop();
    }
    flowerSound.play();
}

function keyPressed() {
    if (key === 'f' || key === 'F') {
        let fs = fullscreen();
        fullscreen(!fs);
    }
}

function windowResized() {
    resizeCanvas(windowWidth, windowHeight);
}
How the Code Works: Serial Communication: p5.js uses the p5.serialport library to establish a serial connection with the Arduino. This connection allows it to receive data (like sensor triggers) from the Arduino. Flower Generation: When a “Bloom” command is received via serial (indicating that a sensor was triggered), p5.js generates a digital flower at a random location on the canvas. Sound Playback: Simultaneously with the flower generation, a sound file is played to provide auditory feedback, making the experience more immersive.
Planning the Interaction Flow: Detection: A user places their hand over one of the 3D-printed roses.
Sensor Activation: The corresponding ultrasonic sensor detects the presence based on the distance and triggers a response. LED Feedback: The LED beneath the detected rose lights up, providing immediate visual feedback. Visual and Auditory Display: The user sees a new flower appearing on the screen and hears a sound, linking their physical interaction with a digital outcome.
Acknowledgements: Special thanks to Stefania for helping me with the idea and the implementation and to my fiancé for helping me setup a beautiful garden using a pizza box 🙂
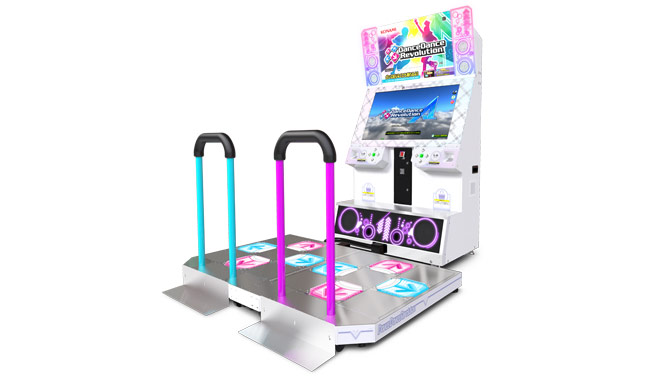
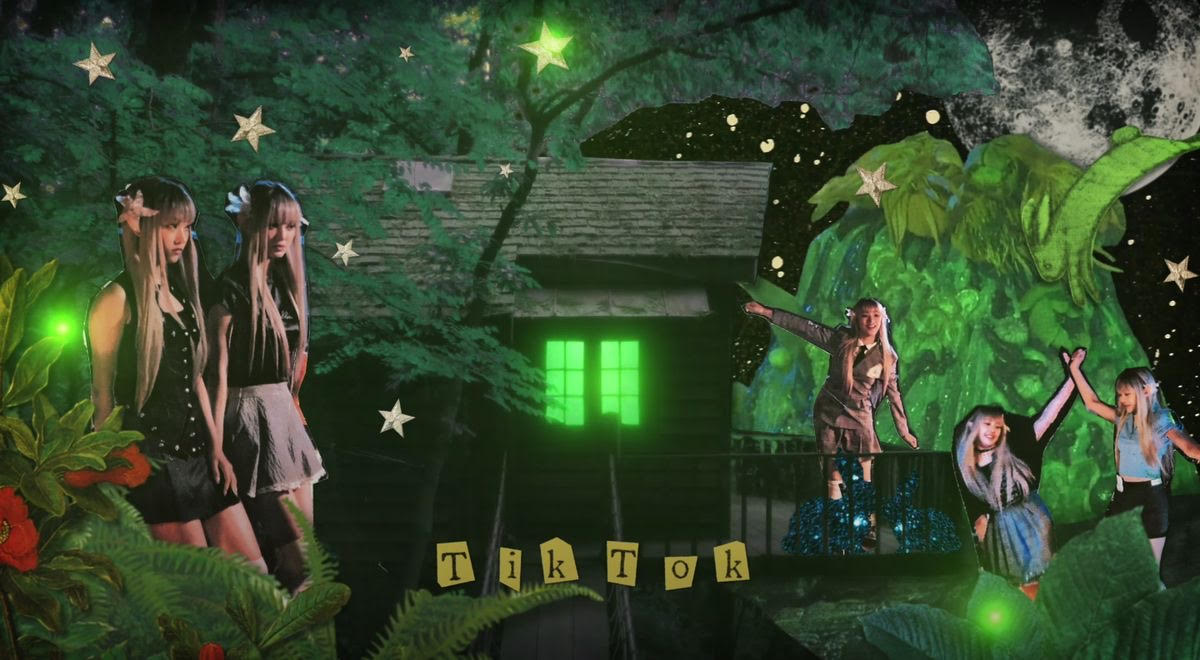
As soon as I heard that I would get to pick a topic again, I decided to go back to my old idea that did not cooperate with me during the midterm period: The Dance Dance Revolution arcade machine. I wanted to do this but in my own way. I’ve been really into looking at different aesthetics and, so far, my favorite aesthetic is the CottageCore aesthetic whic his basically the theme of living in the forest, fantasy, fairies, ..etc.
As I mentioned in my midterm, I have been really into this group named NewJeans and one of their music videos was focused mainly on the cottagecore aesthetic which I was really into. The song’s name is ASAP and I would highly recommend everyone to watch if you want your day to instantly be 1000 times better.
This is what a DDR machine looks like:
The game goes as follows:
Arrows spawn from the bottom of the screen and move to the top according to the rhythm of the song picked. The player must click/ step on the corresponding arrow button when it reaches a certain point.
NewJeans’ ASAP:
Challenges :
This project was a nightmare to make:
The Circle Incident:
Writing the p5 code, I wanted to first start with ellipses that would spawn in four different x coordinates and that would disappear when I would click the arrow keys as they reach y 100. However, p5 had other plans. It just would not work no matter what I tried. Turns out, I just forgot to use the term “key ==” .
2. Mapping : (
I have a past with creating beat maps for the VR game Beat Saber and I knew that people got that idea from mapping DDR games. So, I looked up what DDR mapping looks like and I created one for the song ASAP. But after countless hours of trying to add the mapping for ASAP to p5, I realized that mapping was not for p5. Is it possible? Probably. Would I have tried even longer if I just had more time? Probably.
What I did to consider time was try to have the arrows spawn according to the song’s BPM(Beats Per Minute) and I just now realized as I’m writing this that I had the arrows SPAWN with the BPM, not hit the targetZone according to the BPM which makes so much sense now but it still is very fun.
3. The Horror of Serial Communication :0
For the weekend, I decided to go home and work on this there and that was one of the biggest mistakes I have ever made because I don’t like the serial communication part. I spent the whole weekend working on something that I don’t fully understand. I spent 5 hours my first night home and made zero progress. The following day, I caved and asked my brother who has a good amount of experience with C++ and even he could not figure out a solution.
Sunday evening I’m back on campus and I see Professor Aya who told me that my p5 sketch is only receiving 2 inputs instead of 4…… She fixed it in less than 2 minutes.
4. The Forbidden Restart Button :0
After getting familiar and actually understanding what and how Serial communication work, I wanted to add a simple button. So cute, I know :3.
Little did I know that button was made in the deepest, darkest pits of hell. For some reason, it just would not register the 1. I would check my arduino code and everything would work fine on the serial monitor. I spent hours on that and after asking my very nice classmate Marcus, he looked at my arduino code and figured out I added a teensy tiny “ln” in my println function…..
Not my proudest Rashed moment.
Game Design:
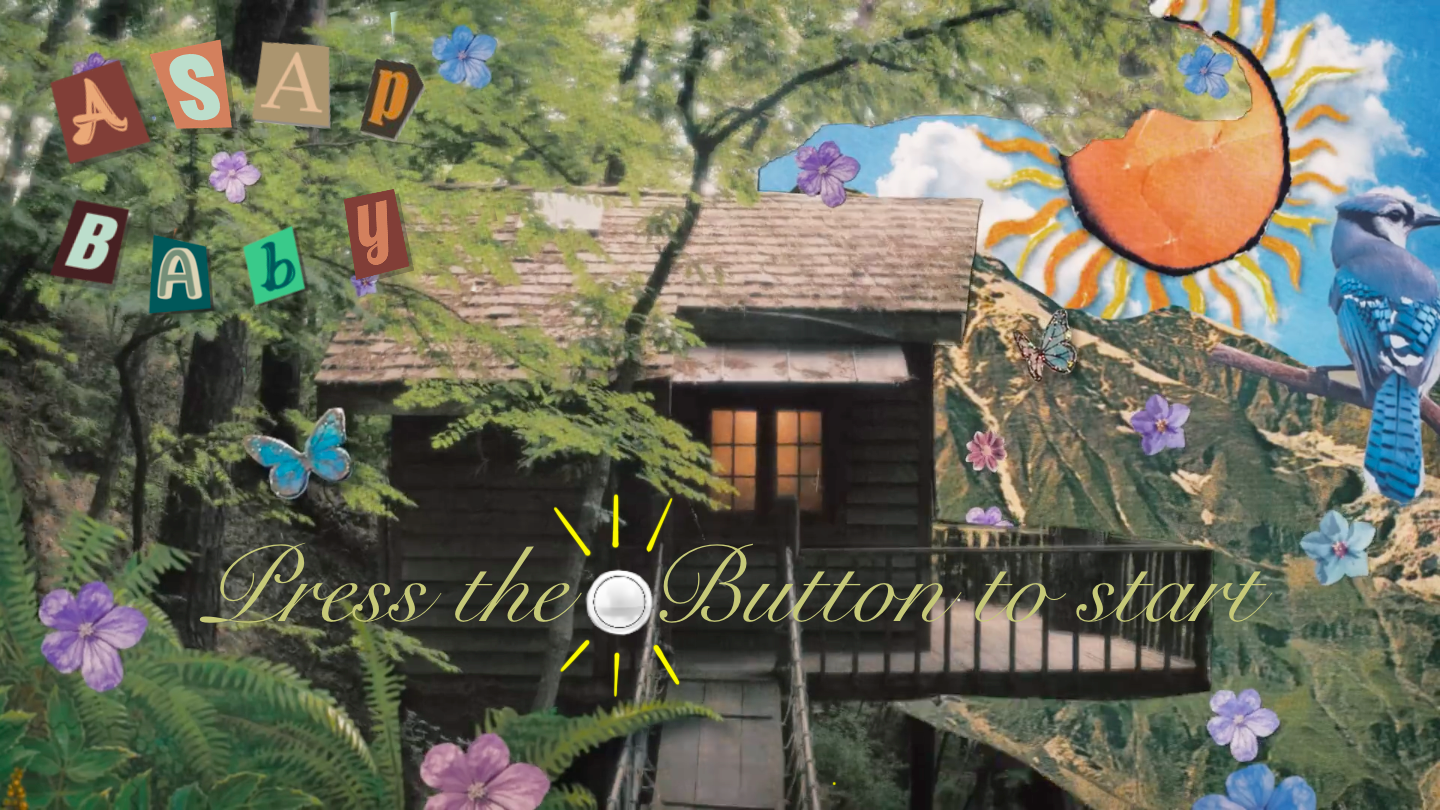
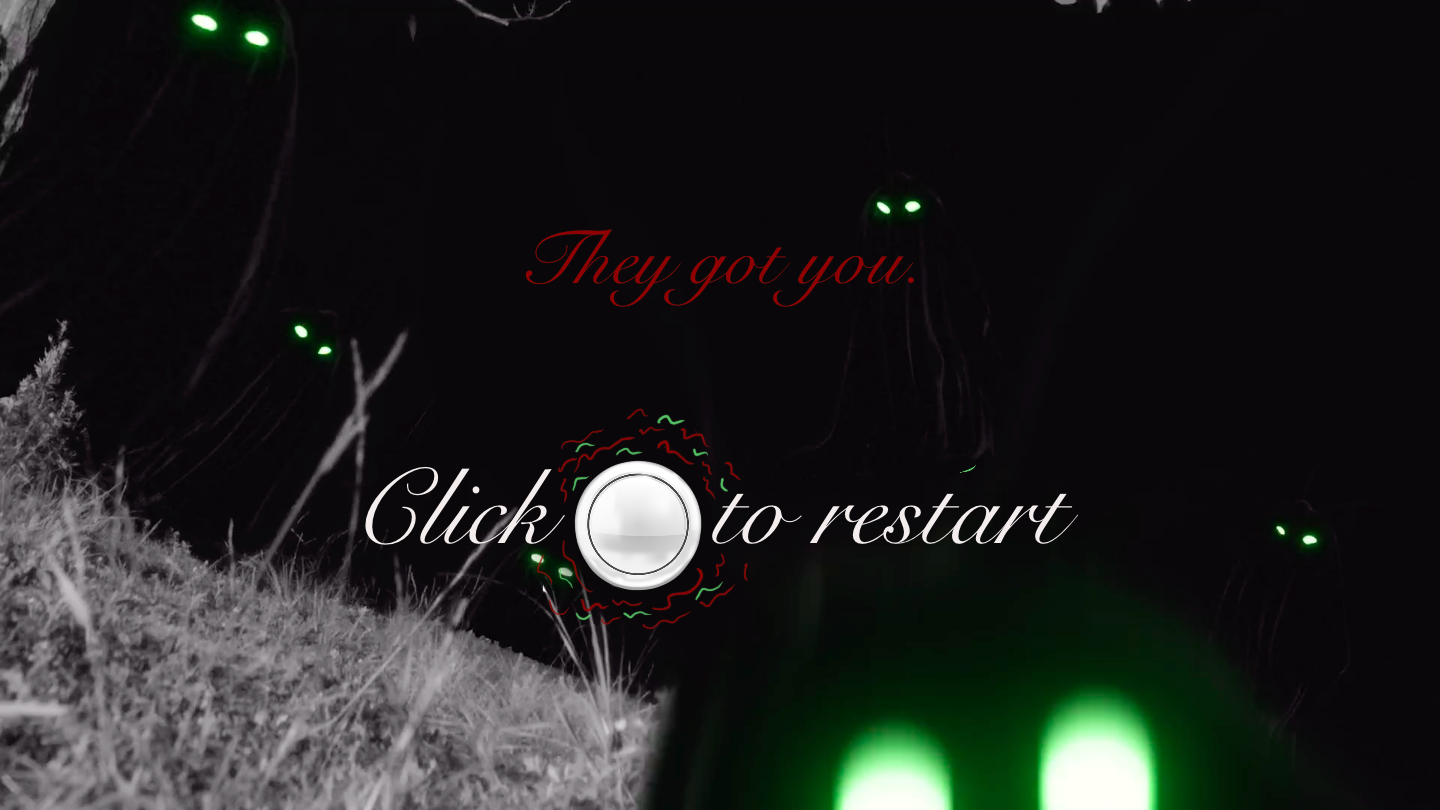
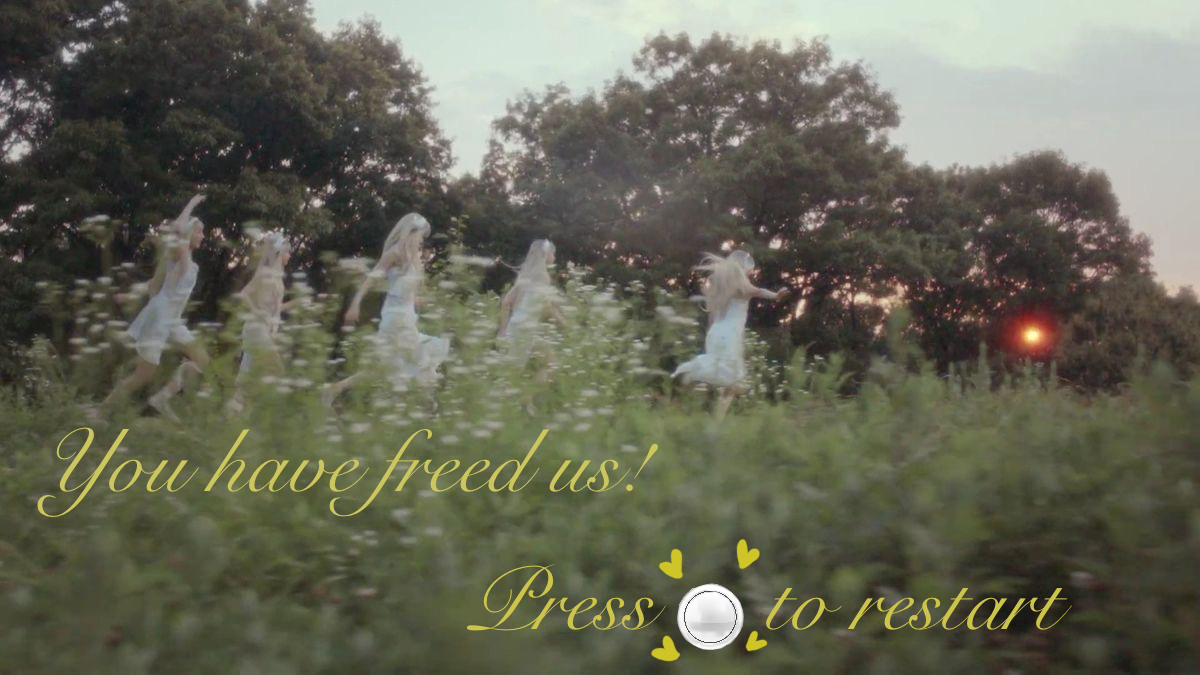
my game has four states for the title screen, game, gameOver, and YouWin.
I wanted to make my own backgrounds for these states instead of using pictures from the group. I used procreate and a bunch of different elements from the theme and I just put them all together and I created these:
Title:
Game Over:
You Win:
Game:
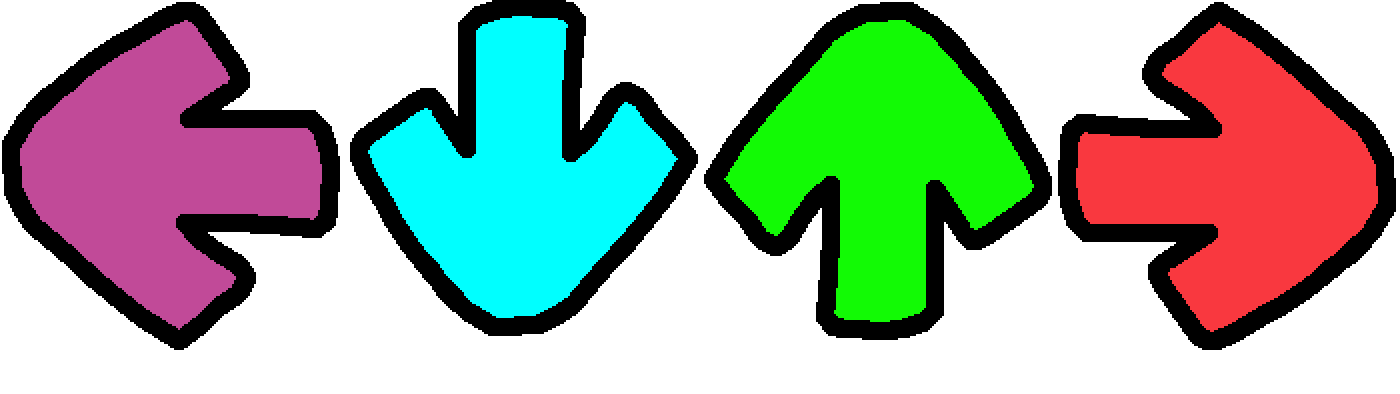
I also designed the arrows myself 🙂
Code:
p5js Sketch:
This code outlines a rhythm-based game where players must synchronize their inputs with arrows moving on the screen to the beat of a background song. The game functions in various states such as “start,” “game,” “gameOver,” and “win,” each presenting unique visuals and interactions.
The preload function loads all necessary assets, including images and sounds, preparing the game for a smooth launch. Following this, the setup function establishes the gaming environment by creating a canvas and configuring text settings.
During gameplay, the draw function operates as the continuous loop that directs the flow of the game. It adjusts what’s displayed based on the game state and also checks the status of the serial port for hardware connectivity, crucial for linking external controllers like buttons.
Player interaction involves using buttons to accurately match onscreen arrows as they align with a designated hit zone. Successful matches increase the player’s score, whereas missed arrows result in a loss of lives. This mechanic tests both rhythm and timing.
The game mechanics are finely tuned; arrows are generated at intervals determined by the song’s BPM, creating a consistent rhythmic challenge. The game monitors for end conditions, either when the player runs out of lives or when the song concludes, leading to different game states like “win” or “gameOver.”
The integration with the Arduino through serial communication allows for the use of specialized controllers.
let arrows = [];
let images = {};
let gameState = "start";
let score = 0;
let lives = 5;
const arrowSpeed = 2;
const hitZoneY = 100;
const tolerance = 30;
let leftButton = 0;
let rightButton = 0;
let upButton = 0;
let downButton = 0;
let restartButton = 0;
let buttonispressed = 0;
// Song and BPM (beats per minute)
let song;
let songBPM = 134; // song's Beats Per Minute
// Images
let titleImage, gameOverImage, youWinImage, gameImage;
// Interval ID for arrow spawns
let arrowInterval;

// Preload function to load assets
function preload() {
  song = loadSound("NewjeansASAP.mp3");
  images.left = loadImage("Left.PNG");
  images.up = loadImage("Up.PNG");
  images.down = loadImage("Down.PNG");
  images.right = loadImage("Right.PNG");
  titleImage = loadImage("TitleBG.PNG");
  gameOverImage = loadImage("GameOverBG.PNG");
  youWinImage = loadImage("YouWinBG.PNG");
  gameImage = loadImage("GameBG.JPG");
}

// Setup function
function setup() {
  // Create canvas
  createCanvas(windowWidth, windowHeight);
  textAlign(CENTER, CENTER);
  textSize(32);
}

function draw() {
  // Display connection status if serial port is not active
  if (!serialActive) {
    text("Press Space Bar to select Serial Port", 20, 30);
  } else {
    text("Connected", 20, 30);
  }
  background(0);

  // Draw different game screens based on game state
  switch (gameState) {
    case "start":
      image(titleImage, 0, 0, width, height);
      drawStartScreen();
      break;
    case "game":
      image(gameImage, 0, 0, width, height);
      playGame();
      break;
    case "gameOver":
      image(gameOverImage, 0, 0, width, height);
      drawGameOver();
      break;
    case "win":
      image(youWinImage, 0, 0, width, height);
      drawWin();
      break;
  }
}

// Function to draw start screen
function drawStartScreen() {
  if (gameState === "start" && restartButton == 1 && buttonispressed == 0) {
    startGame(); // Start the game when restart button is pressed
    buttonispressed = 1;
  } else if (restartButton == 0 && buttonispressed == 1) {
    buttonispressed = 0;
  }
}

// Function to play the game
function playGame() {
  //Read data from input

  if (gameState === "game") {
    // Check if the key pressed matches the arrow type
    for (let i = arrows.length - 1; i >= 0; i--) {
      let arrow = arrows[i];
      if (arrow.y >= hitZoneY - tolerance && arrow.y <= hitZoneY + tolerance) {
        if (
          (leftButton == 1 && arrow.type === "left") ||
          (upButton == 1 && arrow.type === "up") ||
          (downButton == 1 && arrow.type === "down") ||
          (rightButton == 1 && arrow.type === "right")
        ) {
          arrows.splice(i, 1); // Successful hit, remove arrow
          score++; // Increment score
        }
      }
    }
  }

  // Draw hit zones
  fill(255, 255, 255, 100);
  ellipse(width * 0.2, hitZoneY, 70);
  ellipse(width * 0.4, hitZoneY, 70);
  ellipse(width * 0.6, hitZoneY, 70);
  ellipse(width * 0.8, hitZoneY, 70);

  // Display score and lives
  fill(255);
  text(`Score: ${score}`, 70, 30);
  text(`Lives: ${lives}`, width - 70, 30);

  // Move and display arrows
  for (let i = arrows.length - 1; i >= 0; i--) {
    let arrow = arrows[i];
    image(images[arrow.type], arrow.x - 35, arrow.y - 35, 70, 70);
    arrow.y -= arrowSpeed;

    // Remove arrow if it goes out of screen and reduce lives
    if (arrow.y < 0) {
      arrows.splice(i, 1);
      lives--;
    }
  }

  // Check for game over or win conditions
  if (lives < 1) {
    gameState = "gameOver";
    song.stop(); // Stop the song if the player loses
  } else if (song.isPlaying() === false) {
    gameState = "win";
  }
}

// Function to draw game over screen
function drawGameOver() {
   if (restartButton == 1 && buttonispressed == 0){
    gameState = "start"
     buttonispressed = 1;
  } else if (restartButton == 0 && buttonispressed == 1){
    buttonispressed = 0;
  }
}

// Function to draw win screen
function drawWin() {
   if (restartButton == 1 && buttonispressed == 0){
    gameState = "start"
     buttonispressed = 1;
  } else if (restartButton == 0 && buttonispressed == 1){
    buttonispressed = 0;
  }
}

// Function to handle key presses
function keyPressed() {
  if (key == " ") {
    // Start the serial connection
    setUpSerial();
  }
}

// Function to start the game
function startGame() {
  gameState = "game";
  restartButton = 0;
  score = 0;
  lives = 5;
  arrows = [];
  clearInterval(arrowInterval); // Clear any existing interval
  initiateArrowSpawns();
  song.play(); // Start playing the music when the game starts
}

// Function to restart the game
function restartGame() {
  gameState = "start"; // Change gameState to 'start' to return to title screen
  score = 0;
  lives = 5;
  arrows = [];
  clearInterval(arrowInterval); // Clear any existing interval
  initiateArrowSpawns();
  restartButton = 0; // Reset restart button state
}


// Function to initiate arrow spawns
function initiateArrowSpawns() {
  let interval = 60000 / (songBPM / 2 ); // Halve the BPM to spawn arrows at a slower rate
  arrowInterval = setInterval(() => {
    let direction = random(["left", "up", "down", "right"]);
    spawnArrow(direction);
  }, interval);
}

// Function to spawn an arrow
function spawnArrow(direction) {
  let xPosition;
  switch (direction) {
    case "left":
      xPosition = width * 0.2;
      break;
    case "up":
      xPosition = width * 0.4;
      break;
    case "down":
      xPosition = width * 0.6;
      break;
    case "right":
      xPosition = width * 0.8;
      break;
  }
  arrows.push({ x: xPosition, y: height, type: direction });
}

// This function will be called by the web-serial library
// with each new *line* of data. The serial library reads
// the data until the newline and then gives it to us through
// this callback function
function readSerial(data) {
  //////////////////////////////////////////////////
  // READ FROM ARDUINO HERE
  //////////////////////////////////////////////////

  if (data != null) {
    // Make sure there is actually a message
    // Split the message
    let fromArduino = split(trim(data), ",");
    // If the right length, then proceed
    if (fromArduino.length == 5) {
      // Only store values here
      // Do everything with those values in the main draw loop

      // We take the string we get from Arduino and explicitly
      // convert it to a number by using int()
      // e.g. "103" becomes 103
      leftButton = int(fromArduino[0]);
      upButton = int(fromArduino[1]);
      downButton = int(fromArduino[2]);
      rightButton = int(fromArduino[3]);
      restartButton = int(fromArduino[4]);
      //console.log("left button is" + leftButton);
      //console.log("right button is" + rightButton);
      //console.log("up button is" + upButton);
      //console.log("down button is" + downButton);
      //console.log("restart is" + restartButton);
    }

    /////////////////////////////////////////////////
    // SEND TO ARDUINO HERE (handshake)
    /////////////////////////////////////////////////
    let sendToArduino = "\n";
    writeSerial(sendToArduino);
  }
}
Arduino Code:
This section of code is designed to interface with hardware buttons, specifically set up for a gaming application. It starts by defining pin numbers connected to various buttons on an Arduino board: left, up, down, right, and a restart button. Each button is associated with a specific pin number ranging from 2 to 6.
The setup() function initializes the serial communication at a baud rate of 9600 to enable data transfer between the Arduino and a computer. It also configures each button pin as an input, preparing the Arduino to read the states of these buttons.
In the `oop() function, the code continuously reads the state of each button using the digitalRead() function. It checks whether each button is pressed or not, producing a digital high or low signal. These states are then formatted into a comma-separated string and sent over the serial connection. This allows another system, such as a computer running a game, to receive real-time input from these hardware buttons, integrating physical interactions into digital applications.
// Define pin numbers for buttons
const int leftButtonPin = 2;
const int upButtonPin = 3;
const int downButtonPin = 4;
const int rightButtonPin = 5;
const int restartButtonPin = 6;


void setup() {
  Serial.begin(9600);
  // Set button pins as inputs
  pinMode(leftButtonPin, INPUT);
  pinMode(upButtonPin, INPUT);
  pinMode(downButtonPin, INPUT);
  pinMode(rightButtonPin, INPUT);
  pinMode(restartButtonPin, INPUT);
}

void loop() {
  // Read button states and send data over serial
  int leftButton = digitalRead(leftButtonPin);
  int upButton = digitalRead(upButtonPin);
  int downButton = digitalRead(downButtonPin);
  int rightButton = digitalRead(rightButtonPin);
  int restartButton = digitalRead(restartButtonPin);

  // Send button states to serial
  Serial.print(leftButton);
  Serial.print(",");
  Serial.print(upButton);
  Serial.print(",");
  Serial.print(downButton);
  Serial.print(",");
  Serial.print(rightButton);
  Serial.print(",");
  Serial.println(restartButton);

}
I am very proud of myself for pushing myself into an area that I previously left unexplored. Considering how I could not even make the normal game for my midterm, and I was able to do it for my final and even taking it a step further for my final. I am truly happy I was given the freedom to do this. I would like to particularly mention that without the help and support I got from professor Aya, I would have given up a long time ago.
I feel like one thing I wanted to do with this project that I could not was upload my own custom map for the songs and have different difficulties and songs (just like a normal DDR arcade machine). I think that would be important for me as it allows to input even more of my creativity into this project.
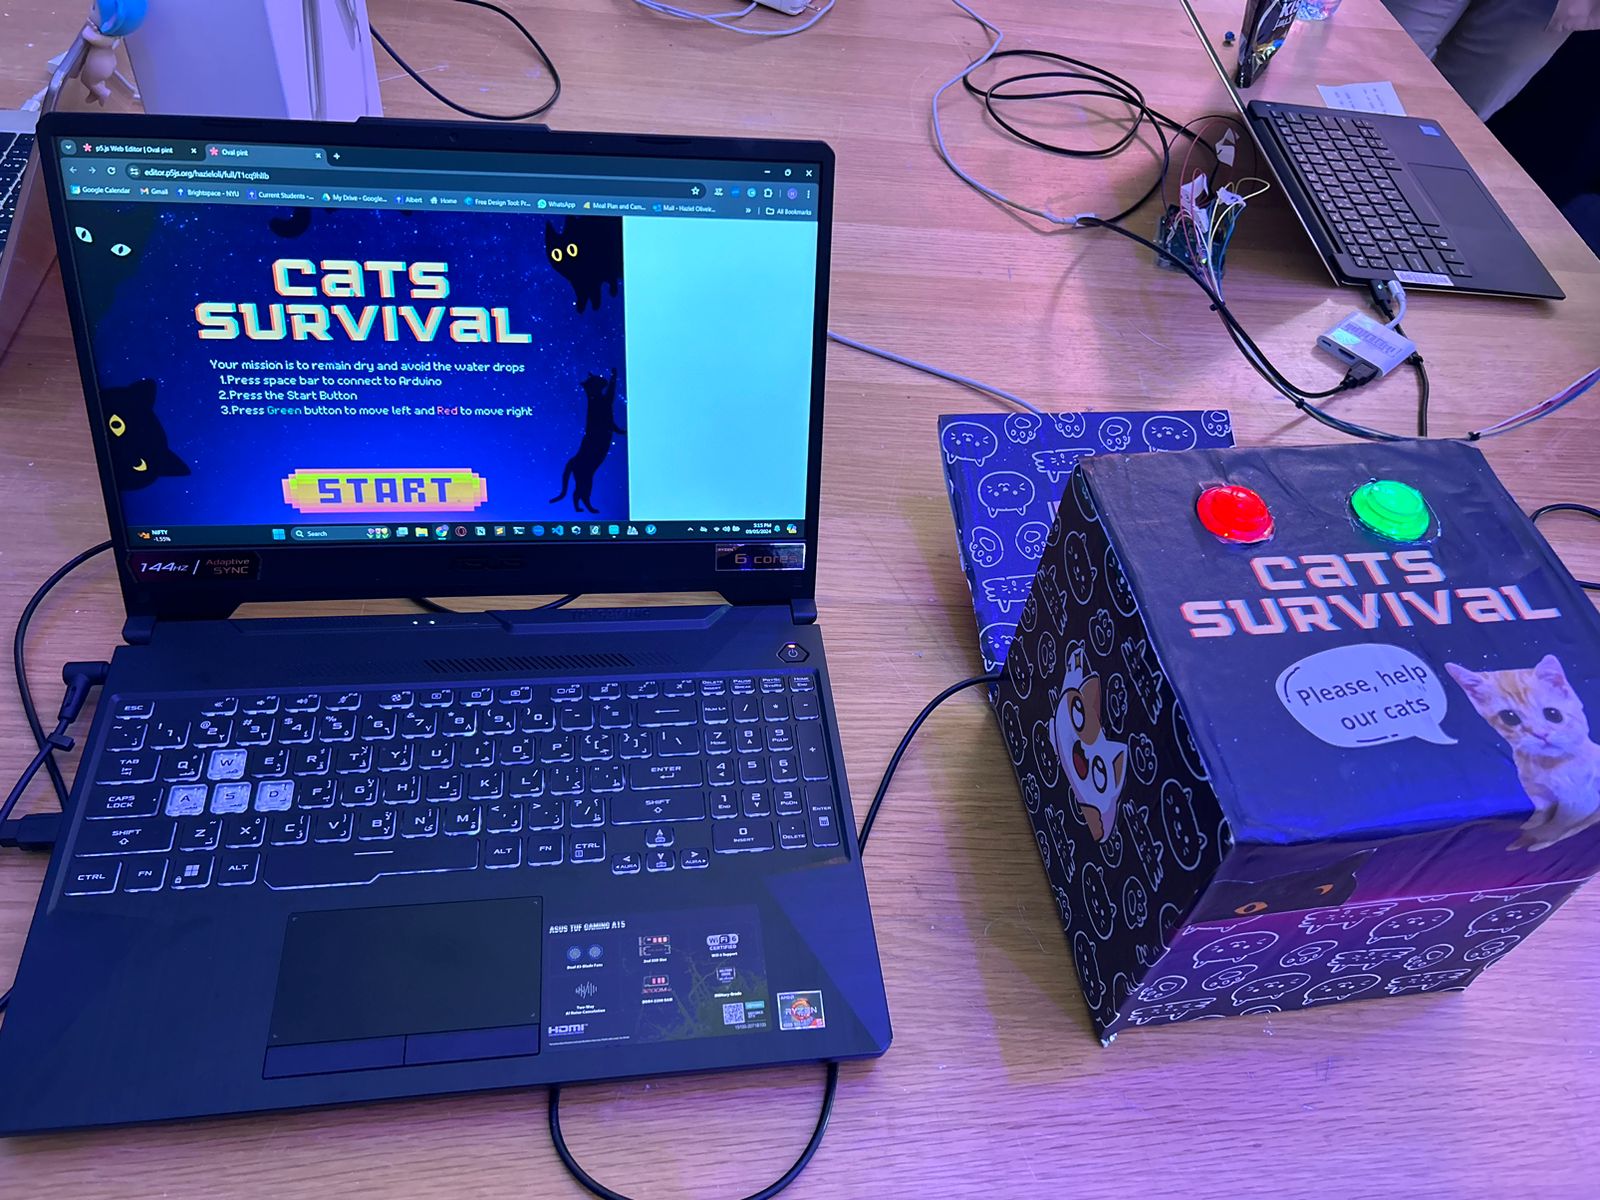
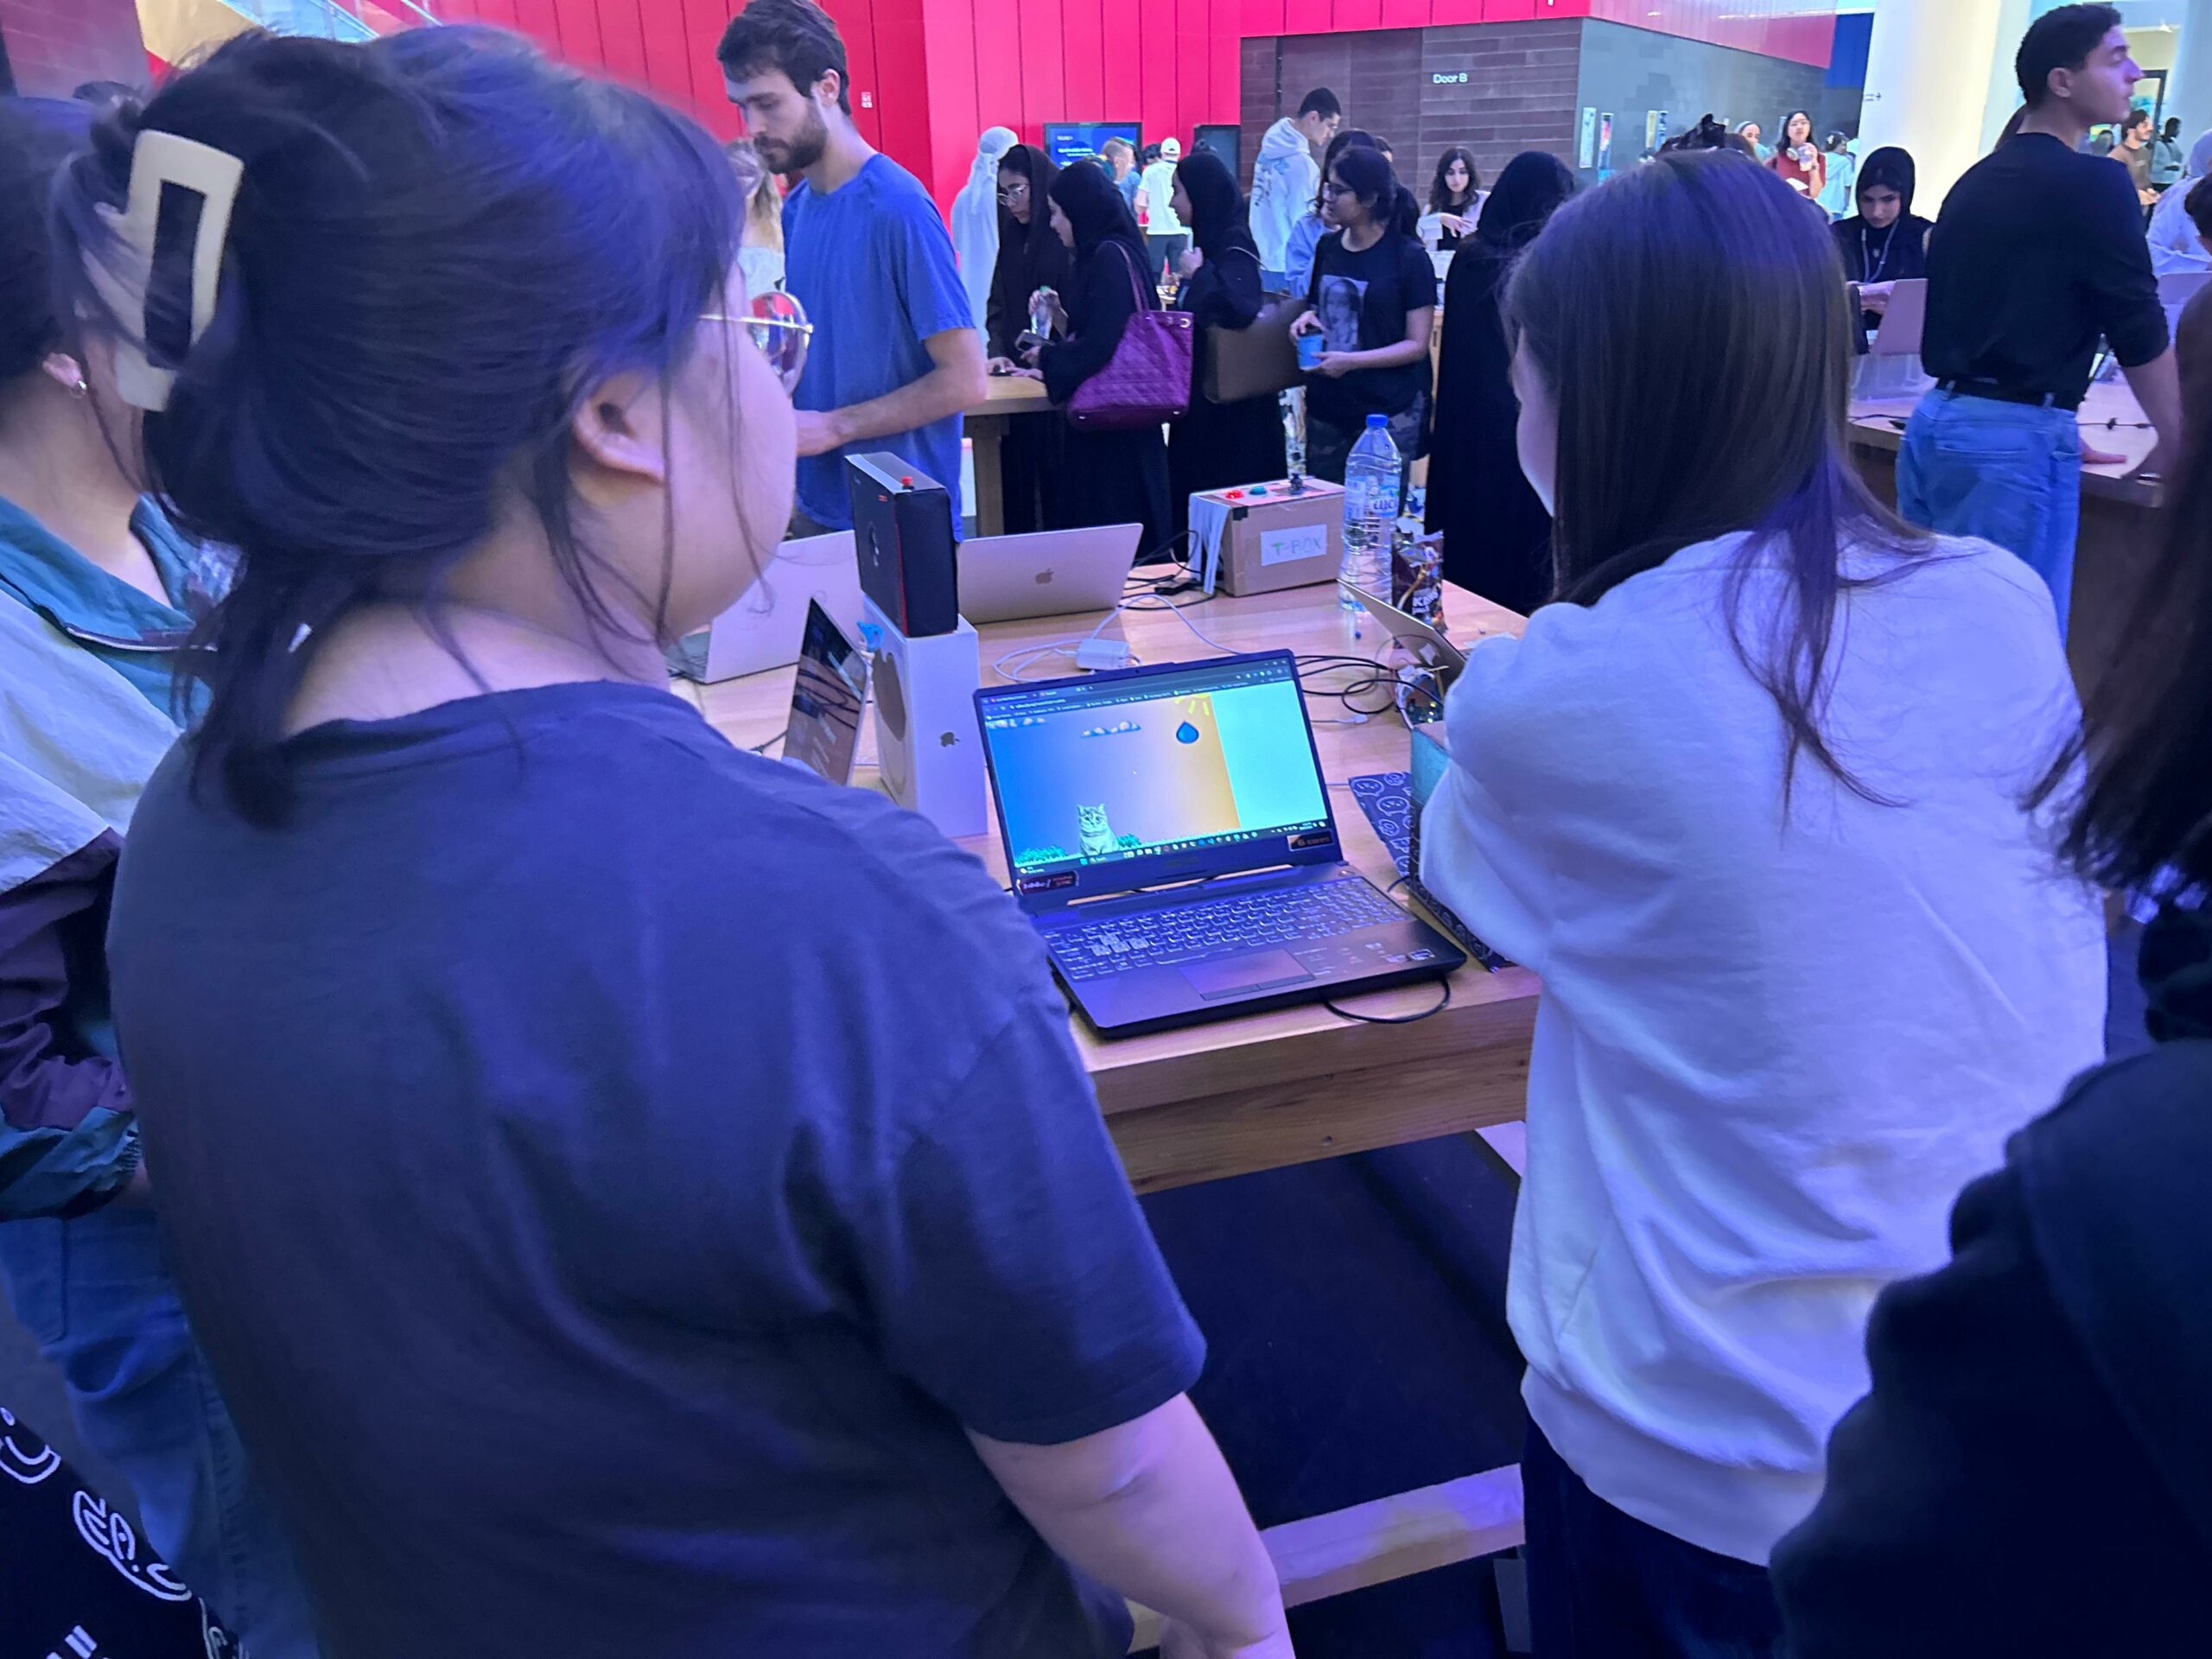
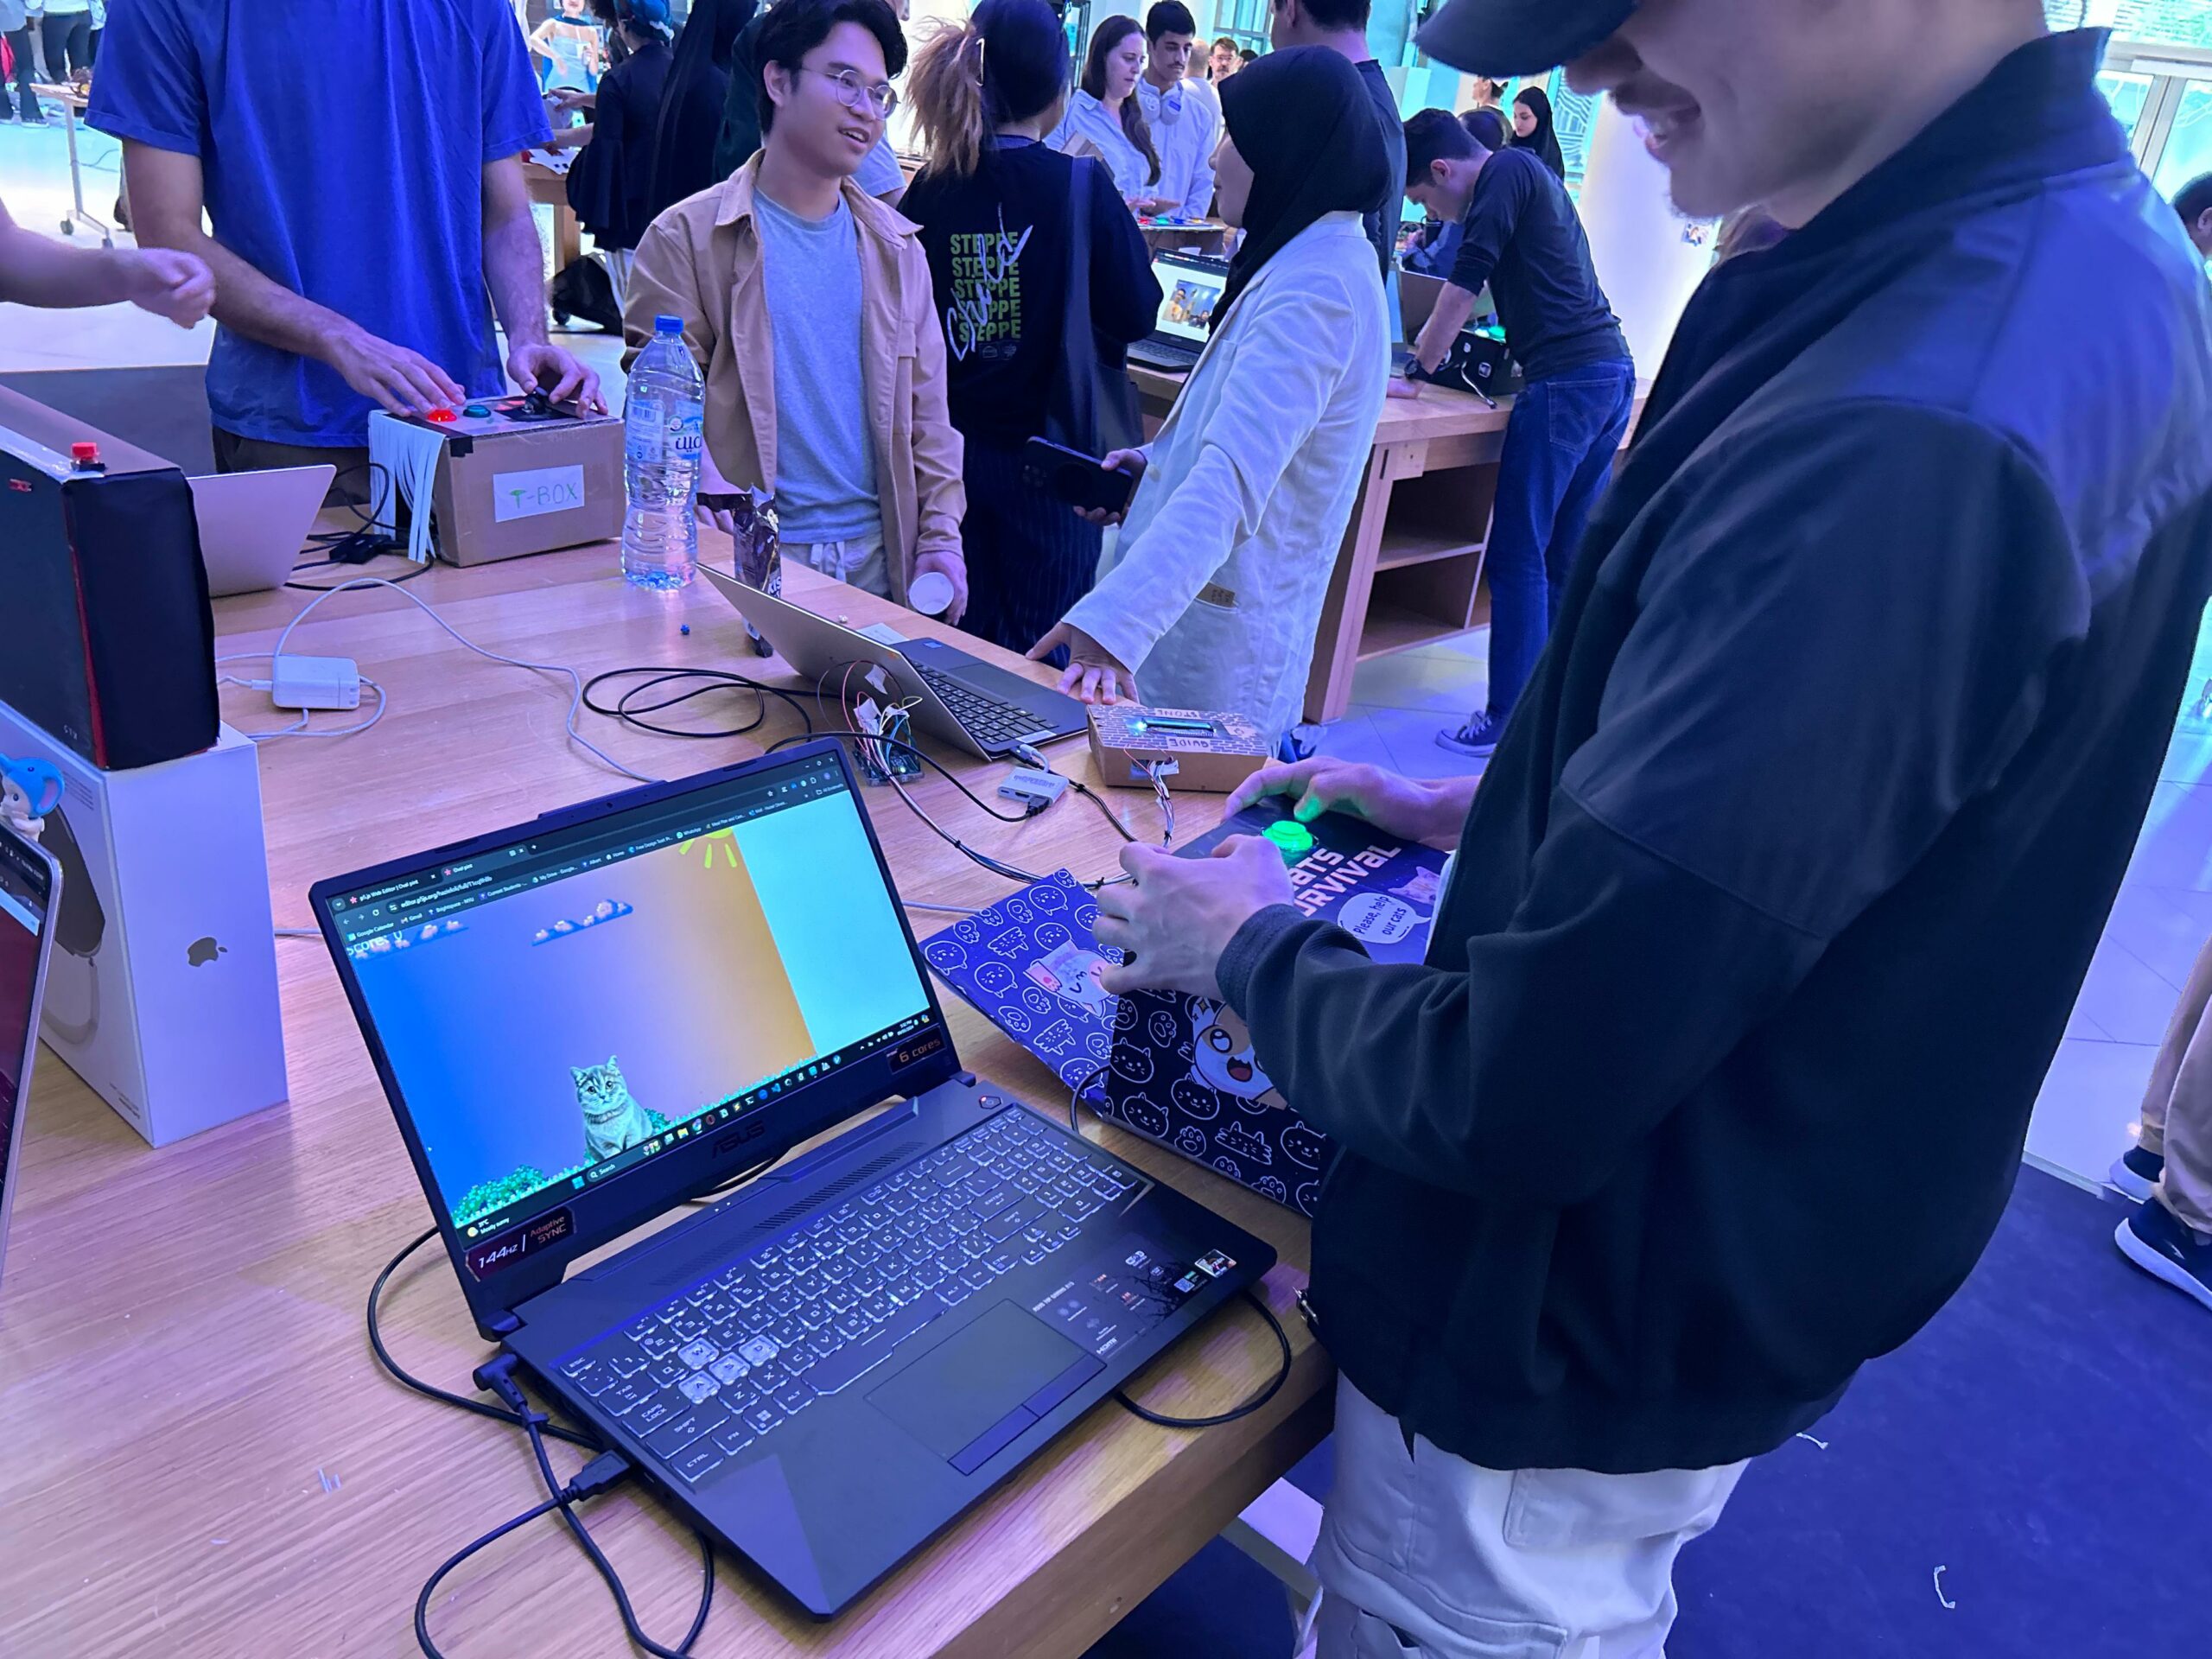
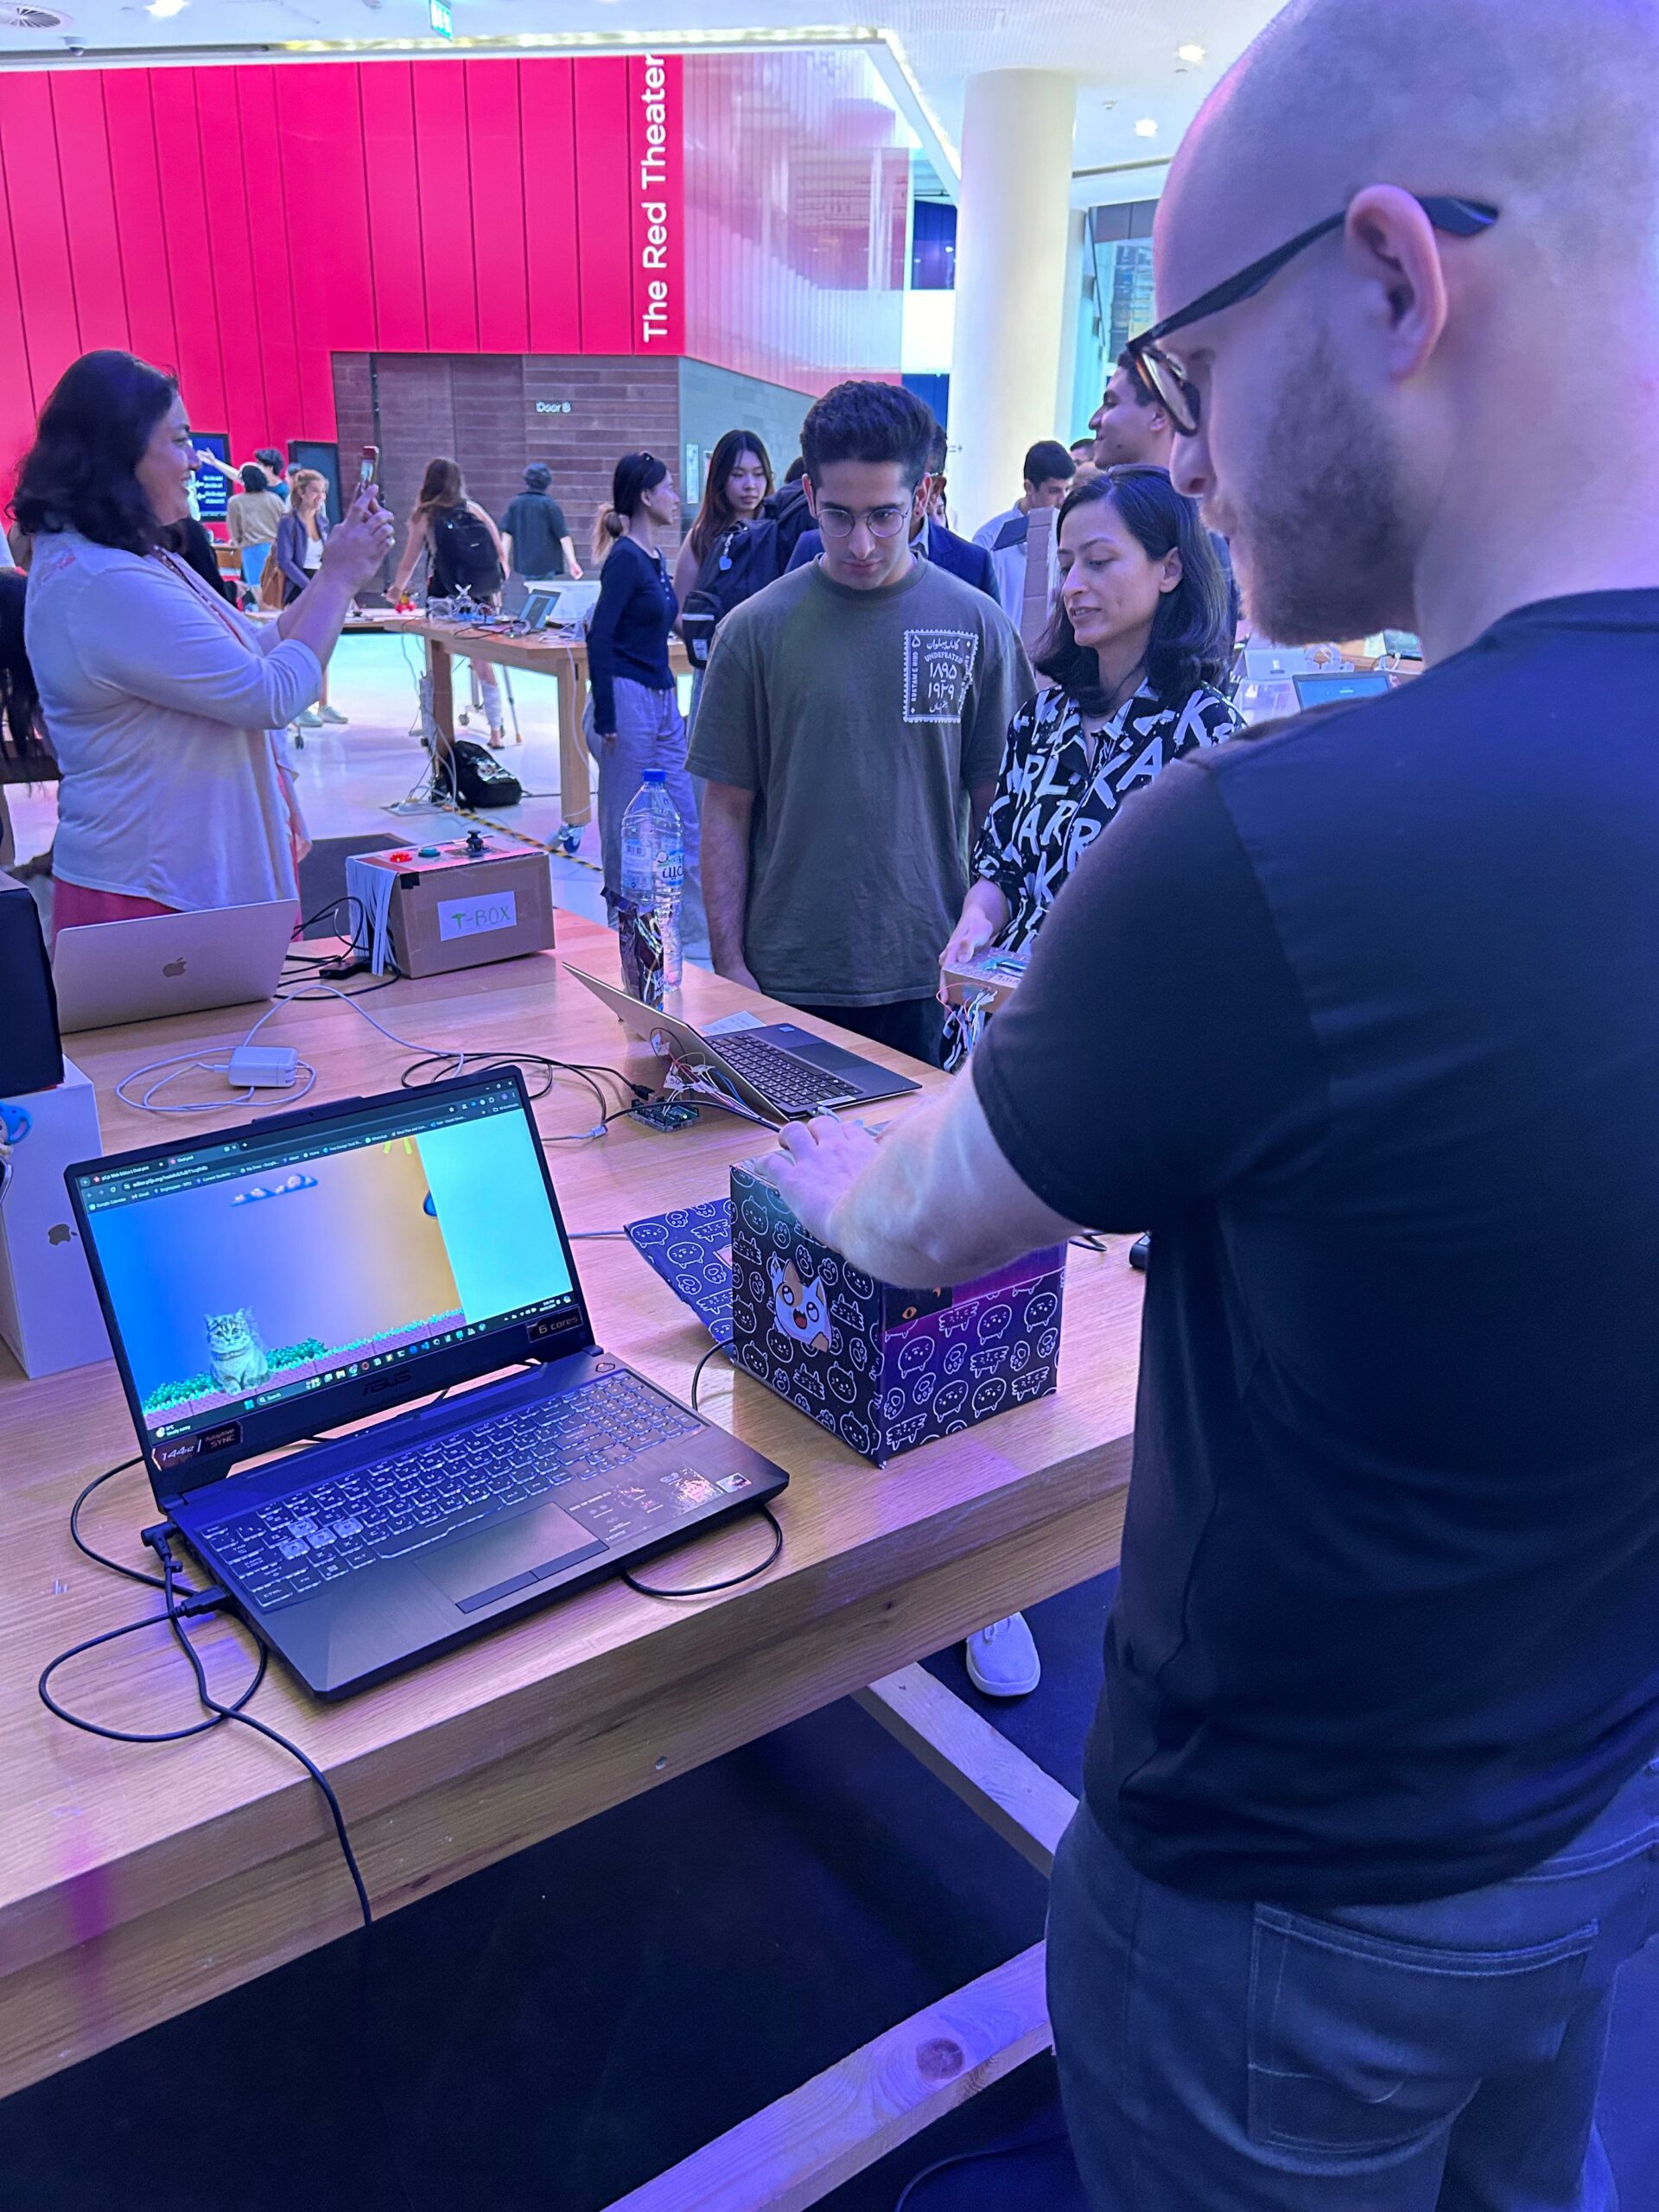
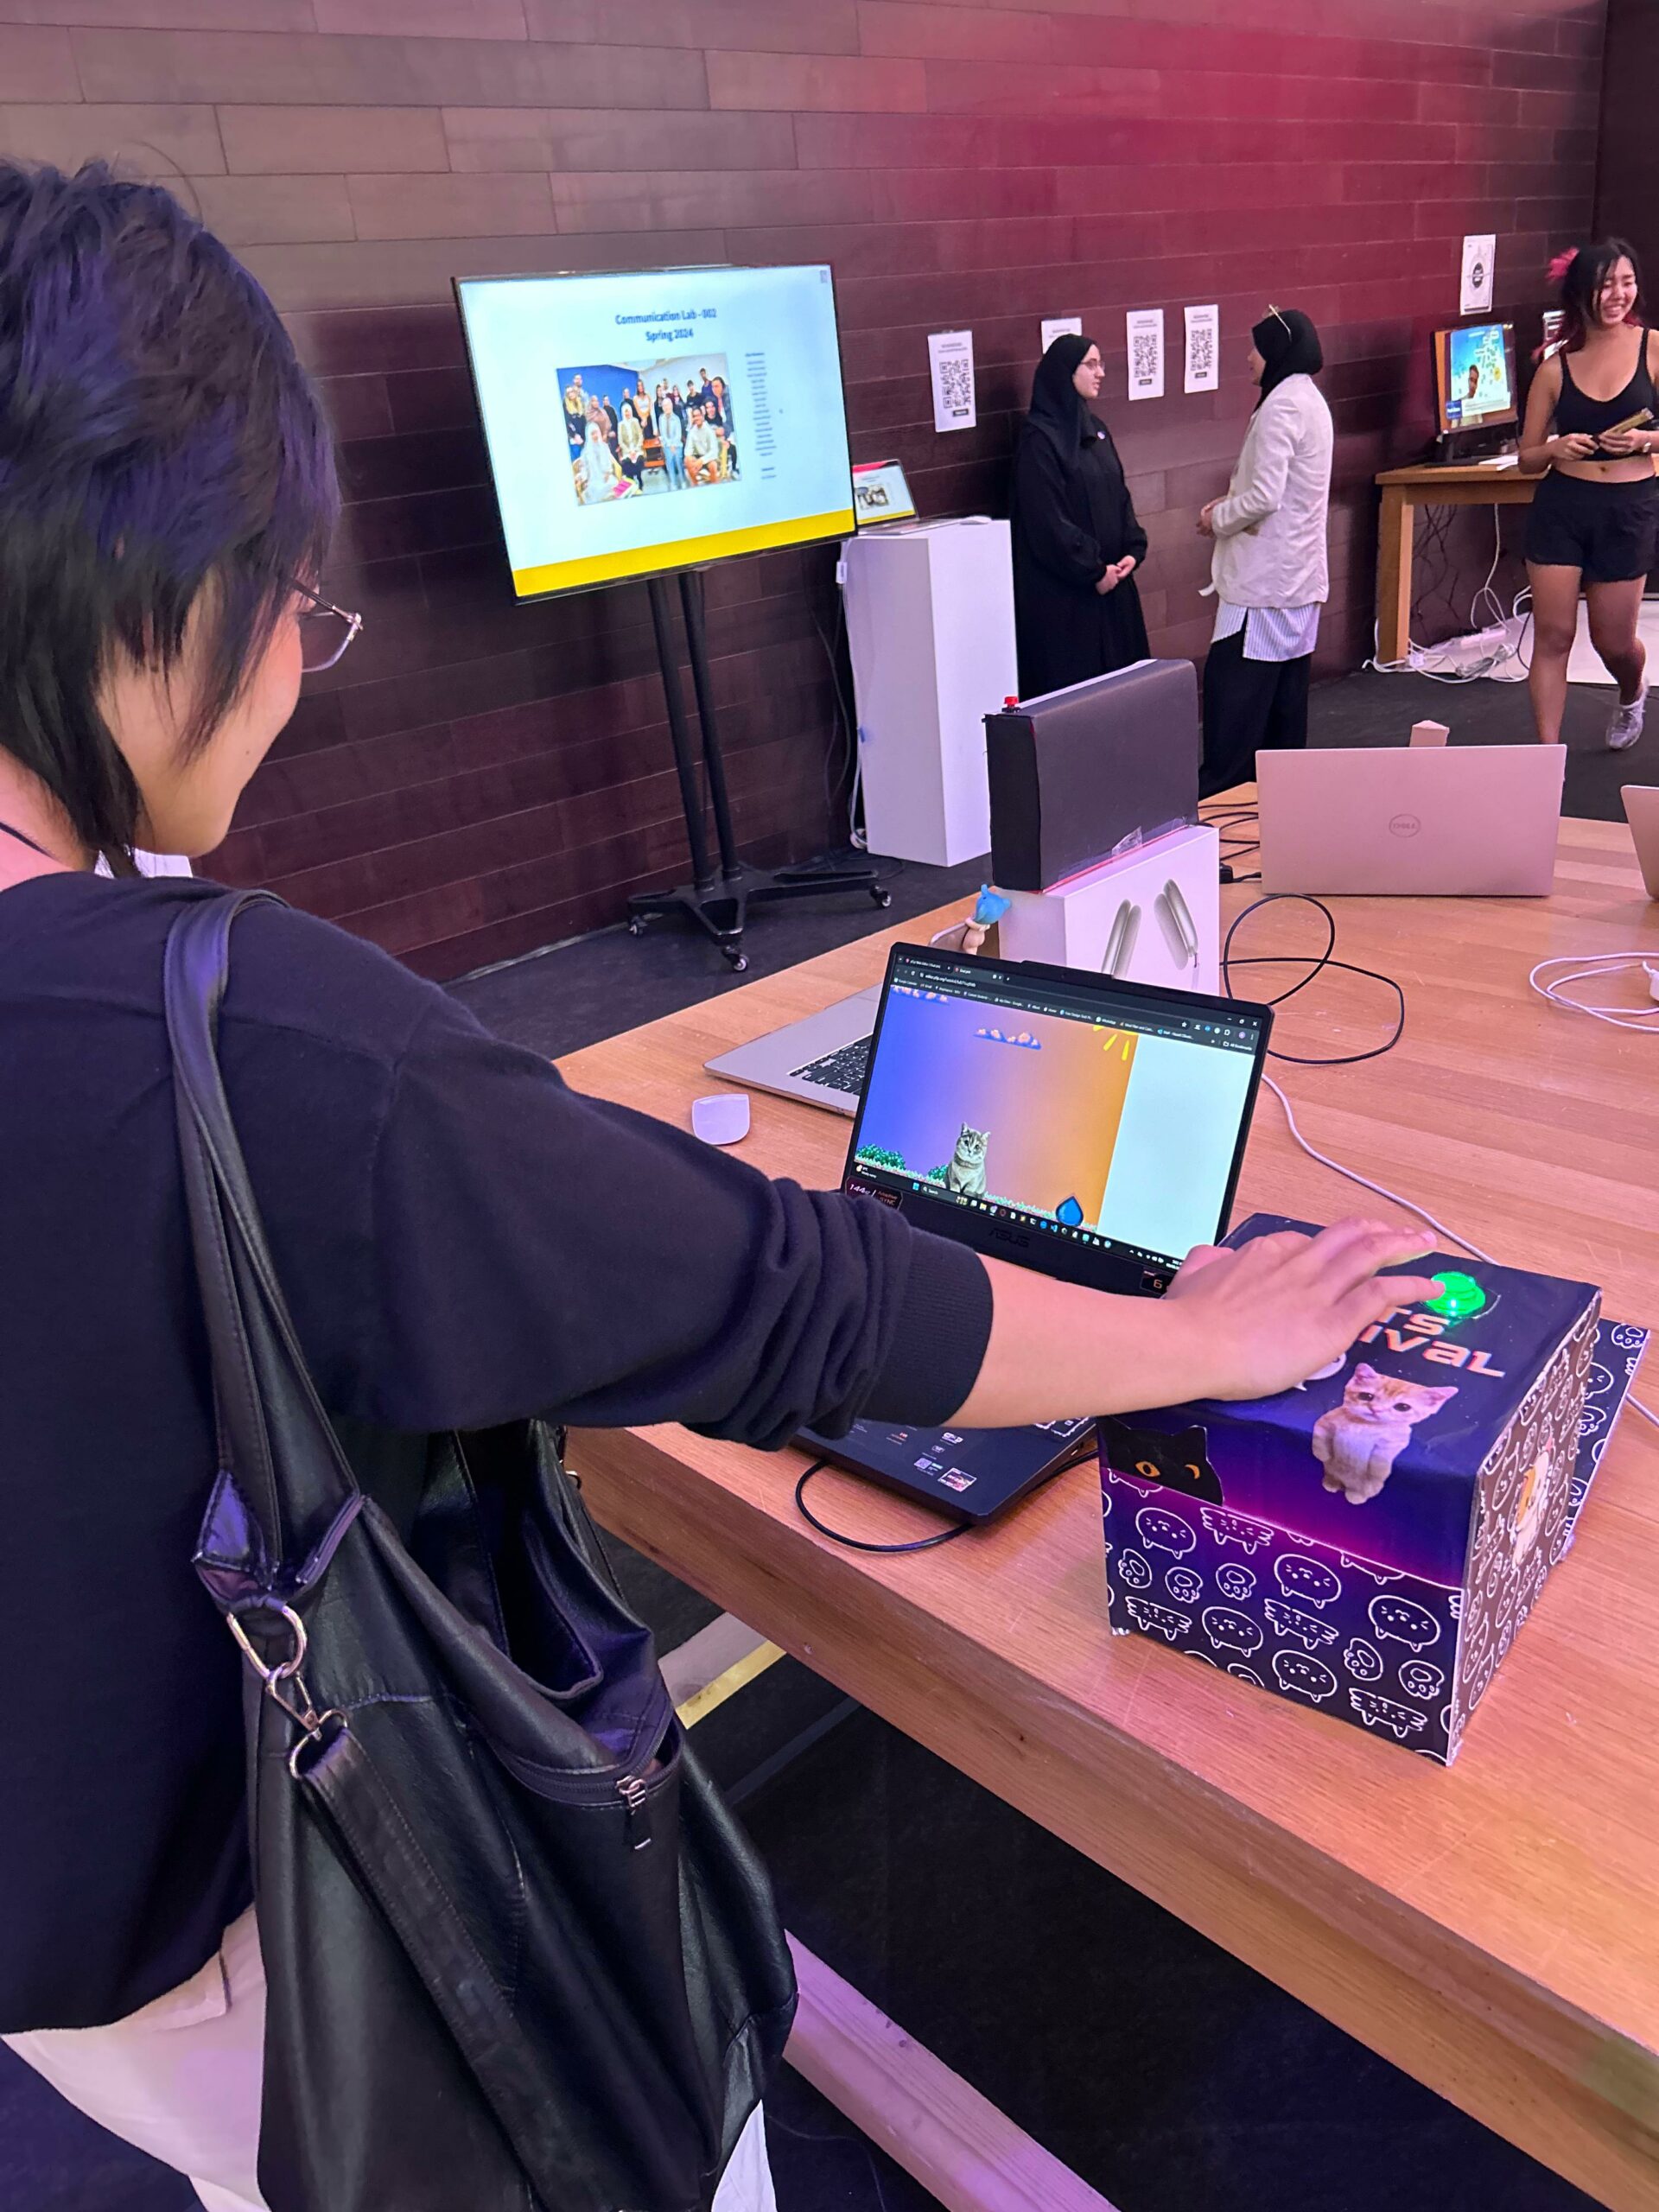
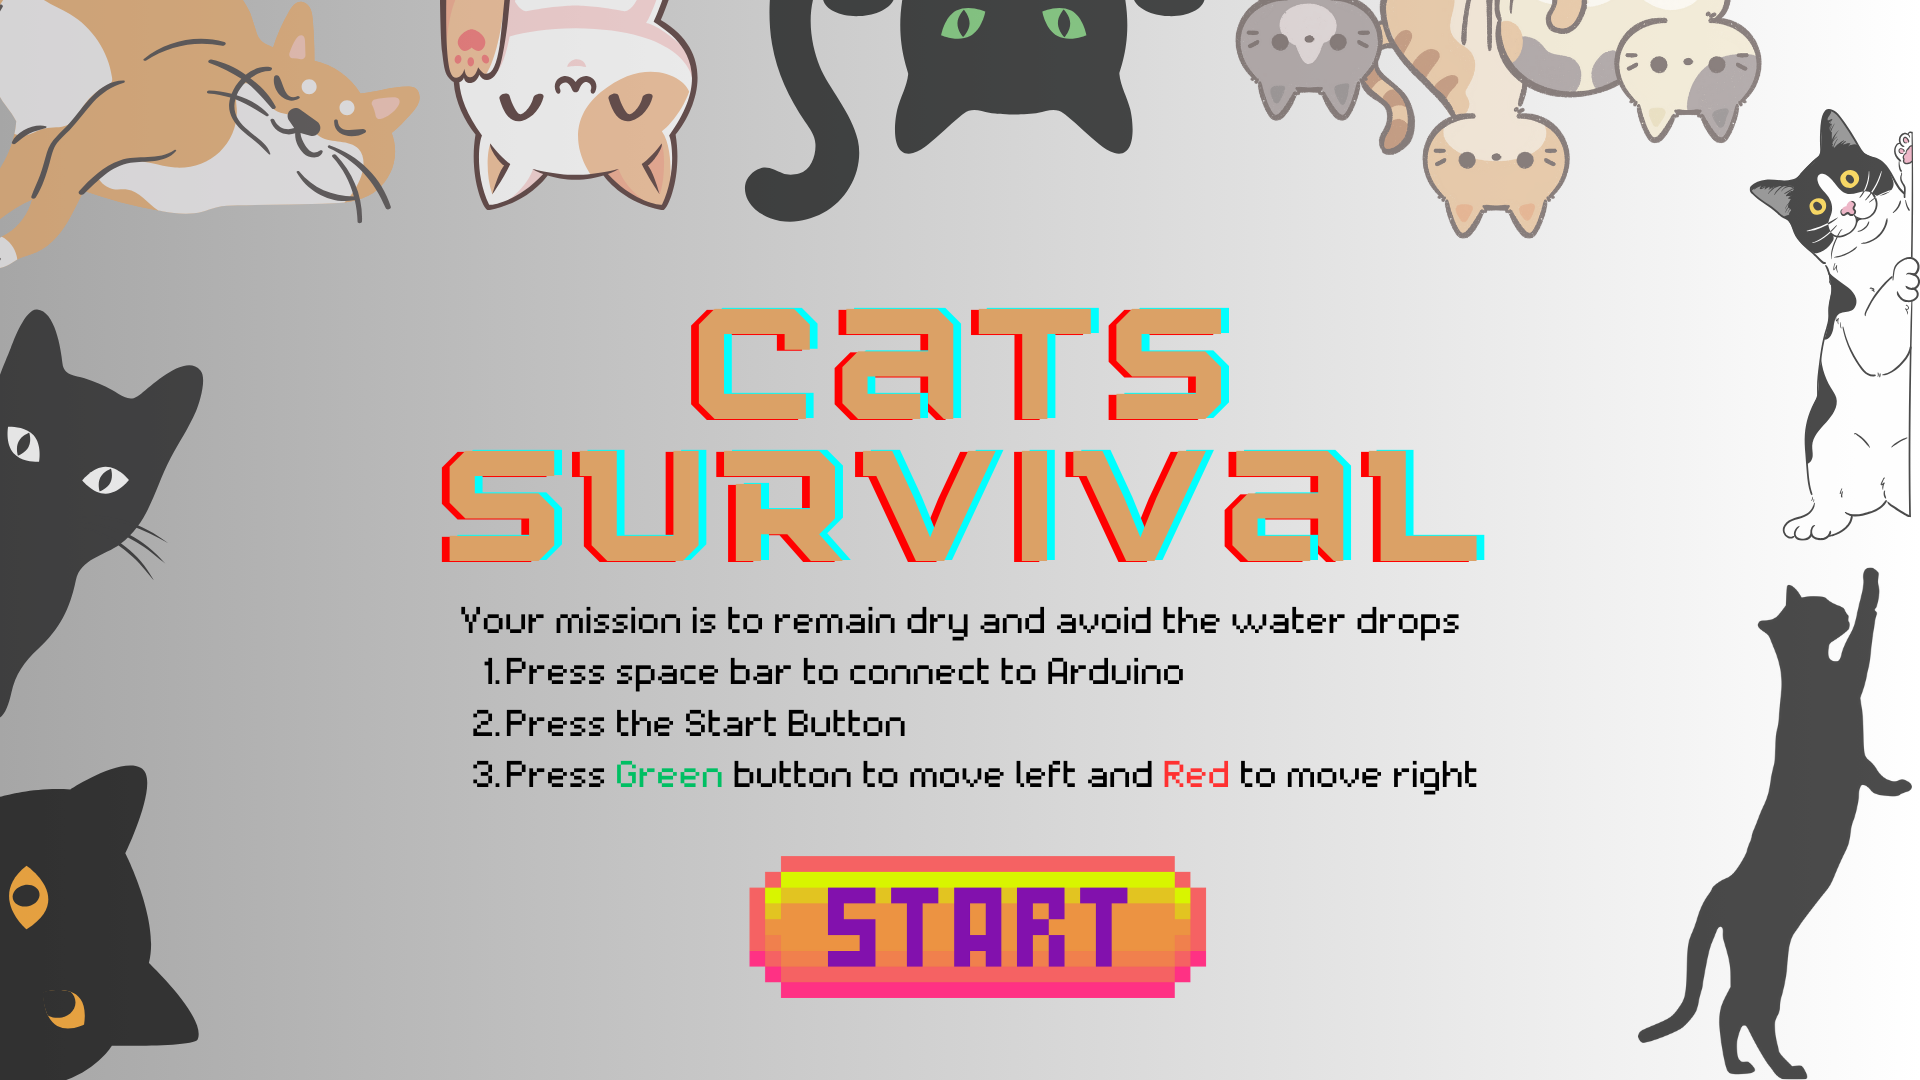
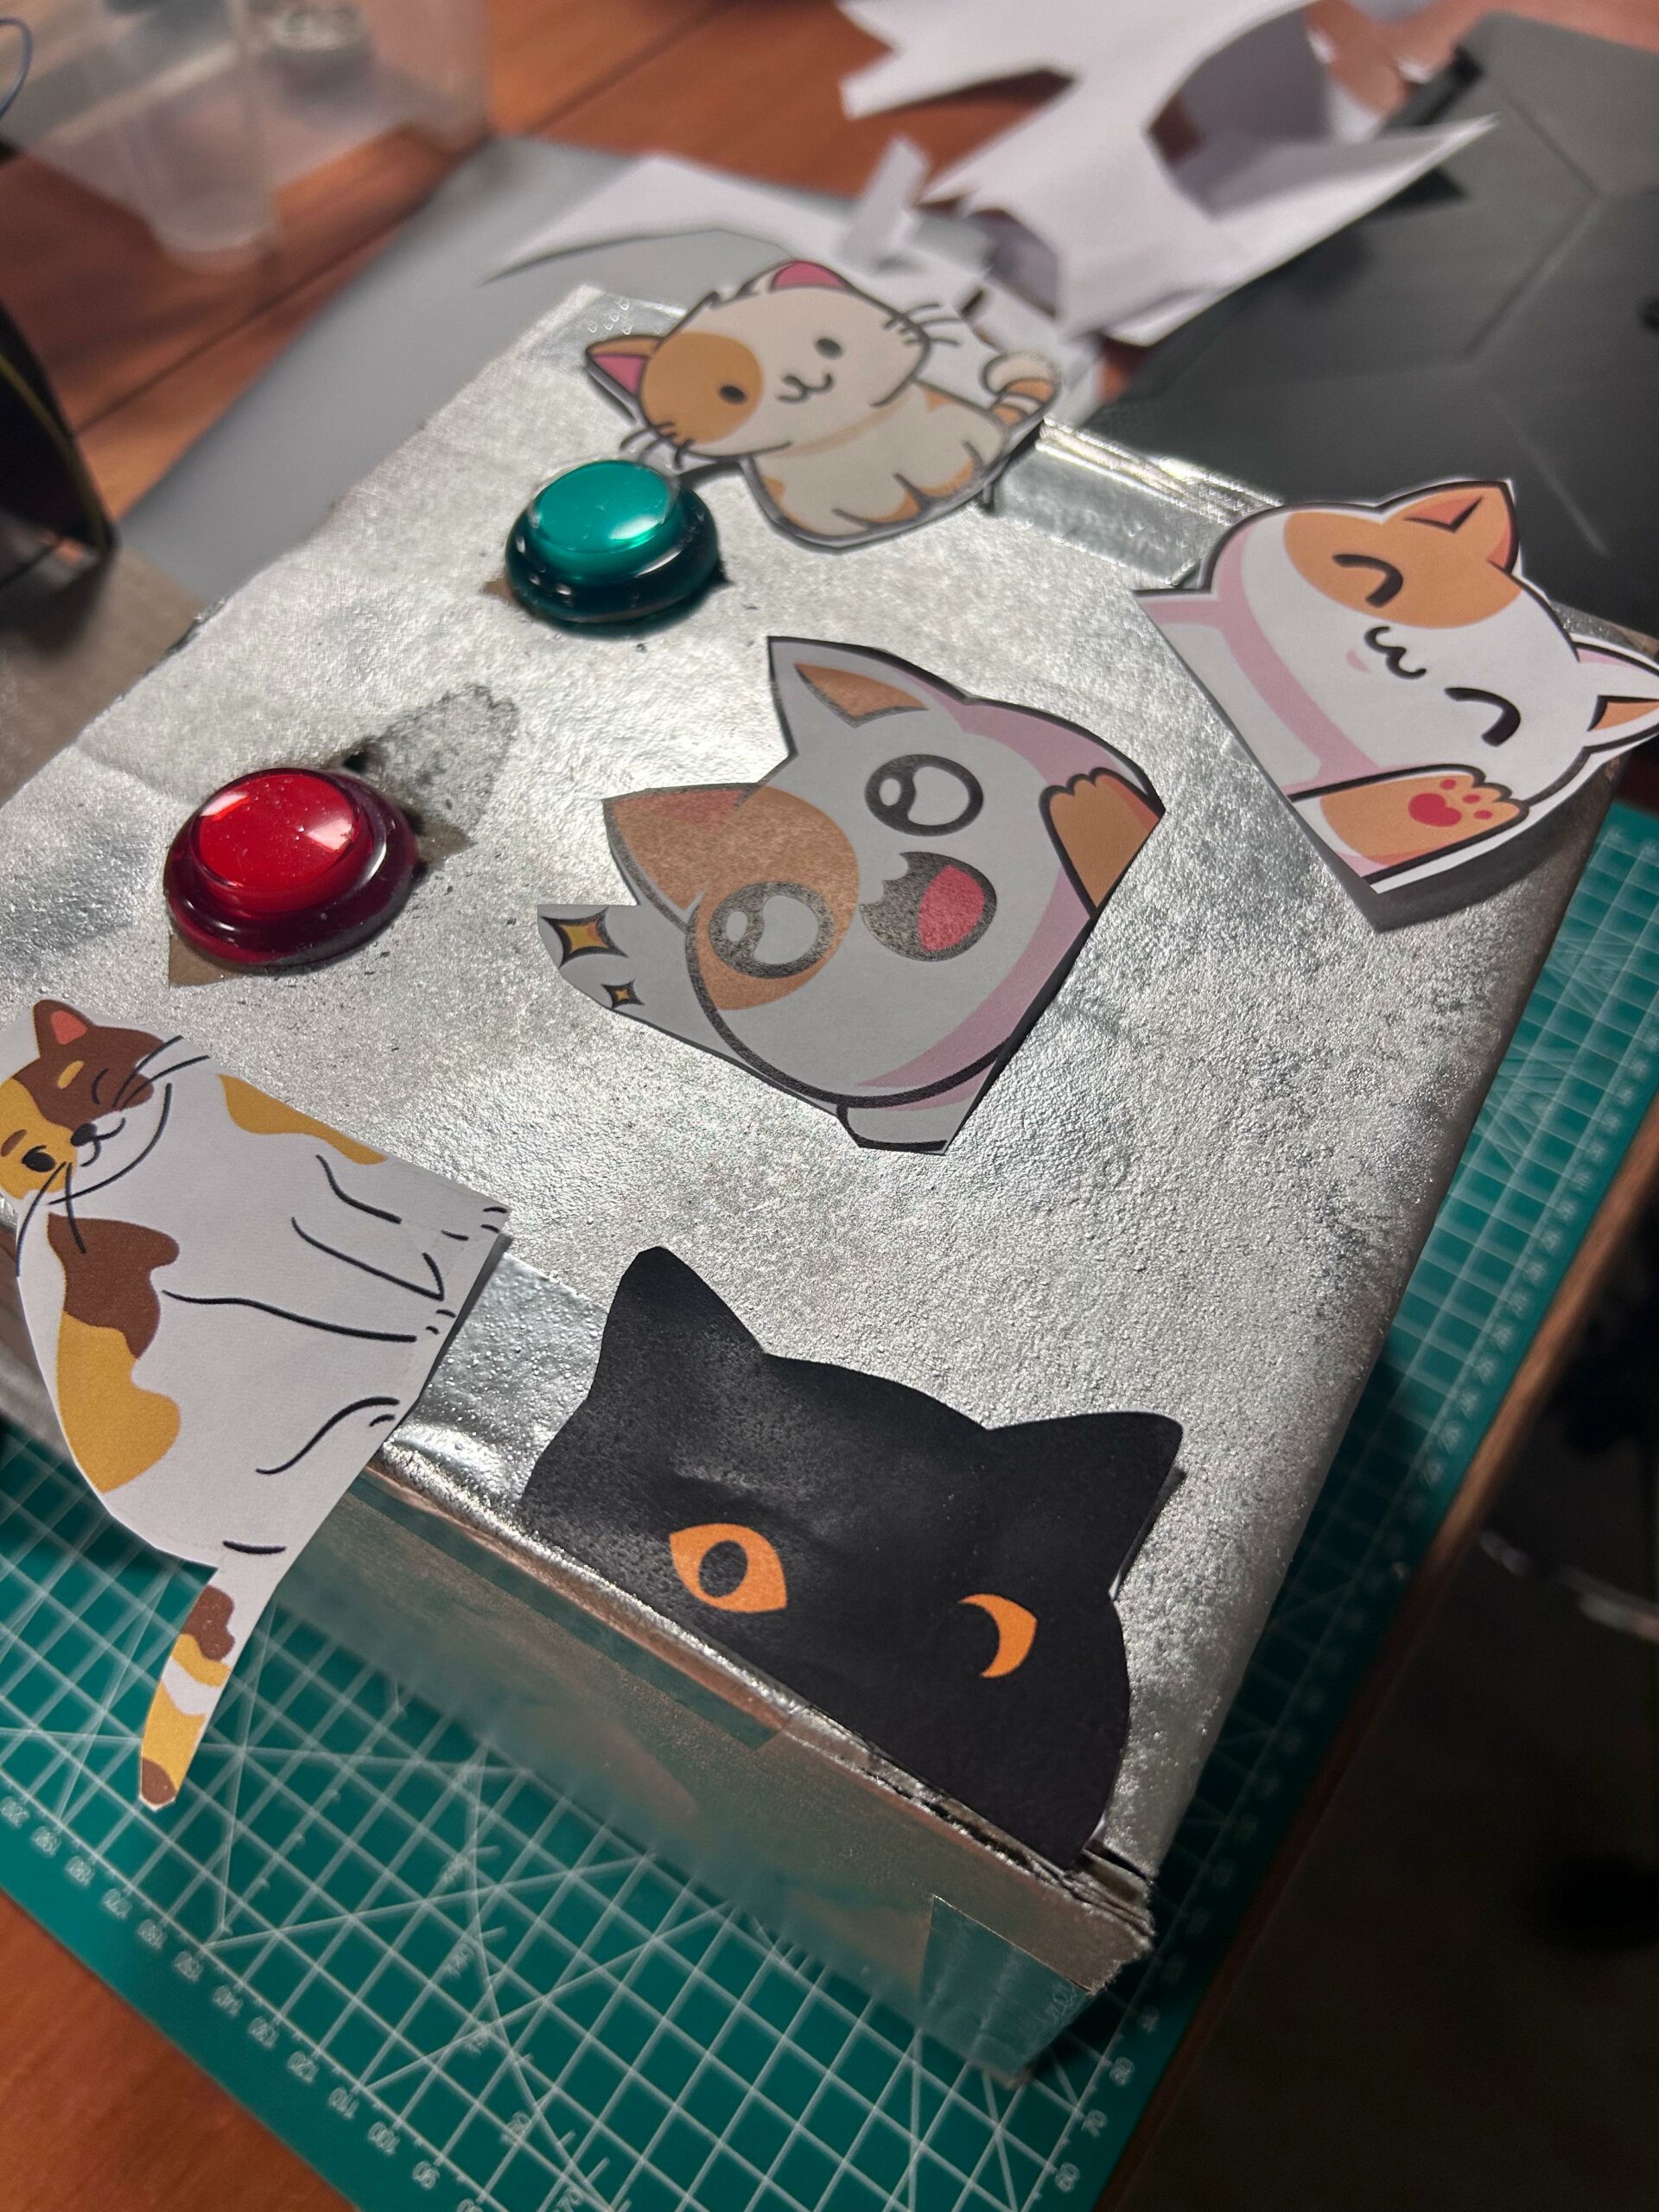
My inspiration for this project was one questions I have asked myself really often during the rainy days: “Where do the campus cats go?” and “How do they survive the rain?”. Based on this, I created “CATS SURVIVAL”, inspired also by the classic arcade games where players navigate through obstacles to achieve a high score. In this game, players engage with Arduino push buttons to control the cat attempting to avoid falling water drops while traversing a colorful campus setting.
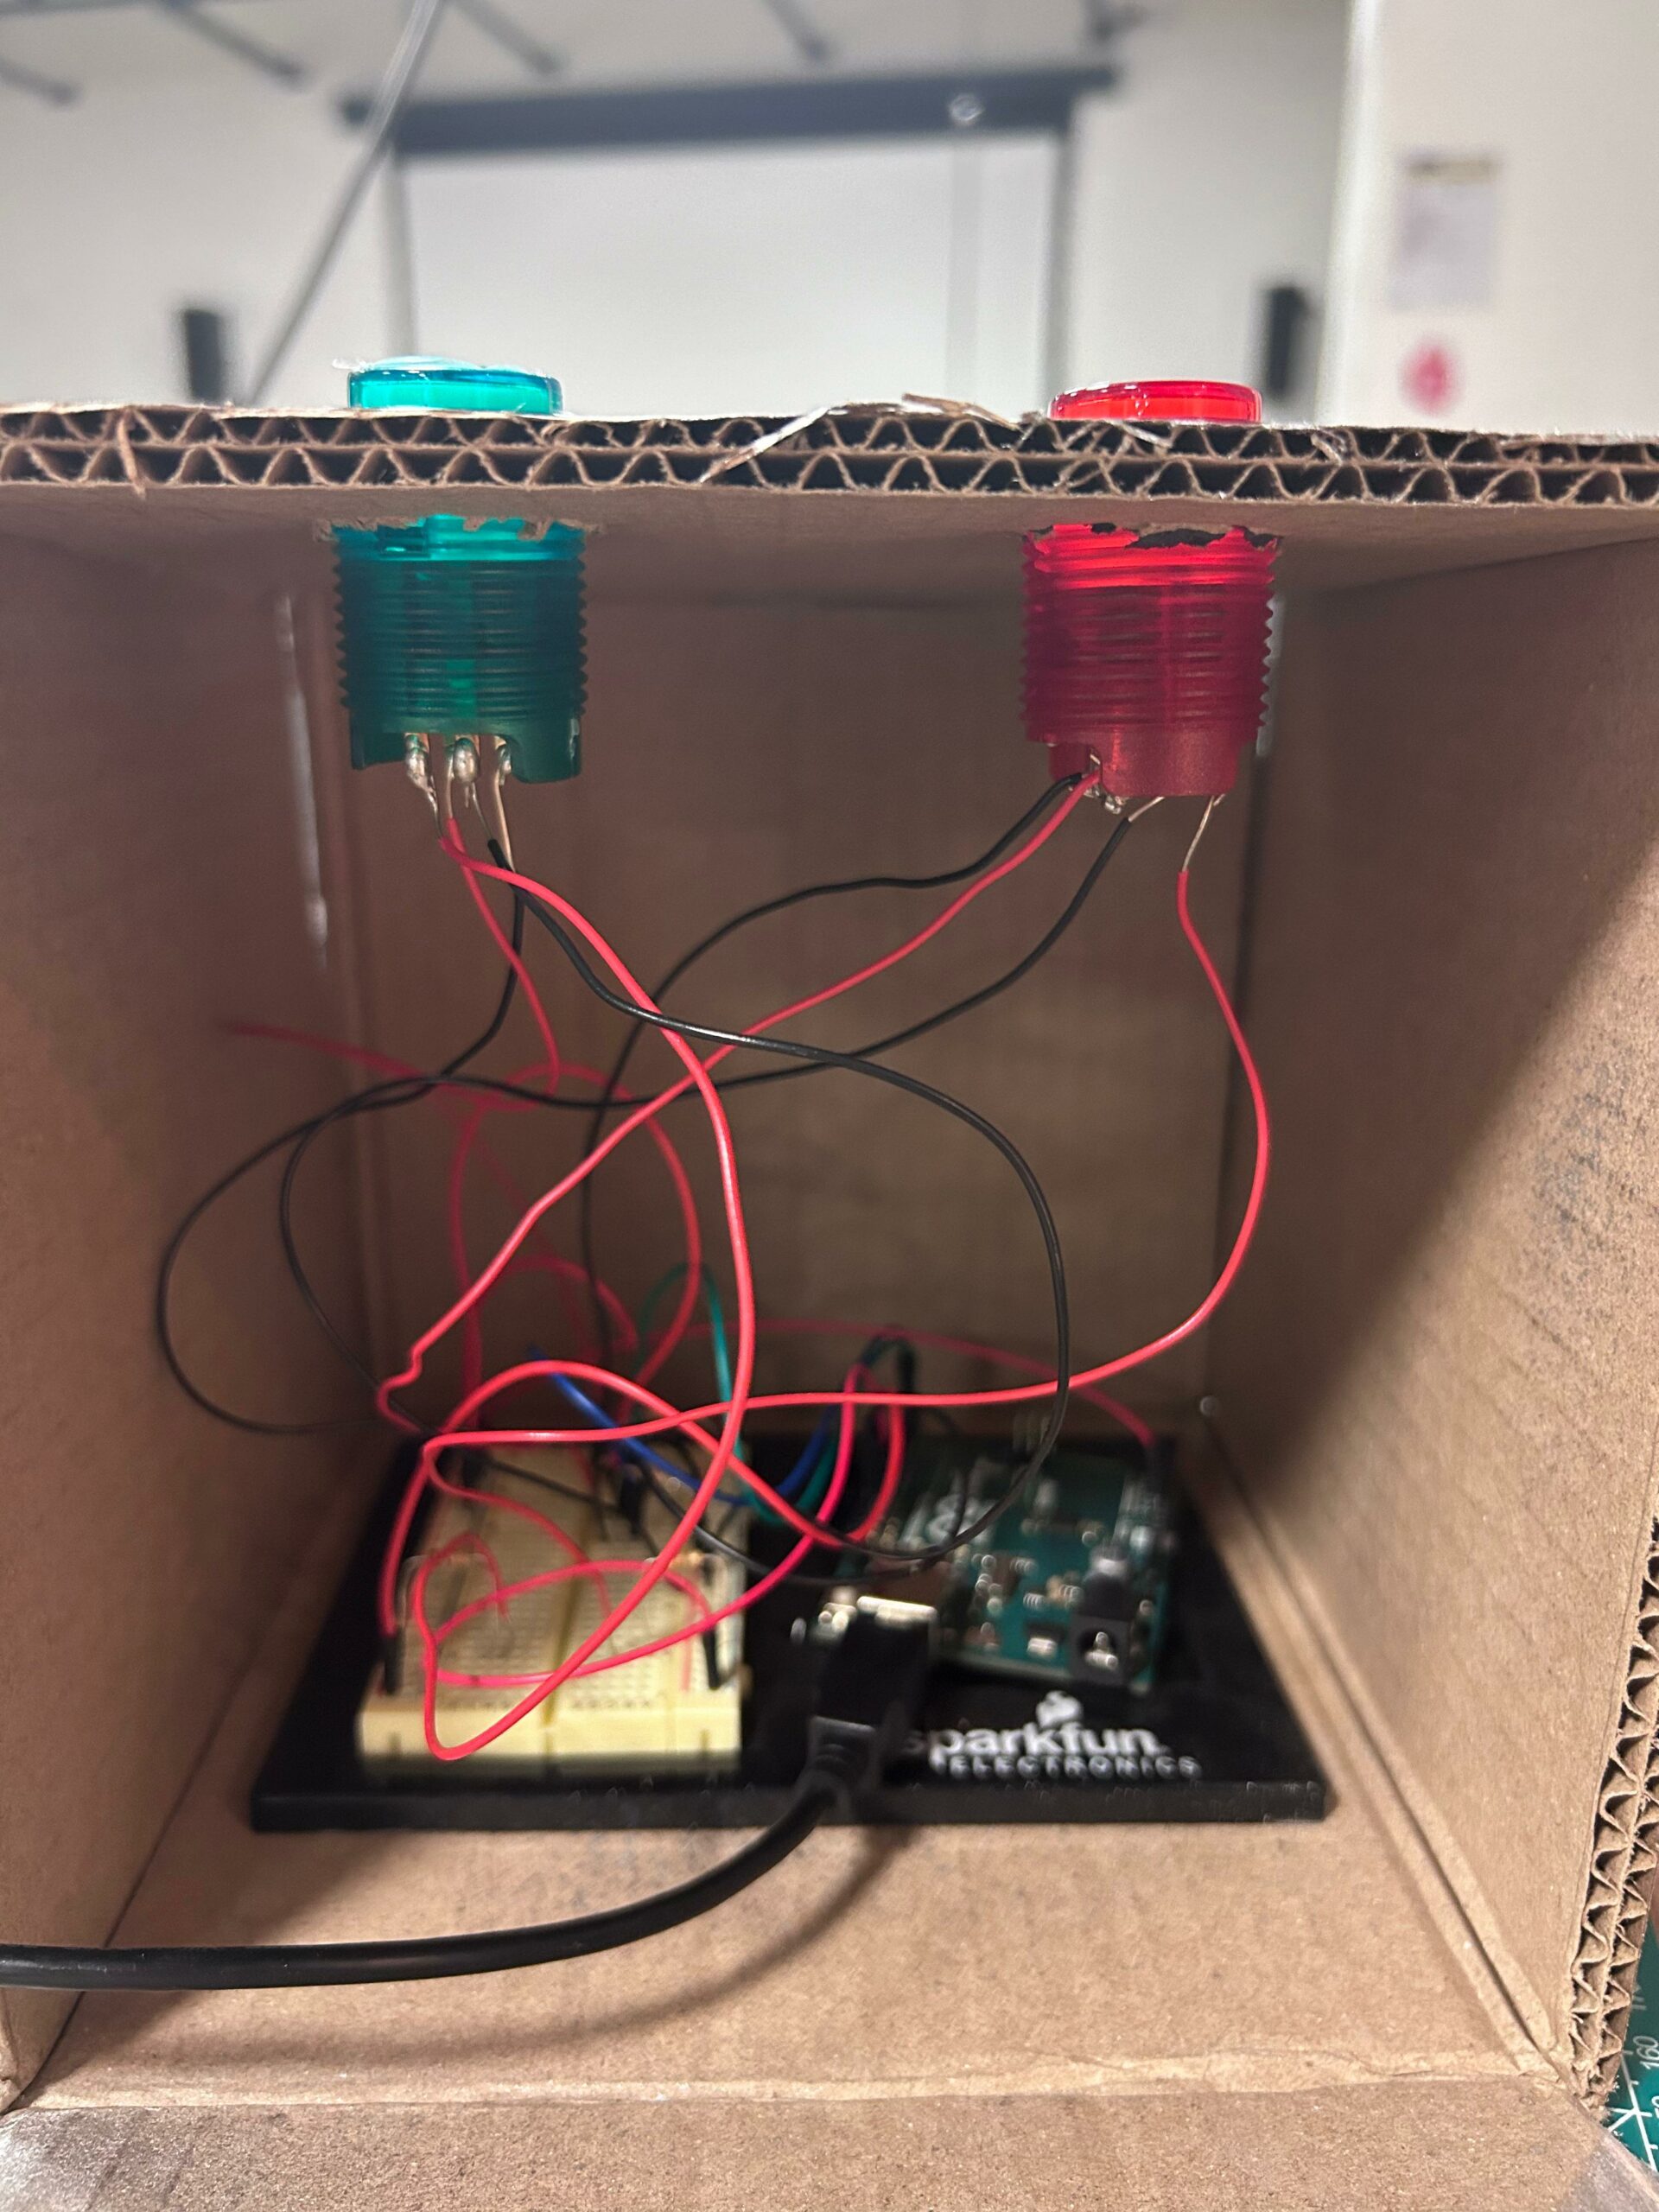
Final Setup:
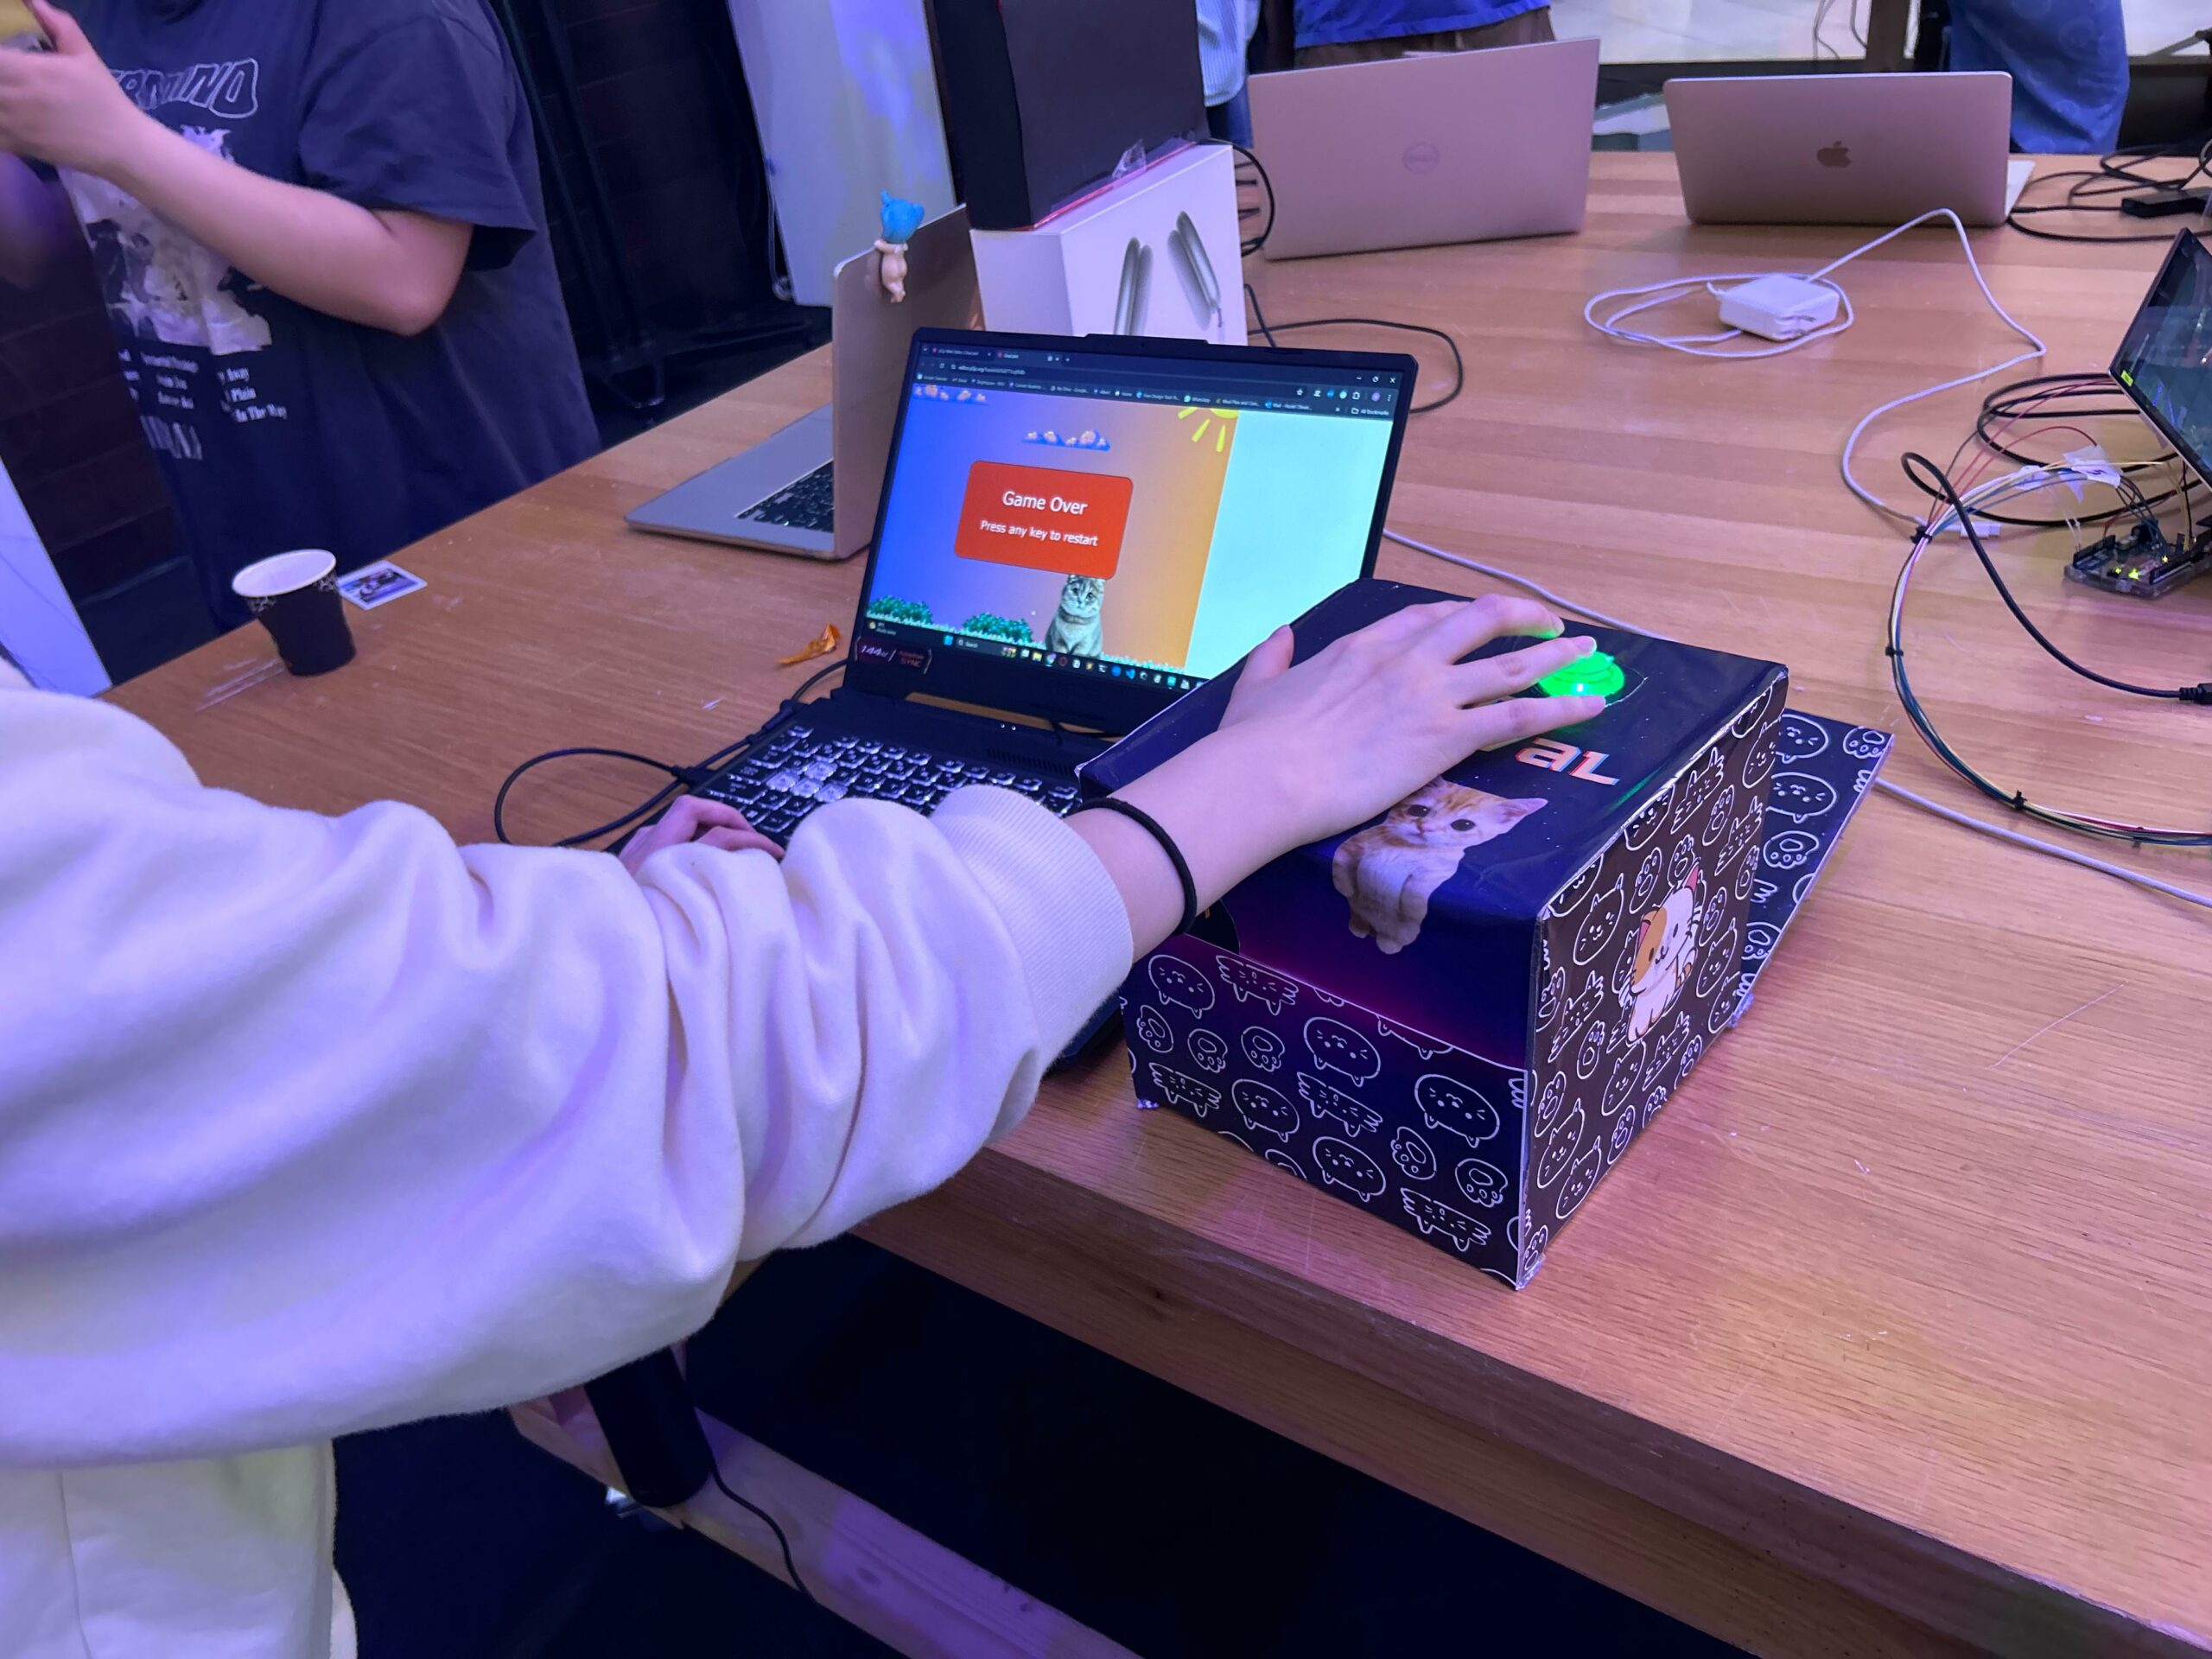
IM Showcase:
How it works:
Players start by launching the game, where they are greeted with a vibrant start page featuring the game’s logo. Once the game begins, the cat automatically appears at the center of the screen, and the player’s objective is to keep the cat from being hit by falling water drops.
Using a connected serial input device (Arduino), players can move the cat left or right, dodging incoming obstacles. Each successful dodge increases the player’s score, while collision with a water drop ends the game.
As the game progresses, the speed, and frequency of falling water drops increase, challenging the player’s reflexes and agility. Upon game over, players can restart the game by pressing any key, offering them the opportunity to beat their previous high score and continue the thrilling dodge-and-survive gameplay.
// Constants won't change. They're used here to set pin numbers:
const int buttonPin1 = 2;  // The number of the first pushbutton pin
const int buttonPin2 = 3;  // The number of the second pushbutton pin
const int ledPin1 = 13;    // The number of the first LED pin
const int ledPin2 = 12;    // The number of the second LED pin

// Variables will change:
int buttonState1 = 0;  // Variable for reading the first pushbutton status
int buttonState2 = 0;  // Variable for reading the second pushbutton status

void setup() {
  // Initialize the LED pins as outputs:
  pinMode(ledPin1, OUTPUT);
  pinMode(ledPin2, OUTPUT);

  // Initialize the pushbutton pins as inputs:
  pinMode(buttonPin1, INPUT_PULLUP); // Changed to INPUT_PULLUP
  pinMode(buttonPin2, INPUT_PULLUP); // Changed to INPUT_PULLUP

  // Start serial communication:
  Serial.begin(9600);
}

void loop() {
  // Read the state of the first pushbutton value:
  buttonState1 = digitalRead(buttonPin1);

  // Check if the first pushbutton is pressed. If it is, the buttonState is LOW:
  if (buttonState1 == LOW) {
    // Turn the first LED on:
    digitalWrite(ledPin1, HIGH);
  } else {
    // Turn the first LED off:
    digitalWrite(ledPin1, LOW);
  }

  // Read the state of the second pushbutton value:
  buttonState2 = digitalRead(buttonPin2);

  // Check if the second pushbutton is pressed. If it is, the buttonState is LOW:
  if (buttonState2 == LOW) {
    // Turn the second LED on:
    digitalWrite(ledPin2, HIGH);
  } else {
    // Turn the second LED off:
    digitalWrite(ledPin2, LOW);
  }

  // Send button states to the p5 sketch
  Serial.print(buttonState1);
  Serial.print(",");
  Serial.println(buttonState2);
  delay(100); // Adjust delay as needed
}
p5 snippet code:
Reading serial data
This function reads data from the serial port, interprets it as button states, and updates the cat’s position accordingly. It ensures that the cat remains within the canvas bounds while moving left or right based on the received data.
This snippet demonstrate how the game can interact with an Arduino board via serial communication to control the cat’s movement.
function readSerial(data) {
  if (data != null) {
    let buttonStates = split(trim(data), ',');
    let buttonState1 = int(buttonStates[0]);
    let buttonState2 = int(buttonStates[1]);

    // Update cat position based on button states
    if (buttonState1 == 1) {
      catX -= 22; // Move left
    }
    if (buttonState2 == 1) {
      catX += 22; // Move right
    }

    // Ensure cat stays within canvas bounds
    catX = constrain(catX, 0, width - catImg.width);
  }
}
Challenges:
The challenge of this game is designing the obstacle mechanics to appropriately balance the game’s difficulty. Since the game operates in full-screen mode, ensuring that the falling obstacles provide a challenging, yet enjoyable experience for players can be tricky. Balancing factors such as the speed, frequency, and size of the obstacles requires careful consideration to prevent the game from becoming too easy or too difficult. Additionally, transitioning from the initial idea of using a potentiometer for input to utilizing two push buttons might pose challenges in terms of code adaptation and player control dynamics.
Future improvements:
Enhance the complexity of the game mechanics and integrating additional features into the circuit in order to elevate the player experience. Adding new gameplay elements such as power-ups, varying obstacle patterns can provide players with more engaging challenges and keep them invested in the game for longer durations.
Incorporating a speaker into the Arduino circuit to synchronize with button presses could add a wider dimension to the gameplay, enhancing immersion and feedback for players. By integrating sound effects or background music that reacts to player actions, such as cat movements and obstacle collisions, the overall gaming experience can be enriched, making it more dynamic and enjoyable.
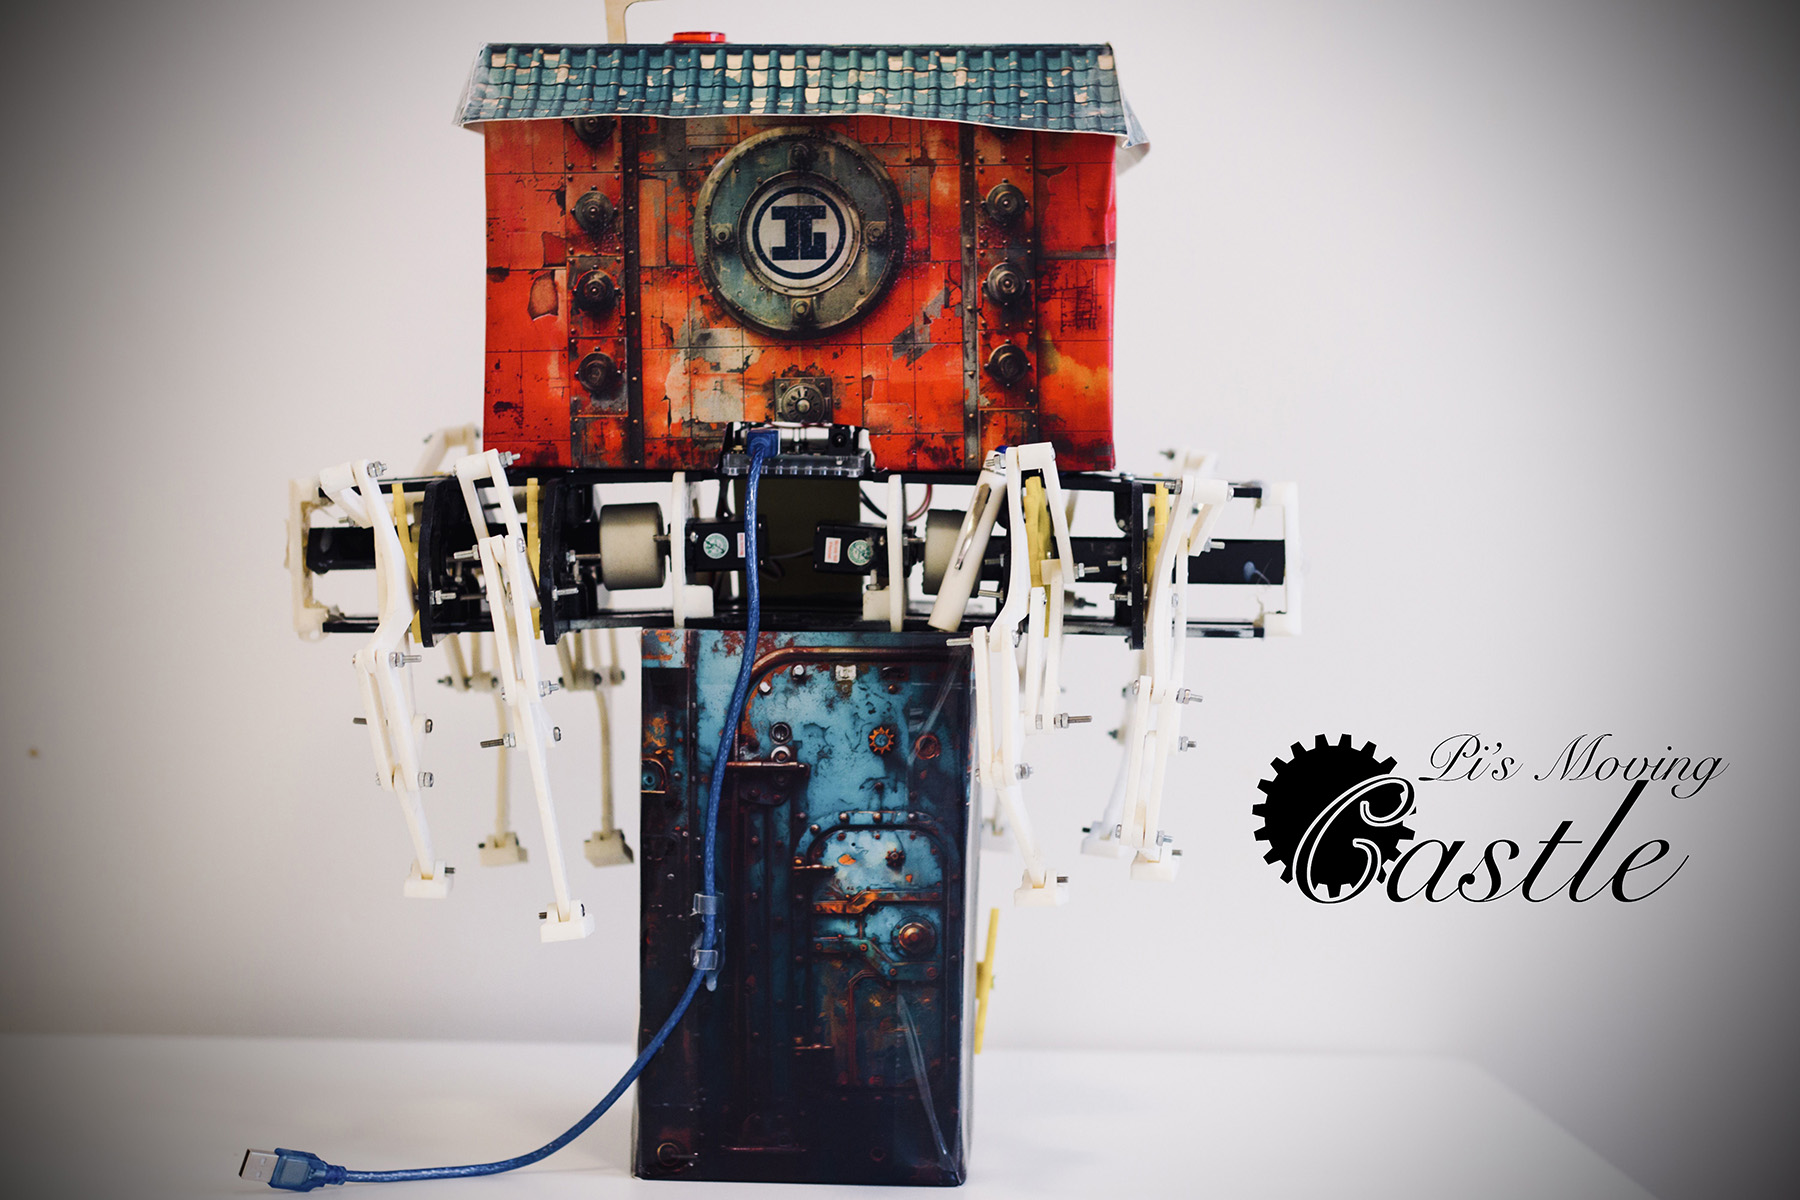
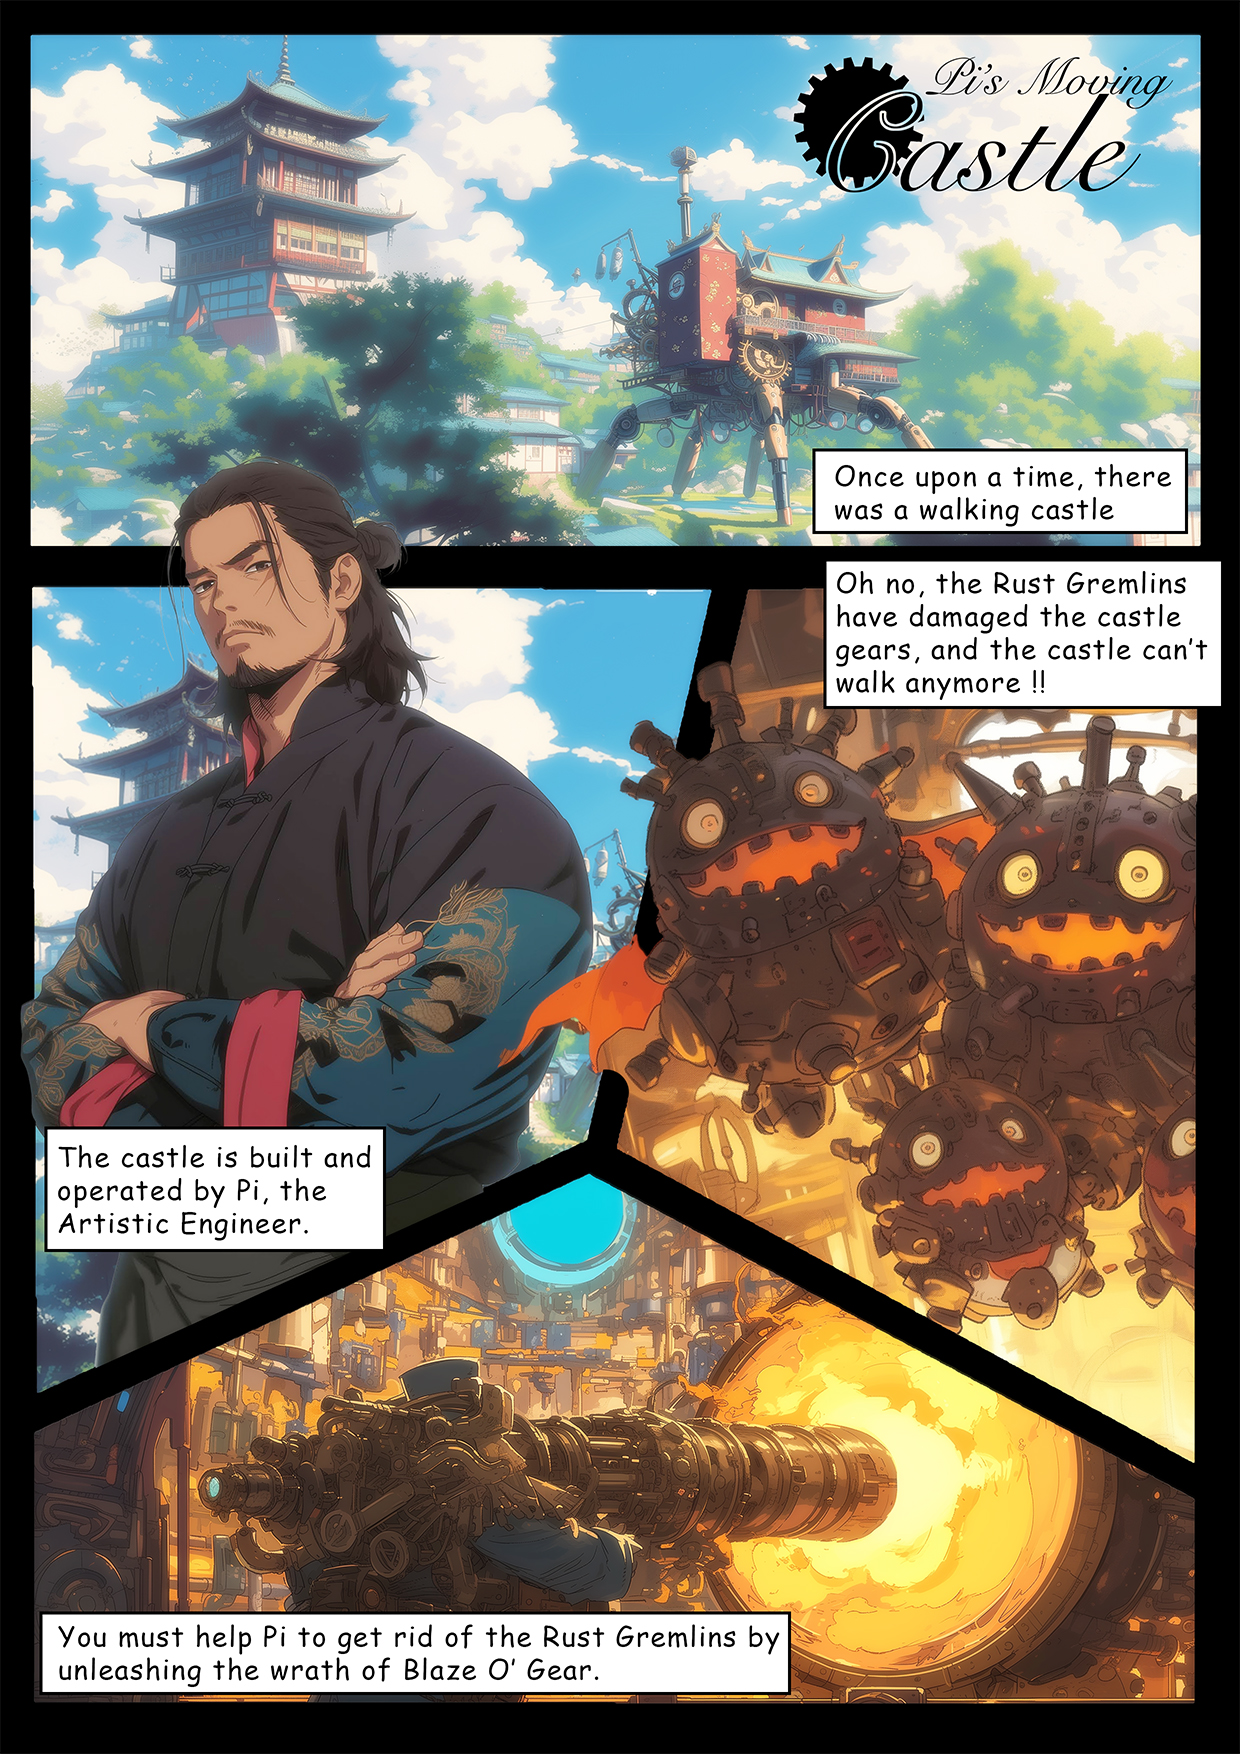
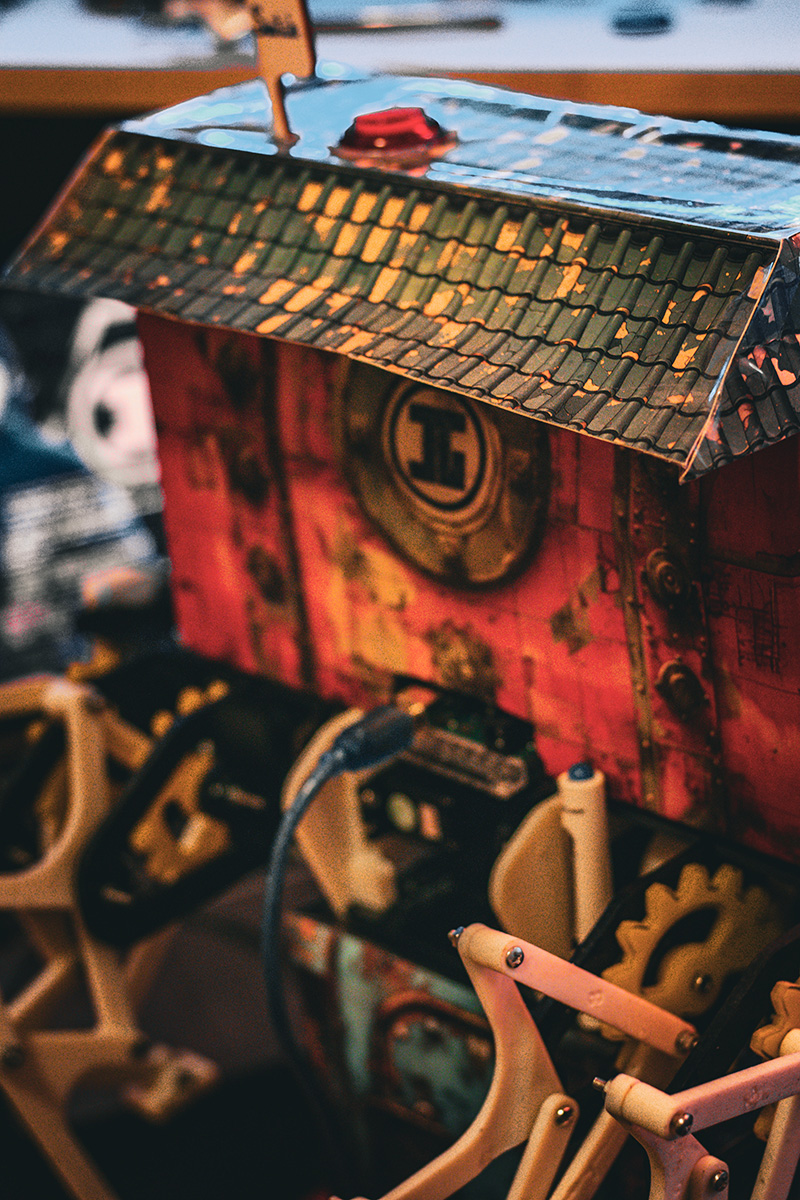
Pi’s moving Castle is a p5js + Arduino interactive game by Pi.
Pi has a moving castle, but it is broken down by the presence of rust gremelins in the machinery. You have to help Pi eliminate these gremelins so that the castle can walk again.
Here’s a more visually appealing version of the story.
Documentation Video
instagrammable goodies
DeMo & Concept
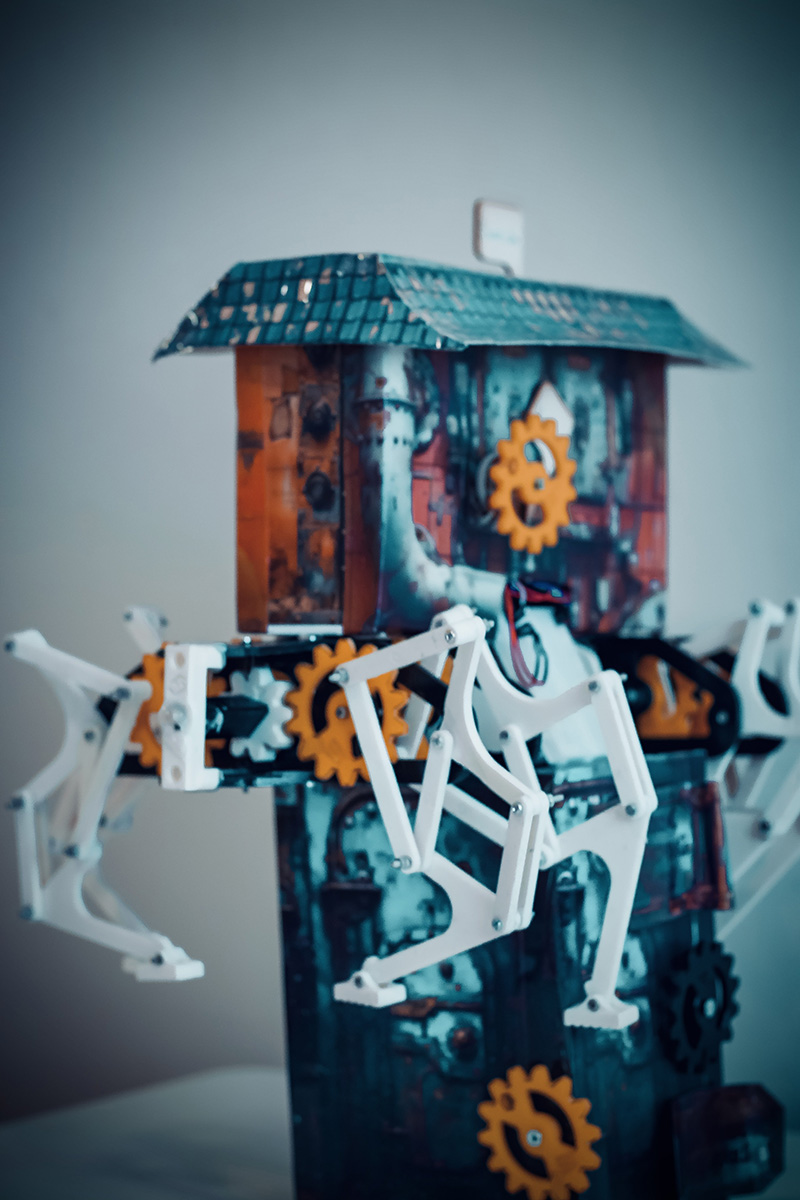
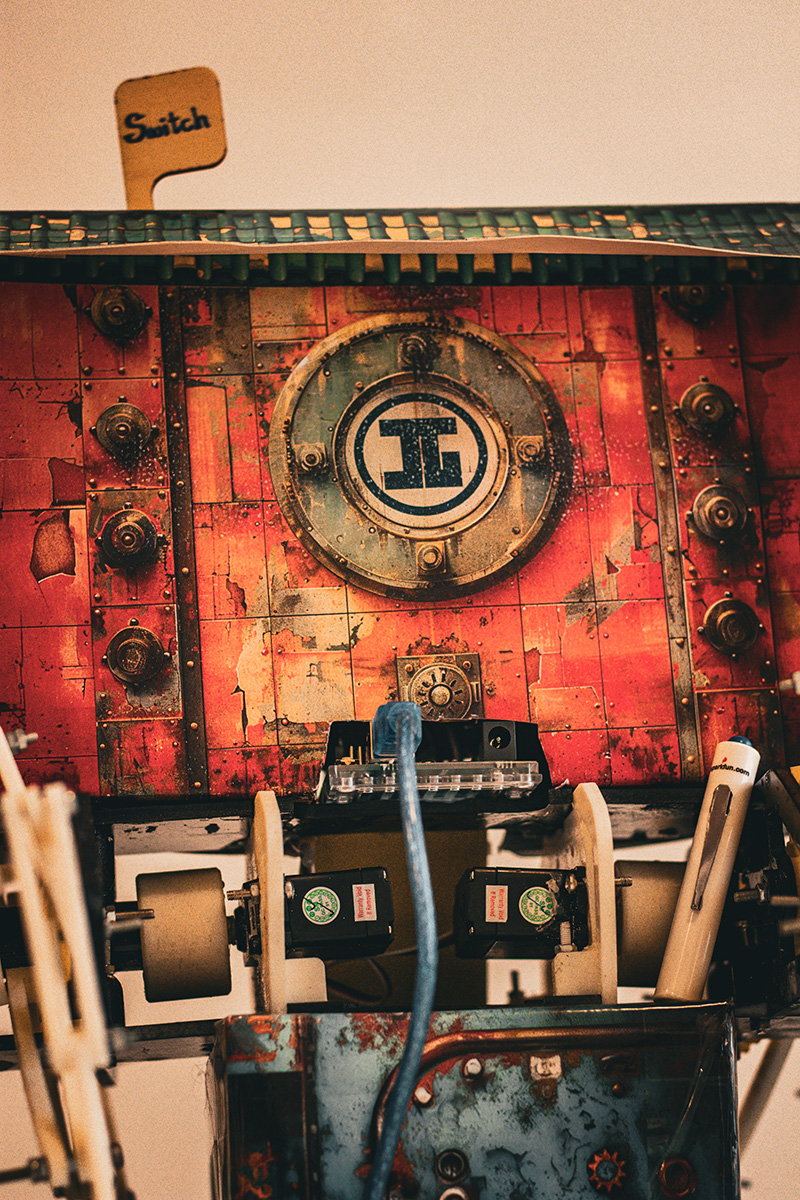
So the project consists of 2 parts. A p5js computer game, and a castle with walking legs and some user inputs (potentiometer and a switch). You control a cannon on the computer screen, using the potentiometer to rotate the cannon and shoot it with the switch. But there is a catch, Some of the gremelins, you cannot aim at them directly, so you need to make the cannonballs bounce off the walls to deliver justice to these monsters. Finally once you have cleared all the monsters, the castle can start walking and will physically walk. Below is a demo video of me playing the full experience.
Arduino Code
The arduino code is below. It always send back serial data with the potentiometer and switch readings back to the computer, and it will wait for a single serial int. If computer sends a 1, castle walks, and if computer sends a 0, it stops walking. Depending on the game state it changes.
#include   // Include the Servo library

Servo myServo;  // Create a servo object
Servo myServo2; // Create a servo object
float lastVoltage = -1; // Variable to store the last voltage
// Arduino code for button, which detects the counts
const int buttonPin = 2;  // the number of the pushbutton pin
const int ledPin = 3;    // the number of the LED pin

// variables will change:
int buttonState = 0;         // variable for reading the pushbutton status
int lastButtonState = HIGH;  // variable for reading the last pushbutton status
unsigned long lastDebounceTime = 0;  // the last time the output pin was toggled
unsigned long debounceDelay = 50;    // the debounce time; increase if the output flickers
int pressCount = 0;  // count of button presses


//Potentiometer
float floatMap(float x, float in_min, float in_max, float out_min, float out_max) {
  return (x - in_min) * (out_max - out_min) / (in_max - in_min) + out_min;
}


void setup() {
  pinMode(ledPin, OUTPUT);   // initialize the LED pin as an output
  pinMode(buttonPin, INPUT_PULLUP);  // initialize the pushbutton pin as an input with internal pull-up resistor
  myServo.attach(9);  // Attach the servo signal pin to digital pin 9
  myServo2.attach(10); // Attach the servo signal pin to digital pin 10
  Serial.begin(9600); // Initialize serial communication at 9600 bits per second
  stopRotation(); // Stop servos by default
}

void loop() {
   int reading = digitalRead(buttonPin);

  //Output potentiometer
  // Read the input on analog pin A0:
  int analogValue = analogRead(A0);
  // Rescale to potentiometer's voltage (from 0V to 5V):
  float voltage = floatMap(analogValue, 0, 1023, 0, 5);


  // check if the button state has changed from the last reading
  if (reading != lastButtonState) {
    // reset the debouncing timer
    lastDebounceTime = millis();
  }

  if ((millis() - lastDebounceTime) > debounceDelay) {
    // if the button state has changed:
    if (reading != buttonState) {
      buttonState = reading;

      // only toggle the LED if the new button state is LOW
      if (buttonState == LOW) {
        digitalWrite(ledPin, HIGH);
        pressCount++;  // increment the press count
      } else {
        digitalWrite(ledPin, LOW);
      }
    }
  }

  // save the reading. Next time through the loop, it will be the lastButtonState:
  lastButtonState = reading;

  Serial.print(pressCount);  // print the count to the serial monitor
  Serial.print(",");
  Serial.println(voltage);          // Print the distance to the Serial monitor
  delay(100);                        // Short delay before next measurement


  if (Serial.available() > 0) { // Check if data has been received
    int state = Serial.read() - '0'; // Read the first byte available and convert from ASCII
    if (state == 1) {
      rotate(); // Rotate servos
    } else if (state == 0) {
      stopRotation(); // Ensure servos are stopped
    }
  }
}

void rotate() {
  myServo.writeMicroseconds(4000); // Example value for rotation
  myServo2.writeMicroseconds(4000); // Adjust if necessary
}

void stopRotation() {
  myServo.writeMicroseconds(1500); // 1500 usually represents a stopped servo
  myServo2.writeMicroseconds(1500); // Adjust if necessary
}
p5js Sketch
In the game, players help Pi clear rust gremlins from a mechanical castle using a turret that shoots cannonballs, controlled by a physical potentiometer and switch. The game mechanics include obstacles where cannonballs need to be bounced off boundaries to hit some gremlins. The game features a visual and auditory loading sequence with gremlin and turret images, background music, and sound effects for actions like shooting and gremlin deaths. The Arduino setup facilitates interaction by receiving turret control signals from the potentiometer and switch, while sending back movement commands to make the castle walk when the game is completed.
The embedding of the p5js sketch is below (Note that you need the castle to play the game).
Communication between Arduino and p5js
As mentioned above, the communication between p5js and Arduino is serial data. Arduino sends 2 values (a float reading for potentiometer, and an int counting the number of times the button has been clicked). This controls the rotation of the cannon and firing of the cannon in the game.
From the computer (p5), Arduino only receives one number all the time that is either 1 or 0. This dictates whether or not to move the castle and make it walk (it walks when the game is complete.)
What I am proud of
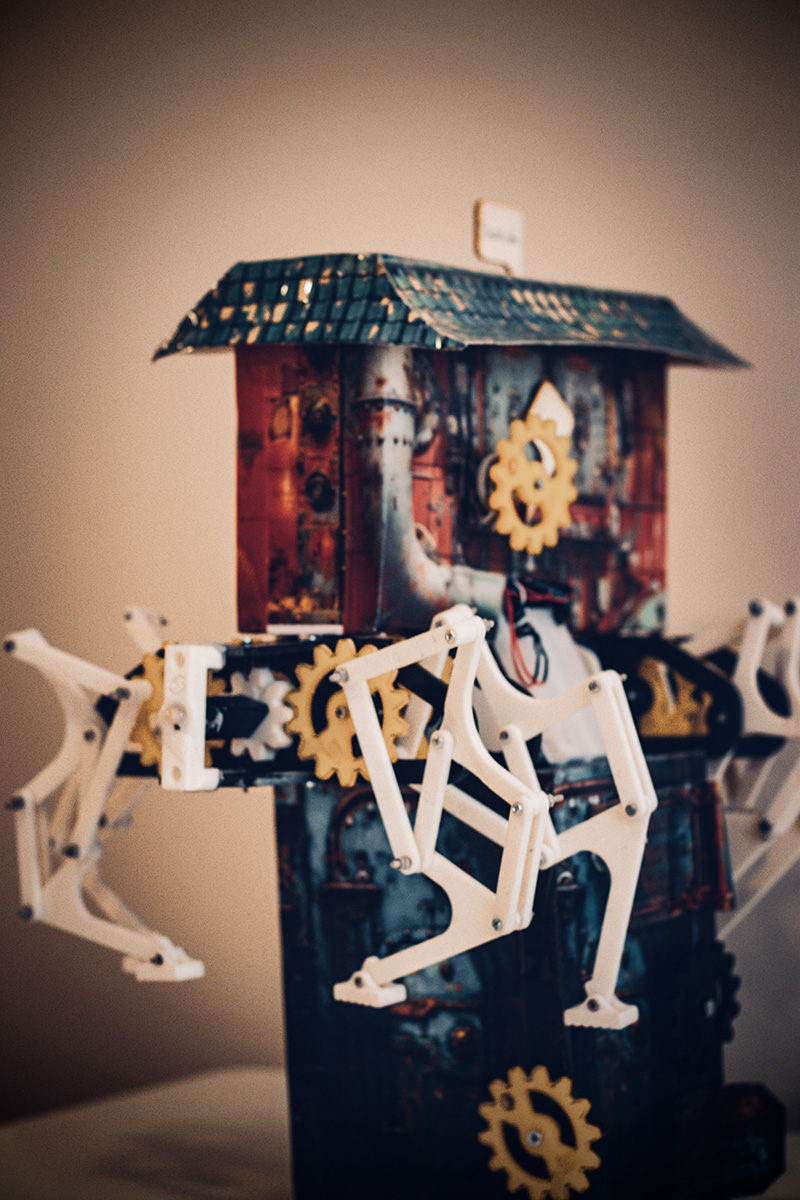
I am particularly very proud of the visual design, the storyline and the walking mechanism. This looks almost unreal to me, I was not expecting that sticking the midjourney textures on an Amazon cardboard box would look sooo good.
Future Improvements
For future improvements, I will integrate what the users have told me during the user tests.