
🐾 PawPortion🐾 Smart Pet Feeding Assistant
Concept
I started this project from a very simple everyday problem: feeding a pet on time. It sounds like something that should be easy to remember, but in real life, routines can get busy, and small responsibilities can be delayed or forgotten. I did not want to make a fully automatic feeder because that would remove the user from the process completely. Instead, I wanted to create a system that supports the user while still keeping them involved in the act of care.
PawPortion is an interactive pet feeding assistant that combines an Arduino-controlled physical feeder with a p5.js digital dashboard. The system keeps track of feeding time, reminds the user when it is time to feed, and responds when the feeding action is completed. The project is not just about dispensing food. It is about creating a clear relationship between the user, the interface, and the physical machine.
The main idea behind PawPortion is assisted responsibility. The system does not take over the task entirely, but it helps make the task more visible, structured, and responsive. The user can see when the pet was last fed, when the next feeding should happen, and whether the feeding has been missed. The pet’s mood on the screen also changes depending on the state of the system, which makes the interaction feel more emotional and less robotic.
Video of Project
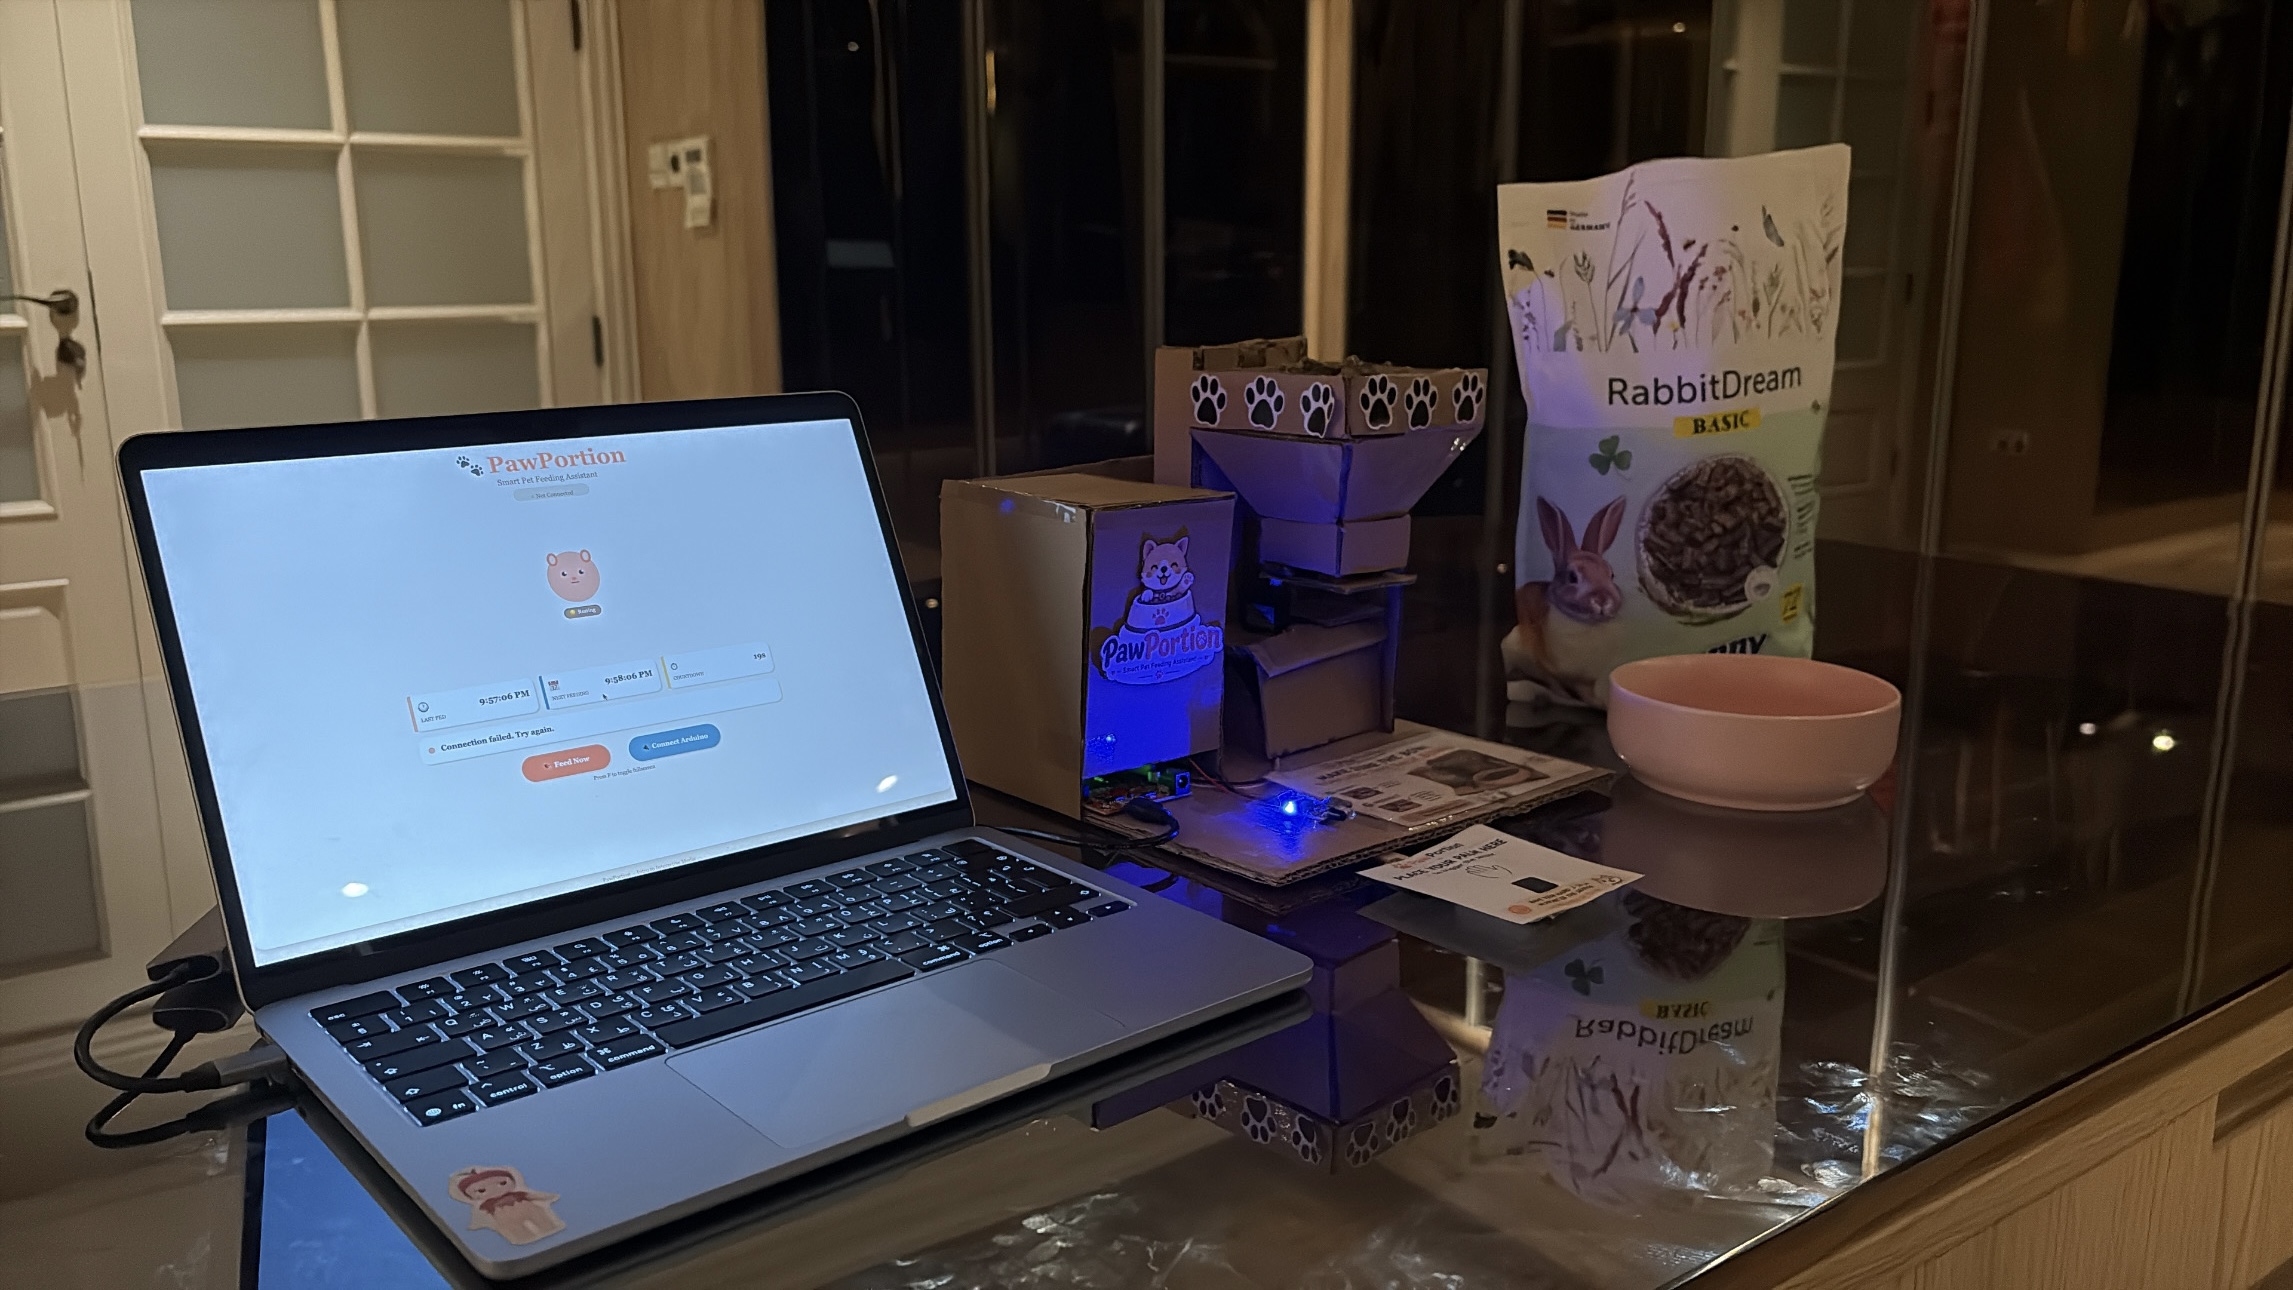
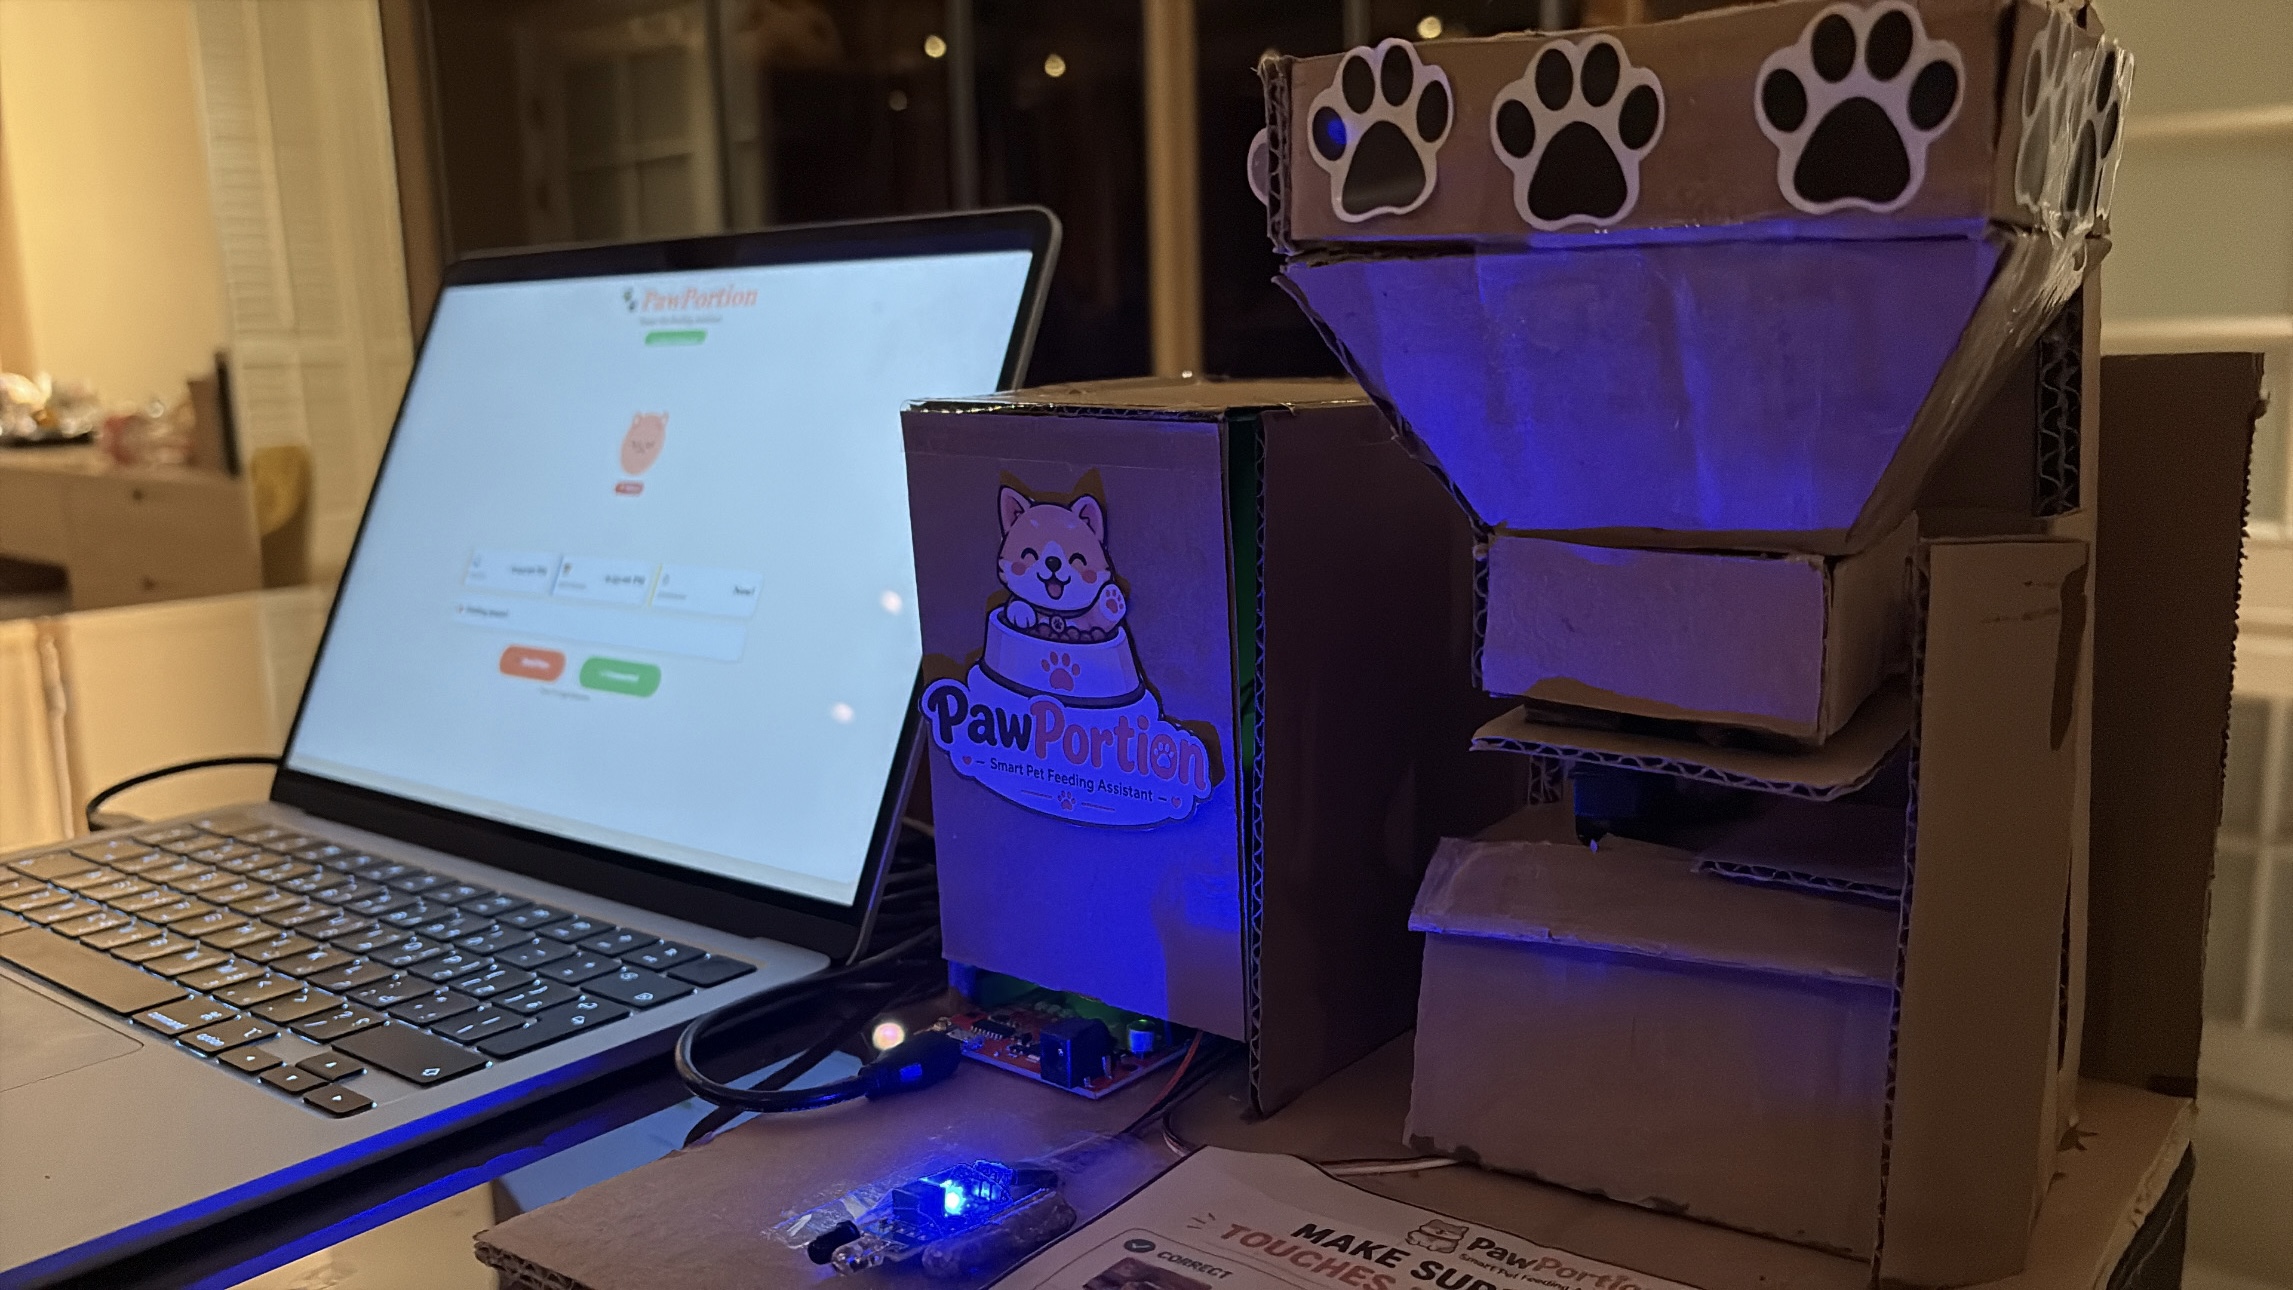
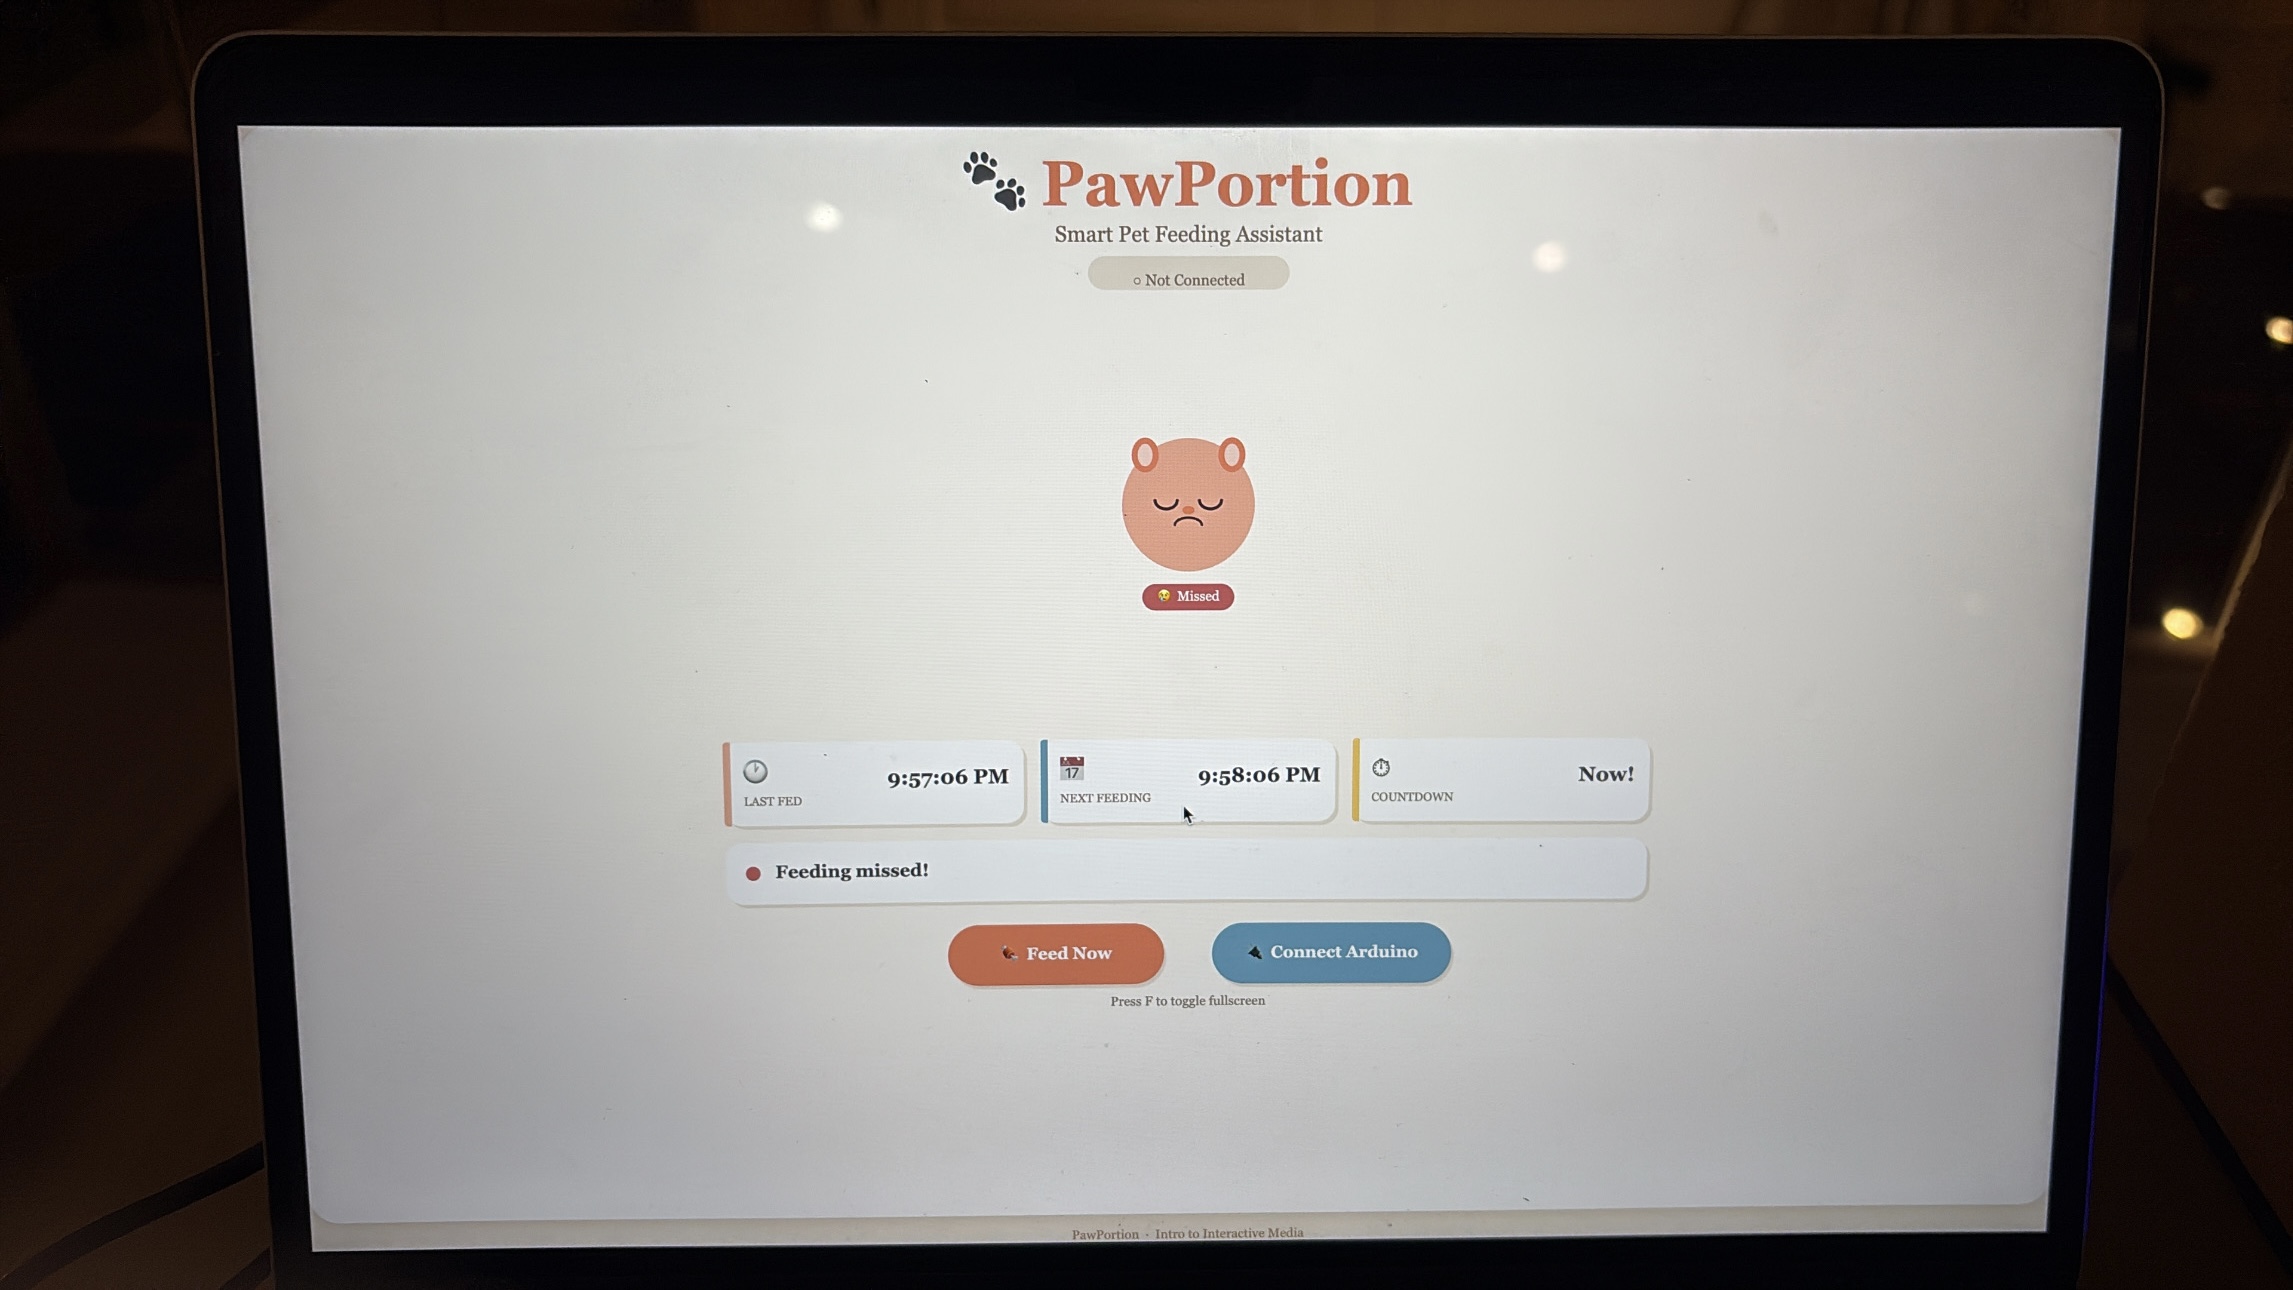
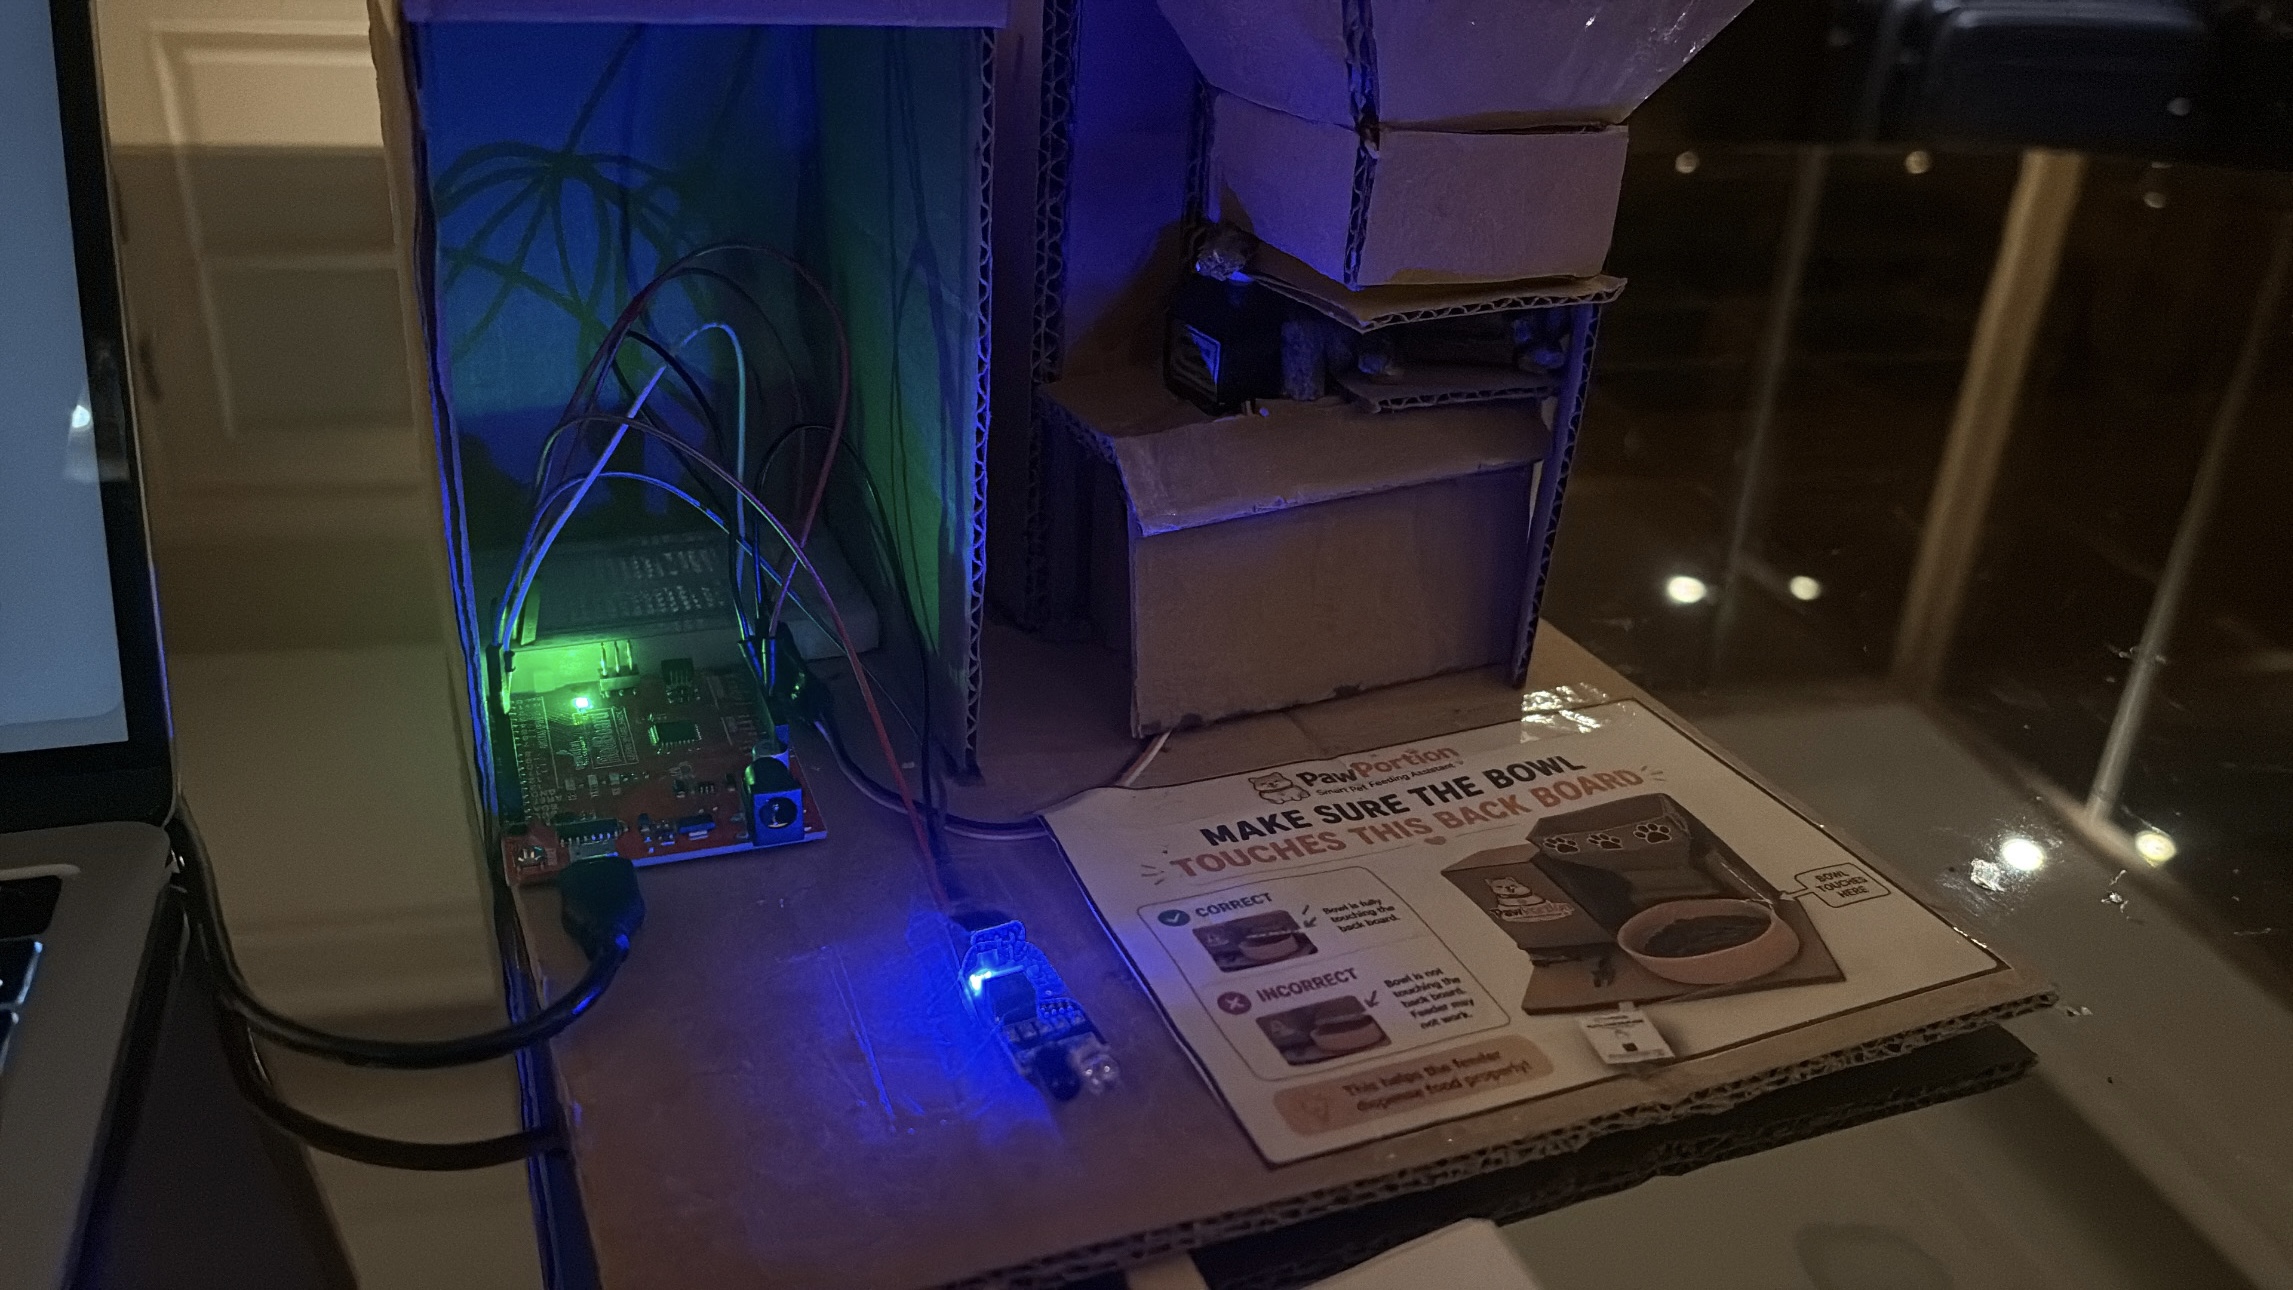
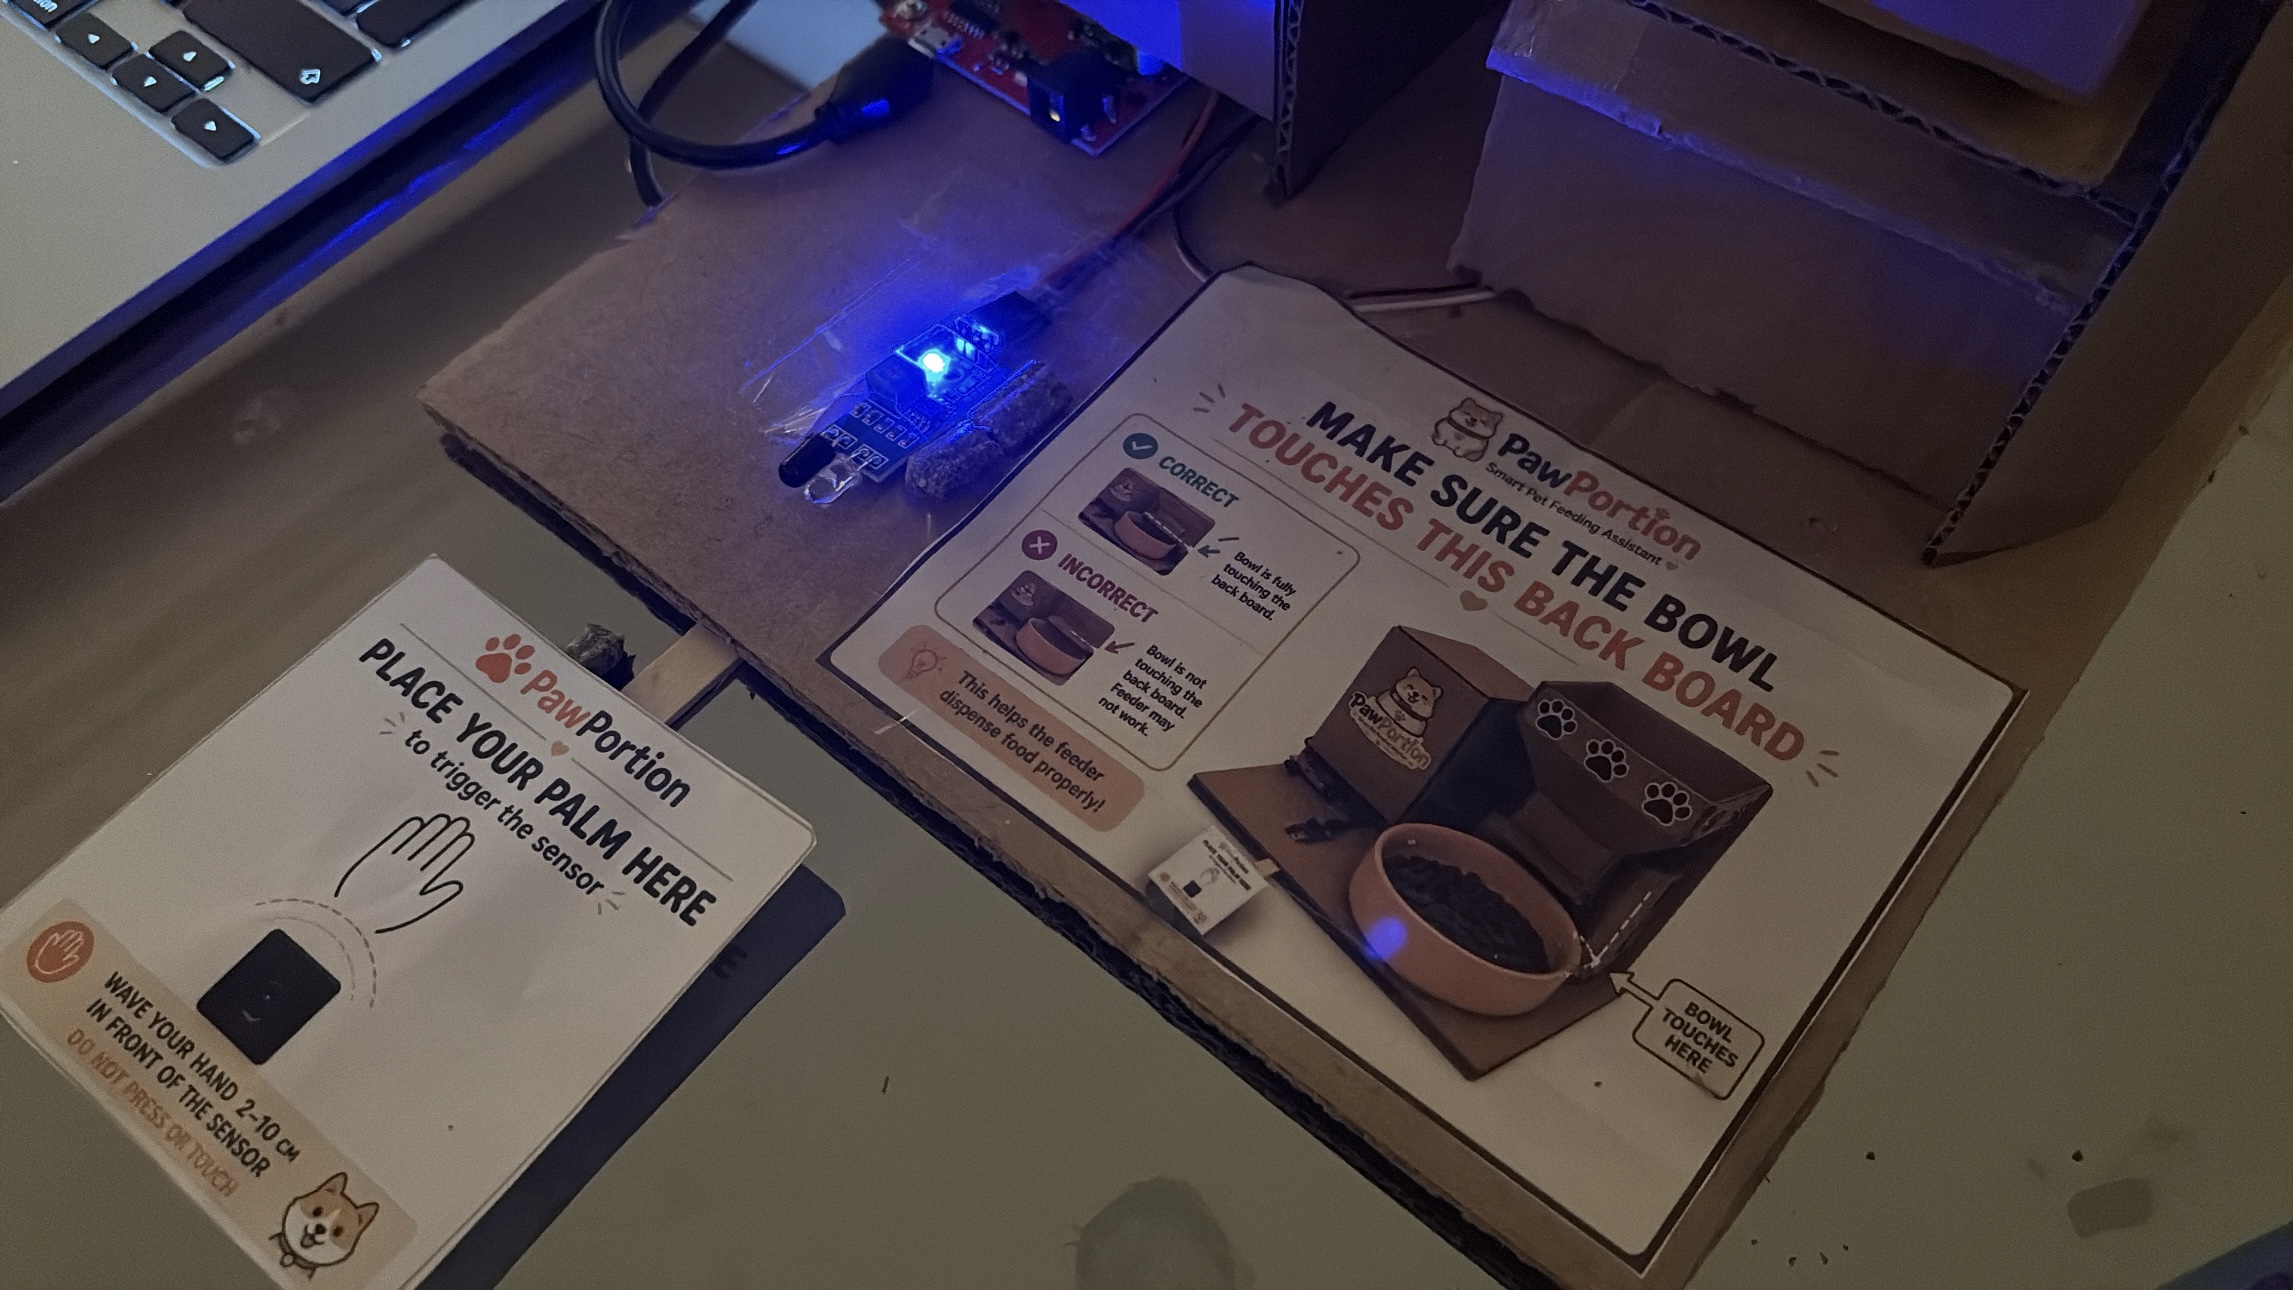
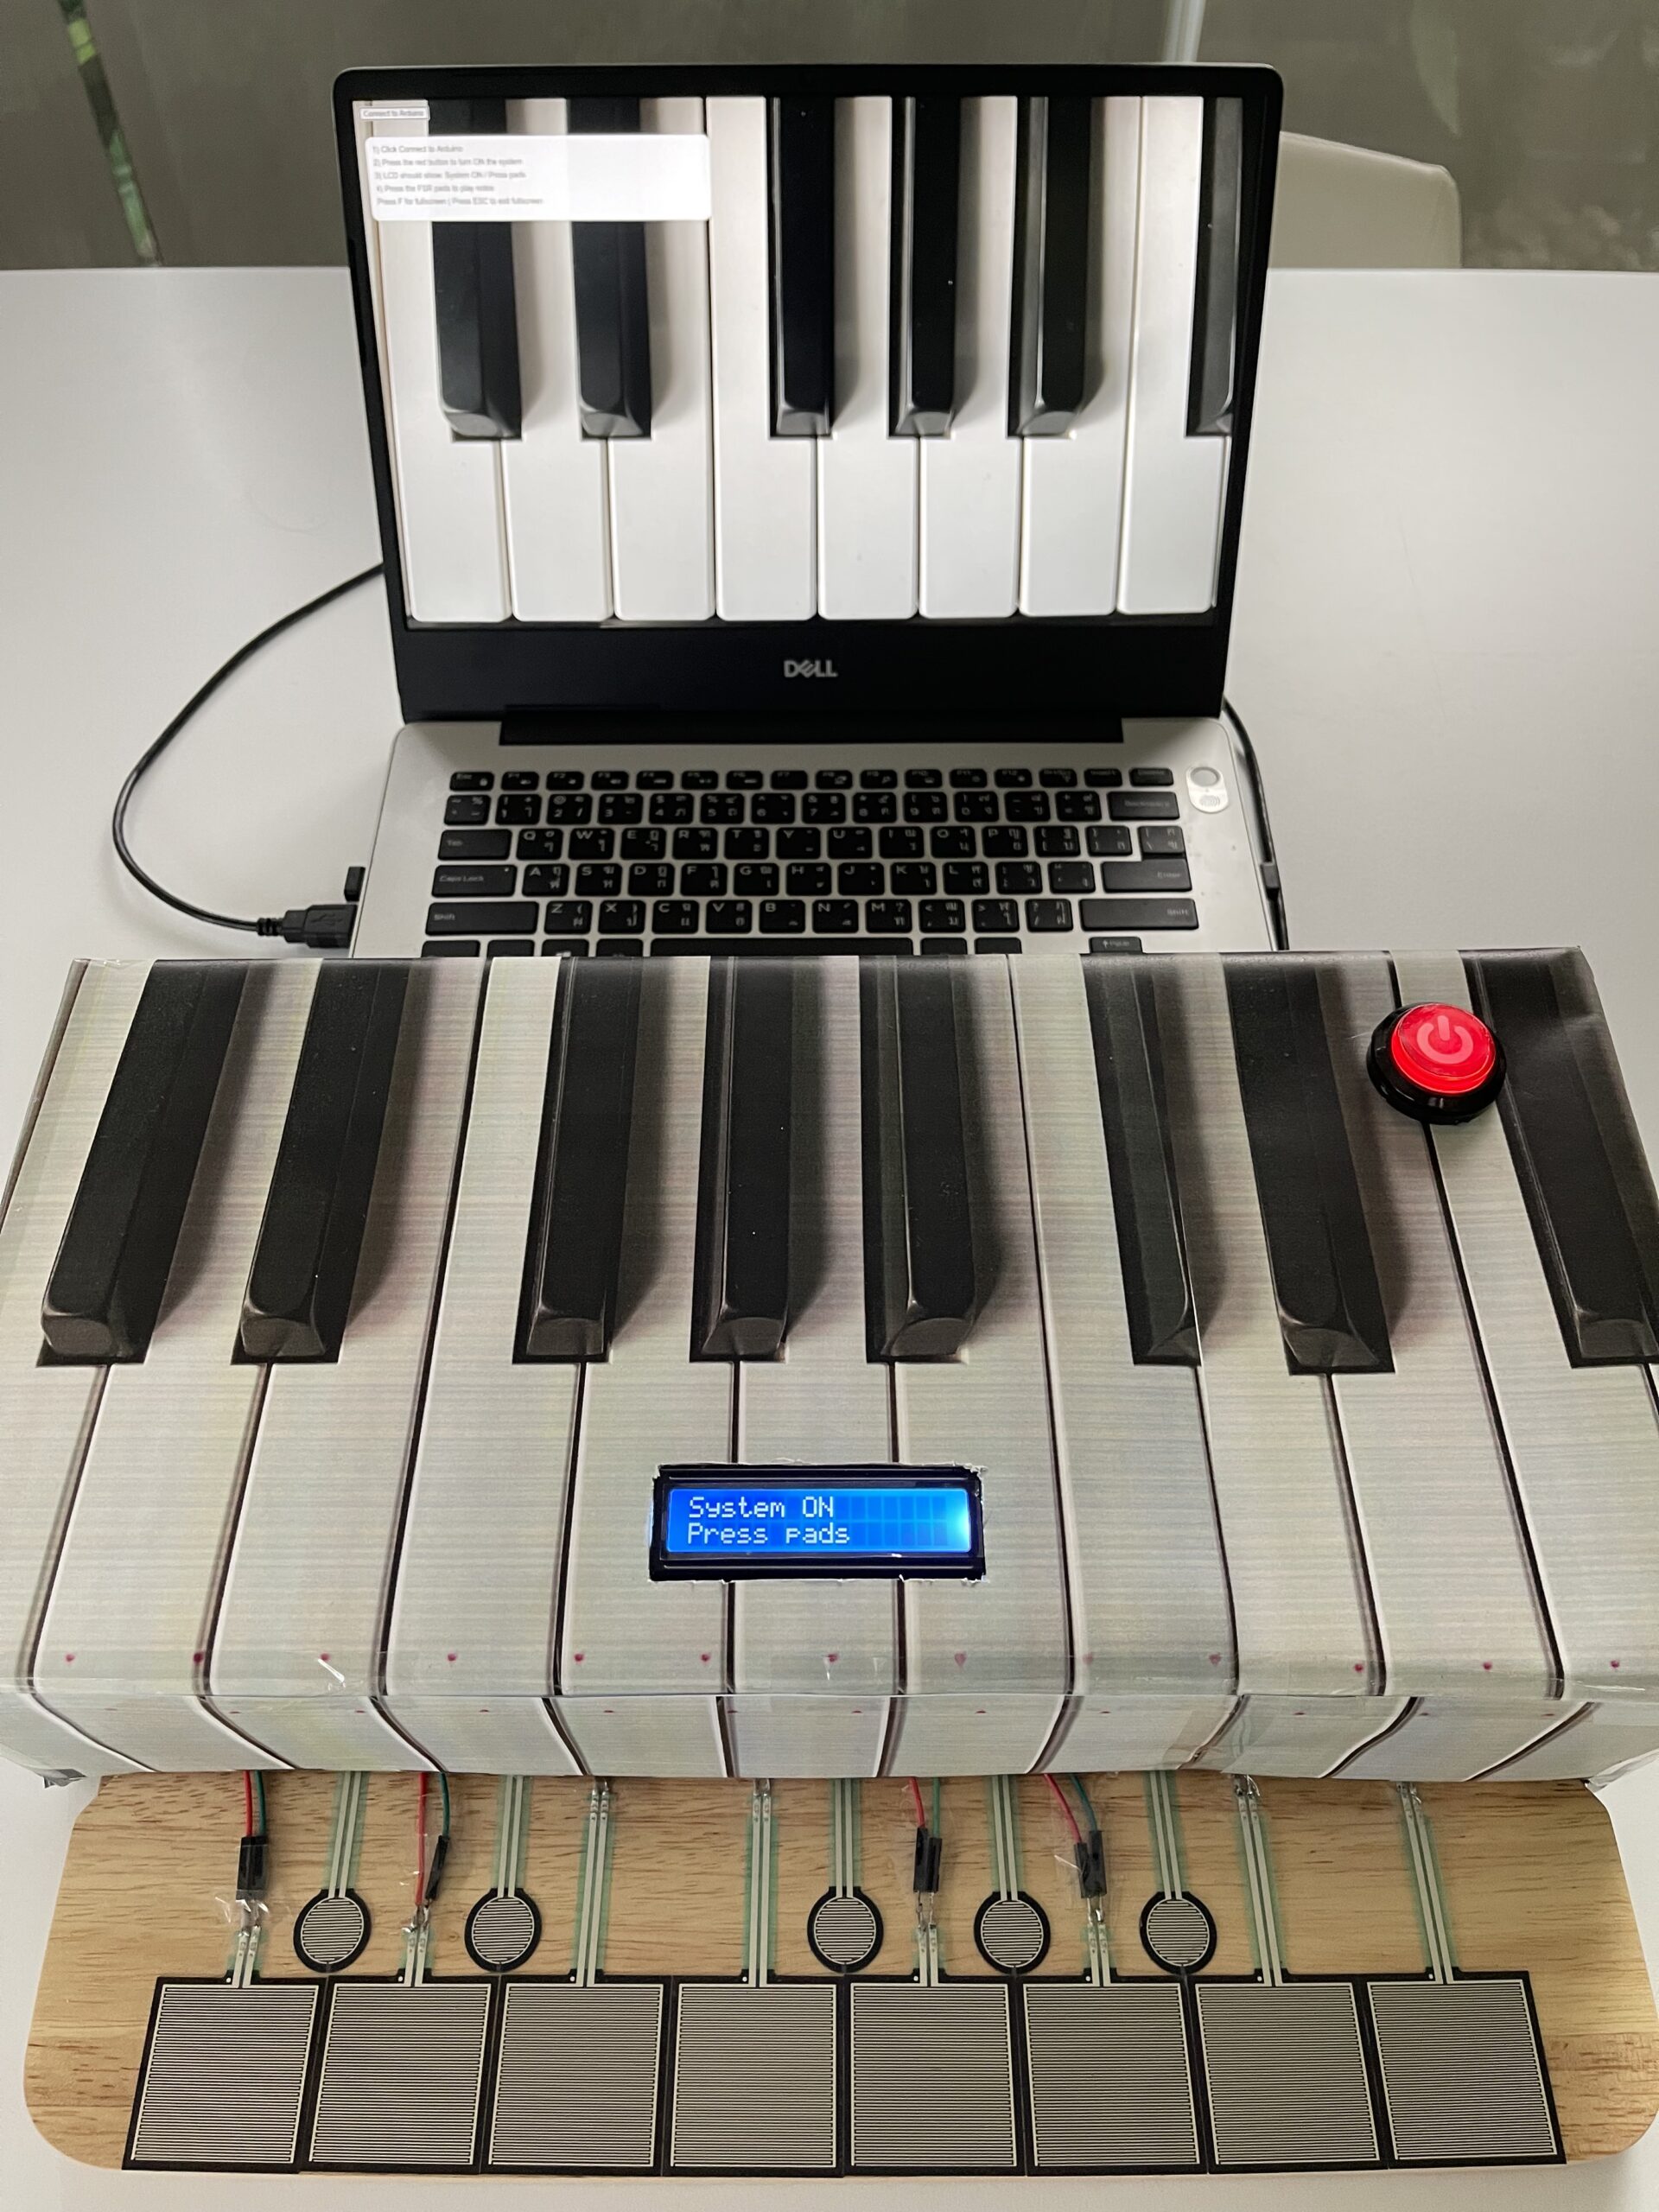
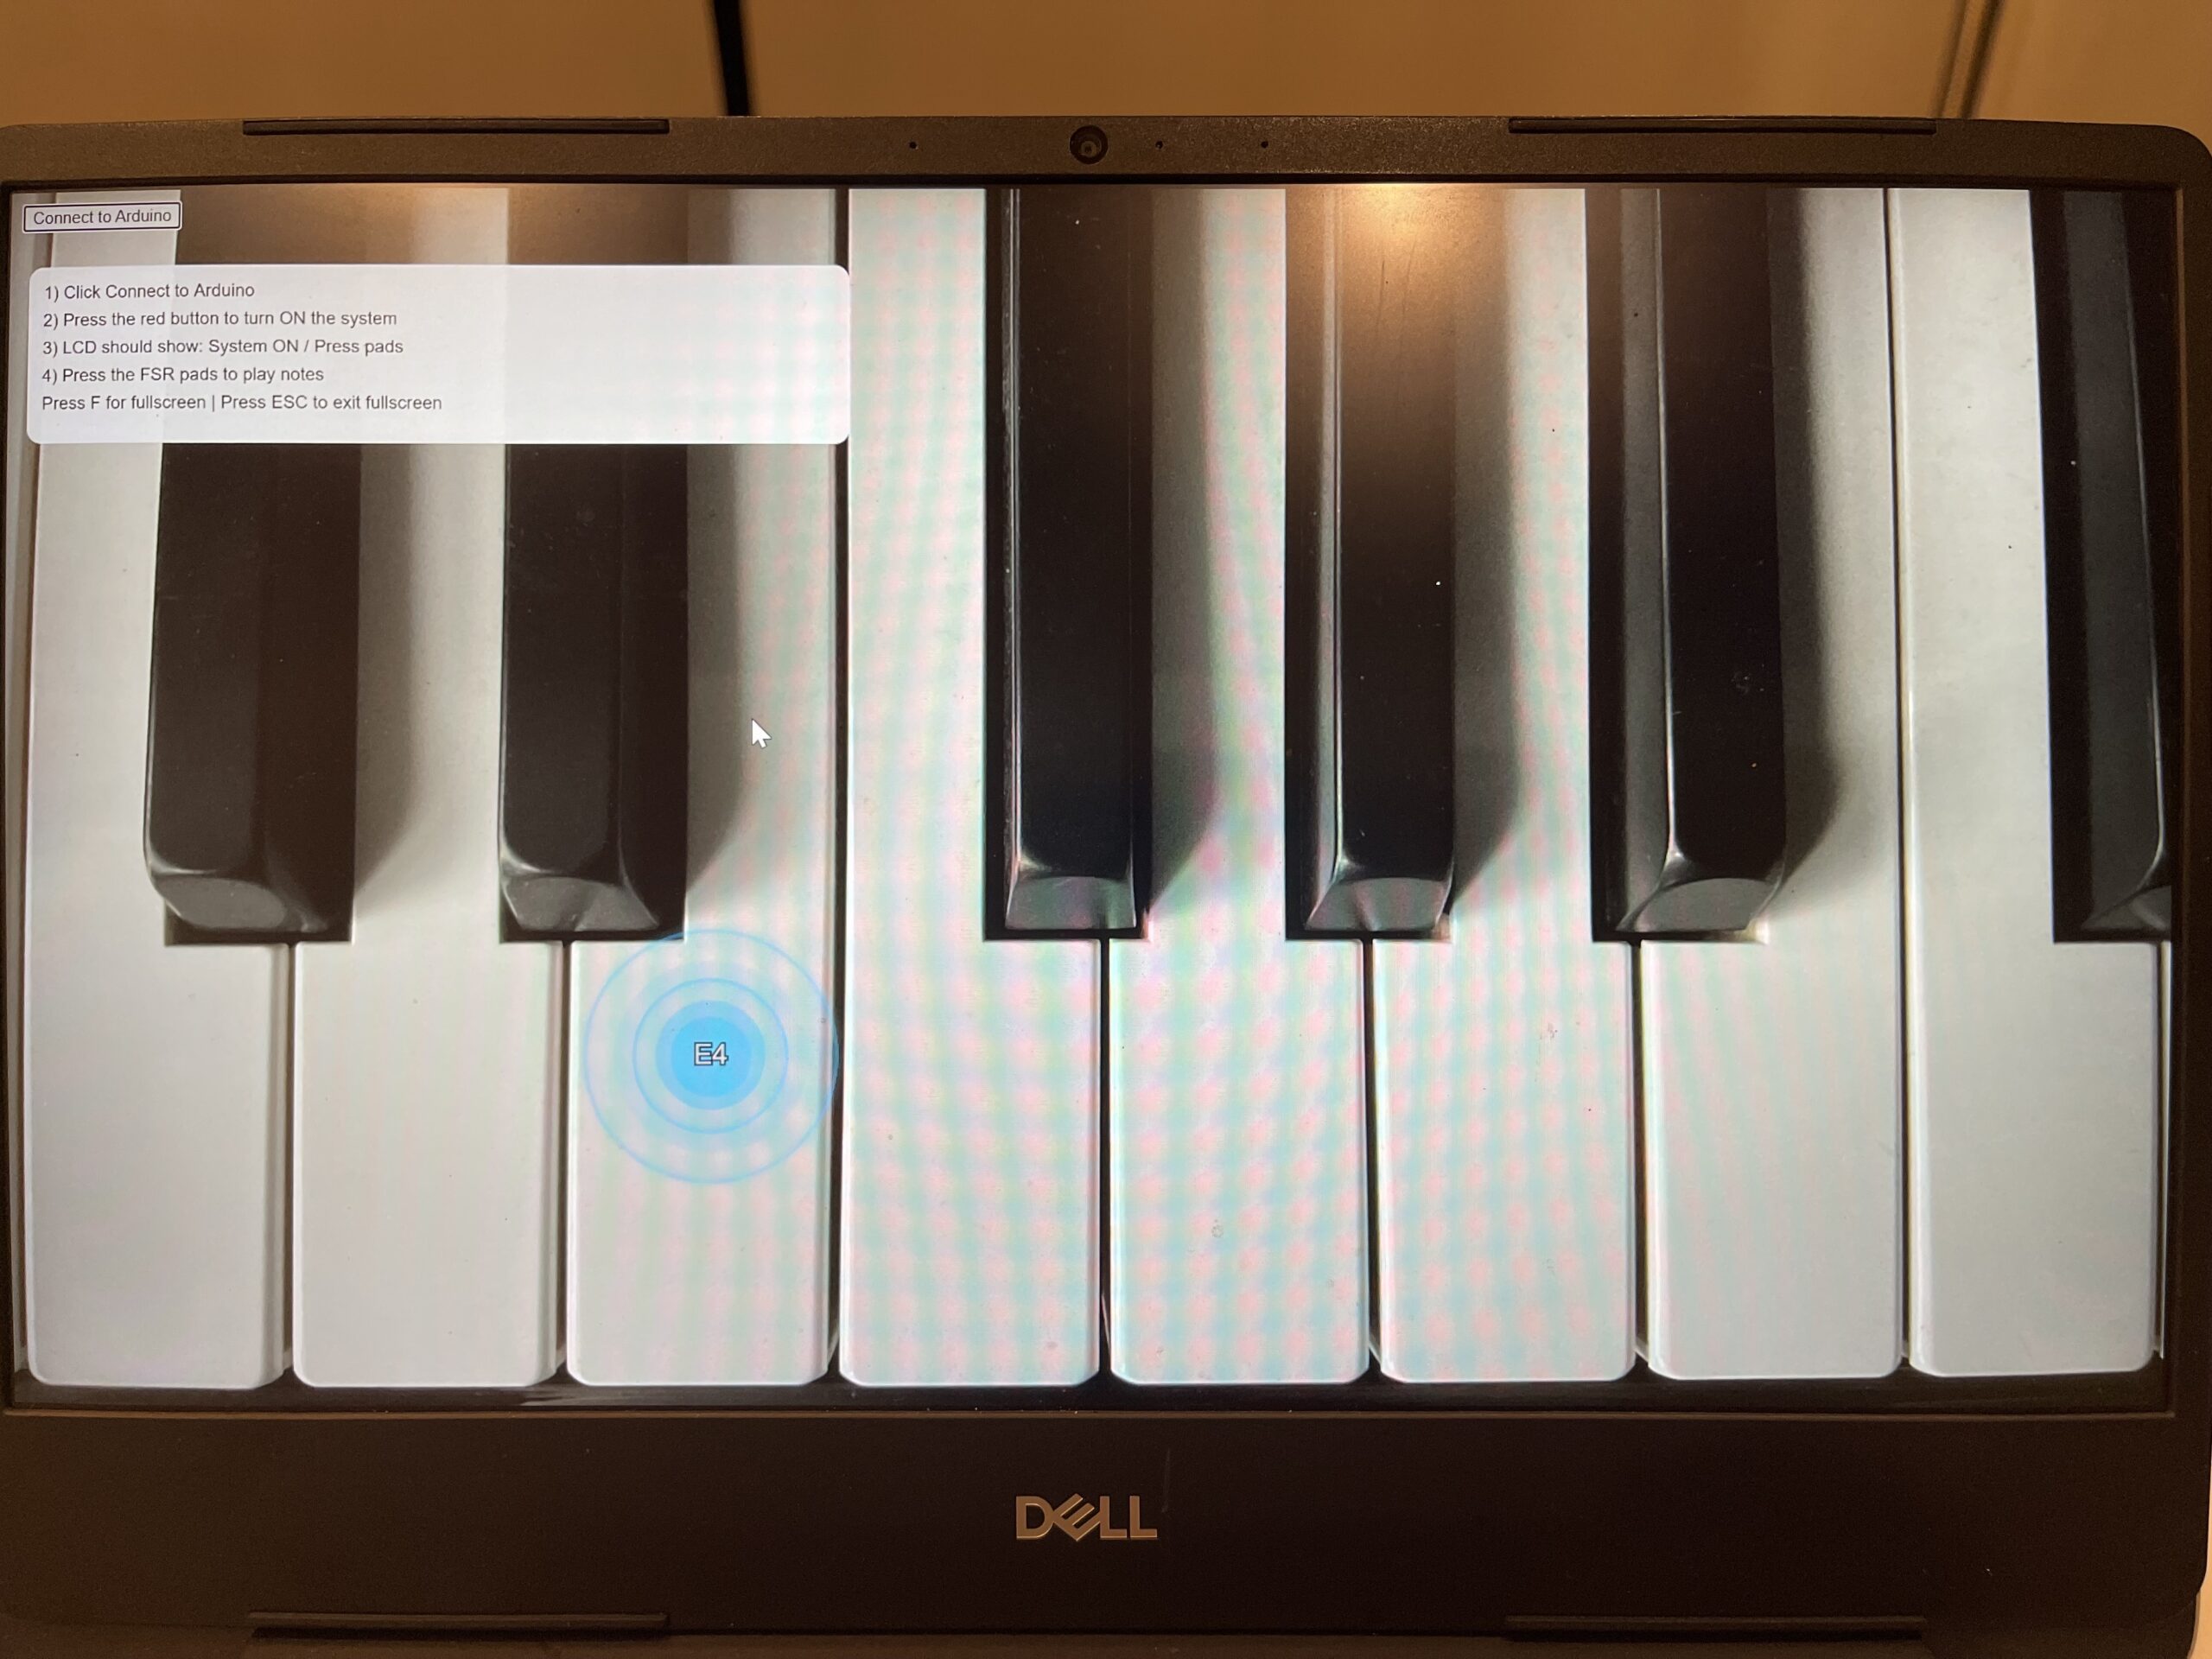
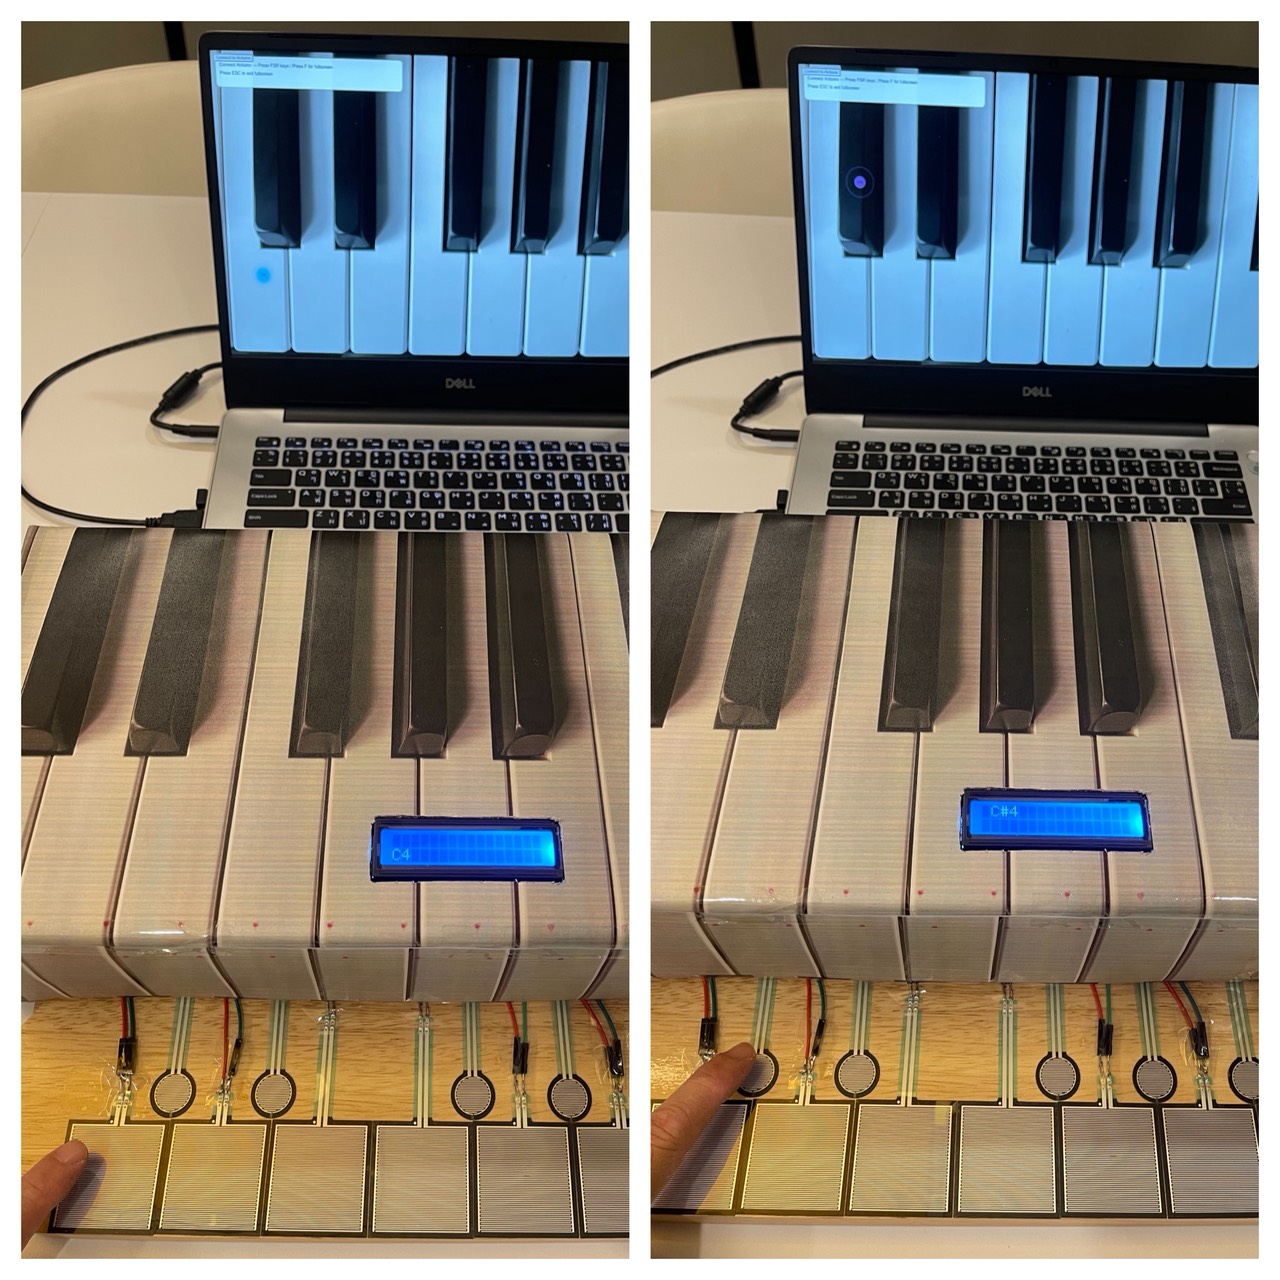
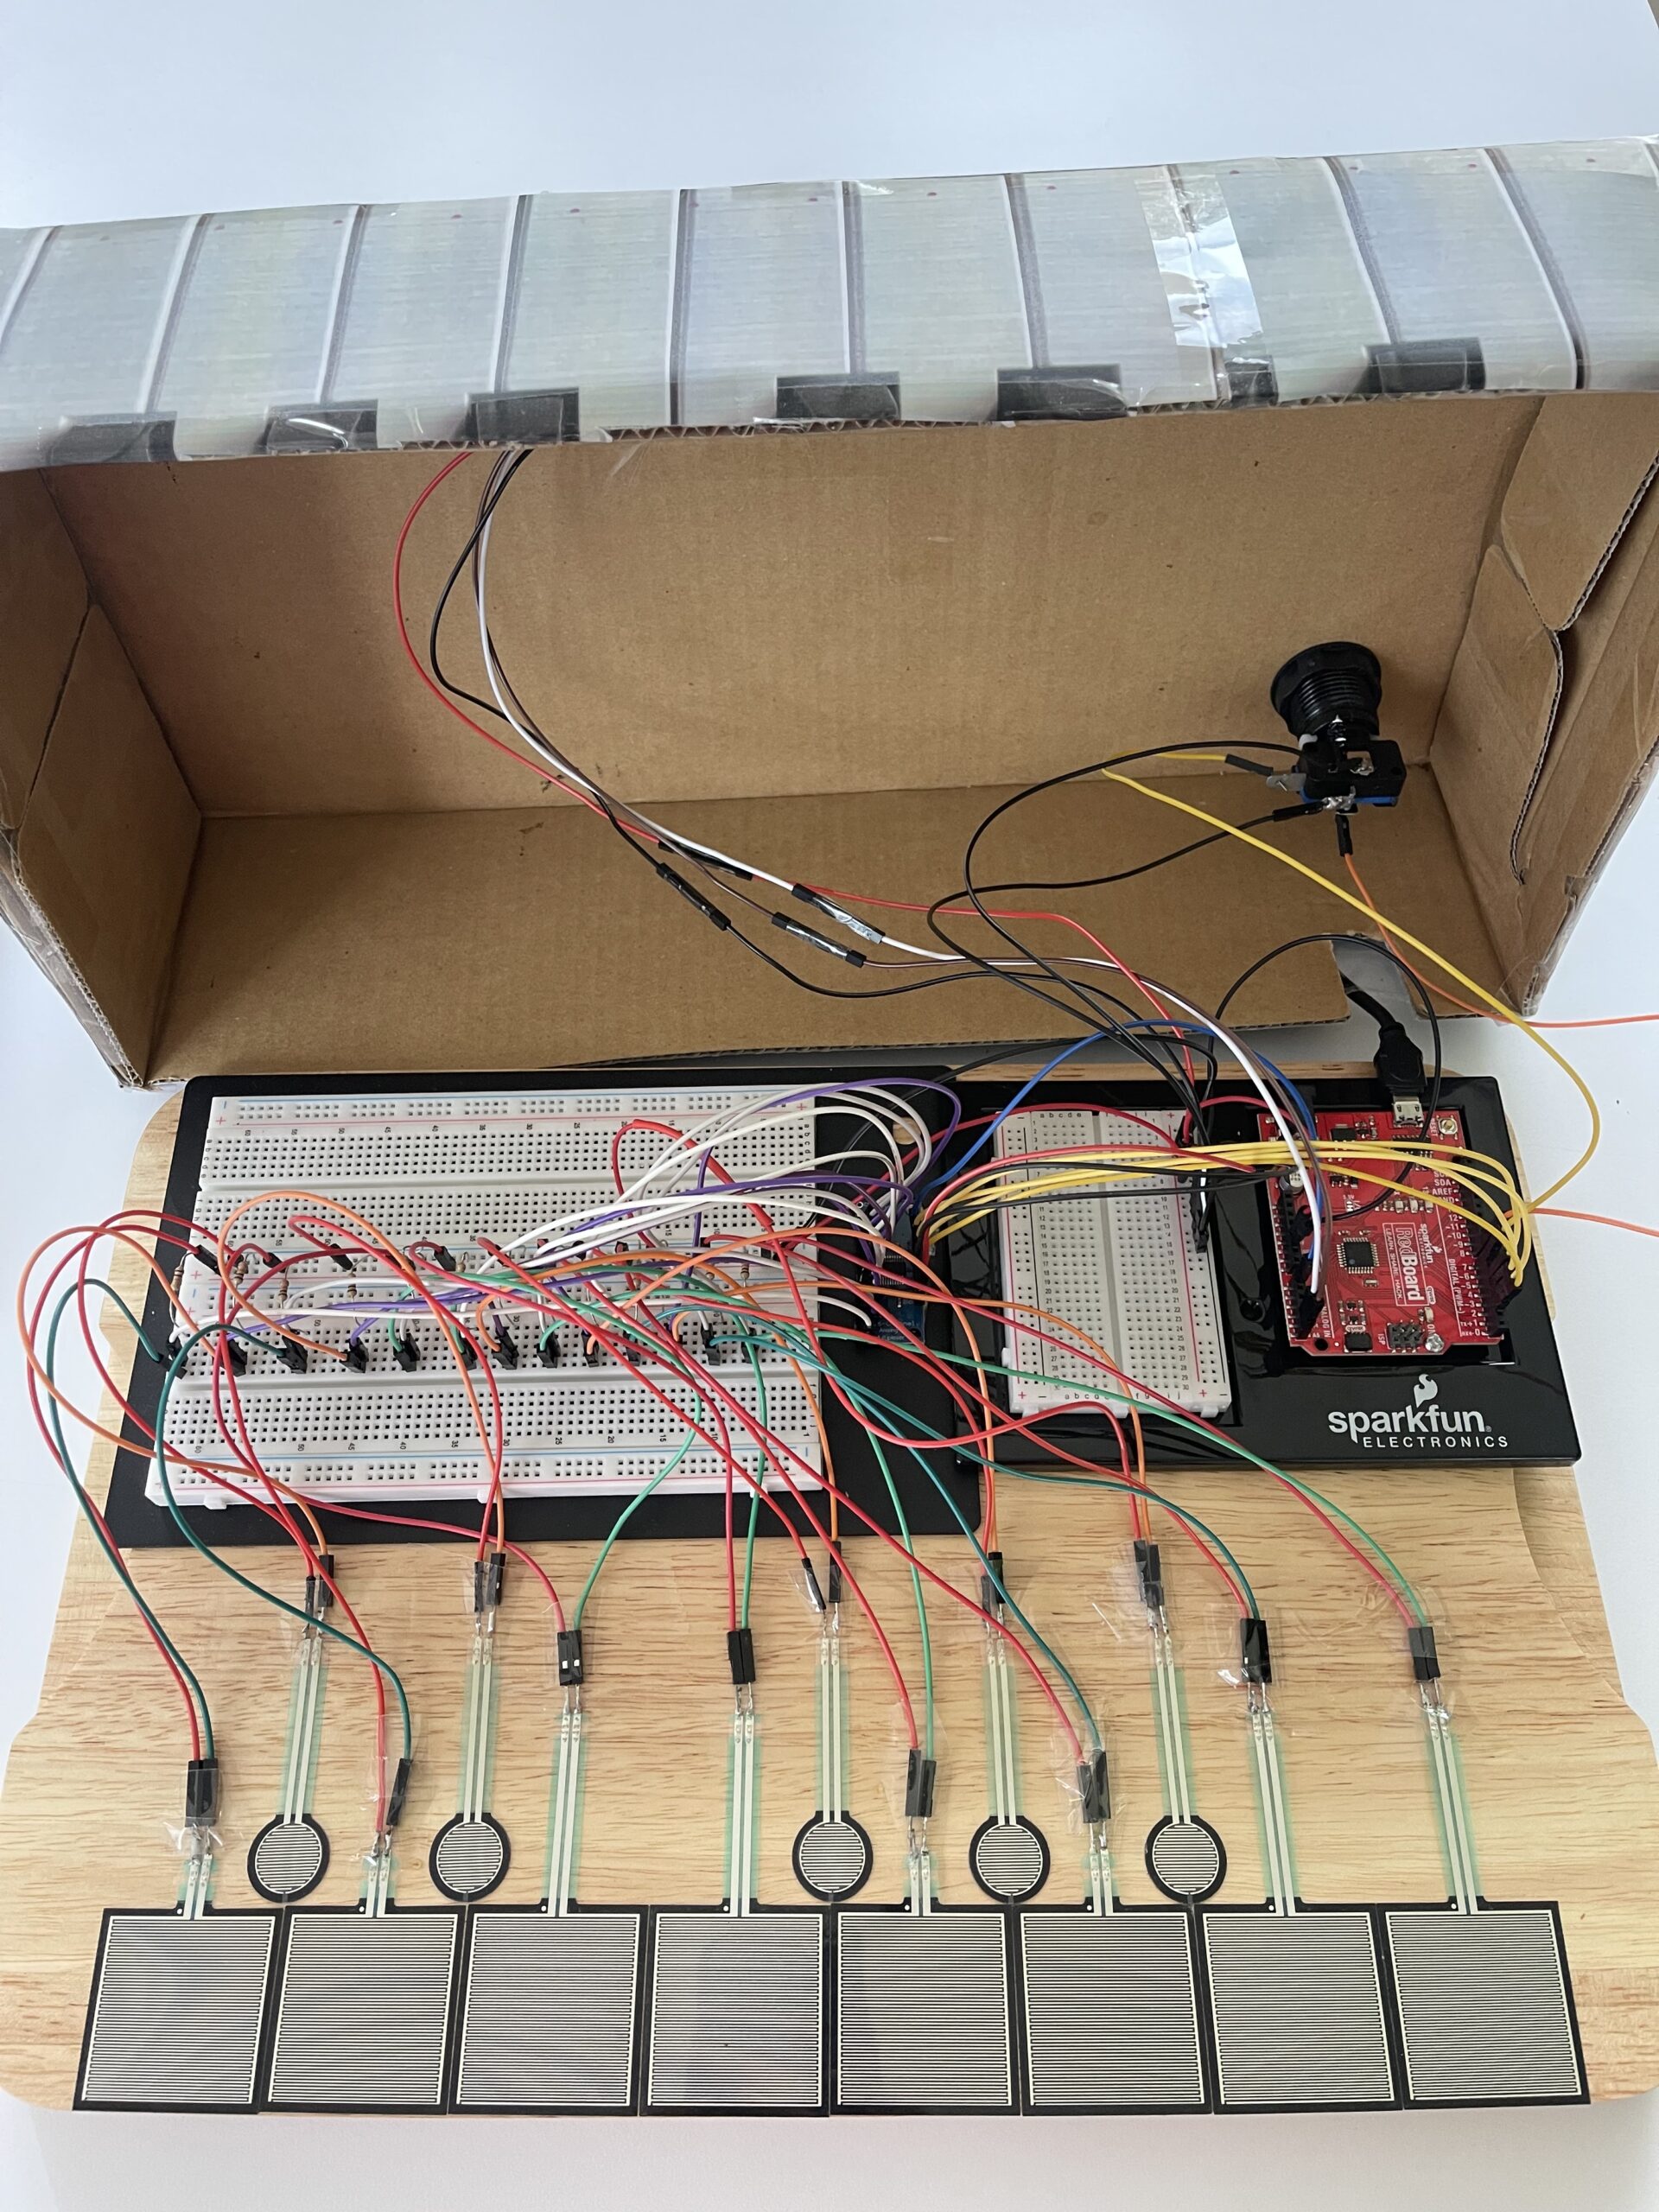
Images of Project
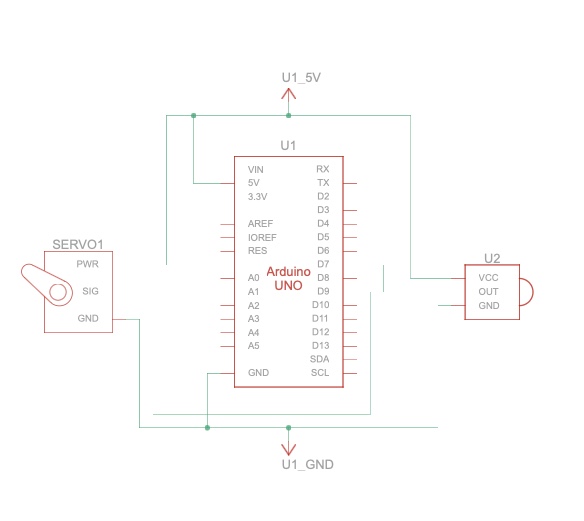
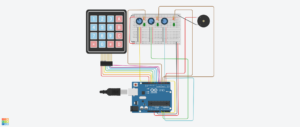
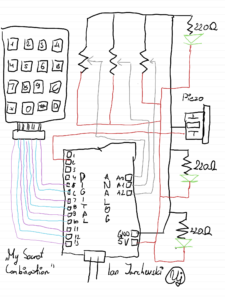
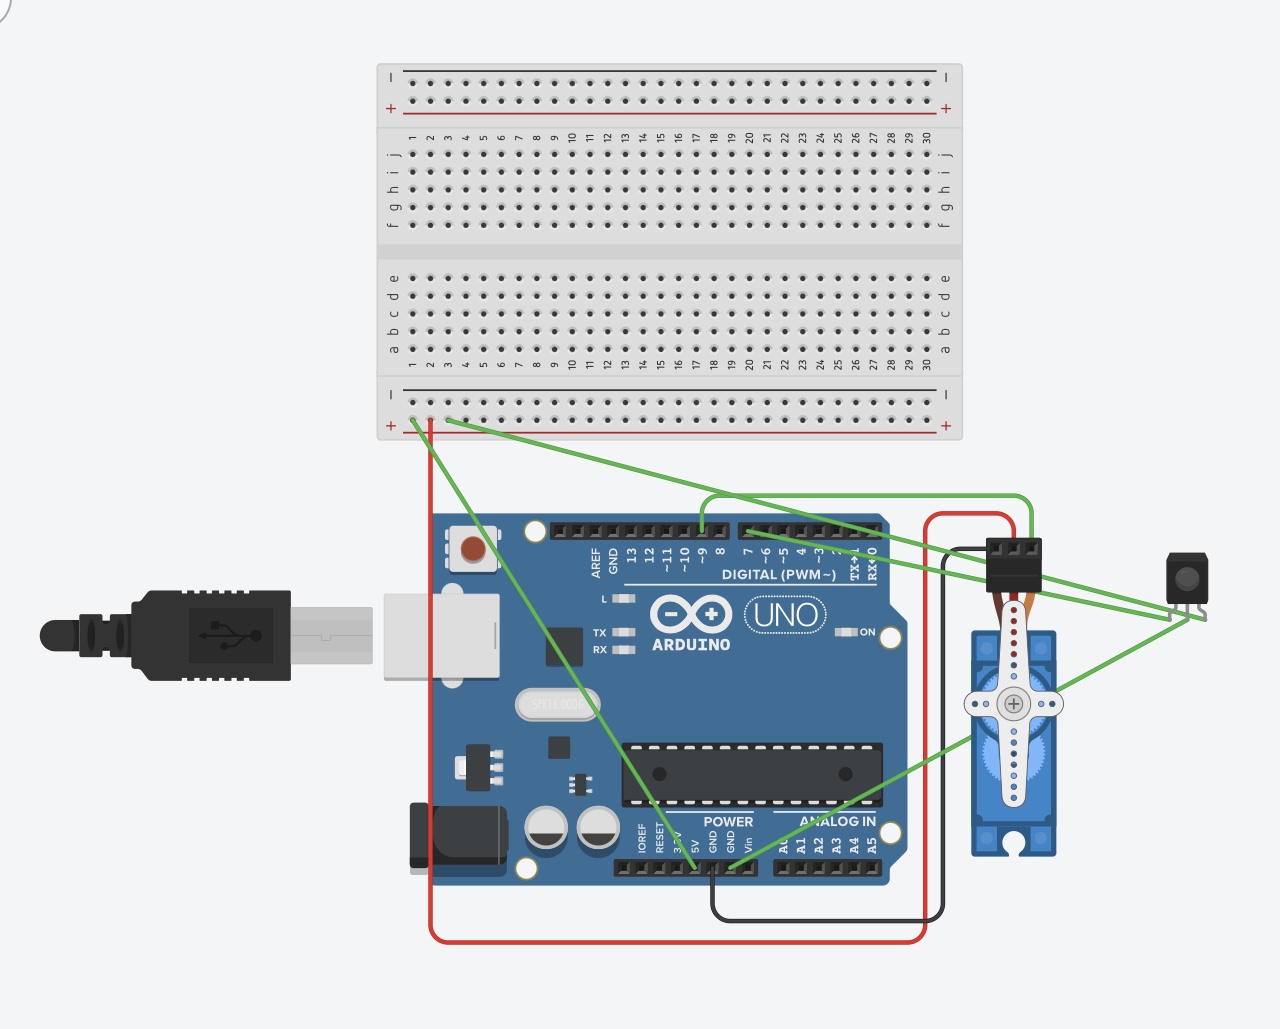
Schematic
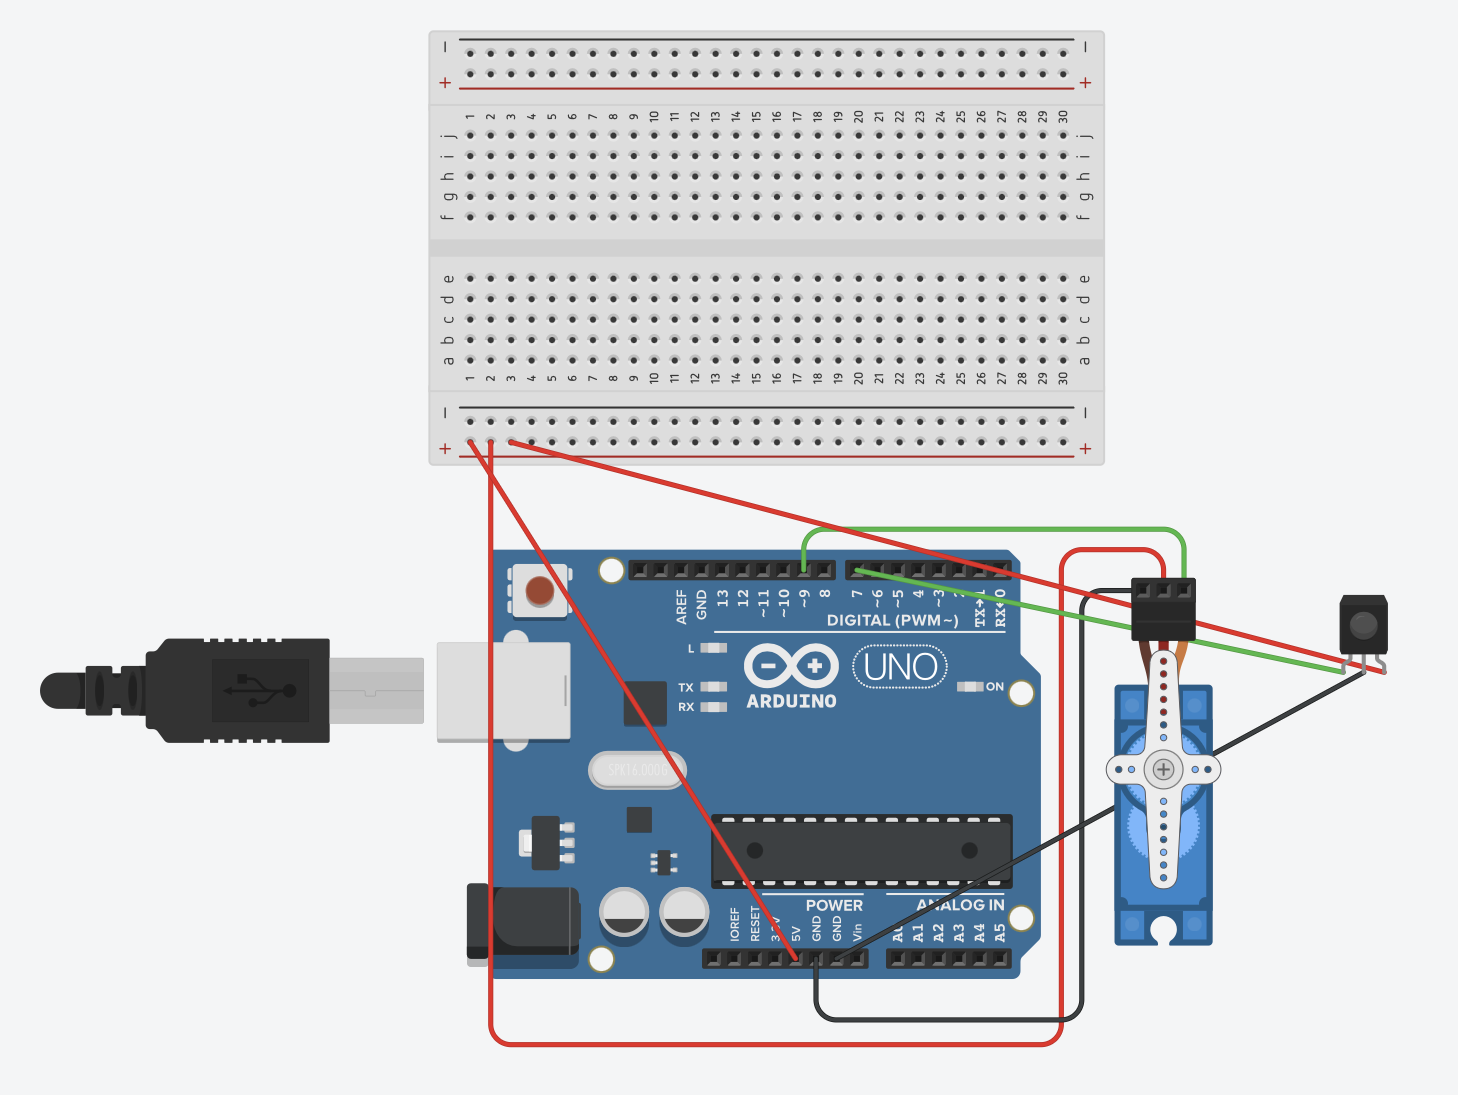
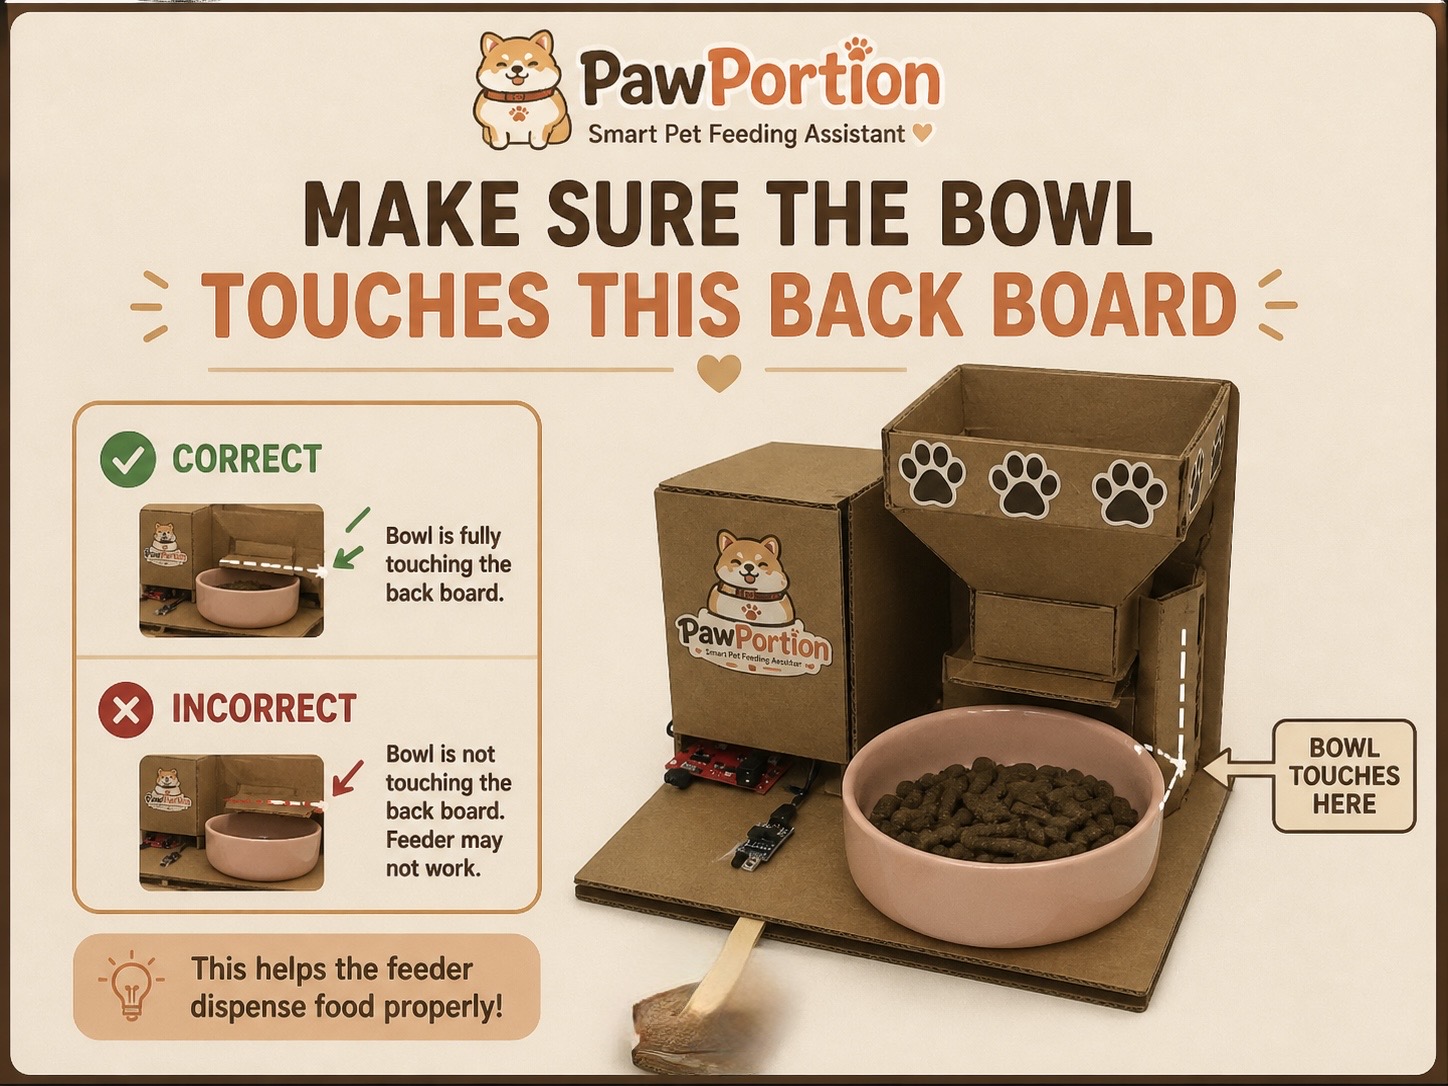
Assembly Instructions
User Testing Videos
During user testing, I wanted to see whether people could understand the system without me explaining every step. The main interaction was mostly clear. Users understood that the p5 dashboard was giving them feeding information, and they were able to recognize the “Feed Now” button as the main action. Once the servo moved and food was released, the connection between the digital interface and the physical feeder became much clearer.
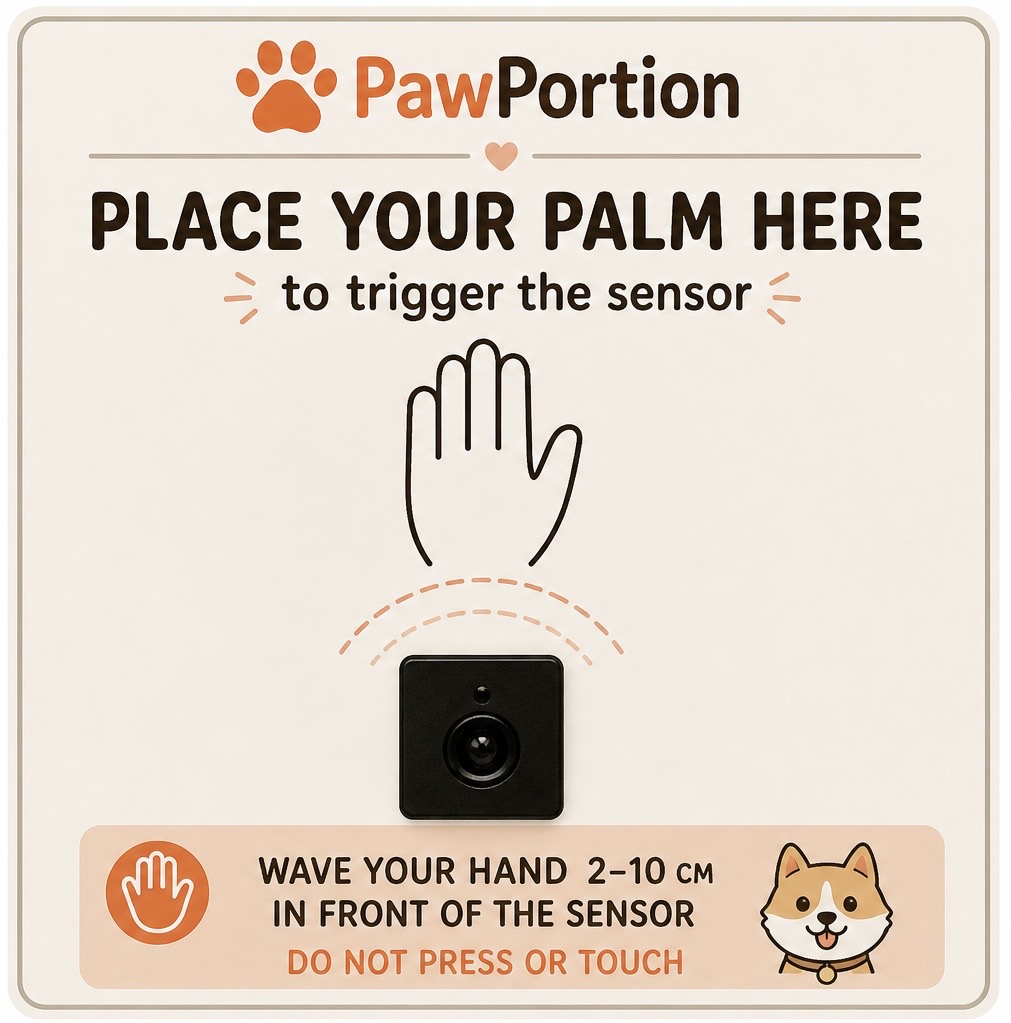
One important issue appeared during testing with the IR sensor. I had placed a printed image near the sensor to guide the user, but the image made some people interpret the IR sensor as a physical button. Instead of triggering it by placing something near it, they tried to press it directly. The problem was not that the sensor failed. The problem was that my visual instruction gave the wrong impression.
This taught me that physical interaction is not only about whether the circuit works. It is also about how the user reads the object. A small label, icon, or printed sign can completely change how someone understands what they are supposed to do. After seeing this confusion, I changed the printed label so it was clearer that the sensor detects presence rather than pressure. This made the interaction easier to understand and reduced the need for verbal explanation.
How Does the Implementation Work?
Description of Interaction Design
The interaction is built around a cycle between the user, p5, and Arduino. First, the p5 dashboard tracks time and displays the feeding schedule. The user can see when the pet was last fed, when the next feeding is due, and how much time is left. This makes the system readable before anything physical happens.
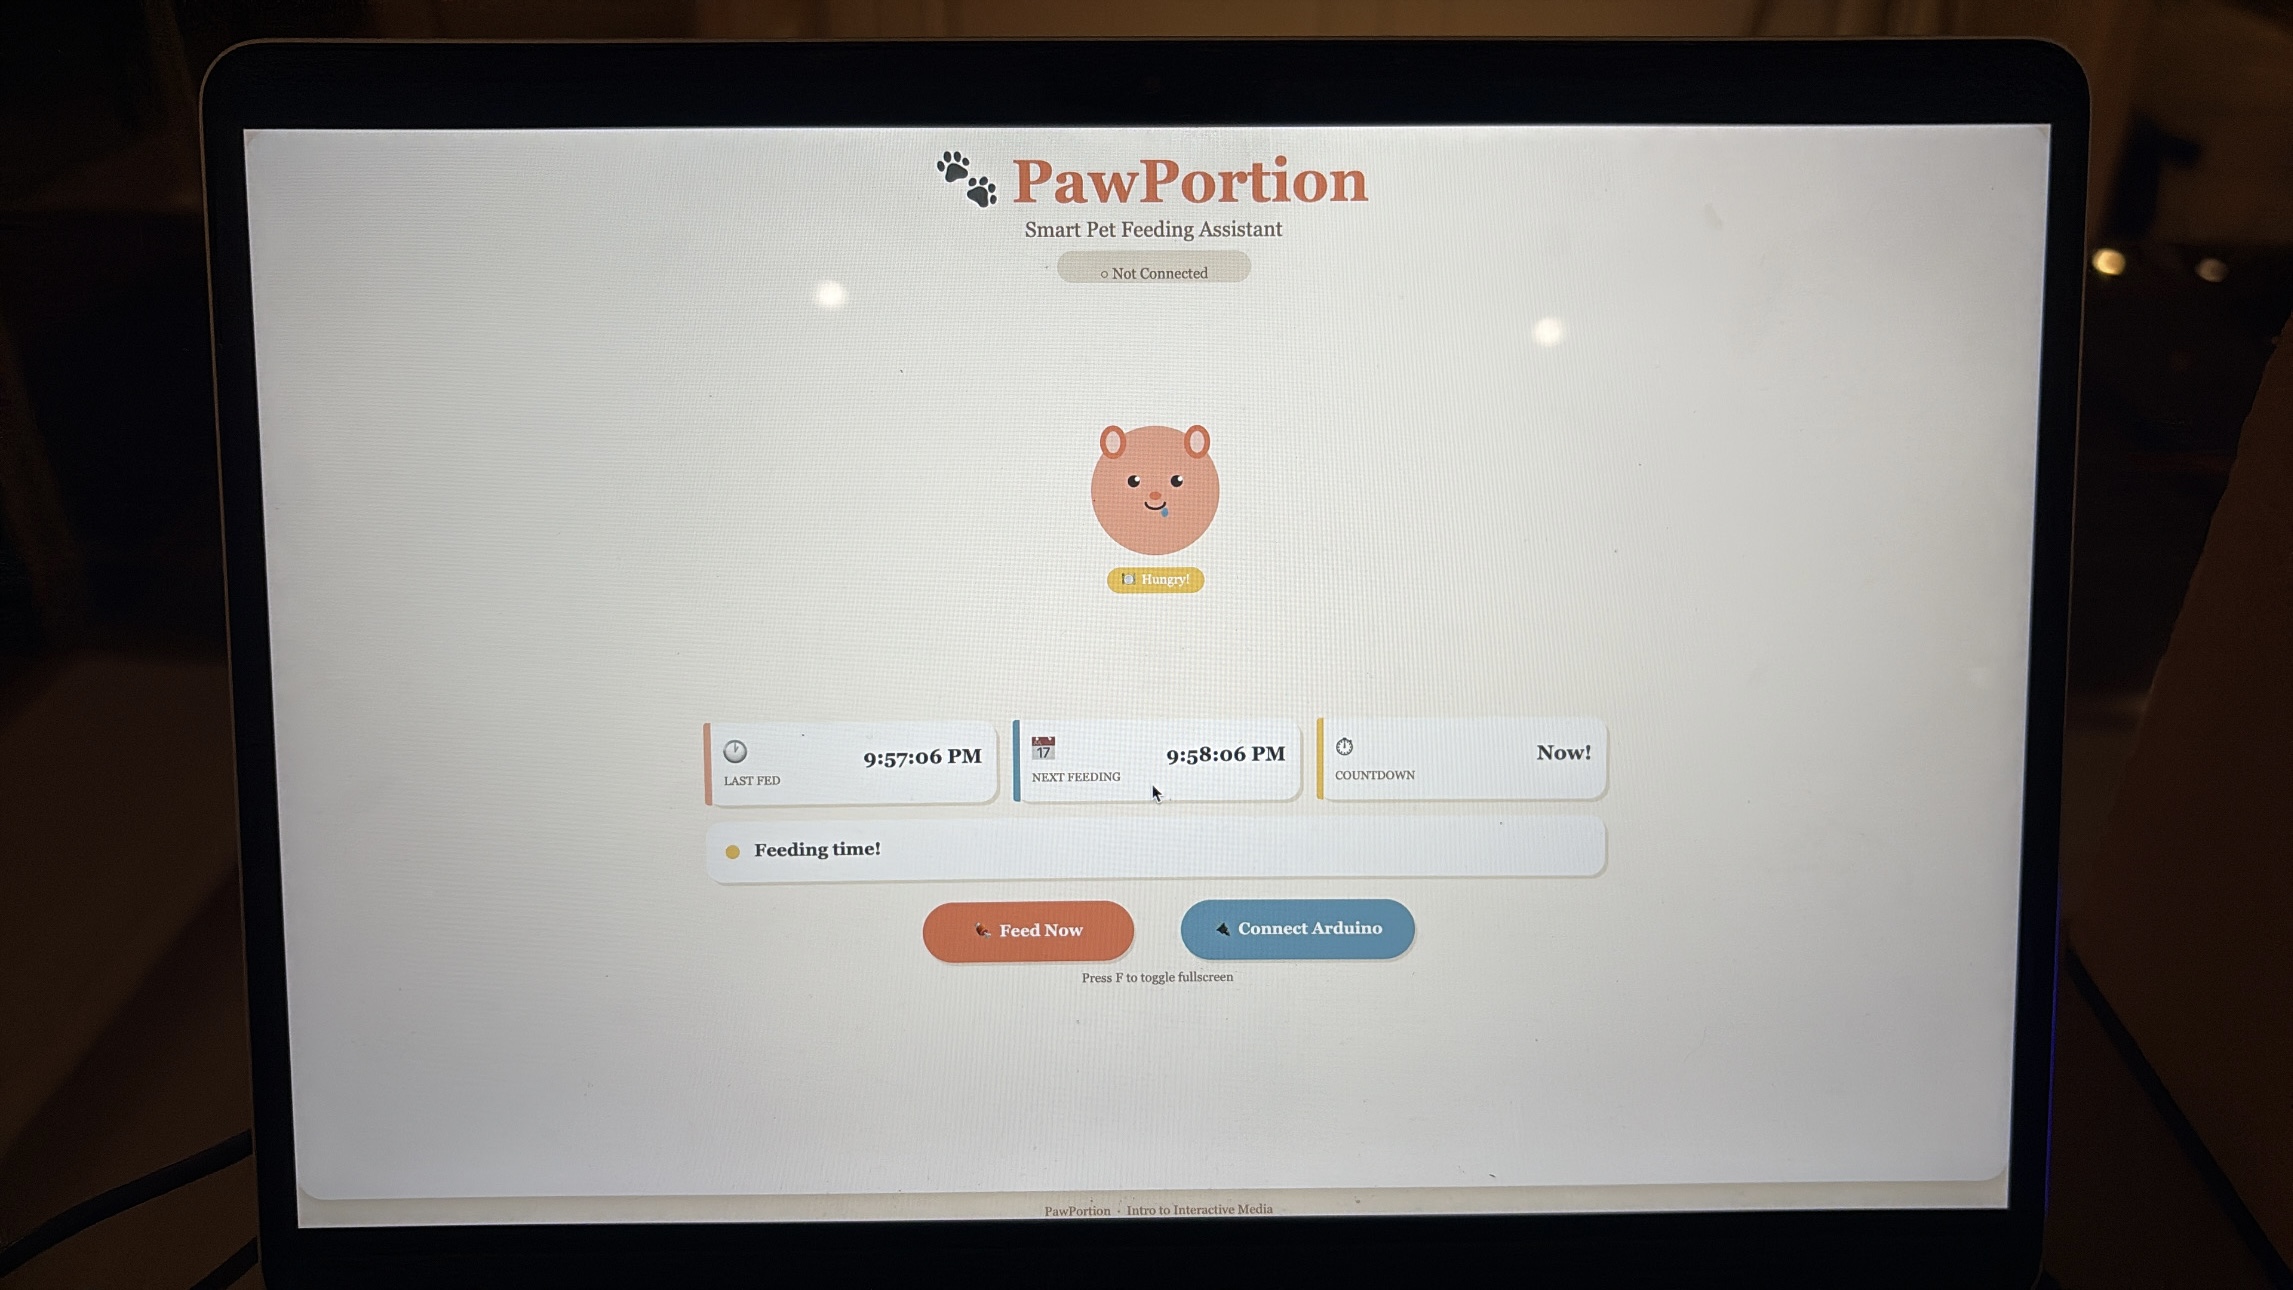
When feeding time arrives, the dashboard changes state. The pet becomes hungry, and the status message tells the user that it is feeding time. This is meant to guide the user instead of forcing the system to act automatically. The user then presses the “Feed Now” button on the p5 interface, which sends a command to Arduino.
Arduino receives the command and moves the servo motor. The servo acts like a small door or gate that opens to release food, then closes again. When Arduino finishes dispensing, it sends a message back to p5. After p5 receives that message, the dashboard updates the last feeding time, resets the countdown, and changes the pet’s mood to happy.
If the user does not feed within the grace period, the system marks the feeding as missed. The pet becomes sad, which makes the missed action more visible. I wanted this to feel gentle, not dramatic, but still noticeable enough that the user understands the consequence of ignoring the schedule, and that they should probably feed their pet.
Description of Arduino Code
The Arduino code controls the physical side of the project. It is responsible for reading the IR sensor, controlling the servo motor, and communicating back to p5 when feeding is complete. I used named constants for the pins instead of random numbers, which makes the code easier to understand and edit later.
Snippet: defining the sensor pin, servo pin, and servo object.
#include <Servo.h>

const int SENSOR_PIN = 7;

const int SERVO_PIN  = 6;

Servo tap_servo;
The main function in the Arduino code is dispenseFood(). This function opens the servo, waits while food is released, closes the servo, and then sends “DONE” to p5. This message is important because it tells the dashboard that the physical feeding action has finished.
Snippet: the feeding function that opens the servo, closes it, and sends confirmation to p5.
void dispenseFood() {

  isDispensing = true;

  tap_servo.write(110);

  delay(2000);

  tap_servo.write(0);

  delay(300);

  lastFedTime = millis();

  isDispensing = false;

  Serial.println("DONE");

}
The Arduino also listens for serial messages from p5. When p5 sends “FEED”, Arduino immediately calls the feeding function. This is what connects the digital button to the physical movement.
Snippet: receiving the FEED command from p5.
if (Serial.available() > 0) {

  String cmd = Serial.readStringUntil('\n');

  cmd.trim();

  if (cmd == "FEED") {

    dispenseFood();

  }

}
I also added a cooldown so the IR sensor does not trigger repeatedly if something stays in front of it. Without this, the servo could keep dispensing again and again. The cooldown makes the physical interaction more controlled.
Description of p5.js Code
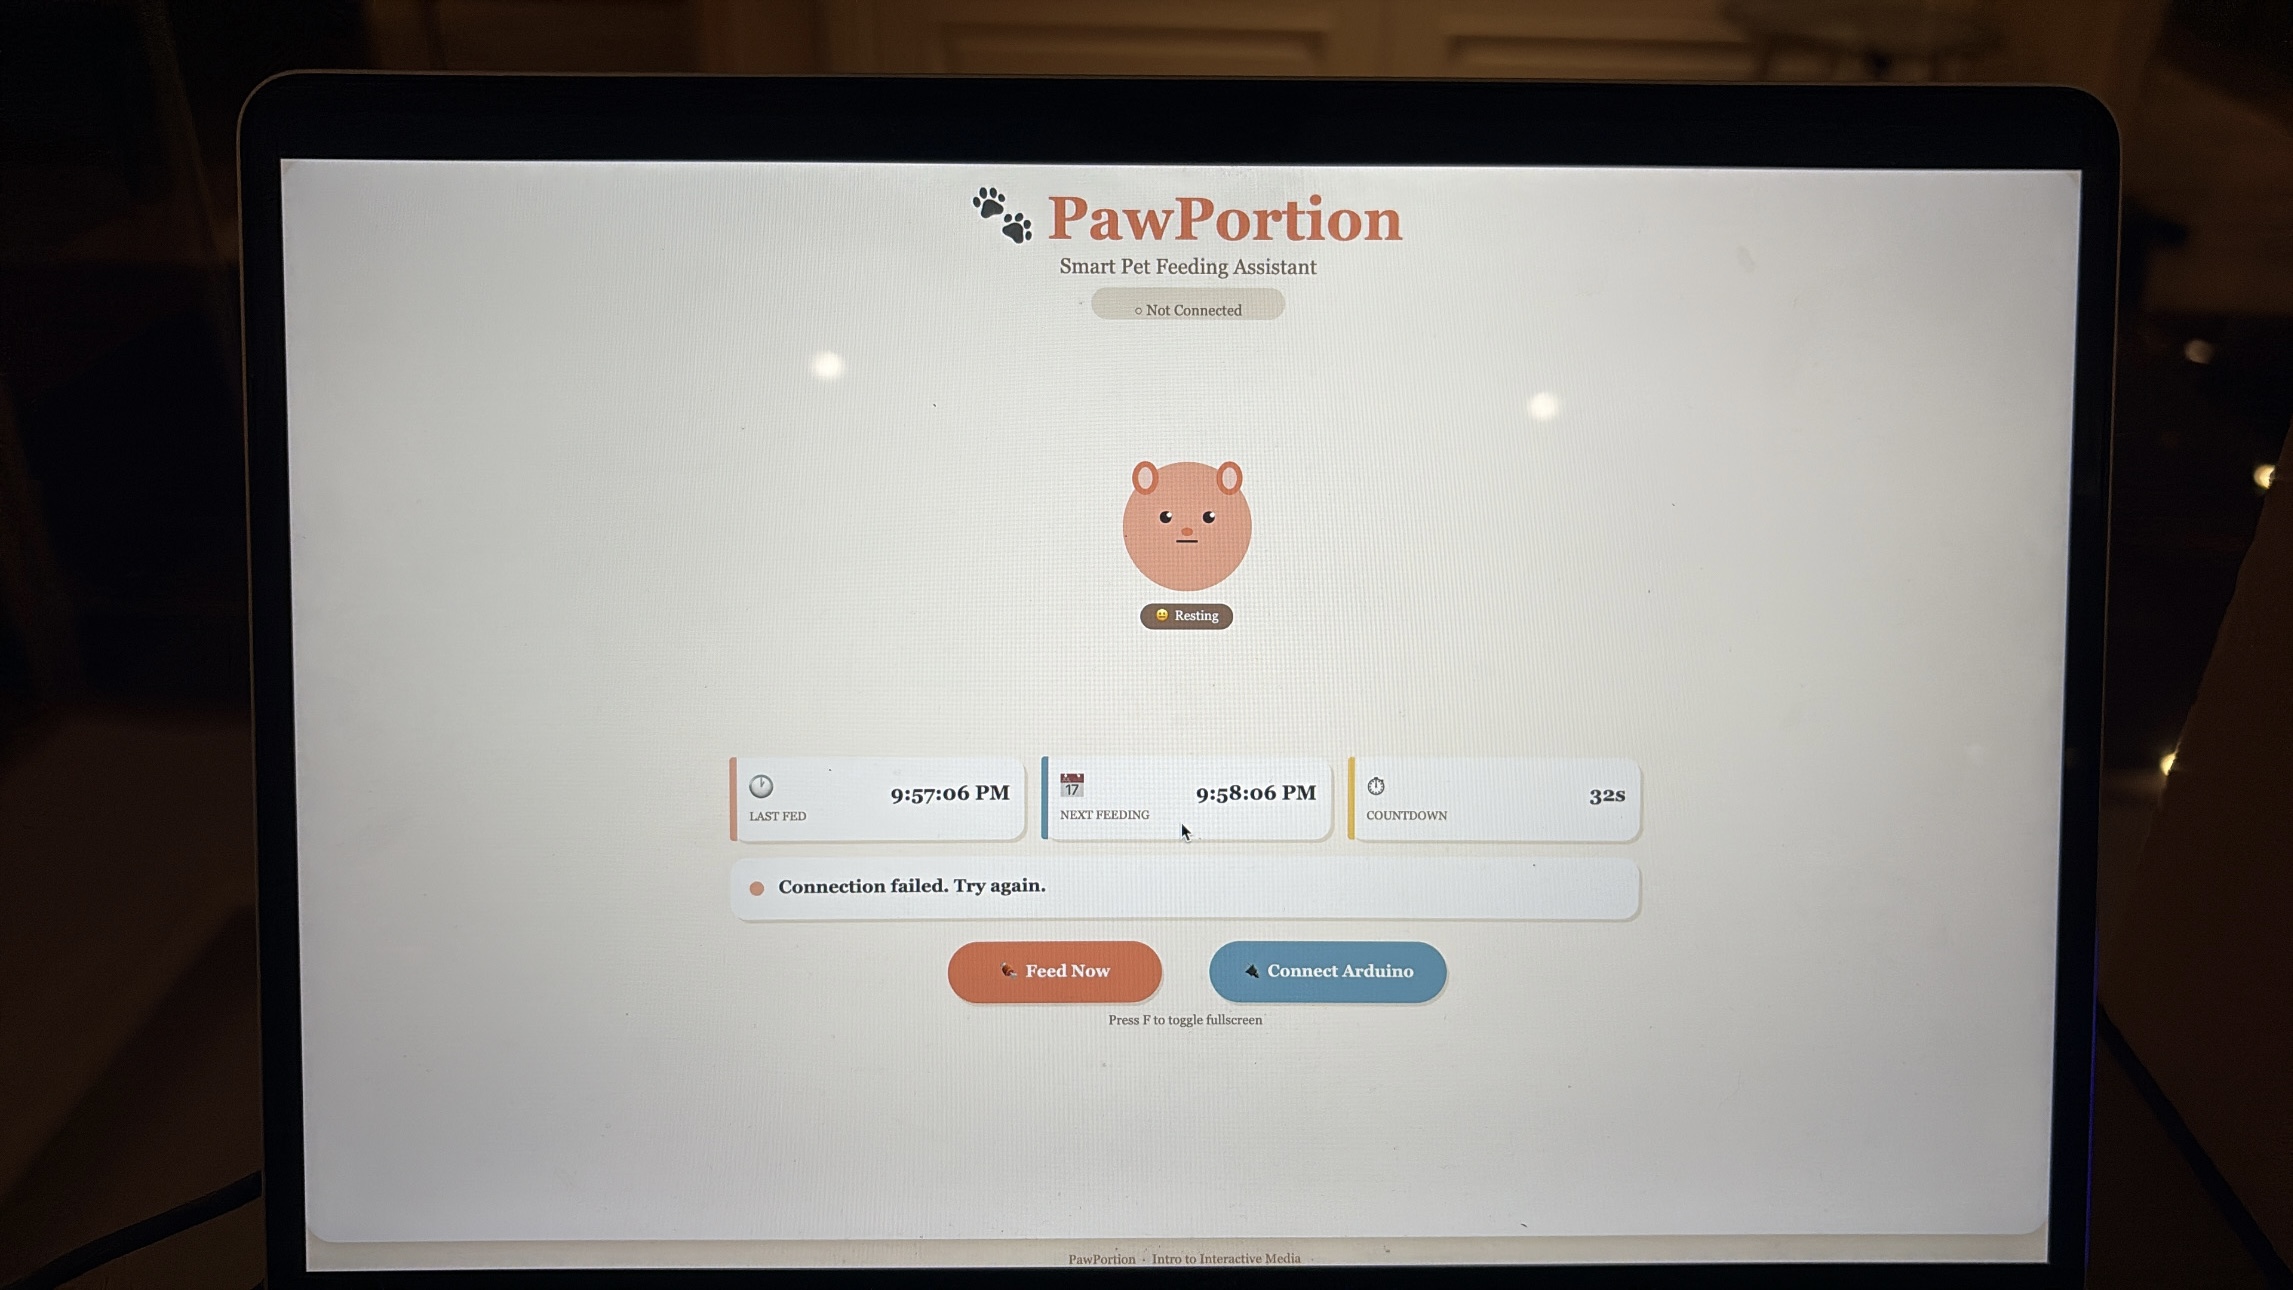
The p5.js code controls the digital dashboard. It handles the schedule, the pet mood, the buttons, and the communication with Arduino. The dashboard shows the last feeding time, the next feeding time, and a countdown. It also shows the pet’s mood, which changes depending on what is happening.
Snippet: timing values for the feeding schedule.
const FEED_INTERVAL_SEC = 60;

const MISSED_GRACE_SEC = 15;
The main schedule logic checks whether feeding time has arrived. If there is still time left, the pet stays neutral. If feeding time has arrived but is still within the grace period, the pet becomes hungry. If the grace period passes, the pet becomes sad.
Snippet: schedule logic that updates the pet mood.
if (secUntilFeed > 0) {

  petMood = "neutral";

  if (serialConnected) {

    statusMsg = "Waiting for next feeding";

  }

} else if (secUntilFeed > -MISSED_GRACE_SEC) {

  petMood = "hungry";

  statusMsg = "Feeding time!";

} else {

  petMood = "sad";

  statusMsg = "Feeding missed!";

}
When the user clicks “Feed Now,” p5 sends the word “FEED” to Arduino through serial communication. I used a newline at the end because it helps Arduino read the command as one complete message.
Snippet: sending the FEED command to Arduino.
const encoder = new TextEncoder();

const writer = port.writable.getWriter();

await writer.write(encoder.encode("FEED\n"));

writer.releaseLock();
The p5 code also listens for messages from Arduino. When it receives “DONE”, it updates the dashboard. This is what makes the interface respond only after the physical action finishes.
Snippet: checking for DONE from Arduino.
if (line === "DONE") {

  onFeedingDone();

}
I also added fullscreen functionality using the F key. This makes the dashboard easier to present during the final demo and makes it feel more like a complete interface rather than just a small sketch window. The course documentation specifically mentions fullscreen and responsive resizing as part of final project programming considerations.
Description of Communication Between Arduino and p5.js
The communication between Arduino and p5.js is one of the most important parts of the project. The system works through a two-way serial communication loop. p5 sends “FEED” to Arduino, Arduino moves the servo to dispense food, and then Arduino sends “DONE” back to p5.
This means the dashboard does not simply assume that feeding happened. It waits for Arduino to confirm that the physical action was completed. This made the project feel more reliable because the screen and the machine were connected through actual feedback.
This was also one of the hardest parts of the project because if the serial communication failed, the entire interaction felt broken. The dashboard could look fine, and the Arduino could work alone, but the project only felt complete when both sides were speaking to each other correctly.
Aspects Of The Project I’m Proud Of
One of the strongest parts of this project is how far it goes compared to where I started at the beginning of the course. If I had seen this project in week one, I genuinely would not have believed that I could build it. It combines physical computing, serial communication, a digital dashboard, user interaction, timing logic, an animated interface, and a mechanical feeding system. That feels ambitious for me, and I am proud that I was able to execute it in a way that actually works.
I am also proud of how complete the project feels as an experience. It is not just Arduino moving a servo, and it is not just a p5 interface on a screen. The two parts depend on each other. The dashboard guides the user, the Arduino performs the physical action, and the screen updates after receiving confirmation. That connection makes the project feel like a full interactive system.
Another part that I think worked well is the personality of the interface. The pet mood makes the system feel more alive, and it helps communicate the feeding state without needing complicated instructions. The sad, hungry, happy, and resting states make the dashboard easier to understand and more engaging.
I am also proud that I improved the project through user testing. The IR sensor confusion could have been ignored, but I used it as a design lesson. Changing the printed label made the interaction clearer, which showed me that the physical design and the code are equally important.
Resources Used
p5.js
https://p5js.org/reference/ https://p5js.org/tutorials/get-started/ https://www.youtube.com/watch?v=c3TeLi6Ns1E
Serial Communication
https://itp.nyu.edu/physcomp/labs/labs-serial-communication/lab-webserial-input-to-p5-
js/https://itp.nyu.edu/physcomp/labs/labs-serial-communication/lab-webserial-output-from-p5-
js/https://makeabilitylab.github.io/physcomp/communication/p5js-serial.html
https://medium.com/@yyyyyyyuan/tutorial-serial-communication-with-arduino-and-p5-js-cd39b3ac10ce
Servo Motor
https://docs.arduino.cc/tutorials/generic/basic-servo-control/
https://learn.adafruit.com/adafruit-arduino-lesson-14-servo-motors/overview
https://www.youtube.com/watch?v=1mDnaiEytAI
IR Sensor
https://arduinogetstarted.com/tutorials/arduino-infrared-obstacle-avoidance-sensor
https://projecthub.arduino.cc/aboda243/obstacle-detector-using-ir-module-tutorial-101320
https://www.youtube.com/watch?v=vi4hkrrkwkY
https://www.youtube.com/watch?v=ESqhOKgKt5c
AI Usage
I used AI as a support tool during the development of this project. The most important use was debugging my p5.js code, especially because this was one of my first larger coding projects involving serial communication between Arduino and p5. Debugging was difficult because problems could come from the Arduino code, the p5 code, the serial connection, or the browser. AI helped me break down the problem and understand where the issue might be coming from.
AI also helped me understand how to structure parts of the p5 dashboard, especially the schedule logic, and serial communication. I still tested, adjusted, and integrated the code myself to make sure it worked with my actual Arduino setup.
if (secUntilFeed > 0) {
  petMood = "neutral";

  if (serialConnected) {
    statusMsg = "Waiting for next feeding";
  }

} else if (secUntilFeed > -MISSED_GRACE_SEC) {
  petMood = "hungry";
  statusMsg = "Feeding time!";

} else {
  petMood = "sad";
  statusMsg = "Feeding missed!";
}
I also used AI to generate visual design elements for the project, including the PawPortion logo and printable signs for the physical machine. These visuals helped make the project feel more polished and easier for users to understand.
Challenges Faced and How I Tried to Overcome Them
The biggest challenge was serial communication between Arduino and p5. This was one of the first times I worked on a larger project where hardware and software had to communicate continuously. When something did not work, it was hard to know whether the problem was in the Arduino code, the p5 code, the USB connection, or the browser’s serial port.
I overcame this by testing each part separately. First, I tested the servo on Arduino by itself. Then I tested whether p5 could connect to the Arduino. Then I tested sending one simple command. After that, I tested receiving “DONE” back from Arduino. Breaking it into smaller steps made the project less overwhelming.
Another challenge was making the interaction clear to users. The IR sensor confusion showed me that a working sensor does not automatically mean a clear interaction. Users interpreted the printed image as a button because that was the visual language I accidentally created. I fixed this by changing the label and making the physical instruction clearer.
A third challenge was making the project feel polished. Since the project includes both physical and digital parts, it needed to look intentional from both sides. I worked on the dashboard design, printable labels, and project logo so the final setup felt like one system rather than separate pieces.
Future Improvements
If I had more time, I would improve the physical build of the feeder. I would make the container more stable, the food release cleaner, and the overall structure more durable. Right now, the prototype communicates the idea, but a more refined version could look and function more like a real product.
I would also improve the interface by adding sound feedback. For example, a small sound could play when feeding time arrives, when food is dispensed, or when feeding is missed. This would make the system more noticeable and more satisfying to use.
Another future improvement would be adding more customization to the schedule. Instead of using a short demo interval, the user could choose real feeding times, like morning and evening. This would make the system more practical outside of the class demo.
I would also conduct more user testing with people who have not seen the project before. Watching how people understand the physical setup, the IR sensor, and the dashboard would help me refine the interaction even more.
Overall, I am very very proud of how far i’ve come and can confidently say that this class was a very formative step for me in my university journey and the first step to taking on my passion for Interactive Media.
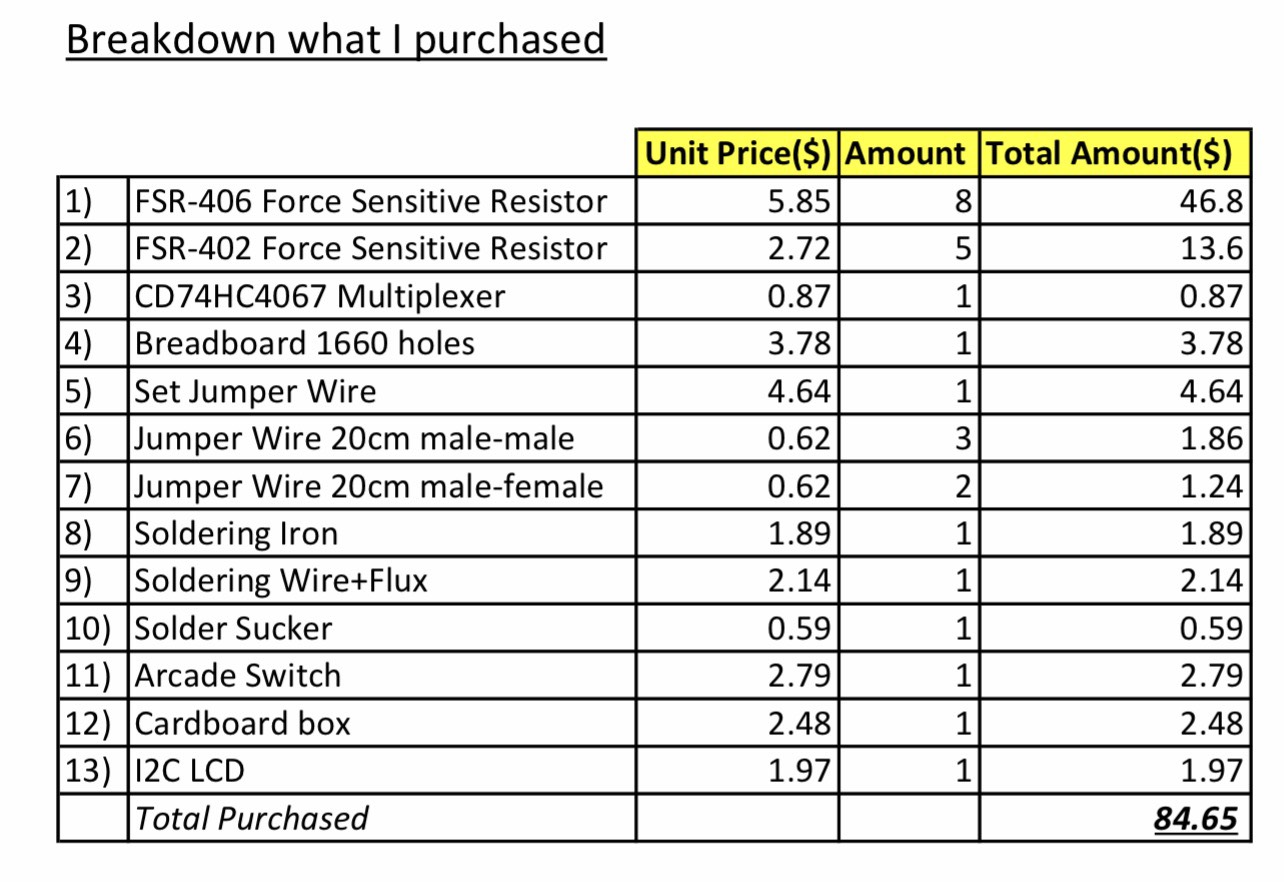
Stipend Breakdown (50$):
- cardboard (18 AED): https://amzn.eu/d/0acbyQjo
- colored paper (16 AED): https://amzn.eu/d/01jTC4gi
- a pet bowl (30 AED): https://amzn.eu/d/0fGxMzge
- paw print stickers (18 AED): https://amzn.eu/d/013sjyhh
- popsicle sticks (8 AED): https://amzn.eu/d/01j7lhqI
- decorative tape (36 AED): https://amzn.eu/d/0fHSoKoB
- IR sensor (24 AED): https://amzn.eu/d/0fzL5Kli
- Male to Female, Male to Male Jumper Wires (26 AED): https://amzn.eu/d/077U0Bvf
Total Spend: 47.92$
