Pressure-Based Digital Musical Instrument – Progress Update
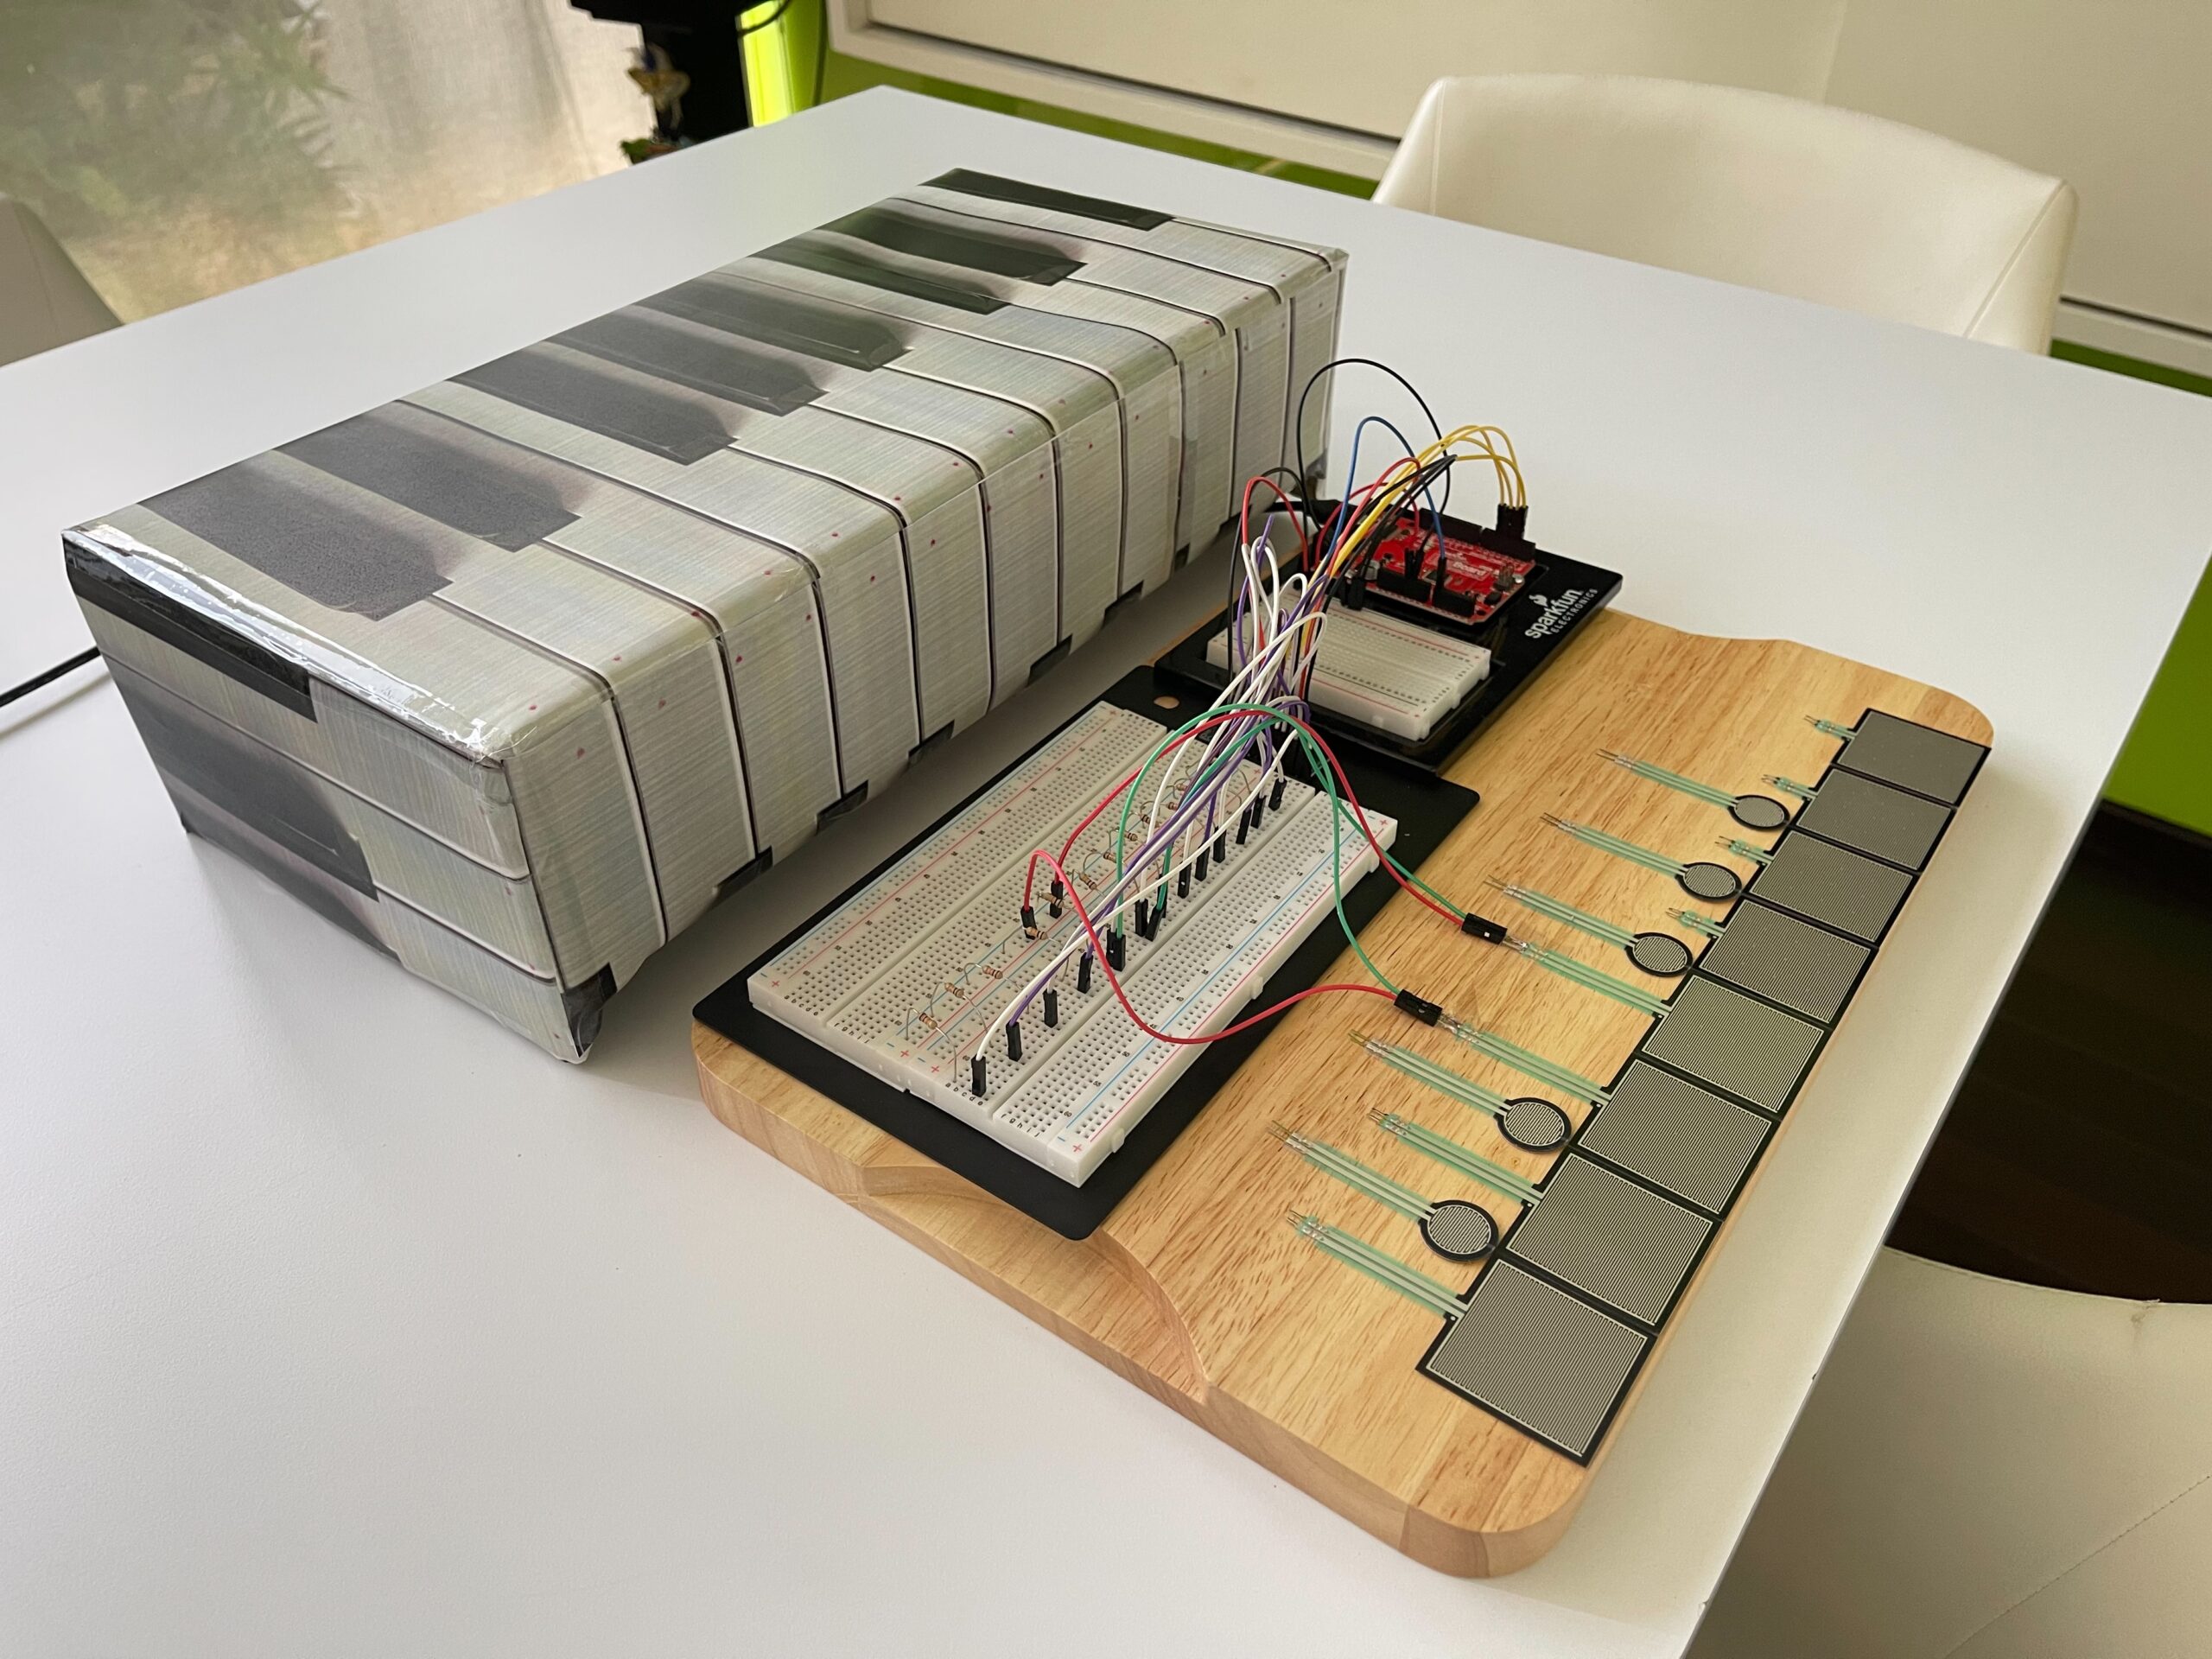
For my final project, I am developing a physically interactive digital musical instrument that combines Arduino and p5.js. The main idea is to simulate a small piano-like interface using pressure sensitive sensors (FSRs) as keys. Each key corresponds to a musical note, and when pressed, it triggers both the sound and visual feedback on the computer.
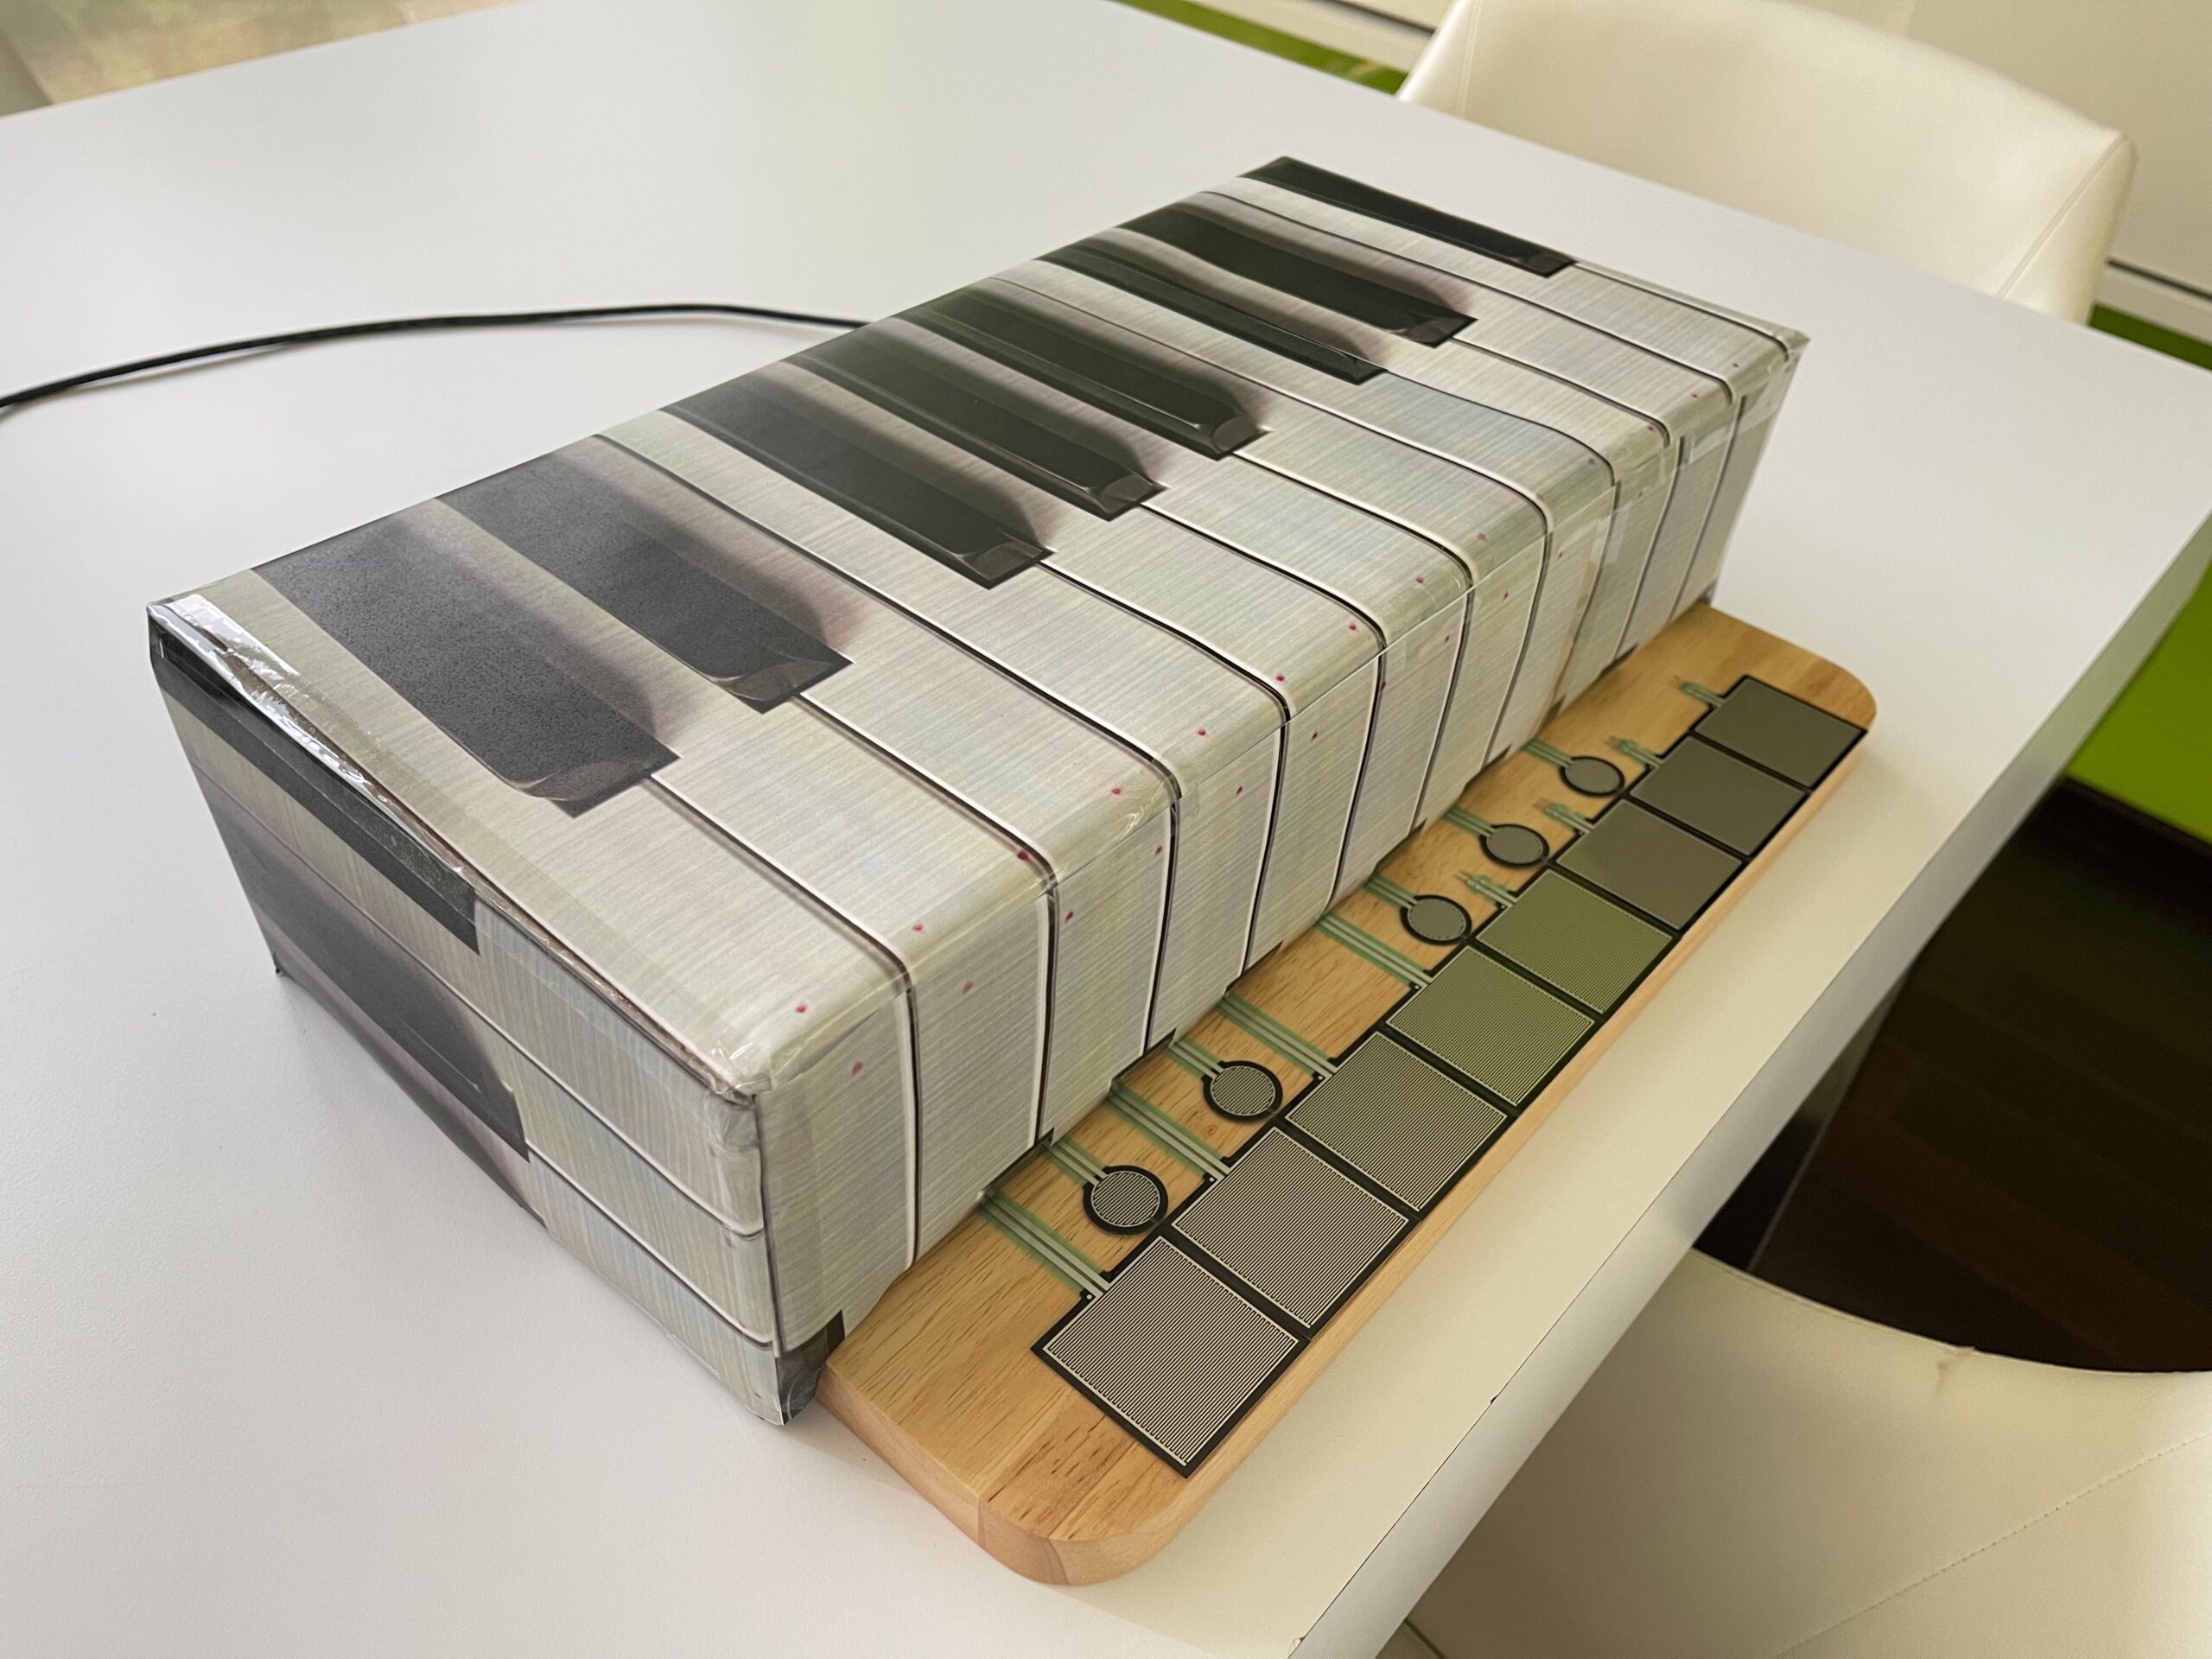
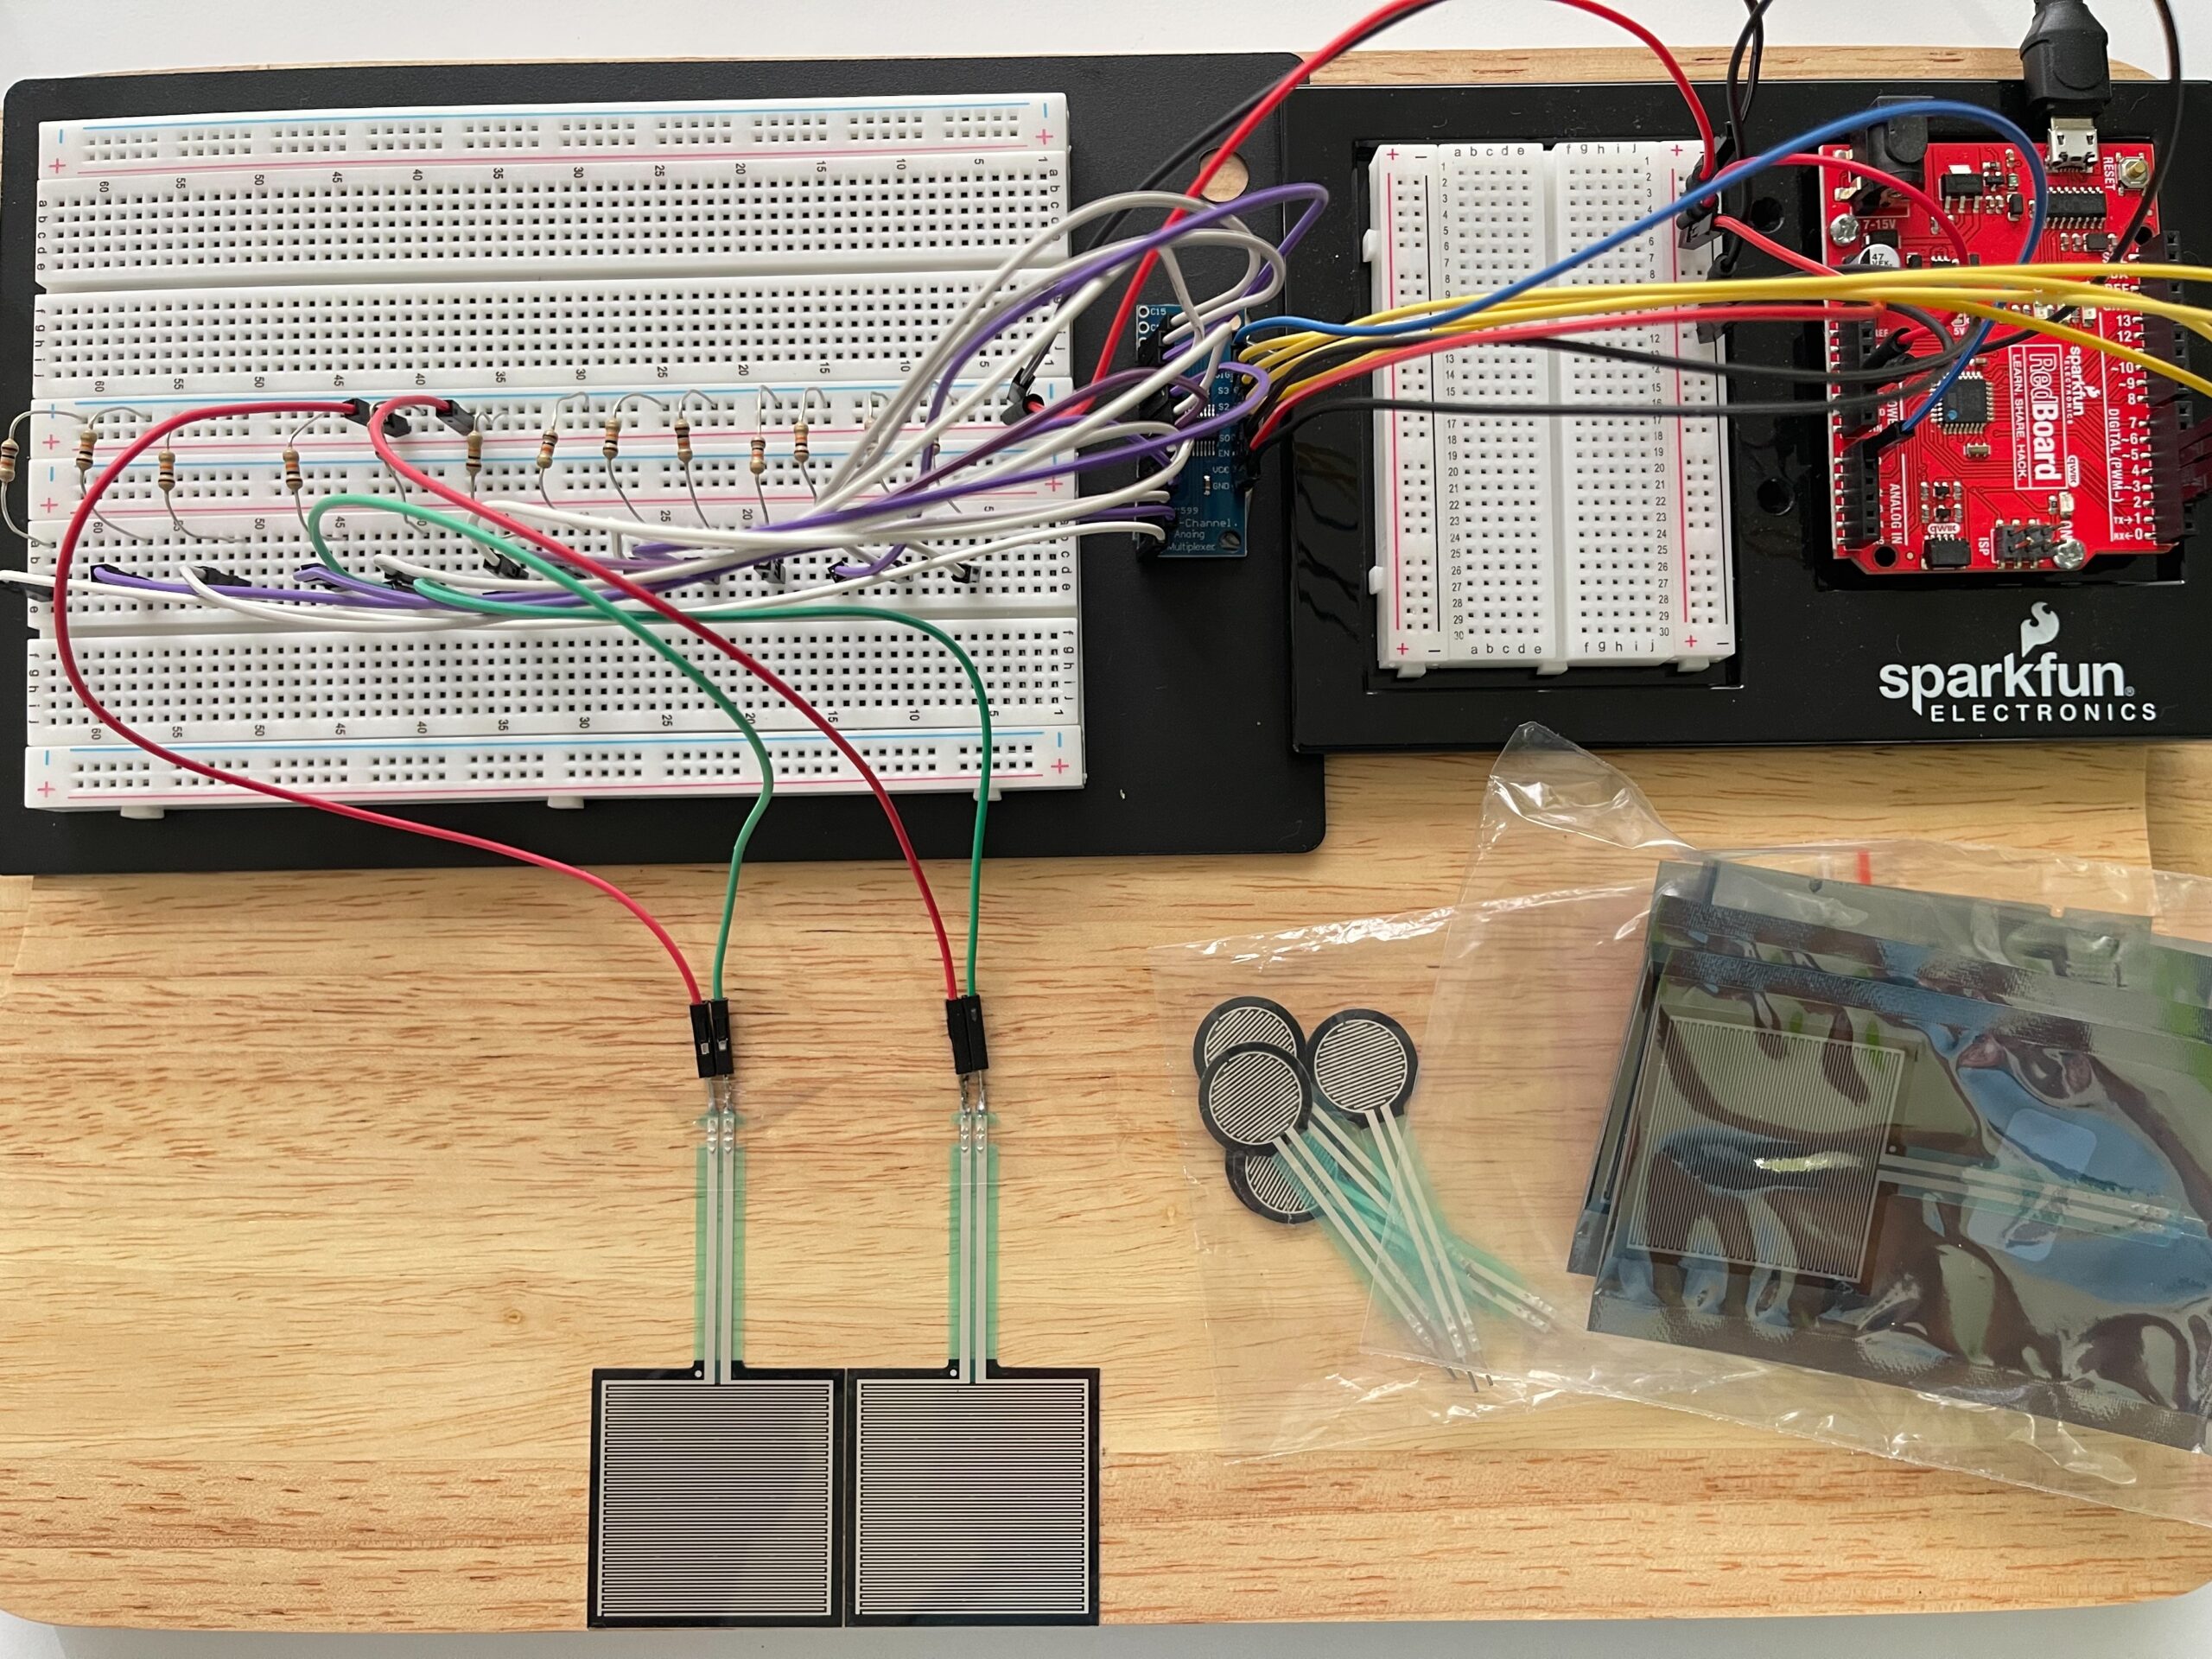
The system is designed to feel closer to a real instrument rather than just a simple button interface. Instead of using traditional push buttons, I chose Force Sensitive Resistors (FSR406 for white keys and FSR402 for black keys) so that the interaction feels more natural when placing fingers on the surface.
The project also includes a visual component in p5.js, where each note triggers a graphical response (such as expanding shapes or bursts) aligned with the keyboard layout.
Arduino System Design (Input & Output)
On the Arduino side, the main responsibility is to read input from multiple FSR sensors and send that data to p5.js through serial communication.
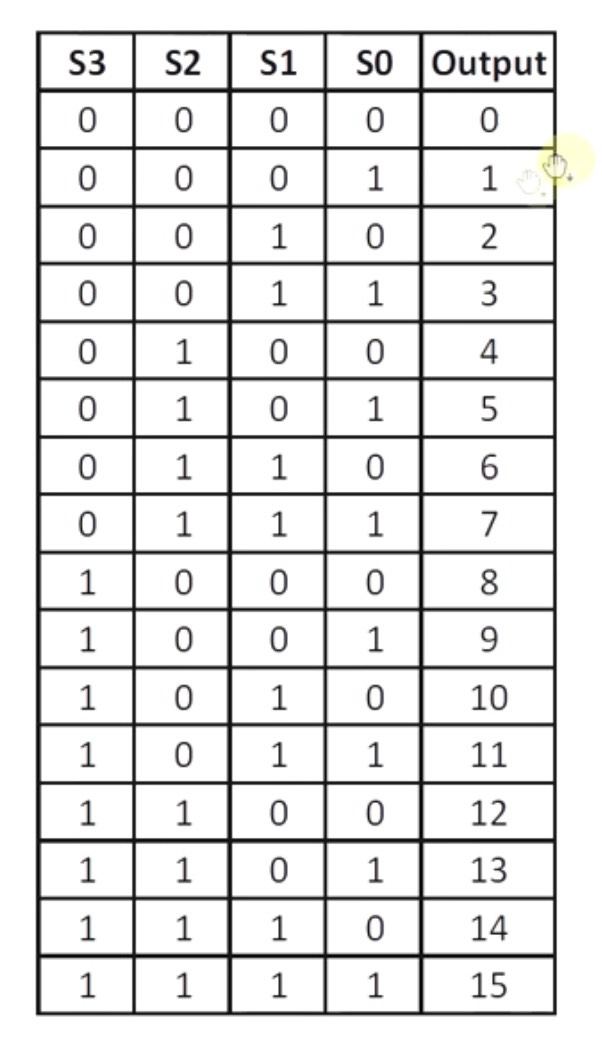
Since I am using 13 keys (8 white + 5 black), I needed a way to expand the number of analog inputs. To solve this, I am using a CD74HC4067 multiplexer, which allows me to read multiple sensors using a single analog pin.
Inputs
* 8 × FSR406 (white keys)
* 5 × FSR402 (black keys)
Each FSR is connected through the multiplexer channels (C0–C12). The Arduino cycles through each channel, reads the analog value, and determines whether a key is being pressed based on a threshold.
Processing
* Scan each multiplexer channel
* Detect press events (based on pressure threshold)
* Map each sensor to a note index
Outputs (to p5.js)
* Sends serial data representing which key is pressed
(e.g., key index or note trigger)
p5.js System Design (Sound & Visual Output)
The p5.js side handles both sound synthesis and visual feedback.
Input from Arduino
* Receives serial data from Arduino (note index or trigger)
* Interprets incoming data as note events
Sound Output
* Uses p5.sound to generate tones
* Each note is mapped to a frequency (C4 → C5 range)
* Oscillator is used to produce sound (triangle waveform for smoother tone)
Because of browser audio restrictions, the user must click once on the screen before sound can play. This is an important part of the interaction design.
Visual Output
* Background image of a piano keyboard is displayed
* When a note is triggered:
* A visual “burst” or circle appears at the corresponding key position
* The animation fades out over time
This creates a synchronized audio-visual experience.
System Interaction Flow
Overall system flow:
1. User presses an FSR key
2. Arduino reads the sensor via multiplexer
3. Arduino sends note data through serial
4. p5.js receives the data
5. Sound is generated
6. Visual feedback appears on screen
This creates a continuous loop of input → processing → output.
Current Progress
So far, I have:
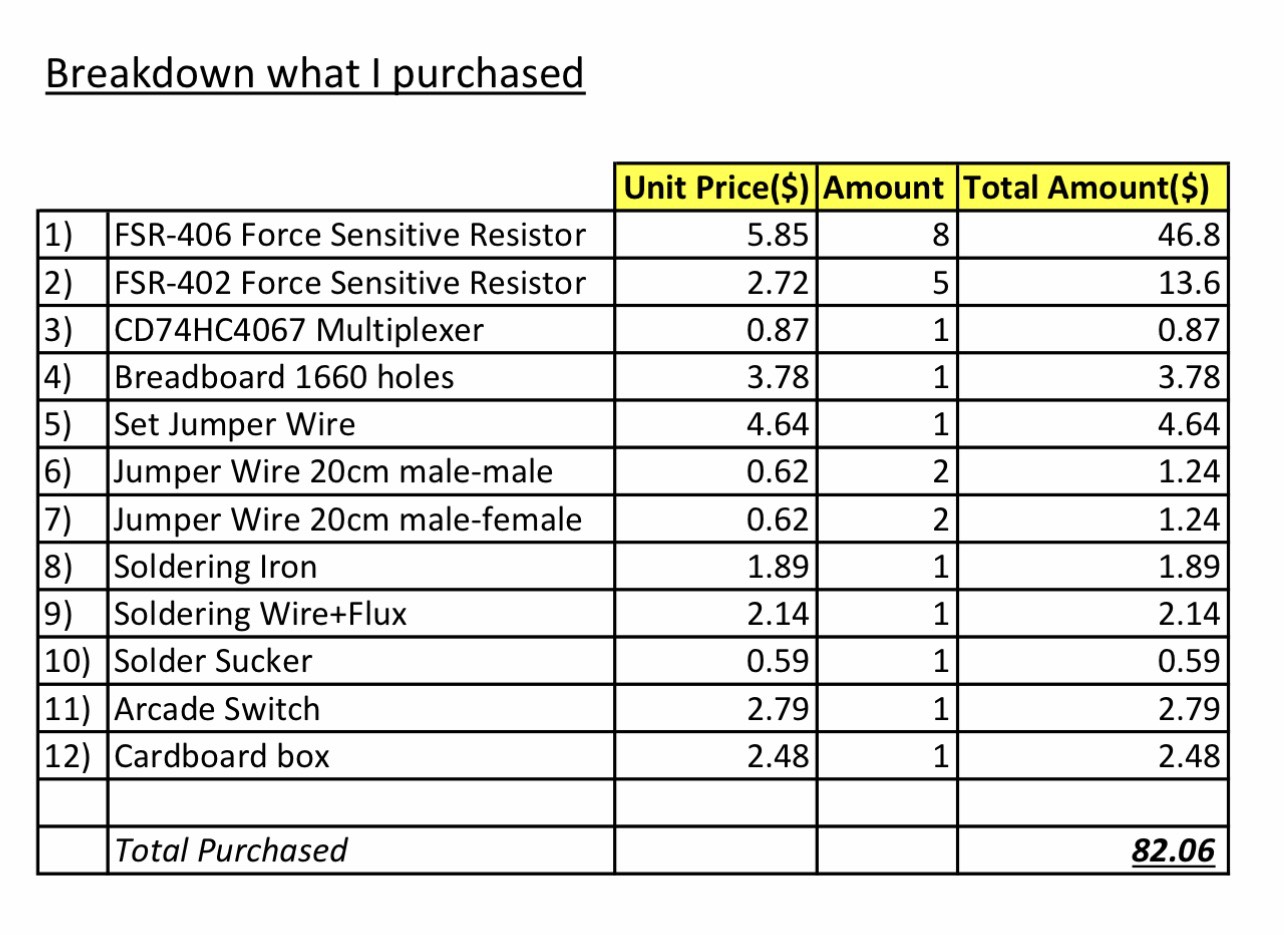
* Set up the basic circuit with some FSR sensors and breadboard
* Soldered to connect and tested the CD74HC4067 multiplexer
* Implemented initial Arduino code to read multiple inputs
* Keyboard mapping
* Sound generation
* Visual feedback system
* Tested interaction using keyboard input as a temporary replacement for hardware input
* Make cardboard box to cover and protect wirings
VDO of Current Progress:
On Arduino side, only test Voltage-Divider on 2 FSRs to see the correct circuit and their threshold and on p5 side only test sound oscillator and visual effect by computer keyboards
https://youtu.be/MlDVwkXKKx0?si=0aQA0kxDGdNnhAR8
Github of testing FSR:
p5:
I have also started integrating real sensor input, though I am still refining the stability of readings and mapping.
Diagram: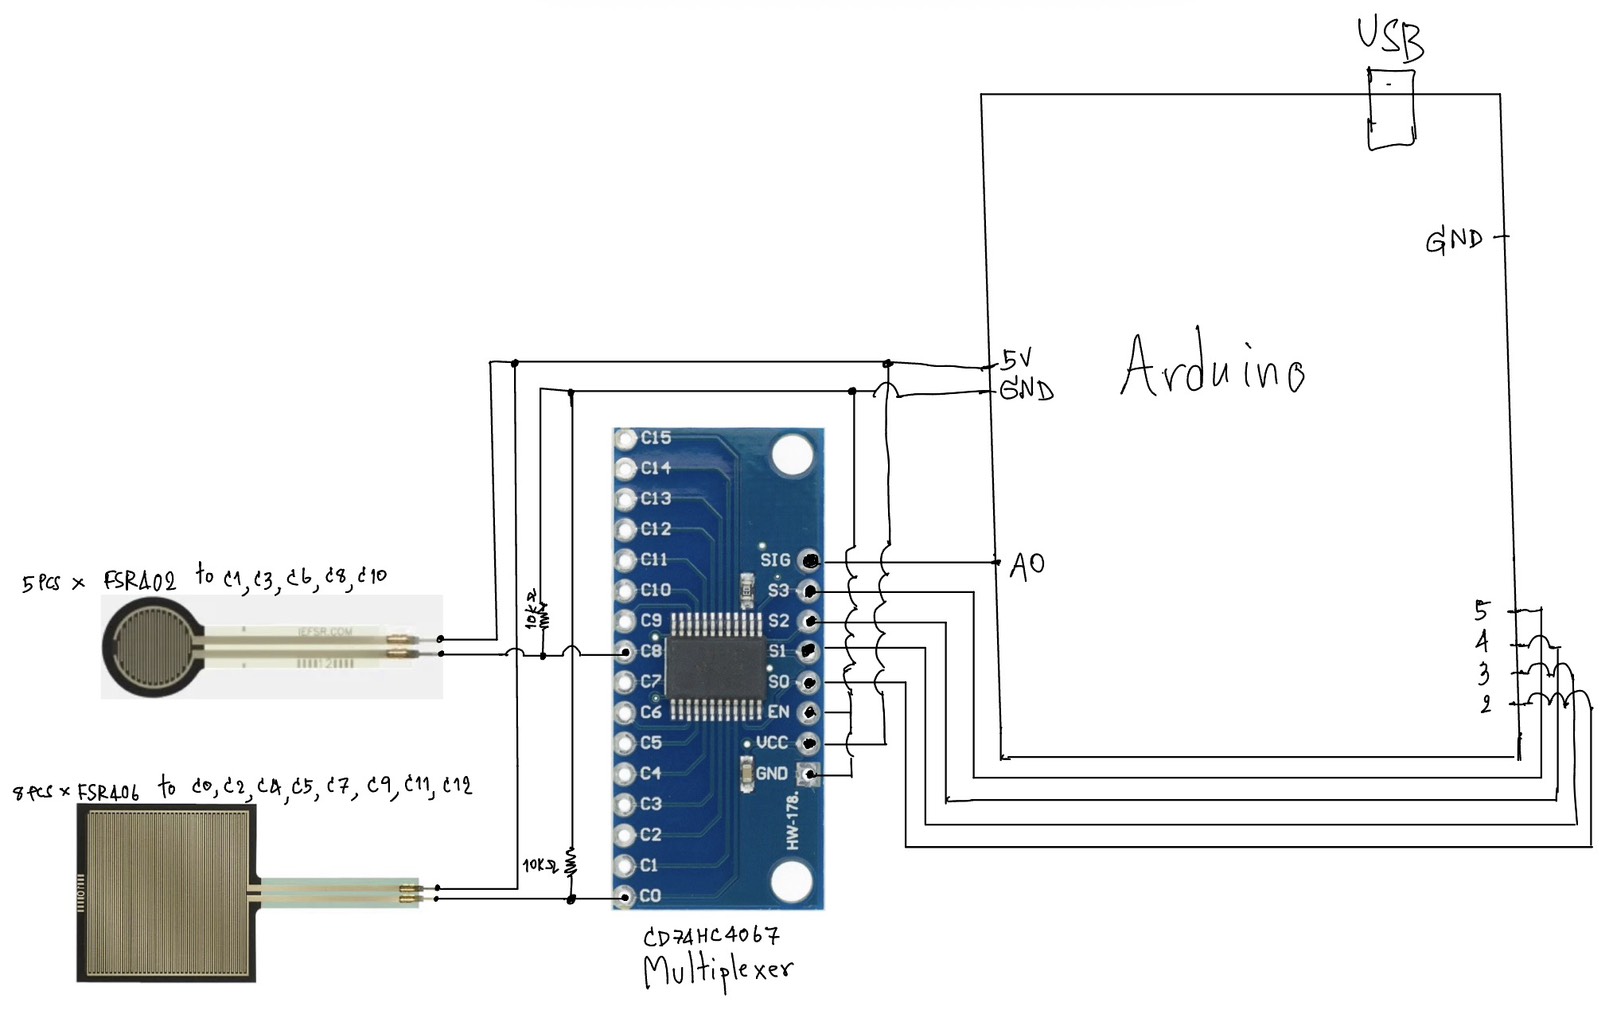
Next Steps
For the next stage of development, I plan to:
* Fully integrate all 13 FSR inputs with stable readings
* Improve serial communication between Arduino and p5.js
* Add the arcade switch as a system control (on/off interaction)
* Refine visual feedback to better align with physical key positions
* Shorter components such as resistors to avoid short circuit
Reflection
One challenge so far has been managing multiple inputs with limited Arduino pins, which is why the multiplexer became an important part of the design. Another challenge is balancing hardware reliability with software responsiveness.
At the same time, combining Arduino and p5.js has made the project more interesting, since it allows both physical interaction and digital visualization.
References:
https://youtu.be/b_MMGJiUcbM?si=z7di2mc-pPGQBt1R
https://youtu.be/XAOo8DEbvck?si=oO7VKZ046IhJgHwh