
Concept
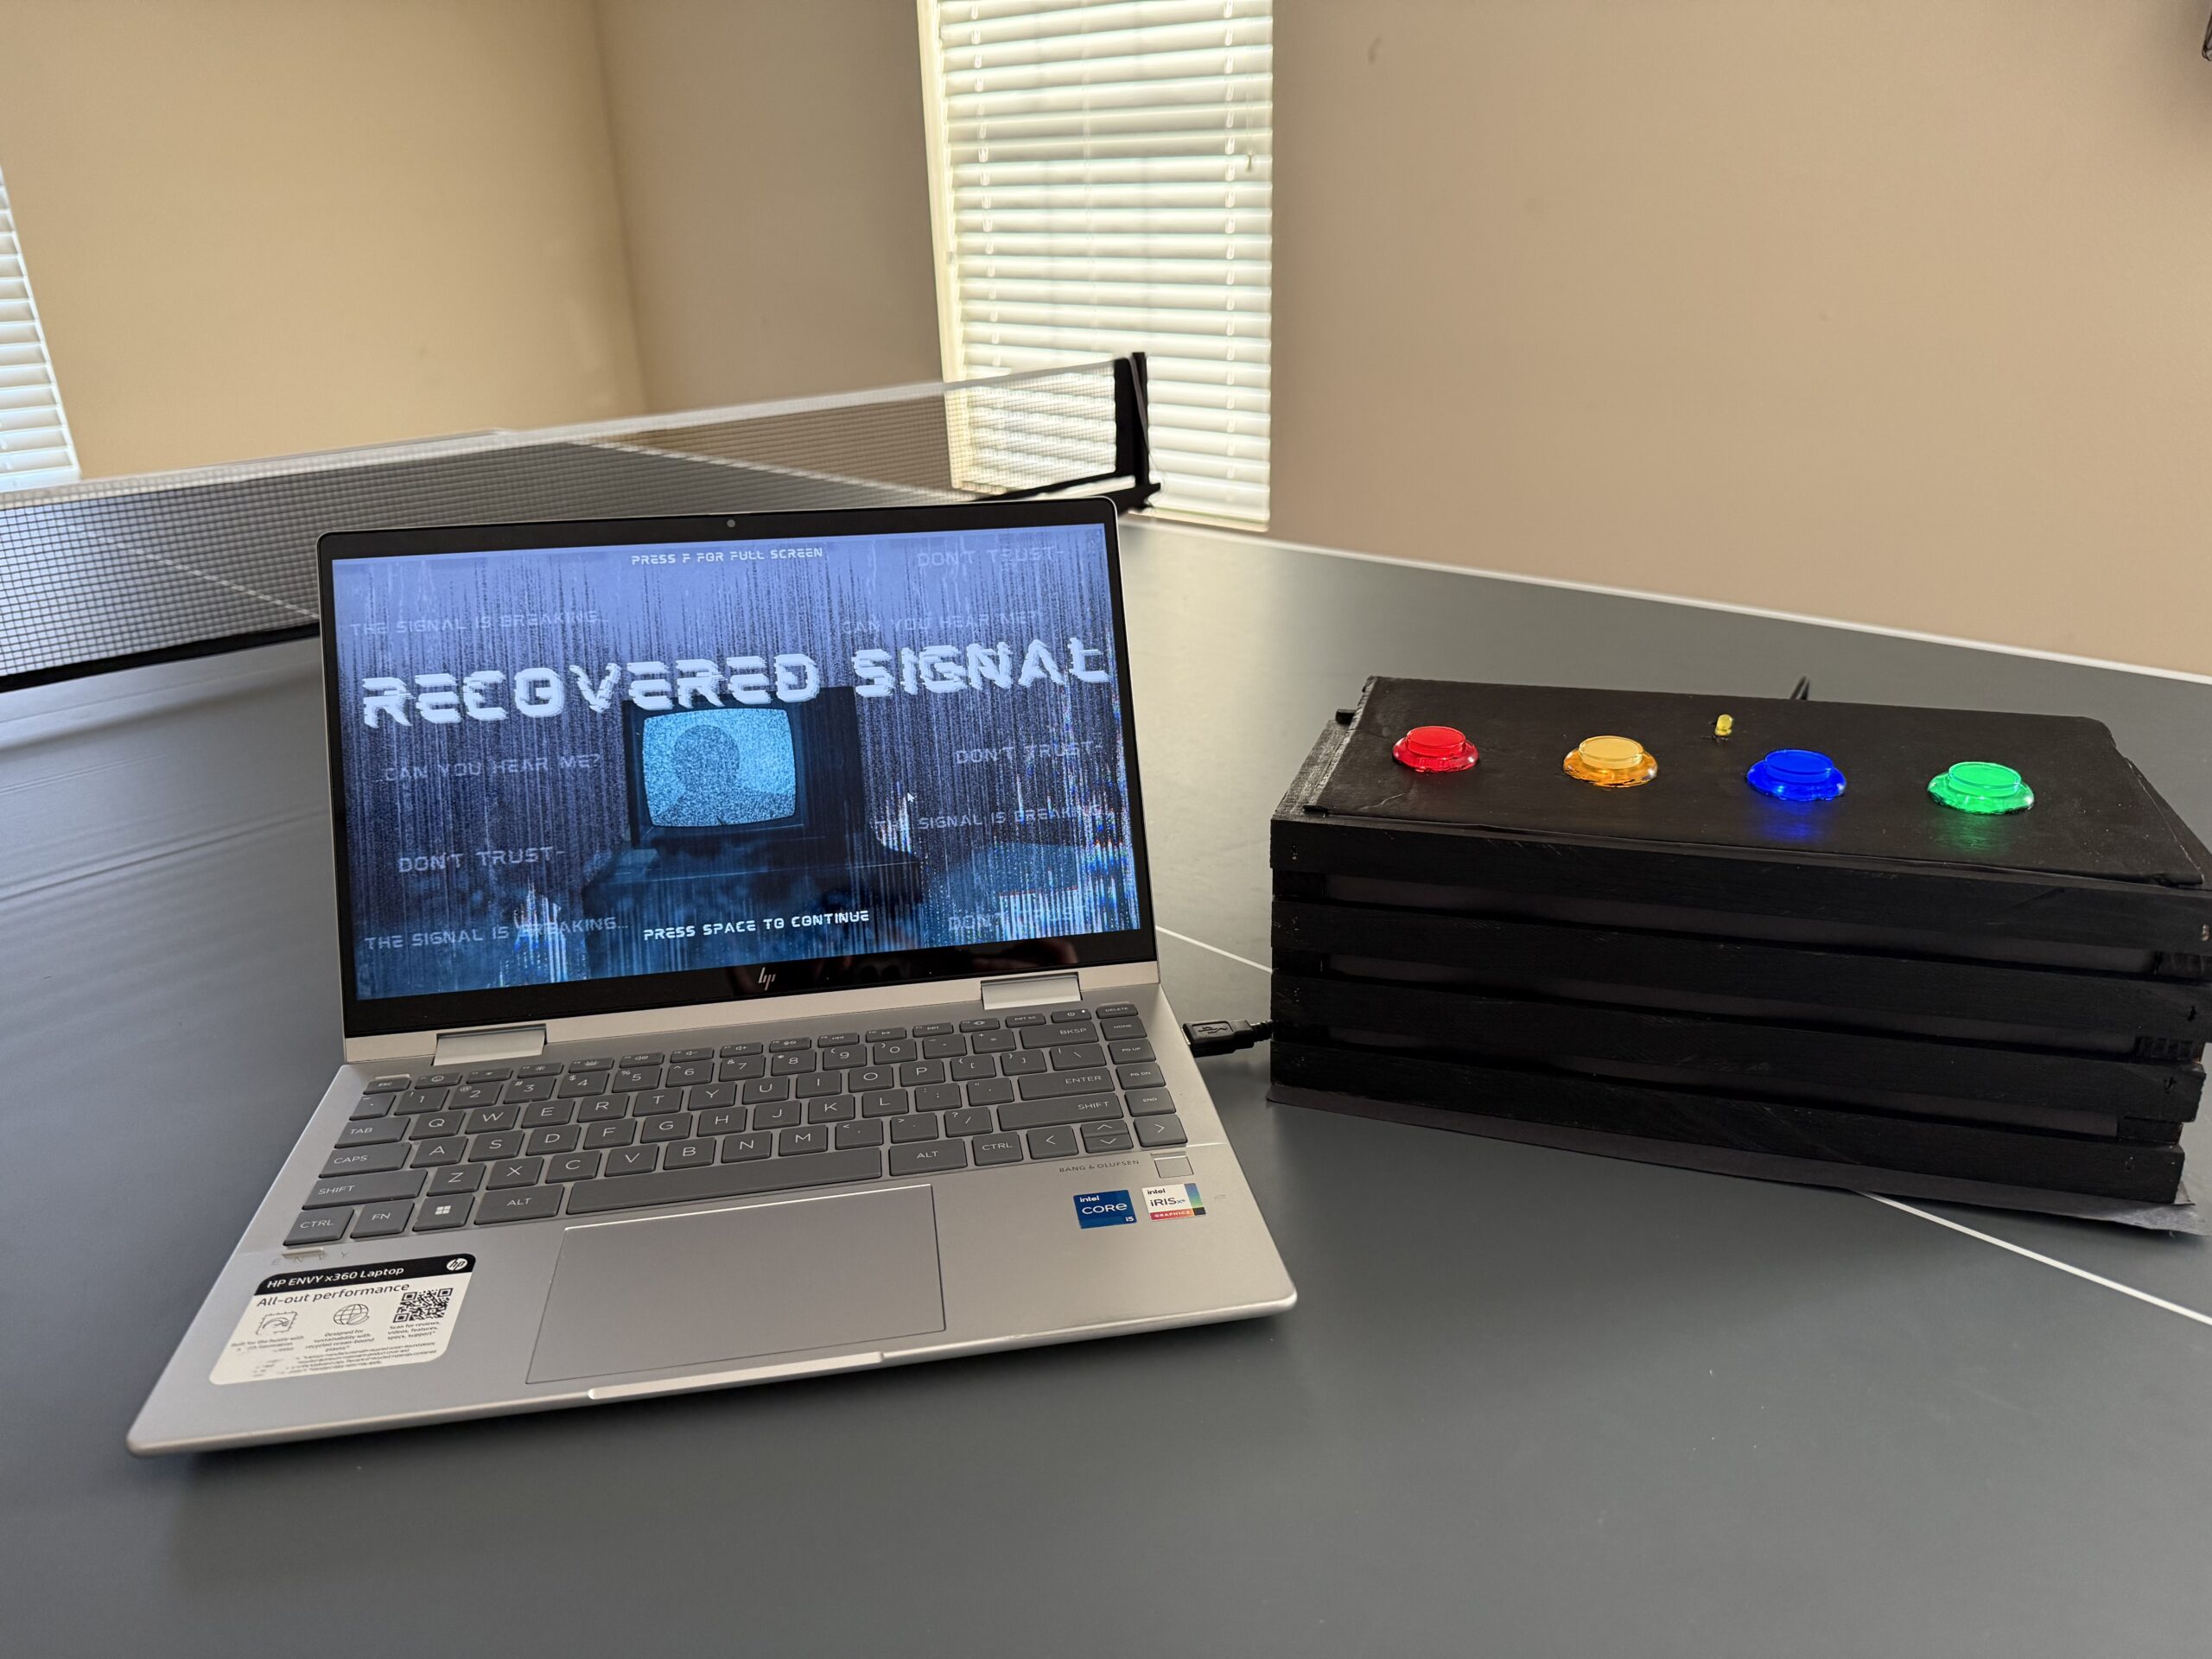
My final project is an interactive rhythm based storytelling game with somewhat of a horror theme. The player presses one of four physical buttons to match falling tiles on the screen, and every correct hit helps restore the signal. As the signal gets stronger, pieces of a hidden story are revealed one fragment at a time, until the final message. I wanted the game to feel like the player was decoding a broken transmission, so the gameplay mixes rhythm, suspense, and storytelling together instead of feeling like a normal rhythm game.
Images

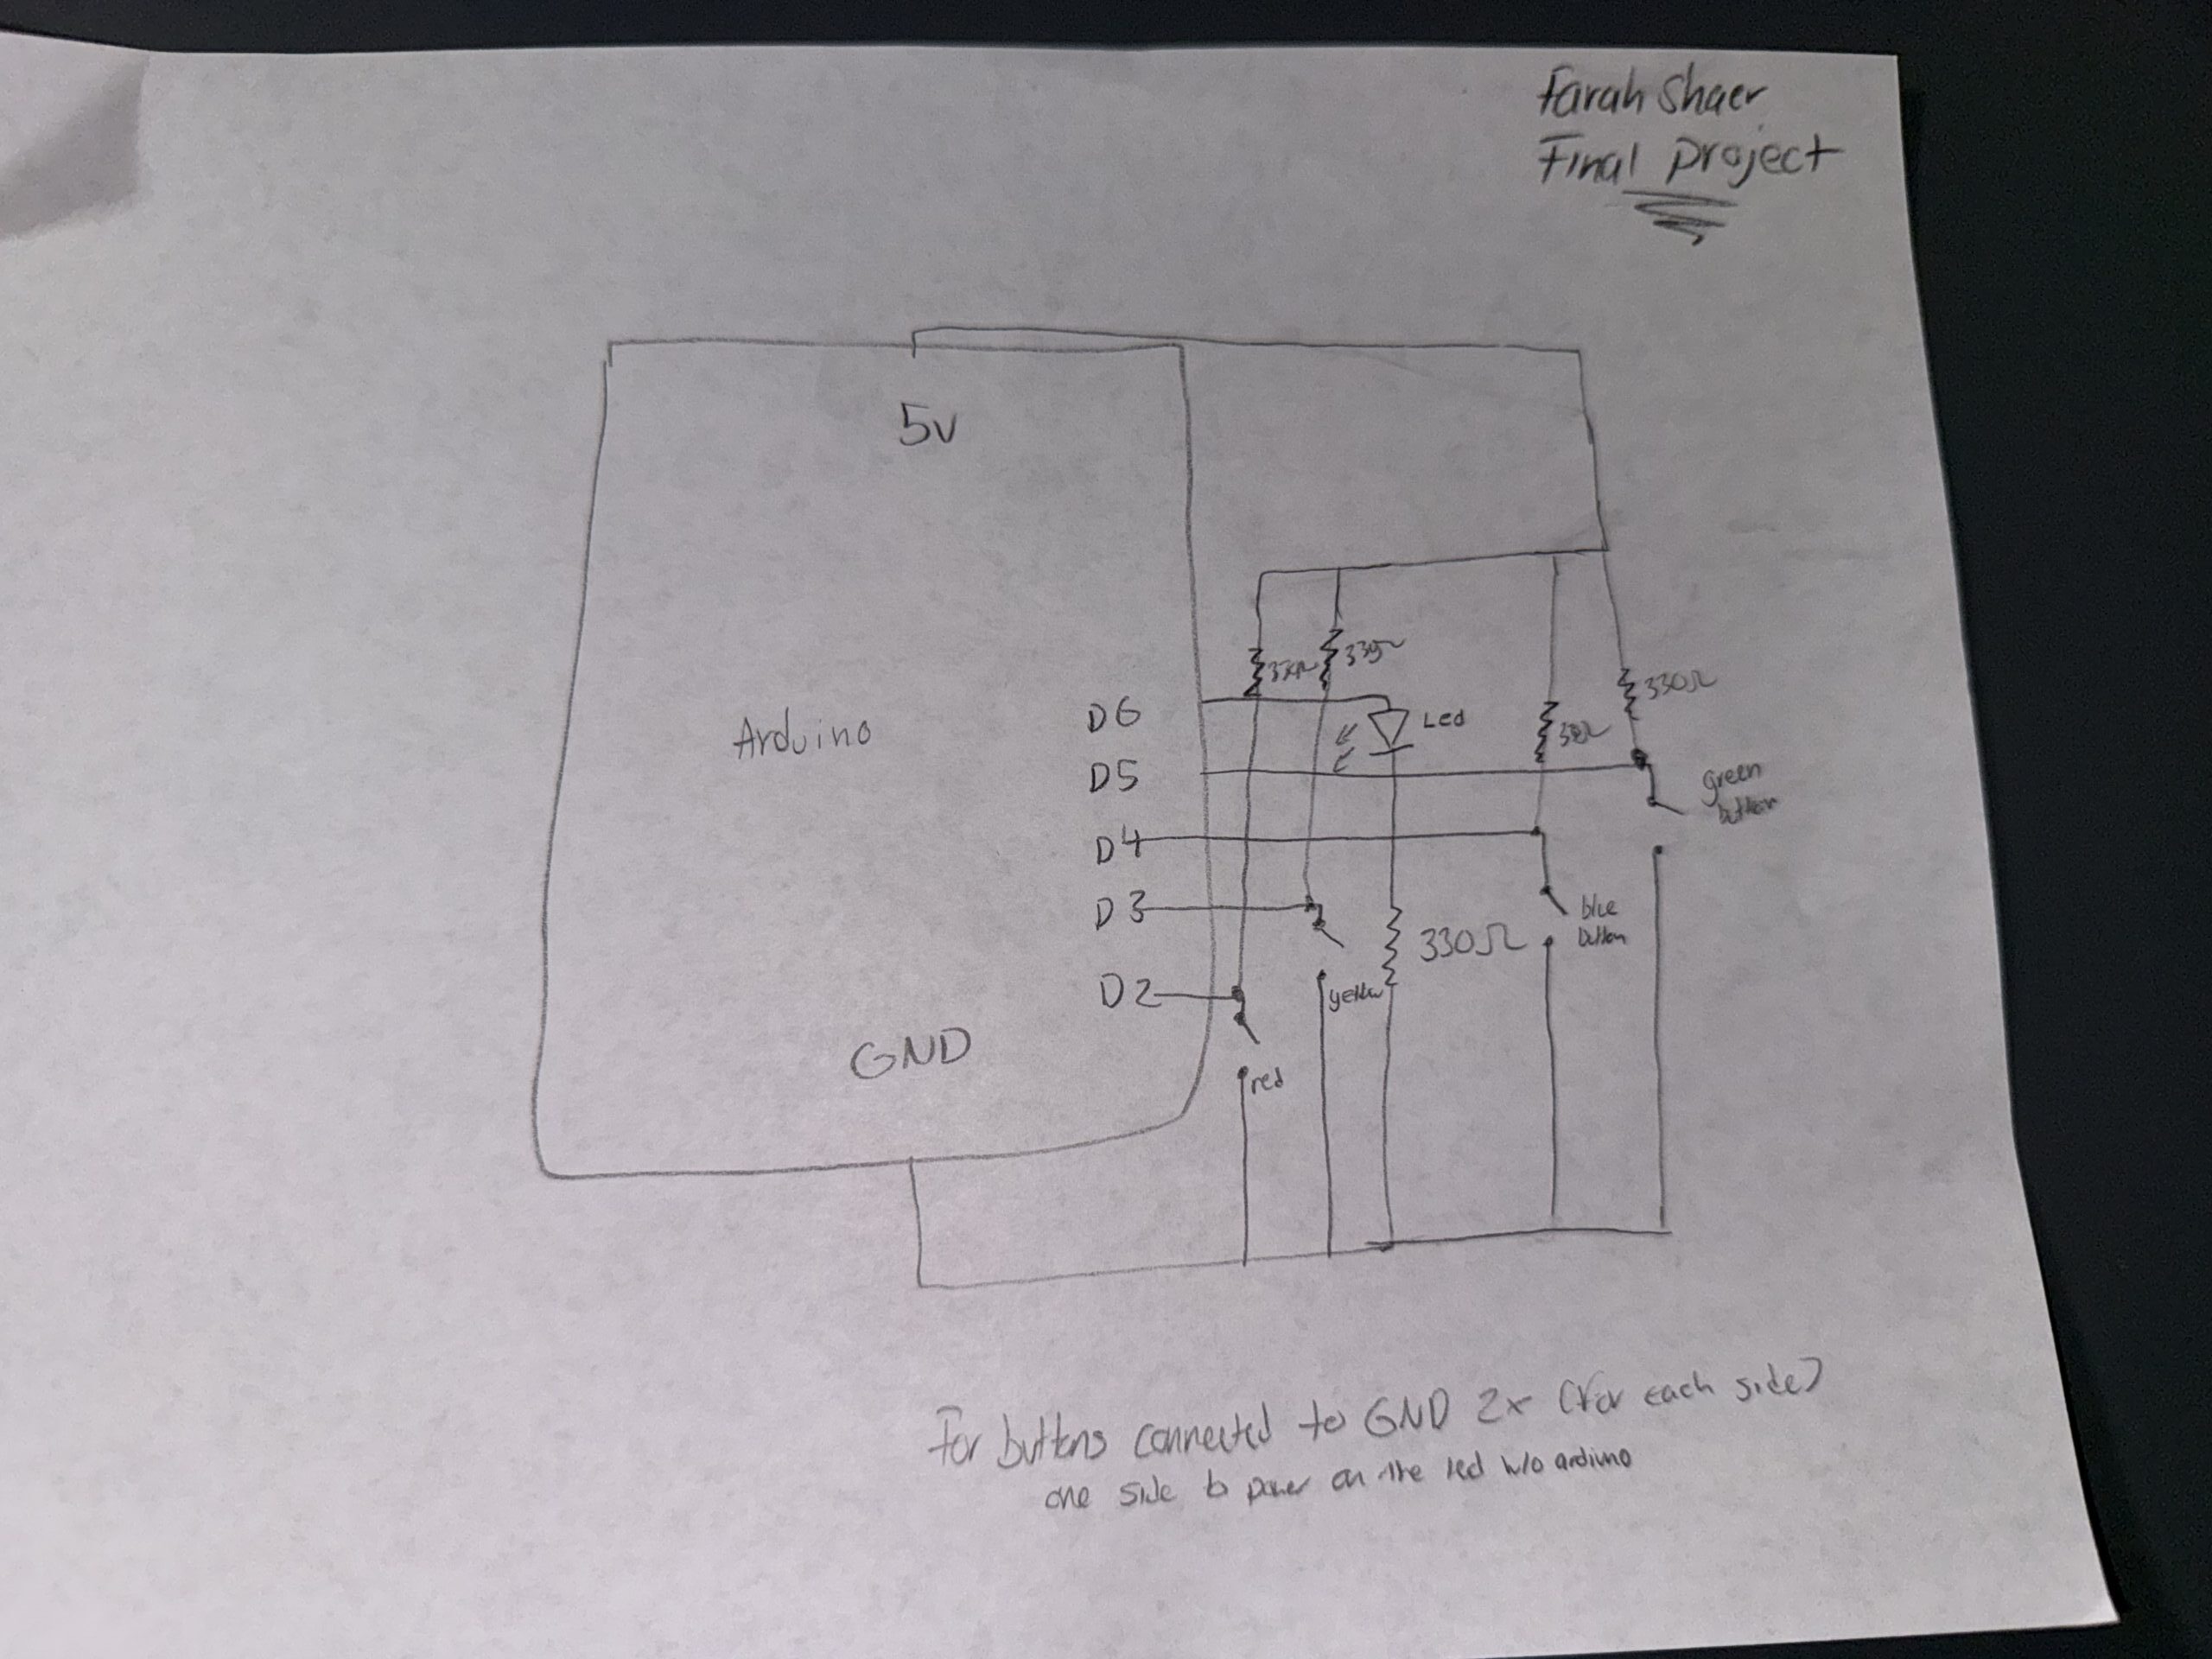
Schematic
User Testing video
Description of interaction design
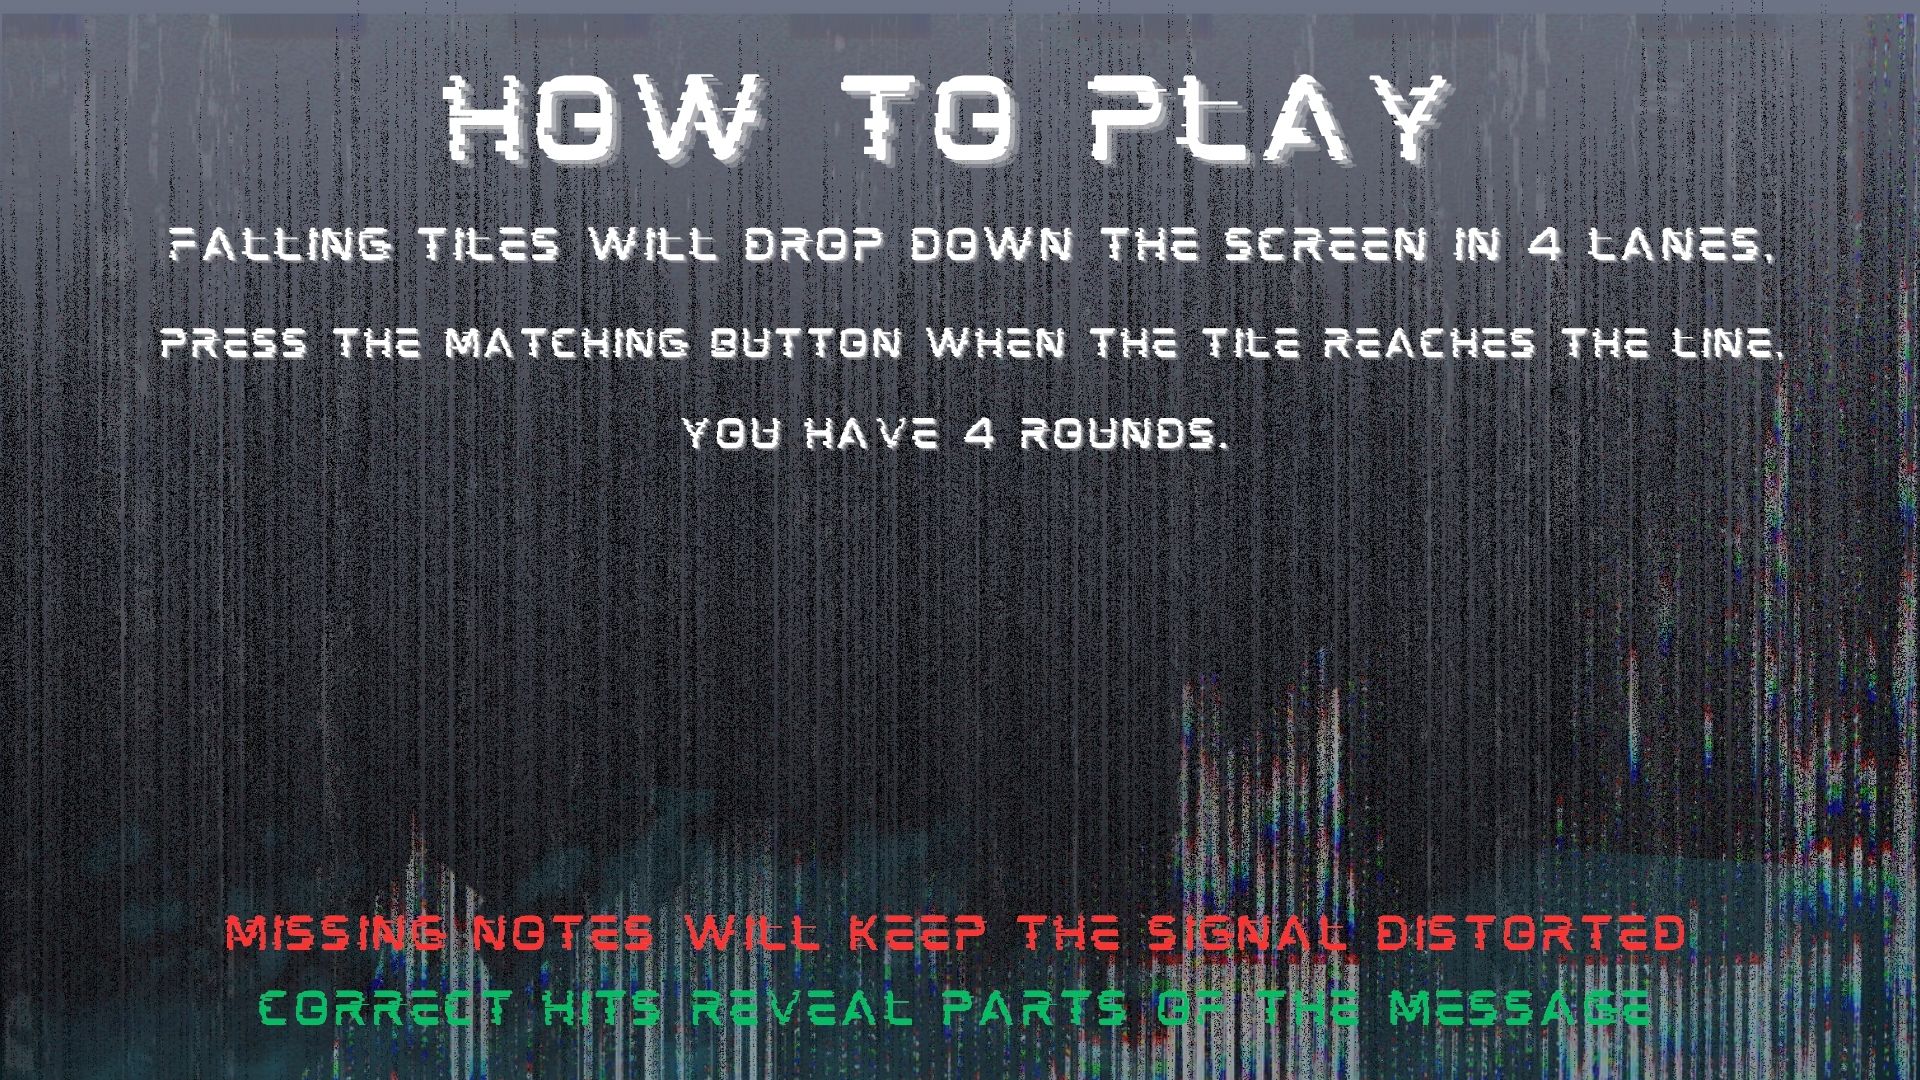
The interaction is based on rhythm timing. Falling tiles move down four lanes, and the player presses one of four buttons that match those lanes and tiles. The player must press the correct button when the tile reaches the hit line near the bottom of the screen. If the timing and button match correctly, the tile counts as a successful hit, the signal bar increases, and the beep sound effect plays. Once the player reaches enough successful hits, the game moves into the “reveal” state, where part of the hidden story is shown on a projector background screen with static sounds and flickering text. After reading the fragment, the player presses space to continue to the next round. This repeats until the final message is revealed.
Description of p5.js code + code snippets + embedded sketch
The p5 code controls almost everything the player sees and experiences visually. At the top of the code, I created variables for the game states, story progress, tiles, spawning system, sounds, images, and serial communication. I also use sentenceProgress to track how many correct hits the player has made and hits needed to decide how many successful hits are required before unlocking the next story fragment. The currentStory variable stores whichever random story is selected for that game session.
One part I spent a lot of time on was the tile spawning system. I used a spawnTimer and spawnInterval to control when new tiles appear. Every frame during gameplay, spawnTimer increases by 1 like a stopwatch. Once it becomes larger than spawnInterval, which I set to 50, the game creates a new tile in a random lane using tiles.push(new Tile(randomLane, -100, 4)). Then the timer resets back to 0 and starts counting again. This makes the tiles appear at steady intervals instead of all at once. I liked this method because it gave me better control over rhythm and difficulty.
The tile checking system works by comparing the button sent from Arduino to the tile’s lane. Arduino sends a number from 1 to 4 depending on which physical button was pressed. In p5, I store that in latestButton. Then inside the game loop, every tile runs tiles[i].checkHit(latestButton). This checks if the tile is close enough to the hit line and whether the correct matching button was pressed. If both are true, the game counts it as a hit, adds 1 to sentenceProgress, resets latestButton back to -1, and plays the tile sound effect. If the tile goes off screen or gets hit, it gets removed from the tiles array using splice(). This keeps the game running smoothly and prevents old tiles from staying on screen.
//check win condition
  if (sentenceProgress >= hitsNeeded && state === "playing") {
    //if player reaches required hits
    state = "reveal";
  }

  //spawn tiles
  if (state === "playing") {
    spawnTimer++; //counts frames and adds 1 like a stop watch
    if (spawnTimer > spawnInterval) {
      //to check if 50 frames has passed yet
      let randomLane = floor(random(4)); //chooses a random lane (i used floor to round the number down to the nearest whole number since random gives decimal values)
      tiles.push(new Tile(randomLane, -100, 4)); //creates a new faling tile (used push to save it in the tile array so i can do the move and display)
      spawnTimer = 0; //reset timer
    }

    //update and draw tiles
    for (let i = tiles.length - 1; i >= 0; i--) {
      //start from the last tile and go backwards through every tile in the array (backwards bc I remove tiles)
      tiles[i].move(); //move tile downward
      tiles[i].display(); //draws tile on screen

      //hit check
      if (tiles[i].checkHit(latestButton)) {
        //checks if player pressed correct button at right time
        sentenceProgress += 1; //increaes score
        latestButton = -1; //reset button input
        tileSound.play();
      }
      if (tiles[i].isOffScreen() || tiles[i].hit) {
        //if tile is gone or hit
        tiles.splice(i, 1); //remove tile from array
      }
    }
  }
//hit detection
  checkHit(buttonPressed) {
    let hitZone = height - this.h; //creates the hit line area near bottom of screen (where the player has to press the button)
    if (buttonPressed === this.lane + 1 && //checks correct button, since the lanes start at 0 i added one so it matches
      this.y + this.h > hitZone && //checks if bottom of tile passed into hit zone
      this.y < hitZone + this.h //check if top of tile has not passed too far
    ) {
      this.hit = true; //marks it hit
      return true;
    }
    return false; //wrong button or timing so no
  }
}
I also built a story system using a custom story class (the story and tiles use oop). Each story has an id, title, fragments, final message, and an index to track progress. Instead of writing separate logic for every story, I used an array of story objects so the game can randomly choose one each time it starts. The function getCurrentFragment() shows the current part of the story, next() moves to the next fragment, and isComplete() checks whether the final message should appear. This made the storytelling system much cleaner and easier to scale because I could just add new stories without rewriting game logic.
class Story {
  constructor(id, title, fragments, finalMessage) {
    this.id = id; //so i can identify which story
    this.title = title; //story title
    this.fragments = fragments; //array of the story lines (one by one)
    this.finalMessage = finalMessage; //the last messagge
    this.index = 0; //keeps track of which fragment is shown
  }

  //story navigaton
  getCurrentFragment() {
    //returns the current line of the story based on index
    return this.fragments[this.index]; //takes the current index and give it that specific story line
  }

  next() {
    //moves to the next line in the story
    if (this.index < this.fragments.length - 1) {
      //only move if we are not at the last fragment yet
      this.index++; //increases the index to move to next fragment
      return true; //keep moving forward
    }
    this.index = this.fragments.length; // force completion state
    return false; //if at end do nothing
  }
  isComplete() {
    //check if story is done
    return this.index >= this.fragments.length; //return true if we are at or past the last fragment
  }

  reset() {
    //resets story back to beginning
    this.index = 0;
  }
}

//array that stores all the stories
const stories = [
  new Story(
    1,
    "Emergency Channel 7",
    [
      "If anyone is still receiving this broadcast,\n do not trust the silence outside.\n We thought the signal loss was a storm at first.",

      "Every attempt to trace the interference..\n led back to the same abandoned house.\n No one who entered answered again.",

      "Tonight..\n the signal came through clearly for the first time. \n It wasn't static. It was breathing...\n and it knew all of our names.",
    ],
    "FINAL MESSAGE: Do not attempt to locate the source.\nIt already knows where you are.\nLock the front door."
  ),
Description of Arduino code + code snippets + Github full code
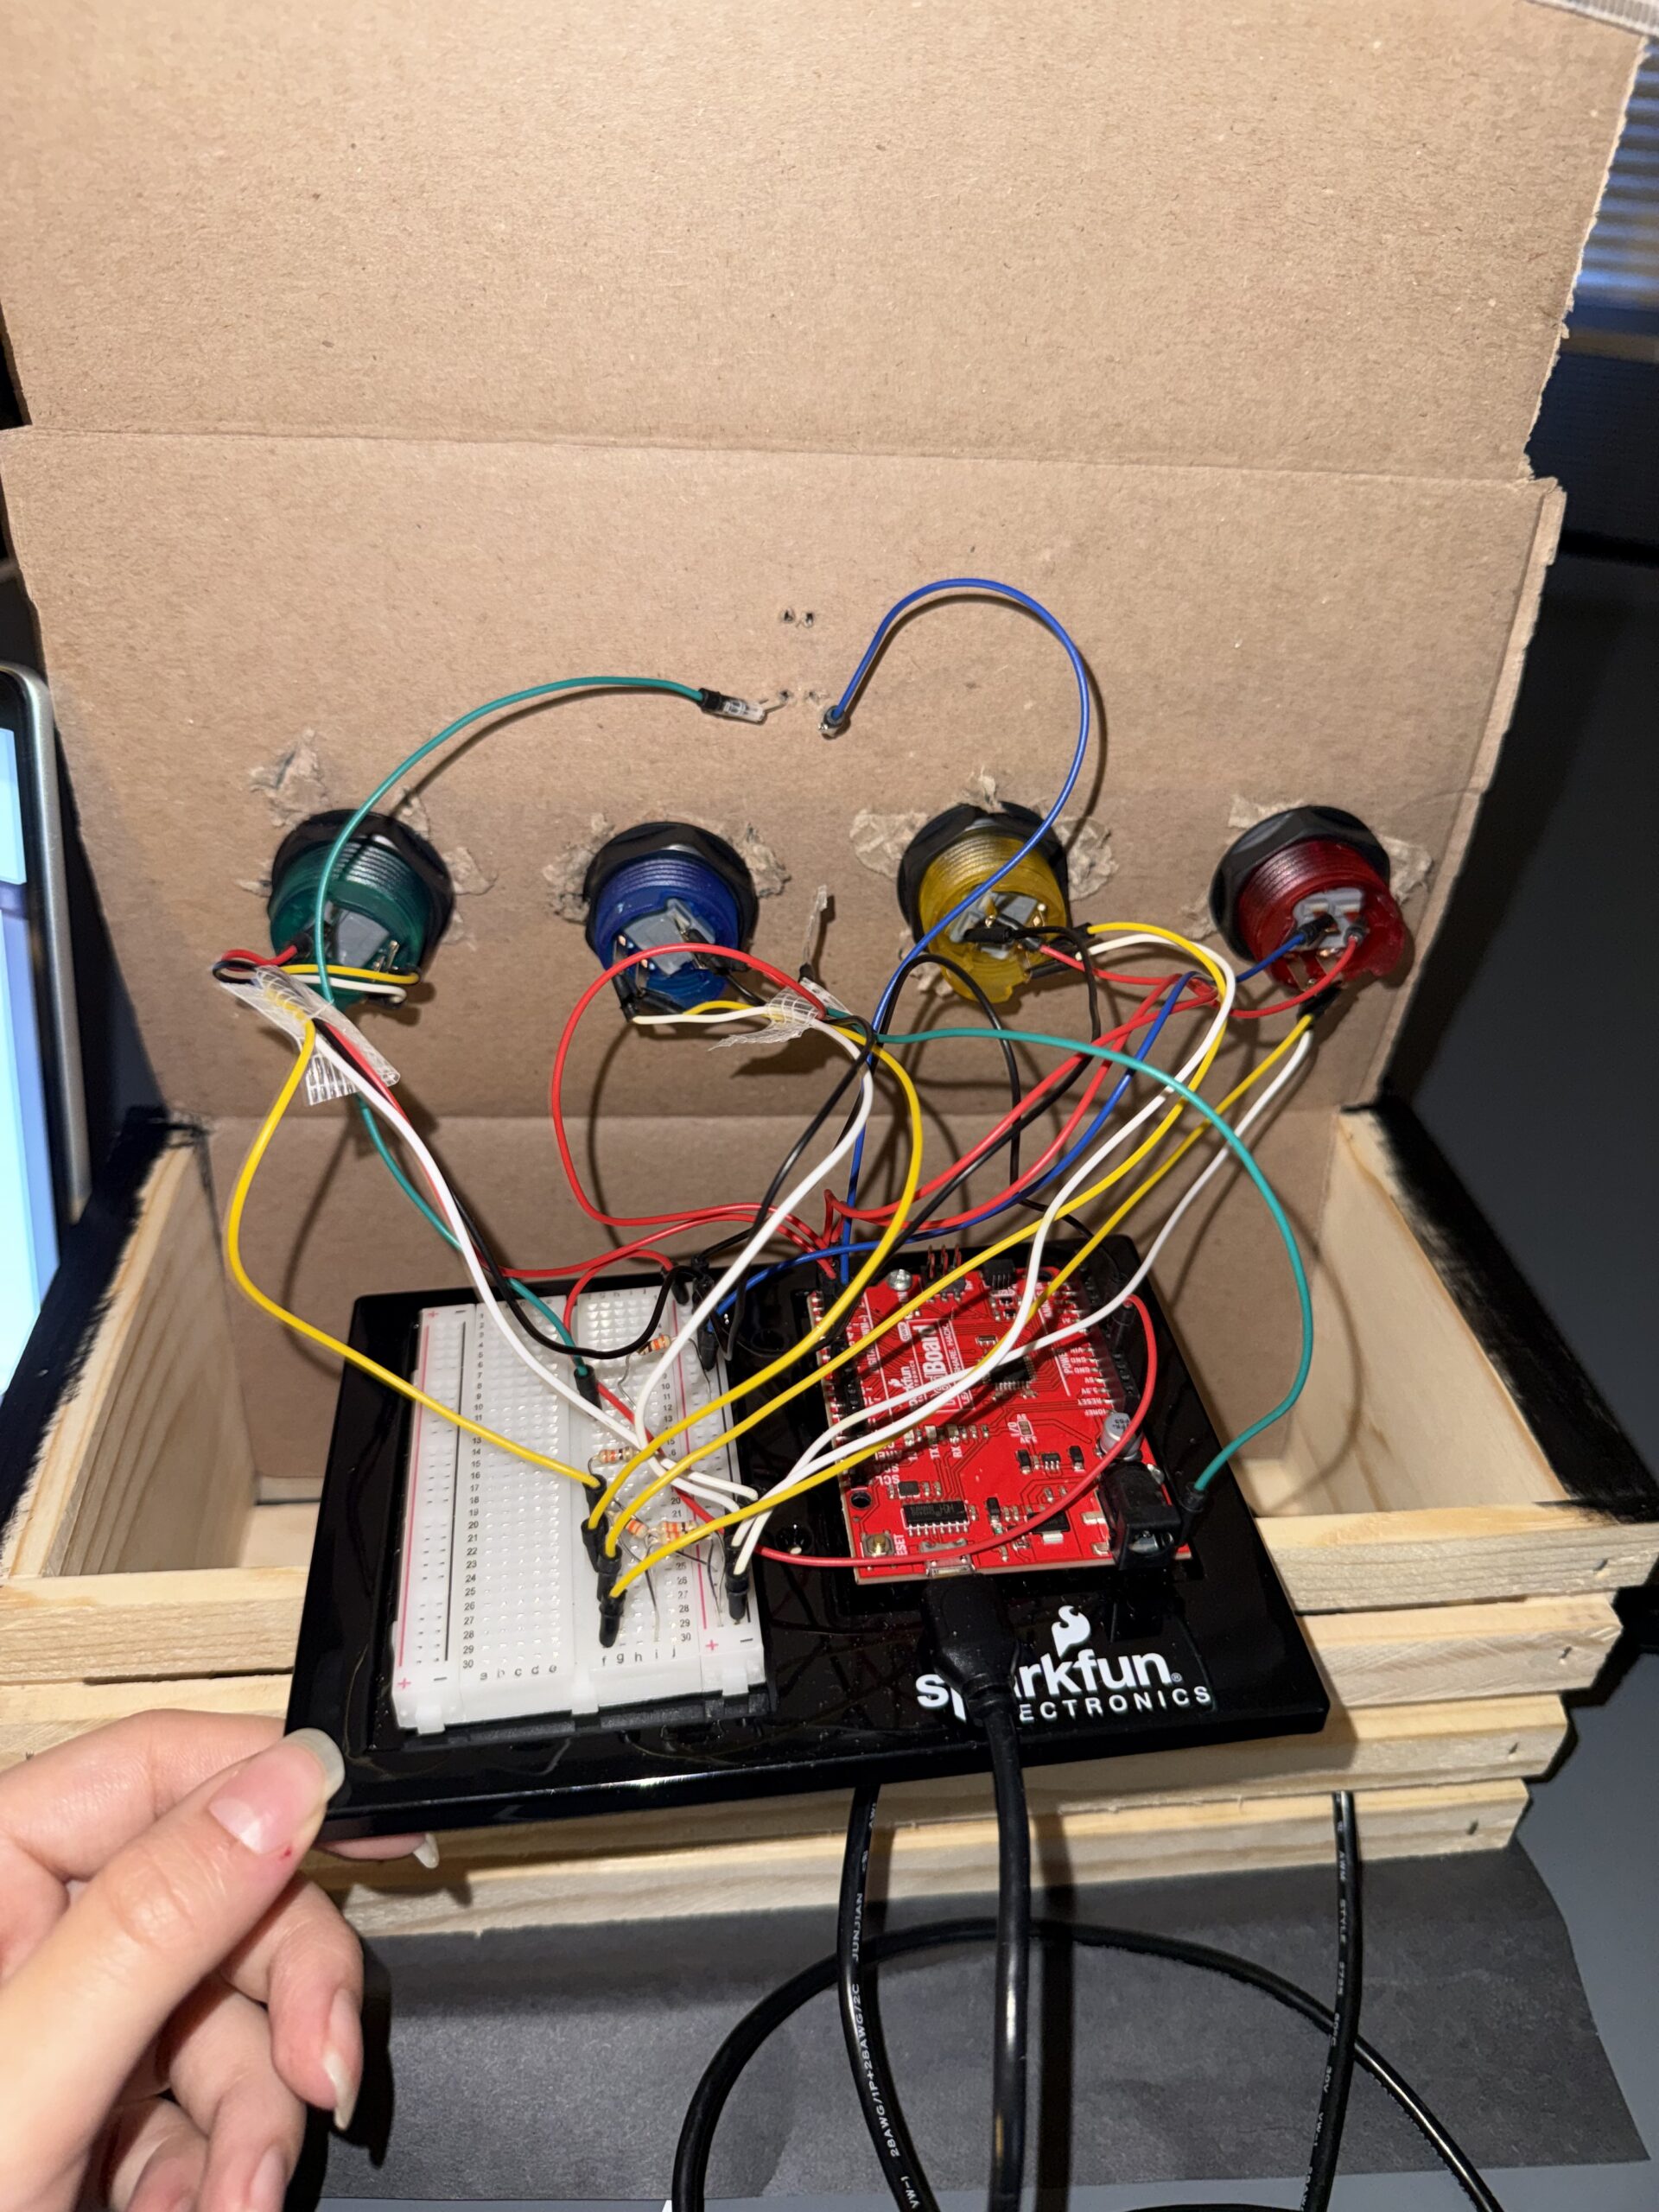
Arduino handles the physical interaction side of the project. I connected four push buttons as inputs and one LED as an output. Each button represents one lane in the rhythm game. I used input_pullup so the buttons read high normally and low when pressed, which made the wiring simpler because I did not need extra resistors:
void setup() {
  Serial.begin(9600);

  // inputs
  pinMode(redButtonPin, INPUT_PULLUP);//used inputpullup so buttons read high when not pressed and for no resistors
  pinMode(yellowButtonPin, INPUT_PULLUP);
  pinMode(blueButtonPin, INPUT_PULLUP);
  pinMode(greenButtonPin, INPUT_PULLUP);

  // output
  pinMode(signalLedPin, OUTPUT);//LED that reacts to game state
  pinMode(LED_BUILTIN, OUTPUT);//for debugging
In the loop, Arduino constantly checks if any button is pressed. If the red button is pressed, it sends 1 through Serial.println(), yellow sends 2, blue sends 3, and green sends 4. These values are what p5 reads and uses to check player input:
//SEND TO P5 (BUTTON INPUTS 1-4)
  if (digitalRead(redButtonPin) == LOW) {//if button pressed
    buttonPressed = 1;//assign value number
    Serial.println(buttonPressed);//prints value and moves to the next line, send to p5
    delay(100);//delay to prevent repeated button tirggers from one press

  if (digitalRead(yellowButtonPin) == LOW) {
    buttonPressed = 2;
    Serial.println(buttonPressed);
    delay(100);
  }

  if (digitalRead(blueButtonPin) == LOW) {
    buttonPressed = 3;
    Serial.println(buttonPressed);
    delay(100);
  }

  if (digitalRead(greenButtonPin) == LOW) {
    buttonPressed = 4;
    Serial.println(buttonPressed);
    delay(100);
  }
}
Arduino also receives information from p5.js about the current game state. In p5, I created a variable called ledState where start= 0, playing= 1, reveal= 2, and end= 3. This gets sent to Arduino using port.write(). Arduino reads that number using serial.parseInt() and changes the LED behavior depending on the state.
During the game tiles, the LED flickers quickly to feel active and stressful. During the reveal screen, it flickers more slowly to create a static/projector feeling. At the end screen, the LED stays fully on, and during start or instructions, it stays off:
void loop() {
//READ FROM P5
  while (Serial.available()) {//check if p5 is sending data
    digitalWrite(LED_BUILTIN, HIGH);//led on while recieving data
    gameLevel = Serial.parseInt(); //read game state number from p5 (used parseint to skp anything that isnt digits)
    Serial.read(); // clears '\n' after parseint
  }
  digitalWrite(LED_BUILTIN, LOW);

//LED behavior based on game state
if (gameLevel == 1) { //the playing state, faster flicker
  digitalWrite(signalLedPin, HIGH);
  delay(50);
  digitalWrite(signalLedPin, LOW);
  delay(50);
}
else if (gameLevel == 2) {//reveal state, slow flicker for a calmer feel
  digitalWrite(signalLedPin, HIGH);
  delay(200);
  digitalWrite(signalLedPin, LOW);
  delay(200);
}
else if (gameLevel == 3) {//end state, light stays fully on
  digitalWrite(signalLedPin, HIGH);
}
else { //for the start and instruction, led off
  digitalWrite(signalLedPin, LOW);
}
Description of communication between Arduino and p5.js
Arduino sends button presses to p5 so the player can interact with the falling tiles:
//SEND TO P5 (BUTTON INPUTS 1-4)
  if (digitalRead(redButtonPin) == LOW) {//if button pressed
    buttonPressed = 1;//assign value number
    Serial.println(buttonPressed);//prints value and moves to the next line, send to p5
    delay(100);//delay to prevent repeated button tirggers from one press
And p5 reads it and converts it to a number:
//READ FROM ARDUINO HERE
   let data = port.readUntil("\n"); //read message until newline
   if (data && data.length > 0) {
     latestButton = int(trim(data)); //converts input into number 1-4
   }
And then p5 sends game state data back to Arduino so the LED can visually respond to the game:
//SEND TO ARDUNIO HERE (sends game state back)
    let ledState = 0;
    if (state === "start") ledState = 0;
    else if (state === "playing") ledState = 1;
    else if (state === "reveal") ledState = 2;
    else if (state === "end") ledState = 3;
    port.write(ledState + "\n"); //sends the state so ardunio can control LED
  }
Where Arduino reads it and changes the LED state based on the game state:
//READ FROM P5
  while (Serial.available()) {//check if p5 is sending data
    digitalWrite(LED_BUILTIN, HIGH);//led on while recieving data
    gameLevel = Serial.parseInt(); //read game state number from p5 (used parseint to skp anything that isnt digits)
    Serial.read(); // clears '\n' after parseint
  }
  digitalWrite(LED_BUILTIN, LOW);

//LED behavior based on game state
if (gameLevel == 1) { //the playing state, faster flicker
  digitalWrite(signalLedPin, HIGH);
  delay(50);
  digitalWrite(signalLedPin, LOW);
  delay(50);
}
So overall, Arduino sends button input to p5 so the player can interact with the game, and p5 sends game state information back so Arduino can physically respond through the LED.
Aspects of the project that I am particularly proud of
One thing I am particularly proud of is how the concept feels cohesive instead of looking like separate parts forced together. The horror story, the rhythm gameplay, the static visuals the sound design, and the led feedback all support the same theme of restoring a broken transmission. I did not want it to feel like just a button game, so I focused a lot on atmosphere. I am also proud of the story system because it made the game replayable by randomly choosing different types of stories instead of showing the same one every time.
Also, the integration between physical buttons and the tiles, I am really proud of the mapping.
Challenges faced
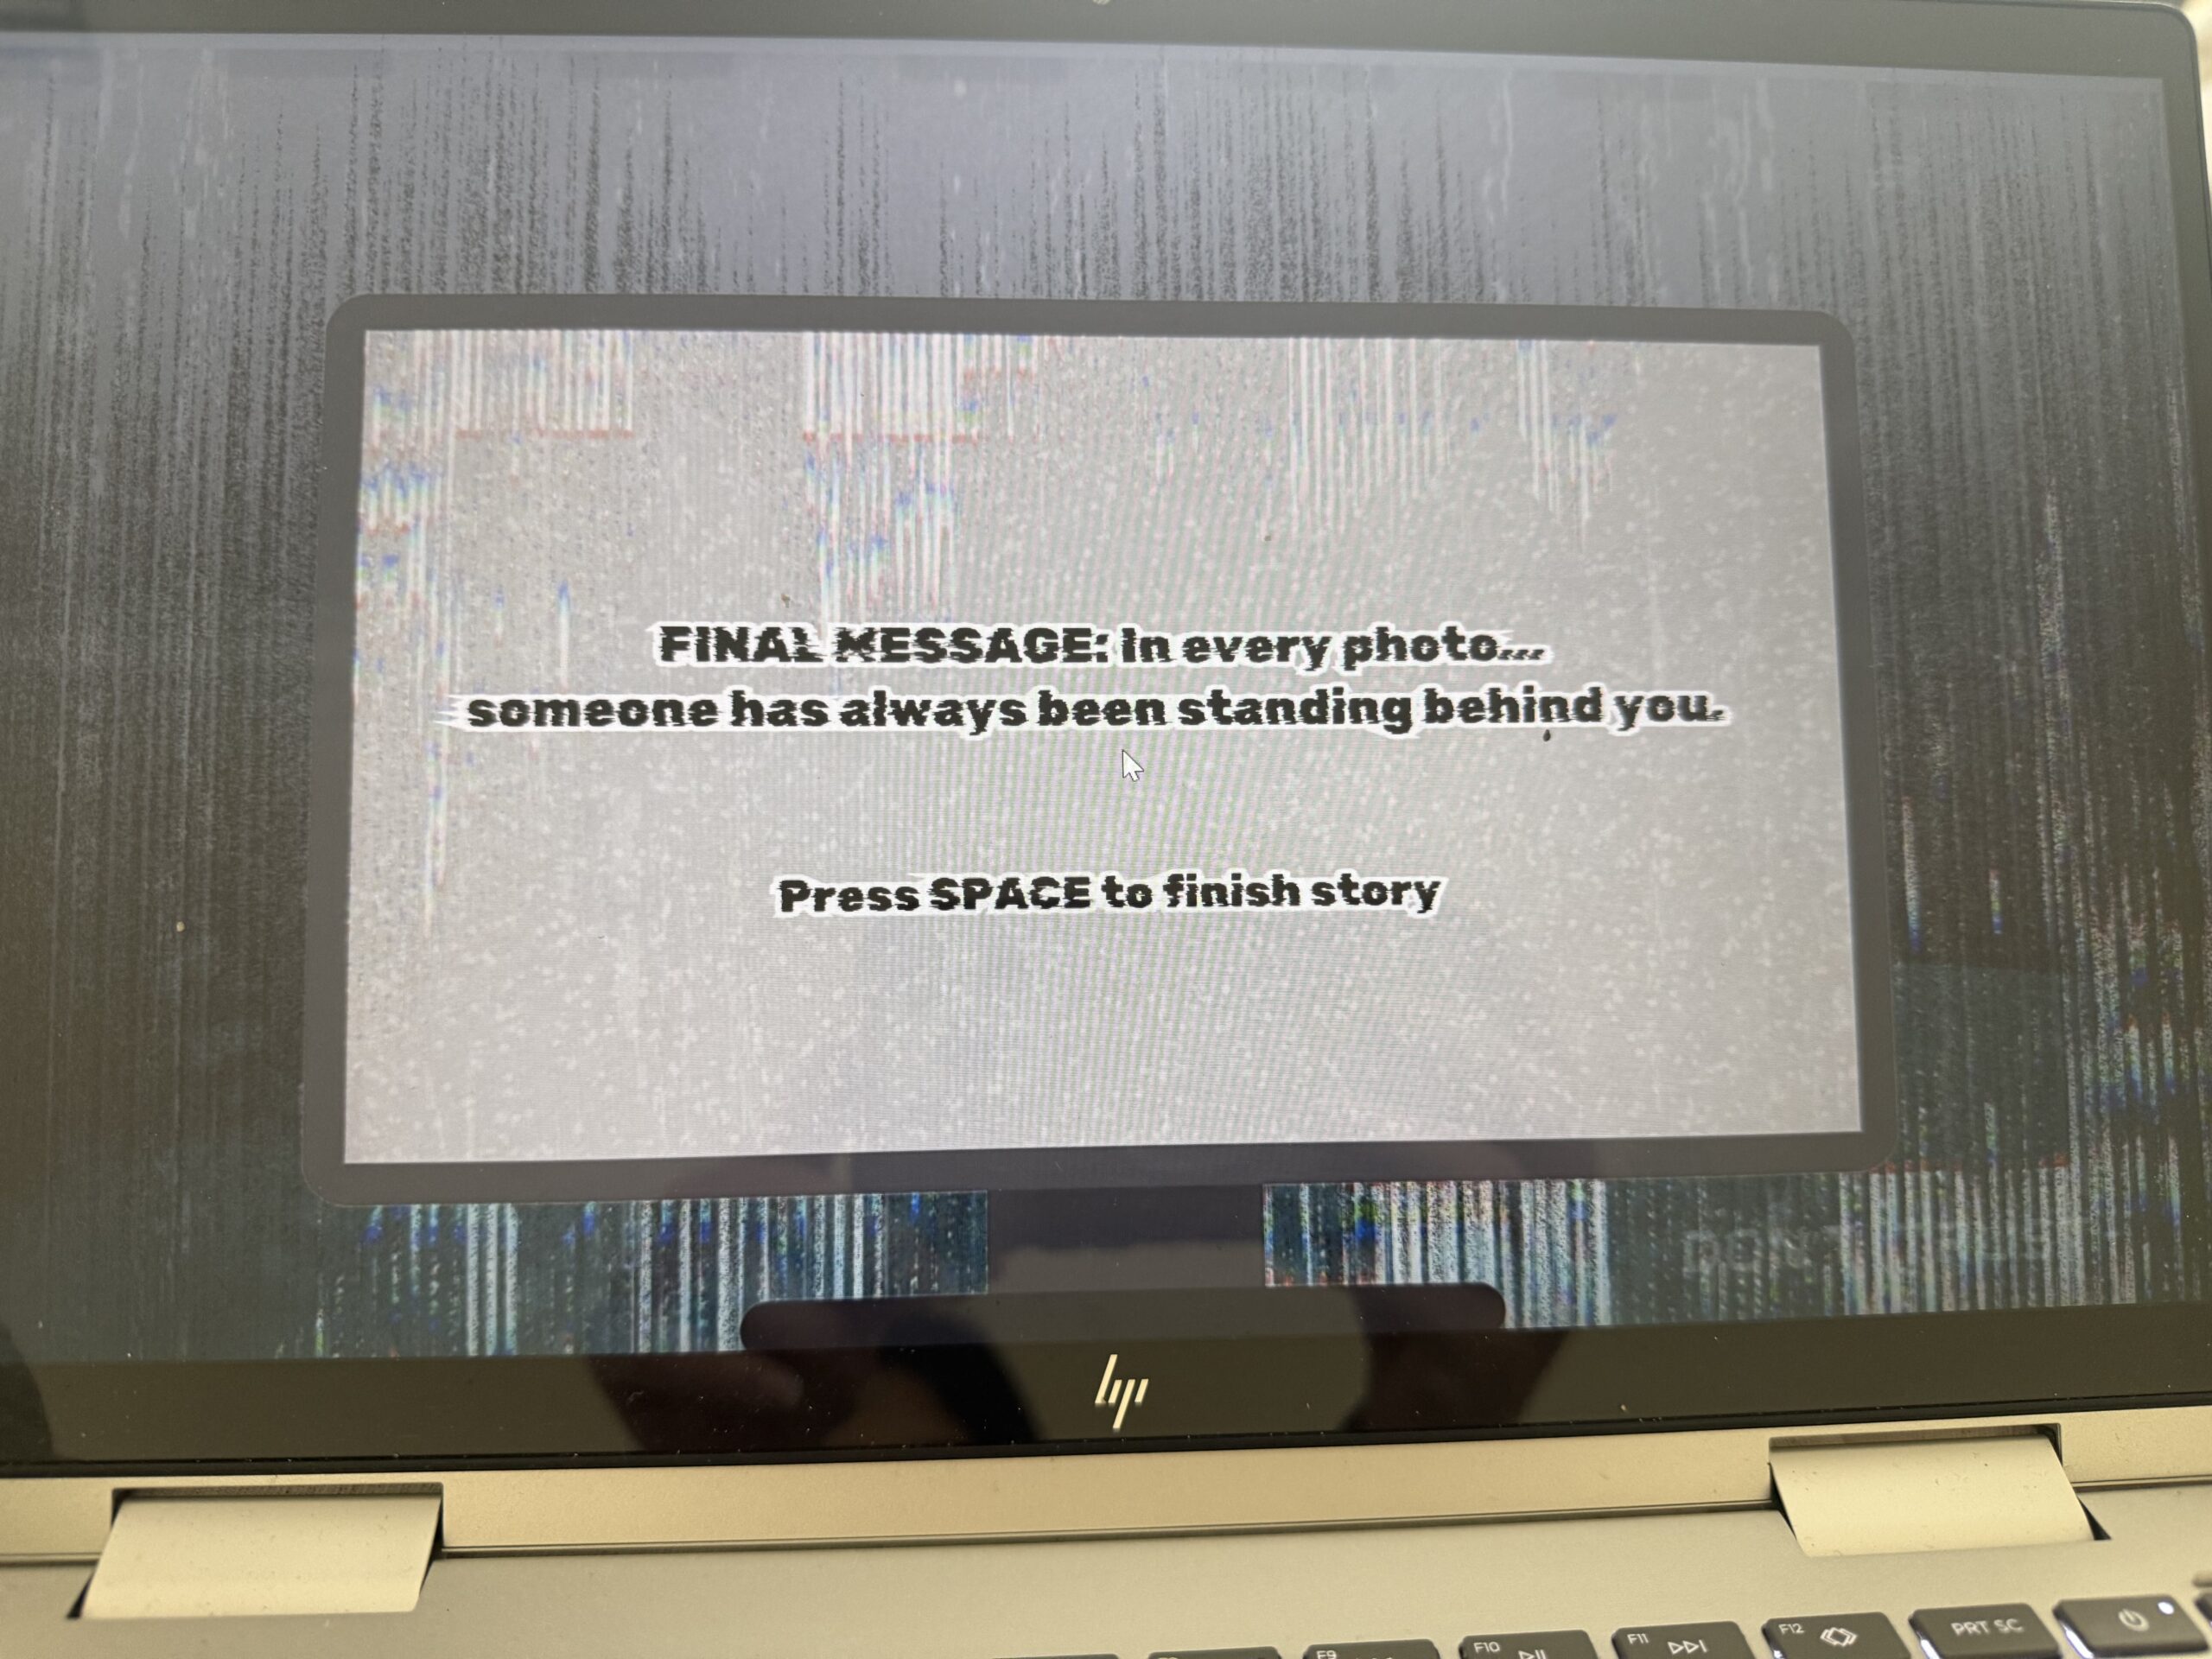
A big challenge was debugging the story progression and the final reveal logic. At one point, the game would skip the final message and go straight to the ending screen, which broke the whole experience. I had to keep testing how currentStory.next() and currentStory.isComplete() interacted and realized the order of those checks mattered a lot in the kepressed logic:
else if (state === "reveal" && key === " ") {
  //if already showing final message, go to end screen
  if (currentStory.isComplete()) {
    state = "end";
    return;
  }
  //otherwise move to next fragment
  currentStory.next();//move to next line/fragment of story
  sentenceProgress = 0;//reset player progress for next round
  tiles = [];//remove all the falling tiles
  spawnTimer = 0;//reset tile spawn timing
  hitsNeeded += 2;//increase diffiuclty each round
  state = "playing";//go back to gamestate
}
  if (state === "end" && key === " ") {
    resetGame();
  }
  //serial connect
  if (key === "v") {
    setupSerial();
  }
}
I also had a challenge with the tiles spawning too fast, so I used spawntimer and the spawninterval system, which worked very well.
Future Improvement
If I had more time, I would improve the game by making the difficulty scale smoother and adding visual feedback for missed notes, not just successful ones. Right now I just wanted to focus mainly on correct hits, but stronger fail states would make the tension higher. I would also like to make the LED system more by using multiple LEDs so each story state feels even more immersive. Another future improvement would be adding more story branches where player performance changes, which ending they get, instead of always leading to one final message. I think that would make the game feel even more interactive and personal.
Resources and AI usage
I searched up on google how to shift something and it said use translate(), so i looked at the p5 reference page for more information so I can do it for the tiles and glitch effect: https://p5js.org/reference/p5/translate/
I needed a refresher on return because I wanted to use it to return the current fragment back into the array or to return true/false so the game knows if the story can keep moving forward. so I watched this youtube video:
https://www.youtube.com/watch?v=qRnUBiTJ66Y
Search on google how I can remove a tile from array after it gets off of screen and I found splice, where I then look at the p5 reference page for more information on how to use it: https://p5js.org/reference/p5/splice/
My music would overlap so I looked through the p5 soundfile page to see if there was a fix for that, which I found playmode to help me.
https://p5js.org/reference/p5.sound/p5.SoundFile/
I also wanted to know how to create a line (the one one at the bottom), so I used beginshape() and end (shape) for the to create a continuous wave line. I also used it to understand vertex shapes function in p5 because I did need a refresher:
https://p5js.org/reference/p5/beginShape/
I also used drawingconext reference page for my effects by looking at their examples:
https://p5js.org/reference/p5/drawingContext/
For the tiles:
https://p5js.org/reference/p5/floor/#:~:text=Reference%20floor()-,floor(),the%20value%20of%20a%20number.
AI usage:
I had trouble with the tiles being skipped, so I asked ChatGPT for debugging, and it was because it was looped forward. So I learned that I need to loop it backwards and start from the last tile and go backwards through every tile in the array because I remove tiles, and so it will not mess up with the remaining index. And scanning a list from bottom to top is better so deleting items basically does not confuse the order. for (let i = tiles.length – 1; i >= 0; i–)
My audio and images would not load, so I asked ChatGPT for debugging, and it was because I had them organized in a folder and forgot to call it…
I also wanted a stronger jitter and glitch effect for my falling tiles to make the game feel more unstable and distorted. I was already using sin() for the pulse effect, but I wanted the tiles to feel less smooth and more corrupted. I asked ChatGPT for ideas on how to make the movement feel more random and glitchy, which helped me understand that I could use random values for variation. I then used this.corruption = random(0, 1); and multiplied it with the pulse and jitter movement, so each tile had a slightly different glitch effect that matched the horror atmosphere I wanted