
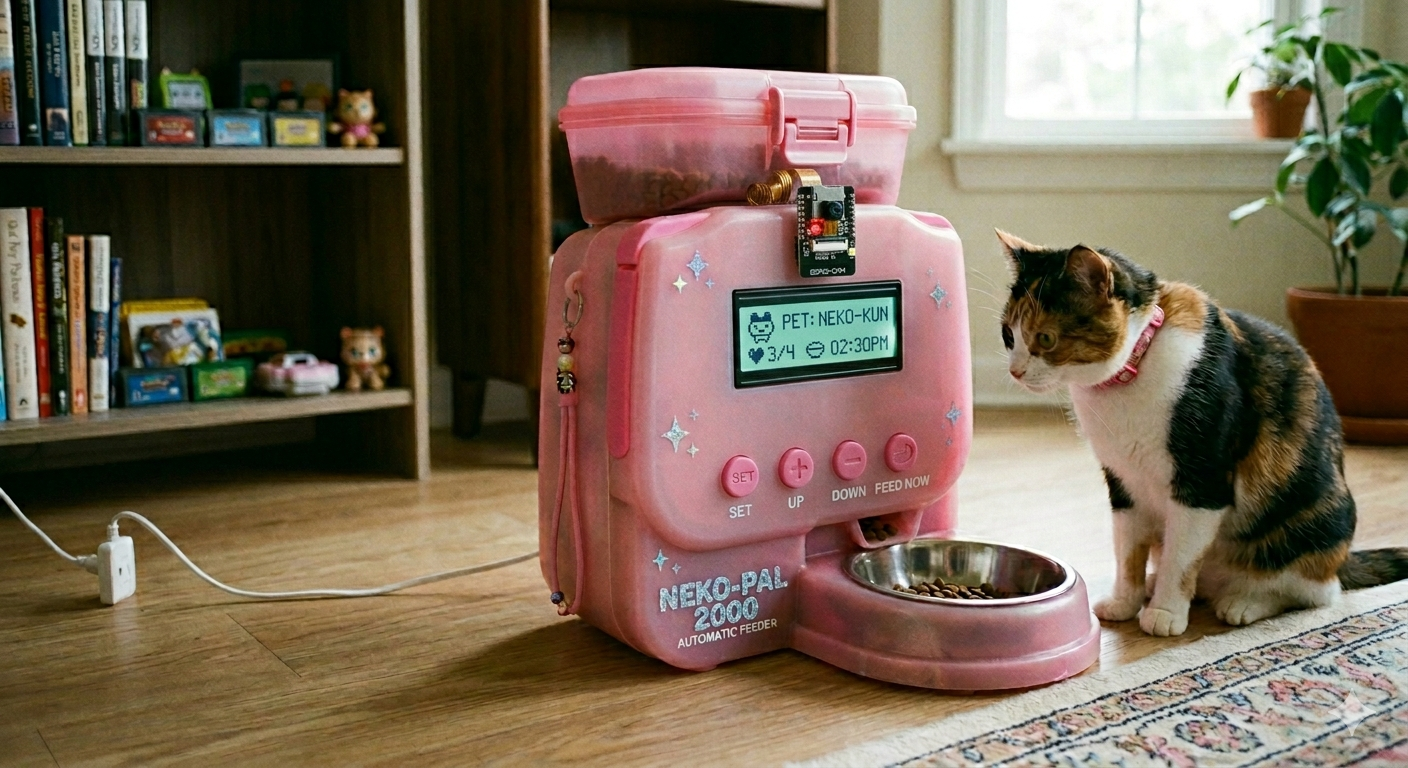
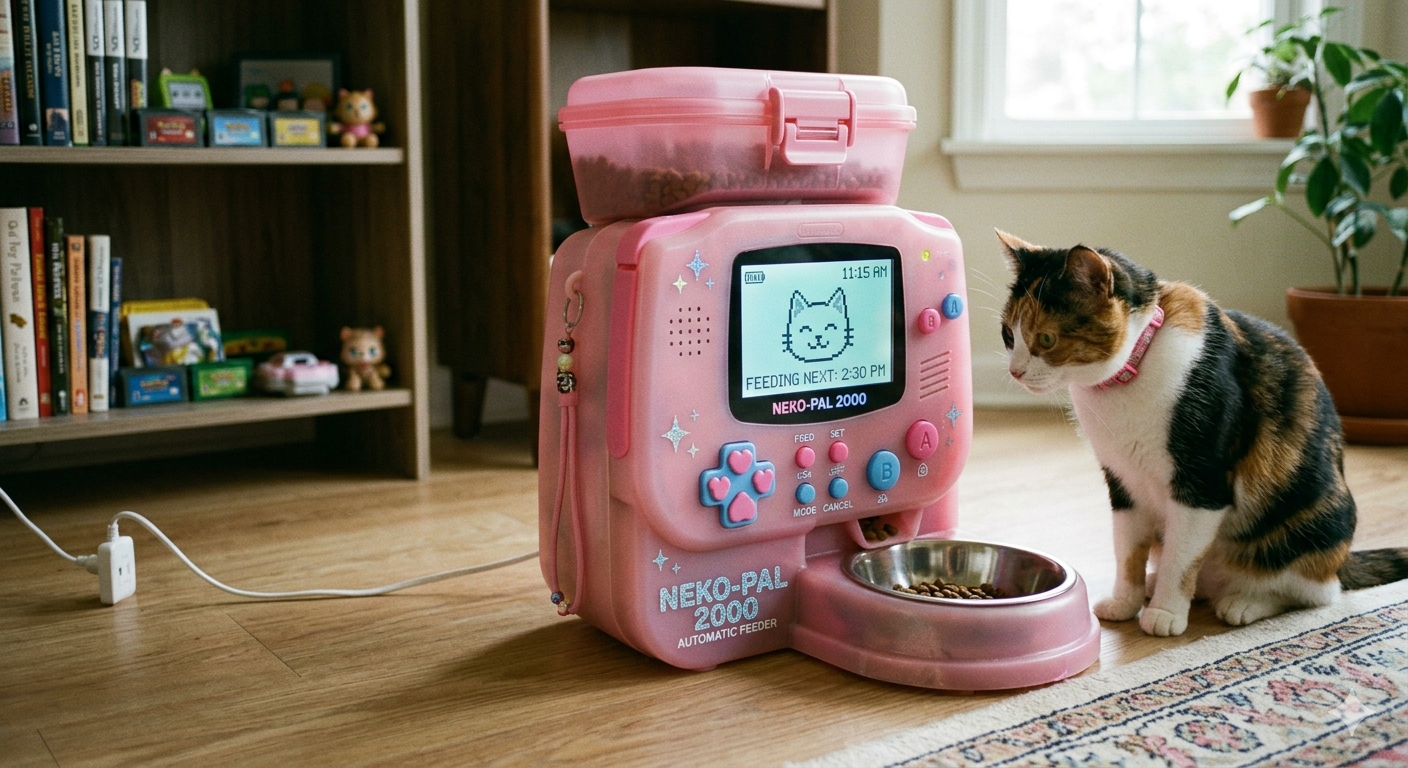
For my final project, I am inspired by early 2000s technology designs like the PSP, Game Boy Advance, Nintendo DS, and Tamagotchi.
Plan A: My idea is to create a simple Tamagotchi game that represents my cats, each with a specific feeding amount that is recognized by computer vision using p5.js. The automatic feeder would use an Arduino Uno, an LCD display, servos, and an ESP32-CAM.
Plan B: I will mainly rely on the buttons on the feeder/p5.js to interact with the feeder and the game.
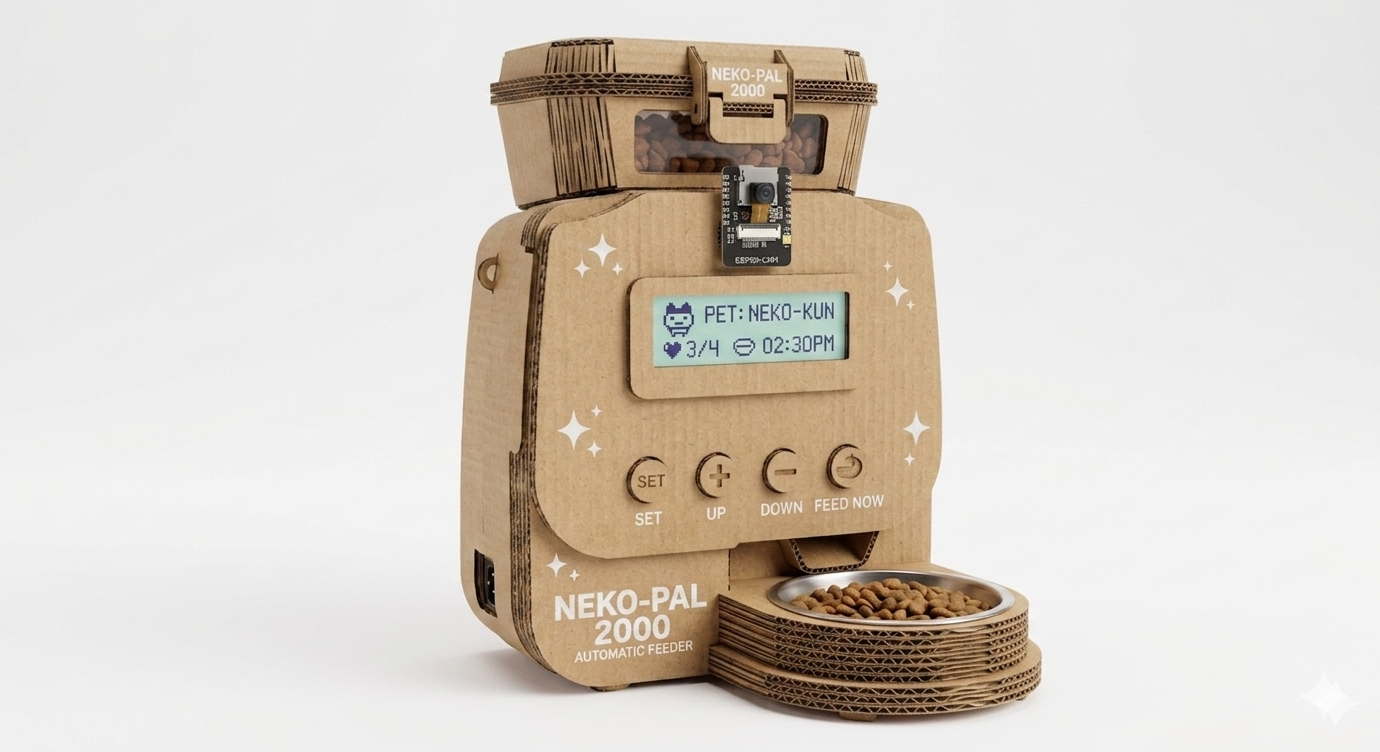
There are two unknown parts: the 3D printing and the ESP32-CAM, which is why I came up with a backup plan.
I am also looking at 3D printing the feeder at a public library or a local maker lab. If I am unable to do so, I will recreate it using cardboard, which I will paint to fit this aesthetic.
These are AI-generated images of what I want to build. I chose to build this not only because it has a nice aesthetic and design, but also because it will be useful for my cats when we are away from home for a long time. If possible, I will also create versions for stray cats.
The P5.js:
It is a Tamagotchi-style game with buttons that control the feeder, including feeding time, the amount per cat, and other settings. The interface will visually represent each cat, showing their hunger levels, mood, and feeding history. It will also allow users to customize schedules, adjust portion sizes, and possibly receive alerts when a cat needs feeding. Additionally, the game can simulate interactions (such as animations or status changes) based on whether the cat has been fed, making it both functional and engaging.
The Arduino:
Its function is to control the physical components of the feeder. The servo motor will open and close the feeder based on input either from the camera (detecting which cat is present) or from commands sent by the p5.js system. The Arduino will process signals from the ESP32-CAM to identify the cat and match it with its assigned feeding amount. It will also control the LCD display to show real-time information such as feeding status, the detected cat, or errors. Overall, it acts as the bridge between the digital game and the physical feeding mechanism, ensuring accurate and timed food dispensing.
This sounds like a nice project, though I would say using the ESP32-CAM is outside the scope of what we’re learning in Intro to IM. I suggest to make the prototype out of cardboard so that you can iterate quickly and start to understand the correct size and layout for the device. One way to mount the servo to the cardboard is to cut a rectangle that matches the servo body (using a hobby knife) and then use screws or hot glue to keep the servo in place.
3D printing is great but can be very time consuming and definitely requires multiple iterations. You could start by printing some existing designs, for example this servo mount https://makerworld.com/en/models/1257619-micro-servo-mount#profileId-1281316
If you want to go the Arduino->p5 route I recommend trying out the serial examples here and get them working before committing to the serial communications. Serial communication can be difficult to get working reliably and unfortunately there isn’t the opportunity to debug together in person this semester.
https://github.com/mangtronix/IntroductionToInteractiveMedia/blob/master/lectureNotes2.md#serial-communication
Sounds like a fun project! Hopefully you can find a nice realization of the idea with our constraints.