Concept:
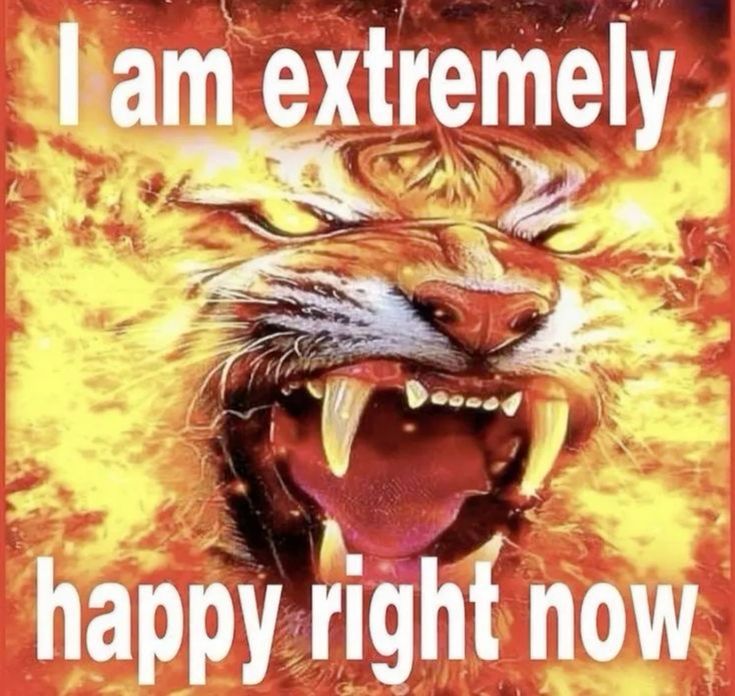 I really like Frutiger Aero, and I love things that are designed so badly that they just become funny and it actually works. I’ve fallen victim so many times to buying products with designs that were just so ugly and horrendous that it made me laugh. Lately, on my Pinterest, I keep seeing these stupid affirmation memes with really loud and emphatic text and completely random background and this horrendous gradient border. Naturally, I was so drawn to it, that now I have these stuck up on my wall back home. My parents are frustrated. My sister loves it.
I’m not a fan of making the same thing as something I see, but since I’m still a beginner to Javascript, I wanted to make something that I would enjoy making, especially in such a short period of time. So, I decided to make my own version of these. I hope you find this as funny as I do.
Artwork:
(I laughed a lot while making this.)
Process:
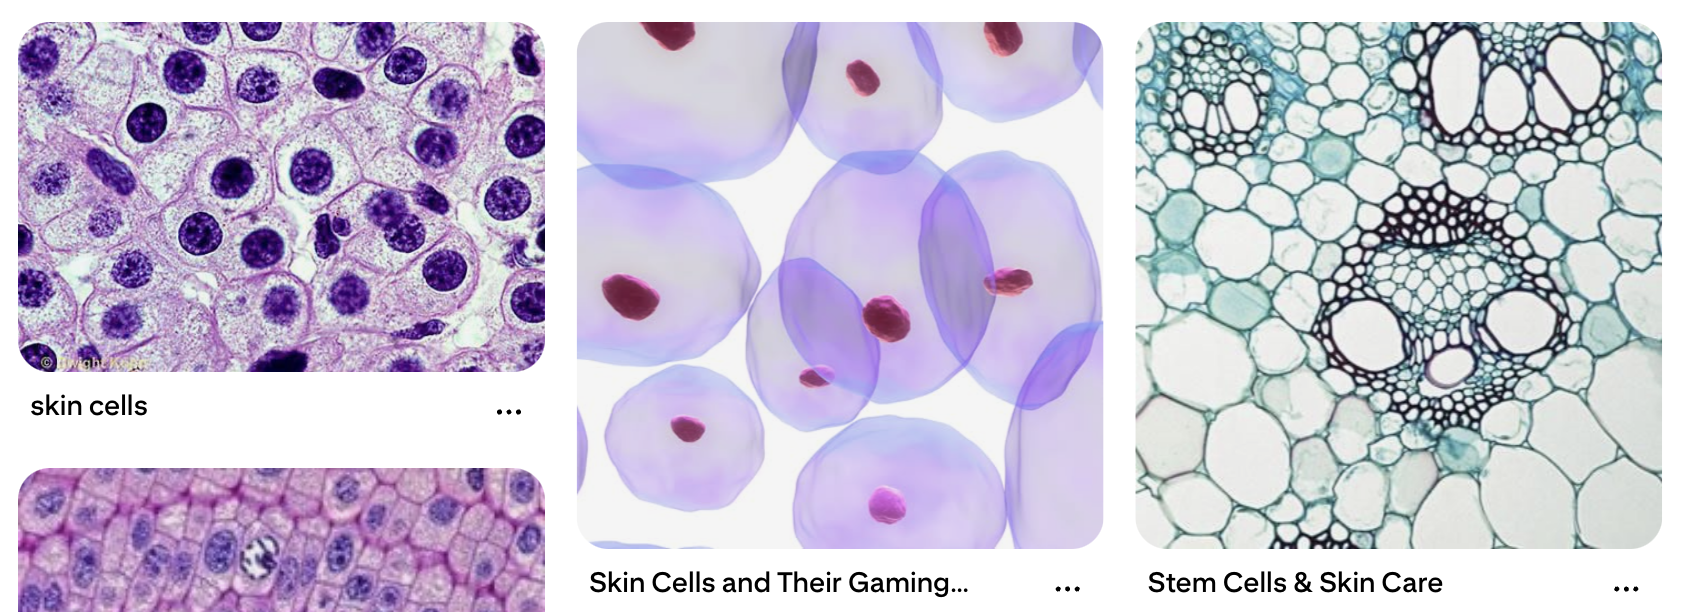
I had to make so many sections and so many functions and so many variables and etcetera, etcetera. Firstly, I had to import each image into the program, and I named each image by number so that importing them would be easier. I also made a list of affirmations I found online and through my friends onto a spreadsheet and imported it as a .csv file. Since I wanted the option of inputting your own affirmations, I made another list for user input.
function preload(){
  table = loadTable('Affirmations.csv','csv'); //csv file
  for (let i=0; i < totalImages; i++)
  {
    images.push(loadImage(i+'.jpg'));
  }
}
I loaded each row from the .csv file.
// load from csv file (I'm starting on row 2 because header lol)
 for (let r = 2; r < table.getRowCount(); r++){
   let line = table.getString(r,0);
   if (line) Affirmations.push(line); // prevent empty
)
After adding user input, I made a function to generate a new image every 3 seconds. There were multiple steps I had to take for this, which were:
FIRSTLY! Pick a random nature image:
let nextImgIndex;
  do {
    nextImgIndex = floor(random(images.length));
  } while (nextImgIndex == lastImgIndex);
  currentImg = images[nextImgIndex];
  lastImgIndex = nextImgIndex;
SECONDLY! Pick which list is currently active (the .csv file or the user input list):
let activeList;
if (modeCheckbox.checked() &&
   userAffirmations.length > 0) {
  activeList = userAffirmations;
} else {
  activeList = Affirmations;
}
THIRDLY! Pick a random affirmation from the chosen list:
if (activeList.length > 0){
   let nextTextIndex;
   do {
     nextTextIndex = floor(random(activeList.length));
   } while (nextTextIndex === lastTextIndex && activeList.length > 1);

   currentText = activeList[nextTextIndex];
   lastTextIndex = nextTextIndex;
 }
FOURTHLY! Add glow. Yay!
colorMode(HSB, 360, 100, 100);
 glowColor = color(random(360), 85, 100);
 colorMode(RGB);
For drawScene(), I used this code. I realized I could crop the nature images in the code (code is so cool… wow) so I did it in this.
function drawScene() {
  if (!currentImg || currentImg.width <= 1) return;

  // automatic crop image to square size
  let imgAspect = currentImg.width / currentImg.height;
  let canvasAspect = width / height;
  let sx, sy, sw, sh;
  if (imgAspect > canvasAspect) {
    sh = currentImg.height;
    sw = sh * canvasAspect;
    sx = (currentImg.width - sw) / 2;
    sy = 0;
  } else {
    sw = currentImg.width;
    sh = sw / canvasAspect;
    sx = 0;
    sy = (currentImg.height - sh) / 2;
  }

  image(currentImg, 0, 0, width, height, sx, sy, sw, sh);
  drawGlowBorders();

  // text style
  let txt = currentText;
  let maxWidth = width * 0.85;
  let fontSize = constrain(map(txt.length, 0, 50, 80, 40), 35, 90);

  push();
  translate(width / 2, height / 2);
  scale(1, 1.7);
  textAlign(CENTER, CENTER);
  textFont('Arial');
  textStyle(BOLD);
  textSize(fontSize);

  drawingContext.shadowBlur = 30;
  drawingContext.shadowColor = glowColor.toString();
  fill(255);
  noStroke();

  text(txt, -maxWidth/2, -height/3.4, maxWidth, height/1.7);

  drawingContext.shadowBlur = 0;
  text(txt, -maxWidth/2, -height/3.4, maxWidth, height/1.7);
  pop();
}
I thought the glow borders at the very end were really funny to figure out, but this is what I ended up with.
function drawGlowBorders() {
  let bSize = 45;
  noFill();
  for (let i = 0; i < bSize; i++) {
    let alpha = map(i, 0, bSize, 180, 0);
    stroke(red(glowColor), green(glowColor), blue(glowColor), alpha);
    strokeWeight(1);
    rect(i, i, width - i*2, height - i*2);
  }
}
Reflection:
There’s a lot of things I want to improve. Obviously, with the current skill level and time that I have, I don’t think this would be feasible, but I wanted to make sure you could save your custom affirmations into a file you can download later. I also wanted to let you delete affirmations you didn’t like and add more (database management? I guess?). I also found out that .csv files cannot store images, so I was limited to using only 21 images for now. I honestly made this so it could double not only as an assignment but also a funny thing for my friends to laugh at, so I think I achieved this, but I would like to play more with the generative aspect and data aspect of this. The text itself on the screen is not interactive (e.g. if I click it, nothing happens) and the data is not really visualized, more being used as a list to remove the need to individually type each affirmation into the code. I’m glad I figured out parts of the code that I know in Python though (like input) so hopefully that should make future projects easier.