
Concept:
In this series of exercises, we explored how Arduino and p5.js can talk to each other through serial communication. Each exercise focused on a different direction of data flow. First, Arduino sent information to p5.js. Then we switched it so p5.js controlled something on the Arduino. Finally, we combined both directions to create a full bi‑directional system. Doing these three tasks helped us understand how physical sensors and digital visuals can work together to create interactive experiences.
For the first exercise, we made a sketch where a circle in p5 moves left and right based on a potentiometer connected to Arduino. The potentiometer is the only sensor being used here, and its value controls the horizontal position of the circle while the circle stays in the middle of the screen vertically. On the Arduino side, the potentiometer value is read and sent through serial communication. On the p5 side, that value is read from the serial port and used to control the x position of the circle.
For the second exercise, we made a sketch where p5 controls the brightness of an LED on Arduino. Instead of Arduino sending data to p5, p5 sends a value to Arduino. I used a slider in p5, and moving that slider changed the brightness of the LED. The slider sends a value through the serial port, and Arduino reads that value and uses analogWrite() to control the LED brightness. Since brightness needs a gradual range, the LED had to be connected to a PWM pin.
For the third exercise, we combined both directions into one interactive system. We used the gravity‑wind example from class and connected it to both Arduino and p5.js. The potentiometer controlled the wind force in the p5 sketch, so turning it left or right pushed the falling ball in that direction. At the same time, p5 sent a message back to Arduino every time the ball hit the bottom of the screen. This made the LED blink with each bounce, creating a small physical reaction that matched the animation. Seeing the LED flash at the exact moment the ball hit the ground made the connection between the screen and the hardware feel much stronger. This exercise showed how both sides can respond to each other in real time.
p5 Code:
P5 exercise 1: https://editor.p5js.org/MaryamAlremeithi/full/yCY7LOF5F
P5 exercise 2: https://editor.p5js.org/MaryamAlremeithi/full/34Nhzf7WZ
P5 exercise 3: https://editor.p5js.org/mharaalnuaimi/full/-E_JsjCiX
Arduino Github Link Exercise 1: Exercise 1
Arduino Github Link Exercise 2: Exercise 2
Arduino Github Link Exercise 3: Exercise 3
Setup:
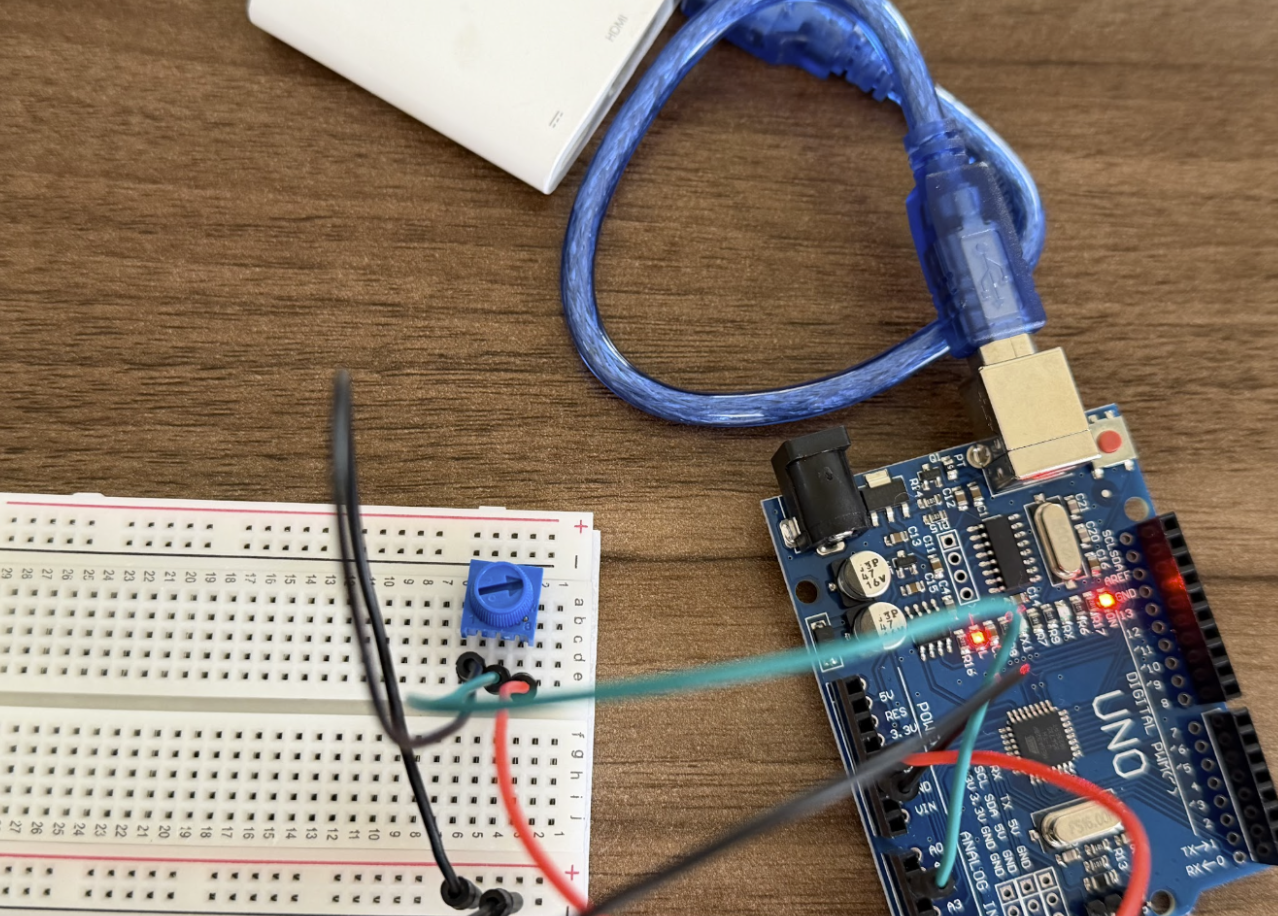
Exercise 1:
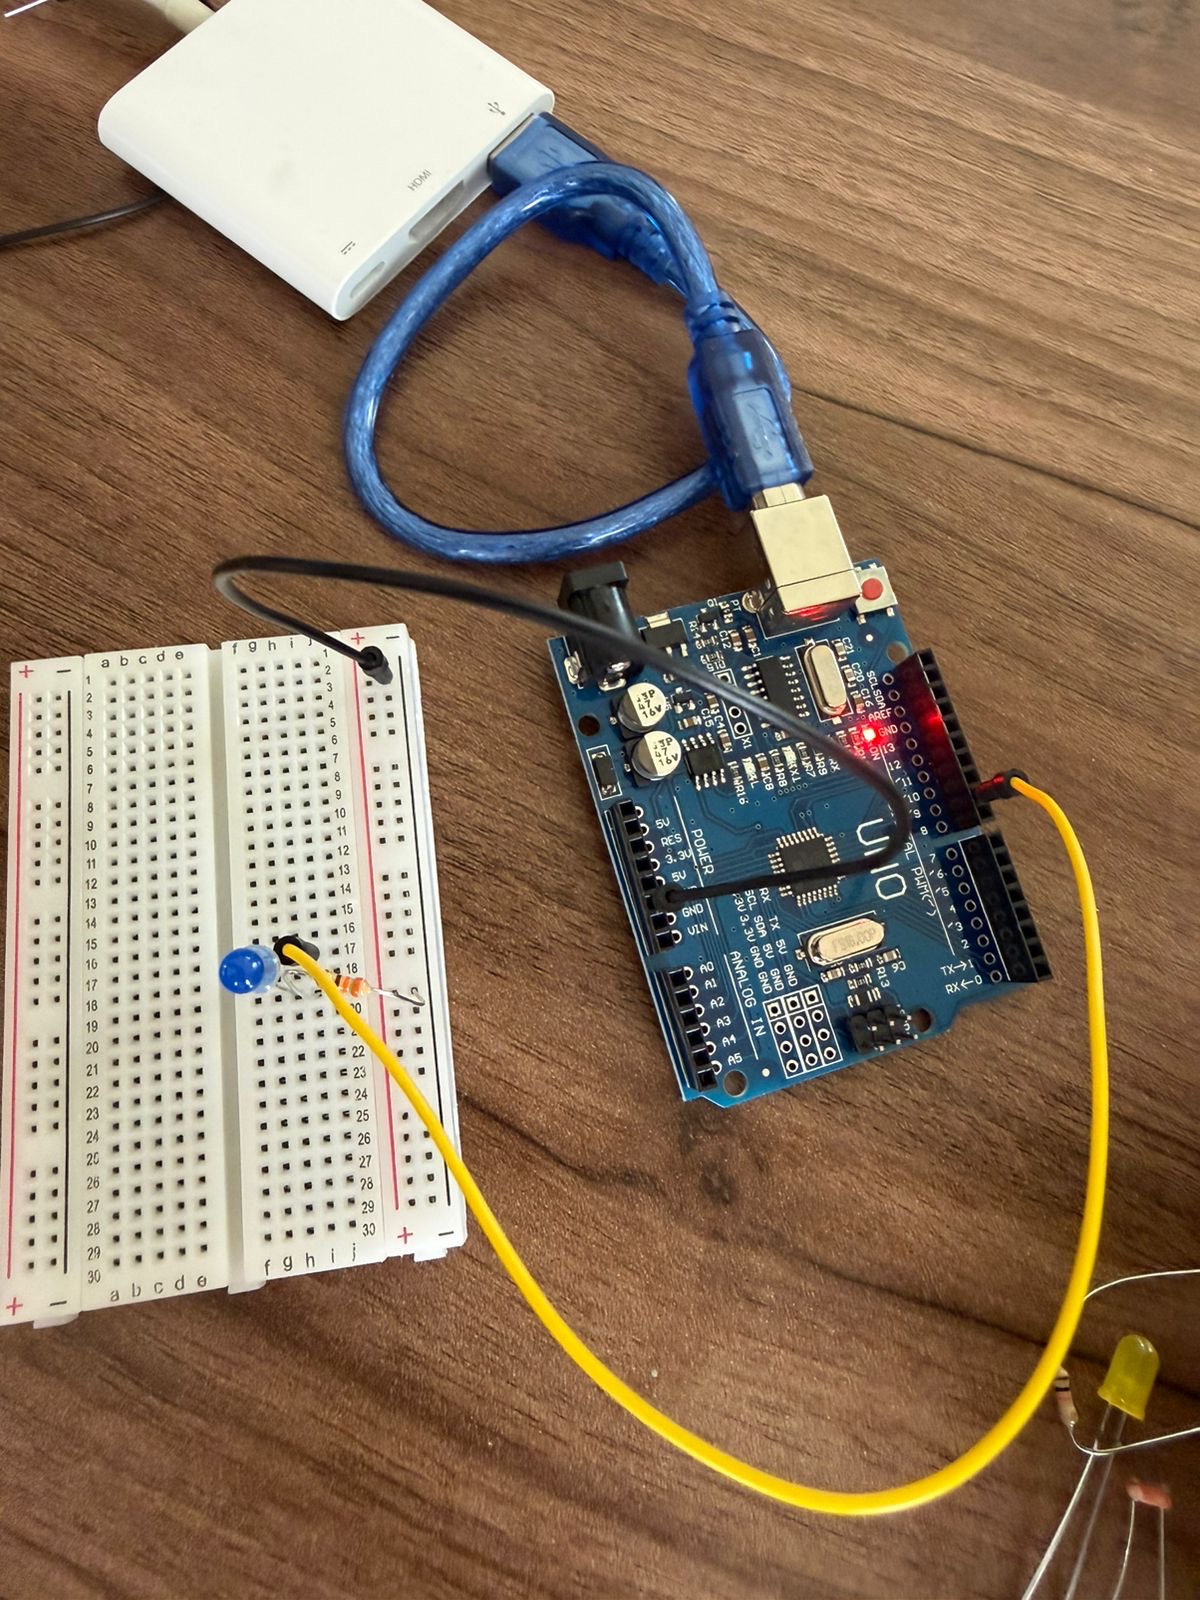
Exercise 2:
Exercise 3:

Demonstration:
Exercise 1: exercise1
Exercise 2: exercise2
Exercise 3: exercise3
Schematic:
Exercise 1: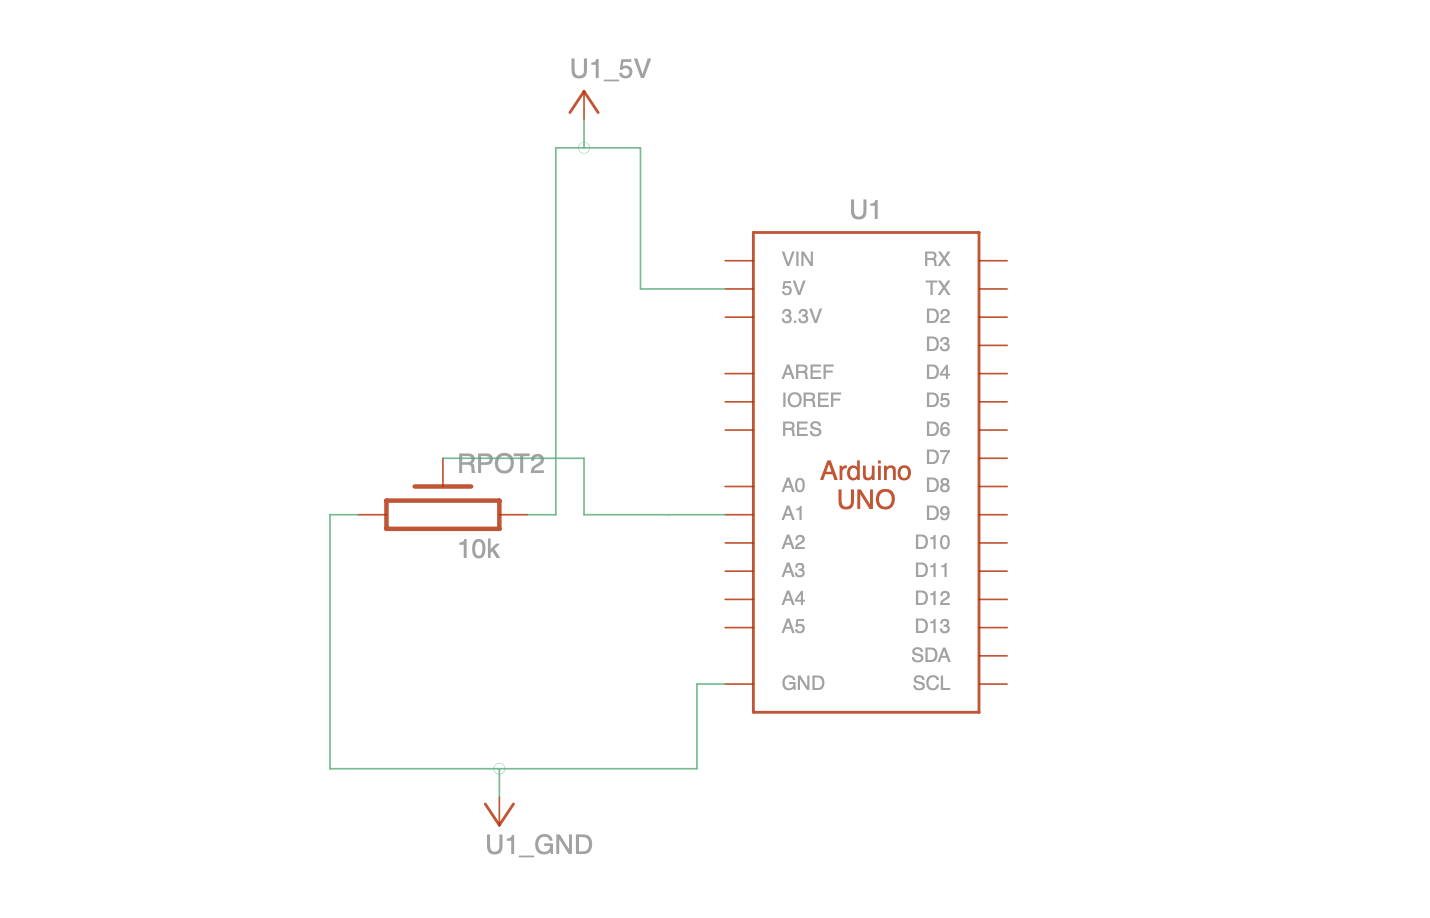
Exercise 2: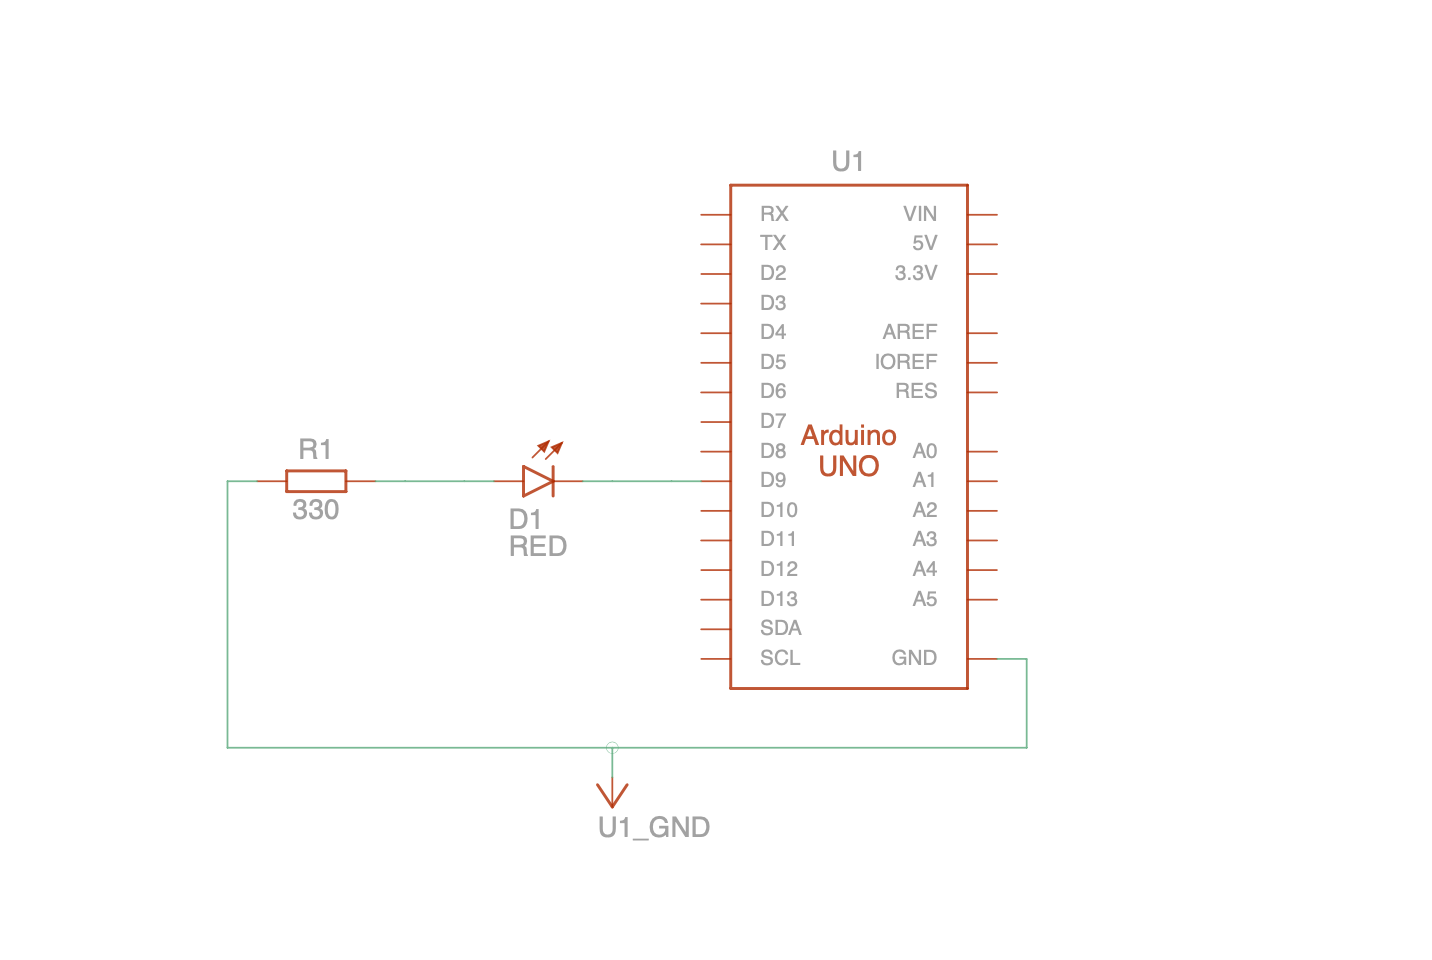
Exercise 3:
Process:
During these exercises, we followed the same steps for each project: wiring the components, writing the Arduino code, and then connecting everything to p5.js using WebSerial. For Exercise 1, we wired a potentiometer and tested the analog readings in the serial monitor before using them in p5. In Exercise 2, we focused on sending values from p5 to Arduino, so we tested the slider and made sure the LED responded smoothly. Exercise 3 was the most detailed because it used both directions of communication. We had to make sure the potentiometer values were clean, the wind force felt natural, and the LED blinked at the right moment. We also learned that adding a newline at the end of each serial message made the communication much more stable. Overall, the process helped us understand how to connect physical sensors with digital visuals step by step.
Code We Are Proud Of:
port.write("1");
setTimeout(() => port.write("0"), 100);
This is the part of the code we are most proud of because it shows the moment when p5.js talks back to Arduino. When the ball hits the bottom of the screen, p5 sends a “1” to turn the LED on and then sends a “0” to turn it off again. This creates a quick flash that matches the bounce.
Reflection and Areas of Improvement:
Working through these three exercises helped us understand how Arduino and p5.js can communicate in different ways. In Exercise 1, we learned how to read an analog value from Arduino and use it to control something in p5.js. In Exercise 2, we learned how p5.js can send values back to Arduino to control hardware like an LED. In Exercise 3, we combined both directions and created a full interactive loop where both sides respond to each other. This final exercise felt like the most complete example of how serial communication can be used in creative projects. If we continued building on these ideas, we could make more complex interactions such as small games, musical tools, or installations that react to multiple sensors. Overall, these exercises helped us build a strong understanding of serial communication and how physical and digital elements can work together.
If we were to improve these exercises, we would try adding more sensors or combining different types of inputs to make the interactions more interesting. For example, we could add buttons, sound sensors, or even an ultrasonic sensor to create more complex reactions in p5. We could also improve the visuals by adding animations or smoother movement to the ball. Another improvement would be organizing the code better by separating the serial functions from the physics code to make everything easier to read. These changes would help make the projects feel more polished and closer to real interactive installations.
References:
All the concepts we used in these exercises came from the Week 11.1 and Week 11.2 lecture slides. These slides explained how serial communication works, how to use WebSerial in p5.js, and how to send and receive data between Arduino and p5.