
Concept:
In this assignment, we had to create a musical instrument using digital and analog sensors. We used push buttons as our digital sensors and a potentiometer as our analog sensor. We then decided to create a mini piano-like device that plays the four basic piano notes C, D, E, and F, and allows the user to adjust the pitch of these notes. In this project, there are four push buttons, each assigned to one note that only plays when the button is pressed, and a potentiometer that changes the pitch of the notes when it is turned.
Code:
Setup:
Mariam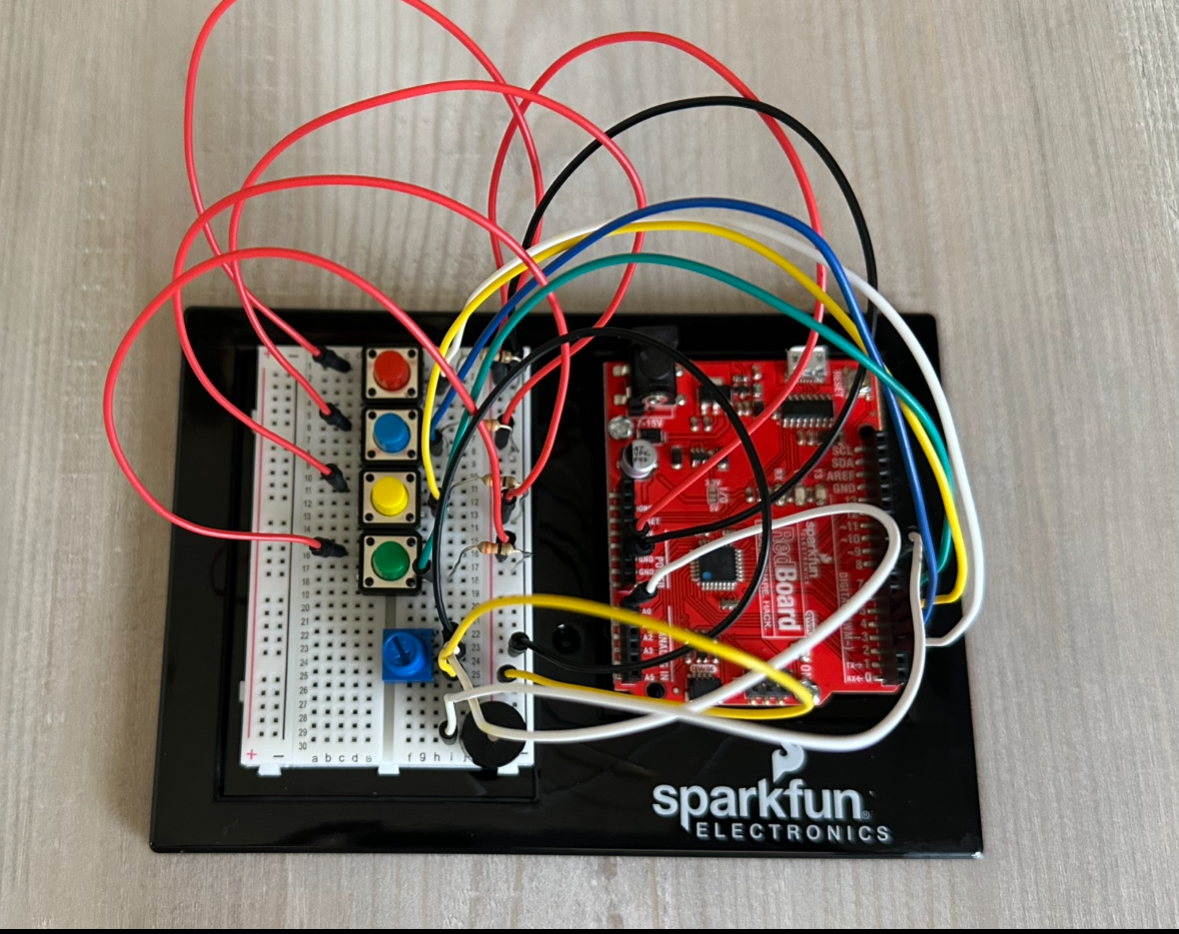 Mhara
Mhara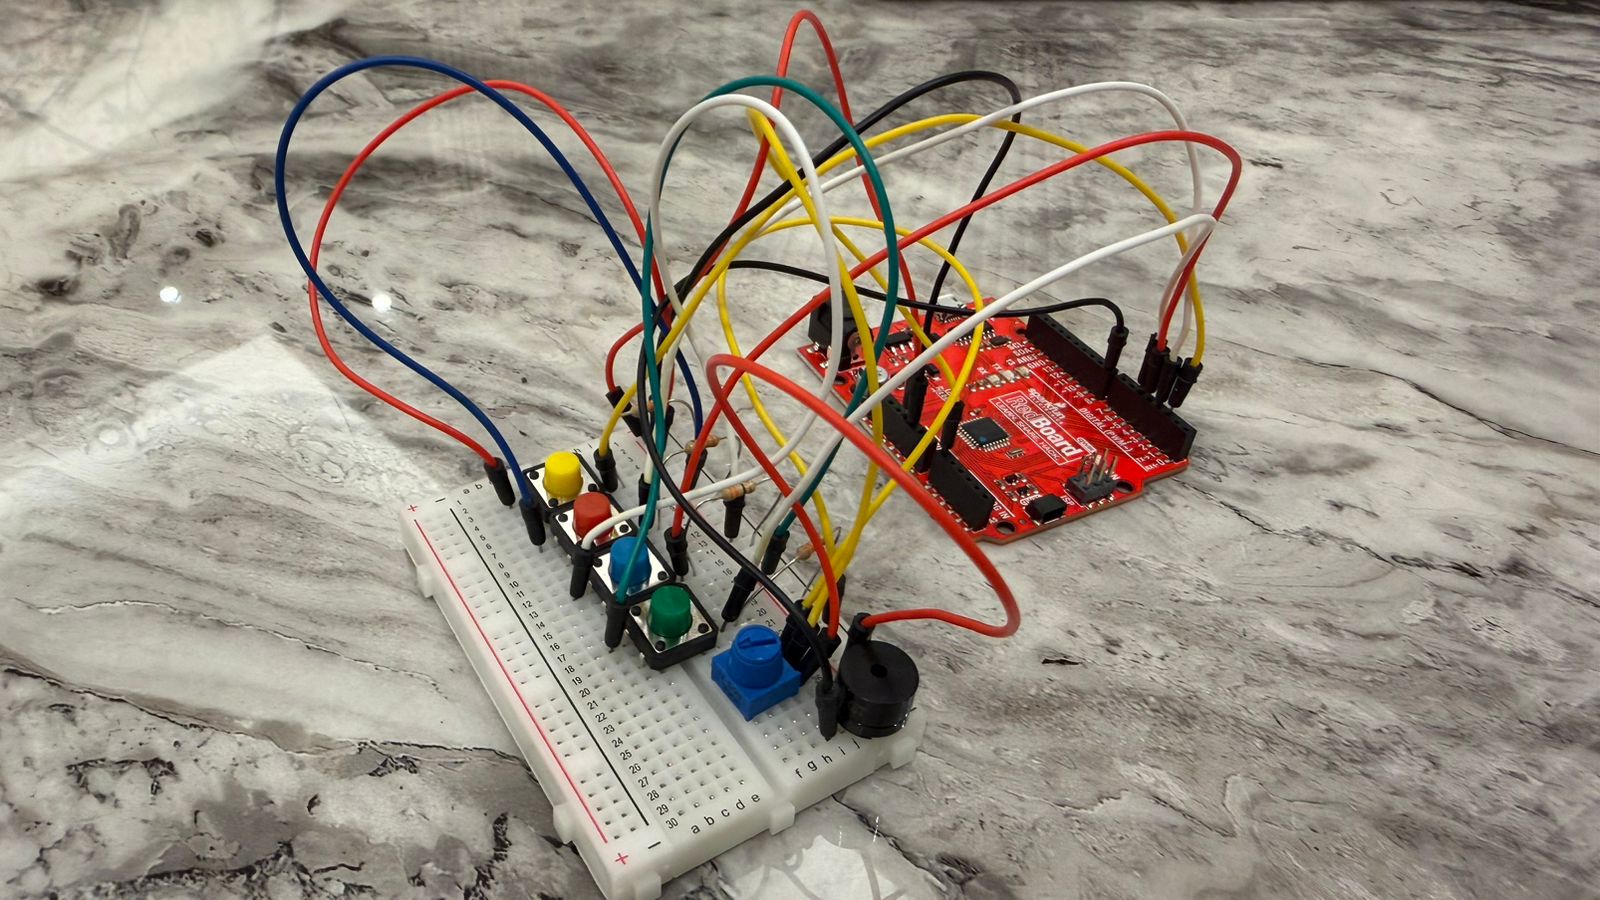
Demonstration:
Mariam
Mhara
Digital Circuit:
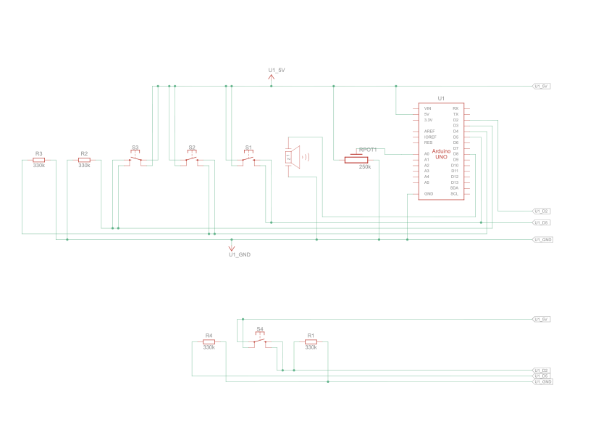
Schematic:
Process:
In the process of this assignment, we decided to combine four buttons (digital) with one potentiometer (analog) to control a piezo buzzer. Each button plays a different note, and the potentiometer slightly adjusts the pitch so the sound changes depending on how much it’s turned. We worked together on the idea and the wiring, but we divided the coding so each of us focused on one part. Mariam handled the digital part (the buttons and the notes), and Mhara worked on the analog part (the potentiometer and the pitch control). After both parts were working separately, we combined them into one full sketch of code.
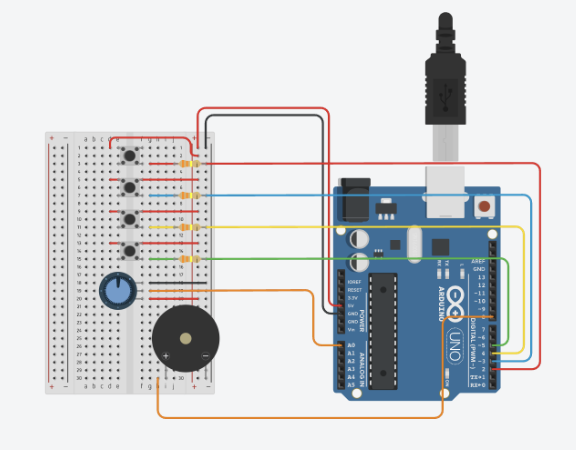
We then tested the circuit in Tinkercad to make sure all the wiring and logic of the code were correct. This helped us confirm that the buttons were reading properly and that the potentiometer was giving smooth values. Running it in Tinkercad also made it easier to fix small mistakes before trying it on the physical Arduino board.
At first, the audio wasn’t changing when the potentiometer was turned because the mapping was happening after the tone was already being played, so we rearranged the order of the code and that finally made the pitch respond. After that, the sound became too noisy and robotic, so we added a small adjustment range (90 – 105) to each note to make the pitch change smoother and less harsh.
Code Snippets:
While building the project, there were a couple of code snippets that stood out to us because they played an important role in making the instrument work the way we wanted it to.
tone(buzzerPin, noteC * map(sensorValue, 0, 1023, 90, 105) / 100);
This was the part we were most proud of because it solved the “robotic” and “noisy” sound problem. Instead of letting the potentiometer completely change the note, we used a small adjustment (90-150) to bend the pitch smoothly. And this showed how the digital and analog inputs can work together in one line of code.
Another part of the code is :
pitch = map(sensorValue, 0, 1023, 200, 2000);
This line shows how the analog input (the potentiometer) controls the sound. It takes the raw value from 0-1023 and maps it into a pitch range that the buzzer can actually play. This was important because the potentiometer originally wasn’t affecting the sound at all, and fixing the order of the code made this line finally work the way we wanted it to.
Areas of Improvement and Reflection:
After completing this assignment, we were able to learn and explore different sensors and sounds. It was easy and smooth to work as a pair, as each person focused on one part and then we combined our work together. As for areas of improvement, we could make the sound of the notes smoother and more musical, since it still sounds slightly robotic, or add more notes to make it closer to a real piano. Another idea is to implement other sensors, such as an ultrasonic sensor, to play different notes or even melodies based on motion or distance. Working with audio and sensors is a fun part of Arduino, and it allows us to create many different ideas for various purposes. Overall, we are satisfied with our final outcome and the entire process of this project.
References:
Looked back at Week 10 slides about sound to recap what we learned.
Reviewed specific code concepts using the Arduino documentation:
https://docs.arduino.cc/language-reference/en/functions/math/map/
- How we used it: We used this to convert the potentiometer’s range into a smaller pitch-adjustment range that works smoothly with the buzzer.
https://docs.arduino.cc/language-reference/en/functions/advanced-io/tone/
- How we used it: We used this page to understand how the tone() function works and how to send different frequencies to the buzzer.
https://docs.arduino.cc/built-in-examples/digital/toneMelody/
- How we used it: We looked at this example to understand how notes from pitches.h are used and how tone() can be combined with different frequencies to create musical sounds.
Used ChatGPT to help navigate and resolve a major issue where the tones sounded too robotic and noisy. From this, we learned that using the map() function with a smaller range for each note helps create smoother, more controlled pitch changes.