
GitHub Code | Demonstration Vid & Photos
CONCEPT
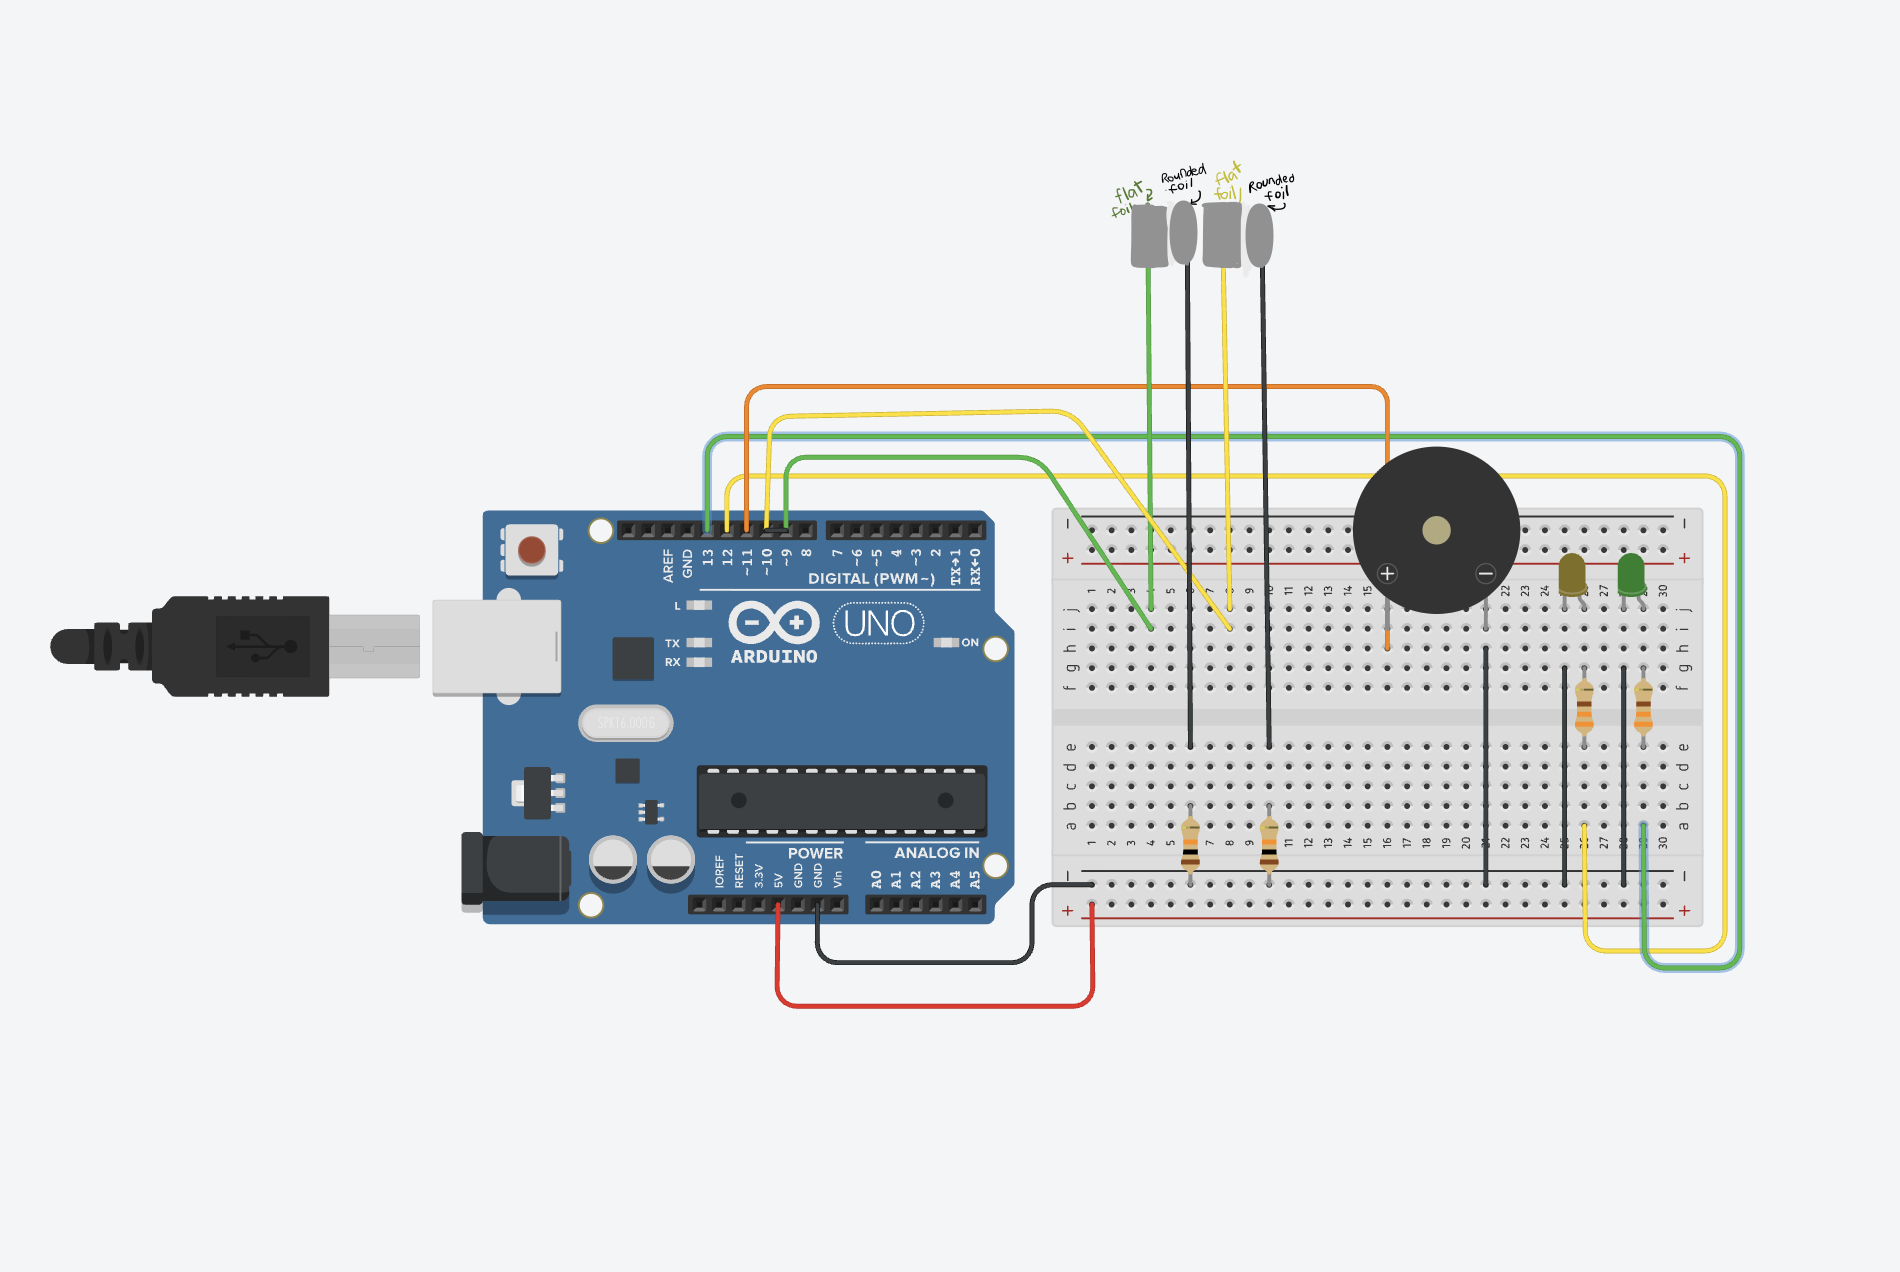
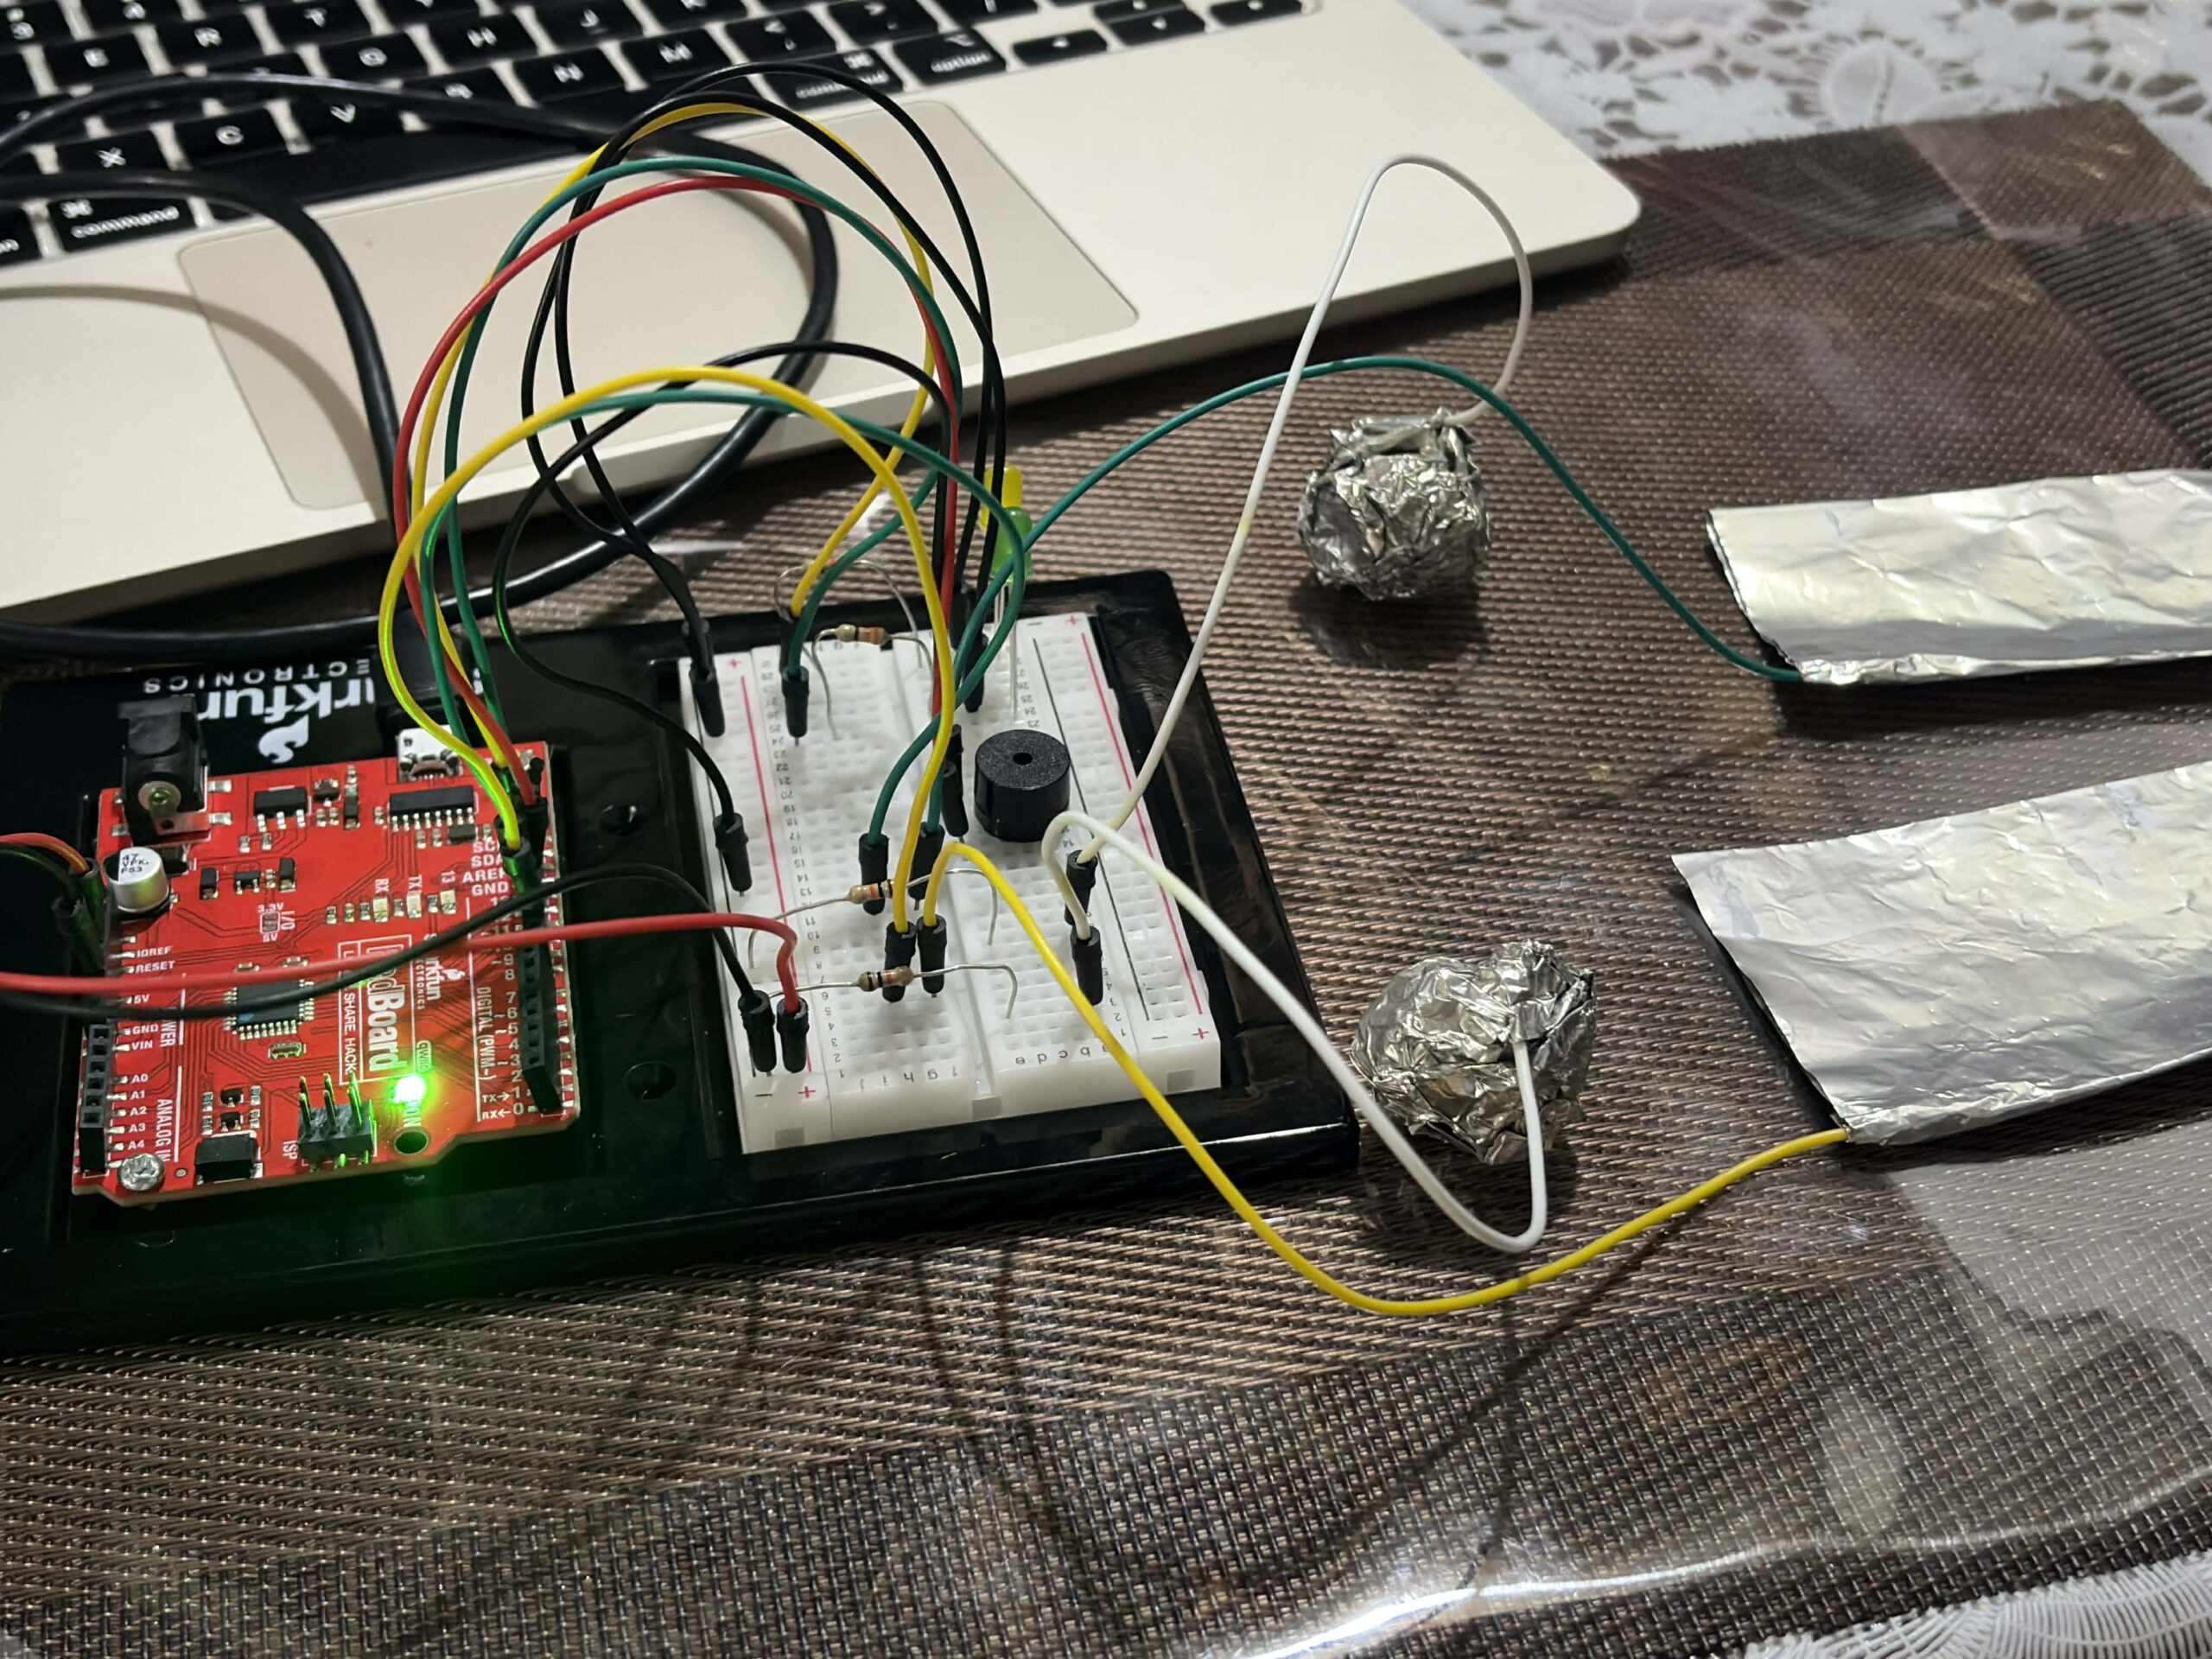
When I was thinking about what to do for this assignment, I remembered watching a TV game show called Family Feud. That’s where I got the idea to recreate their buzzer system. I was curious about how it worked, so I wanted to try making something similar using Arduino. However, the instructions said that we needed to create a switch that uses the human body, but not the hands. So instead of just using a push button to turn on an LED, I decided to modify the idea. I used foil to act as my switch, since it can open and close a circuit when touched.
I created two foil setups with two LED lights, similar to how two players compete in the game show. Each player has their own side, and whoever activates their side first lights up their LED. To make it more interesting, I used a round foil and a flat foil instead of a regular button. The idea is that players drop the round foil onto the flat foil, which completes the circuit and turns on the LED. Whichever LED lights up first means that player gets to go first, just like in the game. So instead of pressing a button directly with my hands, the interaction happens through contact between 2 foil surfaces. When that contact happens, the circuit is completed, turning on the LED, and determines who goes first.
CODE I’M PROUD OF
I feel like my code is simple, but I enjoyed experimenting with the buzzer and how it responds when someone activates the foil. Even though the logic is straightforward, it works well for what I wanted to achieve. Here’s my code snippet:
if (digitalRead(foil1) == LOW) {

    digitalWrite(ledYellow, HIGH);
    tone(buzzer, 1000);
    delay(500);
    noTone(buzzer);

    resetAll();
  }

  else if (digitalRead(foil2) == LOW) {

    digitalWrite(ledGreen, HIGH);
    tone(buzzer, 1000);
    delay(500);
    noTone(buzzer);
PROBLEMS I ENCOUNTERED
I followed a tutorial on YouTube by SunFounder Maker Education, but the tutorial used multiple push buttons. Because of that, I had to experiment with how to replace the buttons with foil and make it behave the same way. I first looked at my classmates’ and previous students’ blog posts about how to connect the foil using jumper wires. From that, I learned that the wires connect well to the foil if I wrap them around it securely. However, I initially just followed the tutorial and directly replaced the buttons with foil and tried to “press” the foil the same way as a button. That didn’t work, and my Arduino wasn’t responding properly.
During class, I learned that I needed to use a 10k resistor to stabilize the input. After adding the 10k ohm resistor, it still didn’t work, so I asked ChatGPT for help. It guided me through debugging and gave me a checklist of things to double check in both my code and Arduino setup. Through that process, I realized that I needed two separate foil pieces for each LED, one connected to the pin and the other to GND. At first, I was only using one piece of foil, which was the main problem. After adjusting this, the setup started working properly. Now, when the round foil is dropped onto the flat foil, it completes the circuit correctly and allows the LED to turn on and function the way I wanted it to.
REFLECTION
I really enjoyed the process, and I’m happy with how everything turned out. It took me a while to get to this finished assignment because I had to change my idea after finishing my first draft. I realized I didn’t fully follow the instructions, so I had to rethink and come up with a better approach. Next time, I’ll make sure to read the instructions more carefully from the start, since that would have saved me a lot of time. I also realized that working with Arduino isn’t as difficult as I thought. I actually enjoy it. I loved the feeling of satisfaction when my circuit and code finally worked the way I wanted them to.
REFERENCES
https://www.youtube.com/watch?v=_DjONeQnseo , class slides, https://github.com/liffiton/Arduino-Cheat-Sheet/blob/master/Arduino%20Cheat%20Sheet.pdf