Self Portrait Mohidul


Week 1: Self Portrait

Concept: Drawing a portrait that looks professional, wearing a suit.


Section I am proud of: Drawing the Suit of the Portrait.

// Draw suit
  fill(30); // Dark gray suit color
  beginShape(); // Left lapel
  vertex(140, 340);
  vertex(200, 280);
  vertex(180, 340);
  endShape(CLOSE);

New things I have learned drawing the suit:

//Vertex

Embedded sketch

Reflection: The hadest part was to start the project and aligning the dots and vertex well. So for next one, I will learn more on the coordinates system and have a paper on my hand before drawing it.

Week 1: Self Portrait

Project Concept

For my first assignment, I envisioned creating a  portrait using only one shape thats minimalist yet offers visual depth. I decided that pixel art was the perfect medium for this idea since Its built out of squares yet shading features help provide the sense of depth. Its structured grid format and the ability to control each individual “pixel” felt ideal for achieving the clean aesthetic I had in mind.

Challenges Faced

While my initial plan was to use nested loops to generate the grid and automate the process, as a complete coding beginner, I encountered errors that made it difficult to implement this approach. To overcome this, I decided to hardcode each pixel manually. This allowed me to fully control the placement and colors but turned the process into a labor-intensive task. Every pixel had to be individually positioned and assigned a color, which made the project take much longer than anticipated. It obviously isn’t ideal but I gained a hands-on understanding of positioning features , drawing features.

Key Takeaways

Despite the challenges, this project turned out to be a significant learning experience. Some of the key insights I gained include:

  1. The necessity of loops and conditions: Hardcoding each pixel gave me total control, but it also highlighted how essential loops are for reducing repetitive tasks and improving efficiency in coding. When I wanted to change my background in the end, it wasn’t possible because that’d need me to hardcode everything all over again.
  2. Improved understanding of p5.js positioning: By working manually on every pixel, I developed a solid understanding of how p5.js handles positioning and coordinates, which will undoubtedly help me in future projects.
  3. Patience and problem-solving: This project tested my patience but also pushed me to find doable solutions when my initial approach didn’t work as planned.


Assignment 1 : Self Portrait

Reflection

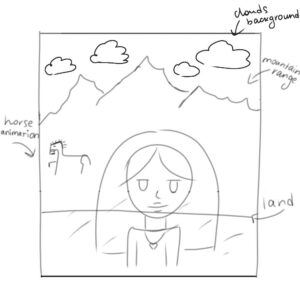
For this self-portrait, I wanted to create a clean, simple, and expressive representation of myself, combining basic shapes like ellipses, arcs, and rectangles. The goal was to balance realism and a playful, cartoon-like aesthetic while incorporating distinct features like a small beard, expressive eyebrows, and stylized hair. I focused on ensuring proportionality and seamless transitions between shapes, such as the neck connecting to the head and the shirt integrating an arc and rectangle for a polished look.

I’m proud of how the self-portrait turned out, as it reflects a good balance of simplicity and personal expression. The use of arcs and ellipses allowed me to create distinct facial features, and the small beard adds a unique touch to the design. However, there is room for improvement. In the future, I’d like to experiment with adding shading or gradients to enhance depth and realism. Additionally, I could explore animations, such as blinking eyes or a waving hand, to bring the portrait to life. This project has been a rewarding exercise in creative coding, helping me better understand shape integration and design principles in p5.js.

function setup() {
  createCanvas(400, 400);
}

function draw() {
  background(220);

  // Drawing the neck
  fill(240, 200, 170);
  rect(180, 280, 40, 20);

  // Drawing the head
  fill(240, 200, 170);
  ellipse(200, 200, 150, 180);

  // Drawing the eyes
  fill(255);
  ellipse(170, 190, 30, 20);
  ellipse(230, 190, 30, 20);

  fill(50);
  ellipse(170, 190, 10, 10);
  ellipse(230, 190, 10, 10);

  // Adding eyebrows using arcs for expression
  stroke(50);
  strokeWeight(3);
  noFill();
  arc(170, 175, 40, 10, PI, TWO_PI);
  arc(230, 175, 40, 10, PI, TWO_PI);

  // Drawing the nose
  stroke(150, 100, 80);
  strokeWeight(2);
  line(200, 190, 200, 220);
  arc(200, 220, 20, 10, 0, PI);

  // Adding mouth
  noStroke();
  fill(200, 80, 80);
  arc(200, 250, 50, 30, 0, PI);

  // Adding a small beard below the mouth
  fill(100, 50, 30);
  arc(200, 280, 70, 30, 0, PI);

  // Drawing the hair 
  fill(50);
  arc(200, 150, 160, 120, PI, TWO_PI);
  rect(120, 150, 20, 80);
  rect(260, 150, 20, 80);

  // Drawing ears on both sides of the head
  fill(240, 200, 170);
  ellipse(125, 200, 20, 40);
  ellipse(275, 200, 20, 40);

  // Drawing a shirt 
  fill(100, 150, 200);
  noStroke();
  arc(200, 347, 100, 100, PI, TWO_PI);
  rect(150, 345, 100, 50);
}


Week 1 – Portrait

For this portrait I wanted it to serve as an opportunity for me to explore p5.js and coding, while also making it represent myself. As this is my first time coding, I am still getting used to it and discovering new elements, which means that my portrait is not as elaborate and realistic as I would like it to be. However, I still made it meaningful by including some things that represent me such as making it colourful and adding a cake to represent my love for baking.

One part of this assignment that I’m particularly proud of is the code for the nose. It was a challenging part of the portrait that took me some time to figure out, but I’m glad I was able to execute it successfully.

noFill(); // nose
stroke(0);
strokeWeight(1);
beginShape();
vertex(200, 200);
vertex(195, 220);
vertex(200, 220);
endShape();

Reflecting on the portrait I created for this first assignment, I feel satisfied with the result. It helped me get more comfortable with how coding in p5.js works and gave me a foundation to build on. For the future, I’d like to focus on adding more detail to my projects. For example, I could experiment with creating more detailed hair, such as adding front strands, designing a more interesting shirt, or even making the portrait interactive. This can be done by conducting more research and experimenting with different shapes and techniques, which I’m excited to try.

–  Raghd

Week 1-Self Portrait

For this project, I created an animated self portrait using  p5.js. The design uses basic shapes like ellipses, arcs, triangles and lines to create the structure of the face.

My 2 favourite things that I spent so much time on is the eyelashes as I had  a hard time adjusting the angles and the coordinates which I couldn’t just calculate, I had to just guess where to place them and see how it looks after running (trial and error).

Here’s the code snippet for the eyelashes:

stroke("Black");
strokeWeight(3);
line(160,170,150,145);
line(240,170,250,145);
line(180,170,190,145);
line(220,170,210,145);
line(170,170,170,142);
line(230,170,230,142);

I also like the interactivity of the portrait. By clicking the mouse, the eyes blink, and the face smiles and upon clicking again the face returns back to its original state.

Here is the portrait:

One thing that I’d like to improve is making the portrait more realistic as that’s what I wanted at first but couldn’t do as I had such a hard time figuring out the coordinates  and the best shapes to use to create the features (ex: the blush on the cheeks and the hair).

Week 1 – Self-portrait

Concept

For the first assignment, I will present a simplified picture of myself using p5.js. I chose to cover my eyes in the portrait because I wanted to symbolize introspection and the idea of seeing beyond appearances, as I used in other mediums.

The highlight of the code I am proud of is this snippet:

//small detail in Abaya
 stroke('rgb(32,32,32)'); 
  strokeWeight(5);
 let dx = 256 - 210; // Difference in X
  let dy = 399 - 410; // Difference in Y

  // Adjusting both points by the calculated difference
  line(210 + dx, 410 + dy, 1006 + dx, 1198 + dy)

This is because it really required me to understand the coordinates to position the detail. Finding an accurate x and y coordinates to perfectly align the detail was pretty challenging, with the errors ruining the other details of the portrait. However, using console.log to track positions and fine-tune them allowed me to get it right.

Embedded Sketch

Reflections

 I think I need to improve more on the colors and the use of shapes since my current portraits lack depth and realism. In addition, I would also add a background and add a bit more details in areas like the headscarf. While the task comes with a lot of challenges and debugging to do, I do learn more about JavaScript than I realized, and hopefully, as I learn how to utilize other functions, like the console.log() function, and line(), the processes of learning JavaScript will slowly become easier.


Self-Portrait – Swan

The purpose of this assignment is to make a self-portrait using p5.js, I chose to create a visual representation of a swan. I wanted the sketch to portray a serene scene where a swan floats on water and the light blue background acts as the sky; using basic shapes such as circles, triangles, and rectangles to create a nice illustration.

I find the following part of the code the most interesting because I had to try many positions to fit the image I wanted to achieve on the swan’s head

// Beak fill('orange'); triangle(190, 180, 210, 180, 200, 170);

The layering of elements, such as the neck and head on the body, effectively mimics a real swan, while the colors chosen – light blue for the background, dark blue for the water, and white for the swan – create the harmonious visual effect I was hoping to achieve.

I plan to introduce several improvements to increase realism, such as adding shading or gradients to the swan’s body and neck to enhance depth and incorporating ripples in the water to give it a more dynamic look. Animations could also be a great idea to make the swan float smoothly on the water or move its neck gracefully.

Assignment 1: Self-Portrait

The first assignment for Intro to IM asked us to make a self-portrait of ourselves using p5.js. I was really excited to do this assignment, and I enjoyed playing around with the different shapes and colors.

I wanted to create a nice background for my portrait, so I began by making a sunset scene. I used multiple rectangles to simulate the effect of a gradient, and then experimented with the colors to create a cohesive color scheme. I then used circles to simulate clouds and added more rectangles to create a window frame.

However, it soon turned out that making the background was the easy part, as I then had to start making myself.

I started by making the body. I used two shades of gray for the jacket to give my portrait some depth. I then used a similar technique with the shades of blue to create my scarf.

Making the face was objectively the hardest part, as getting the proportions right was very difficult. I ended using the quad() function to create the shape of my glasses, then filled them in with a semi transparent white shape to simulate glass. Although making the face was challenging, it was the most satisfying part, as it was rewarding to see all the aspects come together.

Throughout the assignment, I was struggling when trying to get the x and y-coordinates precisely where I wanted them. In the end, I used console.log to track the coordinates I wanted when I clicked in a specific place. While it was still challenging nonetheless, using this function made it much faster to implement.

Overall, I really enjoyed the process of doing this assignment, as it was very interesting to see the way I could use basic shapes to create something meaningful.

Self-portrait

When I was tasked with creating a self-portrait, I realized that my portrait wasn’t simply about representing my appearance, it was more about capturing my background. So, I decided to create a self-portrait set in the background of my hometown in the Northern Caucasus, including elements like the mountains and a horse.

Here’s the initial reference I sketched:

At first, I thought making the self-portrait would be a simple task, but I ended up making it way harder than needed by focusing on the overcomplicated background elements. However, looking back, this pushed me to learn a lot more than if I’d just gone for a simpler face portrait.

The main challenge for me was creating the mountains. For each individual mountain, I used simple triangles, a shape I used to struggle with. However, printing the coordinates helped me figure it out. I also wanted to create a mountain range, but I wasn’t sure how to add something resembling curves. I found this Reddit post that showed me how to do it: Creating Thick Curved Shapes.

Additionally, I wanted to add a gradient sky, which involved using loops to create the desired effect. I found this draft to help me with the technique: Gradient Sky Example.

Surprisingly, the most difficult part of the project wasn’t the background: it was trying to create the elements that represented me. I struggled with coding wavy hair, so I opted for a straight hairstyle instead. I also couldn’t figure out how to create side bangs using the arc function, so I decided to leave that out. The other challenge was creating a simple heart. I tried to make it using an arc, but that didn’t work out, so I came up with a solution: two circles and a triangle.

Looking back on this whole process, I really get the “vision vs. reality” thing now. Sketching out ideas and trying to turn them into something real was way more difficult than I thought. But it also pushed me to learn more coding functions, helping bring my vision to life.

Despite all the challenges and endless debugging, I honestly loved the process and the creative side of coding:) As time goes on, I hope I’ll get better at this, and eventually be able to create whatever I envision, with fewer limitations.

Attaching the code:

Week 1; Self-Portrait

Motivation

I’m not much of a social media person, and even on the platforms I’m on, I’m rarely active. Snapchat, in particular, never really interested me until a good friend recommended it and encouraged me to join. During the account creation process, I had to create an avatar that resembled me. Months later, I joined Duolingo and had to do something similar. I found it fascinating to customize every detail—from facial features and skin tone to hairstyle and outfit. Beyond the fun of creating these avatars, I became curious about the logic and methods behind designing such features. When I learned that our first-week assignment was to draw a self-portrait, it therefore felt familiar, but this time, there were no pre-made shapes or preset colors to choose from. Instead, I was responsible for drawing and coloring everything myself using p5.js. I was genuinely excited about the challenge! I therefore drew my inspiration from my snapchat and Duolingo avatar that I think paint a picture of who I am.

Code

Before coding the portrait, I began by sketching it on plain paper to guide me, particularly with determining precise measurements for the coordinates. I worked on a 400×400 canvas with a light grey background (Greyscale: 220). I started by coding the body and gradually worked my way upward. After much thought about choosing a color that closely represents my skin tone, I decided on RGB(79, 41, 3). To keep the code organized, I grouped related features into separate blocks—such as eyes, glasses, ears, and nose. I’m especially proud of how the eyes, ears, glasses, and mouth turned out because positioning and sizing them correctly took a lot of effort and calculations. For the outfit, I settled for a grey zipper jacket, as grey happens to be my favorite color. To add more aesthetics and also to learn something new; sin curves I decided to add a frame on the top and bottom.

Challenges and Areas for Improvement

The entire process was enjoyable, but I did encounter some challenges along the way. While some issues were minor and I managed to resolve them, others were more complex, and I had to settle for alternative approaches. Some of the key challenges I faced included making curves on the edges of quads, maintaining symmetry, and working with arcs. Additionally, I was unable to implement interactivity in this project, but I hope to explore and implement it in future projects. I aim to enhance my skills in adding interactivity to make future projects more dynamic and engaging. Overall, I really enjoyed the process and look forward to creating more projects. I also appreciate how this journey allows me to continuously improve my JavaScript skills as I move forward.