
In the text I found a new meaning to the term interactive. I understood what will make a work interactive and how I can possibly apply it to my work. The author focused a lot on using feedback from the user to change the work. In other words, the work should be able to react to the user. When it comes to computers, how can we tell if computer is using our feedback to do some work or just following a set of instructions.
Category: S2026 – Mang
Week 3 – Creative Reading Response
What do you consider to be the characteristics of a strongly interactive system?
Building off of the author’s example of interactivity using a conversation (listening, thinking, and speaking), I would say for a system to be strongly interactive, the user has to intentionally cause this ‘interaction.’ I would also argue that the interaction should be something new or different to be a strong interactive system, for instance, pressing a button for the doorbell could be on the same level as the refrigerator light since it’s not a new idea. The user does it without really thinking about it. So by contrast, I would say games shown in the IM Showcase are good examples of a strongly interactive system as they usually use familiar forms of interaction for new situations, so for example, pressing a buzzer for a character to jump on the screen. I would say the characteristics of a strongly interactive system are 1) when there is some form of movement or change as a result of your action and 2) it is unique, unexpected, or different, i.e. done with intentionality. The more I think about this question, the more examples I think of from everyday life that I wonder whether they would be considered an interactive system.
What ideas do you have for improving the degree of user interaction in your p5 sketches?
For p5 sketches, the main way to impose user interaction are using the mouse and keyboard. So far, I’ve mostly used the mouse as a form of interaction to add some uniqueness to my sketches, and to kind of make the work not seem very 2d, but rather more interactive and allow the user to have some control. For this week, I also used the arrow buttons on the keyboard to add more interaction to my sketch (since it’s also a game). I hope to continue exploring more forms of user interaction that are unexpected and go beyond the scope of just the computer, maybe something to do with sound and hand movements. This would add a difference to the interactivity of my sketches as the user may be used to using the mouse and keyboard anyways.
Cosmic Mandala — Radial Symmetry Through Code
Concept
Cosmic Mandala explores radial symmetry and circular motion through generative code, drawing inspiration from 1970s psychedelic computer graphics and ancient mandala symbolism. Unlike traditional static mandalas, this piece breathes and rotates, with each layer moving independently in mesmerizing counter-rotations.
The artwork uses nested loops within loops. The outer loop cycles through 8 concentric layers, while inner loops populate each layer with 36-72 elements (lines, petals, or dots). This creates hundreds of animated elements from just a few lines of code, demonstrating the multiplicative power of loops in generative art.
The piece questions: The slowly shifting hue values and counter-rotating layers create an almost hypnotic effect, inviting viewers into a meditative space.
Code Highlight
I am particularly proud of the central spiral animation, where a single loop creates two intertwining spirals using polar coordinates and Perlin noise:
function drawCentralSpiral() {
  let numPoints = 150;
  let maxInnerRadius = maxRadius * 0.2;

  // First spiral
  beginShape();
  for (let i = 0; i < numPoints; i++) {
    let angle = i * 8 + t * 2;  // angle increases with each point + time
    let r = map(i, 0, numPoints, 0, maxInnerRadius);  // radius grows outward

    // Add organic wobble with Perlin noise
    let wobble = noise(i * 0.1, t * 0.02) * 10;
    r += wobble;

    // Convert polar to cartesian
    let x = cos(angle) * r;
    let y = sin(angle) * r;
    curveVertex(x, y);
  }
  endShape();

  // Counter-spiral (rotated 180°)
  rotate(180);
  // ... mirrors the pattern
}
This creates a dynamic yin-yang effect. The key insight: angle = i * 8 + t * 2 means each point is offset by 8 degrees, AND the entire spiral rotates via t * 2. The noise wobble prevents it from looking mechanical. One loop, 150 iterations, endless motion.
Live Sketch
Interaction: Click to pause/resume | Press 'S' to save | Press 'R' to reset animation
Reflection & Future Directions
Week 3 taught me the power of polar coordinates in generative art. While Week 2 used Cartesian grids (x, y), this piece thinks in circles (angle, radius). This shift unlocked organic, flowing patterns that feel more natural despite being equally mathematical.
The most challenging part was balancing chaos and order. Too many rotating layers made viewers dizzy; too few felt static. I settled on 8 layers with alternating rotation directions, creating visual rhythm without overwhelming motion. The counter-rotating spirals provide a focal anchor point.
Technical Insights:
- Nested loops are multiplicative: 8 layers × 36 elements = 288 animated objects from 2 simple loops
- Modulo creates patterns:
layer % 3cycles through 3 different pattern types seamlessly - HSB color mode enables smooth shifts: incrementing hue creates rainbow cycles naturally
Ideas for Future Work:
- Interactive Meditation Tool: Mouse distance from center controls rotation speed. Moving closer would slow down the animation, creating a breath-paced meditation aid
- Generative Variations: Add keyboard triggers (1-9) to switch between preset moods: calm (blues/slow), energetic (warm colors/fast), or chaotic (random colors/opposite rotations)
- Sacred Geometry: Implement golden ratio (φ) and Fibonacci sequences in radius calculations for mathematically "perfect" proportions
- Particle Systems: Replace some static elements with particles that orbit along the layers, adding another dimension of motion
- 3D Depth: Use WebGL to extrude the mandala into 3D space, creating a rotating torus or tunnel effect
- Sound Generation: Map each layer to a different musical note/frequency, turning the visual mandala into an ambient soundscape using Tone.js
- Export for Projection: Optimize for full-screen projection mapping in gallery installations or meditation spaces
Created with p5.js | February 2026
Week 3 -Object Oriented Programming Megan
Concept:
The concept of this project comes from cacho, a traditional Bolivian dice game. The game is played by putting five dice inside a small leather cup, and you try to roll combinations like a poker hand, for example House, Full, etc. This game caught my attention because all the dice are identical, so I thought I could use them as objects for this project in object-oriented programming.
click it!
Process:
For the process, I first started with a photo of the cubilete, the cup, and the dice inside to be able to draw it in p5.js. I used my iPad to make a sketch highlighting the geometric shapes I needed and how I had to rotate them at different angles. At first, I used translate to set the origin at zero, zero, but later I switched to WEBGL because the dice are 3D geometric shapes.
For the rotations, I set the canvas to use Degrees so I could control exactly how much each shape rotated. That is how I made the base drawing. Then came the dice, which was the most difficult part. I started with 2D using rect, and I wanted them to rotate, so I created a move function inside the Dice class and used rotate so that every time a dice completes a full rotation, it moves forward.
Then I realized 2D did not really give the impression of a real dice, so I switched to 3D and used box from the p5.js 3D examples. For some reason, the box was deforming, its sides would stretch or cut off, so I had to apply rectMode(CENTER), which I was already using for 2D. After trying several methods, this was the only one that kept the cubes from deforming, probably because a box is made of rectangles, and if they are centered, they do not distort.
Next, I wanted to put numbers on the dice, but that turned out to be very complicated. When I tried, the dice faces blinked and did not display properly. The solution I found was to color the different faces with various shades of white and gray to make them look more realistic. I also made sure each dice had a random starting position so they did not all start at the same place.
Another very important part of the process was setting boundaries for the dice. At first, when I got a square to move, it went off the canvas, so I looked at examples from p5.js on how to use the command constrain on balls and adapted that idea. I set random limits so each dice would stop at different places on the table, giving the scene more realism like when you through dice. A key detail was making sure the dice stop rotating once they reach their limits because when I first tried it the dices would keep going on circles once they stopped moving forward.
Full code:
let dice1;
let dice2;
let dice3;
let dice4;
let dice5;

function setup() {
  createCanvas(600, 600, WEBGL);
  colorMode(HSB);
  //Random starting points
  dice1 = new Dice(random(-50, 30), random(-200, 30));
  dice2 = new Dice(random(-50, 30), random(-200, 30));
  dice3 = new Dice(random(-50, 30), random(-200, 30));
  dice4 = new Dice(random(-50, 30), random(-200, 30));
  dice5 = new Dice(random(-50, 30), random(-200, 30));
}

function draw() {
  background("#deb887");
  angleMode(DEGREES);

//Table
  push();
  rotate(48);
  fill("black");
  rect(-320, -250, 800, 800);
  pop();

  push();
  rotate(20);
  fill("black");
  rect(-210, -310, 500, 200);
  pop();

// Cubilete
   //Outside
  fill(30, 85, 30);
  noStroke();
  quad(-193,-286, -250, -130, -100, 40, 40, -230);
  push();
  rotate(14);
  fill(30, 85, 30);
  ellipse(-253, -145, 102, 172);
  pop();
  //Inside
  push();
  rotate(19);
  fill(120, 100, 15);
  stroke(30, 85, 38);
  strokeWeight(15);
  ellipse(-50, -77, 220, 292);
  pop();

  //Dice
  dice1.move()
  dice1.show()
  dice2.move()
  dice2.show()
  dice3.move()
  dice3.show()
  dice4.move()
  dice4.show()
  dice5.move()
  dice5.show()
}

// Function to restart dice when clicking
function mousePressed(){
  dice1 = new Dice(random(-50, 30), random(-200, 30));
  dice2 = new Dice(random(-50, 30), random(-200, 30));
  dice3 = new Dice(random(-50, 30), random(-200, 30));
  dice4 = new Dice(random(-50, 30), random(-200, 30));
  dice5 = new Dice(random(-50, 30), random(-200, 30));
}
class Dice{
  constructor(_x, _y){
    this.x= _x;
    this.y= _y;

    //So that dice can rotate
    this.angle=0

    //Random limit to make dice stop going forward at a certain place in the table
    this.maxX = random(-10, 260);
    this.maxY = random(-10, 260);

    this.colors=["#FFFFFF", "#808080", "#D3D3D3", "#FFFDD0", "#F5F5F5", "#FAEBD7"]

    //To stop dice rotation
    this.stopped = false;

  }
  move(){
    //To make dice stop rotating when limit reached
    if (!this.stopped){

      //Movement forward
    this.x += 3
    this.y += 3

    //Limits for dice to not go past the table
    this.x = constrain(this.x, -10, this.maxX);
    this.y = constrain(this.y, -50, this.maxY);

    //If limit reached, stop rotation
    if (this.x >= this.maxX && this.y >= this.maxY) {
        this.stopped = true;
      }


    //To make them roll
    this.angle += 15;
    this.angle %= 360;

    }
  }

 show(){
  push();
  translate(this.x, this.y);
  rotate(this.angle);
  rectMode(CENTER);

  noFill(); // Base box color
  box(65);   // 3D dice

  // Color each face with planes
  let s = 65/2; // Half the size of the dice, used to position the planes at each face

  // Front face
  push();
  translate(0, 0, s);
  fill("#FFFFFF");
  plane(65, 65);
  pop();

  // Back face
  push();
  translate(0, 0, -s);
  rotateY(180);
  fill("#808080");
  plane(65, 65);
  pop();

  // Right face
  push();
  translate(s, 0, 0);
  rotateY(90);
  fill("#D3D3D3");
  plane(65, 65);
  pop();

  // Left face
  push();
  translate(-s, 0, 0);
  rotateY(-90);
  fill("#FFFDD0");
  plane(65, 65);
  pop();

  // Top face
  push();
  translate(0, -s, 0);
  rotateX(90);
  fill("#F5F5F5");
  plane(65, 65);
  pop();

  // Bottom face
  push();
  translate(0, s, 0);
  rotateX(-90);
  fill("#FAEBD7");
  plane(65, 65);
  pop();

  pop();
  }
}
Code I am proud of:
I am especially proud of the code I wrote to set the boundaries for the dice. As I mentioned, it was really challenging to figure out how to make the dice stop moving and rotating once they reached their limit. Also, making sure the dice did not deform while rolling was tricky, and using rectMode(CENTER) solved that problem perfectly.
//Random limit to make dice stop going forward at a certain place in the table
    this.maxX = random(-10, 260);
    this.maxY = random(-10, 260);


    //To stop dice rotation
    this.stopped = false;

  }
  move(){
    //To make dice stop rotating when limit reached
    if (!this.stopped){

      //Movement forward
    this.x += 3
    this.y += 3

    //Limits for dice to not go past the table
    this.x = constrain(this.x, -10, this.maxX);
    this.y = constrain(this.y, -50, this.maxY);

    //If limit reached, stop rotation
    if (this.x >= this.maxX && this.y >= this.maxY) {
        this.stopped = true;
      }
show(){
  push();
  translate(this.x, this.y);
  rotate(this.angle);
  rectMode(CENTER);

  noFill(); // Base box color
  box(65);   // 3D dice
Overall reflection:
The hardest part was definitely trying to put numbers on the dice, which I did not fully achieve. Maybe with more research on 3D objects, I could eventually make it exactly how I intended. But I really liked the final result, especially because it looks a lot like the cacho I play in real life. I also enjoyed working with objects because it made it easy to create multiple dice without repeating code, giving each one different positions and starting points that I could edit freely.
Overall, this project taught me a lot about working with 3D shapes and object-oriented programming. I learned that even small details, like the starting position, rotation, and boundaries, make a huge difference in making the animation feel realistic. I am happy with how I managed to combine my reference from real-life cacho, geometric thinking, and programming, and I feel more confident creating multiple interactive objects in p5.js for future projects.
Week 3: Arrays and OOP
Concept
I was inspired by candy hearts (as seen below) during Valentine’s Day, which is coming up soon. I wanted to recreate the soft colors and heart shapes of the candy hearts while adding movement and interactivity. So, my final sketch has hearts float and bounce around the screen, and when you click, it changes colors (but still within the color palette I’ve chosen).

My Final Sketch!
Code that I’m Proud of
// hearts' colors selection
getRandomColor() {
  let colorChoice = int(random(4));

  if (colorChoice == 0) {
  return color(255, 200, 220);
} else if (colorChoice == 1) {
  return color(220, 200, 255);
} else if (colorChoice == 2) {
  return color(200, 230, 255);
} else {
  return color(200, 255, 220);
  }
}

changeColor() {
  this.col = this.getRandomColor();
}
I particularly liked how I structured the changeColor() method and the color selection system. I created dedicated method that randomly picks from my chosen pastel palette and learned how conditional statements work with color from Patt Vira’s tutorial on YouTube and w3schools’ Statement Reference page. Each time you click, all hearts get new random colors from this palette.
How this was made
I used Object-Oriented Programming with a Heart class in which, each heart object has properties like position, size, color, and movement. I also used an array called hearts[] to store and manage all the heart objects. In the setup() function, I create each heart with random positions and sizes using a for loop, then push them into the array. In the draw() function, I loop through the array to call move() and display() on each heart every frame, which creates the continuous animation. The move() function makes the hearts bounce around. It updates position by adding speed values to the coordinates. When a heart hits a canvas edge, the function reverses its direction by multiplying the speed by -1 and makes it bounce back. This keeps hearts moving continuously without leaving the screen. For the heart shape itself, I used a parametric equation I found from this YouTube tutorial. The equation uses sine and cosine functions to plot the mathematical curve of a heart shape.
Reflection and Future Improvements
I learned a lot about how objects and arrays work and for these elements, I honestly found YouTube tutorials, like The Coding Train and Patt Vira, more helpful than reference pages (though I still used them as a reference for this project), especially with getting used to OOP. Next time, I’d love to learn how to add text to the objects because for my project, the candy hearts I referenced has phrases on them (as seen above) that would’ve added a nice touch and more accuracy.
Week 3: Creative Reading
The words interaction, interactive, and interactivity have been used a lot and I’ve hear those words multiple times so what really does it mean? The word ‘Interactivity’ from the Oxford dictionary means “the process of two people or things working together and influencing each other.” But I dont think I’ve thought of the word in this way. Before reading this text, I mostly used these words without really questioning them or thinking deeply about qualities does something have to be in order to be labeled as interactive. When thinking about the major interactive media, quite frequently I would ask people like professors or students what it is and it seems to be hard to explain. What is interactive media? What does it mean to interact? This made me realize that interactivity is often treated as a vague label rather than a specific defined concept. So looking at this reading and thinking of interactivity I liked how Crawford explained it. He defined interactivity as a conversation when two actors are actively listening, thinking, and speaking which shows that in order to have or make something interactive, it must be able to be present and respond through interactions from both sides. This definition stood out to me because it made ‘interactivity’ feel more intentional instead of it being seen as automatic.
One thing he mentioned was books and movies, while I first believed that movies and books are interactive, I understand now why they aren’t categorized as interactive. They are just one-way monologues, no matter how emotionally involved I feel while reading or watching them. It makes me questions everything, not just books and movies but also the smallest things like the sensory doors for example or every day materials. This made me think about how often reaction is mistaken for interaction in design and media. Overall, the reading made me more critical of how I design, plan, and execute my ideas and projects. Instead of focusing only on visuals, I will start to think more carefully about whether a system can actually listen, think, and respond in a meaningful way.
Week 3 – OOP Assignment (Magic of Light)
Concept:
For this project, I created a generative artwork inspired by the idea of light and movement from a scene found in the movie Encanto. I asked my friends to tell me their favorite Disney movies, some mentioned Tangled, Moana, but one of them said Encanto. I started searching for movie clips to get inspiration from the scenes and movements but none of the Disney movies caught my attention until I looked at Encanto. While looking through images and clips from the film, I was drawn to the candle and flame that symbolized magic and hope. Looking at the circles and light around the candle made me wonder if I could also create the same scene through code which I titled Magic of Light.
Instead of creating the same exact image, I wanted to add my personal twists to create the feeling of movement and energy by making the flames move around a lot and also adding interactivity when clicking on the canvas.
Inspo: Encanto

Embedded sketch:
How the Artwork Was Made:
I first started by creating the base of my code, which to me is the background and candle. I then started creating the arrays and class for the lights and candlelight to start focusing closely on the code and specific movements of the balls which are the flames. I used a class to define each object that is moving included lots of codes and numbers so that the balls would bounce and move left/right or up/down in an array. Each object has its own position, speed, and behavior, which allows them to move independently across the canvas.
I organized my code using functions and clear variable names (light and candlelight) to keep it structured and smooth when I press play. I also added comments in the code (this is probably the best advice I got because when my code kept messing up and not working, I was easily able to look back and understand my thought process).
Resources:
- Lecture notes from Professor Mang [
- Ball Class Example 1 – using global variables (p5editor)
- Ball Class Example 2 – using a class (p5editor)
- Ball Class Example 3 – multiple instances using a class (p5editor)
- Ball Class Example 4 – keeping track of objects using array (p5editor)
- Ball Class Example 5 – basic interactivity (p5editor)]
- Lecture slides from Professor Aya [looking at OR function I I, bounce, and the loops in Week 2&3]
- p5.js Reference: Classes and Objects [to create the candlelight name]
- The Coding Train (Dan Shiffman) [drawCandle]
- Stack Overflow [to understand the this.size to make sure every light was a random size]
Hardest Part of the Code (and the Part I’m Most Proud Of):
The hardest part of the code was figuring out how I wanted the objects to move and bounce around the canvas. I struggled at first because I didn’t fully understand how to use the array, loop, and class the same way we did in class but especially when trying to figure out how to make the balls bounce on from the edge using the reverse code.
move() {
    this.x += this.xspeed; //moves left/right
    this.y += this.yspeed; //moves up/down

    //using IF and || (OR) to make it bounce, when the ball hits the edge it is reversed by x-1
    if (this.x < 0 || this.x > width) this.xspeed *= -1;
    if (this.y < 0 || this.y > height) this.yspeed *= -1;
  }
I’m proud of this because it took me a while to fully understand what was happening instead of just copying the code. I went back to Professor Aya’s google slides and was able to follow exactly how to create the bounce but also looking at the Ball Class Example 1 helped me create the bounce. Once I understood how multiplying the speed by -1 reversed the direction, I was able to control the movement more intentionally.
Full Code:
let lights = []; //Creating my Array/list that will include all my candleLight

function setup() {
  createCanvas(400, 400);

  //Creating my loop for the balls/flames to fill the array with 150x objects (the circles)
  for (let i = 0; i < 250; i++) {
    let light = new candleLight(//candleLight is the new class I'm using for this section
      random(width), //Random x position
      random(height), //Random y position
      random(7, 13) //random size for the object
    );
    lights.push(light); } // To make the balls continue to come and move around the 'push' will push out a new object into the array
}

function draw() {
  background(0);

  // draw candle
  drawCandle();

  //The Loop through the list to update every ball of light
  for (let i = 0; i < lights.length; i++) {
    lights[i].move(); //updating position of ball
    lights[i].show(); //showing the ball
  }
}

function drawCandle() { //Creating the candle+flame
  fill("#E7BE42");
  rect(125, 200, 150, 200);

  fill("#E7BE42");
  ellipse(200, 200, 150, 50);

  fill("#FAF6D0");
  ellipse(200, 180, 20, 40);
}
//What each light will follow and be programmed as
class candleLight {
  constructor(x, y, size) {//everytime a new obkect is created
    this.x = x; //using this to give each ball its specific position
    this.y = y;
    this.size = size;

    //playing around with the speed
    this.xspeed = random(-1, 1); //left/right
    this.yspeed = random(-1, 1); //up/down

    //creating the array of 3 different color values
    let colors = ["#FFD700", "#FF8C00", "#FAF6D0"];
    this.color = random(colors);
  }

 move() {
    this.x += this.xspeed; //moves left/right
    this.y += this.yspeed; //moves up/down

    //using IF and || (OR) to make it bounce, when the ball hits the edge it is reversed by x-1
    if (this.x < 0 || this.x > width) this.xspeed *= -1;
    if (this.y < 0 || this.y > height) this.yspeed *= -1;
  }

  show() {
    noStroke();
    fill(this.color); //going back to the random colors above
    ellipse(this.x, this.y, this.size);
  }
}

function mousePressed() { //interactive aspect, when someone clicks on the sketch a new ball appears
  let newLight = new candleLight(
    mouseX,
    mouseY,
    random(5, 10)
  );
  lights.push(newLight); //add to the array
}
Problems I Ran Into:
One major issue I faced was constant errors in p5.js where the code would turn red, and I couldn’t figure out what was wrong. At one point, when I pressed play, the sketch would run but only show the black background with no objects. So I tried looking back from top to bottom and commenting again on the functions while also using // to remove the codes I assumed were causing the problem. I was the able to debug it and play it smoothly.
Final reflection:
I am proud of my final artwork because not only is this my first time writing a lot of code (lines 1–78), but I was also able to have fun with my friends throughout the process. Since we all have different majors, I usually show them what I’m learning and creating in Intro to IM. This time I asked them about their favorite movies and used that to create something that could connect us in a meaningful way.
I got my inspiration from the Disney movie Encanto and built my code around that idea. For future improvements, I want to create more realistic versions of my work because even though I’m proud of how far I’ve come and how I used the code, I know I can push myself further and make it look closer to the original inspiration.
Week 3 – Oops… cells!
Concept:
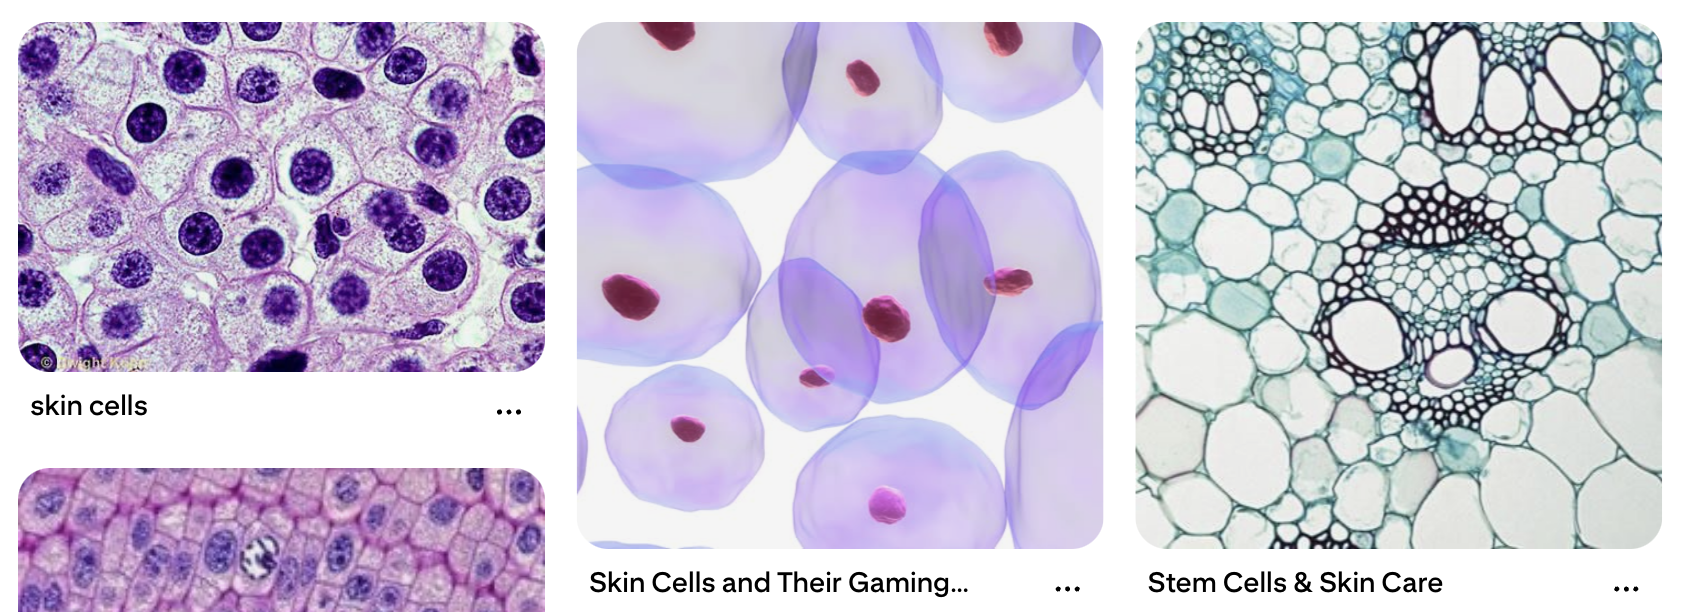
My mom is a Pathologist, and when I was younger, she was fascinated in showing me cells under a microscope from blogposts on Facebook (her feed was a very nice spectrum of plant care and medical studies). I never took biology in school (I’m more of a physics person), but I always found these images really fascinating. So, I thought I would try and recreate cells (very unrealistically) using Javascript. In middle school, when we were taught about cells, we saw cells as this blobby, almost round, jelly-looking circle with things inside of them. While I only remember a few organelles such as the mitochondria and the nucleus, I thought it would be interesting to include these when making the cells. These say skin cells but it’s the closest I can get to explaining what I have in mind:
Artwork:
(Click the screen to generate new cells!)
Process:
I experimented a lot this time, especially with the motion and shapes of the cells. I had two classes, one for the organelles and one for the cells themselves. This is the class code for the organelles:
class Organelle {
  constructor(type, relX, relY, hue) {
    this.type = type;
    this.relX = relX;
    this.relY = relY;
    this.hue = hue;
    this.angle = random(TWO_PI);
    this.spin = random(-0.02, 0.02);
  }

  display(px, py, radius) {
    push();
    translate(px, py);

    let floatX = this.relX + sin(frameCount * 0.02 + this.angle) * 5;
    let floatY = this.relY + cos(frameCount * 0.02 + this.angle) * 5;

    translate(floatX, floatY);
    rotate(frameCount * this.spin);
    noStroke();

    if (this.type === "nucleus") {
      // Hematoxylin stain: Deep purples/blues
      fill(280, 70, 40, 0.9);
      ellipse(0, 0, radius * 0.4);
      fill(280, 80, 20, 0.9);
      ellipse(0, 0, radius * 0.15);
    } else if (this.type === "mito") {
      // Eosin stain: Deeper pink
      fill(340, 60, 70, 0.8);
      ellipse(0, 0, 14, 8);
    } else if (this.type === "crystal") {
      // Hexagon shape in vibrant magenta
      fill(320, 80, 80, 0.7);
      beginShape();
      for (let a = 0; a < TWO_PI; a += PI / 3) {
        vertex(cos(a) * 8, sin(a) * 8);
      }
      endShape(CLOSE);
    } else if (this.type === "ring") {
      // Ring shape in light purple/pink
      noFill();
      stroke(300, 40, 60, 0.7);
      strokeWeight(2);
      circle(0, 0, 16);
    }
    pop();
  }
}
I used H&E staining as a reference for the color scheme to mimic cell scans. For this, there were multiple shapes I used:
- Nucleus (filled in circle at the center of the cell)
- Mitochondria (filled in ellipses)
- Rings and Hexagons for random organelles
These are then randomly generated in each cell.
This is the class code for the cells:
class Cell {
  constructor(x, y) {
    this.pos = createVector(x, y);
    this.baseRadius = random(40, 90);
    this.radius = this.baseRadius;

    // Constraint to Eosin spectrum (Pink/Magenta)
    this.hue = random(325, 350);

    this.noiseOffset = random(1000);
    this.organelles = [];
    this.pulseSpeed = random(0.01, 0.03);
    this.rotation = random(TWO_PI);
    this.spin = random(-0.002, 0.002);

    this.organelles.push(new Organelle("nucleus", 0, 0, this.hue));

    let count = floor(random(3, 8));
    let types = ["mito", "crystal", "ring"];
    for (let i = 0; i < count; i++) {
      let angle = random(TWO_PI);
      let dist = random(this.baseRadius * 0.2, this.baseRadius * 0.7);
      let rx = cos(angle) * dist;
      let ry = sin(angle) * dist;
      this.organelles.push(new Organelle(random(types), rx, ry, this.hue));
    }
  }

  move() {
    this.pos.x += map(noise(this.noiseOffset), 0, 1, -0.8, 0.8);
    this.pos.y += map(noise(this.noiseOffset + 100), 0, 1, -0.8, 0.8);
    this.noiseOffset += 0.005;
    this.rotation += this.spin;

    // Breathing pulse
    this.radius = this.baseRadius + sin(frameCount * this.pulseSpeed) * this.baseRadius * 0.1;

    // Screen Wrap
    if (this.pos.x > width + this.radius) this.pos.x = -this.radius;
    if (this.pos.x < -this.radius) this.pos.x = width + this.radius;
    if (this.pos.y > height + this.radius) this.pos.y = -this.radius;
    if (this.pos.y < -this.radius) this.pos.y = height + this.radius;
  }

  display() {
    push();
    translate(this.pos.x, this.pos.y);
    rotate(this.rotation);

    // Soft Eosin cytoplasm layers
    for (let layer = 1.2; layer > 0.8; layer -= 0.1) {
      noStroke();
      fill(this.hue, 30, 95, 0.15);
      beginShape();
      for (let a = 0; a < TWO_PI; a += 0.1) {
        let xoff = map(cos(a), -1, 1, 0, 1.5);
        let yoff = map(sin(a), -1, 1, 0, 1.5);
        let offset = map(noise(xoff, yoff, frameCount * 0.01), 0, 1, -10, 10);
        let r = (this.radius + offset) * layer;
        vertex(cos(a) * r, sin(a) * r);
      }
      endShape(CLOSE);
    }

    // Main Cell Membrane Outline
    noFill();
    stroke(this.hue, 50, 70, 0.6);
    strokeWeight(2);
    beginShape();
    for (let a = 0; a < TWO_PI; a += 0.1) {
      let xoff = map(cos(a), -1, 1, 0, 1.5);
      let yoff = map(sin(a), -1, 1, 0, 1.5);
      let offset = map(noise(xoff, yoff, frameCount * 0.01), 0, 1, -10, 10);
      let r = this.radius + offset;
      vertex(cos(a) * r, sin(a) * r);
    }
    endShape(CLOSE);
    pop();

    for (let o of this.organelles) {
      o.display(this.pos.x, this.pos.y, this.radius);
    }
  }
}
For the cells to breathe, move and change shape, I used Perlin Noise and sin() functions. I also included screen wrapping to make sure no cell would wander off screen. This part was difficult for me, so I did get some help from my friends. Making the constantly changing shape and boundary of the cell was also especially difficult for me but I’m glad it turned out the way it did.
Reflection:
I liked working with classes! It makes it much more organized (I think… as of now…) and I’m able to separate parts. It was definitely hard though, because I’m primarily a Python user so this threw me off, but it was a good challenge. I want to try and create more projects using OOP now, and try to link more of my interests to making projects like this. I did ask ask my mom for help with the colors and stains, so hopefully she approves of this! I want to experiment more with cell lifespans and cell shapes, maybe set a certain amount of time before a cell “dies” and disappears or set a condition to generate new cells every once in a while too.
Week 3 – Reading Response | THE ART OF INTERACTIVE DESIGN (Chris Crawford)
As a designer, there’s one phrase I find really funny that people ask me: “Can you make it more interactive?” This confuses me immensely. Do you want me to make it “pop” out more? More interactions on your social media posts? Are you expecting something else but you can’t think of the exact word to sum all your thoughts up so instead you tell me to make it more interactive? What do you mean? Thus, I 100% agree with all, if not most, statements that Chris Crawford makes in this reading. Interactivity is “overused and underunderstood.” Just like any other concept (think common internet words and phrases today like “hyperfixation” or “gaslight / gatekeep / girlboss”), interactivity is also one of those words that we didn’t originally know the importance of when it first came out, but now that we live in such a technologically advanced (and advancing) world, we see that word everywhere. And, if you asked someone to define what exactly interactivity is… well. You won’t receive the same definition twice.
I liked how he brought up the example of people using interactivity as a way to make things sound interesting. Interactive screen! Interactive book. Interactive art. Interactive clothes. Shoes. You see them in adverts all the time now. Interactive exhibitions. Interactive events. Washing machines with interactive interfaces. Are we using this term correctly? What is the actual definition of interactivity? When thinking of defining interactivity, he states, “the joy of thinking comes from all of those fascinating nooks and crannies that lurk in nuance.” Could this not also be applied to defining art? There are so many flexibilities in defining what art exactly is, because we all have such varying definitions of what we determine is art or not. So, anything can be considered interactive, because everyone interacts with things differently… right?
I also found his definition interesting, interaction as “a cyclic process in which two actors alternately listen, think and speak.” In Understanding Interactive Media, we discussed interactivity as feedback loops. I, the artist, act a certain way. My audience acts a certain way in response. Then, to their response, I change the way I act too. Even when artists study art, they create an artwork, they see how others react to it and act accordingly, some responses being an art teacher calling their work trash, or a person on the internet sending a comment of how much they like their artstyle. The Gomer and Fredegund example is similar to this. I also never really considered interaction existing in degrees, which surprised me. I liked the comparison of degrees of interaction to having two different conversations where you talk in one and the other person barely responds to you, and another conversation where you both flow really well. They both are interactive! They’re just different degrees of interactions.
In a strongly interactive system, I think the degree of interaction should be very high – there should be a very prominent feedback loop. For example, if an artwork starts off as the color green, and I don’t like that and I say I don’t like this color, it changes to orange. And, I can tell it again, and it can change if it can. However, even with this example, the artwork follows my instructions and doesn’t adapt. It is simply following my instructions and not actually responding. The system should be able to respond to the audience’s conversation. Regarding what ideas I have for improving the degree of user interaction in my P5 sketches, I think I’m yet to figure this out. I do feel like when I create a design, I don’t think too much about interaction and visuals separately. I unintentionally put them together and work with them together, because a good design should have both working collaboratively, not side by side. I’ll probably be more intentional when I design now, though.
Week 3 – OOP Generative Art
Concept
Once again, I was searching for inspiration in tech-aesthetic. I came across this photo on Pinterest, when the idea for my work sparked in my head:
I thoug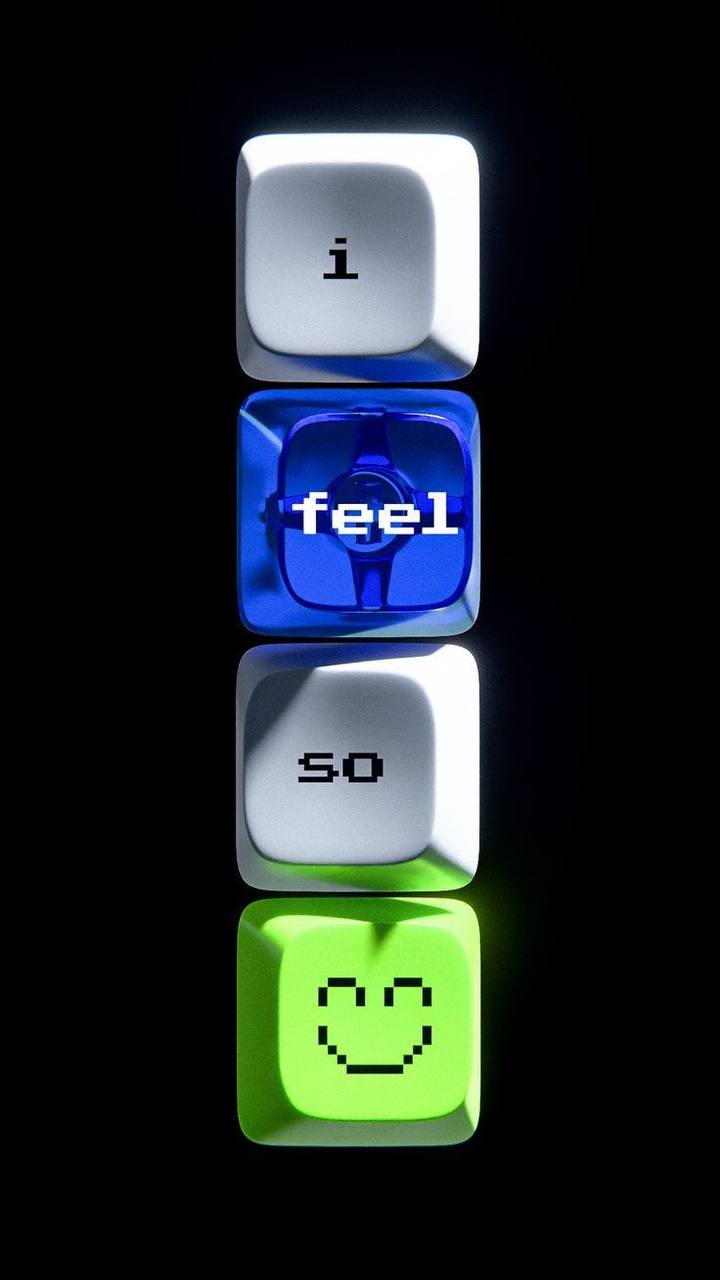 ht that it would be nice to create something that looks like keyboard but is less predictable (and less functional, apparently). Therefore, I created a small piece where keyboard tiles of random color appear all over the screen and stay for random time between 1 and 4 seconds, and, if being clicked, display a random emoji face from the list I provided.
Highlight code
Due to the lack of time, my code is pretty simple this time, but the part of implementing color scheme into the piece is something I struggled with for some time.
class Tile {
  constructor(x, y, size) {
    this.keyHue = random(0, 360);
    ...
  draw_tile() {
      ...

      // Lower tile
      fill(this.keyHue, 90, 80);
      square(this.x, this.y, this.keySize, this.cornerRadius);

      // Upper tile
      let innerSize = this.keySize * 0.8;
      let offset = (this.keySize - innerSize) / 2;

      fill(this.keyHue, 60, 100);
      square(this.x + offset, this.y + offset - 3, innerSize, 8);
I switched to colorMode(HSB) which decodes as Hue, Saturation, Brightness. Basically, the computer randomly chooses only hue, and saturation and brightness settings persist in all tiles. This way, the lightness and the intensity of the color pigment stays the same, but the actual color changes depending on the value the computer chose. It made all the tiles look the same stylistically while being different color.
Overall, for this piece I created one class for each Tile, which had methods for activating it based on timer and then resetting it; checking if the mouse is in borders when it’s clicked, so it can display a random title; drawing the tile itself. I used for loops, and some built-in p5.js functions like mouseClicked() in this sketch. I also preloaded a pixel-like font from Google Fonts for text to match with the overall aesthetic.
Reflection
I find the way the sketch looks to be very colorful and have some tetris vibe, which I really like. I didn’t really have much time for this piece, otherwise I would like to come up with a unified color scheme to create something less colorful but more of one style.
Also, after the reading for today, I thought that it might be great to implement various ways of interaction. For instance, having a text line which will display the user’s entry and give some response to it, like emoji-reactions or some simple replies like “Yay!” and “Oh no”. I think this way the piece would turn out to be much more fun and way more interactive.