Assignment 1: Self Portrait

Concept

For this project, I wanted to create more than just a static self-portrait. My concept was to build a “digital puppet”. A TV show host personality that lives inside the browser.
The goal was to achieve a level of “aliveness” using generative motion (breathing, blinking, head bobbing) and interactivity.

I wanted the character to react to the user’s cursor, shifting from professional composure to excitement depending on how the viewer interacts with the canvas.

I am particularly proud of the interactive expression system. Here is the logic that detects where the mouse is and calculates the “target” emotions, blending them smoothly over time:


// === INTERACTIVE EXPRESSIONS BASED ON MOUSE POSITION ===

// Define interaction zones
let mouseInSmileZone = mouseY > height * 0.6 && mouseY < height * 0.85; 

// SMILE: If mouse is in the lower portion, target a big smile
if (mouseInSmileZone) {
  targetSmile = map(mouseY, height * 0.6, height * 0.85, 0.3, 1.0);
  targetEyebrowRaise = 0.3; // Slight eyebrow raise when smiling
} else {
  targetSmile = 0.1; // Return to subtle default smile
  targetEyebrowRaise = 0;
}

// Smooth transitions to make it feel natural
smileAmount = lerp(smileAmount, targetSmile, 0.1);
eyebrowRaise = lerp(eyebrowRaise, targetEyebrowRaise, 0.1);


This code allows the smile to grow gradually as the mouse moves lower, and pulls the eyelids into a “happy squint” simultaneously, making the reaction feel genuine rather than robotic.

Reflection and Future Improvements

This process taught me how much detail goes into simulating “life.” A simple sine wave can simulate breathing, and a random timer can simulate blinking, but combining them is what creates the illusion of a living character. One significant challenge was the hand, getting the fingers to look anatomical while being drawn with code.

For future improvements, I would like to add Audio Reactivity. Perhaps connect the mouth movement to the microphone so the character can “lip sync” to my voice.


Week 1 – Self-Portrait

My Concept:
For my first project in Intro to IM, I decided to create a representation of myself using only 2D shapes in p5.js for my self-portrait. My goal was to use simple shapes to create the representation using the elements and colors for the face details, hijab/shailah, and abaya. Initially, I wanted to create a yellow bird or a kitten, but when I started writing the code for the face structure, I wanted to create something comparable to myself while challenging my skills. I then changed the shapes and sizes to fit the way I want to portray myself on this canvas. When frustrated or confused, I usually frown without noticing and my cheeks get really hot and red, which is why I wanted to capture myself in this specific emotional state.

How this was made:
Resources: In the second IM class, Professor Mang went through p5.js which I found extremely helpful because I was able to navigate the platform better. I started experimenting with the codes and different forms of digital art I could make. Unfortunately, I had some work that wasn’t saved, so I couldn’t go back to review it. I also found the technical readings link 1 link 2 helpful, throughout my process, I was going back and forth to create the lines or shapes.

I started this sketch by creating the background and then the face shape and hijab. I used basic 2D primitives like lines, ellipse, and arc for my face details. I began with a large black ellipse for my shailah in the background and my face. At first, my head looked like an exact circle but after adjusting the values a couple of times, I was able to change it slightly to a more oval shape that felt more natural. I then worked on the details of my face like my eyes, pupils, nose, mouth, and cheeks. While I found it confusing at first to figure out the math, I searched for a 400×400 graph to help with the placement which made the process easier for me because I had many trials figuring out the size, shape, and position of the eyes and nose for example.

I learned how to create the smile using the arc() function. Even though I experimented with different types of shapes and lines for the mouth, I wasn’t satisfied with the results, so I stuck with this one. I used the arc() with PI, which draws part of a circle and allowed me to create a subtle smile.

I also learned about the stroke() and noStroke() commands which I was proud of. When using stroke () it controls the outline of a shape, so when adding noStroke() it completely removes the outline. I used this for the cheeks to create a softer and more natural look. When I put the noStroke () command, all the shapes lost their outlines, so I decided to move the cheek commands to the bottom but it was still removing all the outlines from all the other shapes. This is when I realized that I must include the stroke() command for the shapes I want to keep the outline, in this case it was the eyes.

Embedded sketch:

function setup() {
  createCanvas(400, 400);
}
   function draw() {
   //update background color to pink
   background(200, 150, 200);
  
   //my scarf- shailah in black
   fill("black");
   ellipse(200,200,240,270); //x,y: center 250,250: width,height
   fill("white");
   fill("black");
   ellipse(200,250,100,350);
  
   //my abaya
   fill("black");
   ellipse(200,400,350,145);
     
   //my face, the base
   fill("#E5C9A0");
   ellipse(200,200,190,230); //putting it in the middle: x,y,w,h
     
   //my eyes 
   stroke(0);
   fill("white");
   ellipse (160,180,40,30); //left eye
   ellipse (240,180,40,30); //right eye
   //my pupils
   fill("black");
   ellipse (160,180,18,18); //left
   ellipse (240,180,18,18); //right
     
   //eyebrows
   stroke(0);
   fill("black");
   line(140,155,180,150); //left
   line(220,150,260,155); //right

   //my nose
   stroke(0);
   line(200,235,195,235); //long line
   line(200,199,210,235); //short line
   
   //mouth
   noFill();
   stroke(0);
   arc(200,260,60,30,0,PI); //x,y,w,h,startAngle0: start of curve,endAngle PI: half circle-end of curve
     
   //cheeks
   noStroke();
   fill("rgb(197,122,135)");
   ellipse(160,220,30,15); //left
   ellipse(250,220,30,15); //right
     
}


The code I’m proud of:

<//my nose
stroke(0);
line(200,235,195,235); //long line
line(200,199,210,235); //short line>

I know that it’s simple, but for some reason I spent a long time trying to figure out how to create the nose. At first, I created a triangle with 2 lines like this /\ but this wasn’t the nose I was looking for, so I decided to create the nose I normally see in simple illustrations and cartoons using one long and one short line. I had trouble finding the right coordinates because sometimes the line would reach the top of the canvas board and then it would disappear and then it would be short. This challenge led me to use a 400×400 grid again to help me understand the positioning better.

Reflection:

I enjoyed doing this mini project. At first, I was procrastinating and stressing all weekend about how I would use code to create a self-portrait, but the process turned out to be much more manageable than I expected. I am proud with how the final piece turned out. In the future, I would love to add motion or interactivity like making the eyes follow the mouse or the facial expressions change when the mouse is clicked. As I learn and become more confident with coding, I would like to revisit this project and create a more advanced version to reflect my growth in the course.

Week 1 – Self Portrait by Megan Del Villar

Concept

I wanted to create a self portrait that genuinely reflects who I am. I love the color green, and for some reason sticking my tongue out has become a small habit of mine whenever I do not know what to say or when I am in an awkward situation. It works as my personal ice breaker. On top of that, I had never animated anything before and had never programmed in JavaScript. Because of this, I decided to challenge myself by animating the tongue in my self portrait.

Click on it!

Implementation

For the self portrait overall, I used basic geometric shapes such as ellipses and circles, mainly working with the stroke of ellipses. For the bangs and the eyelids, I was inspired by this self portrait example by fenfenrita that I found on p5.js. From that example, I learned that you can use only the stroke of an ellipse to create curved lines and that by adjusting the numerical values you can control how stretched or flattened the stroke looks. I experimented extensively with this technique for the eyelids and later applied it to the eyebrows, nose, and mouth.

For the bangs, that same example, combined with experimenting with PI, TWO_PI, and HALF_PI, helped me understand how ellipses and circles can be partially filled using angles. I adapted a similar code structure and adjusted the size, position, and colors to match my own portrait.

Since I have a background in graphic design, I am used to working with HSB color mode, so I changed the color mode at the beginning to keep the entire portrait consistent. For more specific colors, I searched for their hex codes online and used them directly. The rest of the code was taken from the p5.js library. For the animation, I used the mousePressed function and created a tongueOut function so that the tongue only appears when the self portrait is clicked.

Code I Am Proud Of

// Tongue animation
let tongueOut = false;

// Tongue out or in when clicked
if (tongueOut) {
  fill("#C76A6A");
  noStroke();
  arc(305, 372, 40, 55, 0, PI);
}

//Tounge animation
function mousePressed() {
  tongueOut = !tongueOut;

I am especially proud of how I managed to make the tongue animation work, because deciding how to implement it took a lot of trial and error. At first, I wanted the tongue to move along the x axis of the mouse as it moved across the screen. However, this required setting limits, otherwise the tongue would move outside the mouth area and even beyond the canvas. When I finally achieved this, I did not like the result because the movement was not very noticeable unless the mouse moved a lot.

After experimenting more, I explored other mouse related functions and realized that using mousePressed would allow the tongue to appear and disappear completely. This interaction felt much cleaner and more intentional, so I decided to implement it this way.

Reflection

Overall, I really enjoyed this project and learned a lot, especially considering it was my first time using a program like this and my first time discovering that it is possible to draw using code. I understood everything I was doing, and the more I played with numerical values and visual elements, the more connected I felt to my own drawing. For a future project, I would like to challenge myself even more by creating animation without using the mouse and by experimenting with different types of shapes.

Week 1: Self-portrait

Concept

I decided to create myself as a pink crab on the beach. Instead of a traditional self-portrait, I wanted to make something that represents me through the things I like: the crab is my favorite animal, pink is my favorite color, and I like going to the beach! The beach is also a nod to my home country, The Philippines, which is known for having beautiful beaches.

My Final Portrait!

Code that I’m Proud Of

// claws
fill(227, 115, 131);
let biteSize = PI / 16;
let startAngle = biteSize * sin(frameCount * 0.1) + biteSize;
let endAngle = TWO_PI - startAngle;

// left claw
push();
translate(width / 2 - 60, height / 2 - 50);
rotate(radians(330));
arc(0, 0, 45, 45, startAngle, endAngle, PIE);
pop();

// right claw
push();
translate(width / 2 + 60, height / 2 - 50);
rotate(radians(210));
arc(0, 0, 45, 45, startAngle, endAngle, PIE);
pop();

This is the code I’m particularly proud of. I wanted my crab to have the motion of snapping its claws. So, I went on the p5.js reference page to look for something that would help with that. I found a coding reference for a Pac-Man style animation on the arc() section and decided to use that but I had to double and shift it to my liking and what’s fitting for my crab.

How this was made

For the background, I wanted to split the sky and the sand so I used rectangles and to slip them evenly, I just set the size to divide by the height accordingly. To add more of a “beach-y” feel, I added sun (using ellipse), clouds (using ellipse as well), and a beach umbrella (using rectangle and arc). For my crab, I split the body into two arcs because I wanted it to have different colors. For the face, I used two identical black ellipses and for the mouth, I used arc. Now for the legs (the part I spent quite a bit of time on), I used rectangles and had to manually shift each of them accordingly and because of that, some parts appear to be a bit uneven. Throughout the code, I learned to use  PI to control how arcs are drawn, since p5.js uses radians, and it allowed me to create half-circle for the body, smile, and claws. I also used push() and pop() to isolate translate() and rotate() so each part could be shifted independently without affecting the rest of the sketch.

Reflection and Future Improvements

I learned a lot useful coding skills from making this assignment and the p5.js reference page was a huge help. I feel more comfortable with p5.js and navigating myself on the reference page. With more practice, I’d like to learn more animations like clouds drifting or my crab moving sideways, and if there are ways to duplicate or mirror a function (concerning my crab’s legs) to save more time and make sure everything is perfectly even.

Assignment 1 – Kamila

link

function setup() {
  rectMode(CENTER);
  angleMode(DEGREES);

  createCanvas(600, 700);
}

function draw() {
  background(255);

  //   hair
  fill(61, 13, 6);
  rect(300, 400, 600, 800, 200);

  //   neck
  noStroke();
  fill(209, 166, 146);
  rect(300, 500, 200, 200);

  //   head
  stroke(33, 6, 4);
  strokeWeight(3);
  fill(209, 166, 146);
  ellipse(300, 300, 360, 450);

  //  nose
  noStroke();
  fill(219, 199, 186, 87);
  triangle(350, 360, 300, 270, 250, 360);

  //   eyes
  noStroke();

  fill(254);
  ellipse(220, 240, 90, 70);

  fill(254);
  ellipse(370, 240, 90, 70);

  fill(97, 48, 16);
  ellipse(220, 230, 35, 40);

  fill(97, 48, 16);
  ellipse(370, 230, 35, 40);

  //   ears

    noFill();
    stroke(209, 166, 146);
    strokeWeight(12);
    arc(120, 300, 70, 80, 30, 14, CHORD);

    stroke(209, 166, 146);
    strokeWeight(12);
    arc(480, 300, 70, 80, 30, 14, CHORD);

  // airpods

  fill(5, 0, 0);
  rect(100, 300, 100, 170, 20);

  fill(5, 0, 0);
  rect(500, 300, 100, 170, 20);

  fill(145, 17, 173);
  rect(100, 200, 60, 200, 5, 5, 100, 100);

  fill(145, 17, 173);
  rect(500, 200, 60, 200, 5, 5, 100, 100);

  fill(145, 17, 173);
  stroke(145, 17, 173);
  strokeWeight(50);
  curve(73, 120, 500, 120, 274, 1, 50, 50, 50, 100, 10, 100);
  fill(145, 17, 173);
  stroke(145, 17, 173);
  strokeWeight(50);
  curve(10, 120, 96, 106, 274, 1, 50, 50, 50, 100, 10, 100);

  //  lips
  noStroke();

  stroke(130, 12, 12);
  strokeWeight(7);
  fill(145, 39, 39);
  arc(305, 410, 150, 100, 0, 180, CHORD);

  //   brows
  noStroke();
  fill(64, 17, 14);
  rect(215, 180, 80, 10, 50);

  fill(64, 17, 14);
  rect(365, 180, 80, 10, 50);
}

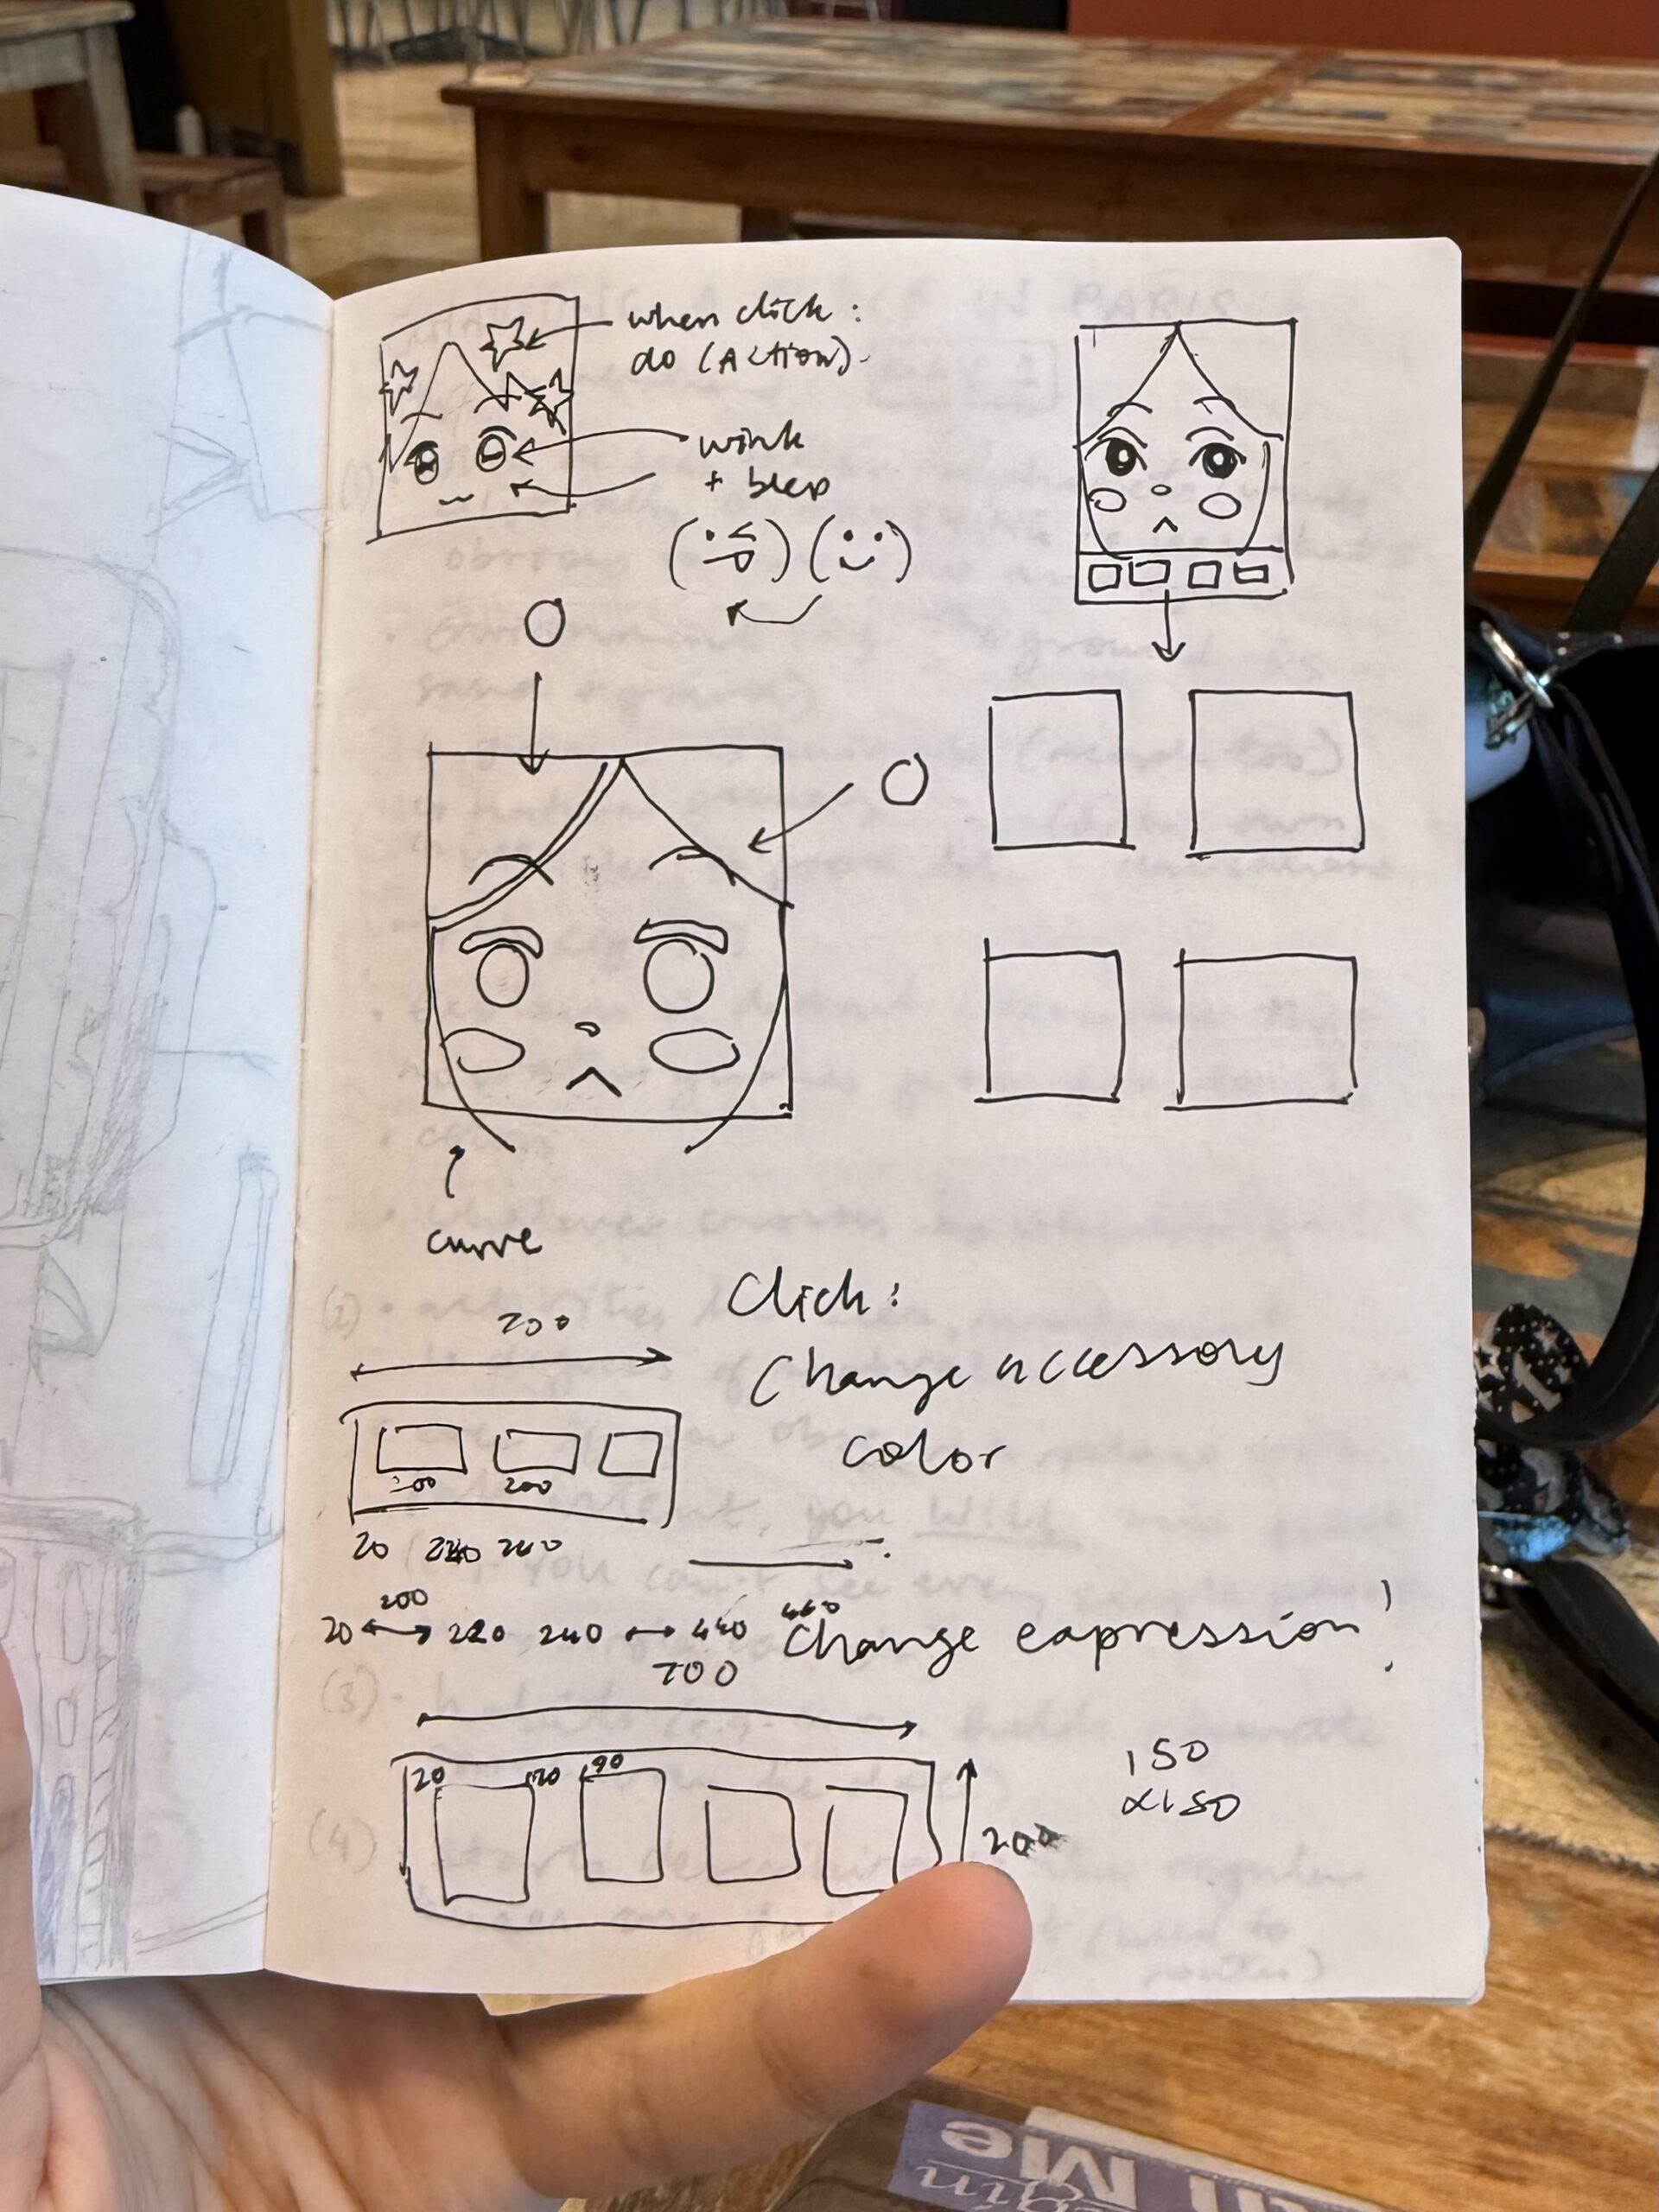
For this project, I created a self-portrait of mine.  My goal was to use only basic shapes (rectangles, ellipses, triangles, and arcs) to represent my facial features and a few signature details: my hair, bold lipstick, and big headphones.

The part I’m most proud of is the headphone area. I used rectangles for the ear pieces and thick curves for the band to suggest a 3D shape using only 2D primitives:

// airpods fill(5, 0, 0); rect(100, 300, 100, 170, 20); fill(5, 0, 0); rect(500, 300, 100, 170, 20); fill(145, 17, 173); rect(100, 200, 60, 200, 5, 5, 100, 100); fill(145, 17, 173); rect(500, 200, 60, 200, 5, 5, 100, 100); fill(145, 17, 173); stroke(145, 17, 173); strokeWeight(50); curve(73, 120, 500, 120, 274, 1, 50, 50, 50, 100, 10, 100); fill(145, 17, 173); stroke(145, 17, 173); strokeWeight(50); curve(10, 120, 96, 106, 274, 1, 50, 50, 50, 100, 10, 100); The reason I chose this specific chunk of code is because it turned out to be exactly the way I wanted it to look like. The rectangles stack together to feel like ear cups and stems. The thickcurve()lines work as the headband, wrapping over the hair. Reusing the same purple color for all the headphone parts makes it look like one connected object even though it’s made of separate shapes.

I started by setting up the canvas and using rectMode(CENTER) so positioning the neck and hair was easier. I built the face using an ellipse for the head and a rectangle for the neck. I added features (eyes, nose, lips, brows) with ellipses, a triangle, an arc, and rectangles. The hair is a large rounded rectangle in the background. For the AirPods, I experimented with curve() and thick strokeWeight to make a band that feels like it wraps over the head. I didn’t use any image files, textures, or external assets, just p5.js drawing functions.

Breaking everything down into simple shapes helped me understand coordinate systems and layering in p5.js. Also, using consistent color palettes made the portrait feel more cohesive. I would make the sketch more interactive next time. For example: eyes following the mouse, or changing lip color with a key press.

Week 1 – Self-Portrait

Concept:

Lately, on my TikTok feed, I keep seeing these square profile pictures which look really cute. I tried to generate my own version of it online, but then the website required me to use Flash… which I do not have. Oops. So, when I was coming up for an idea for my self-portrait during lab on Thursday last week, I thought I could probably just make this by myself, right?

I wanted to make three different versions of the profile picture: one that (somewhat) resembled me normally, one that resembled me when I am tired (me 70% of the time) and one that was fun and colorful. I would use the same base code, so that I wouldn’t need to make completely different faces, but would change some aspects so that the faces would still have some clear changes (e.g. closed vs. open eyes, different color schemes, accessories etc.).

To switch between the three different faces, I would make buttons at the bottom of a screen as a panel. I wanted to make each face more interactive, but I was worried that it would interfere with the faces and the buttons programming, so I’ll work on it once I learn the language better.

Process:

Firstly, before actually deciding on the panels and buttons, I had to figure out how I was even going to code the face. I started with the hair as the background color, making a long ellipse for the face and then adding circles for the bangs. After, I created the eyebrows and eyelids with even more ellipses (I think I may have abused the ellipse() tool…), and the eyes on top (for layering purposes). I used the ellipse with noFill() to create the glasses, and then to make the mouth, I used triangles. Most of the face was just trying and testing out shapes and coordinates, which took me around two hours. However, once I figured out the first face, it didn’t take me that long (only an hour or so) to edit and modify the other faces.

To make it easier, I also coded a line to make sure I could navigate the coordinate system better rather than trial and error-ing again and again.

For the third face, I used this code for the star hair clip. I struggled quite a bit, but I asked one of my friends for help, and we came up with this:

function star(x, y, radius1, radius2, npoints) {
  let angle = TWO_PI / npoints;
  let halfAngle = angle / 2.0;
  beginShape();
  for (let a = 0; a < TWO_PI; a += angle) {
    let sx = x + cos(a) * radius2;
    let sy = y + sin(a) * radius2;
    vertex(sx, sy);
    sx = x + cos(a + halfAngle) * radius1;
    sy = y + sin(a + halfAngle) * radius1;
    vertex(sx, sy);
  }
  endShape(CLOSE);
}
    strokeWeight(3);
    fill(255, 247, 161);
    star(200, 220, 70, 150, 5);

After, I had to create the buttons. I created a new file (so I could just copy and paste the face codes into the file after I programmed the buttons), and I used this as the code:

let currentScene = 1;

let btnSize1 = 200;
let btnSize2 = 150;
let btn1X = 20,btn1Y = 725;
let btn2X = 240,btn2Y = 725;
let btn3X = 460,btn3Y = 725;

 function setup() {
  createCanvas(700,900);
 }
  
 function draw() {
  background(220);
  
//state
  
  if (currentScene === 1){
    drawImage1();
  } else if (currentScene === 2){
    drawImage2();
  } else if (currentScene === 3){
    drawImage3();
  }
   
// panel
   
  fill(251,251,251);
   noStroke();
  //x y w h
  rect(0, 700, 700, 200); 

// buttons
   
   //1
  fill(217, 93, 83); 
  rect(btn1X, btn1Y, btnSize1, btnSize2);
  fill(0);
   
   //2 
  fill(161, 126, 140); 
  rect(btn2X, btn2Y, btnSize1, btnSize2);
  fill(0); 
   
   //3
  fill(66, 164, 255); 
  rect(btn3X, btn3Y, btnSize1, btnSize2);
  fill(255);

 } 
  function mousePressed(){
    
  //button 1
    
  if (mouseX > btn1X && mouseX < btn1X + btnSize1 && mouseY > btn1Y && mouseY < btn1Y + btnSize2) {
    currentScene = 1;
  }
    
  //button 2
    
    if (mouseX > btn2X && mouseX < btn2X + btnSize1 && mouseY > btn2Y && mouseY < btn2Y + btnSize2) {
    currentScene = 2;
  }
    
  //button 3
    
    if (mouseX > btn3X && mouseX < btn3X + btnSize1 && mouseY > btn3Y && mouseY < btn3Y + btnSize2) {
    currentScene = 3;
  }
    
}
   
function drawImage1(){
  // code for first expression;
  
}

function drawImage2(){

// code for second expression;

}
   
function drawImage3(){
 
// code for third expression;

}

   
note: I realized I put the wrong coordinates for the buttons, so now there's more space on the right than the left. I'll fix it soon.
note2: I used the resources from p5.js tutorials, references and examples for most of the code.
Reflection and Possible Improvements:

I had been pushing this off for a while because I was scared it would take too long and I would not be able to create something I would be satisfied with. However, I think this turned out better than I expected! I’m happy with the button interaction and the facial expressions.

I really do want to work with adding more interactivity in the future and maybe also coding an animation (such as spinning the star and flower hair clips in the ‘happy’ expression or waking my picture up for the ‘tired’ expression). I would really like to experiment with adding more features once I become more confident with loops and putting commands within commands, since the many lines of code for each face threw me off and made it hard for me to navigate where one command started and ended. (Oops.)

Week 1 Post Zere

  • My concept of the self-portrait assignment is me as a bird. I have seen a lot of videos online with cute birds lately, so this is the first thing that came into my mind. The bird is eyeing the worm, which is a pink oval moving together with the mouse.
  • function setup() {
      createCanvas(400, 400);
    }
    
    function draw() {
      background(204,255,255);
      
    
      fill(102, 255, 255)
     circle(130,280,100);
      
        fill(102, 255, 255)
     circle(270,280,100);
      
      
      circle(180,210,50);
      fill(102,255,255)
      circle(200,320,200);
       fill(102,255,255)
      circle(200,200,150);
      fill (255,204,255);
       fill(255)
      circle(170,190,20);
    fill(255)
      circle(225,190,20);
      ;
      fill (250,250,0)
     triangle(200,190,200,210,230,200)
    
      
      let moveX=constrain((mouseX - width / 2), -4, 4);
      let moveY = constrain((mouseY - height / 2), -4, 4);
      // pupils
    fill(0);
    
    // left pupil
    circle(170 + moveX, 194 + moveY, 10);
    
    // right pupil
    circle(225 + moveX, 194 + moveY, 10);
      
      
      textSize(32);         
      fill(0);               
      text("I am a bird!", 100, 100);
      
       fill(255,255,255)
     circle(200,350,130);
      
      //worm
        fill(255,204,229)
     ellipse(mouseX, mouseY,80,40);
    
    }
  • A code that I am proud of is the one that makes the bird’s pupils move alongside the “worm”. I had to look up how to constrain the pupils within the eyes so they would not move all around the canvas:
  • let moveX=constrain((mouseX – width / 2), -4, 4);
    let moveY = constrain((mouseY – height / 2), -4, 4);
    // pupils
    fill(0);// left pupil
    circle(170 + moveX, 194 + moveY, 10);// right pupil
    circle(225 + moveX, 194 + moveY, 10);
  • Embedded sketch:
  • Link to sketch
  • “How this was made”: I have created the body of the bird using simple circles. The face of the bird was also created using simple shapes – eyes and pupils are circles, while the beak is a triangle. At first, I had forgotten math, so I had a hard time understanding the coordinates of the triangle, but I figured it out after asking the Professor. We have learned the mouseX,mouseY function in class, so I had the idea to make some sort of an interactive object in the sketch. I decided for it to be a worm since birds like to eat worms. Only the worm moving felt a bit strange, so I decided to make the bird’s pupils move as well. I looked up the constrain function in the Reference page, but had a hard time understanding it, so I used AI to break it down. After I figured it out, I had the bird’s pupils moving.
  • Reflection and ideas for future work or improvements: Use something more complicated than 2D shaped to draw, focus on breaking down the functionality of the code first to fully grasp what each part of the function is responsible for.

Week1-self potrait

Concept:

For this self-portrait assignment, I drew Anpanman, one of my favorite cartoon characters from childhood. Many of my friends say I look like him, so I chose him as a playful version of my self-portrait. I also admire his optimistic, outgoing personality, and I want to reflect that feeling in my work. My goal for this assignment was to learn how to use p5.js, since I had never used it before. Through drawing with code, I practiced working with coordinates and basic programming logic, and I learned how to build an image step by step using simple shapes. Since my birthday is coming up, I also designed this piece as a small birthday gift card for myself.

How this was made:

I created this image using p5.js. I started by drawing Anpanman’s face. For the face color, I asked ChatGPT to help me find the exact color values, and I used the p5.js reference to learn how to make the shape and remove the stroke. Next, I drew the nose and cheeks. Since they are also circles, that part was fairly straightforward. After that, the eyebrows were the hardest part. Even after checking the reference image, I was still confused about how to code the correct shape. I asked ChatGPT for help, but the code it suggested was too complicated for me to understand. So I went back to the p5.js reference and experimented on my own. After about 15 minutes of trial and error, I finally got the eyebrow shape I wanted. For the mouth, I followed the reference image for the shape, but I asked ChatGPT for help with the mouth color because I tried several times and still couldn’t match the shade I wanted. For the remaining details—highlights, clothing, and buttons—I mainly relied on the p5.js reference and built them using simple shapes.

The part I’m proud of:

The part I’m most proud of is the eyebrows. They weren’t a simple shape, and using arcs was harder than I expected. I had to manage a lot of details—especially the angle and the coordinates—and I kept getting confused about where everything should go. After many tries and small adjustments, I finally found the right position, curve, and angle that looked correct and made me feel satisfied.

//left eye brow
 noFill();
stroke(20);
strokeWeight(3);
arc(117, 135, 50, 65, PI, TWO_PI);

//right eye brow
arc(183,135,50,65,PI,TWO_PI);
Reflection and ideas for future work or improvements:

I think I could improve this project by adding more detail to the clothing and including some interactive animation. Since this was my first time using p5.js, there are still many skills I want to develop. In future work, I hope to incorporate more of my own creative ideas and make my drawings more detailed, polished, and well organized.

Week 1 – Self-portrait

Concept

In this assignment, I created a cartoon style portrait of myself. I practiced how to create basic shapes such as ellipses and circles, points, curves and lines. I also practiced using colors and changing the thickness of lines and shapes.

I made the portrait interactive by changing the portrait into night mode when the mouse is clicked, changing the background colors into darker colors and adding stars to represent night time.

Code I’m proud of

The part of the code I am most proud is how I change settings from day time to night time by using if condition. When the mouse is pressed, the background colors of the portrait is changed and stars are added to create the effect of change of time

// Declaration of colors
  let a, b, c;

// Change colors when mouse is pressed
    if (mouseIsPressed) {
      a = color(200, 200, 200);
      b = color(0, 100, 0);
      c = color(0, 0, 139);
  } else {
    a = color(243, 243, 25);
    b = color(0, 128, 0);   
    c = color(173, 216, 230);
  }

  // Use background color
  background(c);
  
  // Stars
  if (mouseIsPressed) {
    textSize(90);
    text("✨", 200, 90)
  }

Here is my portrait

Reflection

This was a very fun exercise where I got to explore using p5 to create images. While this is my first time doing something like this, I really enjoyed and opened to exploring it more. I can improve this project by making it more interactive, making the more shapes and customizations and adding more elements to the portraits

Assignment 1: Self Portrait

“I am my own muse. I am the subject I know best. The subject I want to know better.” — Frida Kahlo

Concept:

For our very first assignment in Intro to Interactive Media, I was able to make a portrait of myself, using only simple 2D shapes, through the use of p5.js’ functions. My main goal was to try an recreate as many facial features about myself, such as my lush, green eyes. Also I added some clothing with a color which sort of, compliments my eyes.

Below is my finished portrait:

How it’s made:

The portrait was made using p5.js’ functions for 2D shapes. I made good use of ellipse, quad, arc, circle mostly as they helped me get a good grasp of how I would shape my face.

Starting out though was actually difficult, as I was confliced of whether it would be best to use a circle or an ellipse for my facial structure. Of course both would work out, but I chose the ellipse as it made more sense for me, as I could add get a better shape to add external features, such as my ears or hair.

Then it was a simple case of designing my face out. I used ellipses for my sclera, and a circle for my pupil and iris. I used ellipse for my nose (though I was considering using a triangle too). And for my shirt I used a few quadilaterals to make the shape of my body. As for the shoulders, I used ellipses that are slightly raised and feel more natural.

Now I did have a few struggles whilst creating the portrait, such as positioning the shapes. I started out using the width and height arguments and then having them positioned by either adding or subtracting a given value. Whilst this worked for a while, it was cumbersome as to figure out the starting and end points of where I wanted my shapes.

But then is when I used my smart head for once and thought

“Wait, I can use the print function to see the exact coordinates of the canvas, so I can see where I can pop my x and y coordinates”

So afterwards for some of the shapes in the code I decided to simply use exact values in order to make my life easier haha. This was done just by using the print function to print out the current position of the mouse using mouseX and mouseY.

Another issue I faced and a partial learning curve was the arc function. I had difficulty with understanding how to utilize it in terms of generating the shape of the arc. As the function utilized the arguements pi, half pi and quarter pi, it was difficult to see at what part did the arc start and end. The arc function was mostly used for my mouth and eyebrows and my hair for a more curved feel.

A highlighted bit of code I’m proud of:

So as my birthday was approaching (14th of February and yes, I’m born on Valentine’s Day 😊), I thought to try my hand at adding a funky effect to sort of mark the occasion. I was aware of the mousePressed and random functions and decided to have it generate circles of random color and size, with them being randomly appear around the background. The reason why I’m proud of it was I wanted to see what a simple effect would do for my canvas.

if (mouseIsPressed){
  
  background(0)
  
  noStroke()
  fill(random(0, 255), random(0, 255), random(0, 255), 100)
  circle(random(width), random(height), random(10, 100))
  
}

Reflection:

I throroughly enjoyed creating my self portrait. Although at many points I had struggles with positioning the shapes around, I was able to sort of overcome it in my own manner. The main thing I struggled with was the arc function, as I was a bit confused at how to implement it with getting the arc correct.

I also did like the addition of the effect but I feel like I’d love to add more perhaps to my own self, such as giving myself a different expression. And maybe I could touch up the effect a little more, such as adding more texture. Perhaps even having a smooth effect would be a nice addition. But overall, as a start, this assignment was quite fun to do and I relished in creating my own portrait.