Week I’m Not Sure: Bloody Buttons!

The prompt for this week was to create an unusual switch which didn’t require hands, which we could use in place of the buttons we had been using in class. My initial ideas for this were either a wand touching a “Lumos” placard or a ghost figurine on a stick touching some Halloween-y thing like a Jack-o-lantern, and then the touches resulting in the LED lighting up. However, as I confirmed with Professor, these involved too direct a use of hands. I would have been directly making the object touch the other objects with my hand.

So, I had to think of a new idea, and I was feeling the Halloween spirit from my earlier idea. I decided to make that my theme. Influenced by the moustache video we saw in class, I started thinking around the mouth area and I thought I could make a switch where if the mouth is closed, the light is switched on and otherwise it’s not. I then remembered a spooky thing which goes there – a vampire’s fangs!

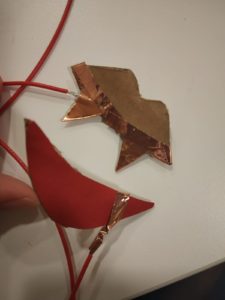
I had a certain image in my head and I got to work to execute it the best I could. I got cardboard and copper tape and long red wires with stranded cores from the IM lab. I didn’t want to just directly attach fangs to my lips because I wasn’t sure how safe it was, and because I thought making cartoon lips would be much more fun. So, I cut the shape of the lips out of the cardboard (one of the most time-consuming things in this project) and 4 fang shapes out of the thicker copper tape. I stuck one of the two long wires between two of these and joined the other two back-to-back too, to make it conductive on both sides. Luckily I had some red coloured paper which I could cut in the shape I wanted and paste it on the cardboard for the lips. For the bottom lip, I did this right away and then attached the required wire in its place with copper tape. It almost looked like the vampire had a lip piercing.

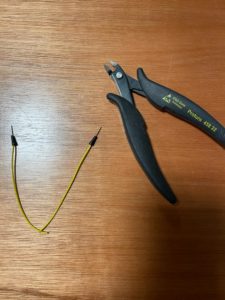
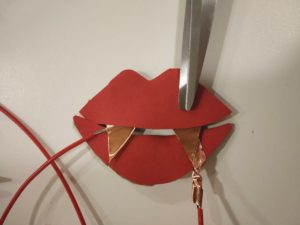
For the upper lip, I had to somehow connect the fangs on two ends and I didn’t want that to be visible. So I first ended up making something like this after using the thin copper tape for connection:

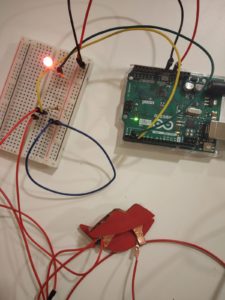
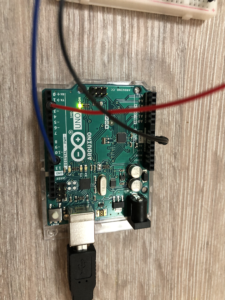
This was shaping up to be what I wanted it to be like, but first I thought I should test if my idea even works without red paper covering the tape. My circuit was a quite simple change from the ones we worked on in class. Instead of the button, I had two wires placed in the bread board where the legs would have been. This helped me place the resistors and other wires as required. The two wires which were replacing the button, each had their ends connected to one of the longer red wires, simply by twisting them together. So, if everything worked correctly and the right fang touched the “lip piercing”, the circuit should be complete and the LED would light up.

I had chosen the colour red because well, it reminded me of blood. And I decided that if the LED blinked when the vampire “bit” and sort of gave an alarm/heartbeat effect, it would be cool. My code combined the two main circuits we had done in Wednesday’s class. Here, LED was the output and the wire leading to the fangs was the input. When the input is HIGH, the light would start flashing at the given intervals. Otherwise, it should stop. It took me a bit of trial and error to arrive at a code which did what I wanted, but I finally got it.

const int ledPin = 2;
const int fangsPin = 3;

unsigned long timer = 0;
int timerAmount = 300;
bool flip = false;

void setup() {
  // put your setup code here, to run once:
  pinMode(ledPin, OUTPUT);
  timer = millis();
  pinMode(fangsPin, INPUT);
}

void loop() {
  // put your main code here, to run repeatedly:
  bool currentState = digitalRead(fangsPin);
  if (currentState == HIGH && millis() >= timer) {

    flip = !flip;
    digitalWrite(ledPin, flip);
    timer = millis() + timerAmount;

  }
  else if (currentState == LOW) {
    digitalWrite(ledPin, LOW);
  }

}

And this code worked with the lips I currently had, so I decided to go ahead and glue on the upper red part too. And too my relief, it worked with that too.

Lips don’t lie
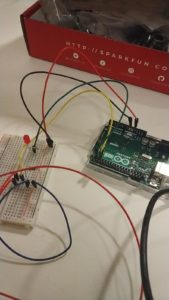
A look at the overall circuit

I hope these make my circuit a bit clearer.

Then came the hardest part: Attaching these lips to my own lips. This involved a lot of tape and adjusting for the flimsiness of the whole thing. I had to make the copper wire “piercing” on the lower lip much thicker by adding more and more rounds of wire- so that it would be easier for the fang to reach. And I had to figure out the pressure and angle I should use. A couple of times by the time I went to take a video, the tape attached to my lips would wear out and I would have to redo everything. This video is not perfect- the tape was a little flimsy again so I wasn’t able to close my mouth properly for a second, but you can see that it works without me having to touch my hand to the fang- which was what was happening initially. I also realised too late that in my bid to draw something which would completely cover my real lips, I had perhaps made the lips too thick. But oh well, I wanted something cartoony anyway. They might look a little lopsided here.

I think that’s about it. Though this isn’t as smooth and perfectly artistic as I would have wanted, I’m still pleasantly surprised that the concept worked out (I don’t know what I would have done if it hadn’t).

Happy end of spooky season to y’all!

Week 8: Bicep function detector :)

Description

Create an unusual switch that doesn’t require the use of your hands. Use Arduino digital input and output for the interaction.

Process

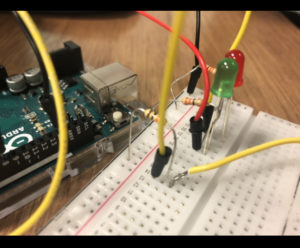
Do your biceps work? Let’s find out! This is a switch that works using the mechanisms of your elbow. As you close your elbow the switch shows a green light, and when open it shows a red one.

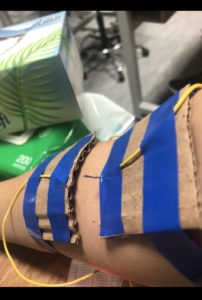
So the programme requires basic coding. I use two LED lights, one red and one green, and wires to connect the flow of electricity. Using cardboard, I created two patches each to be applied on either sides of the inner side of the elbow, and put wires on each side, one going for the output (5V port)  and one for the input and taped it around my arm.

Then creating the following code where if and only if the electricity is flowing through the wire will the lights turn green, otherwise red indicating if the elbow is closed or open. Hence, showing if your biceps are working in your body or not!

CODE:

//declaring the constant variables
const int redPin = 8;
const int book = 6;
const int greenPin = 3;
bool currentState = false;
bool bookState = LOW;

void setup() {
  //determining the source function
  pinMode(redPin, OUTPUT);
  pinMode(greenPin, OUTPUT);
  pinMode(book, INPUT);
}

void loop() {
    bookState = digitalRead(book); //reading the input of book switch
    //condition to change the lights 
    if (currentState != bookState ){
      digitalWrite(greenPin, HIGH); //green on, red off
      digitalWrite(redPin, LOW);
     } else {
      digitalWrite(greenPin, LOW);//green off red on 
      digitalWrite(redPin, HIGH);
    }
}

Get your feet off the coffee table!

Idea:

My idea was inspired by a childhood memory that I think a lot of us will resonate with. You know when you used to put your feet up on the table as a child and your moms face would just turn red and she would yell at you to take you feet off of her coffee table. In this production the led light will turn red as soon as I put my feet on the coffee table 🙂

Implementation:

I attached one jumper cable to the digital input PIN number 10 and connected it with the positive terminal on the led light, while the short leg (negative terminal) is connected to ground through a 330 ohm resistor.The “switch” in this case were two jumper cables (stuck to the table) where when they touch the foil wrapped around my leg, make the led light up. One of the jumper cables was connected to another jumper cable that is connected to PIN number 2. While the other jumper cable that the “switch” consisted off was connected another jumper cable that was connected to ground. Hence, pin 10 is two turn the led on and off while pin 2 will check if the foil has pin touched or not.

Code:

void setup() {
  pinMode(10,OUTPUT);
  pinMode(2,INPUT_PULLUP);
  

}

void loop() {

  if(digitalRead(2)==LOW){
    
  digitalWrite(10,HIGH);
  }

  if(digitalRead(2)==HIGH){
digitalWrite(10,LOW);
}
}

Final project:


Week 8 : Hands Free Switch

SIT AT YOUR OWN RISK

INTRODUCTION:

In week 8, we were given task which involved using Arduino and hardware. We had to create a unique & creative type of switch which could be operated without the use of our hands. By using this switch, we could turn the led on and off as required. So, I mainly learnt about building a simple led circuit using both the breadboard and resistor. I have built an aluminium foil-based switch platform separated by a non-conductive foam which is operated by force. So, the switch on happens by applying force on the platform.

IDEA:

I decide to make my own switch using conductive foils on cutted foam boards which was then separated by a non-conductive material. One side of the stranded wires were stuck to the foam board with the aluminium,  using a clear tape and the other side of it which was stripped was connected with the jumper wires stripped using an electrical tape.  At last, due to force, the terminals would come in contact with each other and circuit would be complete, thus LED would turn on and as the person stands up, the led would turn off.

INSPIRATION:

COVID-19 has become our new normal. Wearing masks, social distancing, constant use of cleaning wipes and sanitizers until our hands dry out is now integrated into our daily routines. This project was inspired by the COVID-19 regulations, specifically the social distancing requirement. In public seating, there is a required empty seat to be set empty between an individual and the person sitting next to them. What is currently being used are stickers and/or tape indicating on which seats it is permitted to sit. This project aims to improve this application. Every time someone sits on an undesignated seat, the LED lights up to tell the person to change their seat. This project’s purpose is to further develop and add technology to accommodate our new normal.

CHALLENGES & PROBLEMS:

The concept I had finalized for completing this task involved was the use of two aluminium foils which had to be wrapped around a carboard sheet and separated by a non-conductive material. Also, I had to find a way to stick the wires to the aluminium foil as soldering would not make them  hold on the foil. Thus, since I had not worked on wiring and hardware much before, using the hardware was new for me. Another things I had to be very careful about is not to mix the +ve and -ve supplies as it could lead to the system getting damaged. The jumper wires were not fitting the Arduino board completely which made me put some force which bended some of them. So , now I take on the lesson that it only needs to be in-tact, no need to be fully on. To conclude, the entire process of sticking wire to the aluminium foil took a lot of time as the tape was not sticking to the foil. Thus, this was a very important process as without this, the switch won’t work for me, but eventually it all worked out. 

PROCEDURE:

The first target was to blink an LED using Arduino and to do that I have gathered the following hardware:

Arduino board - LED - Resistor of value 330 Ohms -Jumper wires - USB Cable

The circuit diagram which we referred was as following:

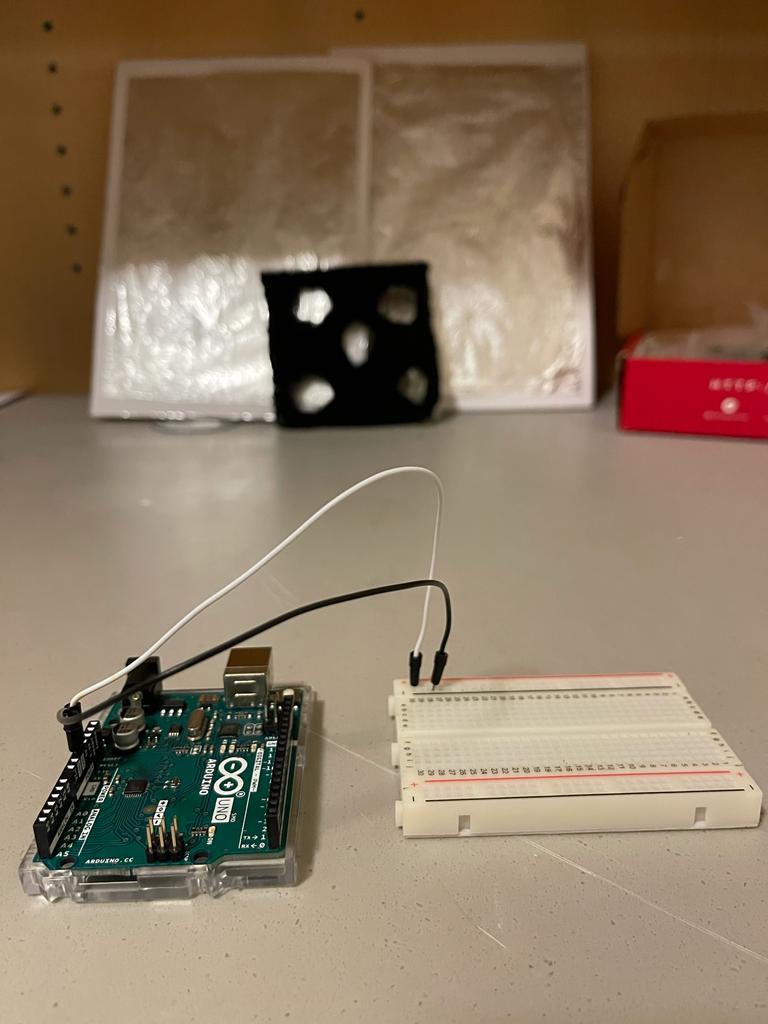
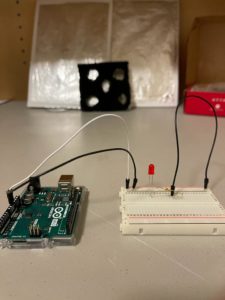
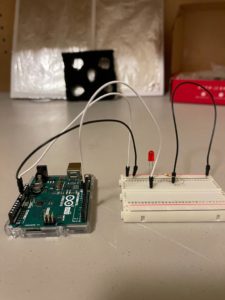
So, I used the hardware to power the + and – rails of the breadboard so that the entire circuit can use + and – from these rails if and when required in future connections. In the following image, the white wire goes into the +ve rail and the black wire goes into the -ve rail.

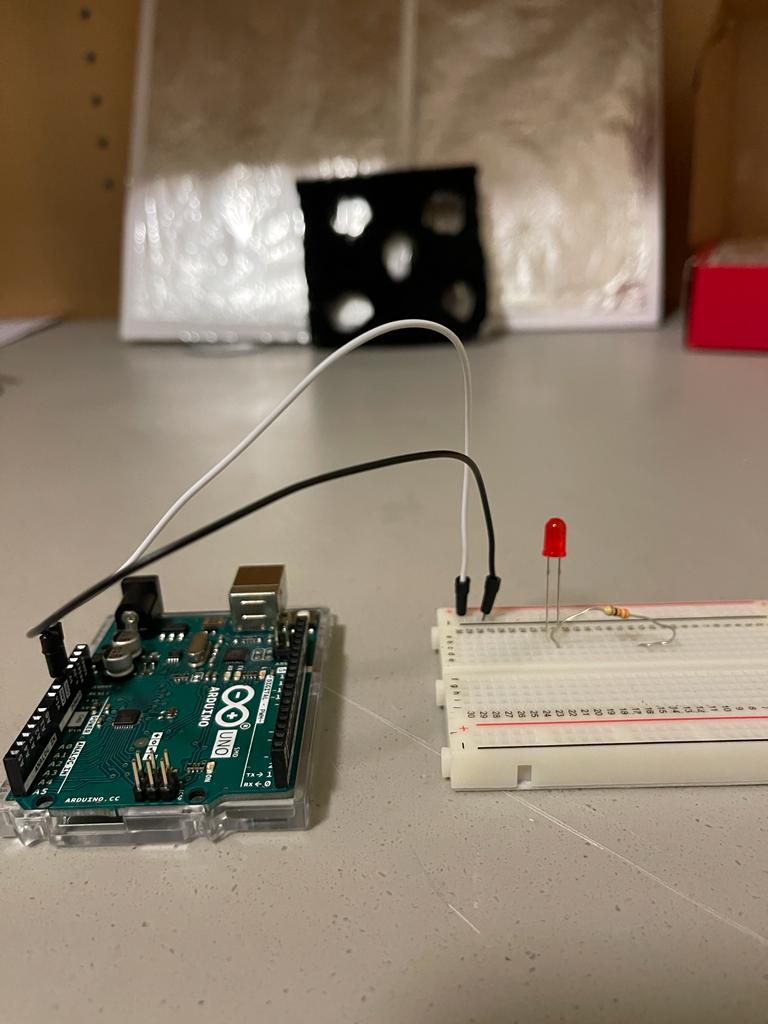
Next, we used a led, identified its Anode and Cathode (cathode has the shorter leg), and connected a resistor with it as shown. Resistor is used to limit the current through the led. We chose a value of 330 ohms as we read that led requires 20 – 25 mA of current for proper operation so resistor value of 100 ohms to 330 ohms work well.

Then I connected the other end of resistor to the ground to give it a -ve or GND signal

In this step, I connected the digital pin 7 from Arduino to Anode of led using a yellow jumper wire as shown.

Afterwards, I wrote a simple program to blink the led connected to digital 7 and uploaded it to our Arduino board by using the following settings on Arduino software. I selected usbmodem 143141 (Arduino Uno)
// C++ code
//
void setup()
{
  pinMode(7, OUTPUT);
}

void loop()
{
  digitalWrite(7, HIGH);
  delay(1000); // Wait for 1000 millisecond(s)
  digitalWrite(7, LOW);
  delay(1000); // Wait for 1000 millisecond(s)
}
Once the code was uploaded, we could see the led blinking on and off with a gap of 1000 ms

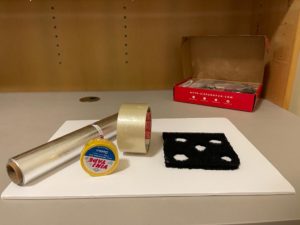
Once my LED circuit was complete, I started gathering material for making my own switching platform.

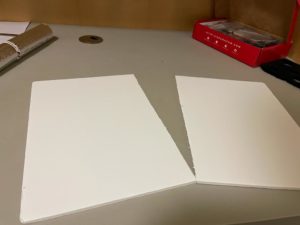
Next, I have cut the carboard in two different parts and these would serve as two different terminals of the switch.

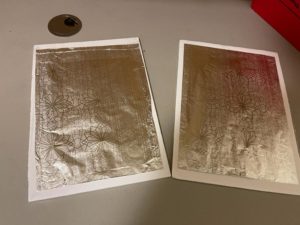
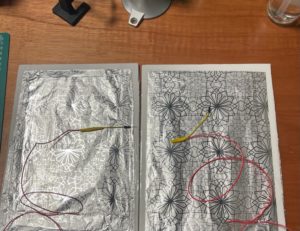
Then I used foil and put it on the foam cardboard using clear tapes as shown. 

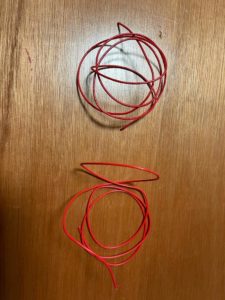
Now, I needed multi-strand wires to be connected to the foil. So, I used a single wire and cut it into two parts using a cutter, one for each foil board.

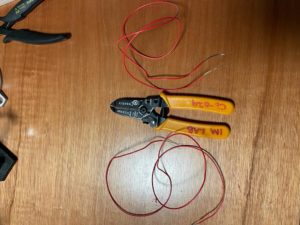
Using a wire stripper, both the ends of the two pieces of wires were stripped like shown

Afterwards, I used electrical tape to stick one end of each wire to the foil in such a way the wire strands were in contact with the conductive surface of the foil.

Later, I used a male-to-male jumper wire and cut it from middle using a wire cutter.

The other end of the wires taped to the foil was taped to male end of jumper wire as shown below.


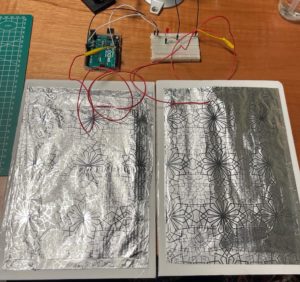
Now, I am ready to test my switch with my led circuit. I connected one foil arrangement to ground and the other was connected to a digital IO of Arduino as per my code.

The, I used the following code in my Arduino circuit and tested the foil switch which I made.
// C++ code

int led = 7;
int sensor = 6;

void setup()
{
  pinMode(led, OUTPUT);
  pinMode(sensor,INPUT_PULLUP);
}

void loop()
{
  if(digitalRead(sensor)==LOW)
  {
    digitalWrite(led, HIGH);
  }
  else
  {
    digitalWrite(led, LOW);
  }
}
So, I observed that the LED switched on once the two foils were made in contact with each other and switched off once the foils were separated which is how a switch works.

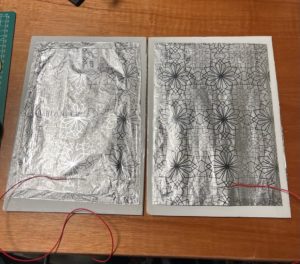
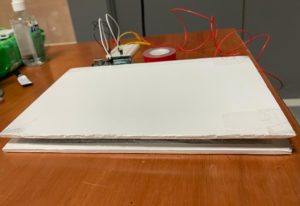
At the last step, I used the black non-conductive foam as a separator between the two foil boards and put everything together like a sandwich in which the non-conductive material ensured the foil would turn on only if someone puts force on the two boards. In this case the two foils would come in contact and the LED would turn on. The final arrangement looked like this.

FINAL WORK:

CONCLUSION:

There were a lot of ups and downs in this assignment, but I pulled it off at the end and had a great time exploring with the construction of my mini project. Furthermore, I will hopefully be taking this experience to achieve much more complicated tasks in the future.

HOPE YOU ENJOYED , HERE IS THE FULL CODE with the comments 🙂

// Shamma's Sit at your own risk Program
//C++ coding in Ardiuno 

// Setting Global Variables 
int led=7;
int sensor =6;


// This code runs only once 
void setup() 
{
  // only declaring input and ouput 
  pinMode(led, OUTPUT); //  define the LED connected on pin 7 as an output 

  // I did not use the input because it wont work properyly with what I builded
  // So,  input_pullup was used because it requires no external components and can be turned on & off in software during program execution 
  //Another thing is that is it used to read switches properly and prevent missed readings
  pinMode(sensor,INPUT_PULLUP);// the proximity sensor acts as an input devide which will take an anction , in our case presnece of an obstacle 
}


// This runs forever as long as system is turned on 
void loop() 
{
  if(digitalRead(sensor)==LOW)// reading if an obstacle (someone infront of sensor) is present 
  {
    digitalWrite(led, HIGH);// turning on LED by giving the anode of LED +5 volt signal
    
  }
  else
  {
    digitalWrite(led, LOW);// if no one is present, turn off LED by giving low signal 
  }
}


Unusual Switch – Jade


Description

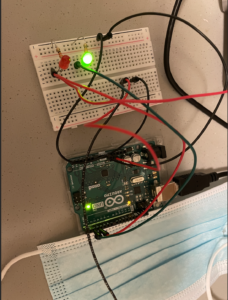
In this project, I used LEDs to create a switch that doesn’t require the need of my hands. The mechanism is that if you move close enough to each other, the red light will turn on and the green light goes out. Otherwise, the green light is on.

The idea of this project is inspired by social distance. If you are keeping a distance with other person, the green light is on, so normally it keeps on. If you are too close, red light is on, suggesting that you violate the social distance. I used masks to protect our arms and also as a symbol.


Code

const int LED2 = 2;
const int LED = 3;
int state = HIGH;

void setup() {
  // put your setup code here, to run once:
  pinMode(LED2, OUTPUT);
  pinMode(LED, INPUT);
}

void loop() {
  // put your main code here, to run repeatedly:
  digitalWrite(LED, LOW);
  digitalWrite(LED2, state);
  if (digitalRead(LED) == HIGH) {
    state = LOW;
  } else {
    state = HIGH;
  }
}


Process

I connect the LEDs to pins 2, 3. I read input from the red one and output the green light. On the circuit of red LED, I connected another two cables which make the switch. When the two cables meet, the circuit will be closed, and the red light turns on, so the green light goes off. Because in my code, I set it so that when the red light is on, the green light will change state.

The challenge I encounter is to figure out a creative way to make a switch free of the use of hands. Initially, I also thought of several ideas, but they required indirect use of hands. So it took me sometime to think of which part of my body I want to use for the switch.

Though, it was interesting to work on circuits, cables and codes!

Midterm: The Fight Goes On

As stated last week, my project was inspired by the classic Road Fighter game, but trying to adapt it to another theme instead. And unfortunately (but not that surprisingly), this post is coming a night later than I thought it would, the 14th “night” instead of 13th.

In my game, named “Magic Fighter” now, the main character (it was pointless to get a wizard with a cloak because the movements would be hidden and I wanted a more retro feeling game) is trying to reach the safety of the Hogwarts castle, running away from a great evil threat. On the way, you can pick up objects like potions, charms and chocolates (it helps) which will increase your health, and you have to avoid dark magic residues and dementors on the way which will decrease your health and the time you have. You can see your health percentage in a bar on the side, as well as the timer.

Update: I can now add the graphics here. I made everything a darker colour because I thought the evening look fit it more.
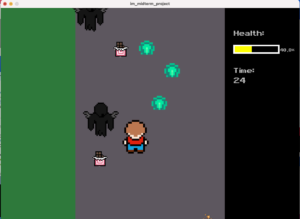
I am done with all the mechanics of the game and also with the sprites and images for most things, but as I was testing out my object images, my laptop started a weird thing where I am not able to edit or see the image sizes of any of my images, because the cursor changes to the loading symbol whenever I try. Fortunately, this happened after I had already taken care of the character and enemies, and inserted one of the object images as a test, but I have to make more object variety options and update the code accordingly, and also insert something at the finish line. The png images have been ready since long, and I tried everything to get my editor to work properly, but it is just not happening.

I am going to attach a zip folder anyway, but I hope to post a proper code breakdown and video once I am able to insert the images I want to. So until then, this documentation is going to be a bit bare. Everything else is done, and it is still a playable game which you can try out.

I was also not able to implement super and sub classes because for some reason, the display function in all of them was giving a problem. So my final code now has separate classes. Overall, display has been acting a bit weird. Also, it might be a bit weird to see the dementors disappear once you hit them but let’s just assume they left because they got what they wanted. If they are not immediately removed from the array then the health would decrease to 0 almost immediately. But I did implement the dist() function as mentioned in the tip.

Overall, this project has given me a lot of trouble and I have perhaps made it more difficult for myself than I needed to, not because of the actual difficulty of the game itself but the way I set about it the past few days and how I have been managing things in general, and my laptop certainly hasn’t helped. I haven’t been able to cope with the stress of submitting a less than perfect game, I really wanted it to complete my vision. I can’t help but feel disappointed that this is still not over, and I am praying that in the morning my laptop will magically let me do what I need to do. This is a request (especially to Professor) that if you see this current version, by all means, go ahead and play it, but do check out the updated one too, I will update the documentation with it as soon as it is ready and it will look much better then.

(Edit: I am keeping this just so that you can see how much I was done with before, but this is not the final version now)

im_midterm_project 

I am really sorry 🙁

Updates:

My laptop still is refusing to work with PNGs, so in the end I had to resort to other methods but finally, I am done. Huge thanks to the internet for providing free tools.

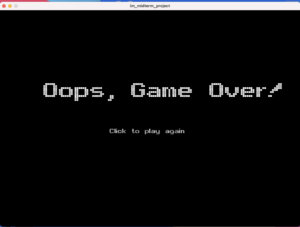
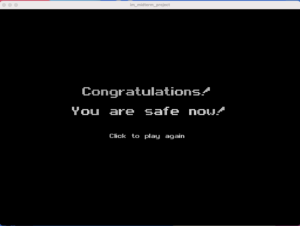
Here are the start and end screens of my game. I have tried to keep the font and sprites to a retro look.
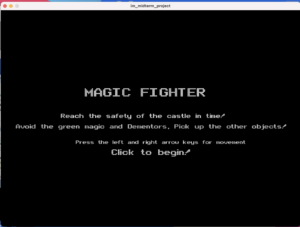
Additionally, here is the code for easier reading:

import processing.sound.*;

Character character;
Object[] objects;
Enemy[] enemies;
MovingEnemy[] moving_enemies;
int timer;
float health_percentage;
boolean game_over;
boolean started_game = false;
PFont f;
int finishline_y;
SoundFile theme;
SoundFile pick;
SoundFile hit;
PImage hogwarts;

void setup() {
  size(1000, 720);
  f = createFont("ARCADE.TTF", 72);
  textFont(f);
  theme = new SoundFile(this, "rise-and-shine.mp3");
  pick = new SoundFile(this, "object pick.wav");
  hit = new SoundFile(this, "enemy hit.wav");
  character = new Character(500, 500, 57, "Main Character.png", 100, 140, 4);
  objects = new Object[30];
  enemies = new Enemy[30];
  moving_enemies = new MovingEnemy[30];
  hogwarts = loadImage("hogwarts.png");

  //object initialisation
  for (int i = 0; i<10; i++) {
    int choice = int(random(3)); //so that one of the three options is chosen
    objects[i] = new Object(random(275, 725), random(-5200, 695), 25, choice==0? "potion.png": choice==1? "charm.png": "chocolate bar.png", 50, choice==2? 87: 50); //so that as the negative is updated to positive, the illusion of movement is created

    //to ensure the objects don't overlap with each other
    for (int j = 0; j<i; j++) {
      if (i!=j && objects[i].distance(objects[j]) < 50) {
        while (objects[i].distance(objects[j]) < 50) {
          objects[i] = new Object(random(275, 725), random(-5200, 695), 25, choice==0? "potion.png": choice==1? "charm.png": "chocolate bar.png", 50, choice==2? 87: 50);
        }
      }
    }
  }

  //enemy initialisation
  for (int i = 0; i<30; i++) {
    enemies[i] = new Enemy(random(275, 725), random(-5200, 695), 30, "magic blast.png", 60, 48);

    //to ensure they don't overlap with each other
    for (int j = 0; j<i; j++) {
      if (i!=j && enemies[i].distance(enemies[j]) < 60) {
        while (enemies[i].distance(enemies[j]) < 60) {
          enemies[i] = new Enemy(random(275, 725), random(-5200, 695), 30, "magic blast.png", 60, 48);
        }
      }
    }
  }

  //moving enemies initialisation
  for (int i = 0; i<20; i++) {
    moving_enemies[i] = new MovingEnemy(random(280, 720), random(-12000, 690), 60, "dementor.png", 120, 116, 280, 720);

    //to ensure they don't overlap with each other
    for (int j = 0; j<i; j++) {
      if (i!=j && moving_enemies[i].distance(moving_enemies[j]) < 120) {
        while (moving_enemies[i].distance(moving_enemies[j]) < 120) {
          moving_enemies[i] = new MovingEnemy(random(280, 720), random(-12000, 690), 60, "dementor.png", 120, 116, 280, 720);
        }
      }
    }
  }
  timer = 65;
  health_percentage = 100;
  finishline_y = -2600;
  game_over = false;
  if (started_game == false)
    startScreen();
}

void draw() {

  if (started_game && !game_over) {
    if (frameCount % 60 == 0)
      timer-=1;    
    finishline_y+=1; //so that the finish is slowly reached
    gameDisplay();
  }
}

void startScreen() {
  background(0);
  textSize(60);
  text("MAGIC FIGHTER", 280, 300);
  textSize(30);
  text("Reach the safety of the castle in time!", 200, 365);
  text("Avoid the green magic and Dementors. Pick up the other objects!", 50, 400);
  textSize(25);
  text("Press the left and right arrow keys for movement", 250, 450);
  textSize(40);
  text("Click to begin!", 370, 490);
}

void gameDisplay() {
  
  //game winning conditions
  if (character.y == finishline_y) {
    background(0);
    fill(255);
    textSize(60);
    text("Congratulations!", 275, 300);
    text("You are safe now!", 240, 365);
    textSize(30);
    text("Click to play again", 365, 435);
    theme.stop();
    game_over = true;
    return;
  }
  
  //game losing conditions
  if (character.health <= 0 || timer <= 0) {
    background(0);
    fill(255, 255, 255);
    textSize(100);
    text("Oops, Game Over!", 145, 310);
    textSize(30);
    text("Click to play again", 365, 415);
    theme.stop();
    game_over = true;
    return;
  }

  //basic background
  background(#5D575F);
  noStroke();
  fill(#2E793B);
  rect(0, 0, 250, 720);
  fill(0);
  rect(750, 0, 1000, 720);

  //displaying the objects and enemies and character
  for (int i = 0; i<30; i++) {
    //picking  up objects
    if (objects[i]!=null) {
      if (dist(character.x, character.y, objects[i].x, objects[i].y) <= character.r + objects[i].r) {
        objects[i] = null;
        if (character.health+2 < 150) {
          character.health+=2;
        } else {
          while (character.health < 150) {
            character.health+=1;
          }
        }
        //object sounds
        pick.play();
      }
    }

    //being hit by enemies
    if (enemies[i]!=null) {
      if (dist(character.x, character.y, enemies[i].x, enemies[i].y) <= character.r/2 + enemies[i].r) {
        character.health -= 10;
        timer -= 1;
        enemies[i] = null;
        //hit sounds
        hit.play();
      }
    }

    if (moving_enemies[i]!=null) {
      if (dist(character.x, character.y, moving_enemies[i].x, moving_enemies[i].y) <= character.r/2 + moving_enemies[i].r) {
        character.health -= 10;
        timer -= 1;
        moving_enemies[i] = null;
        //hit sounds
        hit.play();
      }
    }

    //"finish line"
    imageMode(CORNER);
    image(hogwarts, 150, finishline_y-529);
    imageMode(CENTER);

    if (objects[i]!=null)
      objects[i].display();

    if (enemies[i]!=null)
      enemies[i].display();

    if (moving_enemies[i]!=null)
      moving_enemies[i].display();
  }

  //calculating health
  fill(255, 255, 255);
  textSize(36);
  text("Health: ", 780, 100);
  health_percentage = int((character.health * 100) / 150.0 * 100) / 100.0;
  noStroke();

  //To change colour depending on health
  if (health_percentage >= 50)
    fill(0, 250, 0);
  else if (health_percentage >= 20)
    fill(255, 255, 0);
  else
    fill(255, 0, 0);
  rect(780, 125, character.health, 25);
  noFill();
  strokeWeight(5);
  stroke(255, 255, 255);
  rect(780, 125, 150, 25);
  fill(255, 255, 255);
  textSize(22);
  text(str(health_percentage) + "%", 935, 150);

  //To display timer
  fill(255);
  textSize(36);
  text("Time: ", 780, 225);
  textSize(40);
  text(str(timer), 780, 260);
  
  character.display();
}

void mouseClicked() {
  if (started_game == false) {
    started_game = true; //to start game
    theme.play();
  } else if (game_over) {
    frameCount = -1; //to restart game
    theme.play();
  }
}

//for movement when the left or right keys are pressed
void keyPressed() {
  if (keyCode == LEFT)
    character.pressed_left = true;
  else if (keyCode == RIGHT)
    character.pressed_right = true;
}
void keyReleased() {
  if (keyCode == LEFT)
    character.pressed_left = false;
  else if (keyCode == RIGHT)
    character.pressed_right = false;
}

The different classes:

class Character {
  float x, y, r, vx;
  int img_w, img_h;
  boolean pressed_left; //for the keys pressed
  boolean pressed_right;
  int health;
  PImage spritesheet;
  PImage[] sprites;
  int num_frames, frame;

  Character(float x, float y, float r, String s, int w, int h, int num_frames) {
    this.x = x;
    this.y = y;
    this.r = r;
    img_w = w;
    img_h = h;
    spritesheet = loadImage(s);
    sprites = new PImage[num_frames];
    for (int index = 0; index < num_frames; index++) {
      sprites[index] = spritesheet.get(index*img_w, 0, img_w, img_h);
    }
    frame = 0;
    this.num_frames = num_frames;
    vx = 0;
    health = 150;
    pressed_left = false;
    pressed_right = false;
  }

  void display() {
    update();
    image(sprites[frame], x - img_w/2, y - img_h/2);
  }

  void update() {
    if (pressed_left == true && x-r>300)
      vx = -5; //to change direction
    else if (pressed_right == true && x+r<800)
      vx = 5;
    else
      vx = 0;

    x+=vx;

    //for moving slower between the different frames
    if (frameCount % 5 == 0)
      frame = (frame + 1) % num_frames;
  }
}
class Enemy {

  float x, y, r;
  int img_w, img_h;
  PImage img;

  Enemy(float x, float y, float r, String s, int w, int h) {
    this.x = x;
    this.y = y;
    this.r = r;
    img = loadImage(s);
    img_w = w;
    img_h = h;
    imageMode(CENTER);
  }

  void update() {
    y+=2;
  }

  void display() {
    update();
    image(img, x, y, img_w, img_h);
  }

  float distance(Enemy other) {
    return dist(this.x, this.y, other.x, other.y);
  }
}
class MovingEnemy {

  float x, y, r, vx, ll, rl;
  int dir;
  int img_w, img_h;
  PImage img;

  MovingEnemy(float x, float y, float r, String s, int w, int h, float ll, float rl) {
    this.x = x;
    this.y = y;
    this.r = r;
    img = loadImage(s);
    img_w = w;
    img_h = h;
    imageMode(CENTER);
    this.ll = ll;
    this.rl = rl;
    vx = random(1, 5); //to have random speeds
    dir = int(random(0, 2));
    if (dir==0) {
      vx*=-1;
    }
  }

  void update() {
    x += vx;
    if (x<ll) { //moving between left and right limits
      vx*=-1;
      dir = 1;
    } else if (x>rl) {
      vx*=-1;
      dir = 0;
    }

    y+=2;
  }

  void display() {
    update();
    image(img, x, y, img_w, img_h);
  }

  float distance(MovingEnemy other) {
    return dist(this.x, this.y, other.x, other.y);
  }
}
class Object {
  float x, y, r;
  int img_w, img_h;
  PImage img;

  Object(float x, float y, float r, String s, int w, int h) {
    this.x = x;
    this.y = y;
    this.r = r;
    img = loadImage(s);
    img_w = w;
    img_h = h;
    imageMode(CENTER);
  }

  void update() {
    y += 2; //for downward movement
  }

  void display() {
    update();
    image(img, x, y, img_w, img_h);
  }

  float distance(Object other) {
    return dist(this.x, this.y, other.x, other.y);
  }
}

I hope the comments and my previous explanations make everything clear.

Finally, here is a video of me playing the game, once when I won, once when I lost. The game gets quite slow sometimes so the audio at the end glitched, otherwise it should stop at the end. I got the main theme from chosic.com.

Here is a zip folder where you can see all the sprites and images and sounds, and play the final game itself!

im_midterm_project 2

And phew, this is finally done! I hope I didn’t miss out anything. And despite what it might seem like, I did enjoy working on this game, until the very end! 🙂

Update 2.0: Well, my work wasn’t done. The above zip file won’t work either. Because I had apparently not saved the latest version of my code. Here is one which will hopefully work.

im_midterm_project 4
Week 7: Midterm

Inspiration:

I really like trains, so I wanted my game to represent that aspect of my interests. I was inspired by the Dino game on Google Chrome, as that had similar characteristics.

Process:

I basically tried to brute force this entire code. I found a video of someone who made their own version of the Dino game from Google, from which I drew some inspiration.

I have five classes: Ground, Tree, Obstacle, Player, and Station.

The ground is simply a line that acts as the rail, and has regularly appearing lines underneath which represent the ties of the track.

The obstacles are now only the red signals, but it used to have the green signals and stations. There is a boolean for SPAD (Signal Passed at Danger) which triggers a fail if you pass a red signal too quickly.

The trees now include the green signals, as the trees and green signals are all passive background objects.

The player always stays in the same spot and “controls” the train. They are really controlling the speed at which the objects move across the background. The W and S keys control the speed.

The station has a green rectangle underneath the image that is suppose to denote the stopping zone, however the station no longer loads and I don’t know why.

Final work:

Challenges:

I had lots of challenges. If you had seen my midterm progress post, you can tell how different the two versions are. The biggest two issues are that the game will fail seemingly for no reason, and the station apparently never shows up. I think that is because the green signals and station both used to be a part of obstacles, there is some vestige that no longer appears on screen, but still fails. I also tried to get the station to load only after a certain amount of time, but once it was moved to its own class, it stopped working.

If you keep your speed under 3 km/h, you won’t fail, but also the station will never appear. Because I was attempting to fix this issue, I didn’t have time to add sound.

Code:

PImage myTrain;
PImage greenSignal;
PImage redSignal;
PImage trainStation;
PImage tree;
PImage tree1;

ArrayList<Obstacle> obstacles = new ArrayList<Obstacle>();
ArrayList<Station> stations = new ArrayList<Station>();
ArrayList<Tree> trees = new ArrayList<Tree>();
ArrayList<Ground> grounds = new ArrayList<Ground>();

int obstacleTimer = 0;
int minTimeBetObs = 100;
int randomAddition = 0;
int groundCounter = 0;
float speed = 0;

int groundHeight = 100;
int playerXpos = 100;
int highScore = 0;

Player driver;

void setup(){
  size(1024,400);
  frameRate(60);
   
  
  myTrain = loadImage("myTrain0000.png");
  myTrain.resize(0, 100);
  greenSignal = loadImage("signalGreen0000.png");
  greenSignal.resize(50, 0);
  redSignal = loadImage("signalRed0000.png");
  redSignal.resize(50, 0);
  trainStation = loadImage("stationTrain0000.png");
  trainStation.resize(500, 0);
  tree = loadImage("chree0000.png");
  tree.resize(0, 100);
  tree1 = loadImage("chree0001.png");
  tree1.resize(0, 100);
  
  driver = new Player();
}

void draw(){
  background(250);
  stroke(0);
  strokeWeight(2);
  line(0, height - groundHeight, width, height - groundHeight);
  
  updateObstacles();
  addStations();
  
  if(driver.score > highScore){
    highScore = driver.score;
  }
  
  textSize(20);
  fill(0);
  text("score: " + driver.score, 5, 20);
  text("High Score: " + highScore, width - (140 + (str(highScore).length() * 10)), 20);
  text("Speed (km/h): " + speed, width/2, 20);
  text("Press W to Accelerate, S to Deccelerate", width/2, 50);
}

void keyPressed(){
  switch(key){
    case'w': speed++;
              break;
    case's': speed--;
              break;
  }
}

void keyReleased(){
  switch(key){
              
    case'r': if(driver.dead){
               restart();
              }
              break;
  }
}

void updateObstacles(){
  showObstacles();
  driver.show();
  if(!driver.dead){
    obstacleTimer ++;
    if(obstacleTimer > minTimeBetObs + randomAddition){
      addObstacles();
    }
    groundCounter++;
    if(groundCounter > 10){
      groundCounter = 0;
      grounds.add(new Ground());
    }
    moveObstacles();
    driver.update();
  }
  else{
   textSize(32); 
   fill(0);
   text("You Failed and Endangered the Lives of Everyone Onboard", 180, 200);
   textSize(16);
   text("(Press R to Restart)", 330, 230);
  }
}

void showObstacles(){
 for(int i = 0; i < grounds.size(); i++){
   grounds.get(i).show();
 }
 for(int i = 0; i < obstacles.size(); i++){
   obstacles.get(i).show();
 }
 for(int i = 0; i < trees.size(); i++){
   trees.get(i).show();
 }
}

void addObstacles(){
  if(random(1) < 0.15){
    trees.add(new Tree(floor(random(3))));
  }
  else{
    obstacles.add(new Obstacle(floor(random(3))));
  }
  randomAddition = floor(random(50));
  obstacleTimer = 0;
}

void moveObstacles(){
  for(int i = 0; i < grounds.size(); i++){
   grounds.get(i).move(speed);
   if(grounds.get(i).posX < -playerXpos){
     grounds.remove(i);
     i--;
   }
 }
 for(int i = 0; i < obstacles.size(); i++){
   obstacles.get(i).move(speed);
   if(obstacles.get(i).posX < -playerXpos){
     obstacles.remove(i);
     i--;
 }
 }
 for(int i = 0; i < trees.size(); i++){
   trees.get(i).move(speed);
   if(trees.get(i).posX < -playerXpos){
     trees.remove(i);
     i--;
   }
 }
}

void addStations(){
  if(driver.score > 10){
    stations.add(new Station(1));
  }
}

void restart(){
  driver = new Player();
  obstacles = new ArrayList<Obstacle>();
  trees = new ArrayList<Tree>();
  grounds = new ArrayList<Ground>();
  
  obstacleTimer = 0;
  randomAddition = floor(random(50));
  groundCounter = 0;
  speed = 0;
}

class Ground{
  float posX = width;
  float posY = height - groundHeight + 1;
  int w = 1;
  
  Ground(){
  }
  
  void show(){
   stroke(0);
   strokeWeight(3);
   line(posX, posY, posX + 10, posY);
  }
  
  void move(float speed){
   posX -= speed; 
  }
}

class Obstacle{
  float posX;
  int w, h;
  int type;
  
  Obstacle(int t){
    posX = width;
    type = t;
    switch(type){
      case 0: w = 30;
              h = 60;
              break;
    }
  }
  
  void show(){
    switch(type){
      case 0: image(redSignal, posX - redSignal.width/2, height - groundHeight - redSignal.height);
              break;
    }
  }
  
  void move(float speed){
    posX -= speed;
  }
  
  boolean SPAD(float playerX){
    float playerRight = playerX + myTrain.width/2;
    float thisRight = posX + redSignal.width/2;
    
    if(playerRight > thisRight && speed > 3){
       return true;
     }
     else{
       if(playerRight > thisRight + 1){
         return false;
       }
     }
    return false;  
  }
}

class Player{
 float posY = 0;
 int size = 20;
 boolean dead = false;
 
 int runCount = -5;
 int lifespan;
 int score;
 
 Player(){
 }

 
 void show(){
   image(myTrain, playerXpos - myTrain.width/2, height - groundHeight - (myTrain.height - 15));

   
   if(!dead){
     runCount++;
   }
   if(runCount > 5){
     runCount = -5;
   }
 }
 
 void move(){
     posY = 0; 
   for(int i = 0; i < obstacles.size(); i++){
     if(dead){
       if(obstacles.get(i).SPAD(playerXpos)){
         dead = true; 
       }
     }
     else{
       if(obstacles.get(i).SPAD(playerXpos)){
         dead = true;
       }
     }
     
   }
   
   for(int i = 0; i < stations.size(); i++){
     if(dead){
       if(stations.get(i).overshoot(playerXpos)){
         dead = true; 
       }
     }
     else{
       if(stations.get(i).overshoot(playerXpos)){
         dead = true;
       }
     }
     
   }
 }
 
 void update(){
  incrementCounter();
  move();
 }
 
 void incrementCounter(){
  lifespan++;
  if(lifespan % 3 == 0){
    score += 1;
  }
 }
}


class Station{
  float posX;
  int w, h;
  int type;
  
  Station(int t){
    posX = width;
    type = t;
    switch(type){
      case 0: w = 60;
              h = 40;
              break;
    }
  }
  
  void show(){
    switch(type){
      case 0: image(trainStation, posX - trainStation.width/2, height - groundHeight - trainStation.height);
              noStroke();
              fill(0, 255, 0, 50);
              rect(posX - trainStation.width/2, height - groundHeight, trainStation.width, 50);
              break;
    }
  }
  
  void move(float speed){
    posX -= speed;
  }
  boolean overshoot(float playerX){
    float playerRight = playerX + myTrain.width/2;
    float thisRight = posX + trainStation.width/2;
    
    if(playerRight > thisRight){
       return true;
     }
    return false;  
  }
  
  boolean stopped(float playerX){
    float playerRight = playerX + myTrain.width/2;
    float thisRight = posX + trainStation.width/2;
    
    if(posX - trainStation.width/2 < playerRight && playerRight < thisRight){
       return true;
     }
    return false;
    }
  }

class Tree{
  float w, h;
  float posX, posY;
  int type;
  
  Tree(int t){
    posX = width;
    type = t;
    switch(t){
      case 0: w = 20;
              h = 40;
              break;
      case 1: w = 20;
              h = 40;
              break;
      case 2: w = 20;
              h = 40;
              break;
    }
  }
  
  void show(){
    switch(type){
      case 0: image(tree, posX - tree.width/2, height - groundHeight - (posY + tree.height - 50));
              break;
      case 1: image(tree1, posX - tree1.width/2, height - groundHeight - (posY + tree1.height - 50));
              break;
      case 2: image(greenSignal, posX - greenSignal.width/2, height - groundHeight - greenSignal.height);
              break;
    }
  }
  
  void move(float speed){
    posX -= speed;
  }
}


Midterm Project: Pixel Run!

For our midterm project, we were tasked with making a game!

The game I made is called Pixel Run! It’s a fun little game and I’m very proud of it!!

Concept

Basically, When you start the game (after you view the instructions) you will see your sprite in the center of the screen, which you can move with the arrow keys. There will be static stars at random places all around the screen and frantic bananas that move with random speeds across the screen. Your score is displayed at the top right corner of the screen.

Collect the stars!! They’re worth 20 points, but you must avoid the bananas! When your points are > 0 , they will take 10 points off your current score.

Goal of the game

To win, you must score 500 points! When you hit 500 or more points, you are taken to the end screen. You can press the space key to play again!

Different Screens

To make the different screens, I used an int variable called game mode.
I started by adding all my variables at the top of my code, then I loaded all my data like images, fonts and sounds.

I made 2 classes: one for bananas, one for stars. I made arrays for both classes and used a for loop in setup for each. I made it so that when you start the game, there are 20 stars and 10 bananas on screen.  This is also where I made the nested array for my sprite sheet. I set imageMode and textAlign to center.   I downloaded some theme music and made it loop while you play the game (The music keeps playing in all the game screens)

Here’s my setup code:

PImage linksprite, bg, star, banana, start; // all of the images
PImage[][] sprites;
PFont mario, score;
int direction = 1;
int step = 0;
int x, y;
int r1, r2;
int speed = 4;
int gamemode = 0; // for the diff screens
int pts = 0; // points in game
import processing.sound.*;
SoundFile file;
String audioName = "music.wav";
float timer=0;
boolean timerActivated = false;


Banana[] bananas;
Star[] stars;
// arrays for both objects

void setup() {
  size (1000, 700);
  //loading the images and fonts here :
  bg     = loadImage("bg.png");
  star   = loadImage("star.png");
  banana = loadImage("banana.png");
  start  = loadImage("start.png");
  mario  = createFont("/Users/fatimaaljneibi/Library/Fonts/Mario-Kart-DS.ttf", 32);
  score  = createFont("Courier New", 25);
  linksprite = loadImage("linksprite.png");

  //theme music loop:
  file = new SoundFile(this, "music.wav");
  file.loop();


  stars = new Star[20] ;
  for (int i=0; i<stars.length; i++) {
    stars[i]= new Star(random(width), random(height));
  }

  bananas = new Banana[10] ;
  for (int i=0; i<bananas.length; i++) {
    bananas[i]= new Banana(random(width), random(height), random(-5, 5), random(-5, 5));
  }

  sprites = new PImage[4][10]; // 12 images across, 4 down, in the spritesheet

  int w = linksprite.width/10;
  int h = linksprite.height/4;

  for (int y=0; y < 4; y++) {
    for (int x=0; x< 10; x++) {
      sprites[y][x] = linksprite.get(x*w, y*h, w, h);
    }
  }

  x = width/2;
  y = height/2;

  imageMode(CENTER);
  textAlign(CENTER);
}

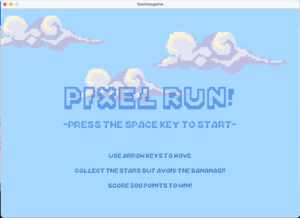
When game mode = 0, (it starts at zero when you run the game) you can see the start screen, which looks like this:

Here’s the code for the first page: (it was inside void draw)

if (gamemode == 0) { // starting screen
  background(start);
  fill(#5F9AEA);
  textFont(mario, 100);
  text("PIXEL RUN!", width/2, height/2-25);
  // instructions
  textFont(mario, 40);
  text("-press the space key to start-", width/2, height-300);
  textFont(mario, 25);
  fill(#3F7CC9);
  text("use arrow keys to move", width/2, height-200);
  text("collect the stars but avoid the bananas!!", width/2, height-150);
  text("score 500 points to win!", width/2, height-100);


  if (keyPressed) {
    if (key == ' ' ) {
      gamemode = 1;
      pts = 0;
    }
  }


I made the background on Picsart, then I downloaded a Mario Kart font and added it to my data folder. I used createFont() to use this font in my game, I used the font for the title & instructions, as well as in the win screen. When you press the space key, game mode = 1 and the next screen loads! (the actual game screen!!)

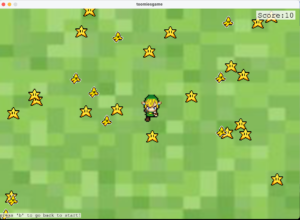
It looks like this:

Here’s the code for this page!

else if (gamemode == 1) { // actual game code goes here

    background(bg);

    // makes the disappeared objects reappear every 5 seconds:
    if (timerActivated==true) {
      if (millis()>timer ) {
        println("timer done!");
        timerActivated = false;
        for (int i=0; i<15; i++) {
          if (stars[i].disp == false) {
            stars[i].starx = random(width);
            stars[i].stary = random(height);
          }
          stars[i]. disp=true;
        }
        for (int i=0; i<8; i++) {
          bananas[i]. disp=true;
        }
      }
    }


    if (timerActivated == false && gamemode == 1) {
      println("timer triggered");
      timer = millis()+5000; // more objects appear on screen every 5 seconds
      timerActivated = true;
    }


    // displays the initial stars & bananas, calls the functions from their classes
    for (int i=0; i<20; i++) {
      stars[i]. display();
    }
    for (int i=0; i<10; i++) {
      bananas[i]. display();
      bananas[i]. move();
    }


    //look at sprite sheet to determine which direction is which
    if (keyPressed) {
      if (keyCode == DOWN) {
        direction = 0;
        y+=speed;
      }
      if (keyCode == LEFT) {
        direction = 1;
        x-=speed;
      }
      if (keyCode == RIGHT) {
        direction = 3;
        x+=speed;
      }
      if (keyCode == UP) {
        direction = 2;
        y-=speed;
      }
      if (key == 'b' || key == 'B' ) {
        gamemode = 0;
      }
      if (keyCode == DOWN || keyCode ==  UP || keyCode == LEFT || keyCode == RIGHT) {

        if (frameCount%speed==0) { //the spritesheet images will loop only if the arrow keys are pressed
          step = (step+1) % 10;
        }
      }
    }

    image(sprites[direction][step], x, y); // the sprite


    // points system:
    for (int i=0; i<10; i++) {
      float d2 = dist(x, y, bananas[i].banx, bananas[i].bany);
      if ( d2 <= 50 && bananas[i].disp==true) {
        if (pts >=10)
          pts-= 10;
        // takes 10 points off for every banana collided w the sprite

        bananas[i].disp=false; //banana disappears
      }
    }

    for (int i=0; i<20; i++) {
      float d1 = dist(x, y, stars[i].starx, stars[i].stary);
      if ( d1 <= 50 && stars[i].disp==true) {
        pts+= 20;
        stars[i].disp=false;  //adds 20 pts per star and makes it disappear on contact w sprite
      }
    }


    if (y>height) {
      y=0;
    }
    if (y<0) {
      y=height;
    }
    if (x>width) {
      x=0;
    }
    if (x<0) {
      x=width;
    } // this is to keep the sprite always on screen

    //the score board:
    textFont(score);

    pushStyle();
    fill(255, 200);
    noStroke();
    rectMode(CENTER);
    rect(width-80, 22, textWidth("Score:" + pts)+10, 30);
    popStyle();
    fill(0);
    text("Score:" + pts, width-80, 30);
    pushStyle();
    fill(255, 180);
    noStroke();
    rect(2, height-20, 270, 15 );
    textAlign(LEFT);
    textFont(score, 15);
    fill(0);
    text("press 'b' to go back to start!", 2, height-8);
    popStyle();


    if (pts >= 500) {
      gamemode = 3;  //game ends when the player hits 500 pts
    }
  } // game code ends here

There’s a lot to unpack here:

When gamemode = 1, the background changes, the sprite appears at the center of the screen, the stars appear at random spots(they do not move) the bananas also appear at random spots, but they move with a random speed ranging from -5 to 5. This is because I added an extra argument for the bananas, which is spx and spy (speed x and speed y).

The sprite moves in directions 0-3, corresponding to the row on the sprite sheet image.  The sprite is always on screen because of this code:

if (y>height) {
     y=0;
   }
   if (y<0) {
     y=height;
   }
   if (x>width) {
     x=0;
   }
   if (x<0) {
     x=width;
   } // this is to keep the sprite always on screen

I used a similar code in the bananas class, so that the bananas always appear on screen as well.

The bananas and the stars classes have a display() function, which displays them at random spots on screen. The banana also has a move() function.

When the sprite collides with a star or a banana, it disappears and the pts variable adds or subtracts points depending on whether it is a star or a banana. These images disappear because of a boolean disp in their classes which makes them disappear on contact with the sprite.

The way collision detection works here is it checks to see if the image is displayed (the boolean disp I mentioned earlier) and if it is && the distance between the sprite’s x and y positions and the image’s x and y positions is less than 50 pixels, the image(star or banana) will disappear.

I also made a timer which will make the disappeared objects ( if their disp boolean =false and the 5 seconds have passed, the star or banana will reappear at a different spot. I made it so that 8 bananas and 15 stars can reappear every 5 seconds. This happens continuously.

Here’s the code for the timer:

// makes the disappeared objects reappear every 5 seconds:
    if (timerActivated==true) {
      if (millis()>timer ) {
        println("timer done!");
        timerActivated = false;
        for (int i=0; i<15; i++) {
          if (stars[i].disp == false) {
            stars[i].starx = random(width);
            stars[i].stary = random(height);
          }
          stars[i]. disp=true;
        }
        for (int i=0; i<8; i++) {
          bananas[i]. disp=true;
        }
      }
    }


    if (timerActivated == false && gamemode == 1) {
      println("timer triggered");
      timer = millis()+5000; // more objects appear on screen every 5 seconds
      timerActivated = true;

I also added a rectangle underneath the score counter & the bottom right text, it is not fully opaque so that you can see if there are any objects in that area of the screen. I used push & pop style here to make the rectMode= center for the score one.

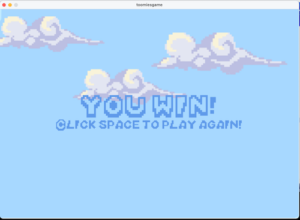
When you hit 500 points or more, gamemode= 3 and the win screen is displayed. It looks like this :

As you can see from the image, clicking the space bar will reset the game.

Here is the code for the bananas class:

class Banana {
  float banx, bany;    // bananas position
  float spx, spy;     //  speed
  float banw, banh; //width & height of the image
  boolean disp = true;

  Banana(float _banx, float _bany, float _spx ,float _spy ) {
    banx = _banx;
    bany = _bany;

    banw = 40;
    banh= 40;

    spx = _spx;
    spy = _spy;

 
  }

  void display() {
    if (disp)
      image(banana, banx, bany, banw, banh);
    // displays the bananas on screen
  }

  void move() {
    banx += spx;
    bany += spy;

    if (bany>height) {
      bany=0;
    }
    if (bany<0) {
      bany=height;
    }
    if (banx>width) {
      banx=0;
    }
    if (banx<0) {
      banx=width;
      //banana is always moving on screen
    }
  }
}

Stars class:

class Star {
  float starx, stary;    // stars position
  float starw, starh; //width & height of the image
  boolean disp = true;


  Star(float _starx, float _stary) {
    starx = _starx;
    stary = _stary;

    starw = 40;
    starh= 40;

  }

  void display() {
    if(disp)
    image(star, starx, stary, starw, starh);
    // displays the stars on screen
  }
  
}


Here is the the gameplay! TA-DA!!

https://youtu.be/r99jzLBahlk

(the “press  ‘b’ to go back to start!” text is not in this recording, but its in the game code now! I added it in after I recorded this!)


Here’s the zip file for the whole game:

toomiesgame

Mid Project: Bouncing Ball Game (Final)

Introduction:

Bouncing ball game is one of the old era game which is much popular and is easy to play. The main logic behind this game is to remove all the marbles or tiles from the top of the screen by bouncing the ball towards it through a simple stick laid at the bottom of screen. The ball moves randomly in any direction based on the collision of ball with the stick and touches the marbles at the top with different speed.

Inspiration for the Project:

Children are always found of ball games and the bouncing of ball not only release stress but also gives opportunity for a healthy activity. The visualization of ball bouncing in computer graphics gives smooth and realistic touch to eyes and fun to visualize such graphics. The old game gadgets and devices always incorporate such small games i.e. ball bouncing game. The game rules are easy to understand and anyone can play this game without any professional training. These are facts which inspired me a lot to implement ball bouncing game for my mid project.

Challenges and Problems:

It was challenging for me to give different direction to ball and to simulate the direction based on the collision of ball on stick residing at the bottom of the screen. It was challenging for me to move the ball with random speed and velocity. I faced little problem when detecting collision between ball and marble. It was challenging for me to display marbles on top of the screen at random positions. The addition of more speed and velocity if the ball is hitting the stick at same position was challenging for me.


Procedure:

 I started by implementing a ball class as ball object is the main object of the game. In this class I implemented function for the movement of the ball. The class contains attributes for the speed and velocity of the ball movement which sets based on the marble position and collision of ball with the stick. For sound effect I initialized audio sample object which further loads an external sound and plays when ball hits the bottom stick.

I implemented the displayball() inside ball class which draws a ball shape object based on the given screen position and specified size. I filled the ball shape with black color and using nostroke() function to give ball a realistic look.

Then I implemented the marble class which is responsible for displaying marbles at the top of the screen. The marble class object further used in marble aims class which is responsible for handling the collisions of ball with marbles.

In marble constructor I am setting the default size of marble and default position of marble.

I then implemented the display marble function which displays the marble in rectangular shape on top of the screen with specified width and height assigned through the constructor of the marble class.

I game class I implemented function to calculate the ball speed and velocity. If the ball position is far from the targeted marbles then increasing the speed and velocity of the ball.  

I implemented the isBallTouchMarble() function which uses distance function to check if the ball touches any marble or not. If the distance between the ball and marble is 0 then the function is returning true otherwise false.

Finally in main program I am initializing the game class object and calling the relevant functions in setup function to display marbles, ball and stick on screen. In draw function which is iterating infinite times I am calling calculate function which updates the ball speed and velocity based on the marble collisions.

Below I attached my final code including data class along with setup and draw function.

import ddf.minim.*;

Minim minim = new Minim(this);

boolean start= false;
class Ball 
{
  PVector MarblePosition;
  PVector velocity;
  PVector acceleration;
  AudioSample groove;
  float MarbleSize = 0;

Ball(float MarbleSize)
{
  
  
  this.MarbleSize = MarbleSize;
 
  groove = minim.loadSample("collision.wav");
  MarblePosition = new PVector(200,500);
  velocity = new PVector(2,2);
  acceleration = new PVector(0.008,0.008);
  
}

void MoveBall()
{
  if(MarblePosition.x>(width-(MarbleSize/2))|| MarblePosition.x<(MarbleSize/2) )
  {  
  velocity.x = velocity.x*(-1);
  acceleration.x = acceleration.x*(-1);
  this.groove.trigger();
  }

  if(MarblePosition.y>(height-(MarbleSize/2)) || MarblePosition.y<(MarbleSize/2) )
  {
   
  velocity.y = velocity.y*(-1);
  acceleration.y = acceleration.y*(-1);
  this.groove.trigger();
  }
  
  MarblePosition = MarblePosition.add(velocity);
  velocity = velocity.add(acceleration);
}

void DefaultVelocity()
{
  velocity.x=2;
  velocity.y=2;
}

void SimulateDirection(float x,float y)
{
  acceleration = new PVector(x,y);
}

void DisplayBall()
{
 noStroke();
 fill(random(255));
 ellipse(MarblePosition.x,MarblePosition.y,MarbleSize,MarbleSize);
}

}

class Game
{
  Ball ball;
  Marble Marble;
  Aims marbleaims;
  int score = 0;
  int level = 1;
  
  Game()
  {
  ball = new Ball(50);
  Marble = new Marble(120 , 30);
  marbleaims= new Aims();
  marbleaims.LoadMarbles();
  }

  void calculate()
  {

  marbleaims.AimCollision(ball);
  if(ball.MarblePosition.y> height-(Marble.MarbleHeight*2))
  {
    
  if((Marble.MarblePosition.x - (Marble.MarbleWidth/2)-(ball.MarbleSize/2)) < ball.MarblePosition.x && 
        ball.MarblePosition.x < ((Marble.MarblePosition.x + (Marble.MarbleWidth/2) + ball.MarbleSize/2)))
        {
          
    ball.velocity.y = ball.velocity.y*(-1);
    ball.acceleration.y = ball.acceleration.y*(-1);

    ball.groove.trigger();
    
     }
  }
 
  
  ball.MoveBall();
  Marble.MoveMarble(int(mouseX));
 
}

  void display()
  {
   marbleaims.DisplayMarbleAim();
   ball.DisplayBall();
   Marble.DisplayMarble();
   if(ball.MarblePosition.y>height-(Marble.MarbleHeight))
   {
    background(255);
    textSize(40);
    fill(random(255),random(255),random(255));
    text("You lost the ball! Game Over!",width/2-200,height/2);
    start=true;
    noLoop();
  }
  
  textSize(30);
  score=marbleaims.marblescount-marbleaims.currentmarblecounts;
  text("score : "+score,width-200,50);
  
  if(score==marbleaims.marblescount)
  {
    background(255);
    textSize(40);
    fill(random(255),random(255),random(255));
    text("LEVEL "+level+" COMPLETED",width/2-100,height/2);
    ++level;
    marbleaims.LoadMarbles();
  }

}
}


class MarbleAim
{
 
 PVector MarblePosition;
 float MarbleSize = 40;
 
 MarbleAim(int x,int y)
 {
   
   MarblePosition = new PVector(x,y);
 }


  boolean isBallTouchMarble(Ball ball)
  {

  if(dist(MarblePosition.x,MarblePosition.y,ball.MarblePosition.x,ball.MarblePosition.y)<(this.MarbleSize/2+ball.MarbleSize/2))
  {
    return true;
  }
  return false;

  }
 
  void DisplayMarbleAim()
  {
   stroke(0);
   strokeWeight(2);
   fill(255,0,0);
   rectMode(CENTER);
   rect(MarblePosition.x,MarblePosition.y,MarbleSize,MarbleSize);
  }

}


class Aims
{
  
  int marblescount;
  int currentmarblecounts;
  
  ArrayList<MarbleAim> marbleaims;

  Aims()
  {
    marbleaims=new ArrayList<MarbleAim>();
  }

  void LoadMarbles()
  {
    
    for(int i=40; i<height/2; i += 60)
    {
      for(int j=40; j<width-20; j += 50)
      {
        int flag=int(random(0,2));
        if(flag == 1)
        {
          marbleaims.add(new MarbleAim(j,i));
        }
      }
    }

    marblescount=marbleaims.size();
    currentmarblecounts=marblescount;
   } 


  void AimCollision(Ball ball)
  {
  
  for(int i = marbleaims.size()-1; i>=0; i--)
  {
      MarbleAim MarbleAim= marbleaims.get(i);
      
    if(MarbleAim.isBallTouchMarble(ball))
    {
      ball.velocity = ball.velocity.mult(-1);
      ball.acceleration = ball.acceleration.mult(-1);
      marbleaims.remove(i);
      currentmarblecounts -= 1;
    }
  }
}
  
  void DisplayMarbleAim()
  {
    for(MarbleAim t: marbleaims){
    t.DisplayMarbleAim();
  }
}
}


// Marble class for displaying marbles at the top of the game screen
class Marble
{

  PVector MarblePosition;
  float MarbleWidth;
  float MarbleHeight;


Marble(float MarbleWidth,float MarbleHeight)
{

  this.MarbleWidth = MarbleWidth;
  this.MarbleHeight = MarbleHeight;
  MarblePosition = new PVector(width/2,(height-MarbleHeight/2));

}

void MoveMarble(int x)
{
  MarblePosition.x=x;
}

void DisplayMarble()
{
  noStroke();
  fill(0);
  rectMode(CENTER);
  rect(MarblePosition.x,MarblePosition.y,MarbleWidth,MarbleHeight);
}


}


Game game;


void startgame()
{
  game.calculate();
  game.display();  
}

void setup()
{
  size(1000,800, P2D); 
  game = new Game();
  background(255);
  
}

void draw()
{
  background(255);
 if(!start)
 {
   startgame();
 }
 else
 {
   textSize(18);
   text("The game is starting......", 40, 120); 
 }
}

Conclusion:

In this mid project I learned how to move objects with different speeds and directions. I learned how to create a list of objects and renders on the screen at random positions. I learned how to check intersection of two objects. I learned how call one class function into another class and how to encapsulate the functionalities of each class. I learned how to build and map the game logics in an object oriented way.


Midterm : The Grab Food Game

Hello there, we are back in the game! Let’s start off by recalling the inspiration.

Inspiration

On a Saturday night, NYUAD students tend to have more meal swipes than they need. Students face the dilemma of either stacking more food with their extra swipes or losing all the swipes the next day.

The idea then is to create a game where the player (student) would try to collect as much food as it can on a movable food tray.

To win this game, just make the most of your meal swipes, just be patient and stack away as much food as you can. Choose wisely, more healthy food is worth more points. You gonna lose the meal swipes any way so the more points you acquire, the better.

Oh, don’t forget we are working with time ( the 30seconds surprise) 😄.

What were the next steps?

1.  Create the assets

2. Work on the game mechanics

3. Add sound to make it lively

4. working mainly on the gameplay screen and polishing the start and end screen

Assets

Created an Item Class that has a draw function and a method to check whether an item collides with another. Using inheritance, I created a Player class and a Food class.

Let me spare you the details and focus on the fun part. So now to create a player, I just needed to use an image of a tray. To create the food items, I just needed to use png images of the food I wanted.

Game Scenes

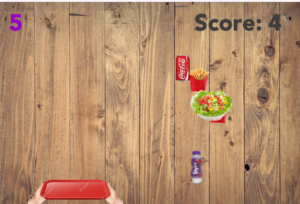
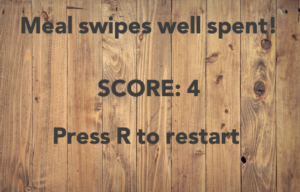
The game has three scenes. The starting page, the game window, and the win/restart page. The starting page has instructions on how to start the game. The user is informed of the countdown timer. In the game scene, there is the score on the top right, the timer on the top left. There is also the player (student holding tray) and falling food. The win/ restart page just shows the text, the score, and the key to press to restart the game.

Game Mechanics

So as mentioned earlier, when the game begins, the food starts falling, and the player has to navigate the tray to catch as much food as it can within 30 seconds. The healthier the food, the more points the player accumulates.

Sound

There is the main theme song playing in the background and a catching sound ( boip).

Demo


Challenges

Timer!

Yeah I know I mentioned this earlier but the timer was still printing  negative values. I solved this by  starting the timer once the user press ENTER to begin the game.

Sound!

Since my theme music is short, I was getting this weird noise when the game state changes. I had to check whether the theme was not  playing so that I can play it again.

Also, the theme sound was drowning the catch sound. I fixed this by reducing the volume of the theme music when the game starts.

Code

– Timer

//credit : http://www.cs.du.edu/~leut/1671/09_Fall/ProcessingNotes7.pdf
// converted the display into a countdown 

class Timer
{
  long startTime ; // time in msecs that timer started
  long timeSoFar ; // use to hold total time of run so far, useful in
  // conjunction with pause and continueRunning
  boolean running ;
  int x, y ; // location of timer output

  Timer(int inX, int inY)
  {
    x = inX ;
    y = inY ;
    running = false ;
    timeSoFar = 0 ;
  }


  int currentTime()
  {
    if ( running )
      return ( (int) ( (millis() - startTime) / 1000.0) ) ;
    else
      return ( (int) (timeSoFar / 1000.0) ) ;
  }

  void start()
  {
    running = true ;
    startTime = millis() ;
  }

  void restart()
    // reset the timer to zero and restart, identical to start
  {
    start() ;
  }

  void pause()
  {
    if (running)
    {
      timeSoFar = millis() - startTime ;
      running = false ;
    }
    // else do nothing, pause already called
  }

  void continueRunning()
    // called after stop to restart the timer running
    // no effect if already running
  {
    if (!running)
    {
      startTime = millis() - timeSoFar ;
      running = true ;
    }
  }


  void DisplayTime(int totalTime)
  {
    int theTime ;
    String output = "";

    theTime = currentTime() ;
    output = output + (totalTime - theTime) ;

    // println("output = " + output) ;
    fill(150, 0, 200) ;
    PFont font ;
    font = loadFont("Avenir-Black-48.vlw") ;
    textFont(font) ;
    text(output, x, y) ;
  }
}

– Objects

//game objects
class Item {
  PImage image;
  float xlocation;
  float ylocation;
  float _width;
  float _height;

  Item( PImage _image, float _xlocation, float _ylocation, float new_width, float new_height) {
    image = _image;
    xlocation = _xlocation;
    ylocation = _ylocation;
    _width = new_width;
    _height =new_height;
  }

  // draw item on screen
  void draw() {
    image(image, xlocation, ylocation, _width, _height);
  }

  //check intersection
  Boolean Intersect(Item newItem) {
    float itemwidth = newItem._width;
    float itemheight = newItem._height;
    float  itemxloc = newItem.xlocation;
    float itemyloc = newItem.ylocation;

    if (itemxloc < xlocation + _width &&
      itemxloc + itemwidth > xlocation &&
      itemyloc < ylocation + _height &&
      itemheight + itemyloc - 50
      > ylocation) {
      return true;
    }


    return false;
  }
}

class Player extends Item {
  
  Player( PImage _image, float xloc, float yloc, float w, float h) {
    super(_image,xloc, yloc, w , h);
  }
  
  void moveLeft(){
    if (xlocation - 10 > 0 ){
       xlocation -= 10;
    }
    
  }
  
  void moveRight(){
     if (xlocation+_width+10 < width ){
       xlocation += 10;
    }
  }

}


class Food extends Item {
  
  float speed;
  float originalspeed;
  int value;
  
  Food( PImage _image, float xloc, float _speed , int _value, float w, float h) {
    super(_image,xloc, random(-300, -100), w, h);
      speed = _speed;
      originalspeed = _speed;
      value = _value; // food value
  }


  //fall
  void fall(){
    ylocation = ylocation + speed;
    
    // add some velocity
    
    speed += 0.05;
    
    // reset to 
    if ( ylocation > height){
       ylocation = random(-300, -100);
       speed = originalspeed;
    }
  }
 

}

– Game

// game itself

class Game {

  PImage bgimage;
  PImage playerimage;
  PImage [] foodimages;
  
  SoundFile catchSound;
  SoundFile backgroundMusic;

  Timer timer;
  int totalGameTime;
 
  
  Player player;

  Boolean timeOut;
  int score;

  ArrayList<Food> Fooditems; 

  int foodspeed;
  

  Game(PImage _bgimage, PImage _playerimage, Timer _timer, PImage [] _foodimages, SoundFile _catchSound , SoundFile _backgroundMusic) {
    bgimage = _bgimage;
    playerimage = _playerimage;
    foodimages = _foodimages;
    timer = _timer;
    catchSound = _catchSound;
    backgroundMusic = _backgroundMusic;


    totalGameTime = 30; // 30 seconds
    timeOut = false;
   

    Fooditems = new ArrayList<Food>();

    score = 0;
    foodspeed = 3;
    
    player = new Player(playerimage, width/2, height - 80,200,100);
    createFood();
  }
  
  
  void play(){
    backgroundMusic.amp(0.1);
    
     if(!backgroundMusic.isPlaying()){
        backgroundMusic.play();
     }
     
    drawGameScene();
    moveFood();
    checkIntersection();
    checkGameOver();
  }
  
  void createFood(){
    // food value is based on food type
    // height and width of food is 10% of original size
    // the x coordinates of each food is random
     
     for ( int i = 1; i < 7; i++){
       int foodtype = int(random(5));
       Fooditems.add(new Food(foodimages[foodtype],random(30,width-100), foodspeed, foodtype,foodimages[foodtype].width*0.1,foodimages[foodtype].height*0.1));
     }
   
   
  }
   
  void drawGameScene(){
     timer.DisplayTime(totalGameTime);
     showScore();
    
    // draw fruits
    for (int i =0 ; i < Fooditems.size() ; i++){
      Fooditems.get(i).draw();  
    }
    
    // draw player
    player.draw();  
  }
  

  void moveFood(){
     for (int i =0 ; i < Fooditems.size() ; i++){
        Fooditems.get(i).fall();
    } 
  }
  
  // stockFood once one is removed from stack
  void stockFood(){
     int foodtype = int(random(5));
     Fooditems.add(new Food(foodimages[foodtype],random(30,width-100), foodspeed, foodtype,foodimages[foodtype].width*0.1,foodimages[foodtype].height*0.1));
     
  }
  
  
  // check if player touches food 
  
  void checkIntersection(){
    
     for (int i =0 ; i < Fooditems.size() ; i++){
       if (player.Intersect(Fooditems.get(i))){
           score  += Fooditems.get(i).value;
           Fooditems.remove(Fooditems.get(i));
           catchSound.play();
           stockFood();
       }
    }
  }
  
  
  void checkGameOver(){
     if(timer.currentTime() == totalGameTime){
        timeOut = true;
        timer.pause();
     }
     
  }
  
   void restartGame(){
     timer.restart();
     timeOut = false;
     score = 0;
   
   }


  void showScore(){
       fill(60);
       text("Score: " + str(score), width - 140, 60);
  }
  
  void showGameOver(){
    
     if(!backgroundMusic.isPlaying()){
        backgroundMusic.play();
     }


     backgroundMusic.amp(1.0);
   
     text("Meal swipes well spent!", width/2, 80);
       
     text("SCORE: " + str(score), width/2,height/2);
     
     text("Press R to restart ", width/2,height/2 + 100);
  
  }
  
  
}

– Main

import processing.sound.*;

// THE TWO MAIN SCREENS
// 0: Start Page (Instructions)
// 1: Game Window and Restart


SoundFile backgroundMusic;
SoundFile catchSound;

PImage backgroundImg;
PImage fruitImg;
PImage fruit2Img;
PImage playerImg;

PFont times;

int gameScreen = 0;

Timer timer ;

Game game1;

void setup() {
  size(640, 425);

  backgroundMusic= new SoundFile(this, "theme.mp3"); //change song length
  catchSound= new SoundFile(this, "boip.mp3");

  backgroundImg = loadImage("data/wood.jpg");

  playerImg =  loadImage("data/holdingplate.png");

  PImage [] foodsimgs = { loadImage("data/pizza.png"), loadImage("data/coke.png"),
    loadImage("data/fries.png"), loadImage("data/yoghurt.png"),
    loadImage("data/salad.png") };

  timer = new Timer(35, 60) ; // make the display at location (35,60)

  frameRate(30);
  

  game1 = new Game(backgroundImg, playerImg, timer, foodsimgs, catchSound, backgroundMusic);

  backgroundMusic.play();
}

void keyPressed() {
  if (key == CODED) {
    if (keyCode == LEFT) {
      game1.player.moveLeft();
    }

    if (keyCode == RIGHT) {
      game1.player.moveRight();
    }
  }
}


void draw() {
  

  if (gameScreen == 0) {
    startScreen();
  } else {
    background(game1.bgimage);
    if (!game1.timeOut) {
      game1.play();
    } else {
      game1.showGameOver();

      if (keyPressed && (key == 'R' || key == 'r') ) {
        game1.restartGame();
      }
    }
  }
}


void startScreen() {
  background(loadImage("data/market.png"));
  
  
   times = createFont("Times New Roman",60);

  
  textFont(times);
  textAlign(CENTER);
  fill(0, 408, 612, 204);
  textSize(60);
  text("It's Saturday Night", width/2, height/2-40);
  textSize(18);
  text("Stack Up as much food as you can by moving left and right with the arrow keys.", width/2, height/2);
  text("The clock is ticking!", width/2, height/2 + 50);
  textSize(20);

  //added rectangle as a highlighter to serve as a signal to the user
  rectMode(CENTER);
  rect(width/2, height-100, height/2, 30, 10);
  fill(255);
  text("Press Enter to start !", width/2, height-95);
}

void keyReleased()
{
  if ((keyCode == ENTER))
  {
    gameScreen = 1 ;
    game1.timer.start();
  }
}

Here is a link to the code repo on Github

Credits

Let’s show appreciation to  http://www.cs.du.edu/~leut/1671/09_Fall/ProcessingNotes7.pdf and https://github.com/jb3dahmen/CatchTheFruitComplete for the timer class and  game mechanics idea respectively.