
Sketch link!
Describe the overall concept of your project (1-2 paragraphs)
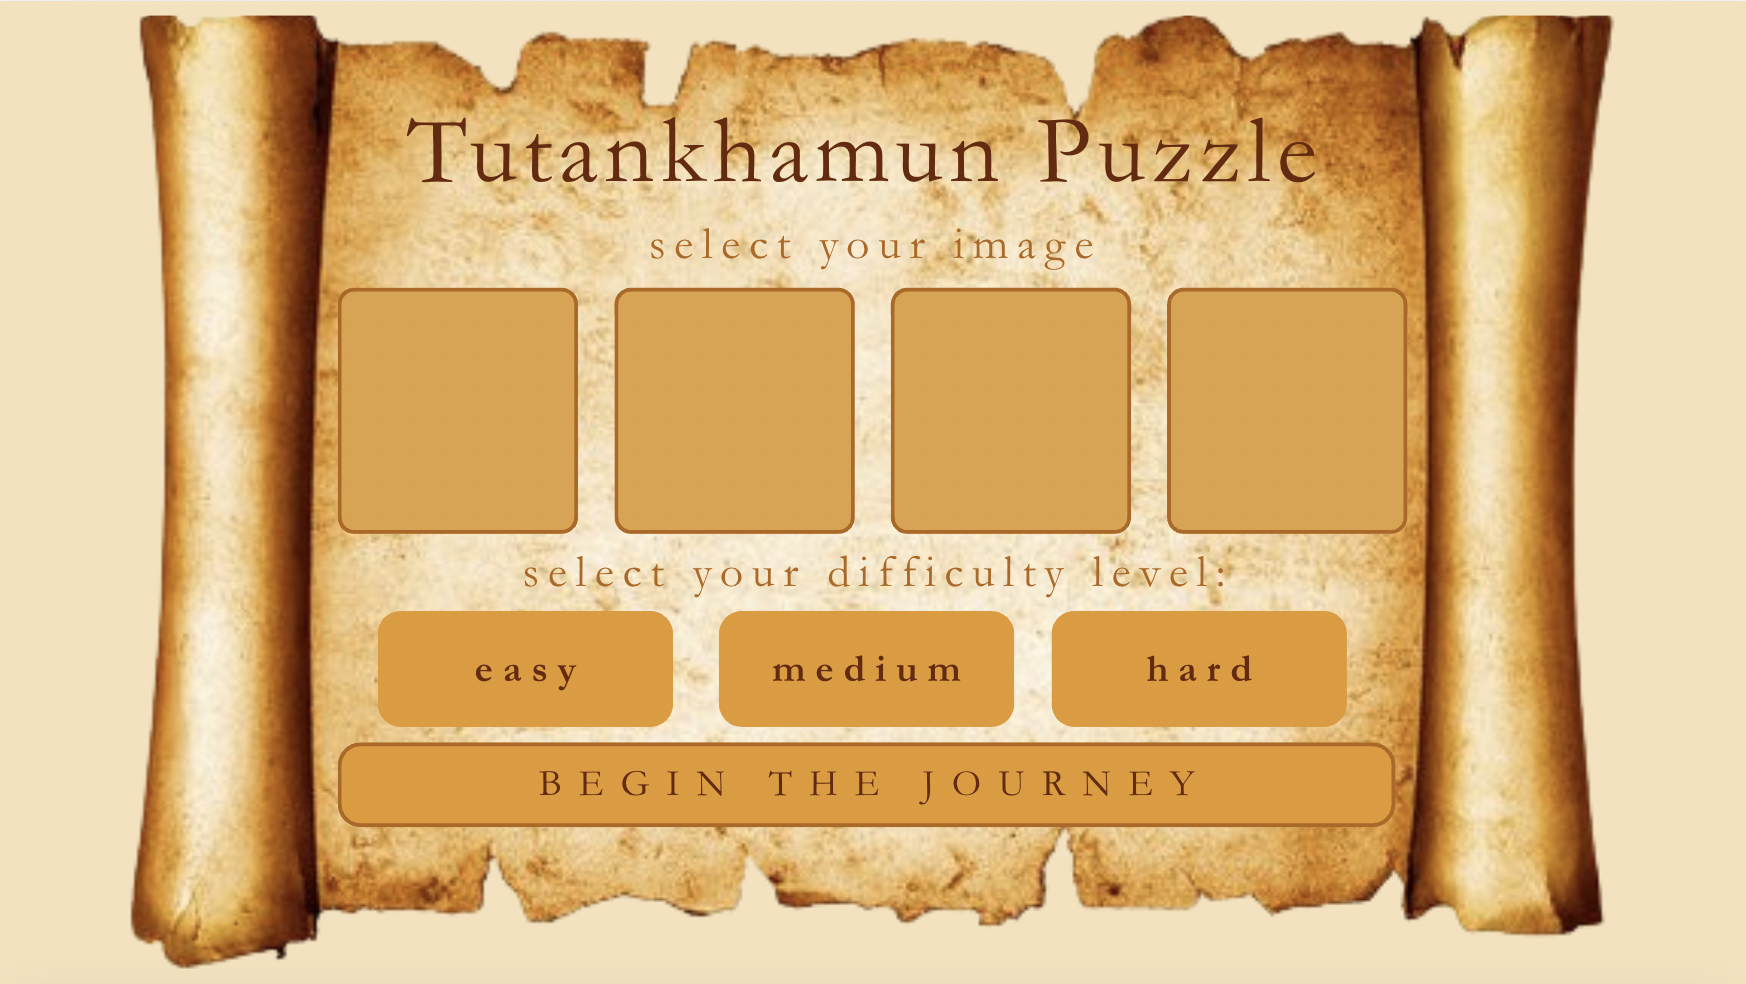
My project is a puzzle solving game with an “Ancient Egypt” theme. I wanted to have theme that related to me and since I’m Egyptian, this theme only made sense. Initially, I planned to use cartoon-like images of landmarks in Egypt, but I couldn’t find any images online of what I wanted or there wasn’t enough variety. I also can’t draw so I ended up just using realistic images instead (which I think I found through a website called freepik, but it was so long ago that I don’t even remember anymore). I had a rough plan of how I wanted the different screens within the game to look like in Canva (included in my midterm progress documentation), most things stayed the same in my final project. I found a font online called “khamenet,” which I decided to use throughout. I feel that this really added to the vibe of my project. 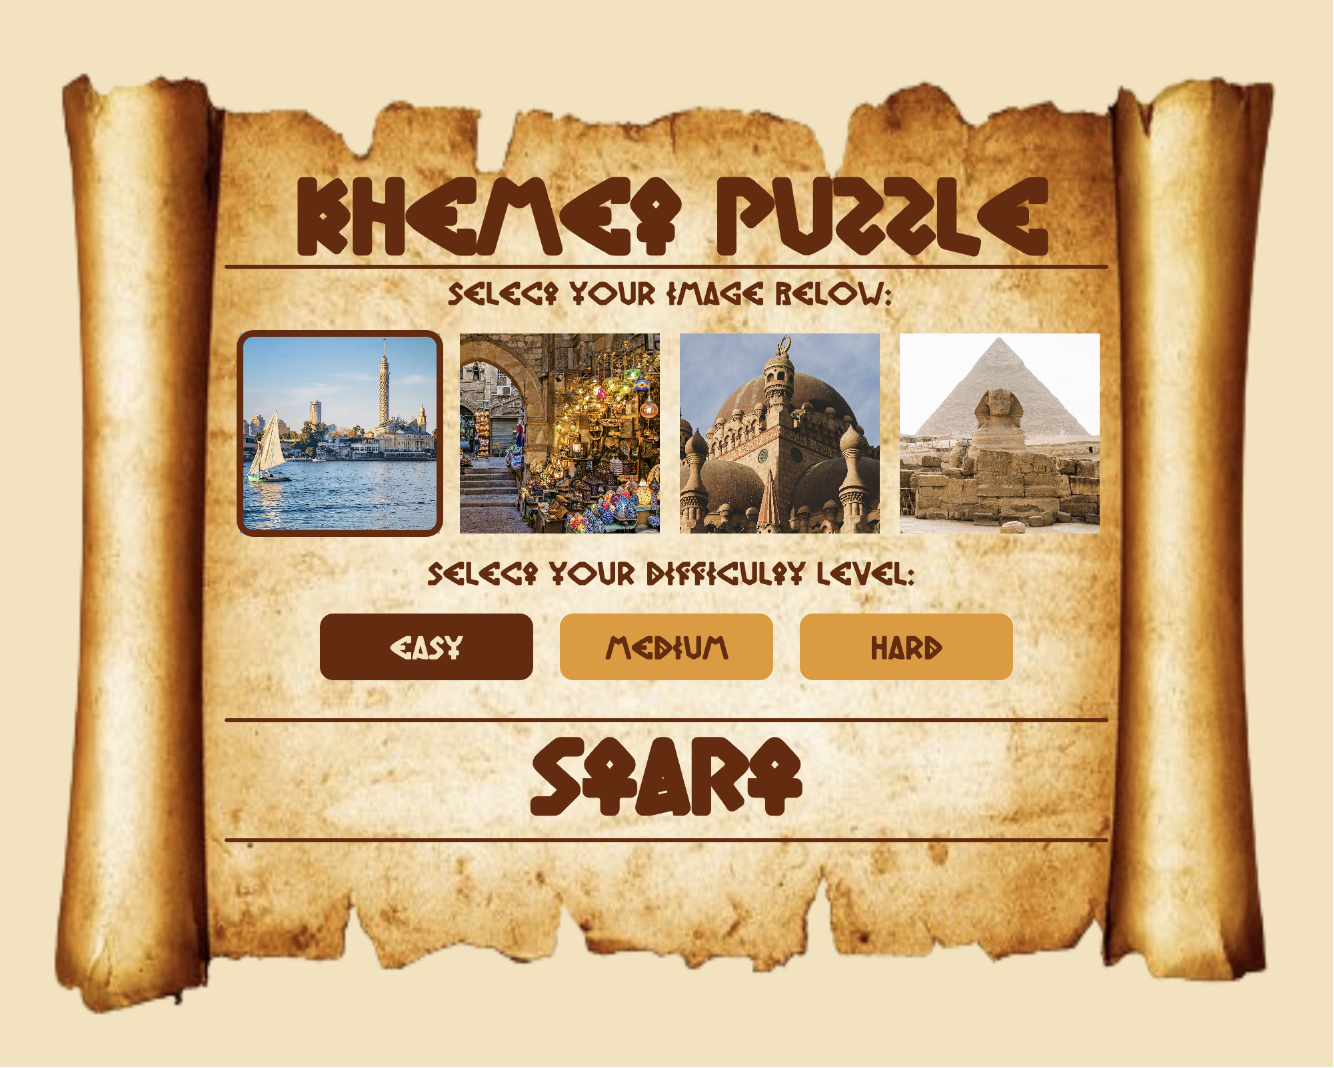
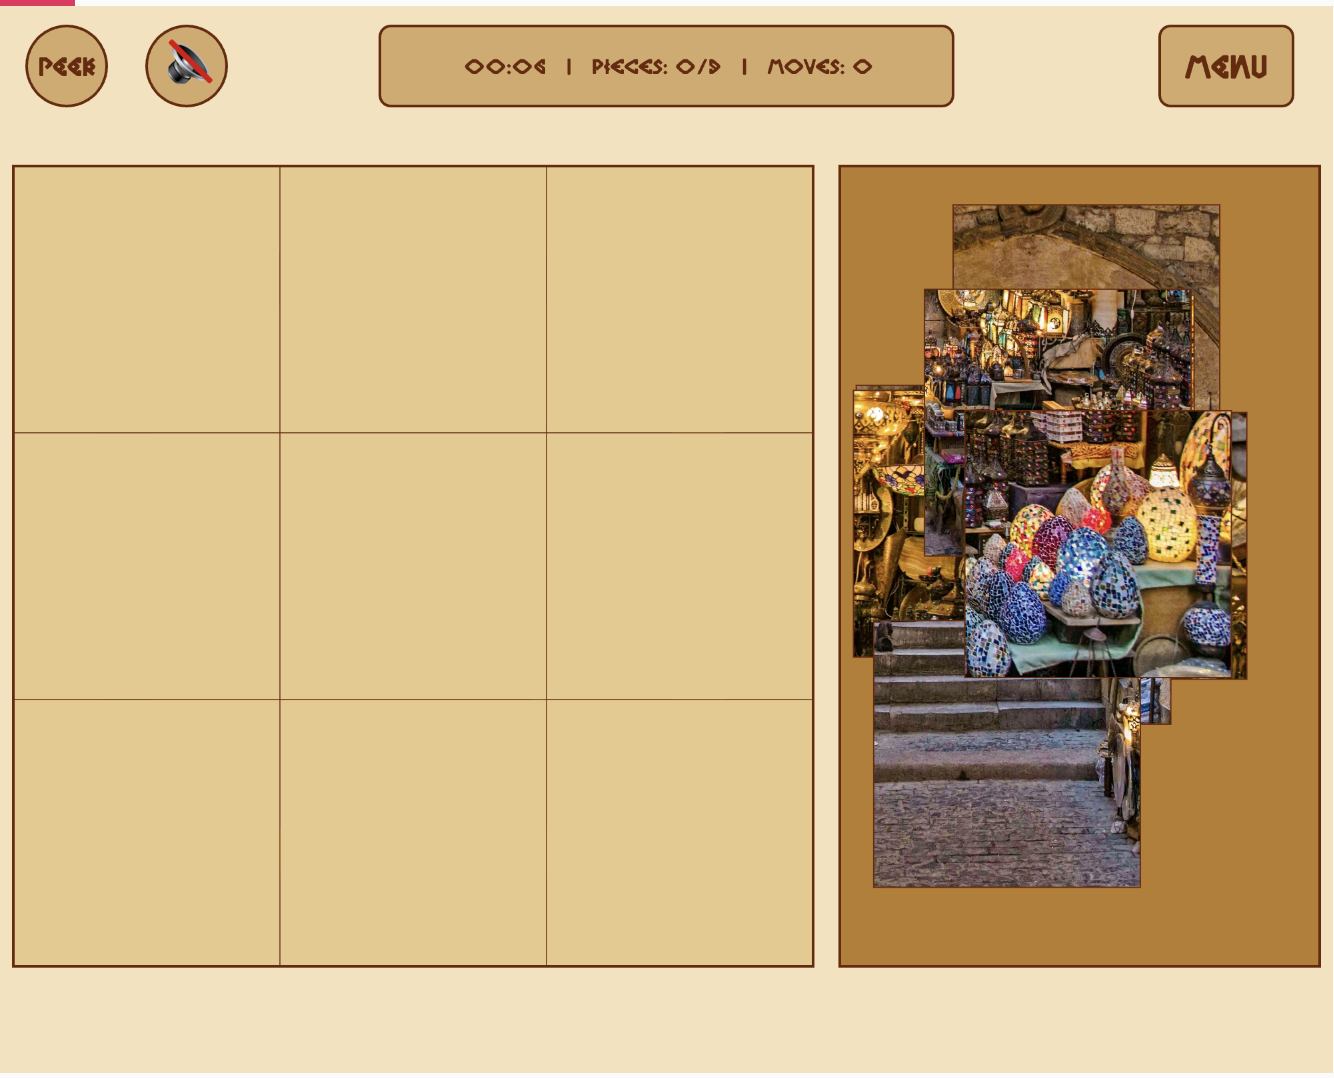
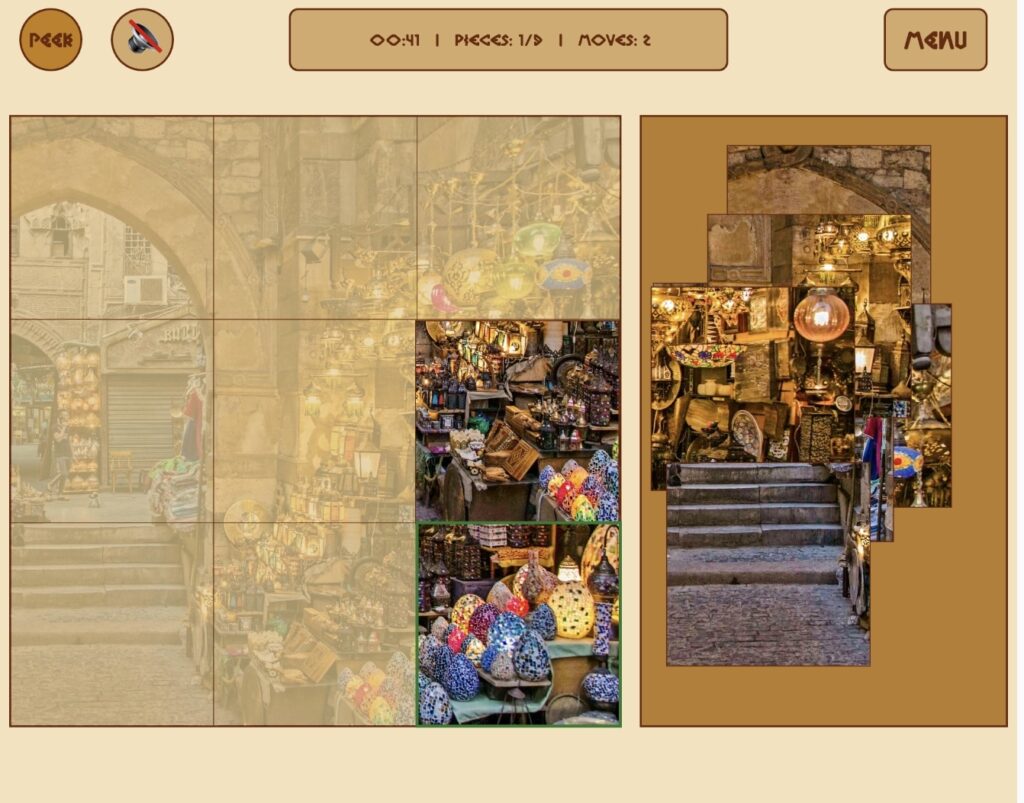
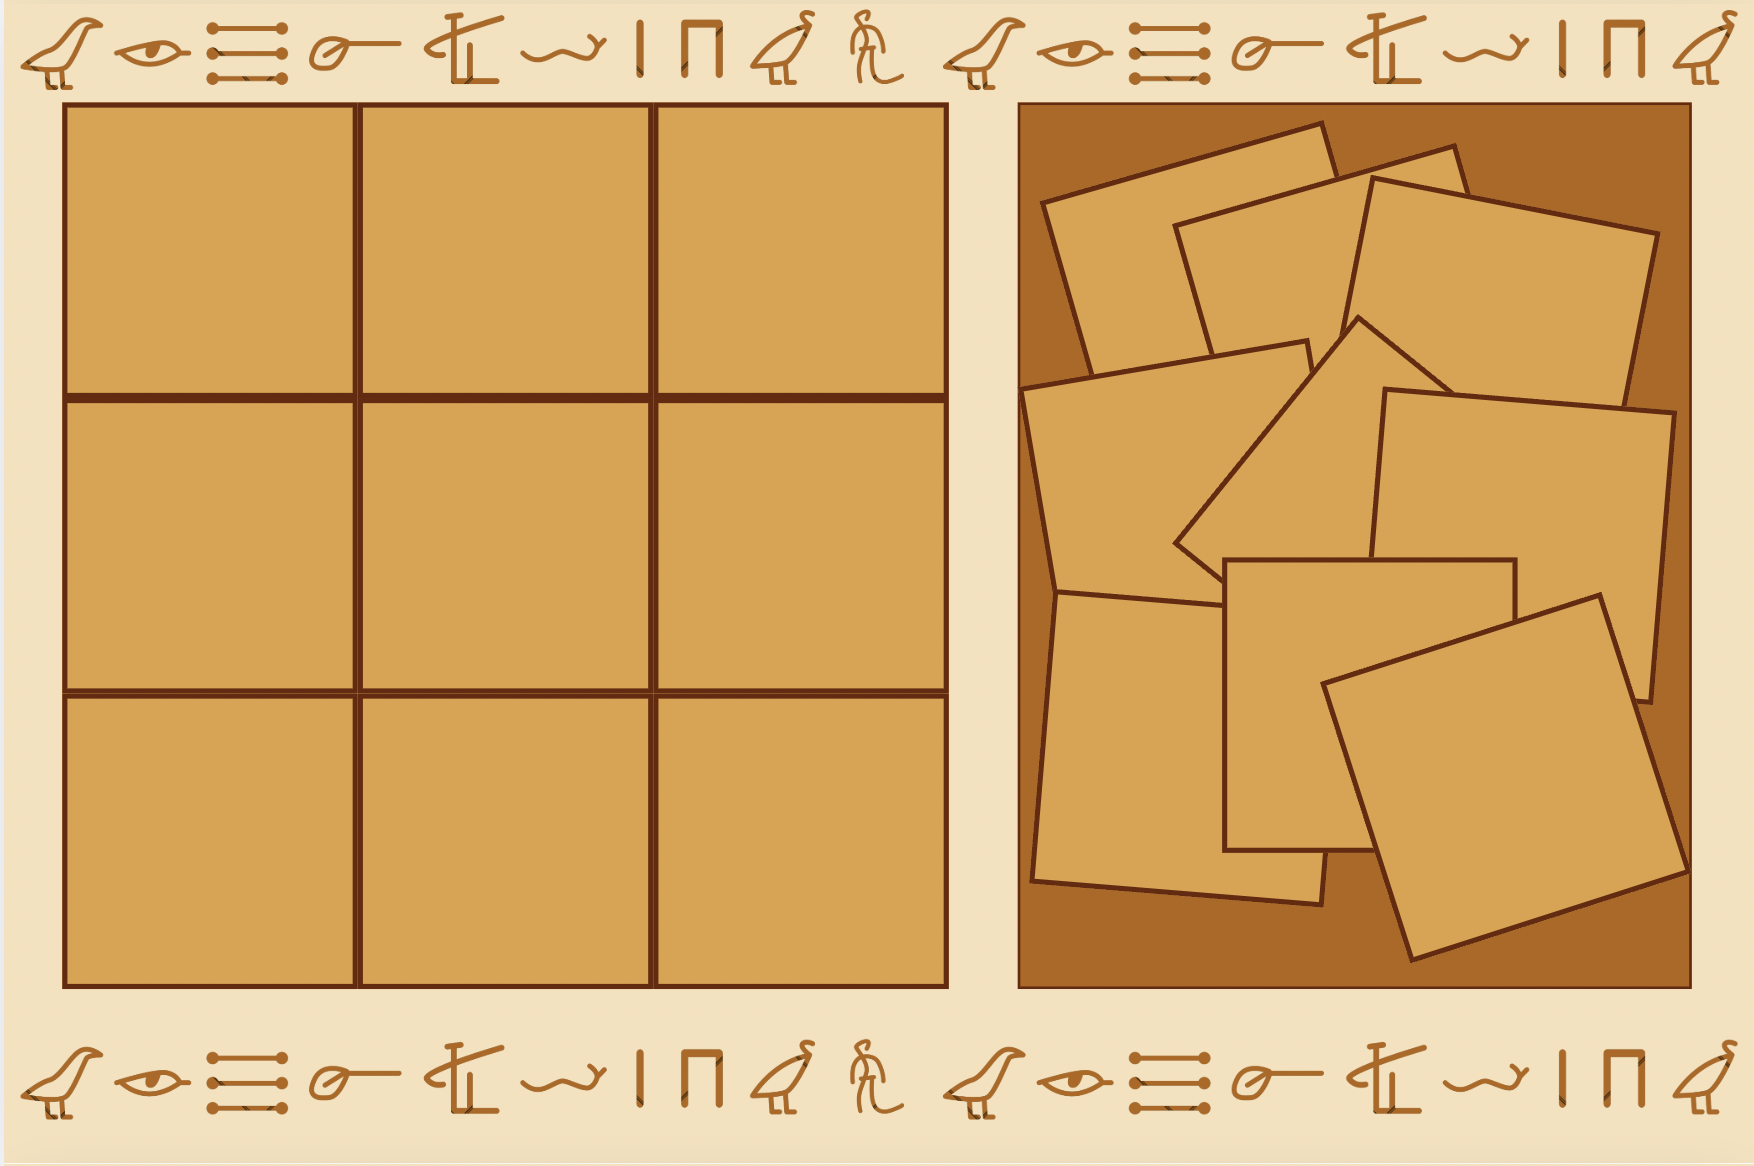
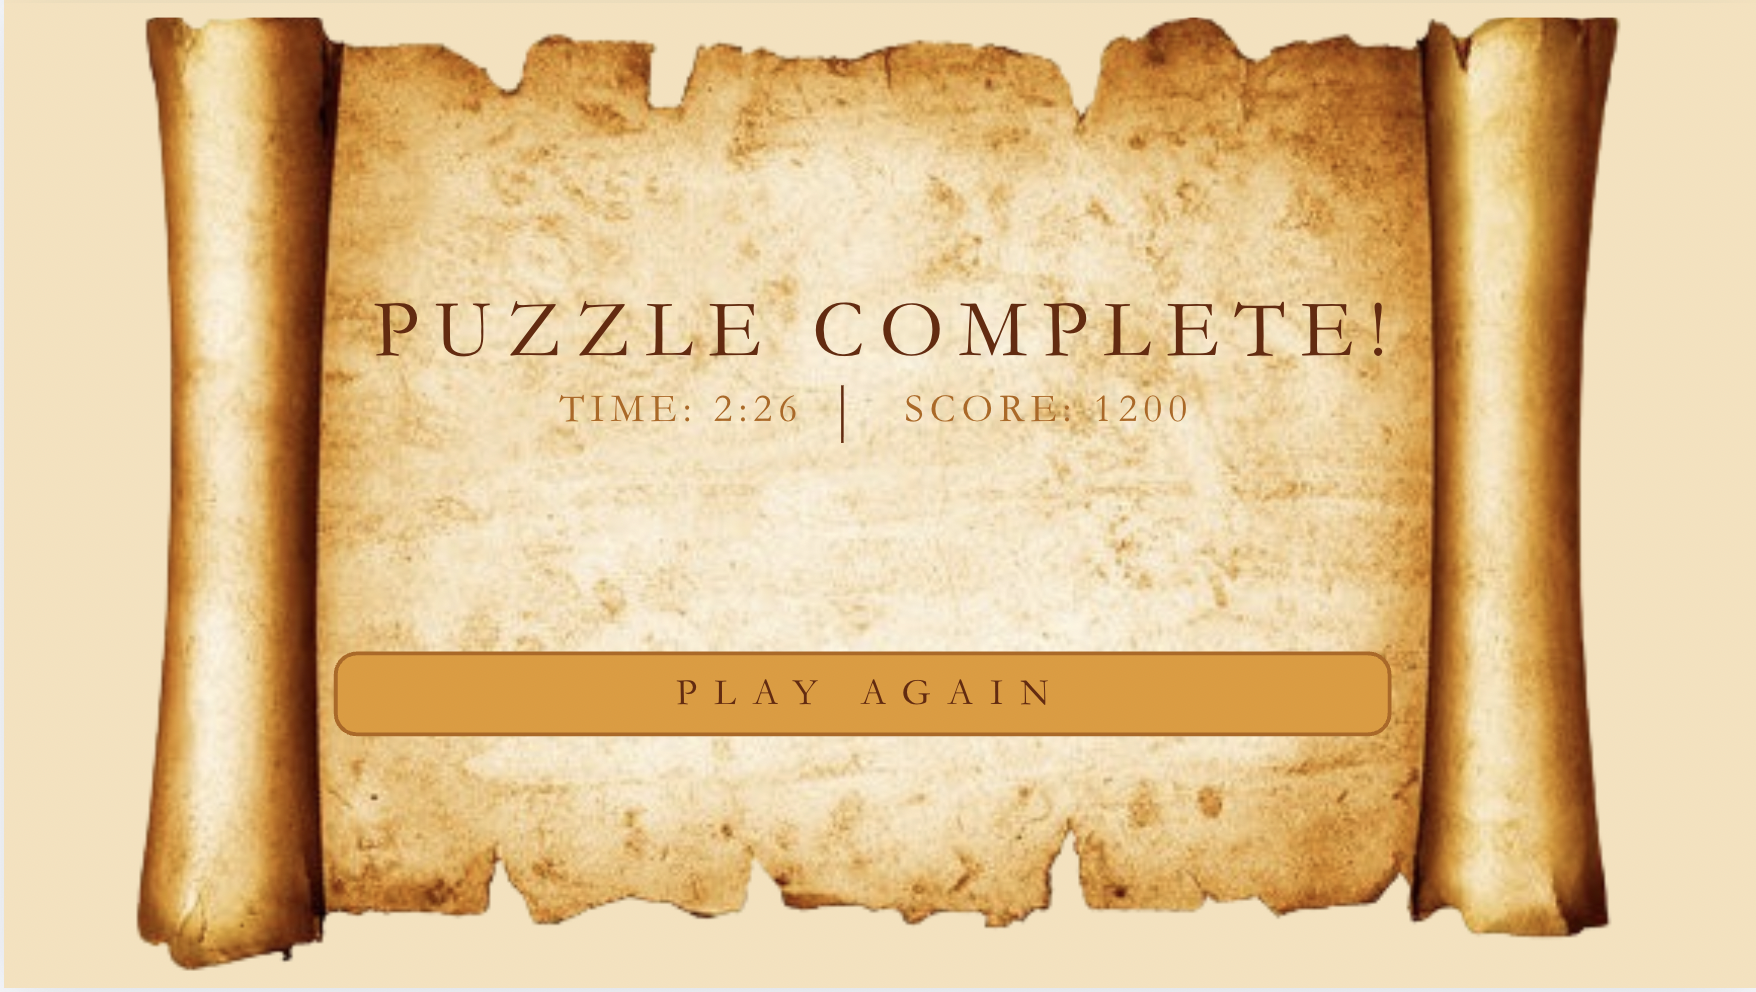
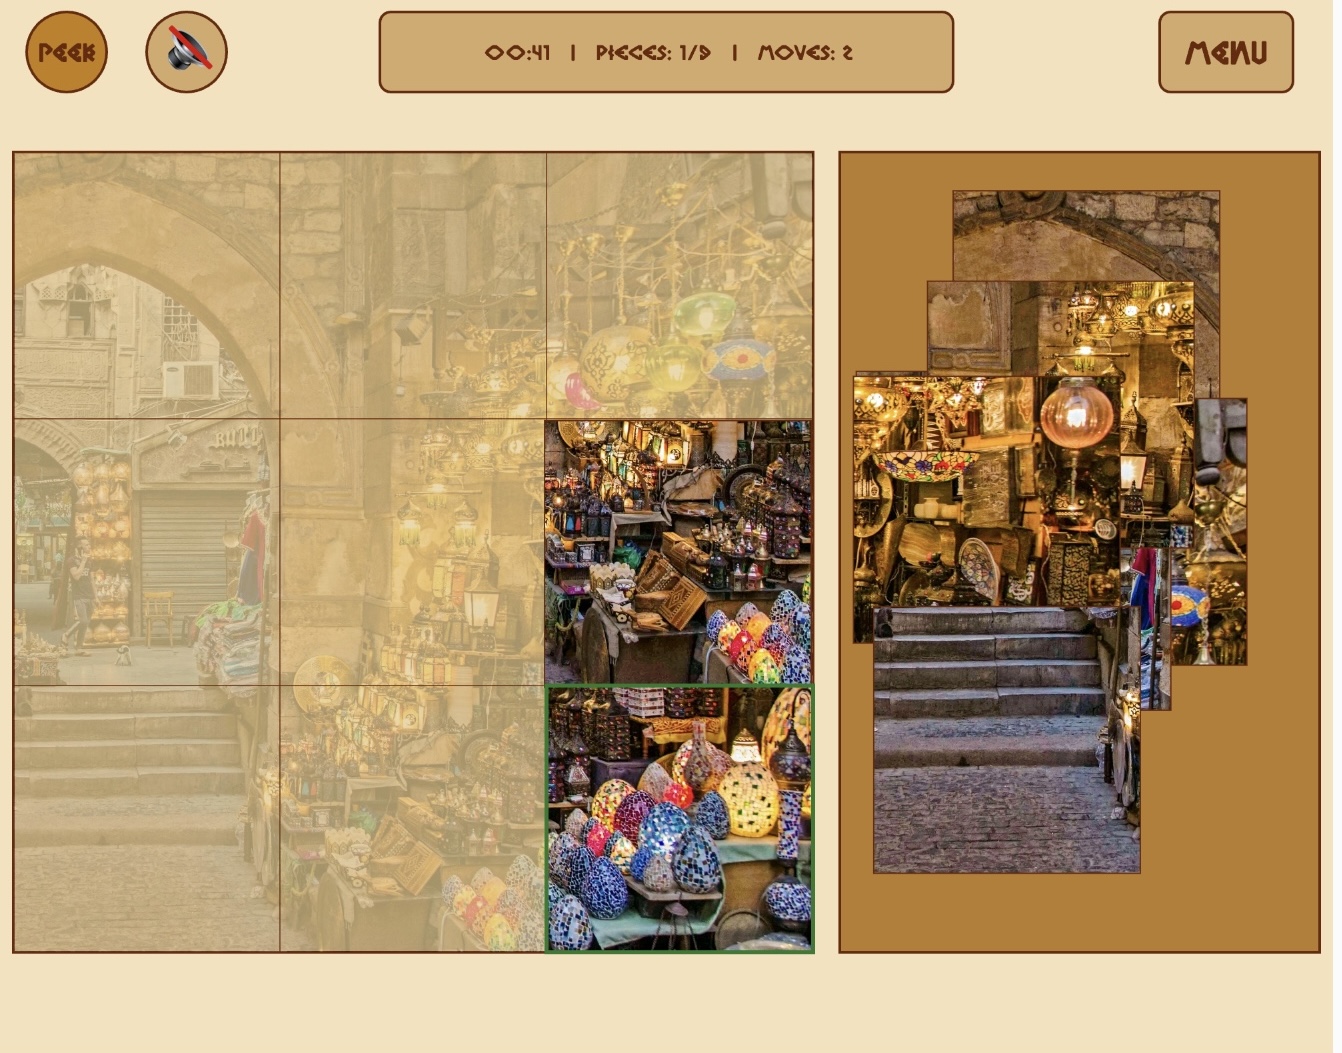
As for the game aspect, I settled on having each piece just be a square, rather than actual puzzle shaped since that would’ve been too difficult to code. The user can move the pieces around using their mouse. I didn’t add any instructions for my game as I felt it was self-explanatory, I tested it with my siblings and they both were able to play the game without any instructions. The only thing that I needed to point out was the ‘peek’ button. The peek button allows the user to see a preview of what the image they’re putting together looks like on the board itself. Initially, I was planning to just have a small reference image at the bottom of the screen, however, the peek overlay option ended up being more helpful and looks more seamless than having something in the corner. While the user plays, there’s background music and a ‘ding’ whenever a piece is placed correctly, if the user turns of the sound, both of these audio elements are muted/stopped. In addition, while the user plays, the game keeps track of the time taken, number of pieces placed, and number of moves taken. Finally, at any point, if the user gives up, they can press the menu button at top right to go back to the main menu. If they do not give up and complete the puzzle successfully, there’s a victory cheer (called a zaghrouta) that plays as well as an ending screen with their time taken. They can press anywhere to restart.
Describe how your project works and what parts you’re proud of (e.g. good technical decisions, good game design) 2-3 paragraphs
For the start screen, the main interactions are choosing the image and the difficulty level. The user can select each of these elements by clicking on them using the mouse. If the user presses within the coordinates of the element, their choice is recorded and the game proceeds accordingly. By default, if the user does not click on anything, the first image is selected and the difficulty is easy. The user can see which option is selected as the selected image has a border around it and selected difficulty is darker in color. Finally, the user starts the game by pressing within the boundaries of the lines around the work “START”. As long as the user is on the start screen, there is some music in the background.
I’m really proud of the aesthetic and the look of my start screen, since I wasn’t sure how closely I would be able to match the idea I had put together on Canva. However, luckily everything came together really nicely. I was really happy with the visual feedback to the user selecting the image and difficulty.
On the game screen, there’s a puzzle board on the left where the user puts the pieces together, a piece tray on the right where all the pieces start out scattered, and a few buttons at the top to control different things. First, top left, there’s the peek button. This button (as described earlier) allows the users to see a light preview of the full image overlaid on the puzzle board. I’m really proud of this element since I didn’t really have a plan of how I wanted to display the preview, so the fact that in the end, it ended up being something so simple is really nice.
// shows a preview of the image being solved, as a background
function drawPeekOverlay() {
  let img = getSelectedImage();
  if (img) {
    push();
    tint(255, 70);
    imageMode(CORNER);
    image(img, 10, 120, 600, 600);
    pop();
  }
}
Next to the peek button is the volume button which simply either toggles all the sound on or off, which includes the correct ding sound and the background music. A possible improvement is keeping the ding sound audible even when the user silences the music since I feel like that audible feedback can be more helpful.
In the middle at the top there’s an info bar that tracks the time elapsed, how many pieces have been placed out of the total, and the number of moves taken. The time elapsed is tracked by calculating the difference between millis() and the startTime that was recorded when the puzzle began, and counts placed pieces by looping through the pieces array each frame. Finally, on the top right, there’s a menu button which simply takes the user back to the start screen at any point.
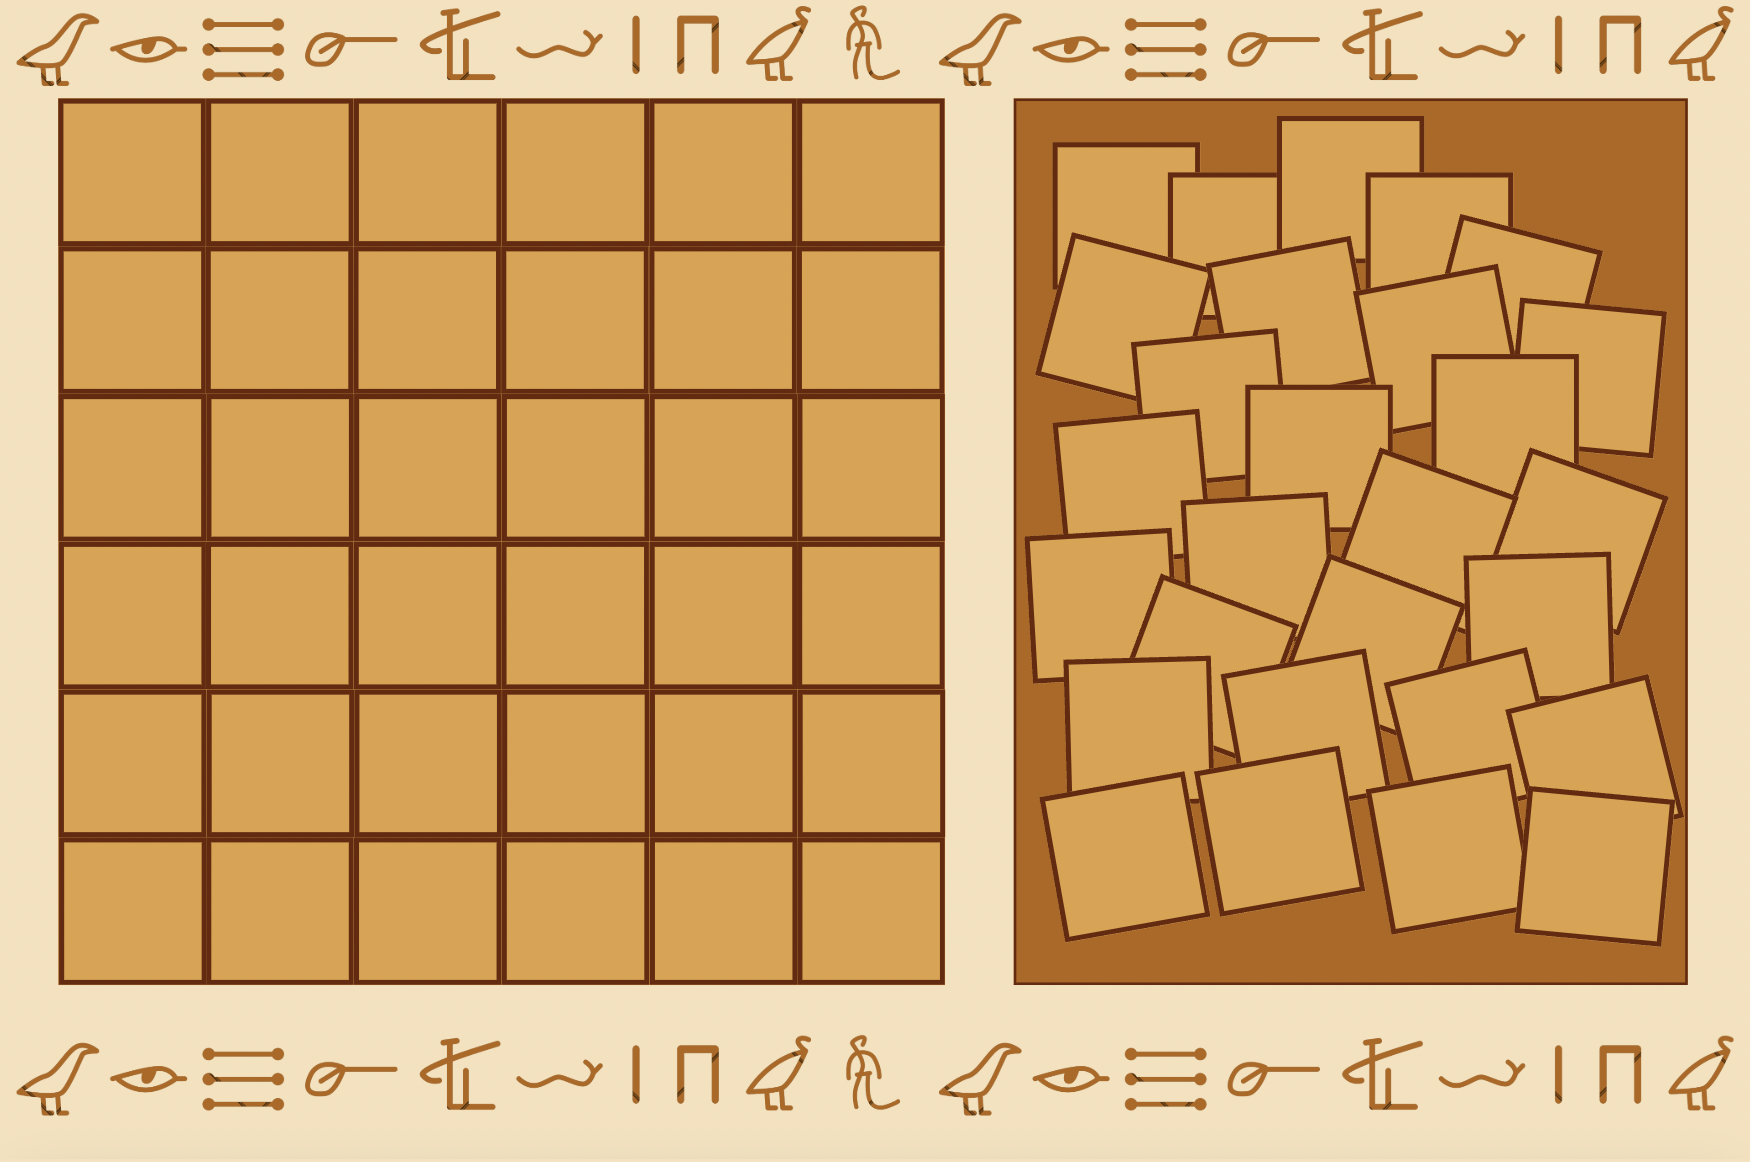
As for the actual puzzle, when buildPuzzle() is called it creates a PuzzlePiece object for every cell in the grid and scatters each one at a random position inside the tray using random(). Each piece stores which row and column it belongs to, so it knows its exact target position on the board. The drag and drop system uses three separate p5.js mouse functions working together: mousePressed() picks up the topmost unplaced piece the user clicked on by looping backwards through the array, mouseDragged() updates the piece’s position to follow the mouse every frame, and mouseReleased() drops it and calls trySnap() which checks if the piece landed within 30 pixels of its correct target — if it did, it locks into place exactly and the border around it turns green. The dragged piece is always moved to the end of the pieces array so it draws on top of everything else. When all pieces are placed, the background music stops, the zaghrouta audio plays, and the state switches to WIN which triggers the win screen on the next frame.
class PuzzlePiece {

  constructor(id, col, row, cols, img) {
    this.id = id;
    this.col = col;
    this.row = row;
    this.cols = cols;
    this.img = img;

    // calculate piece size based on the no. of cols and board size
    this.w = 600 / cols;
    this.h = 600 / cols;

    // current position, updated in buildPuzzle
    this.x = 0;
    this.y = 0;

    // target position (where the piece actually belongs on the board)
    this.targetX = 10 + col*this.w;
    this.targetY = 120 + row*this.h
    this.isPlaced = false;
}
draw() {
    push();
    // draw the actual image slice
    if (this.img) {
      let sliceW = this.img.width / this.cols;
      let sliceH = this.img.height / this.cols;
      let sliceX = this.col * sliceW;
      let sliceY = this.row * sliceH;

      imageMode(CORNER);
      // draw slice at current this.x and this.y
      image(this.img, this.x, this.y, this.w, this.h, sliceX, sliceY, sliceW, sliceH);
    }
    // draw border based on 'state'
      noFill();
      if (this.isPlaced) {
      stroke("#2a7a2a"); // green, if correct
      strokeWeight(3);
    } else if (this === dragging) {
      stroke("#e59828"); // orange, if being moved
      strokeWeight(3);
    } else {
      stroke("#6b2705");
      strokeWeight(1);
    }
      rect(this.x, this.y, this.w, this.h);
      pop();
    }

    // check if the mouse is touching this specific piece
   contains(mx, my) {
    return mx > this.x && mx < this.x + this.w && my > this.y && my < this.y + this.h;
  }
// snap logic
  trySnap() {
    let d = dist(this.x, this.y, this.targetX, this.targetY);
    if (d < 30) {
      this.x = this.targetX;
      this.y = this.targetY;
      this.isPlaced = true;
      return true;
    }
    return false;
  }
}
Describe some areas for improvement and problems that you ran into (resolved or otherwise) (1-2 paragraphs)
I think one main area for improvement is having actual puzzle shaped pieces rather than just squares. I think that would’ve definitely my idea across more, however, considering my skill set and based on tutorials and p5.js reference page, square seemed more feasible. I think adding instructions to clarify what the peek button does would’ve also been helpful, but my hope was that the user would just play around with the buttons and eventually discover it themselves (or ask me how to view a preview and I would guide them to use the button). I also would’ve loved to add some visual animations associated with the background music and also have different music/audio for each picture, but I completely forgot about the sound requirement till the last minute so there was a bit of a time constraint there.
I ran into a few problems throughout writing the code for this project, however, at this point, most of the problems have slipped my mind. One thing that I do remember since it was added last minute is that when I added audio files, my code was stuck in an endless loading loop. I was stuck on that for around 10 minutes, thinking maybe the files are just taking longer than usual to load, before I checked back through our class notes and realized I needed to add the sound library to my index.html file. Luckily, that wasn’t too big of an issue. Whenever I did run into any problems with my code (debugging) or was stuck with how to begin or how to proceed with specific features, I did get some help from Gemini as it would guide me on what topics to cover, give me links to videos to refer to, and what pages would helpful from the p5.js reference so I felt that I learnt a lot more that way.


