
Concept
After procuring some conductive fabric from the IM Lab, I was fiddling around with the kit when a thought struck my head: instead of having a wire be dependent on the switch, I could have a resistor play the part. My eyes then turned to the box for the Arduino Uno board lying on its side—it looked quite dejected, emptied of its contents and all on its lonesome. I simply had no choice but to let it play a central role in my contraption. Looking at the box, an idea found itself in my mind: closing the box would act as a trigger for lighting up the LED. To work, then.
Process
After creating a simple circuit composed of four wires, a resistor, and an LED (5V → Wire → Wire → Resistor → Wire → LED → Wire → GND), I removed the resistor and unplugged each end of the two wires surrounding it. I then taped two slivers of the conductive fabric to the two side flaps of the box, creating small openings between the fabric and box within which I could slip in the ends of the wires. The final step was to tape the resistor to the inside of the box so that its tips would touch the fabric on both sides when the box is closed, thus completing the circuit. These pictures should help show what this looks like:
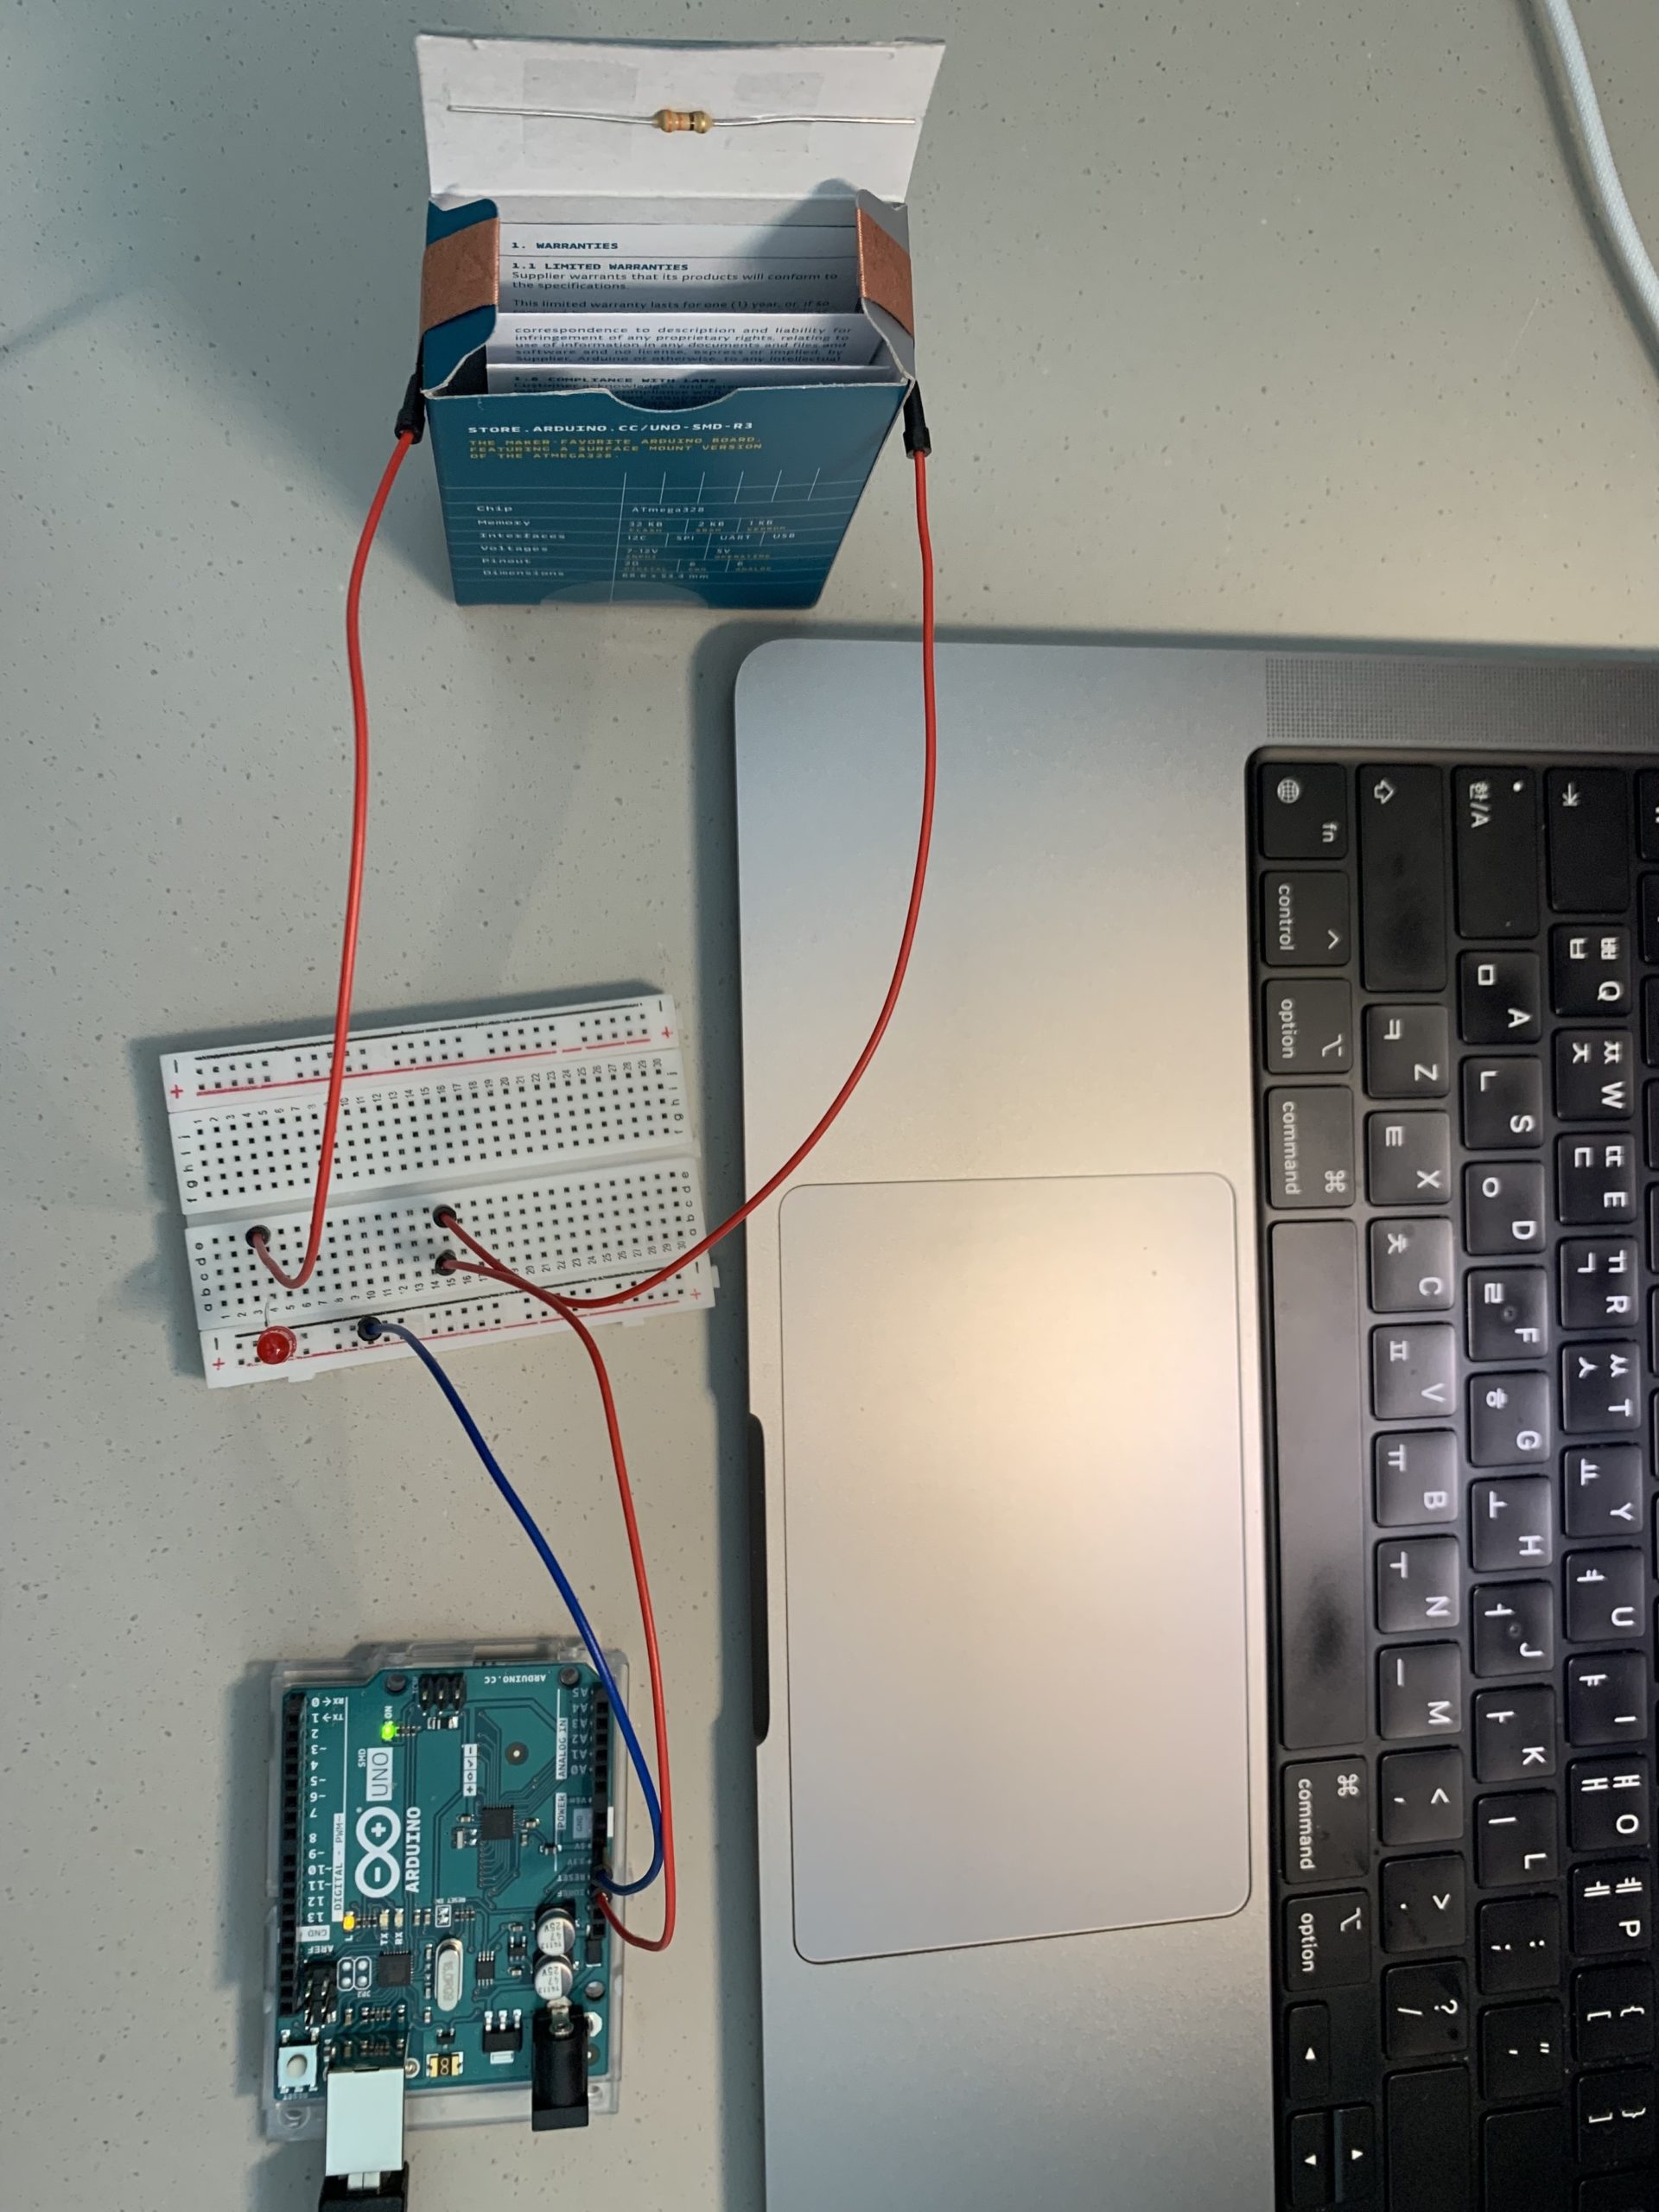
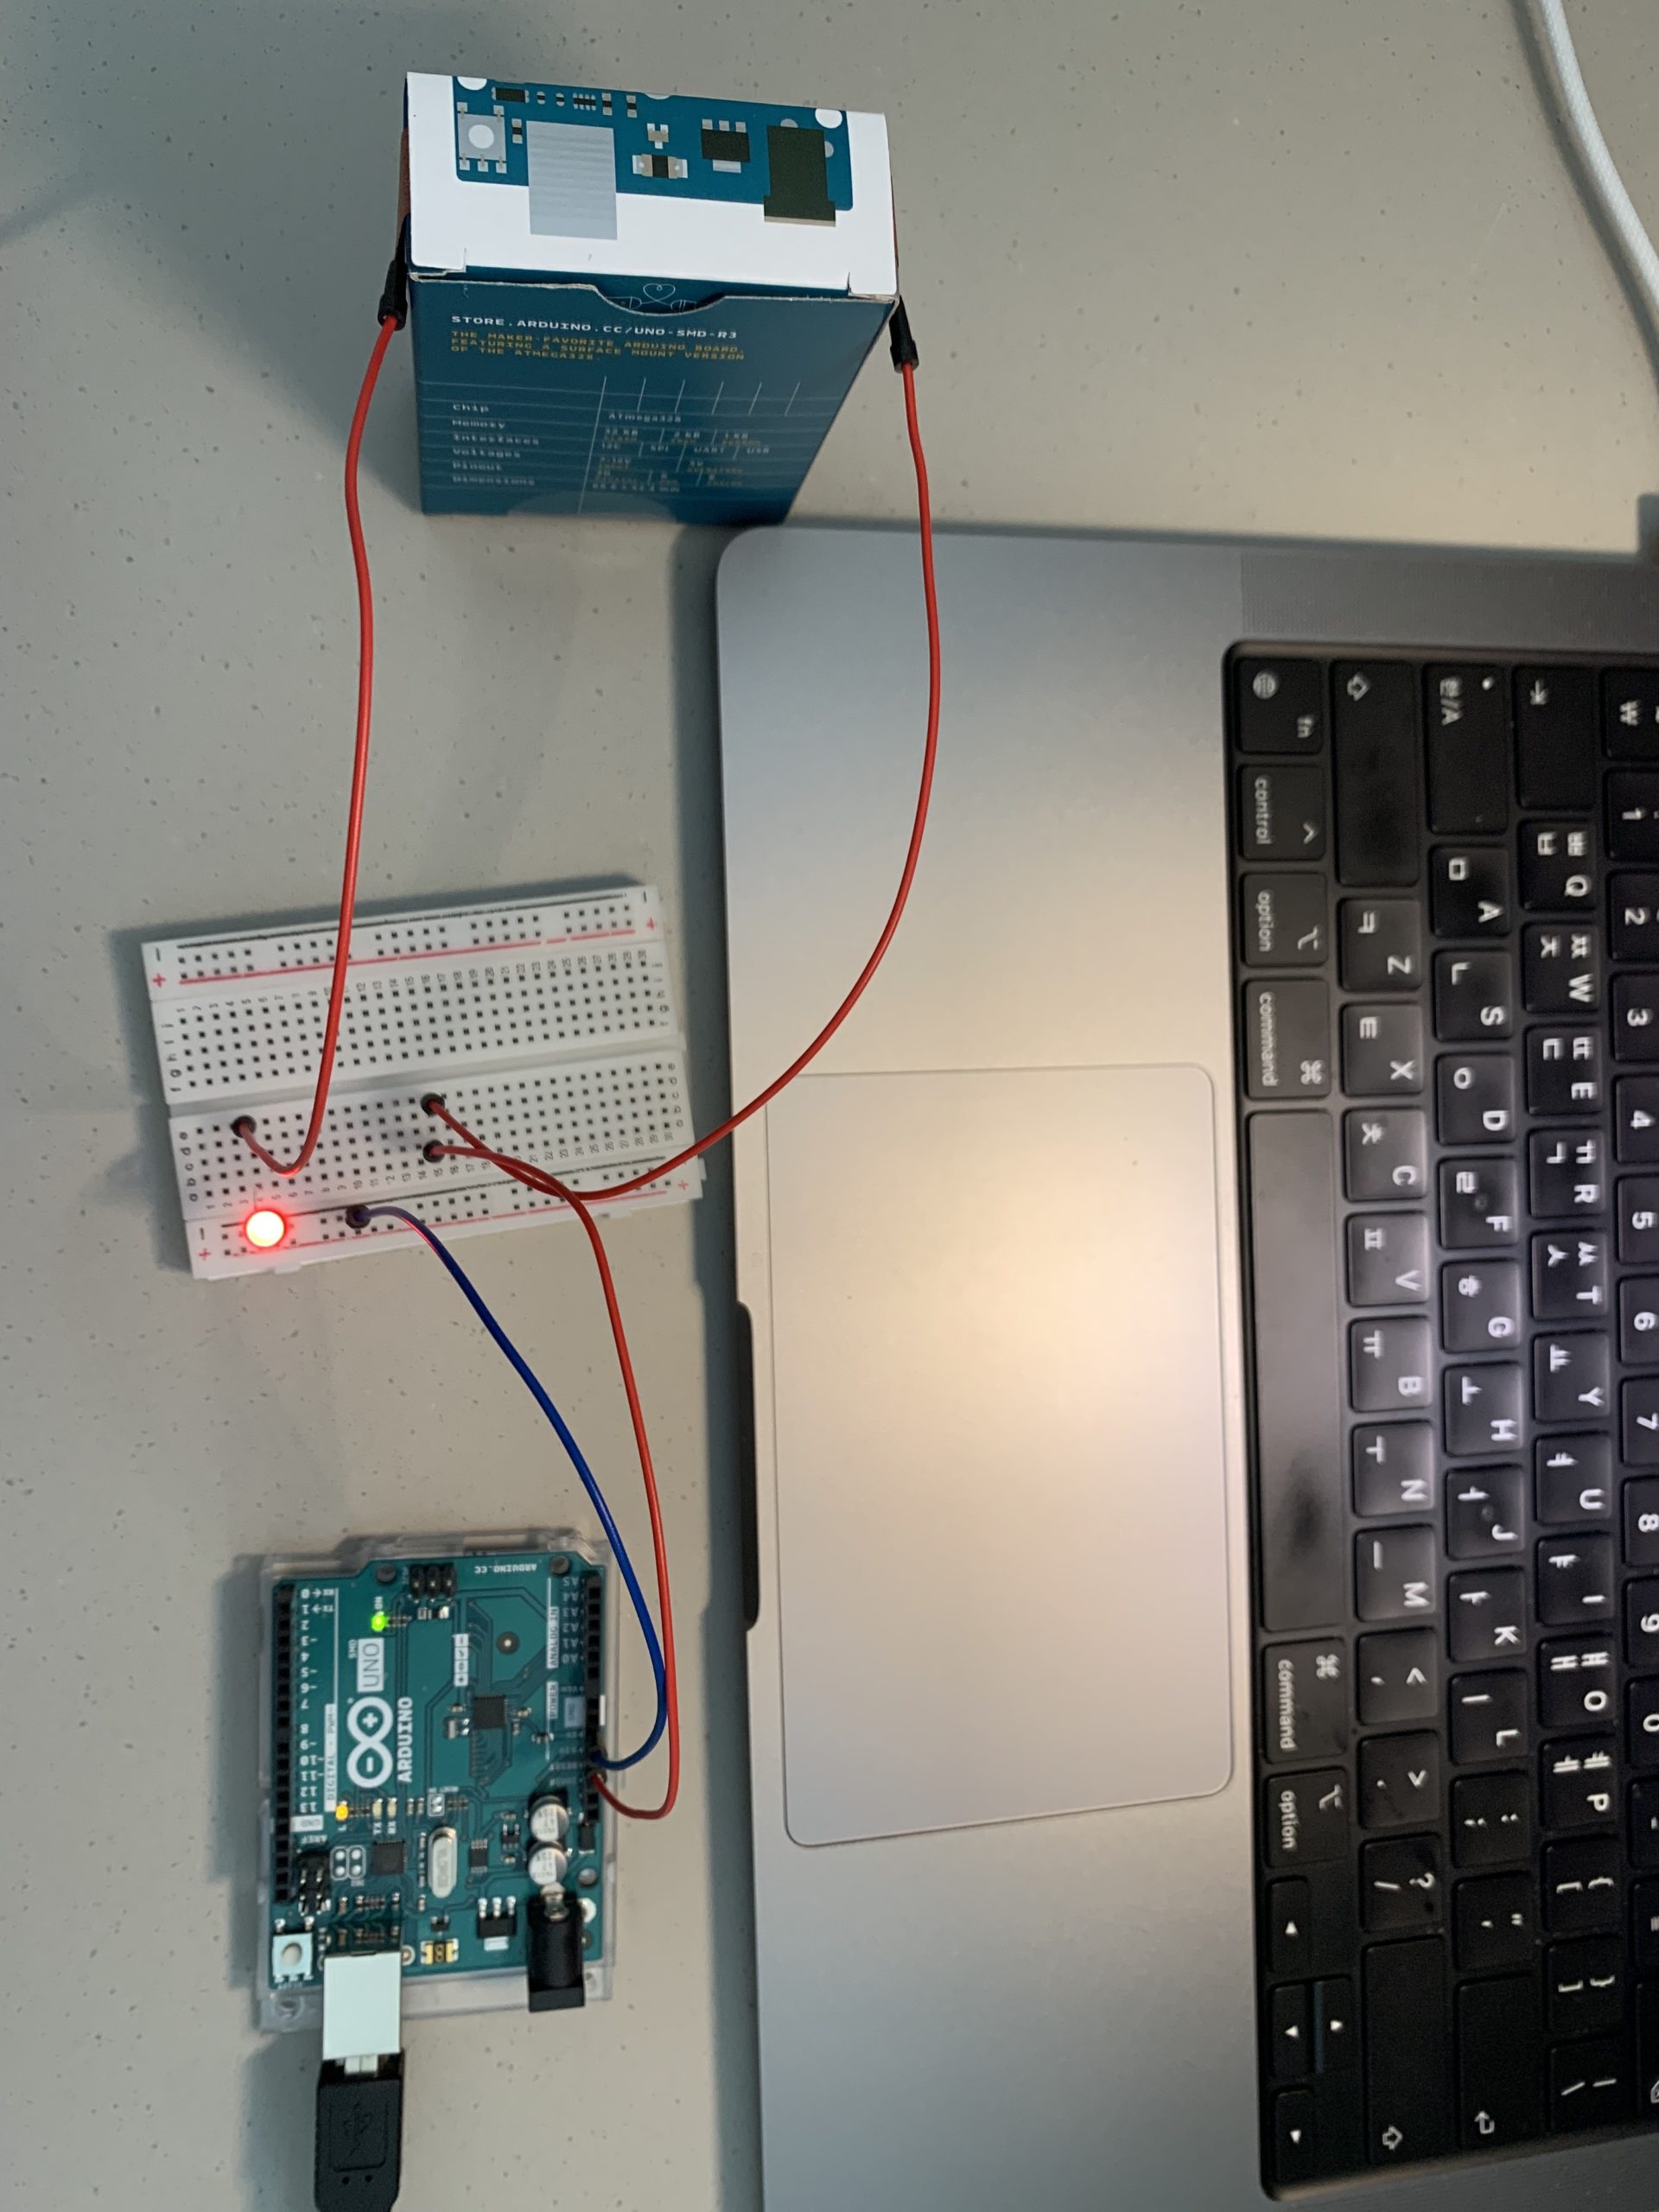 Off…and On!
And also a video:
Reflections
While it initially took me a little time to formulate the concept for my switch, things went quite smoothly after I settled on an idea! It was an exciting moment when the LED lit up as I had intended, akin to the thrill one feels when their code works. On that note, I look forward to what I can make by combining circuits with code—and especially to the doubled sense of satisfaction when things work out!