
Demo Below:
Concept:
The idea of this is that, you “charge” up a light show by shining a really bright light on the photo resistor, once you charged it up for a good 10 seconds, a light show happens! A yellow RGB light slowly brightens up as the percentages reaches to a 100 while charging. I implemented a physical button that resets everything to stop the light show and so that you are able to charge it again.
Implementation:
Schematic:
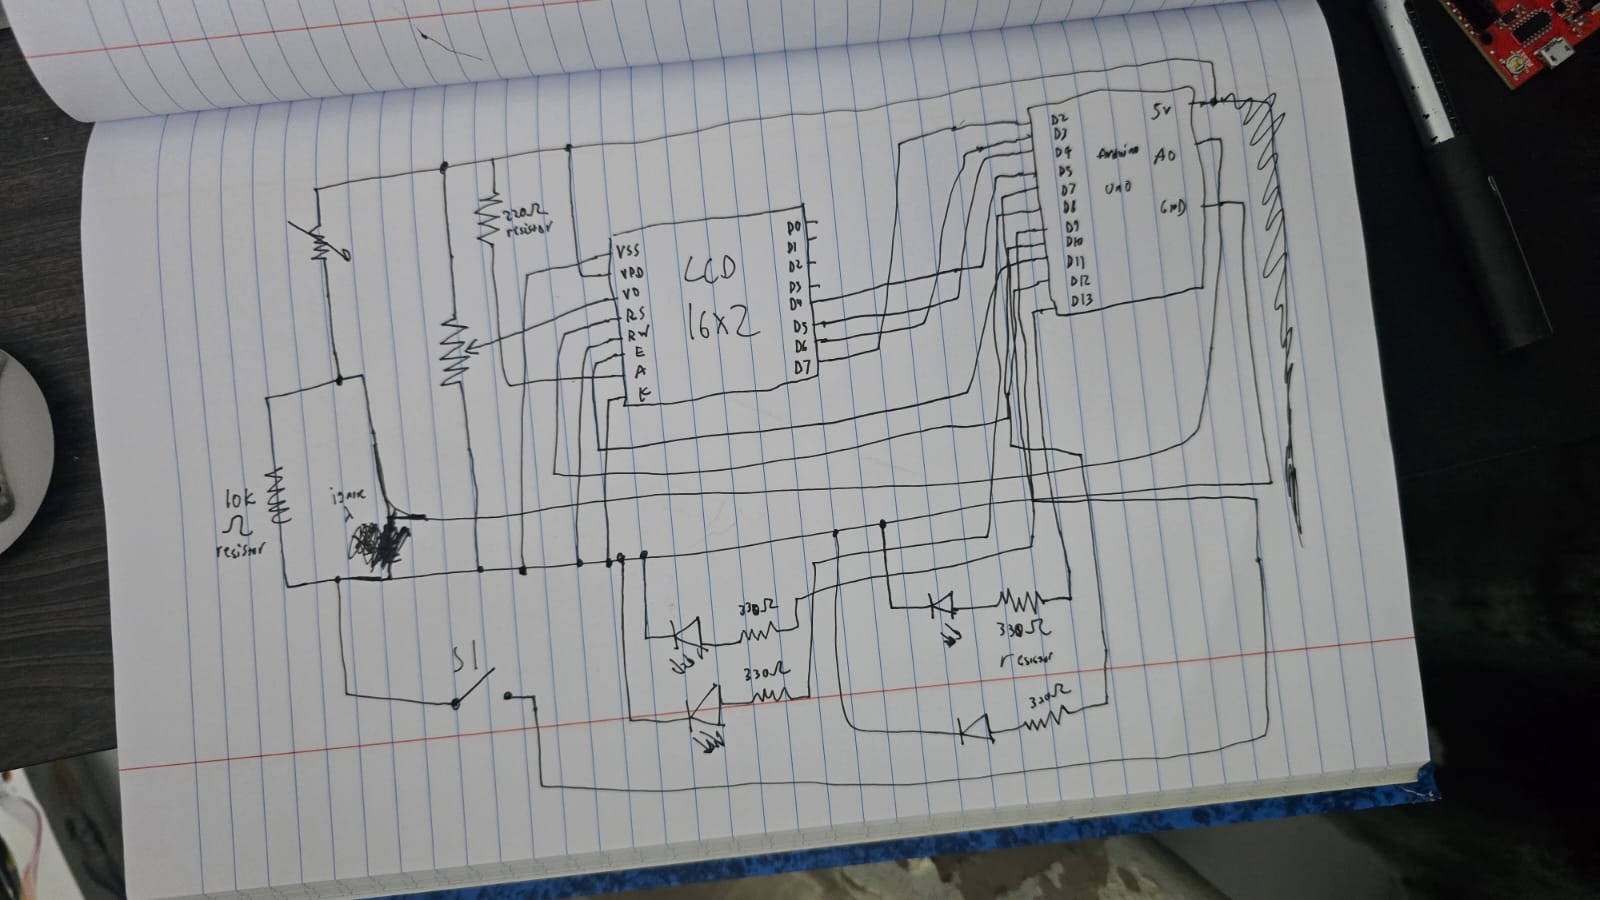
The components used are RGB lights, a photo resistor, a 2×16 LCD and a potentiometer.
#include <LiquidCrystal.h>

// RS, E, D4, D5, D6, D7
LiquidCrystal lcd(12, 11, 5, 4, 3, 2);

const int ldrPin = A0;
const int btnPin = 7;     // Button
const int ledAnalog = 9;  // The fading LED
const int ledA = 13;      // Light show LED
const int ledB = 10;      // Light show LED
const int ledC = 8;       // Light show LED

int threshold = 600;
unsigned long startMs = 0;
bool charging = false;
bool done = false;
Here we initialize everything, since LCD has its own module and example code, I took the initialization and syntax from there, we assign pins, the threshold and set everything to false since the program just began.
// Reset logic
  if (digitalRead(btnPin) == LOW) {
    // Set variables to original values
    startMs = 0;
    charging = false;
    done = false;
    // Turn off everything
    digitalWrite(ledA, LOW);
    digitalWrite(ledB, LOW);
    digitalWrite(ledC, LOW);
    analogWrite(ledAnalog, 0);
    lcd.clear();
    lcd.print("System Reset");
    delay(500);
  }
This is the reset code for when the button is pressed, it just turns off everything, and sets charging and done false to enter the mode it originally started with and just reset everything to the origin.
if (!done) {
    // When light above threshold start counting
    if (light > threshold) {
      if (!charging) {
        startMs = millis();
        charging = true;
      } ...
  }
}
We have nested if statements here, to first check if the charging is done, if it isn’t we check if the light crosses the threshold, and if we aren’t already charging, we should start. If the light passes down the threshold, the charge goes to 0 and we restart.
  // Light show time
  lcd.setCursor(0, 0);
  lcd.print("FULLY CHARGED!  ");
  lcd.setCursor(0, 1);
  lcd.print("   100 PERCENT  ");

  // Blink Pattern
  digitalWrite(ledA, HIGH); delay(100);
  digitalWrite(ledB, HIGH); delay(100);
  digitalWrite(ledC, HIGH); delay(100);
  digitalWrite(ledA, LOW);  digitalWrite(ledB, LOW); digitalWrite(ledC, LOW);
  delay(100);
}
When it has charged for 10 seconds or more, we set done to true, which calls the else commands and starts the light show till stopped by the button or simply turned off.
Code here:
GitHub link
Reflection:
Some ways I thought of improving this is having a proper choreography of the lights that go along with some music, maybe manually do it or write up an algorithm that works for any song, either way I think that would improve this project. It was fun learning about the LCD however, and I am glad that I am able to use it now.