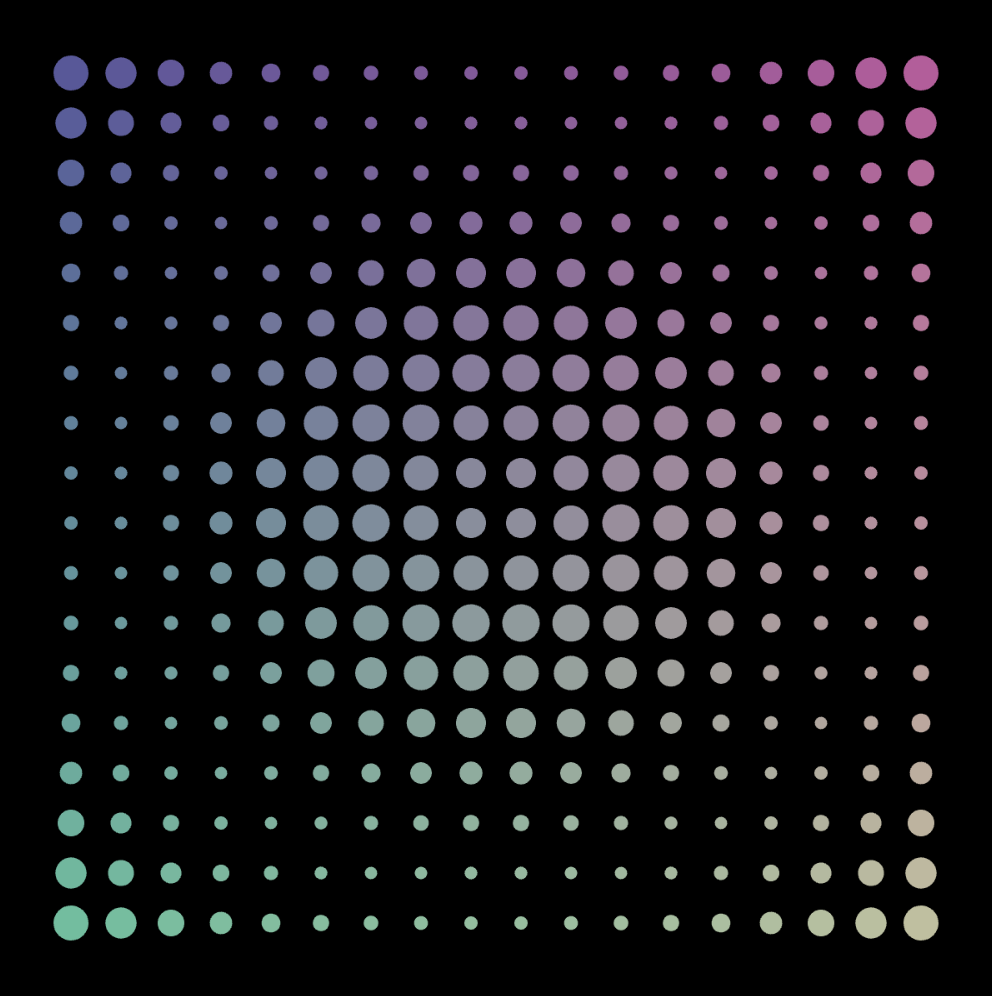
Assignment 2 – Loops

Concept:

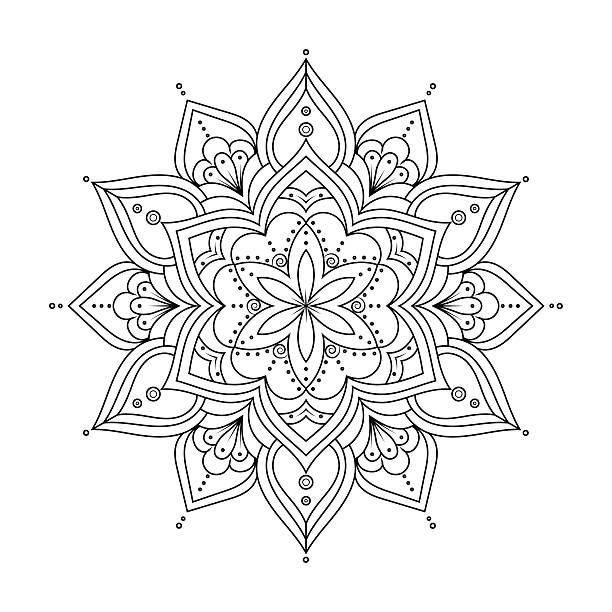
When I first thought about how I wanted to use a loop in my assignment, I decided to create a flower with five layers of petals that move and rotate. In my code, each loop repeats the same ellipse many times while slowly rotating, forming a full circle of petals. By using five separate loops, the code creates five layers that rotate at different speeds, making the flower look alive and constantly changing. The loops make the process simple and efficient because they draw many shapes with very little code. Additionally, when the viewer clicks the mouse, the flower’s colors change, which makes the artwork more playful and interactive.

The use of loops also made it easy for me to experiment with different numbers of petals, sizes, and speeds until I found a design that felt balanced and beautiful. It helped me understand how powerful loops are in creating complex patterns and animations with very few lines of code. It also showed me how combining repetition with motion can turn simple shapes into something that feels dynamic and alive.

Highlight of the code I am proud of:

One of the most challenging and important parts of my code was creating the background. I had to figure out how to map each y-coordinate to a color gradient and make it look smooth while still matching the rotating flower layers on top. I used a for loop to go through every horizontal line of the canvas and calculate a color between color1 and color2 using lerpColor. The loop was essential as it let me blend the colors smoothly across the whole canvas. I am proud of this part because it added depth and contrast to the flower, making the petals stand out more and giving the artwork a more polished and dynamic look.

function draw() {
  // Gradient background
  for (let y = 0; y < 400; y++) {
    let color1 = color(90, 60, 140);  
    let color2 = color(150, 100, 200); 
    stroke(lerpColor(color1, color2, map(y, 0, 400, 0, 1)));
    line(0, y, 400, y);
  }

Sketch:

Click the mouse to change the colors

Reflection:

In this project, I learned how to use loops to create repeating patterns and motion in my artwork. For future improvements, I would like to experiment with adding more layers, changing rotation patterns, or incorporating transparency effects to make the visuals more dynamic. Another possible improvement is making the animation respond to additional interactions, such as mouse movement or key presses to create a more engaging experience for the viewer.

Week 2: Work of Art

Concept

For this assignment, I decided to create a simple artwork inspired by the portal in the movie Coraline. I’ve always loved how layered and colorful it looks in the film, so I used it as inspiration for my own piece.

Here’s a picture of the portal from Coraline:

Code I’m Proud Of

It took a lot of trial and error to get the loop working properly. Once I figured out how to write the condition correctly, the rings appeared just how I wanted them. I also added randomized colors of blue, purple, and pink to the rings to make them feel closer to the portal from Coraline. I also adjusted the frame rate to create more of a portal effect.

// circles size increase by an increment as it loops
 for (let i = 0; i < ring1; i += 1) {
   let s = minsize + i * increment;
   ellipse(centerX, centerY, s, s);

   // random colors from the list for each ring
   stroke(random(colors));
 }

Here’s the work of art I created:

Reflections and Improvements

Overall, I’m happy with how it turned out. I wasn’t trying to recreate the portal exactly, but instead capture the beauty of its colors and layers. However, I noticed it took me a really long time to figure everything out, and at one point the program kept crashing. I’d like to improve in understanding loops in general to be more efficient in future projects. I’d also love to add animation to this artwork, like making the rings spiral and swirl so it feels more like an actual magical portal.

Reading Reflection – Week 2

In his talk, Casey Reas explores how generative art uses code, rules, and chance operations to create dynamic and unpredictable visuals, showing that creativity comes from both structure and chance. I found it particularly interesting when Reas explained that generative art is a space where structured rules interact with randomness, because when people generally think of coding, they assume there’s always a “right” way to do it, but I don’t necessarily think that’s true. I agree with Reas on this point about how chaos and order thrive together in generative art. But at first, I was one of the people who thought coding was strict and bound by certain rules to follow,  now I see that it can be more playful and freeing.

When I was coding my artwork assignment, I decided to add randomized colors to my code to make it more exciting every time I run the code. The outcome always comes out as different and unique from the one before it, and I enjoyed the unpredictability of it. At the same time, I wonder if too much randomness could take away from the artist’s control. Reas seems to always see randomness in a positive way, but I’m not sure I fully agree with that. Personally, I think it works best when theres a balance, where the structure I write in the code guides the randomness so that the results are still under my control to some extent.

Reading Reflection – Week2

prompt: How are you planning to incorporate random elements into your work? Where do you feel is the optimum balance between total randomness and complete control?

I watched the video after I completed the coding assignment. Surprisingly, some of the idea from the presenter coincide with thoughts that crossed my mind during creation.

First, the presenter argued that the emergence of randomness in computers renders new life to creation of art. I agreed strongly as computers are already good at repeating simple patterns and this usually leads to stunning effect as it appeared in the presenters’ examples, however, to create certain chaotic element in the art piece, using randomness that is achieved through built-in functions in computers shred new light on adding vividness into the artwork. For example, patterns could appear in different directions, different styles, and for each time the key is pressed, something new appears.

Second, I also agree with the presenter’s idea of having something simple to govern the art piece is essential and I believe this is the best balance between total randomness and complete control. In particular, computers need certain elements, as simple as a line, to work with and then randomness should be added to on top of this repeated patterns. If we let randomness totally governs the art piece, it would lead to a complete chaotic situation in which no aesthetics could be observed.

Week 2 Art

When given the chance to create geometric art, my mind immediately went back to a tradition from my childhood. Since I was ten years old, every Diwali, my family and I would gather outside our home to make rangoli: a colorful pattern made on the floor with powders, flowers, or rice. Diwali, the festival of lights, is celebrated in India with lamps, sweets, and vibrant designs meant to welcome prosperity and joy into the home. For me, rangoli has always been a way to blend creativity with culture. Alongside this, I also grew up enjoying drawing mandalas, which share the same symmetrical and intricate qualities. Together, these influences shaped my concept.  A digital reinterpretation of rangoli through geometric art.

For the scope of this assignment, I decided to use two shapes: circles and triangles. The circles form the core of the design, anchoring the artwork, while the triangles create a layered geometric background effect. This simple structure captures both the symmetry of mandalas and the festive layering of rangoli.

Rangoli:

DIY Rangoli Kit for Diwali Decorations

Mandala:

94,700+ Mandala Tattoo Stock Photos, Pictures & Royalty-Free Images -  iStock | Rose tattoo

One section of my code that I am particularly proud of is the logic behind alternating triangle shapes. I wanted two different kinds of triangles to appear in an alternating pattern. While drawing a single triangle was straightforward, alternating between two variations required more thought. After experimenting, I realized I could use an ‘if’ condition based on coordinate positions. The logic I arrived at was:

let step = 50;
  for (let x = 0; x < width; x += step) {
    for (let y = 0; y < height; y += step) {
      // pattern A
      if ((x / step + y / step) % 2 == 0) {
        fill("#800000");
        triangle(x, y, x + step, y, x, y + step);
        fill("#000080");
        triangle(x + step, y + step, x + step, y, x, y + step);
      }
      // pattern B
      else {
        fill("#000080");
        triangle(x, y, x + step, y + step, x, y + step);
        fill("#800000");
        triangle(x, y, x + step, y, x + step, y + step);
      }
    }
  }

This simple equation gave me an alternating algorithm, ensuring the triangles switched consistently across the canvas along with their colours.

In the future, I would like the artwork to become more dynamic and closer to an actual rangoli design. I imagine the outer circles slowly rotating, smaller circles filled with different colors, and more intricate shapes combining into floral or star-like motifs. Expanding beyond just circles and triangles would also bring the piece closer to the vibrancy of traditional rangoli while preserving its digital, algorithmic foundation.

This project allowed me to merge childhood memories, cultural traditions, and coding in a way that felt both nostalgic and innovative. Just as rangoli brings people together during Diwali, I hope this digital version shows how art and technology can come together to celebrate tradition in new ways.

Week 2 Reading Reflection

At first I thought randomness only mattered in games, from simulating rolling a dice to how Minecraft generates new worlds with caves, mountains, and villages that always look different. I assumed randomness was just for variety in play and had little place in art or design. Watching Casey Reas’ talk completely changed that assumption. I was amazed by the art you can generate using randomness. What struck me most was how a set of simple rules, combined with small unpredictable changes, could create results that felt alive and unique. His examples showed me that randomness is not just a tool for unpredictability but also for discovery, allowing new patterns and visuals to emerge that no one could have planned in advance.


Before, I believed coding should always be exact, like solving a math problem where the answer must be correct. Reas showed me that art can be structured yet open-ended, where randomness works as a collaborator rather than an obstacle. Seeing grids of dots or lines shift in slightly unexpected ways made me realize that unpredictability is what gives the piece depth and character. I now think the best balance is to set clear boundaries for the work, such as the palette, the number of elements, or the layout, but then leave space for randomness to control movement, position, or interaction. That way the work keeps its structure but also grows in ways no one could have fully imagined. For me, the optimum balance is when structure provides a stable foundation for the art to not look completely random like scribbles, while randomness adds the spark that makes each result surprising and engaging.

Week 2 – Loops

Sketch

My Concept

This week, I wanted to make a simple work of art using for() loops. The piece I made explores how repetition and rhythm can form mesmerizing visual patterns. I started with a simple grid of circles, using nested loops to control the rows and columns as we learned in class. I wanted to make a field of circles that felt alive, so I thought about how I was going to vary their sizes and colors. The sin() function in mathematics is frequently used to model oscillations and waves in nature, so I figured why not map the circles’ diameters to it in some way to shift their sizes in a wavy pattern as they moved across the canvas. As for varying the colors, I made two of the fill() function’s arguments dependent on the coordinates of the circle with each iteration of the loop, while keeping the other arguments constant so the colors don’t contrast too much.

Code Highlight

It was a bit tricky to figure out how exactly I was going to map the sin values to the size of each circle. I ended up defining the variable d as the distance of each circle from the center, and using it as input for sin. Since the range of sin, which is [-1,1], is too small to use as a radius, I used the map() function to to increase its range to [5,15]. Finally, I stored whatever was calculated in the size variable and used that in drawing each ellipse.

let d = dist(x, y, width / 2, height / 2); // distance from center
let size = map(sin(d * 0.05), -1, 1, 5, 15); // wavy circle sizes
ellipse(x, y, size); // draw the circle

This small section controls the shifting “wave” effect, transforming what would otherwise be a flat grid of circles into a dynamic field with depth and rhythm.

Reflection

I was amazed by how powerful loops can be in creating a piece that looks intricate but only requires a few lines of code. My entire draw function fit in 7 lines of code! At first glance, the result seems like something that would take countless steps to draw manually, but by letting the computer repeat instructions, complexity emerges naturally. It taught me to see code not only as instructions for individual shapes but as a way to design systems that generate patterns on their own. Another thing I that was cool is how small changes to the rules, like adjusting the sine function, completely transform the mood of the work.

Using 10 as the coefficient of d


Using 0.03 as the coefficient of d

Week_2_Code_Assignment

Here’s the final output.
Inspiration:

How “for” and “while” work are often related to the term repetition: by applying these two statements simplify programmers job to program for repetitive scenarios. While at the same time, another keyword in the reading for this week is “random”, so I decided to create a piece that combines the two.

Through first impression, my art work is a rough imitation of the art pieces created by Piet Mondrian(https://artsandculture.google.com/entity/m0crnb5?hl=en). When I first saw them in museums, I was shocked by their simplicity. However, a question rises in my head, if we draw lines and place colors in those grids randomly will they achieve the same visual effect?

Through this interactive creation, in my opinion, it is very hard to achieve same visual effect by just randomly drawing lines on canvases. Only certain ratio of arrangements of lines and certain arrangements of colors create artistic effects.

Highlight of Code:

The complete code could be found on (https://github.com/dr04002/Intro_IM/blob/main/Assignment2/sketch.js). GPT5 is employed in assisting the completion. However, there are few interesting codes.

function makeRandomLines(count, span, margin, minGap) {
  const picks = [];
  let tries = 0, triesLimit = 5000;
  while (picks.length < count && tries < triesLimit) {
    tries++;
    const x = random(margin + LINE_W, span - margin - LINE_W);
    if (picks.every(p => Math.abs(p - x) >= minGap)) picks.push(x);
  }
  picks.sort((a,b)=>a-b);
  return picks;
}

To generate random lines, there are several difficulties:

  1. the lines must have the same numbers of the original piece so that it is easier for the transition effect
  2. the lines have to stay inbound of the canvas
  3. a minimum distance is imposed to ensure lines are not too close to each other

These difficulties are solved through:

  1. using parameter count to ensure the same number of lines
  2. using random(margin + LINE_W, span – margin – LINE_W) to control the lines’ positions within boundaries
  3. picks.every(p => Math.abs(p – x) >= minGap controls the lines distances.

Future improvements:

  1. the randomized art piece could have more or less lines than the original piece, but this would make the transition effect way harder
  2. the stroke weight could also be randomized to see how different compositions of stroke weights affect the audience


Week 2: Simple Work of Art

Fullscreen sketch

My main concept:

My concept originally came from the Japanese horror anime called “渦巻き(うずまき)”, which literally means a spiral in English. I watched this anime during the last summer vacation back in Japan. At first, I was surprised by how it was even possible for humans to be able to create such peculiar and disturbing animations using only black and white colors and spirals. The animations were too powerful and creative to the point where I almost threw up. However, I really liked how the author incorporated his originality and personality into this anime. I was especially intrigued by the scene where the main character’s girlfriend was infected by a contagious disease where if you get infected, you become obsessed with spirals. One of her eyes started to fall out and twist inward into a spiral.

It was very gross at first when I looked at it, but I really liked the animation there, so I decided to draw it as a simple artwork this time. If you hover over the drawing, you can change the color of spirals into either green, red, or blue. Also, if you click the eye going around, its color changes into red, implying inflamed eyes. Try it out!

Part of code that I particularly like:

The part of my code that I particularly like is this block of code dedicated to producing continuous spiral movement. At first, I had no idea how to make a moving spiral other than using a for loop, sin(), and cos(). Thus, I explored some tutorials on YouTube about how to make spirals. These videos (https://www.youtube.com/watch?v=Z3PvLZYLW0U  and  https://www.youtube.com/watch?v=U_2WwjKEasc) really helped me understand that incrementing angle each time moves x and y coordinates and eventually helps create a static spiral and by adding a change (being incremented each time) to angle each time, you can make it move continuously. I also realized that it was important to distinguish between polar and cartesian coordinates, since cos() and sin() are based upon a unit circle. Furthermore, I learned some new functions called beginShape() and endShape(), both of which are responsible for drawing a line between points. Overall, I struggled a lot to create a moving spiral, but these tutorials really helped me understand new concepts I needed to learn. 

//spiral 
  beginShape(); 
  for (let angle = 0; angle <= TWO_PI * n; angle += angleInc){
    let radius = scaler * angle; //radius
    let x_position = radius * cos(angle + change); //x coordinate
    let y_position = radius * sin(angle + change); //y coordinate 
    change += changeInc; //increment change by changeInc
    vertex(x_position, y_position);
  }
  endShape();

Reflections & Future Improvements:

In terms of reflection, it took me a lot of time to figure out how to make a spiral using for loops and other functions we haven’t yet learned in class. Thus, I had to watch tutorials to learn these new functions and how to apply them. But this assignment helped me learn various concepts and how to integrate them with the concepts that we already learned in class. For future improvements, I would like to make the animation more interactive so that people can actually engage with it. Right now, it only changes the color of the spiral and eyes using your mouse, but I want to add interactive elements, where someone’s face gradually appears inside the spiral to make it creepier. I remember I got shocked when the main character’s father’s face appeared from the middle of the spiral in the anime. I think adding these kinds of elements can engage users by scaring them. Furthermore, I need to improve how I name my variables, because  many of my variables have lengthy names, which makes the code a bit messy. 

Week 2: Work of Art

Portrait Concept

While browsing the old computer art magazines I came across the two images below and felt like they perfectly captured the different possible contrast that can be achieved with computer art. The first one is more mechanical, sharp and exact, while the second one felt more natural and human due to it’s varying corners and circular flow. I derived my concept from this contrast, creating a work that is able to capture both ends of the scale using interactivity created with the use of loops. Initially the screen displays a constant line that stimulates the contents of a heart rate monitor, it is mechanical and rigid, what one could describe as lifeless. Then when the user comes in the picture and interacts with the work by pressing their mouse, the work begins to transition into a more organic flowing curve, along with a pulsing heart that appears in the middle that in a way adds life to the piece. This highlights the collaboration between human and machine that computer art embodies, combining both mechanical precision and human emotions.

Bild 1 Polygonzug
Bild 2 Kreis-Variationen


Code that I am Proud of  

for (let x = 0; x < width; x++) {
    let y_machine = baseline;

    let lineX = (x + frameCount*1.5) % 130;

    //Machine heart beat based on x position
    if (lineX < 15) {
      y_machine = baseline;
    } else if (lineX < 30) {
      y_machine = baseline - 60;
    } else if (lineX < 45) {
      y_machine = baseline + 30;
    } 

    //Human heartbeat wave
    let y_human = baseline + sin((x + frameCount) * 0.05) * 40;

    //Transitioning between machine and human
    let y = y_machine + (y_human - y_machine) * trans;

    noFill();
    strokeWeight(2);
    
    //Color changing with transition
    let r = 255 * trans;
    let g = 255 * (1 - trans);
    let b = 50 * trans;
    stroke(r, g, b);

    vertex(x, y);
  }

Most my time spent on this assignment was in creating and refining the transition between the mechanical and human line, trying to recreate the vision. After multiple tries I ended up with the for loop above, that both creates the lines and blends them together using the transition factor defined earlier in the code. I do believe that this is the most important element of the code that creates the part that captures the concept, which is why it occupied most of my attention when creating the work.  Creating it taught me a lot about the technical and conceptual thinking that goes into coding computer art. It brought my attention to things like the use of color and the possibilities technically when it came to transitioning the color, which I integrated into the code.

Embedded Sketch

Reflection

I really enjoyed exploring the possibilities that come with using loops in the creation of a work of art. After completing my previous assignment and getting more comfortable with the program, I had a goal of shifting my focus a little to the concept behind the work. Which I think I was able to achieve this assignment with the use of the computer art magazines. With their assistance I was able to get inspired and integrate meaning into the code. For future work I’d like to use the techniques I learnt today to create a work where the user interaction does not only affect the visuals, but also the narrative and direction of the piece. With this time of interactivity the work can become a collaboration between the creator, the users and the computer all at once.