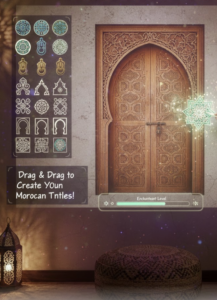
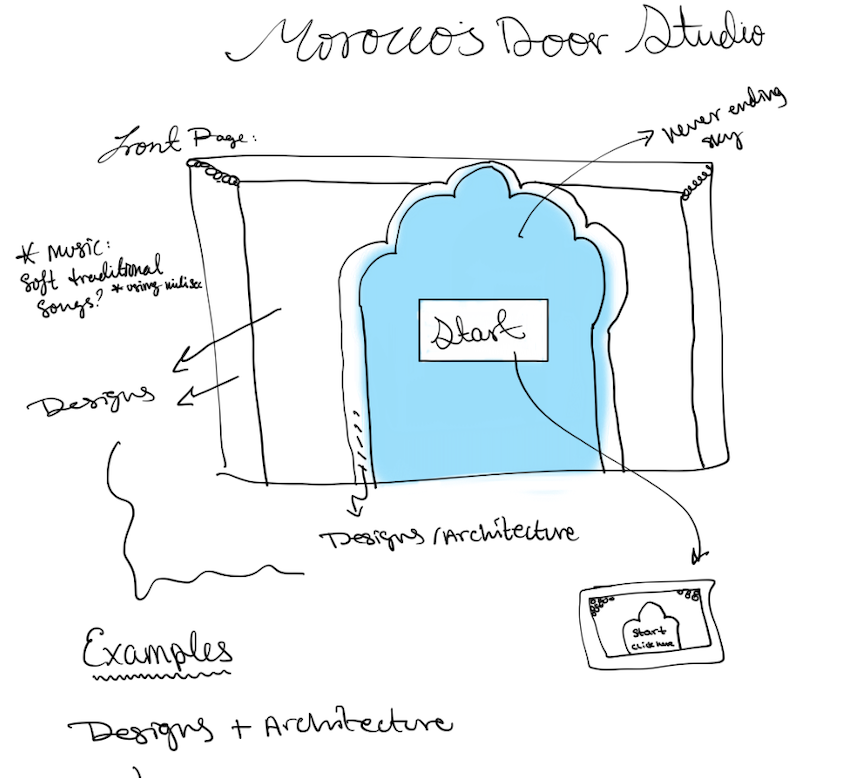
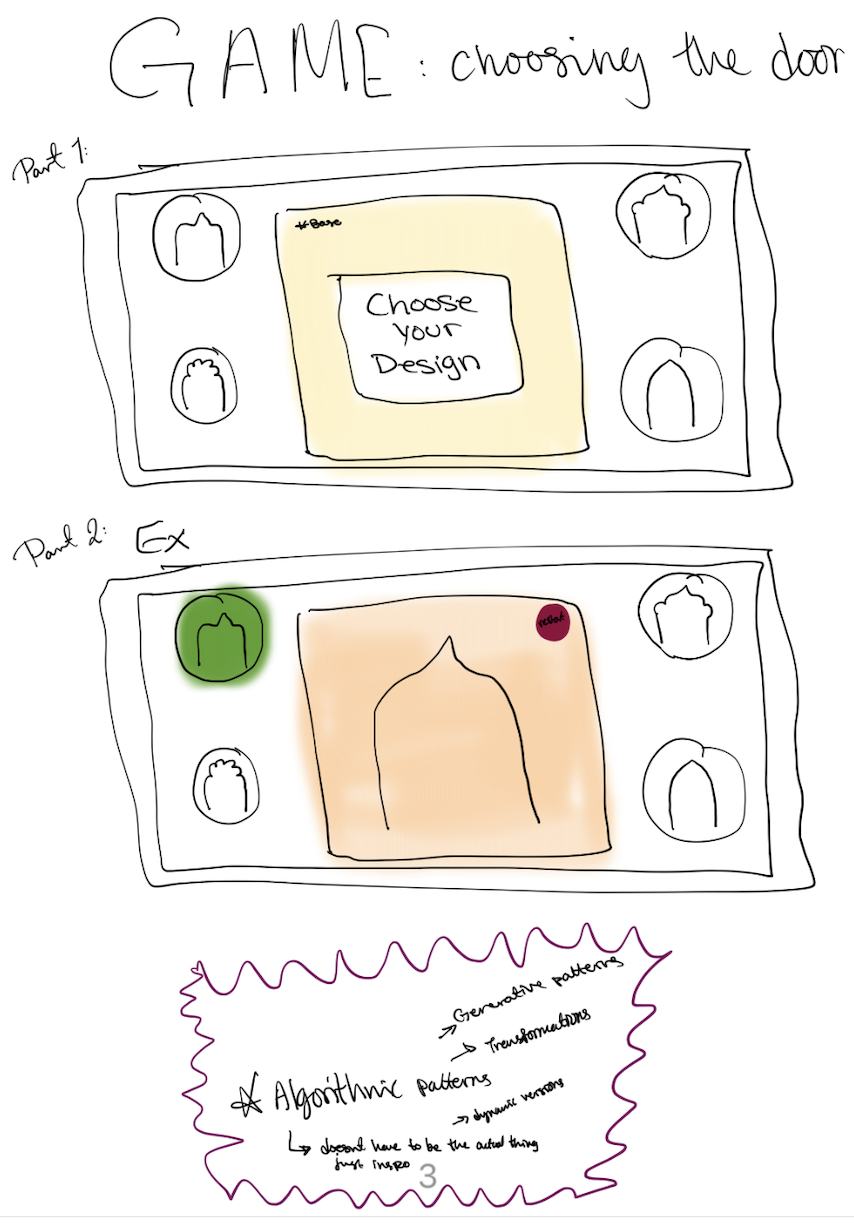
Overall concept:
Since I am half Moroccan, I wanted to include a personal touch to my work and connect it to my culture. I decided to create a game where users can design one of my favorite elements of Moroccan architecture, which is the doors. Instead of simply creating a game that includes templates and colors, after speaking to Professor Mang, I decided to make it more interactive and generative. This way players can add their own shapes, change colors, and control the speed of the patterns. The shapes are also randomly generated, which is one of my favorite parts because my game includes randomness but at the same time it makes every design unique and unpredictable.
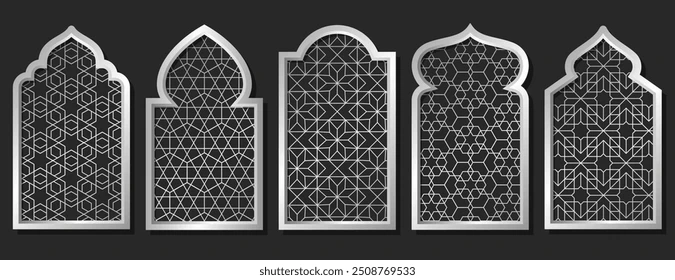
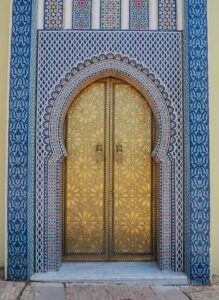
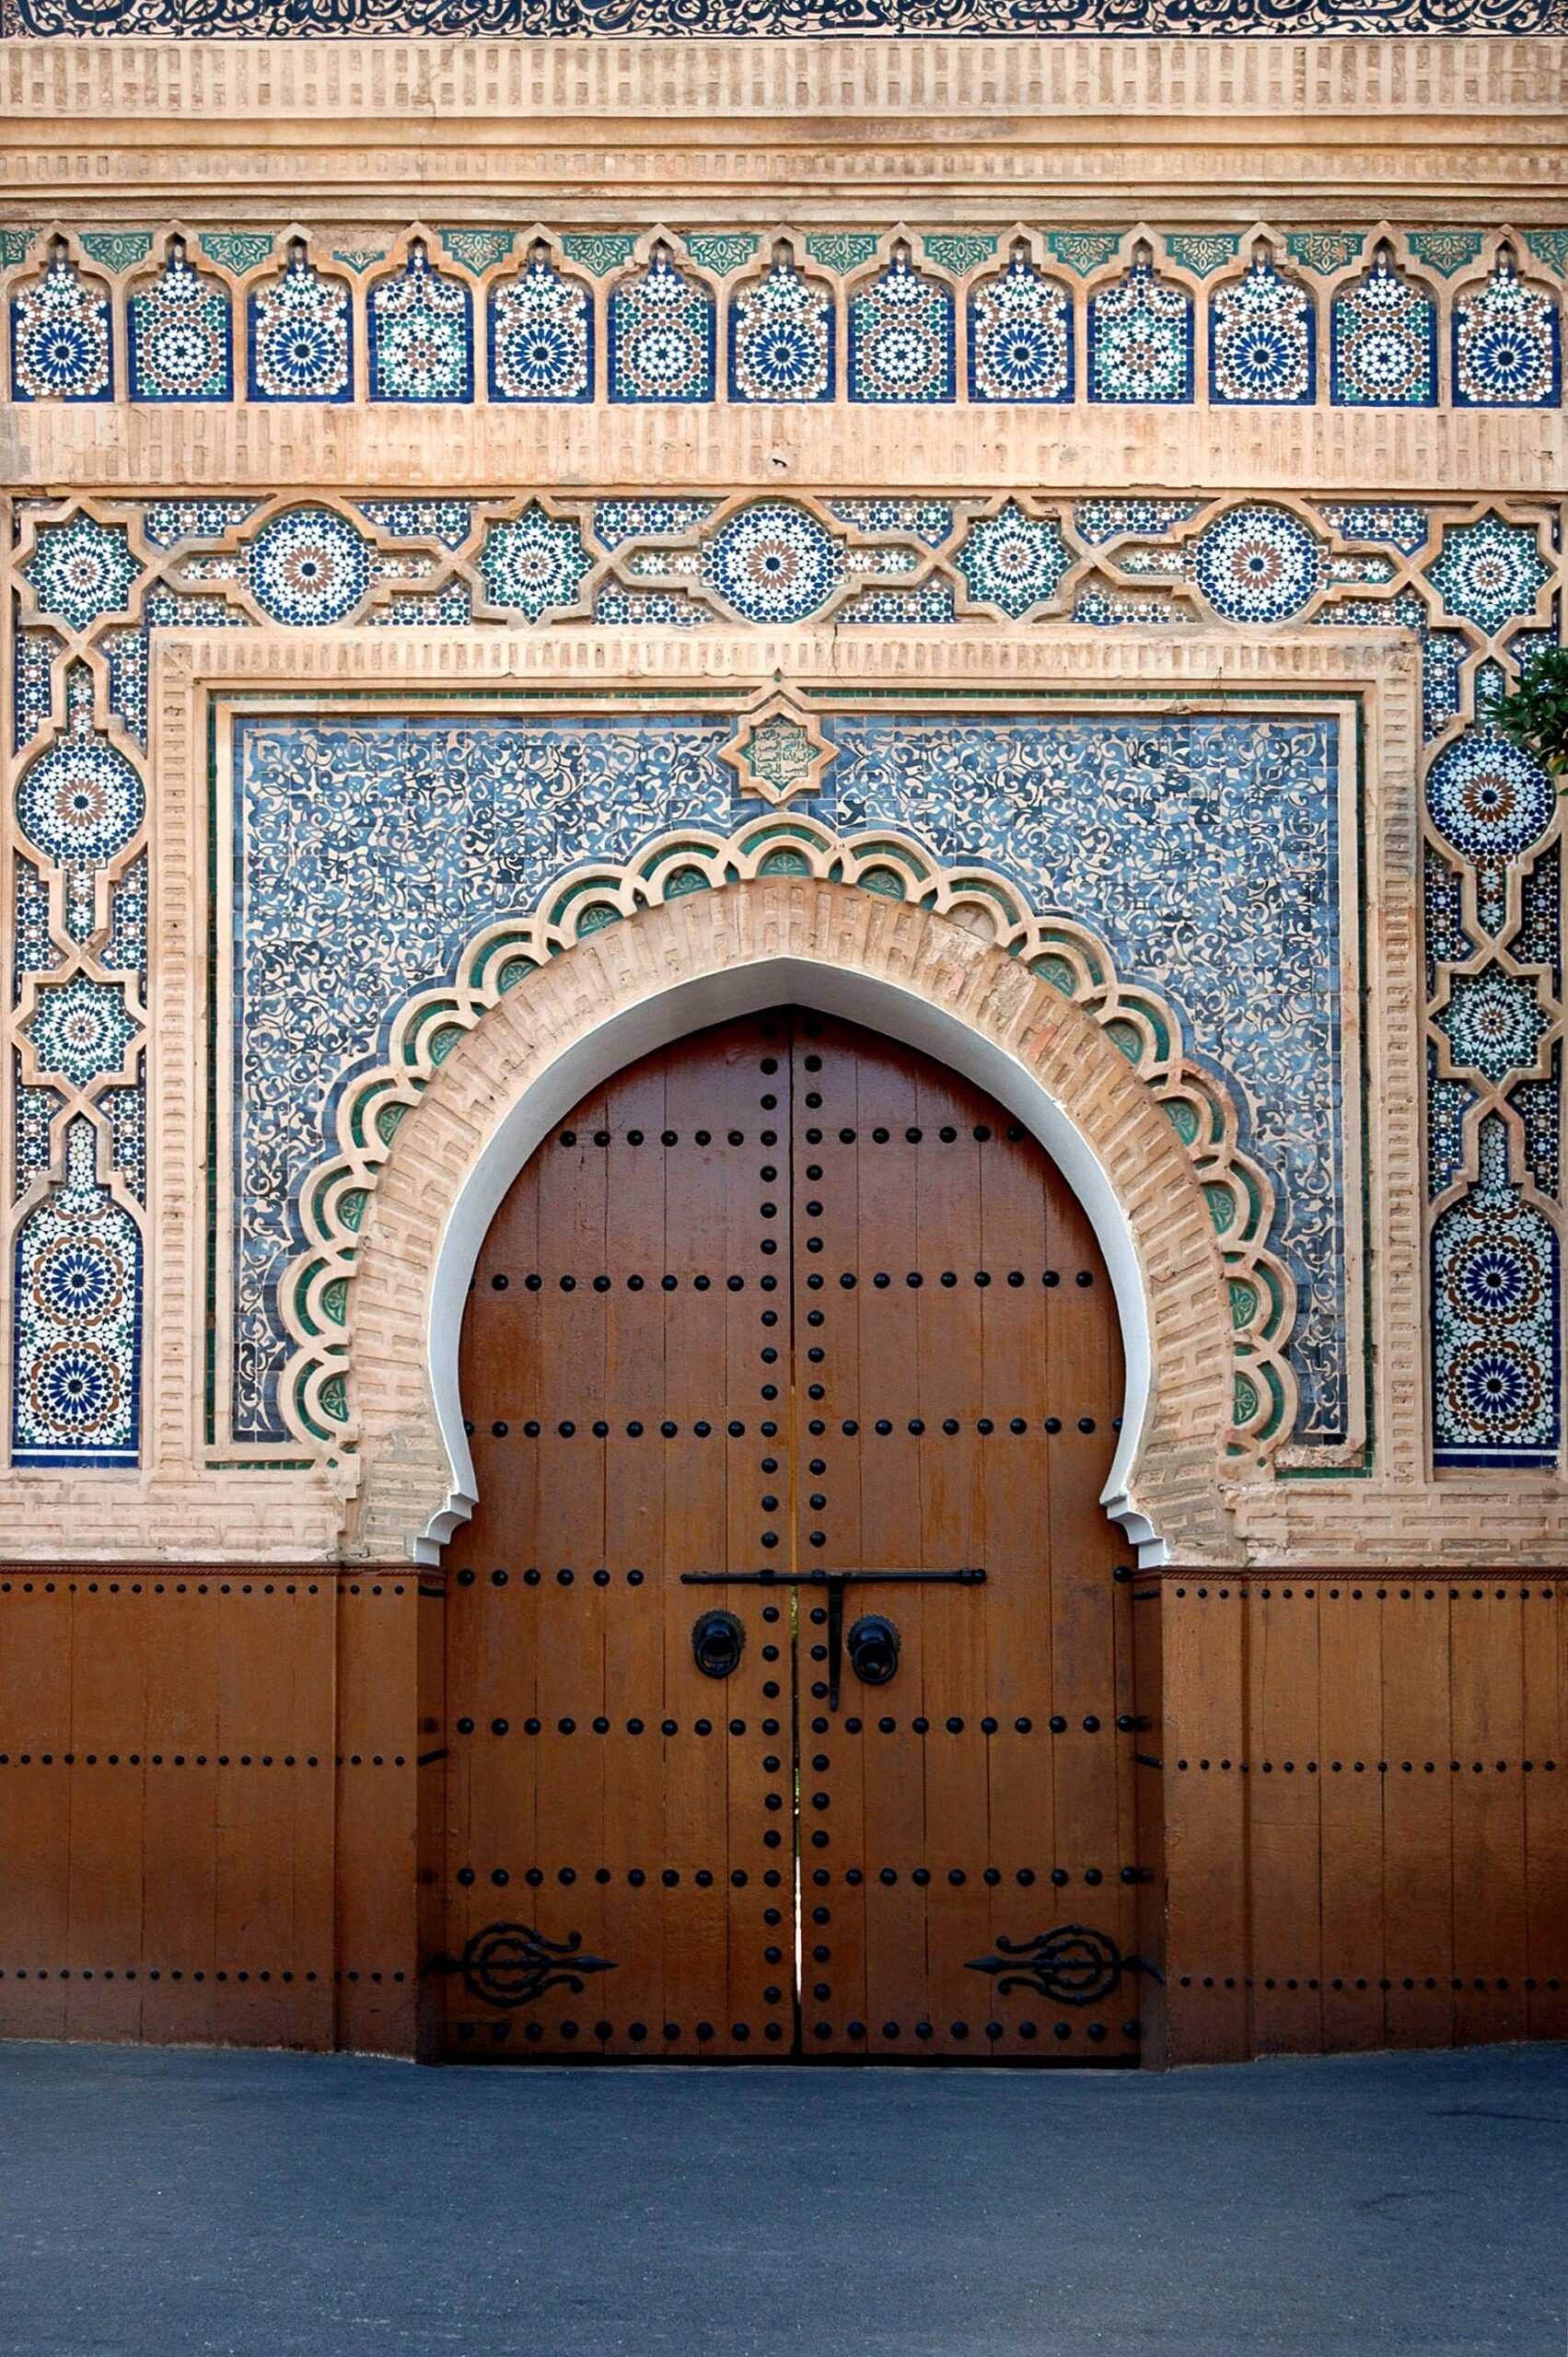
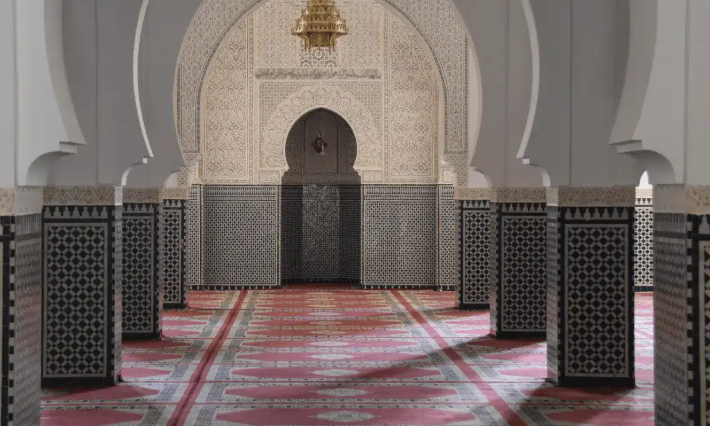
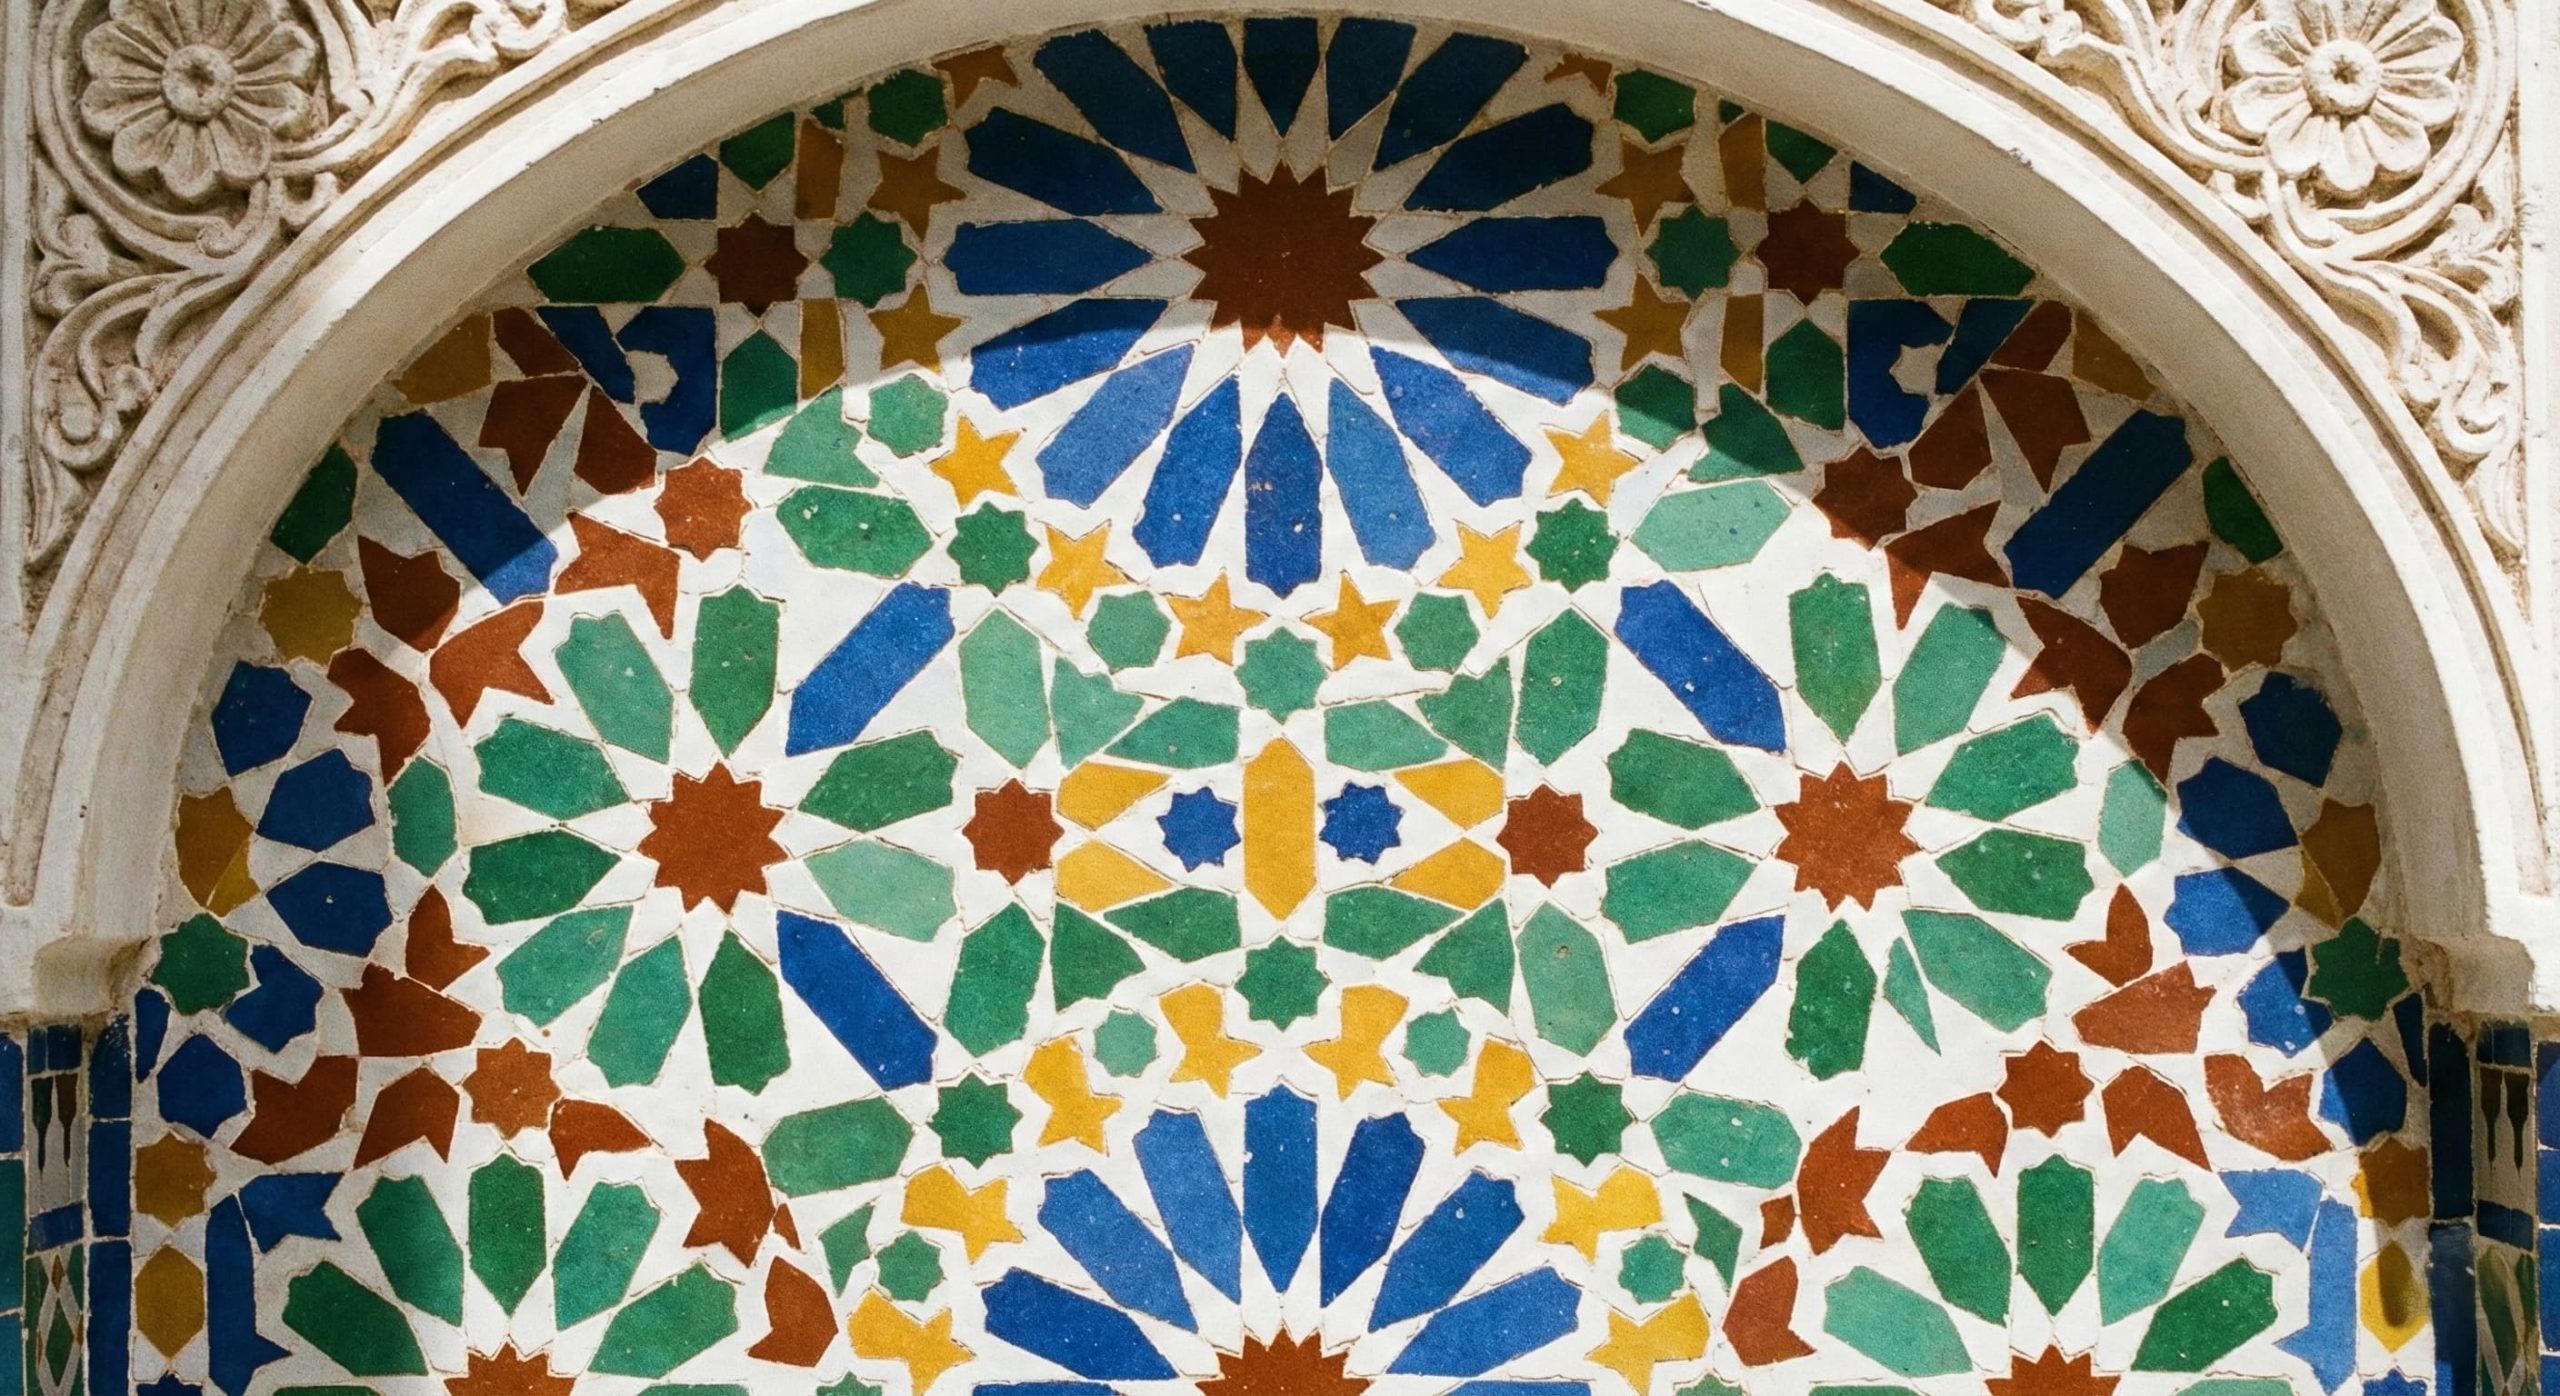
In Moroccan architecture, the Riyad is one of my favorite styles because of the level of detail and craftsmanship. It’s known for its intricate patterns, zellige tiles, and carefully designed spaces. What I find most interesting is how much time and effort goes into creating these details by hand, sometimes taking weeks or even months and up to years depending on the piece. I also grew up seeing these designs in my own home in Morocco, especially in fountains, tiled walls, and stairs which inspired me to recreate this experience digitally. I realized that there aren’t many games that focus on cultural design, especially Moroccan culture, so I wanted to create something that represents it in an interactive and modern way.
I started this project with an idea, although I had multiple ideas and sketches I decided to stay with this one. I mainly feared that it would be hard to create but in fact although it was challenging (starting before spring break and then with everything happening it was confusing to go back to unfinished work so a part of me wanted to start everything all over again and even change the concept but I didnt!) I loved every part of it because the concept truly speaks to me.
Inspo from Moroccan Architecture:
Embedded sketch: (click to start!)
How it was made/how it works:
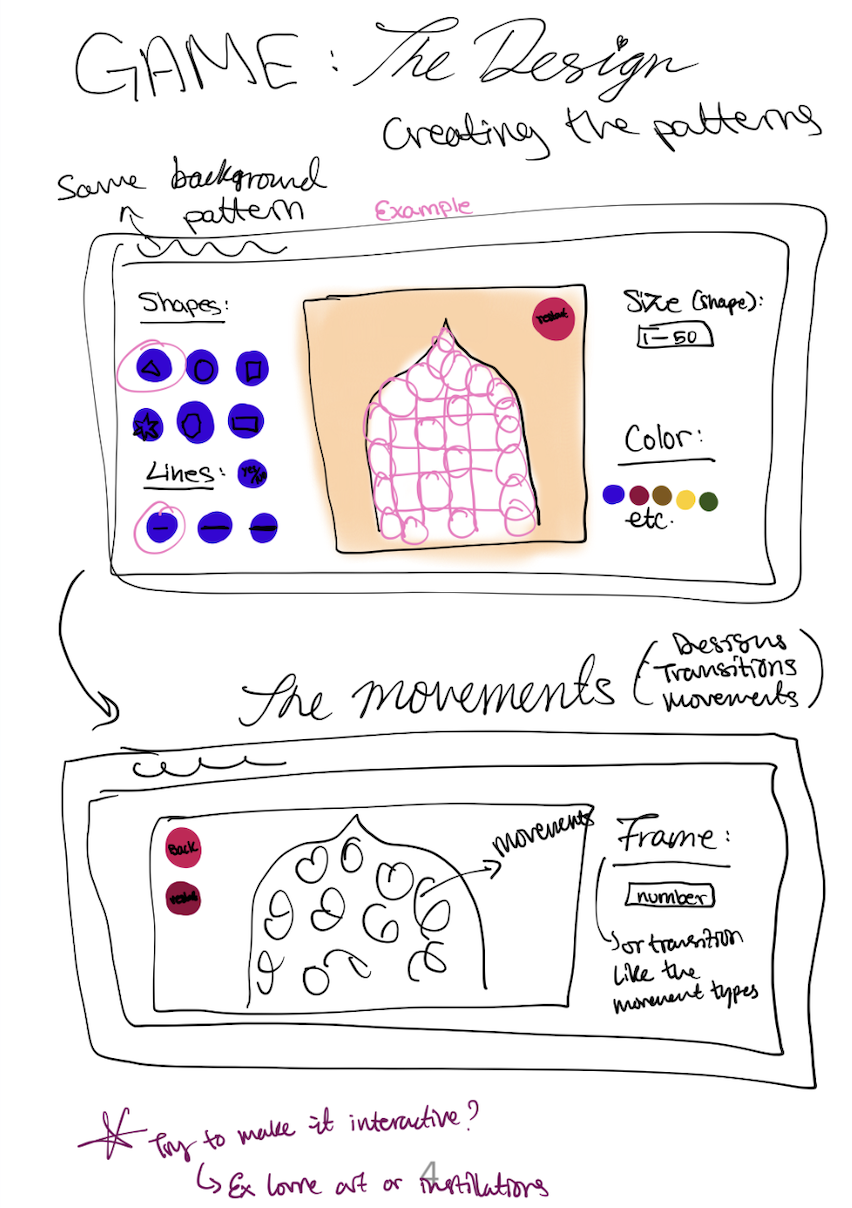
The project is built using a state-based system (a system where it changes, operates, or makes decisions based on the current “state” of the process), where the player moves through five different screens or pages as I call them: the home screen, help screen, info page, door selection, and finally the interactive “studio.” Each page is controlled by a variable that updates depending on where the user clicks, making the navigation simple but effective. I’ve always liked using Canva which is why I decided to create shapes and patterns to make something inspired by Moroccan architecture while still keeping it visually aesthetic and aligned with the overall concept. I also decided to look at Aya’s class since they finished their midterms, I got inspired to generate an image using Gemini which pushed me to experiment more with tools like Gemini. Instead of just using basic images, I uploaded my own references and used Gemini to help generate and refine visuals for the first three pages (home, intro, and instructions). So while the first 3 pages (home page, intro, and instructions) are generated by ai using an original existing image that I uploaded I still did lots of the designing myself in the other pages. When it comes to the doors I used a base vector from Vecteezy, but since the quality was low, I enhanced and clarified the design using Gemini so it would look clean and detailed in the final game. For the sound, I wanted something that matched the cultural vibe of my project and game so I searched for Moroccan-style audio on TikTok. I wanted to find a sound I can play in the background and a nice click sound effect, the click sound I found actually reminded me of games I used to play as a kid (friv, roblox, blocks). When I found the sounds I liked I had to convert the files into MP3 format since p5.js does not support formats like MOV or MP4. After that, I uploaded all the files into the sketch, I initially thought this would be the hardest part, but it turned out to be one of the easiest since it mainly involved organizing and dropping files correctly.
When it comes to coding, (the fun part!) I mainly relied on class lecture notes from Professor Mang and Professor Aya because the material and examples available are always extremely helpful and always makes my process a lot smoother. For the main interaction, I used Object-Oriented Programming by creating a Tile class so every time the player clicks inside the door area (the white part), a new tile (which are the shapes) is created and added to an array. Each tile is independent so it stores its own size and color based on the slider values at the exact moment it is placed but for the speed slider, all the tiles change accordingly. One part I’m especially proud of is the geometric pattern system, specifically the 8-point star. I created this using a loop that rotates shapes by PI / 4 (45 degrees) around a central point. By repeating this rotation, I was able to recreate patterns inspired by traditional Moroccan zellige designs. Even though the code itself is relatively simple, the final result looks detailed and visually complex. I also focused on the user interface. I used createDiv() along with .parent() to group the canvas and sliders into one container, which keeps everything centered and organized. This idea came from researching how to structure UI elements because I thought I needed to research it a bit more. By doing this, the sliders stay aligned with the canvas and the whole project feels more like a complete application rather than just a basic sketch. The sliders allow users to control size, color, and speed, making the experience interactive and personalized instead of static.
Resources:
- p5.js Reference: .parent(): I used this to attach my sliders and canvas to a single createDiv(). I had to use this to keep my UI organized and in position on the page.
- p5.js Reference: colorMode(HSB): I switched from RGB to HSB (Hue, Saturation, Brightness) so that my color slider could be used as a 360-degree rainbow wheel since the game is a design studio.
- The Coding Train: Transformations: This helped me understand how to use push() and pop() within my Tile class so that the rotation of one star wouldn’t affect the rest of the canvas.
- MDN Web Docs: Early Return: I used return in my mousePressed function to stop the code once a button was clicked. This helped me fixed an issue (the bug) where a tile would accidentally be placed behind the “Home” or “Screenshot” buttons.
- Vecteezy Moroccan Door Vector: For the architectural doors which I then refined and cleared up using Gemini AI.
- Aya Riad lecture notes: Anytime I forgot how to use a concept like PI or OOP I was able to go back and look at the slides which is always helpful.
- Mang lecture notes: I always referred to the lecture notes for writing the code and functions as well understanding the bug in my code by checking the examples.
- Gemini’s images: creating and clearing up images
- Canva: used to help create all the pagesCode:
for (let i = 0; i < 8; i++) { //option 3: a complex 8-pointed Moroccan star made of rotating rectangles
  rotate(PI / 4);
  rect(0, 0, this.s, this.s / 4, 2); } //rotates 45 degrees for each of the 8 petals
This part of the code creates one of the more complex patterns in my project, which is the 8-point Moroccan star inspired by Zellige designs. Instead of drawing it manually, I used a loop that runs 8 times and rotates the shape by 45 degrees each time. By using ai I was able to create this repeating and rotating a rectangle around the same center point, it forms a symmetrical star pattern. Even though the code itself is simple, the result looks detailed and reflects real Moroccan geometric design.
class Tile {
  constructor(x, y, type) { //constructor allows the tiles to happen/appear
    this.x = x; //remembers where the user clicked horizontally
    this.y = y; //remembers where the user clicked vertically
    this.type = type; //remembers the type/shape
    //captures the current slider values at the exact moment of placement
    this.hue = colorSlider.value();  //color
    this.s = sizeSlider.value(); //size
  }
This constructor is what makes each tile unique! When a tile is created, it stores the exact position, type, size, and color based on the slider values at the moment the user clicks. This means that even if the user changes the sliders later, the old tiles stay the same instead of updating. Basically, each tile “remembers” how it was created, which makes the design feel more layered and personalized instead of everything changing at once.
//Home button: house icon which will be used to go back to the home screen
let homeBtn = dist(mouseX, mouseY, 745, 356); //the center of the house icon location is x:745, y:356
if (homeBtn < 55) { //if the click is within 55 pixels the home button will be triggered
  clickSound.play(); //sound effect
  currentPage = 2; //return to Main Menu
  tiles = [];    //clear canvas
  hideSliders(); //sliders removed immediately to avoid overlap
  return; //pauses/stops the function
The ‘Early Return’ problem I faced. This part of the code solved one of my biggest issues because before adding this, whenever I clicked the Home button, it would also place a tile behind it, which messed up the design. By using return, the function stops immediately after detecting the button click, so no extra code runs after that. This makes sure the button works properly without triggering other actions at the same time.
Personal Sketches:
Code I am proud of + Areas for improvements and problems I ran into:
One of the biggest problems I ran into was when I clicked the “Home” or “Screenshot” buttons in the arch design pages, the program would accidentally place a tile on the door behind the button. This kept happening, and I didn’t know how to fix it until I used Early Return logic. Now, when the code detects a click on a button, it immediately stops the rest of the function, so no extra tiles are placed and the interaction works properly. Another issue I faced was when pressing the Home button on the arch design page, it would take me back to the home screen, but the sliders would still be visible, which made the interface confusing. I fixed this by explicitly hiding the sliders when leaving the studio page, so they only appear where they’re actually needed.
Overall, the idea of creating a game sounded scary at first. Before entering Intro to Interactive Media, I didn’t think I would be able to build something like this, let alone make it personal and meaningful. I’m really proud that I was able to create a full interactive experience and connect it to my culture. However, there are still areas I would improve. For example, I would expand the variety of shapes instead of only having a few options. I could also add an information button where users can learn about Moroccan architecture, the purpose of the game, and cultural facts. Another improvement would be giving users direct control over shape selection (like buttons for each shape) instead of relying only on randomness and sliders, which would make the experience feel more intentional and user-controlled.