Week 2 : Reading Reflection on Casey Reas’ Talk

When I first watched Casey Reas’ talk on chance operations at the beginning of the semester, I wasn’t entirely sure how to feel. Honestly, I was just ready to absorb whatever perspectives were being offered through different narratives. I’ve always been someone who likes control when I’m creating and knowing what’s going to happen, having a plan, getting things “right.” So the idea of building randomness into a project felt a little chaotic, maybe even risky. But Reas broke that tension down. He walked us through how he uses systems, chance, and instruction-based art to remove the artist’s ego from the process and let the artwork evolve in ways he couldn’t fully predict. The way he referenced John Cage and connected those ideas to computational art made it all click: randomness doesn’t mean lack of intent, it just shifts where the intent is. Reas isn’t just throwing things into the void and hoping for the best, he’s setting up a structure where randomness can still move freely. That clicked with me. It’s not about losing control entirely, it’s about creating a space where unexpected things can happen without everything falling apart. That made the idea of randomness feel a lot less intimidating and a lot more useful.

Since I’m writing this reflection a bit later in the semester, I’ve had more time to think about my own relationship to randomness—and honestly, I like randomness I can control. Total chaos just ends up looking like a muddy mess. I prefer when randomness happens within boundaries, where the outcome is still cohesive and intentional, even if it’s unpredictable. That’s the balance I’m drawn to: letting go a little, but not so much that the work loses meaning or direction. It’s about creating space for surprise, but still being able to call the final result your own.

Week 12-Finalised Concept

 Concept

It’s Crossy Road gone fairy-tale: guide an on-screen duck across busy roads and small streams in p5.js. Reach the final, wide river and a real-world duck glides straight across a tabletop “river,” lights pulsing as a victory lap. Screen and reality shake hands for one perfect moment

 What Already Works (p5.js Only)


Module Done Notes
full screen canvas, road- rivers, predators, food 60 fps, collision OK( still needs work)
Duck sprite + full-axis movement Arrow keys for now
Item counter + score/time keeping only counted through codes so far
Final-river trigger zone logic works

 Real-World Interaction (Planned)

  • Prop: duck on a 30 cm linear rail (continuous-rotation servo + belt).

  • Motion: one smooth back to front glide only.

  • FX: underside RGB LED strip (water glow) + small piezo “quack” sample.

  • Cue: begins the instant p5 fires DUCK_GO and stops at rail limit.

 Arduino Paragraph (hardware plan)

Thinking of using the Arduino as the go-between that lets the computer game talk to the real duck. A little joystick and one “hop” button plug into it; the board simply reads how far you push the stick and whether the button is pressed, then sends those numbers to p5.js through the USB cable every split-second. Most of the time the Arduino just listens. When the game finally says “DUCK_GO”, the board springs into action: it turns on a motor that slides the rubber duck straight across a mini track, switches on soft blue-green lights under the “water,” and makes a quick quack with a tiny speaker. When p5.js later sends “DUCK_STOP,” the motor and lights shut off and the duck stays put. Because motors and lights can gulp a lot of power all at once, they’ll run from their own plug-in adapter so the Arduino itself never loses juice mid-move.

 Next-Week Targets

  1. Prototype rail — mount servo + belt, confirm straight glide

  2. Minimal Arduino sketch —  joystick; act on DUCK_GO with LED blink

  3. Serial bridge live — replace console.log() with serial.write() in p5

  4. End-to-end smoke test — finish level, duck moves

 Risks & Mitigation

  • Servo overshoot → limit switches or timed cutoff.

  • Serial lag → short packets, high baud.

  • Scope creep → no extra rivers, no particle splashes until core loop is solid.

Final Project Proposal

The Fairy’s Wish

Ever since I was little, I’ve been fascinated by fairies — the idea that tiny magical beings could exist just beyond what we can see has always made the world feel more enchanted. That love, combined with a growing interest in interactive art and physical computing, inspired me with this thought

The Concept

The Fairy’s Wish is a playful, interactive project where players guide a brave little cat through an enchanted forest to collect three magical items. The controls aren’t just keyboard keys — they’re real-world physical inputs (joystick, buttons, maybe even pressure pads) connected through an Arduino.

When the cat finally reaches the fairy and completes the quest, something truly magical happens. A real-life fairy — represented by a handmade Barbie doll with glittering wings — comes to life. Her wings flutter using servo motors, her body glows with soft LED lights, and she thanks the player with a glowing blessing, making the whole experience feel magical and earned.

 Ideas in Motion

The core idea started with this question:

What if beating a game didn’t just give you a virtual reward, but sparked something real in front of you?

From there, I began sketching:

  • Physical Controls: A joystick to move the cat, a big friendly button for jumping, and possibly a rotating dial to navigate hidden paths. All inputs run through Arduino to control the game made with p5.js.

  • Game Design: The forest has three areas, each holding a different magical item. Players solve simple puzzles or navigate mini challenges to unlock them. Dialogue boxes from forest spirits guide the way.

  • The Real-World Fairy: Built with a Barbie, fairy wings made from wire + sheer fabric or acetate, servo motors hidden behind her, and color-changing LEDs in her base. Her activation is synced with the game logic — so she only “blesses” you when you’ve truly earned it.

  • Sound and Light: I’m exploring the idea of adding a soft melody that plays when the fairy activates — maybe even using a piezo speaker or pre-recorded message. I’d also love to add sparkly lights or a mini bubble machine for that extra fairy dust moment.

Production Plans & Future Thoughts

Here are some dreams I’d love to work toward:

  • Make the fairy’s wings feel more alive — using multiple servos for a more natural fluttering motion.

  • Create a “fairy blessing” moment with lighting effects and maybe even scent (imagine a lavender puff when you succeed).

  • Build a portable fairy shrine: a beautiful little display box that holds the fairy and all the electronics, decorated like a miniature forest shrine.

  • Expand the story into a chapter-based quest where the cat meets more characters, with the real-world doll responding differently depending on what items were collected.

I’m using p5.js to make the game. It’s a simple way to build cute graphics and animations with code.

  • I’m using Arduino to handle the physical parts (like the joystick and fairy’s wings).

  • When your cat touches the fairy in the game, p5.js sends a message to the Arduino.

  • Then the fairy doll lights up and her wings flutter (with servo motors).

It’s like the game and the real world are talking to each other!

 Some Cool Features I Want to Add

I’m still building it, but here’s what I’m planning:

  • Joystick movement for the cat — maybe even a big “jump” button.

  • A forest with different paths and challenges to find each magical item.

  • The fairy doll will glow in different colors depending on what you collected.

  • A soft melody when the fairy activates (maybe using a tiny speaker).

  • A beautiful mini “fairy shrine” where she lives — decorated like a real enchanted forest!

 Challenges (aka The Tricky Stuff)

  • Timing: Making sure the fairy only reacts at the exact right moment in the game.

  • Syncing Arduino with p5.js smoothly — there’s some trial and error here.

  • Making the wings move naturally without looking too robotic.

But I’m excited to figure it all out!

Future Thoughts

Once I finish the basic version, I’d love to:

  • Add more levels or characters to the game.

  • Let players customize their cat before starting the journey.

  • Add sound effects and sparkles for extra magic.

  • Maybe even make a version that other people can play at an art show or event.

Week 11: Serial Communication

Group Members: Maliha Nahiyan Srotosshini & Shamsa Alremeithi

Exercise 1

task: make something that uses only one sensor on arduino and makes an ellipse (or other shape) in p5 move on the horizontal axis, in the middle of the screen, and nothing on arduino is controlled by p5

For this exercise, we had connected a potentiometer to the Arduino by connecting the middle pin to analog pin A1, and the other two pins to 5V and GND. we had written a simple Arduino code to read the analog value from the potentiometer and map it to a range of 0 to 400, which was then sent to the computer through the serial port. With p5.js and the p5.webserial library, a circle moves left to right across the screen based on the potentiometer’s position. we also included “Connect” and “Disconnect” buttons to control the serial connection from the browser with ease.

arduino code
void setup() {
  Serial.begin(9600);  // Initialize serial communication at 9600 baud rate
}

void loop() {
  // Read the analog value from pin A1 (range: 0 to 1023)
  int potentiometer = analogRead(A1);

  // Map the potentiometer value (0-1023) to a new range (0-400)
  int mappedPotValue = map(potentiometer, 0, 1023, 0, 400);

  // Send the mapped value to p5.js via serial
  Serial.println(mappedPotValue);

  delay(100);  // Wait for 100 milliseconds before the next reading
}
); }
P5.js code
let port;
let connectBtn;
let disconnectBtn;
let baudrate = 9600;
let isConnected = false;

function setup() {
  createCanvas(400, 400);
  background(220);

  // Create a new Web Serial port instance using p5.webserial
  port = createSerial();

  // If a port was previously used, auto-connect to it
  let usedPorts = usedSerialPorts();
  if (usedPorts.length > 0) {
    port.open(usedPorts[0], baudrate);
    isConnected = true;
  }

  // Create the Connect button and open the port when clicked
  connectBtn = createButton("Connect to Serial");
  connectBtn.position(10, 10);
  connectBtn.mousePressed(() => {
    port.open(baudrate); // Opens a serial connection using the chosen baud rate
    isConnected = true;
  });

  // Create the Disconnect button to close the serial port
  disconnectBtn = createButton("Disconnect");
  disconnectBtn.position(150, 10);
  disconnectBtn.mousePressed(() => {
    port.close(); // Closes the serial connection
    isConnected = false;

    // Clear screen and show "Disconnected" message
    background(255);
    textAlign(CENTER, CENTER);
    textSize(18);
    fill(100);
    text("Disconnected.", width / 2, height / 2);
  });
}

function draw() {
  if (isConnected) {
    // Read until newline character
    let str = port.readUntil("\n");

    if (str.length > 0) {
      background("white");

      // Convert the received string to an integer (e.g., mapped potentiometer value)
      let x = int(str);

      // Make sure x stays within the canvas width (safety measure)
      x = constrain(x, 0, width);

      // Draw an ellipse at the position based on incoming data
      ellipse(x, 200, 40, 40);
    }
  }
}

Excercise 2

task:
make something that controls the LED brightness from p5

p5.js interface:

Arduino Code:
int ledPin = 9; // PWM-capable pin to control LED brightness

void setup() {
  Serial.begin(9600);          // Start serial communication at 9600 baud rate
  pinMode(ledPin, OUTPUT);     // Set the LED pin as an output
}

void loop() {
  if (Serial.available()) {    // Check if data is available to read from serial
    int brightness = Serial.parseInt();  // Read the integer value (brightness)
    brightness = constrain(brightness, 0, 255); // Limit the value to the 0-255 range
    analogWrite(ledPin, brightness);   // Write the brightness value to the LED pin
  }
}

This project creates a real-time visual and physical interface to control an LED’s brightness using a slider in a p5.js sketch. The brightness value is sent from the browser to an Arduino board via serial communication. As the user moves the slider, the LED’s intensity changes accordingly, both in the physical circuit and on-screen through a glowing animation and gauge ring. The interface also includes a connect/disconnect button for flexible hardware control.

Excercise 3

In this exercise, we took the gravity and wind example and instead connected it to the Arduino. We replaced the digital wind control with a potentiometer, allowing us to control the wind force by hand. Additionally, we used an LED to light up every time the ball hit the ground and is at rest.

Arduino Code:
// Define the pin connected to the LED
const int ledPin = 5;

// Define the analog pin connected to the potentiometer
const int potPin = A0;

void setup() {
  // Start serial communication at 9600 baud
  Serial.begin(9600);

  // Set the LED pin as an output
  pinMode(ledPin, OUTPUT);
}

void loop() {
  // Read the analog value from the potentiometer
  int sensorValue = analogRead(potPin);

  // Print the sensor value to the Serial Monitor
  Serial.println(sensorValue);

  // Check if data is available to read from the Serial Monitor
  if (Serial.available() > 0) {
    // Read the incoming character
    char msg = Serial.read();

    // If the received character is '1', turn on the LED
    if (msg == '1') {
      digitalWrite(ledPin, HIGH);
    }
    // If the received character is '0', turn off the LED
    else if (msg == '0') {
      digitalWrite(ledPin, LOW);
    }

    // Clear any extra characters in the serial buffer
    while (Serial.available() > 0) {
      Serial.read();
    }
  }

  // Small delay to avoid flooding the serial output
  delay(50);
}

p5.js Code:

let port;
let baudrate = 9600;
let position, velocity, acceleration, gravity, wind;
let drag = 0.99;
let mass = 50;
let val = 0;
let str = "";
let hitGround = false;

function setup() {
  createCanvas(640, 360);
  noFill();

  position = createVector(width / 2, 0);
  velocity = createVector(0, 0);
  acceleration = createVector(0, 0);
  gravity = createVector(0, 0.5 * mass);
  wind = createVector(0, 0);

  port = createSerial();

  let connectButton = createButton("Connect");
  connectButton.position(10, 10);
  connectButton.mousePressed(() => {
    if (!port.opened()) port.open(baudrate);
  });

  let disconnectButton = createButton("Disconnect");
  disconnectButton.position(100, 10);
  disconnectButton.mousePressed(() => {
    if (port.opened()) port.close();
  });

  let dropButton = createButton("Drop Ball");
  dropButton.position(220, 10);
  dropButton.mousePressed(dropBall);
}

function draw() {
  background(255);

  applyForce(gravity);
  applyForce(wind);

  velocity.add(acceleration);
  velocity.mult(drag);
  position.add(velocity);
  acceleration.mult(0);

  ellipse(position.x, position.y, mass, mass);

  if (position.y > height - mass / 2) {
    velocity.y *= -0.9;
    position.y = height - mass / 2;

    if (!hitGround) {
      hitGround = true;
      if (port.opened()) {
        port.write("1\n"); // turn LED on
      }
    }
  } else {
    hitGround = false;
    if (port.opened()) {
      port.write("0\n"); // turn LED off
    }
  }

  str = port.readUntil("\n");
  val = int(str.trim());

  if (!isNaN(val)) {
    updateWind(val);
  }
}

function applyForce(force) {
  let f = p5.Vector.div(force, mass);
  acceleration.add(f);
}

function updateWind(val) {
  wind.x = map(val, 0, 1023, -1, 1);
}

function dropBall() {
  // Reset ball to the top
  position.y = 0;
  velocity.set(0, 0);
  acceleration.set(0, 0);
  hitGround = false;

  // Force LED off
  if (port.opened()) {
    port.write("0\n");
  }
}

SCHEMATIC

SchematiC


P5.js Artwork

Video

Link: https://drive.google.com/file/d/1bVrW1jPjtYBfAijWJPNHeHTnERkzNfPb/view?usp=sharing

Week 3: Generative artwork using Object-Oriented Programming.

Concept

Prior to this assignment being due, I was going through some of my childhood story books and thats when The Pied Piper of Hamelin inspired me to create this artwork using OOP. In the original story, the Piper plays his magical tune, and all the mice follow him (and later, all the children of the town as well)

Pied Piper Illustration
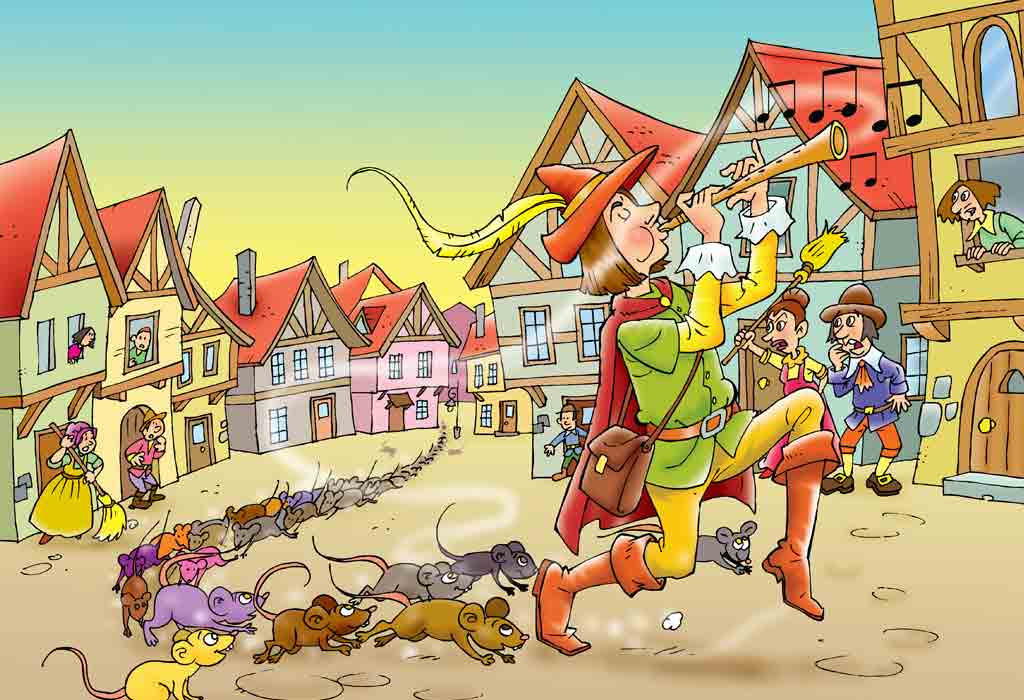
But I wanted to keep things happy and do just that part of mice following him in my preferred aesthetic- a night sky. In my version, a glowing dot represents the Piper, and mice randomly appear and start following it. But they’re not just mindless followers—if you move your mouse, you can actually distract them!

When the mice get close to the Piper, they start glowing, like they’re enchanted by some unseen force. To make things even more atmospheric, the background keeps shifting, creating a dreamy, night-sky effect.

 The Artwork

Week 10

const int ldrPin = A0;         // LDR connected to analog pin A0
const int buttonPin = 2;       // Button connected to digital pin 2
const int speakerPin = 9;      // Speaker connected to digital pin 9
const int ledPin = 13;         // LED connected to pin 13

// Dramatically different frequencies (non-musical)
int notes[] = {100, 300, 600, 900, 1200, 2000, 3000};

void setup() {
  pinMode(buttonPin, INPUT);         // Button logic: HIGH when pressed
  pinMode(speakerPin, OUTPUT);     
  pinMode(ledPin, OUTPUT);         
  Serial.begin(9600);              
}

void loop() {
  int buttonState = digitalRead(buttonPin); // Read the button

  if (buttonState == HIGH) {
    int lightLevel = analogRead(ldrPin);         // Read LDR
    int noteIndex = map(lightLevel, 0, 1023, 6, 0); // Bright = low note
    noteIndex = constrain(noteIndex, 0, 6);      // Keep within range
    int frequency = notes[noteIndex];            // Pick frequency

    tone(speakerPin, frequency);                 // Play note
    digitalWrite(ledPin, HIGH);                  // LED on

    Serial.print("Light: ");
    Serial.print(lightLevel);
    Serial.print(" | Frequency: ");
    Serial.println(frequency);
  } else {
    noTone(speakerPin);            // No sound
    digitalWrite(ledPin, LOW);     // LED off
  }

  delay(100);
}


Week 8:Unusual Switch

Concept

As part of my exploration into unconventional switches and interactive physical computing, I set out to create a hands-free tilt maze that would light up an LED when a metal ball reached the end. The goal was to design a circuit where the ball itself would act as a conductor, closing the circuit when it landed in the final zone. This would be a simple yet effective way to merge an engaging, movement-based game with basic electronics.

Planning & Execution

1. Designing the Maze

I started with a small wooden tray, which served as the base for my maze. Using thin wooden strips, I created walls to guide the ball along a path. The objective was to navigate the ball from the start to the finish zone using only tilting motions, without touching it by hand.

2. Creating the Conductive Finish Zone

The most crucial part of the project was designing the finish zone, where the ball would complete an electrical circuit. I used copper tape to create two separate conductive paths (Pads A & B) with a small gap between them. When the metal ball landed on both pads simultaneously, it bridged the connection and completed the circuit, allowing current to flow and light up the LED.

3. Wiring the LED Circuit

To keep the project simple, I opted for a basic circuit:

  •  Arduino 5V power supply
  • Some LEDs
  • A 330Ω resistor to protect the LED
  • Wires connecting the copper tape pads to the circuit

The LED remained off until the ball touched both pads, acting as a natural switch.

4. Making It Hands-Free

To fully embrace the “hands-free” challenge, I designed the maze to be played by tilting the tray. I experimented with different ways to control the tilt: Holding the tray with some other body part ( added a stick for easy holding later)

The Confusing Part

One of the trickiest parts of the project was ensuring consistent electrical contact when the ball landed on the finish zone. Initially, the ball wouldn’t always complete the circuit properly. Through testing, I identified a few issues:

  • Copper tape alignment: If the gap between the two pads was too wide, the ball wouldn’t bridge them effectively.
  • Surface roughness: Uneven copper tape or debris could prevent a reliable connection.
  • Ball material: Not all metal balls conducted electricity equally well. A steel washer worked best.

and heres “The Video”-

Final Thoughts

This project was a fun way to combine electronics, physical movement, and creative problem-solving. the conductivity issues helped me better understand how to design reliable electrical contacts.

I’m excited to explore more unconventional switch mechanisms in the future. Maybe next time, I’ll design a game that reacts to body heat, breathing, or even sound vibrations!

Will be demonstrating the gameplay on class!

Midterm Project

Final Update: Concept

At first, I wanted my project to recreate my old, cluttered workspace in Bangladesh—full of life, creativity, and memories. But after moving into my dorm, I realized my space now is the opposite: empty, open, and full of possibility.

So instead of a busy, object-filled world, my interactive artwork in p5.js reflects this new beginning. The emptiness isn’t just emptiness—it’s potential. It invites exploration, just like my dorm did when I first moved in. This project became more than just a recreation; it’s a reflection of change, growth, and the spaces we make our own.

️ How It Works

This p5.js sketch opens with a sliding door animation triggered by a double-click—inviting the user into my new, reimagined space. The background is made of looping breathing frames (3 total), giving life to an otherwise still room. All visuals are hand-drawn—hair, furniture, plants, and even a little desktop cat.

Hair animations are split into base, fringe, and left/right segments. Each segment has its own independent frame logic, animated dynamically in code, not as spritesheets—saving memory while giving me more layering control. The breathing and hair create ambient movement that never overwhelms the canvas.

There’s interaction too:

  • Hovering over the lamp activates its glow and animates its arm.

  • Clicking the mirror brings up a live webcam feed. You can “capture yourself” inside the mirror.

  • Clicking the cat opens a surprise sketch.

  • Clicking the Spotify icon links to my actual profile—and starts background music.

I also display a live UAE time clock on the desk monitor, updating every second. Because yes, I coded that too.

 What I’m Proud Of

  • The balance between aesthetics and interaction. I didn’t just cram in clickable objects—I made them meaningful, subtle, and thematic.

  • Hair movement logic. Animating hair in separate segments and syncing their speed gave it a much more natural feel than I could’ve achieved with pre-rendered spritesheets.

  • // Left hair animation
    image(leftHairFrames[currentLeft], xPos - xOffset, yPos - yOffset, hairWidth, hairHeight);
    leftBlend += hairSpeed;
    if (leftBlend >= 1) {
      leftBlend = 0;
      currentLeft = nextLeft;
      nextLeft = (nextLeft + 1) % leftHairFrames.length;
    }


  • Mirror interaction. Using cam.get() and masking the feed to fit into an oval gave the illusion of a real, personal reflection without needing AR libraries.

  • Sound integration. Audio feedback (the knock, the music) grounds the scene and enhances immersion without stealing the spotlight.

Challenges & Improvements

1. Asset Load Limits & Compression Woes
Initially, I tried creating one big spritesheet for all hair frames—until p5.js (rightfully) panicked. Compressing the sheet butchered the image quality, so I scrapped it in favor of individually loaded and layered PNGs.

// Breathing animation logic
image(breathingFrames[currentFrame], 0, 0, width, height);
tint(255, 255 * blendAmount);
image(breathingFrames[nextFrame], 0, 0, width, height);
blendAmount += fadeSpeed;

if (blendAmount >= 1) {
  blendAmount = 0;
  currentFrame = nextFrame;
  nextFrame = (nextFrame + 1) % breathingFrames.length;
}
noTint();


2. Interactivity Clutter
I wanted everything to be interactive. Bad idea. Midway through, I remembered something Professor Mang said: it’s better to be clean and compelling than overloaded. So I scaled back. Some items are just pretty. And that’s fine.

3. Mirror Lag on Some Browsers
Depending on user permissions, the webcam sometimes doesn’t load right. I didn’t implement a fallback system, but it’s something I’d add next time.

 Conclusion

This project started as an homage to an old space but became a meditation on new beginnings. It’s my first time making an ambient interactive piece—part game, part diary, part room. It’s not perfect, but it’s mine. And like any good workspace, it’s full of potential.

Week 5: Midterm Progress

Concept

Back home, one of the places I used to spend most of my time was my workspace in my room. As the saying goes, “You spend most of your life inside your head. Make it a nice place to be” ; for my case would be my workspace. That, combined with my passion for filming content, sparked my obsession with decorating my workspace. I studied, ate, worked, and even slept there (quite literally ).

Since I’ve left that space behind in Bangladesh, I wanted to recreate a piece of it through an interactive artwork in p5.js for my midterm project. My goal is to visually mimic my workspace and integrate interactivity based on what I’ve learned in class. For starters, i plan it to have the feels of an open world game where you can interact and explore the objects around you. Since my workspace is so busy with a lot of stuff, it creates the perfect scenario for exploration. I also plan to add a knock-on-my-door ish start screen instead of a regular one.I think this will not just meet the project’s requirements for interactivity but also make it feel more personal— it the closest thing I have to my old workspace now.

Design Process

Now that i have jotted down my concept, I realized I had unintentionally set myself up for a lengthy challenge. Hunting for assets that matched my aesthetic turned into a frustrating game of almost-but-not-quite—everything either messed with the vibe or threw off the whole look I was going for.

I ultimately made the (inevitable) decision to draw everything from scratch. To begin the production process, I created a rough sketch of my concept:

Description of the image

At this point, I felt overwhelmed by the number of objects I was adding and my initial plan to make all of them interactive. Then I remembered  professor Mang’s advice which was something along the lines of-what matters most is that the project is aesthetically pleasing and clean, rather than being overloaded with features. Moving forward, I might limit interactivity, making some objects static to maintain a clean look and also for ease.

I decided to work further on deciding the aesthetic, I adjusted my initial sketch, settling on a more cohesive design:

Description of the image

I wanted to include myself in the scene, so I drew my character sleeping at the desk—just as I often did in real life. I initially considered adding interactive movement to my character but ultimately decided against interactivity for two main reasons:

  1. The sheer amount of drawings I’d have to draw to animate it.
  2. Potential issues with the layering, which could interfere with other interactive elements.

To avoid complications, I’ll position my character far from the interactive elements. My workspace had a blue theme with touches of white and pink, so I chose those as my main color palette. I also opted for a flat 2D style, as shading objects would take too much time and require changing the direction of shadow if I later changed their placement.

Challenges & Possible Fixes

1. Preparing the Assets

I started by drawing my character’s hair particles in the app Resprite and attempted to create movement. However, I realized that different segments of the hair needed to move at different speeds based on their density and weight, meaning a single sprite wouldn’t be enough. This led me to manually draw multiple hair segments, and the assets piled up quickly.

Description of the image

I took this photo halfway through the process of drawing each hair segment. To ease the workflow, I loaded them into Pixel Studio to create a spritesheet. However, I ran into a major issue—the file size exceeded p5.js’s permitted limit. Compressing the spritesheet resulted in a significant loss of quality, which is a problem since the hair is a large, prominent element on the screen.

At this stage, I’m still unsure how to proceed while maintaining the quality. I may need to explore alternative ways to optimize the sprites or adjust the animation approach.

Possible fix:

1.Splitting the hair into separate layers and animating them dynamically in p5.js instead of pre-rendering frames.

Or, 2. Using vector-based movement instead of raster spritesheets.

2. Layering Issues & Depth Management

Since some objects are interactive and others are static, layering them incorrectly might make it hard to interact with certain elements or could cause visual glitches. I also feel like the range of interactivity of one object could hamper the others.

Possible Fix:

1.Use z-index ordering within the p5.js draw loop to ensure the correct stacking of elements.

Or,2. Implementing collision detection if certain objects should not be interactable when behind others. However, I’m yet to figure out the logic for that.

3. Interactivity & User Experience

With so many objects in the workspace, interacting with them all might feel cluttered or overwhelming. There’s also the risk of users not realizing which objects are interactive.

Possible Fix:

Add subtle visual cues, like slight movements, highlights, or hover effect/audio feedback/different interaction types (e.g., clicking, dragging, hovering) to make interactions more varied and engaging.


Wrapping It Up

While I initially set out to create an interactive replica, the design process has made me rethink how interactivity and aesthetics can coexist without overwhelming. With ongoing challenges like asset optimization, performance tuning, and user interaction design, I’m continuously refining my approach. Ultimately, I hope this piece not only meets the technical requirements but also captures some of my personality-keeping things interesting to urge the user to continue the explorations would be hard though.

Week 2 – Animation, Conditionals, Loops Artwork

For this weeks production assignment of creating an artwork using animation, conditionals, loops, I wanted to create a gamified artwork based on  a slice of life of my cat Piku.


Piku the Cat
This is Piku! A cat that loves showers more than anything(strangely)!

So I quickly sketched up my plan for today’s artwork which roughly looked like this-


Vision Image
I wan
ted to implement animation, conditionals, and loops to bring everything to life. I imagined:

-Window blinds that could open and close smoothly, setting the scene.

-A background with clouds and a sun, all randomly generated to make things feel dynamic. Also, day to night transition.

-Foam filling up the bathtub, to give it some depth.

-Dirt appearing on the cat, to make it interactive

-A sponge that could move around as a cursor and detect collision when it touched the dirt, making it disappear.

-Bubbles floating around animation to show that the dirt splashes are being cleaned

At first, it all sounded doable in my head. But once I started coding, I quickly realized just how many moving parts there were. Making sure the sponge actually removed the dirt was tricky. Getting the animations to feel smooth took a lot of tweaking. And sometimes, the whole thing would just break for no reason, forcing me to backtrack and figure out what went wrong.

The Part that took the longest: Collision detection!

The dirt and sponge interaction was by far the toughest challenge. At first, I thought it’d be simple—just check if the sponge touches the dirt and remove it. Spoilers- it wasnt. What Went Wrong?

-Frames: The dirt sometimes disappeared too fast or not at all because collisions were checked every frame, making it inconsistent.

-Layering: Dirt kept reappearing because new frames kept redrawing it, even after “removal.”

-Messed-up logic: I tried so many broken approaches—checking collisions wrong, deleting dirt before drawing it, and even accidentally scrubbing the whole screen at once.

The Fix

I stored dirt in an array and only removed pieces when they were properly scrubbed:

let dirtParticles = Array.from({ length: 20 }, () => ({
  x: random(width), y: random(height), scrubbed: false
}));

function draw() {
  background(220);
  let sponge = { x: mouseX, y: mouseY };

  fill(255, 204, 0);
  ellipse(sponge.x, sponge.y, 50, 30); 

  dirtParticles = dirtParticles.filter(dirt => {
    let scrubbing = dist(sponge.x, sponge.y, dirt.x, dirt.y) < 30;
    if (!scrubbing) {
      fill(139, 69, 19);
      ellipse(dirt.x, dirt.y, 15, 15);
    }
    return !scrubbing;
  });
}

And after hours and hours of googling every function ever, here’s the final result:

What I’d Do Differently

This project was a huge learning experience. If I had to do it again, I’d plan my code structure better from the start. I ran into so many issues with layers, frame updates, and collision logic, which could have been avoided if I had mapped out how each element would interact beforehand.Also, I’d put more focus on the aesthetic aspects of the project. This project forced me to dive deep into some tricky p5.js functions and concepts, including:

  • filter()
  • push() / pop()
  • frameRate() and frame-based logic
  • Arrays and Objects
  • Background Gradient
  • Animation Timing

This project had its frustrating moments, especially when things wouldn’t behave the way I expected. But in the end, seeing everything finally come together was incredibly rewarding.