Norman’s central argument (that positive affect broadens thinking and makes people more tolerant of minor design flaws, while negative affect narrows it) is intuitive and reasonably well-supported by the psychological research he cites. The distinction between depth-first and breadth-first thinking is genuinely useful, and it reframes stress not as uniformly bad but as a cognitive mode that suits certain situations. That said, Norman is not entirely without bias. The essay reads partly as a self-correction, an attempt to walk back the “usability over beauty” reputation he’d earned from The Design of Everyday Things, and his anecdotal framing around his teapot collection, while charming, does a lot of heavy lifting for what is supposed to be a scientific argument. More importantly, he treats aesthetic pleasure as relatively universal without interrogating whose standards of beauty are being applied — a significant gap when design operates across cultures and contexts.
McMillan’s portrait of Hamilton is compelling and the Apollo 8 anecdote is particularly striking: Hamilton identifies a realistic failure scenario, NASA dismisses it as impossible, and then it happens on a live mission anyway. It’s a clean illustration of institutional overconfidence and the cost of ignoring people closest to the problem. However, the piece leans hagiographic — Hamilton is framed almost as a lone genius, while the broader collaborative effort, including the Raytheon seamstresses who physically hardwired the memory and engineers like Don Eyles, gets quietly sidelined. The bias is an understandable corrective given how long Hamilton’s contributions went unrecognized, but it’s worth naming. What the two readings share is an underlying tension about whose judgment gets trusted within institutions, and both suggest that the people with the clearest view are often the ones being overruled.
Read together, both texts circle the same problem: institutions tend to trust hierarchy over proximity. Norman’s supervisors dismissed color displays as scientifically valueless; NASA dismissed Hamilton’s error-checking as unnecessary. In both cases, the person closest to the work had the clearest picture. Norman resolves this through neuroscience — affect shapes judgment in ways we don’t always consciously recognize. McMillan resolves it through biography — one person’s persistence against institutional resistance changed the course of history. The question both readings leave open is how to build systems, whether design processes or space programs, that actually listen to the people who see the problems first.
For this assignment, I built a hands-free switch that uses the human body as a conductor. The project uses two aluminum foil patches — one taped to the floor, one to the sole of a shoe — to open and close a circuit through the act of jumping. An Arduino reads the state of the switch using digitalRead and communicates over USB serial to a Python script running on a laptop, which plays and stops a song based on the jumping rhythm. The music only plays while jumps are happening in close sequence, stopping if the user pauses for more than 1.5 seconds.
3. Concept
My goal was to turn the whole body into an instrument of interaction, removing the hands entirely and replacing them with something more physical and committed. The initial inspiration came from an unexpected source: my baby nephew, who kept interrupting my work sessions. Rather than fighting the disruption, I decided to include him in the project. Babies and toddlers are defined by their movement — bouncing, jumping, stomping — so building a switch that is activated by jumping felt like a natural way to design around him and his abnormal enthusiasm for dancing. The idea became about handing control to someone who couldn’t operate a traditional switch at all.
The music-as-reward mechanic adds another layer that felt personally fitting: the music only survives as long as the jumping continues, stopping if the user pauses for more than 1.5 seconds. For a restless toddler this creates an instinctive feedback loop between movement and sound. Stop jumping and the music dies. Keep going and it lives.
4. Process and Methods
I began with the physical circuit, using the INPUT_PULLUP mode on Pin 2 to avoid needing an external resistor. This keeps the pin held HIGH when the circuit is open, and pulls it LOW when the foil patches make contact through the body.
To filter out noise and false triggers — particularly the pin floating when only one foil patch was touched — I implemented a two-stage debounce. The code waits 50ms after detecting a change, then re-reads the pin to confirm the state change was real before acting on it.
On the software side, I wrote a Python script that listens on the serial port for LANDED and JUMP messages. Rather than toggling the music on a single event, I used a timeout system: every landing resets a timer, and the music stops only when that timer expires without a new landing.
The serial communication bridge between the Arduino and the laptop uses the pyserial library, and audio playback uses Mac’s built-in afplay command via Python’s subprocess module, keeping dependencies minimal.
5. Technical Details
The core of the switch detection relies on INPUT_PULLUP, which activates an internal ~50kΩ resistor inside the Arduino chip. This pulls Pin 2 to 5V (HIGH) by default. When the foil patches make contact, they create a conductive path through the human body to GND, pulling the pin LOW.
pinMode(jumpPin, INPUT_PULLUP);
The debounce reads the pin twice, separated by a 50ms delay, to confirm that a state change is genuine and not electrical noise or foil flutter on contact:
// Only act if the state has changed since the last loop
if (currentSwitchState != lastSwitchState) {

  // Wait 50ms before reading again — debouncing — one landing could trigger dozens of false readings.
  delay(50);
  currentSwitchState = digitalRead(jumpPin);

  // Re-check that the state still differs after the debounce delay.
  // If the reading went back to the original state, it was just noise — ignore it.
  if (currentSwitchState != lastSwitchState) {

    if (currentSwitchState == LOW) {
      // Foil patches are touching — the circuit is complete — user has landed
      digitalWrite(ledPin, HIGH);       // turn LED on as visual confirmation
      Serial.println("LANDED");        // notify the Python script to start music
    } else {
      // Foil patches are separated — the circuit is open — user is in the air
      digitalWrite(ledPin, LOW);        // turn LED off
      Serial.println("JUMP");          // notify the Python script
    }

    // Save the current state so we can detect the next change
    lastSwitchState = currentSwitchState;
  }
}
The Python timeout logic uses time.time() to track the moment of the last landing. The music continues as long as landings arrive within the threshold window:
    if line == "LANDED":
        # Foil patches made contact — reset the timer and start music
        last_landing = time.time()
        start_music()

# If music is playing but no landing has come in within TIMEOUT seconds, stop
if playing and (time.time() - last_landing > TIMEOUT):
    stop_music()
6. Reflection
This project pushed me to think about interaction in a much more physical way than usual. The main technical challenge was dealing with pin floating — when only one foil patch was touched, the unconnected pin would pick up ambient electrical noise from the environment and the body, triggering false readings. Understanding why INPUT_PULLUP solves this (by giving the pin a definite default state rather than leaving it undefined) was the key insight. The two-stage debounce was also a lesson in how unreliable physical contacts can be at the moment of touch — foil crinkles and makes intermittent contact before settling, and reading the pin twice filtered that out cleanly. Physically, the strain relief on the wires (taping them to the leg with slack at the ankle) turned out to be just as important as the electronics, since a pulled wire mid-jump would break the circuit unpredictably.
One thing I should have considered more carefully from the start was my nephew’s impatience. The whole project was inspired by him, but toddlers don’t wait; if the music doesn’t start immediately or cuts out too quickly between jumps, the experience breaks down fast. In hindsight, I would have tuned the TIMEOUT value with him in mind from the beginning, giving a little more grace time between landings to account for the unpredictable rhythm of a small child jumping rather than calibrating it around an adult’s pace.
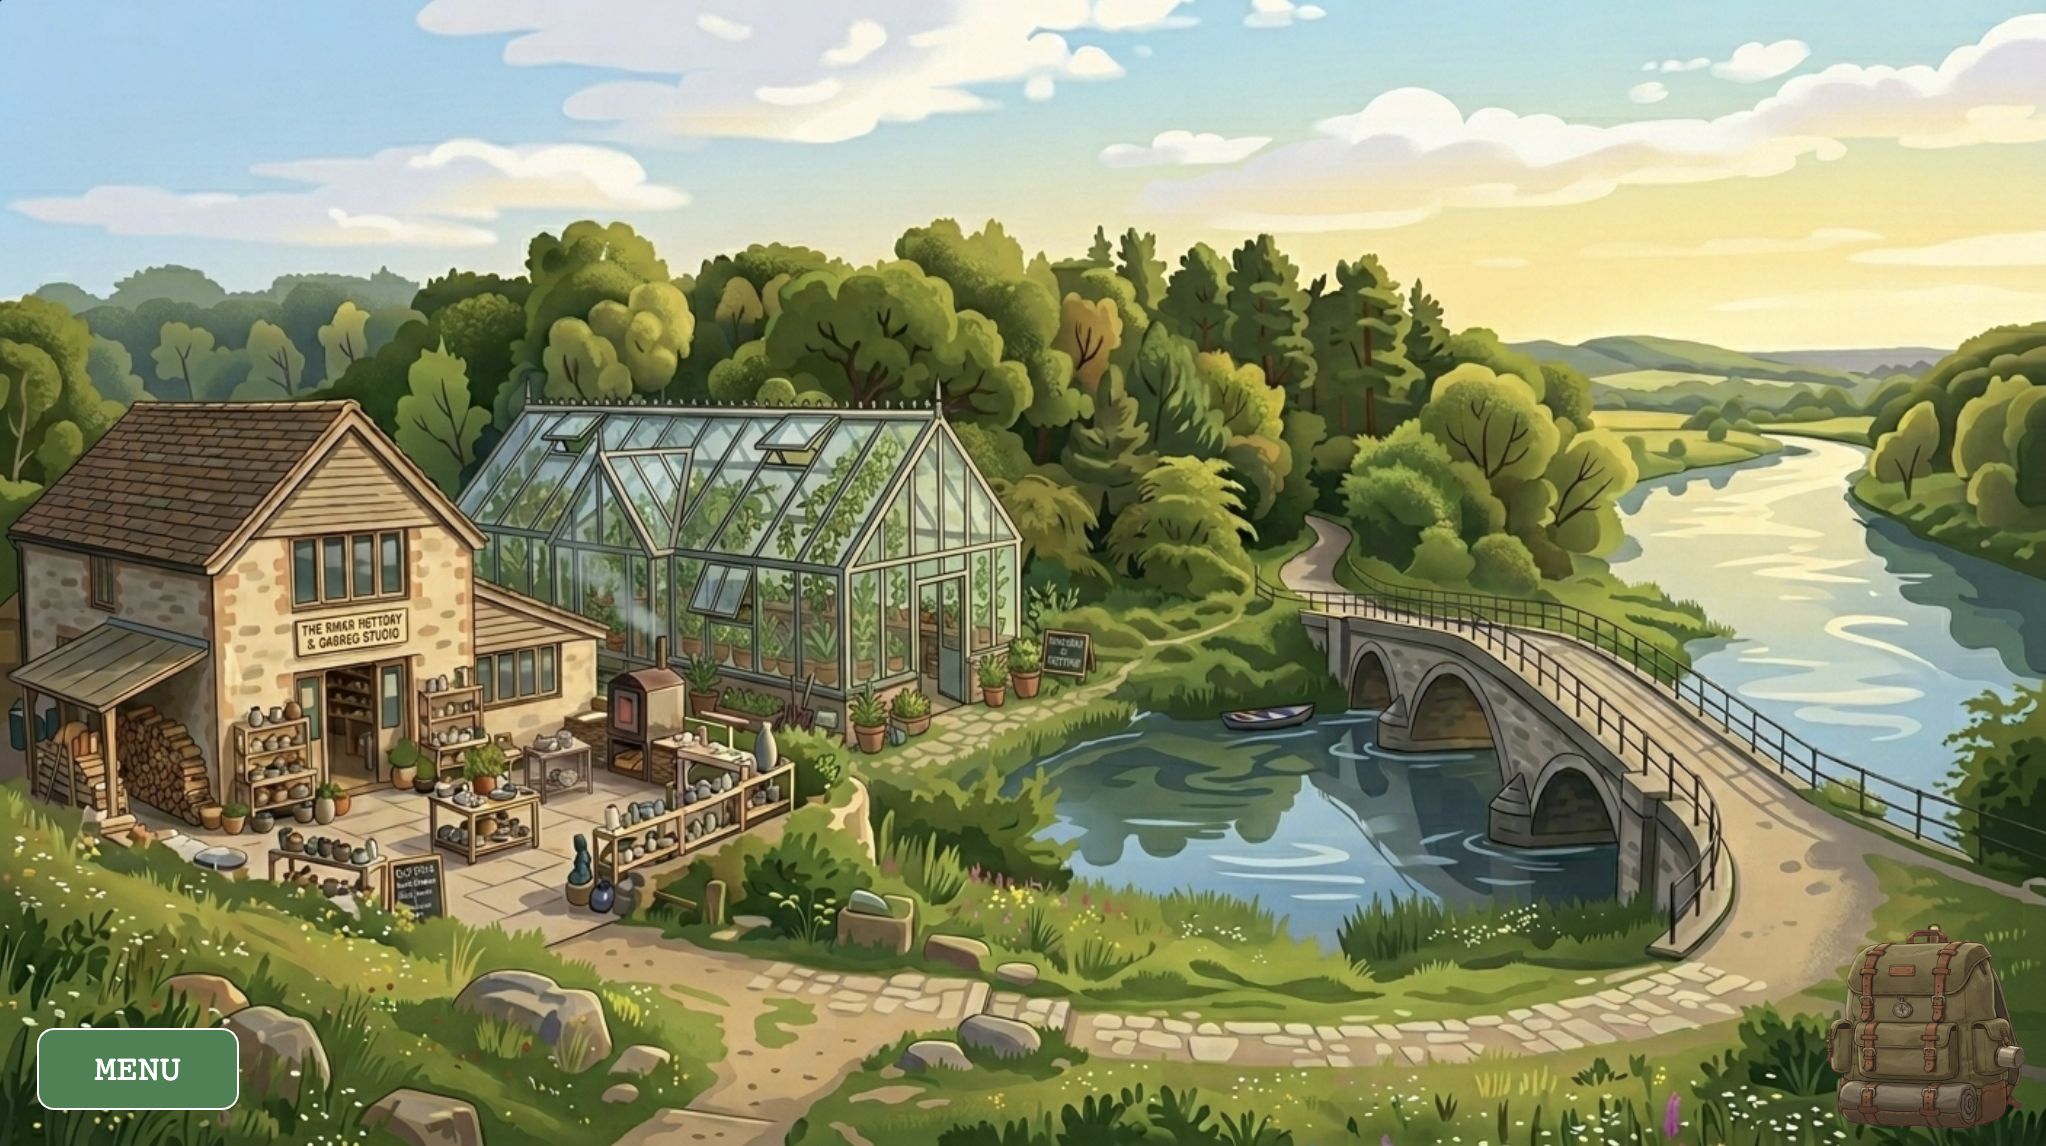
I wanted to make something that felt more physical than most browser games. The idea was simple: instead of clicking a button and having a resource appear, you actually go and get it. You walk to the river to fill a bucket. You dig in the forest and carry the clay back. You hold your mouse on a pottery wheel until the shape changes. The whole game is built around making you move between spaces and handle things directly, rather than managing numbers in a menu.
The game has five locations — a world map, a river, a forest, a pottery studio, and a greenhouse — each with its own interaction logic and its own music track. You start with five seeds and no other resources, and the loop is: collect clay and water, make a pot in the studio, bring it to the greenhouse with soil and a seed, and wait for the plant to grow. The cursor changes depending on where you are and what you’re carrying, so you can always tell what you’re holding without opening an inventory screen. The visual style came from wanting it to feel lo-fi and cozy, loosely inspired by games like Stardew Valley but much smaller in scope.
The world map – each region is a hand-mapped pixel boundary
3. How it Works
The entire game runs on two parallel state variables stacked on top of each other. gameState controls the meta-level — which screen the player is on (title, instructions, gameplay, or pause). currentLayer controls the world-level — which physical location the player is standing in. Every frame, the draw() loop reads both and routes rendering and input accordingly. This separation means that pausing the game, for instance, simply renders the pause menu on top of an already-drawn scene without tearing anything down. A new layer can be added to the game without touching any existing screen logic.
Navigation between scenes is handled by a rectClick() helper that checks whether the mouse landed inside a manually defined pixel rectangle. The world map coordinates were discovered by logging mouseX and mouseY to the console while clicking over the background image — a reliable form of coordinate mapping. Two rectangles per scene allow irregular regions of the map to be approximated without any polygon math.
/*
 * Detects which map region was clicked and navigates to that layer.
 * Regions are defined as bounding rectangles over the map background art.
 */
function checkMapClick() {
    if (rectClick(0, 190, 260, 470) || rectClick(240, 330, 380, 430)) {
        currentLayer = "STUDIO";
    } else if (rectClick(240, 200, 500, 260) || rectClick(300, 260, 510, 360)) {
        currentLayer = "GREENHOUSE";
    } else if (rectClick(260, 110, 780, 200) || rectClick(520, 200, 780, 290)) {
        currentLayer = "FOREST";
    } else if (rectClick(525, 365, 840, 450) || rectClick(790, 215, 1025, 450)) {
        currentLayer = "RIVER";
    }
}
Plants must keep living regardless of which scene the player is viewing. They are stored in a global activePlants array and updated on every frame via updateGlobalPlants(), called unconditionally at the top of draw(). This means a seedling keeps aging while the player is away collecting water at the river. Growth is tracked using millis() rather than frameCount, making it completely frame-rate independent.
// Called every frame; promotes the stage when enough time has passed.
update() {
    let age = millis() - this.birthTime;
    if (age > this.growthDuration && this.stage < 2) {
        this.stage++;
        this.birthTime = millis();          // Reset timer for the next stage

        // Play the "fully grown" sound once
        if (this.stage === 2 && !this.hasPlayedGrowthSfx) {
            sfxGrowing.play();
            this.hasPlayedGrowthSfx = true;
        }
    }
}
4. Technical Decisions
The Pottery Wheel — Hold-to-Craft
The most deliberate design decision in the project was rejecting an instant “Make Pot” button in favor of a hold-to-craft interaction. The pottery wheel tracks how long the player’s mouse has been in contact with it and advances a shapingFrame counter every five seconds, visually pulling the clay through four distinct silhouettes. During contact, a looping wheel sound plays and the pot sprite is mirrored horizontally on alternating frames to suggest rotation. Release the mouse and the sound cuts immediately — the wheel stops the moment you lift your hand. The entire sequence takes fifteen seconds of sustained attention, which is long enough to feel like real effort and short enough not to become tedious.
// ── Pottery Wheel ──
if (wheelState !== 'EMPTY' && !isDraggingFromWheel) {
    let isTouching = mouseIsPressed && dist(mouseX, mouseY, wheelX, wheelY) < 70;

    if (wheelState === 'SHAPING') {
        if (isTouching) {
            // Keep wheel sound looping while the player holds the wheel
            if (!sfxWheel.isPlaying()) sfxWheel.loop();

            // Advance the pot shape frame every 5 seconds of contact
            if (millis() - shapingTimer > 5000) {
                shapingFrame = min(shapingFrame + 1, 3);
                shapingTimer = millis();
            }
        } else {
            sfxWheel.stop(); // Stop sound when mouse is lifted
        }

        // Once fully shaped, transition to draggable state
        if (shapingFrame === 3) {
            wheelState = 'READY_TO_DRAG';
            sfxWheel.stop();
        }
    }

    // Draw the pot on the wheel, mirroring every 10 frames to suggest spinning
    push();
    imageMode(CENTER);
    translate(wheelX, wheelY);
    if (wheelState === 'SHAPING' && isTouching && frameCount % 20 < 10) scale(-1, 1);
    drawPotFrame(0, 0, shapingFrame, 200, 200);
    pop();
}
The Furnace — Time as Stakes
Once a shaped pot is dragged into the furnace, a four-phase timer begins. There is a ten-second window to retrieve a perfect pot, then a five-second grace period where the pot is visibly burnt but still removable (though broken), then five more seconds before it crumbles to ash entirely. This makes the act of pot-making carry real risk: leave the studio to collect other resources and you may return to nothing. The time-management tension it creates between the furnace and the wider world loop was a late addition to the design, but it became one of the most important decisions in the whole game — it’s what makes the studio feel dangerous rather than merely mechanical.
// ── Furnace ──
if (furnaceState !== 'EMPTY' && !isDraggingFromFurnace) {
    let elapsed = (millis() - furnaceStartTime) / 1000; // Seconds since firing started

    if (elapsed < 10) {
        furnacePotFrame = 3;
        furnaceState = 'FIRING';
        if (!sfxFurnace.isPlaying()) sfxFurnace.loop();
    } else if (elapsed < 15) {
        furnacePotFrame = 4;
        furnaceState = 'READY_TO_DRAG'; // Pot is done — player can pick it up
        sfxFurnace.stop();
    } else if (elapsed < 20) {
        furnacePotFrame = 5;
        furnaceState = 'BURNT'; // Left too long — pot is cracked
    } else {
        furnacePotFrame = 6;
        furnaceState = 'ASH';  // Completely destroyed
        sfxFurnace.stop();
    }

    imageMode(CENTER);
    drawPotFrame(205, 237, furnacePotFrame, 70, 70);
}
The Cursor as a Physical Inventory
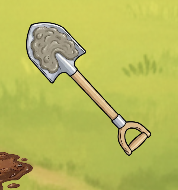
Rather than displaying abstract resource counts in a HUD panel, physical resources are communicated directly through the cursor. In the forest, the shovel sprite changes to show clay or soil clinging to the blade the moment something is dug up. At the river, the bucket visually fills. Resources are deposited by carrying them to the backpack icon in the corner — the act of storing something is the same gesture as moving it there.
Bucket cursor fills visually after clicking the river surfaceCursor becomes a clay-caked shovel after digging a deposit
5. Challenges
Double-Firing Buttons
The most persistent bug in the project was button clicks firing twice from a single physical interaction. p5.js triggers both mousePressed and mouseClicked in sequence for the same click event, and because several buttons triggered state changes or inventory mutations, the same action would execute twice — opening and immediately closing the inventory, or incrementing a counter twice in one tap. The fix was a lastMenuClickTime debounce guard: every button action stamps the current timestamp, and any input arriving within 250 milliseconds of that stamp is silently discarded. Setting mouseIsPressed = false inside the button handler also “eats” the event before any downstream listener can see it.
// Fire the action on click, preventing double-firing with a debounce timestamp
if (hover && mouseIsPressed) {
    sfxButton.play();
    lastMenuClickTime = millis();
    mouseIsPressed = false; // Consume the press so nothing else reacts to it
    action();
}
The Cursor Bleeding Over UI Buttons
A subtler issue emerged from the custom cursor system: the shovel and bucket sprites would remain active when hovering over the “Return to Map” and “Menu” buttons in the forest and river scenes. This made the buttons feel broken — the system’s hand cursor never appeared, and the sprite image obscured the button labels. The fix required duplicating the button bounding-box logic inside drawCustomCursor() and explicitly reverting to cursor(ARROW) whenever the mouse entered a UI button’s region. It’s not the most elegant solution, since the same coordinates appear in two places, but it is simple, clear, and reliable.
6. Areas for Improvement
The most obvious missing layer of feedback is what happens when a planting action fails. If the player clicks a greenhouse slot without the right resources, nothing happens. A brief wobble on the backpack icon or a soft error tone would communicate the missing ingredient without interrupting the lo-fi calm. The furnace has the same problem: because there is no visible countdown, the “BURNT” outcome surprises players on a first run through the studio. A subtle color shift on the furnace door as elapsed time crosses into the danger zone would be enough to telegraph urgency without resorting to a numerical timer on screen.
Structurally, the game currently has no win condition or narrative arc beyond the resource loop itself. A concrete goal — growing five plants to full harvest, for instance — would give the loop a sense of closure and make the opening seeds feel like the start of something rather than an arbitrary starting point. Beyond that, the pottery wheel’s hold-to-craft timer could become adaptive: longer contact for a more durable pot, shorter contact for a fragile one that breaks after a single use. That single change would introduce meaningful trade-offs to what is currently a single fixed path through the studio, without adding any new systems
On the technical side, every scene coordinate in the codebase is a hard-coded pixel value sniffed by hand from a 1024×576 canvas. If the canvas size ever changes, every boundary needs to be remapped manually. Normalizing all coordinates to proportions of width and height and then multiplying at render time would make every scene scale to any canvas size automatically — a straightforward refactor that would future-proof the entire coordinate system.
6. Resources
Inspiration
Some of the interaction design was also influenced by this p5.js sketch, which was linked as an example and I came across while exploring what direct, hands-on interaction could look like inside a browser canvas.
Libraries
p5.js (v1.11.11) — core rendering, input handling, and sprite-sheet animation via image().
p5.Sound — loadSound(), loop(), setVolume(), and isPlaying() for all BGM cross-fades and per-action sound effects.
Visual Assets
All backgrounds, sprites, and sprite sheets were generated using Google Gemini and subsequently edited by hand — cropped, trimmed to transparency, and sliced into equal-width frames for use with p5’s source-rectangle API.
Audio
All audio is managed through p5.Sound. BGM transitions are handled by manageBGM(), which compares a targetBGM reference against currentBGM each frame and only swaps when the target has changed — preventing the track from restarting on every draw call.
Background Music — each location in the game has its own assigned instrumental track, chosen to match the mood of that space:
Main Menu Supernatural NewJeans
Instructions ASAP NewJeans
Map The Chase Hearts2Hearts
River Butterflies Hearts2Hearts
Forest Ditto NewJeans
Studio Right Now NewJeans
Greenhouse OMG NewJeans
Pause Menu Midnight Fiction ILLIT
Sound Effects — all SFX (wheel spinning, bucket fill, shovel dig, furnace fire, etc.) were sourced from Pixabay and other royalty-free libraries.
The Secret Garden will be an immersive resource-management game that utilizes a point-and-click adventure interface. The core concept revolves around the “journey of growth” — shifting the focus from instant gratification to the physical labor of gardening. To successfully cultivate life, the player must navigate a layered world, traveling between different locations to collect raw materials. The gameplay loop requires the player to visit the River to fetch water, the Pottery Studio to craft vessels (may or may not include), and the Forest to gather nutrient-rich soil.
The interaction is designed around a “Layered Scene” system. The player navigates by clicking on specific environmental “portals,” such as a path leading to the woods or a bridge crossing the river. Within each scene, the cursor acts as a tool: clicking the river fills a bucket, while clicking a potter’s wheel initiates a crafting sequence. In the central Garden hub, interaction is more tactical, requiring the player to drag and drop collected resources from their inventory onto active plant plots to trigger growth stages.
2. Code Design: Functions, Classes, and Interactivity
The technical architecture of the game will rely on a Scene Manager class to maintain the game state. This class will store boolean flags for every location, ensuring that the program knows exactly which background to render and which set of interactive hitboxes to activate. A global inventory object tracks the count of water, soil, pots, and seeds, acting as the bridge between the gathering scenes and the planting scenes.
The plants themselves will be managed through a Plant Class, which will encapsulate all the logic for individual growth. Each instance of a plant tracks its own unique needs and developmental progress. A central mouseClicked() function serves as the primary input handler, using conditional logic to determine what action to take based on the currently active layer. Furthermore, a persistent HUD runs every frame to provide the player with a clear view of their current resources, regardless of where they are in the world.
3. The Most Uncertain Part
Asynchronous Growth Logic: In a multi-scene game, the player spends significant time away from the Garden. If growth is tied to the Garden’s display loop, plants will “freeze” in time whenever the player leaves the room. Ensuring plants age accurately in the background across different layers is a major logic hurdle.
Interactive Pottery and Asset Alignment: Designing a pottery mini-game that feels tactile — such as requiring the player to click and hold to “shape” clay — risks being buggy or unintuitive, so I’m still in the process of figuring out how exactly I want to introduce “interactivity” there. Additionally, finding specific sprites for for everything and ensuring they align perfectly is difficult.
3. Risk Minimization and Test Implementation
By using the millis() function, each plant records the exact moment it was last nurtured. This creates a “real-time” clock for every organism. When the player returns to the Garden, the class calculates the difference between the current time and the recorded timestamp to determine growth, ensuring the world feels persistent and alive even when the player is at the River or Studio.
To handle the pottery mini-game, I plan to use a “fill-bar” logic where mousePressed increments a shaping variable. This avoids complex physics and keeps the interaction reliable.
Golan Levin’s essay on computer vision really hammered home the fact that a camera isn’t an eye — it’s just a sensor feeding a math equation. Having done CS IBDP HL, I was already pretty familiar with how control systems work and how cameras process input, so honestly, none of the technical side was surprising to me. I’ve spent enough time looking at how sensors translate the physical world into data arrays to know that a computer doesn’t “understand” what it’s looking at; it’s just running basic tricks like frame differencing to see what moved or background subtraction to see what’s new in the shot. It doesn’t see a “person”; it just sees a bunch of pixels that changed from gray to brown. This makes the computer incredibly easy to trip up with something as simple as a flickering light or a shirt that’s the same color as the wall.
Because computers are so literal and limited, artists have to do a lot of the heavy lifting physically before the code even runs. Levin points out that things like controlled lighting or high-contrast backgrounds aren’t just aesthetic choices — they’re necessary “cheats” to help the computer distinguish a human from the floor. I think about projects like Myron Krueger’s backlit walls, where the environment is specifically engineered to give the computer a perfect silhouette. It makes me realize that successful interactive art isn’t just about writing clever software; it’s about designing a space that “explains” the world to the camera so the algorithm doesn’t get confused by visual noise.
There’s also a weird tension in using these tools because, at their core, they’re surveillance technologies. Levin mentions works like Sorting Daemon or the Suicide Box to show how artists can flip the script on military-grade tracking. It’s a bit uncomfortable to realize that the same tech making a digital shadow look cool in a gallery is what’s used to profile people in public spaces. It makes me wonder if we can ever fully enjoy “interactive” media without that nagging feeling of being watched and categorized. It’s a reminder that while the interaction feels like magic, the data being pulled is never really neutral — it’s always being filtered through whatever narrow definitions the programmer chose.
In reading “The Psychopathology of Everyday Things,” I was struck by how often I have blamed myself for “operator error” when, in reality, I was just a victim of bad design. Don Norman’s breakdown of the disconnect between engineers — who often design with a logic that doesn’t match human behavior — and actual users was eye-opening. One thing that drives me crazy, which Norman doesn’t specifically detail, is the modern design of “smart” appliances that replace physical knobs with touchscreens.
Trying to set a timer on a touch-based stove while my hands are wet or covered in flour is an exercise in pure frustration. The lack of a physical affordance (something to grab and turn) and the absence of immediate haptic feedback make the interface feel fragile and unresponsive. This could be vastly improved by following Norman’s principle of discoverability –incorporating tactile controls like physical dials that naturally signal how they should be operated without me having to look away from my cooking to navigate a sub-menu.
When applying Norman’s principles to interactive media, I see a clear path forward through the use of signifiers and natural mapping. In a digital environment, we don’t always have physical objects, so signifiers become our primary tool for communication. For example, in a complex mobile app, instead of hiding features behind ambiguous icons, designers should use signifiers that clearly communicate “where the action should take place”. Furthermore, applying natural mapping—like having a volume slider that moves vertically to represent “more” or “less” — takes advantage of biological standards that lead to immediate, intuitive understanding. By focusing on human-centered design and assuming that users will make mistakes, we can build interactive media that feels like a helpful collaboration rather than a “fight against confusion”.
For this assignment, I moved away from abstract shapes toward a conceptual exploration. The project uses Object-Oriented Programming to manage a dense grid of hundreds of independent “Bit” objects. The artwork functions as a digital ecosystem that transitions from a chaotic, flickering state of binary data to a structured, symbolic heart shape when the user provides “attention” via a mouse click.
3. Concept
My goal was to visualize the friction between cold machine logic and human emotion. I wanted to create a “hidden” layer of data that only reveals itself through interaction. The aesthetic is inspired by classic terminal interfaces — matrix-green on a deep black background — but the focus shifts to how human interaction (the mouse) acts as a lens, organizing random 0s and 1s into meaningful language and iconography.
4. Process and Methods
I populated the canvas using a nested loop that instantiates Bit objects which allowed every single character on the screen to have its own internal state, managing whether it currently displays a binary digit or a human word.
To make the background feel “alive,” I implemented a probability check within each object. By giving each bit a 2% chance to flip its value every frame, I created a shimmering effect.
Instead of a simple radius, I utilized a heart curve equation which creates a high-definition mathematical boundary that filters the grid, determining which objects should “corrupt” their binary state into human text.
5. Technical Details
Unlike a standard distance check, which creates a simple circle, I implemented an algebraic heart curve. The challenge was that p5 coordinates are pixel-based and grow downwards from the top-left (0,0). To make the equation work, I had to translate every point in the grid into a normalized local space relative to the cursor.
// 2. COORDINATE NORMALIZATION:
// Transforms pixel coordinates into a math-friendly scale (-x to +x) centered on the mouse position.
let x = (this.pos.x - mouseX) / 150;
let y = (this.pos.y - mouseY) / 150;

// 3. ALGEBRAIC HEART CURVE:
// Formula: (x^2 + y^2 - 1)^3 - x^2 * y^3 <= 0
// If the result is negative, the coordinate is inside the heart shape.
let heartEquation = pow(x*x + pow(-y, 2) - 1, 3) - pow(x, 2) * pow(-y, 3);

// INTERACTION LOGIC
if (mouseIsPressed && heartEquation < 0) {
  // If inside the heart boundary, reveal a human word
  // 'frameCount % 20' creates a shifting glitch effect within the heart
  if (this.currentText.length === 1 || frameCount % 20 === 0) {
    this.currentText = random(humanWords);
  }
} else {
  // Revert to background binary logic
  this.currentText = this.binaryState;
}
The background’s “breathing” light effect is driven by a sine wave. By adding the x coordinate of the object to the frameCount inside a sin() function, I created a horizontal phase-shift, resulting in a light ripple that moves gracefully across the grid.
// 4. TRIGONOMETRIC PULSING:
// Uses a sine wave to cycle brightness based on time and X-position
let pulse = sin(frameCount * 0.05 + this.pos.x * 0.02);
let brightness = map(pulse, -1, 1, 60, 200);
6. Reflection
This project was a bit of a shift in my style of works, where I dipped more into the artistic side rather than just the technical. My main challenge was mastering the balance between the machine code and the heart. Initially, the heart appeared distorted because I hadn’t accounted for the rectangular aspect ratio of the canvas. By learning to normalize the X and Y scales independently of the pixel count alongside changes in sizes, I achieved a more crisp silhouette. Using push() and pop() to isolate the font styles of individual objects allowed me to create a dual-identity system where “Machine” and “Human” layers exist in the same space without visual conflict.
Reading the first chapter of Chris Crawford’s The Art of Interactive Design really made me stop and rethink how I’ve been using the word “interactive.” Honestly, I realized I’ve been throwing that term around for years to describe anything with a screen and a few buttons. Crawford’s metaphor of a conversation — a tight, messy loop of listening, thinking, and speaking—sets a much higher bar than I ever considered. It hit me that most of my “interactions” with technology are actually just reactions. Like his example of dodging a falling branch, I’m often just responding to a trigger rather than engaging in a real exchange. This definitely challenged my assumption that user agency automatically equals interactivity.
However, as much as I appreciate the clarity of his model, I couldn’t help but feel that Crawford is being incredibly restrictive — almost to the point of being a gatekeeper. By insisting that a system must “think” (process data in a complex way) to be interactive, he’s basically dismissive of a huge chunk of digital art and media that I love. I thought about atmospheric games or simple creative tools where the “thinking” is minimal, but the emotional impact is huge. Does a digital instrument not count as interactive just because it doesn’t deliberate before making a sound? This rigid, almost elitist definition feels like it prioritizes computer science logic over the actual human experience of a medium. It makes me wonder if he’s so focused on the “cycle” that he misses the beauty of simple, high-quality reaction.
One passage that really stuck with me was his critique of the “gauchely techie” replacement of human terms with “input, process, and output.” It’s a bit ironic because, while he wants to keep the human element (the “conversation”), his requirements for what qualifies as “thinking” feel very mechanical. This leaves me with a lot of questions: Has my own definition of interactivity been too lazy, or is Crawford’s just too narrow for the modern world? This reading didn’t just give me a new framework; it actually made me more defensive of the “simpler” digital experiences that he seems to look down on, while also making me want to strive for more depth in the things I build myself.
For this assignment, I moved beyond a simple coordinate grid to a more swarm like idea. The project uses Object-Oriented Programming (OOP) to simulate a collection of 80 independent particles. The artwork transitions between a chaotic “dispersion” state and a focused “magnetic” state based on mouse interaction, utilizing internal memory for each object to draw fluid trails.
3. Concept
My goal was to simulate “digital ink” or bio-luminescent trails. I wanted the movement to feel viscous—as if the particles were swimming through a thick fluid. The pink-on-black aesthetic remains, but the focus shifted from “pointers” to “pathways” to emphasise the beauty of the movement itself rather than the final position.
4. Process and Methods
My process was centered on encapsulation — hiding the complex math inside the object so the main program remains clean.
Instead of global variables for x and y, I created a Particle class to manage individual behaviors, positions, and memory.
Each particle has its own history array to store previous coordinates, allowing for the rendering of custom “ribbon” shapes rather than relying on screen-wide trails.
I used conditional logic to switch the “force” applied to particles.
Wander: Driven by perlin noise for smooth, non-linear dispersion.
Magnetize: Driven by vector subtraction to seek the cursor when mouseIsPressed.
5. Technical Details
For the “brain” of each particle, I used conditional logic to toggle between two distinct mathematical forces. When the mouse is clicked, it employs Vector Subtraction (p5.Vector.sub) to calculate a direct path between the particle’s current position and the cursor. Then, using setMag(0.6), it normalizes this vector to a constant strength, making sure that the magnetic pull is smooth and predictable regardless of distance.
Conversely, when the mouse is released, the code samples perlin noise based on the particle’s unique (x, y) coordinates to find a value in a multi-dimensional field. This value is mapped to an angle and converted into a force via p5.Vector.fromAngle. This causes the particles to disperse in organic, flowing motions rather than random lines.
Both behaviors conclude by adding these forces to the acceleration vector (this.acc.add) which queues up the physical move that will be executed in the next frame.
// 1. BEHAVIOR SELECTION
if (mouseIsPressed) {
  // --- MAGNETIC MODE ---
  let mouse = createVector(mouseX, mouseY);
  // Subtract current position from mouse position to get the "toward" vector
  let attraction = p5.Vector.sub(mouse, this.pos);
  // Normalizing the pull force to 0.6 keeps the movement constant and non-erratic
  attraction.setMag(0.6);
  this.acc.add(attraction);
} else {
  // --- DISPERSE MODE ---
  // Sampling the noise field based on local coordinates for organic flow
  let n = noise(this.pos.x * 0.006, this.pos.y * 0.006, frameCount * 0.01);
  // Convert the noise value (0 to 1) into a steering angle
  let wander = p5.Vector.fromAngle(n * TWO_PI * 2);
  // Apply a weaker force for a graceful, drifting dispersion
  wander.mult(0.3);
  this.acc.add(wander);
}
I implemented a three-tier physics system based on acceleration, velocity, and position. Instead of moving objects by fixed pixels, I applied forces to the acceleration vector to create momentum.
// 2. PHYSICS
this.vel.add(this.acc);          // Acceleration changes Velocity
this.vel.limit(this.maxSpeed);   // Cap speed for smoothness
this.pos.add(this.vel);          // Velocity changes Position
this.vel.mult(0.97);             // Damping (Friction) for a liquid feel
this.acc.mult(0);                // Reset for next frame
To create the intricate trails, each particle records its movement. I used push() to add new coordinates and shift() to remove old ones, ensuring the “ribbon” has a constant length without filling up the computer’s memory.
// 3. HISTORY TRACKING (The "Ribbon" Logic)
let v = createVector(this.pos.x, this.pos.y);
this.history.push(v);            // Record position

// If the ribbon gets too long, remove the oldest point
if (this.history.length > this.maxHistory) {
  this.history.shift();          // Remove the tail end
}

this.checkEdges();
6. Reflection
This project served as a major evolution from my previous work, shifting from basic coordinate manipulation to more a sophisticated force-based physics system. My main challenge was mastering the balance between the magnet and wander behaviors; while my earlier projects used simple if statements to bounce objects off walls, this one uses vector math and perlin noise to create a viscous, liquid-like motion. I spent significant time troubleshooting a glitch I was having, where ribbon trails would stretch across the canvas during edge-wrapping, which eventually taught me to “wipe” the object’s internal memory to keep the visuals clean — that was how I came up with the history array inside the Particle class; I was able to move away from robotic, linear paths. Learning to use functions like setMag() for constant pull and drag for fluid friction allowed me to fine-tune the “feel” of the interaction, resulting in a piece that responds to the user with an organic grace that feels more like a living organism than a set of lines.
In reflecting on Casey Reas’ discussion of chance operations, I found my fundamental assumptions about artistic intent deeply challenged. I’ve always associated “intent” with manual, top-down control, but Reas’ argument for “jitter” or “noise” as a tool to keep a system from becoming “homogeneous” offers a much more interesting path. I am particularly struck by the idea of “homeostasis” within a system — where a work stays dynamic and shifting while maintaining a consistent texture. This shifts my perspective of the computer from an “obedient tool” to a creative collaborator. By utilizing randomness as a “jumping-off point,” I want to see if I can bypass my own aesthetic biases and “logical nonsense,” similar to how Reas and Tal Rosner used dice-rolls to spark compositions for their Chronograph project.
However, Reas’ mention of Rosalind Krauss’s critique of the “grid” leaves me with a lingering, uncomfortable question: if a work is generated through chance, can it still hold onto the “pure feeling” or “humane quality” that artists like Mondrian or Malevich aimed for? If I follow John Cage’s lead and use chance to “remove myself from the activity,” I worry that the work might lose its connection to social discourse and humanity. Yet, I am increasingly drawn to Gerhard Richter’s provocation that chance is “better” than the artist because it can “destroy what I’ve worked out wrong.” This suggests that the “human” element might actually reside in my willingness to let a system disrupt my own ego.
All these connections reinforced my goal to find an “optimum balance” between total randomness and complete control. Moving forward, I want to experiment with defining “minimal structures” or constraints that allow for “surprising visual qualities,” testing whether a system-based approach can actually feel more organic than one born of purely determined geometry.