Week 9 Reading

Physical Computing’s Greatest hits and misses

This was definitely an interesting read. I was surprised at how many of the experiences we have, such as the dancing game at the arcade, incorporate the concepts we learned in class. This definitely made me think of just how simple some of these experiences really are built when I actually once thought they were extremely complex to build. Especially since we touched over some of the concepts in class such as the hand cursor. It helped me gain some inspiration of what I may want to include in this week’s assignment. I was confused by the title of the text after I finished reading it, because of all the examples mentioned in the text, I didn’t find an example or theme mentioned that would be considered a “miss.”

Making Interactive Art: Set the Stage, Then Shut Up and Listen

This reading made me reflect back on the text we read in the first half of the semester about giving users indicators of how to use certain systems. I remember when I read that specific reading, I fully agreed with the author that indicators should definitely be included in designs, but after reading this text, my opinion has changed.

I think the idea of just giving hints to the users of what to do, instead of fully spoon-feeding it to them, makes an experience much more entertaining and fulfilling.

I think what fully changed my opinion is when I thought of my previous experiences in an interactive space, which was TeamLab, in order to fully decide whether I would have enjoyed explicit indicators or not. I remember in one the zones, you had the opportunity to write your name on a lizard or drawing of your choice, and it would be scanned and projected on the ground. Naturally, I followed my lizard, and was completely surprised when my lizard was “killed” when I stepped on it. I definitely think my discovering of this on my own made it much more entertaining experience than it would have if someone had told me that this is possible. It made it feel more fun as I felt that I “discovered” or “achieved” something new.


Unusual Switch

https://github.com/da3755-ui/intro-to-im/blob/84cc7d7002b1b2e0cfad3839631bc4e4fa16566c/UnusualSwitchAssignment_IntroToIM.ino


The Concept

For this assignment I had two attempts and changed my concept. my first concept was a switch that lights up when you put glasses on. I ended up changing it to a led that lights up when a book is closed.

The Process

I used the same process for both concepts. Connected to my breadboard was an led with a jumper wire connected from the longer leg to a digital pin, and from the shorter leg a resistor then a wire connecting to ground.

For my conductor I used aluminum foil. I put aluminum foil on two pages of the book and placed a jumper wires on each foil. the first wire is connected to ground while the second to a digital pin. When the book closes, the foils touch the led lights up.

Challenges

The main challenge was in my glasses concept. ALthough my wiring and code were correct, I had a problem with connecting the foils and the wires together and getting them to light up the LED. After removing the wires from the foils and putting them towards each other I realized the issue. To fix this for my book concept, I made sure the tips of the wires were properly secured to the foil to ensure proper conduction for the foils.

I also  had to watch many Youtube videos after my failed attempt to get a full understanding of the difference between digital pins and power, understanding how LEDs work, and how circuits open and close with the arduino. I also watched many tutorials on digital read, write, and inputs to understand how it works. I also rewatched the lectures and decided to switch my code from using INPUT to INPUT_PULLUP after I heard someone  in class say it helps since arduino already has a built in resistor and this makes it mroe stable.

Code snippet

  if (state == LOW) {   
    digitalWrite(ledPin, HIGH);
  } else {
    digitalWrite(ledPin, LOW);
  }
  // digitalWrite(ledPin, HIGH);
}

I am actually most proud of the commented out code. This code is what helped me understand whether the problem in my failed attempt was because of wiring or because of the foils. After commenting out almost everythung out, leaving only relevant code, and adding this final line of code, I realized the led was working and the issue was with the foil.

Reflection

For future works I would love to create something with other forms of sensors like a sound sensor so the switch can light up with sound.

References

I also cant figure out how to move the code to github so here is the code

int book = 2;
int ledPin = 13;

void setup() {
  pinMode(book, INPUT_PULLUP);
  pinMode(ledPin, OUTPUT);
}

void loop() {
  int state = digitalRead(book);

  if (state == LOW) {   
    digitalWrite(ledPin, HIGH);
  } else {
    digitalWrite(ledPin, LOW);
  }
  // digitalWrite(ledPin, HIGH);
}


Week 8 Reading Reflection

Emotion & Design: Attractive things work better

This was definitely an interesting reading, which, in summary, discussed the positive relationship between aesthetics and usability. Norman makes the point that although aesthetics do not play a role in the function of a certain design, they allow the user to forgive or overlook certain shortcomings in a design.

I will admit, initially, I was skeptical about his idea. I assumed that it doesn’t matter if a design is aesthetically pleasing; if it works, then that’s what matters. But my perspective shifted when one of the lines mentioned a clean versus a dirty lookng car, especially since cars are things I look at much more frequently than I analyze designs. That made me realize that even without realizing it, we are drawn to more aesthetically pleasing designs and are almost tricked into thinking that something works better when it looks better. As I think back on my mid-term project, I also make a connection where if I had included more graphics and visual elements, I would have been able to overlook certain drawbacks in the game.

Overall, I gradually got more and more convinced by his idea the more I read, and I fully believe in his idea.

Her Code Got Humans on the Moon

I really appreciated how this reading highlighted the idea of Hamilton being the backbone of software programming and space exploration, especially the part that emphasized that she and the team were practically inventing key concepts of programming.

One of the things I particularly liked was the labelling of her as a positive radical and her ability to foresee certain mistakes before they happen. It really portrayed her passion towards programming and that she took it as more than just a career. It also still made me think about her motivations when programming and her meticulous nature. Especially since she faced ridicule as she mentioned for being a working mother. It made me question whether her detail-oriented nature was a result of her passion or fear of further ridicule and facing even further criticisms and blame.

I thought the text was concise, straight to the point, and delivered an important message in a beautiful way. I loved how it didn’t stop at just the process of Hamilton programming before the Apollo launch, but even mentioned what happened during the Apollo launch and how Hamilton had to quickly find a way to fix the error that occurred despite her constant warnings. It focused on both the process and the outcome.

Midterm Project

The Concept

For my midterm project, I decided to create a choice-making game based on the Star Wars film series. The concept is that you have the choice to control the events in the film Revenge of the Sith, following up to Anakin Skywalker becoming Darth Vader. You get to control key events in the film to try to prevent Anakin Skywalker from becoming Darth Vader.

The Process and Challenges

I first started out by creating the starting page of the game on p5. I downloaded an image that I had and added a sound in the background in the draw function. I added the full-screen option and resized the window accordingly. My initial plan for the instructions page was for you to click an instructions button, and a box would appear telling you the instructions. I built the instructions button and the box appearing, but then I didn’t end up liking it as much as I thought I would. That’s when I decided to make the instructions appear in the same way the opening crawl appears at the beginning of every Star Wars film. I found a website that creates crawls and made one. The only problem was that the video was 90 MB, and p5 only supports up to 5 MB. I tried cutting up the video into several videos and playing them one after the other, but that was not working. It would only play one video, or it would play each one under the other in the same window at the same time. That made it extremely difficult to create the idea I wanted, and it made running p5 very uncooperative, as the page would refuse to load and p5 would crash.

That’s when I decided to switch to VS Code.

After switching to VS Code, I uploaded the instructions video, and it worked perfectly. A problem I faced however was that the background audio kept running overitself over and over again, so I switched its location to the setup() function and it worked. My sister told me afterwards, to include a way to skip the instructions because that would make debugging easier and playing much more enjoyable. I created a Skip button and a start button, but I ended up removing the skip button altogether since the start button served the same purpose.

I then began creating the nodes and game states. To do that, I decided to incorporate Object-Oriented Programming to create each question in its own seperate class instead of repeatedly writing down the questions and option buttons. I created my first question class and used it as a template. I attempted to use a for loop to run through the class because that’s what I assumed I had to do. Then I decided to completely omit the for loop and just accessing the classes without loops.

After accessing the question from my class, I started working on the conditional aspect of changing the node after clicking the choice you want. I tried doing a typical option1Button.mousePressed(xyz), but it wasn’t working. So I asked ChatGPT and it told me it’s because I’m not accessing the class itself so I had to include the array name before.

Following that, I started actually working with my game states. (since my game is a choice-making game, I had to incroporate a state for every single node). I used the following code example: if (firstQuestion[0].option1Button.mousePressed()){ gameState===’node2′; }. I used this because my if statements in the beginning of my game call to draw the other nodes once the game state changes. This did not work and I was not able to access my other node/question when I clicked the choice button..After multiple attempts at debugging like trying to make the background black to cover over the previous start page,  I resorted to ChatGPT which suggested I make a seperate transition function to be called when the buttons are pressed. This transition function would change the game state successfully and allow me to switch between nodes/questions since this was the structure of my game states:

function draw(){
//creating the conditions that will allow to switch between nodes
 if (gameState === 'start') {
    drawStartScreen();
  } else if(gameState==='instructions'){
    drawInstructions();
  } else   if (gameState==='node1'){//what happens in the first node and so on
    drawNode1();
  } else if (gameState==='node2'){
    drawNode2();
  } else if (gameState==='node3'){
    drawNode3();
  } else if(gameState==='node4'){
    drawNode4();
  } else if(gameState==='node5'){
    drawNode5();
  } else if(gameState==='node6'){
    drawNode6();
  } else if(gameState==='node7'){
    drawNode7();
  } else if(gameState==='sithEnding'){
    drawSithEnding();
  } else if(gameState==='deathEnding'){
    drawDeathEnding();
  } else if(gameState==='happyEnding'){
    drawHappyEnding();
  }
}

I then wrote the specific draw functions for each node. The concept of the transition node was extremely helpful and I used it repeatedly across my code. I proceeded to repeat the pattern of transition functions —> changing the node —> writing my drawNode functions.

I repeated this cycle across my timeline until I had to code the endings. Once I finished my endings, I had to incorporate a method to reset the game. At the endings of my timeline, I included a restart button. This button would call a transition function. This transition function would change the node back to ‘start’ again, effectively reseting the game.

Part I’m Most Proud Of

I’m most proud of using OOP for my questions and choice buttons. I think that was one of the most effective and efficient ways I could have run my code. It saved me so much time that could have been wasted debugging and searching for which question in particular to fix. It kept everything organized and structured.

class Question1{
    constructor(question, option1, option2){
        this.question = question;
        this.option1 = option1;
        this.option2 = option2;
    
        this.option1Button=createButton(this.option1);
        this.option1Button.style('font-size', '18px');
        this.option1Button.style('font-family', 'titleFont');
        this.option1Button.style('color', 'white');
        this.option1Button.style('background-color', 'black');
        this.option1Button.style('text-align', 'center');
        this.option1Button.style('border', 'none');
        this.option1Button.size(500, 80);
        this.option1Button.position(width*0.25 - 250, height/1.5);
        this.option1Button.hide();
    
    
        this.option2Button=createButton(this.option2);
        this.option2Button.style('font-size', '18px');
        this.option2Button.style('font-family', 'titleFont');
        this.option2Button.style('color', 'white');
        this.option2Button.style('background-color', 'black');
        this.option2Button.style('text-align', 'center');
        this.option2Button.style('border', 'none');
        this.option2Button.size(500, 80);
        this.option2Button.position(width*0.75 - 250, height/1.5);
        this.option2Button.hide();
    
    
    }


    display(){
        fill('white')
        textFont(titleFont); 
        textSize(34);
        textAlign(CENTER, CENTER)
        text(this.question, width/2, height/3);
    }
    show(){
        this.option1Button.show();
        this.option2Button.show();
    }
    hide(){
        this.option1Button.hide();
        this.option2Button.hide();
    }
}

AI Disclosure

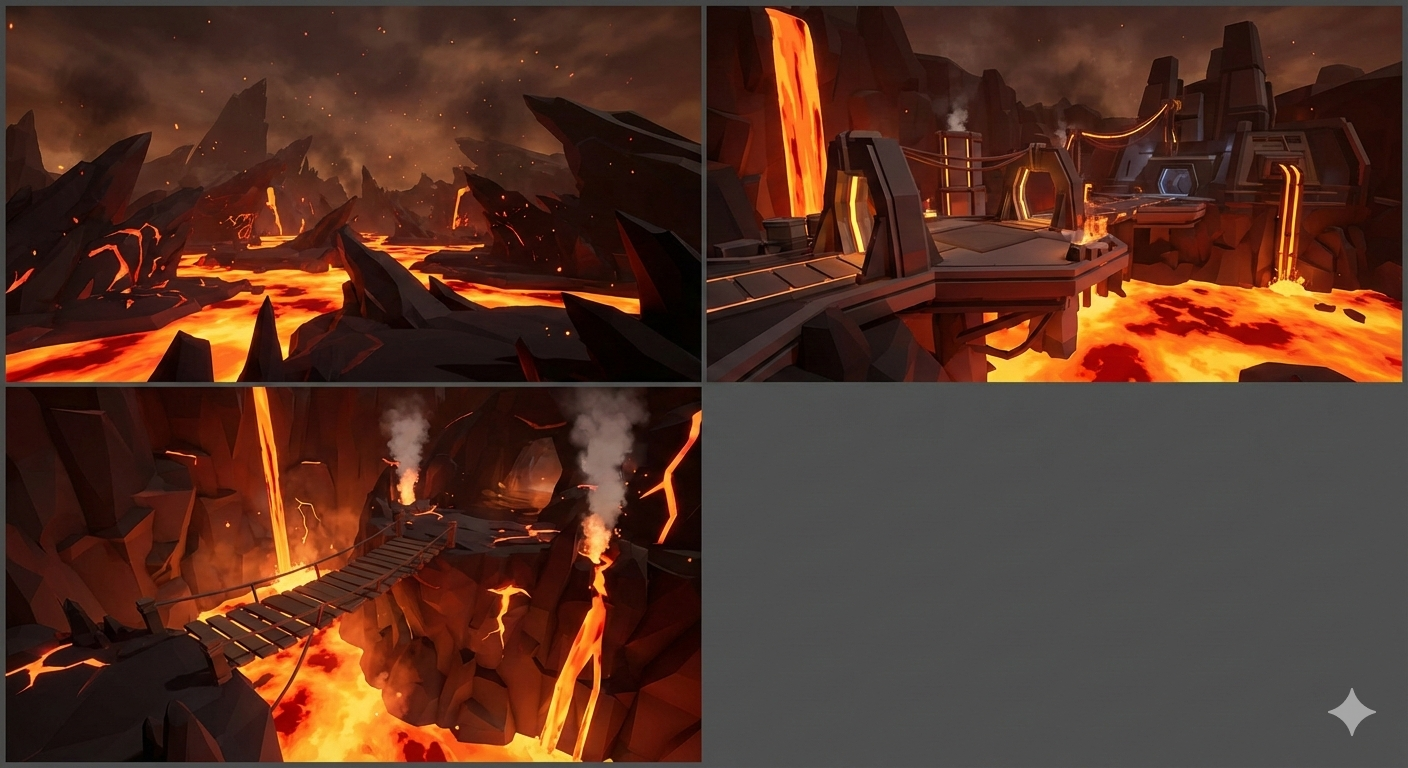
I used Gemini to produce the backdrop images of the nodes. I used ChatGPT to debug issues such as:

  1. The soundtrack playing repeatedly, ChatGPT told me to move my soundtrack.play to setup() since draw() runs 60 times a second
  2. The nodes would not switch but that was because I did not know the difference between = and ===. ChatGPT explained the difference to me, and I was able to know when to use = and ===
  3. I was not able to change nodes when I click buttons, this was the structure I tried incorporating:
    (firstQuestion[0].option1Button.mousePressed()){ gameState==='node2'; }
    

    but it did not work and it refused to switch nodes. ChatGPT told me to incoroporate the transition nodes. That was I believe the most beneficial and efficient parts that ChatGPT told me to incorporate. Without it my code would be extremely chaotic and difficult to debug. It was extremely beneificial, and it allowed me to create the pattern I would use to switch out the node and game states. It was a one time suggestion, but it was something I repeatedly included in multiple parts of the code. Even within restarting  the game I used it. And also, towards the end of coding my instructions video was changing its position differently than I coded it. So, I applied the transition function to only call the video when the instructions button is pressed.

  4. My buttons would not be in the correct position until I hit full-screen, so ChatGPT told me to put their code in my windowResized function
  5. I used the CoPilot extension in VS Code to change stylistic components of my buttons. After I finished the project and posted the github link, I realized that I had been working on the project with my computer zoomed out to 33% instead of it being at the default 100%. So I asked the extension to change all the text and button sizes 66% smaller to fit the frame correctly. I did this to save time instead of going to every singular text and button and manually changing the sizes which would have been extremely time consuming. I made it lower the positions of my buttons and change the background colors instead of manually doing it for every button and text.

All the code was written entirely by me, all AI tools were used as a supplement to debug.

Reflection:

For the future I would love to incorporate the idea of creating and animating the actual characters and allowing the users to move the characters around with the mouse, choosing which other characters to speak to and picking choices from the dialogue themselves. I would want to give it a video game style. I would have loved to create more storylines and endings for the game as well.

GAME LINK: https://da3755-ui.github.io/prevent-the-fall-of-anakin/

Midterm Progress

The Concept

For my game, I decided to go for a Star Wars theme, building on the process of Anakin Skywalker becoming Darth Vader. The concept of a game is an interactive choice-making game; you have to try to help Anakin not turn to the dark side by making certain choices. Depending on the choices you make, Anakin will either remain a Jedi or turn to the Dark Side.

The Design

The game’s color palette is going to consist of red, orange, brown, and black. It’s mostly going to be geometric with minimal curves. The game will start with a start page with Anakin Skywalker and Obi-Wan Kenobi on the screen with a Mustafar background. Once the user clicks the start button, an instruction block should pop up with instructions on the game and explaining the elements of choice and consequence. Users cannot control the motion of the characters, only their choices.

There will be music in the background from the Star Wars franchise. As for the code’s design, the game will rely on Object Oriented Programming for the characters’ design, relationships,  dialogue, and the choice boxes. I will also be relying on several if statements and nested loops since the story is a very condition-based game.

What I Am Afraid Of:

My biggest concern/fear is connecting certain choices with particular events and consequences going wrong. I fear the code doesn’t run properly, the choices don’t connect, and I am left with an inconsistent story and a game that doesn’t make sense. To manage this, I’m going to work on the different parts seperately, and organize certain elements into classes to avoid complexity of the code. I will have to make explicit comments on the code to make everything organized so no mistakes happen or confusion within the events and consequences.

Visuals

AI was used to generate visuals


Week 5 Reading Analysis

Unlike human vision, computer vision is not as malleable and flexible. It is trained on the basis of algorithms, therefore, if any error occurs, it’s not as quick to adapts and lacks human adaptability. Instead, it would need to be trained. I believe that in order to translate our physical world for computer vision and algorithms, we must map out their particular characteristics which make them stand out. Almost similar to how we would explain to a child (or even a visual of a child’s painting) reveals the most identifying aspects of particularities in our physical world. Since computer vision has certain limitations and require algorithm training, you would need to extensively train the computers to read what you want it to read in extreme detail. In addition, you would want to make sure it makes no errors especially since surveillance and privacy are extremely sensitive topics in the digital world.

Week 4 Assignment-Data Visualization

The Concept:

I decided for this assignment to recreate the five-star rating system used for film ratings. So my plan was for there to be five stars, and once you click on any of the five, it will show you the films with an average rating of that particular star.

The Process:

I first loaded all my images, fonts, and csv file.

I thought this would be easier than it actually was; this was much, much harder than I expected. I first started by building my stars in a separate class to make it neater and easier for me to use. I followed this YouTube tutorial to make them since there is no star shape on p5, and trying to create the stars using lines that I would have to manually connect was too complex.

After creating the stars, I put them on my screen using a for loop to present 5 stars on the canvas. The first challenge I faced was getting the stars to light up or get filled in once my mouse was inside them. I tried using a particular if statement within a for loop, stating that if we were at index=0 to fill, but that did not work. I knew I had to do something with the distance between the mouse and each star’s outer radius.  So, I decided to create an if statement where I used the distance function, but I used for my parameters mouseX, mouseY, and the outer radius. Unfortunately, that did not work, so I had to use ChatGPT to fix it for me, and it instead included the x and y parameters of the stars. After that, I created an if statement where if the distance is less than the outer radius, the star would fill and “light up.” That’s when I faced another issue where, at some point, two stars would light up at the same time. I decided to call my sister, who is a computer science major, to help me solve the problem. We tried manipulating the x and y positions of the stars, but the problem persisted. My sister then suggested that the issue is with the if statement of the distance between the mouse and the outer radius, since there will always be an overlap between the stars’ outer radii. She suggested I do some addition/subtraction to the mouseX and mouseY positions within the if statement. Once I did that, the stars lit up successfully.

The real challenge was extracting the ratings of the data onto the canvas. I tried many different things such as a triple nested loop like this:

for(let i=0; i<numRows; i++){ for(let j=0; j<=Film_title; j++){ for(let k=0; k<ratingStar.length; k++){ if(mouseIsPressed&&d < ratingStar[i].outerRadius&&int(Average_rating[i])<1.5&&ratingStar[0]){ background(255) text(Film_title[j], 200, 200) } } } }

but it did not work. I knew I wouldn’t be able to work out the code, so I decided to go the peer tutors to figure something out. Although we couldn’t completely figure out what to do, she suggested I use ranges.

My friend then explained to me that I could create a minimum and a maximum and assign them to an array of ratings we created. While his method worked, it was difficult to understand for someone with minimal coding experience.

I asked for help from the professor as this stage, and she gave me a starting code that helped me understand what I needed to implement. After I applied the code, the code fully ran successfully.

Code I’m Proud of:

Even though I wrote out the code with the help of the professor, I still felt particularly proud of this chunk because it made me realize the logic behind what I wanted to do, and it felt like a moment of realization and understanding. Also this was the hardest part of the code I wanted to achieve so being finally able to do it was very relieving.

    } else if (status == 1) {
      for(i=0;i<TwoRatingFilms.length;i++){
      text(TwoRatingFilms[i], 260, 240+i*30);
      }
    } else if (status == 2) {
      for(i=0;i<ThreeRatingFilms.length;i++){
      text(ThreeRatingFilms[i], 420, 240+i*30);}
    } else if (status == 3) {
for(i=0;i<FourRatingFilms.length;i++){
      text(FourRatingFilms[i], 590, 240+i*30);}
    } else {
      for(i=0;i<FiveRatingFilms.length;i++){
      text(FiveRatingFilms[i], 540, 420+i*30);}
    }
  }

Future Reflection:

Honestly for the future I would try to aim for something only a little bit outside my comfort zone. I would also not underestimate what I would have to do like I did in this project.

References:

https://youtu.be/rSp5iSTXwAY?si=RaaxtuAu8XivtpAF


Week 4 Reading Psychopathology of Everyday Things

One thing that drives me crazy that was not mentioned in the text is when I go to a bathroomm at a restaurant or any other place and I try to use the sink, but the sink does not turn on/I don’t know how the sink turns on. I believe one way that could be fixed is by having clear symbols on the handles or visible handles to indicate where and what motion to do. Or a poster on the wall to show how to open the sink.

One way I would incorporate some of Norman’s principles of design into my work is by having more indicators of what the user is supposed to do to activate my sketch’s interactive element. For instance, in my bubble-pop design, it is unclear for my users what to click or what to try to do as there are no indicators that the bubbles are meant to pop. I would therefore include more explicit instructions.

The Art of Interactive Design – Reading Reflection

After reading Chris Crawford’s perspective on what is considered interactive, I still don’t believe it changed my definition of interactivity. Yes, his idea of interactivity, including listening, speaking, and thinking, was striking; however, it wasn’t enough to change my idea of interactivity. Throughout the text, I was feeling confused about what his true definition of interactivity is. Initially, he mentioned listening, thinking, and speaking; then he went on to describe ideas beyond that scope, and I was left confused. The only thing I would say changed in my perspective is that now I expanded my understanding of the word interactive, and things I wouldn’t have considered to be “interactive” now are (such as conversations).

Yes, I think the fridge lights turning on once the fridge is opened is an interactive element. Perhaps I do agree with Crawford that there are extents to interactivity, since the fridge light turning on and off is not necessarily an intentional interactive element. With that being said, my definition of interactivity is a reciprocated exchange between two parties, and how striking it was to both of them.

In my opinion, I would improve the interactivity of my p5 sketches through expanding the users’ ability to choose exactly what it is they are interacting with. For example, in my balloon-popping sketch, I would like for the users to choose exactly which balloons they want to pop.


Week 3 Assignment – Dina

My Concept:

I won’t lie, I went into the assignment completely blind. This was probably the most challenging assignment for me conceptually. I struggled with understanding the concept of arrays/how they function. After calling four people to come and explain it to me, I got the hang of it.

For my assignment, I was inspired by the idea of popping balloons at a party, and that seemed like something I could replicate through building an array and building a class.

Here is the finished product:


The Process:

Honestly, the process of creating the project began way before I opened the p5 website. I still had a lot of confusion about arrays and how they function, especially with the addition of the “i.” I re-read the lesson’s slides to try to grasp the concept to no avail. I then decided to get help from others who managed to successfully explain the topic.

Since I just got the hang of the topic, I decided that I wanted to create something that encapsulates all of what we did in class this week, from arrays, classes, to interactivity.  I first wanted to create a Sudoku game/grid, then a coloring page, but in the end, I decided that the one thing I could do to incorporate the three main things we took in class is through a balloon-popping experience.

I first started by creating a class for my balloons, creating a motion, display, and bouncing function for them. Afterwards, I created an empty array for my balloons and built a for loop to initialize and create my balloons, their parameters, and details. In order to allow my balloons to appear, bounce, and move as intended, I made a for loop within my draw function. Within the same for loop, I made an if statement to allow a text that says “POP!” to appear whenever the user pops a balloon. I incorporated the mousePressed() function as well as mouseX, to boost interactivity and functionality.

Snippet of Code I’m Proud Of:

There isn’t one particular part of my code that I’m proud of. I’m honestly more proud of the entire code in general, because it was a challenge for me to grasp the concepts and integrate them into one idea. For that, I will paste my main sketch’s code:

let balloons = [];
function setup() {
  createCanvas(600, 600);
  for(let i=0; i<9; i++){
    balloons[i]=new Balloon(50*i, random(600), 4+1*i, 4+1*i)
  }

}

function draw() {
  background('pink');
for (let i = 0; i < balloons.length; i++) {
  balloons[i].display();
  balloons[i].move();
  balloons[i].bounce();
  
   if (mouseIsPressed){
     fill('red')
       textSize(100)
    text('POP!', mouseX, mouseY)
  } 
     
}

}


 function mousePressed(){
  
  balloons.pop(balloons);
   

}


Reflections:

I’m satisfied with the end product, however, for future works I would hope to push and challenge myself even more and create specific projects I have in mind like an interactive coloring book that I know could be created using arrays and OOP.