
The prompt for this week was to create an unusual switch which didn’t require hands, which we could use in place of the buttons we had been using in class. My initial ideas for this were either a wand touching a “Lumos” placard or a ghost figurine on a stick touching some Halloween-y thing like a Jack-o-lantern, and then the touches resulting in the LED lighting up. However, as I confirmed with Professor, these involved too direct a use of hands. I would have been directly making the object touch the other objects with my hand.
So, I had to think of a new idea, and I was feeling the Halloween spirit from my earlier idea. I decided to make that my theme. Influenced by the moustache video we saw in class, I started thinking around the mouth area and I thought I could make a switch where if the mouth is closed, the light is switched on and otherwise it’s not. I then remembered a spooky thing which goes there – a vampire’s fangs!
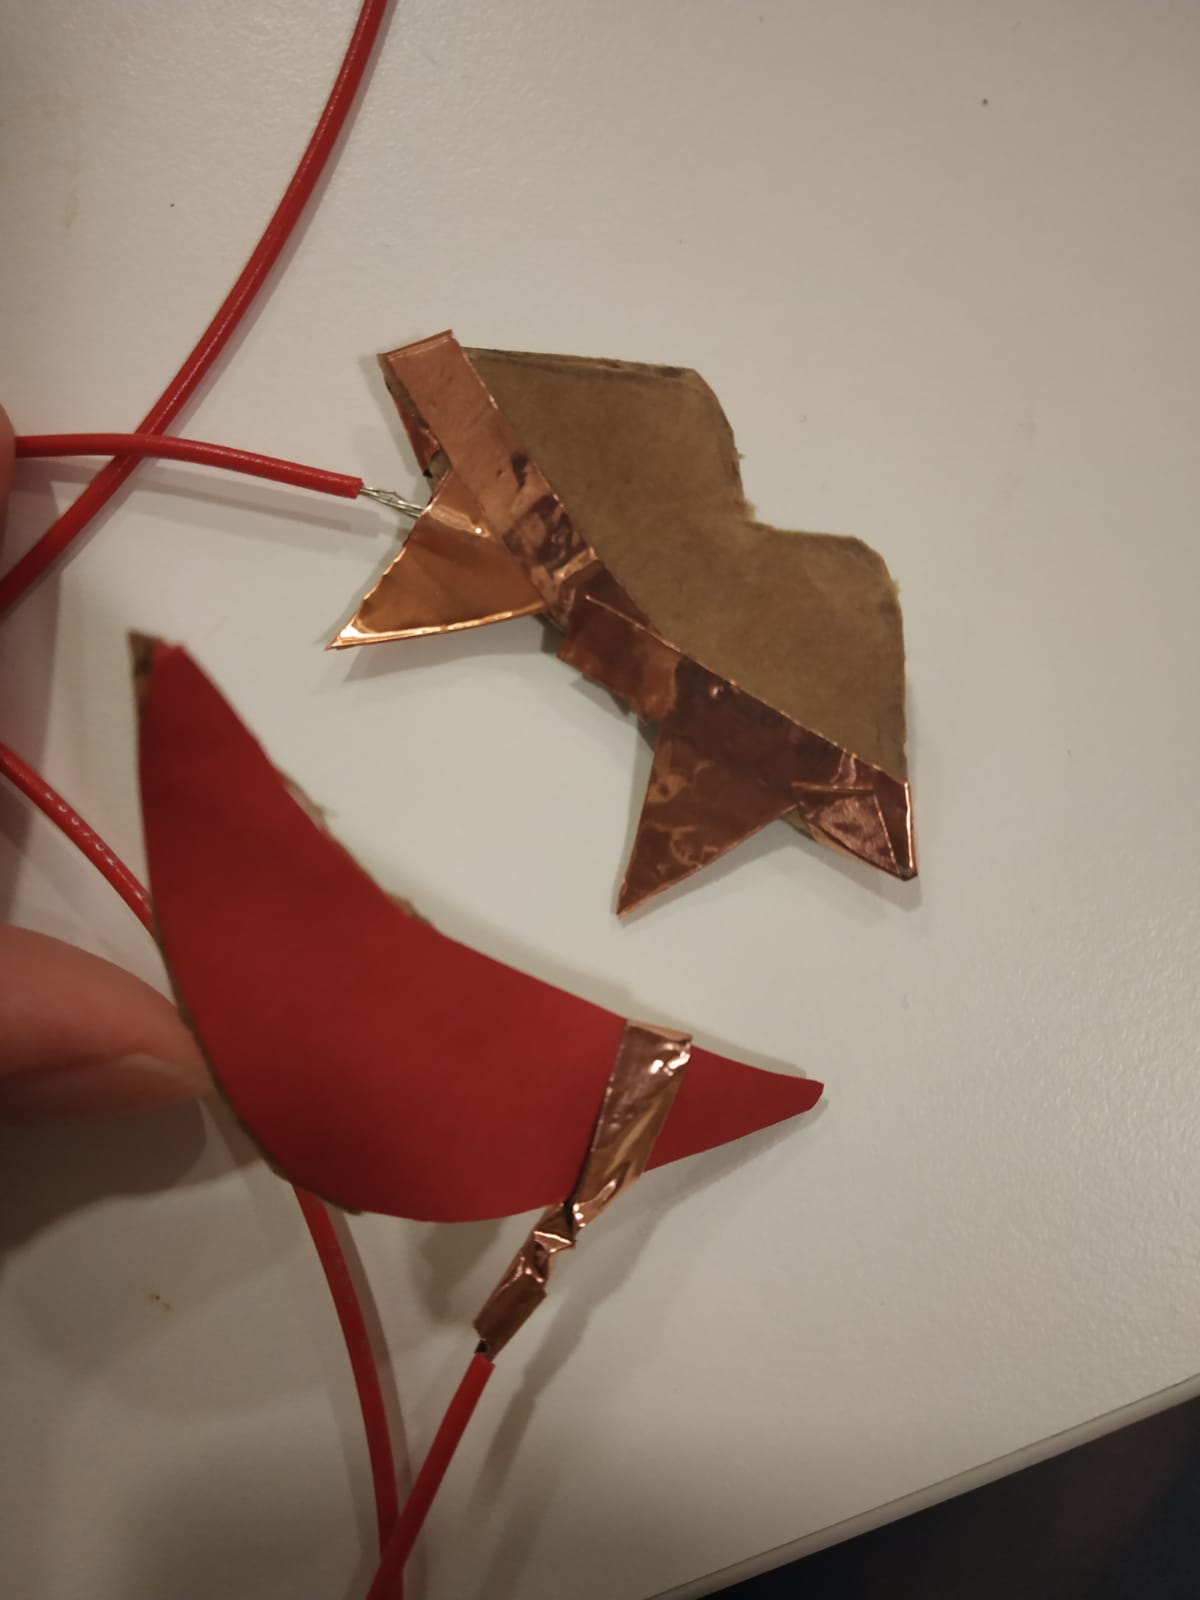
I had a certain image in my head and I got to work to execute it the best I could. I got cardboard and copper tape and long red wires with stranded cores from the IM lab. I didn’t want to just directly attach fangs to my lips because I wasn’t sure how safe it was, and because I thought making cartoon lips would be much more fun. So, I cut the shape of the lips out of the cardboard (one of the most time-consuming things in this project) and 4 fang shapes out of the thicker copper tape. I stuck one of the two long wires between two of these and joined the other two back-to-back too, to make it conductive on both sides. Luckily I had some red coloured paper which I could cut in the shape I wanted and paste it on the cardboard for the lips. For the bottom lip, I did this right away and then attached the required wire in its place with copper tape. It almost looked like the vampire had a lip piercing.
For the upper lip, I had to somehow connect the fangs on two ends and I didn’t want that to be visible. So I first ended up making something like this after using the thin copper tape for connection:
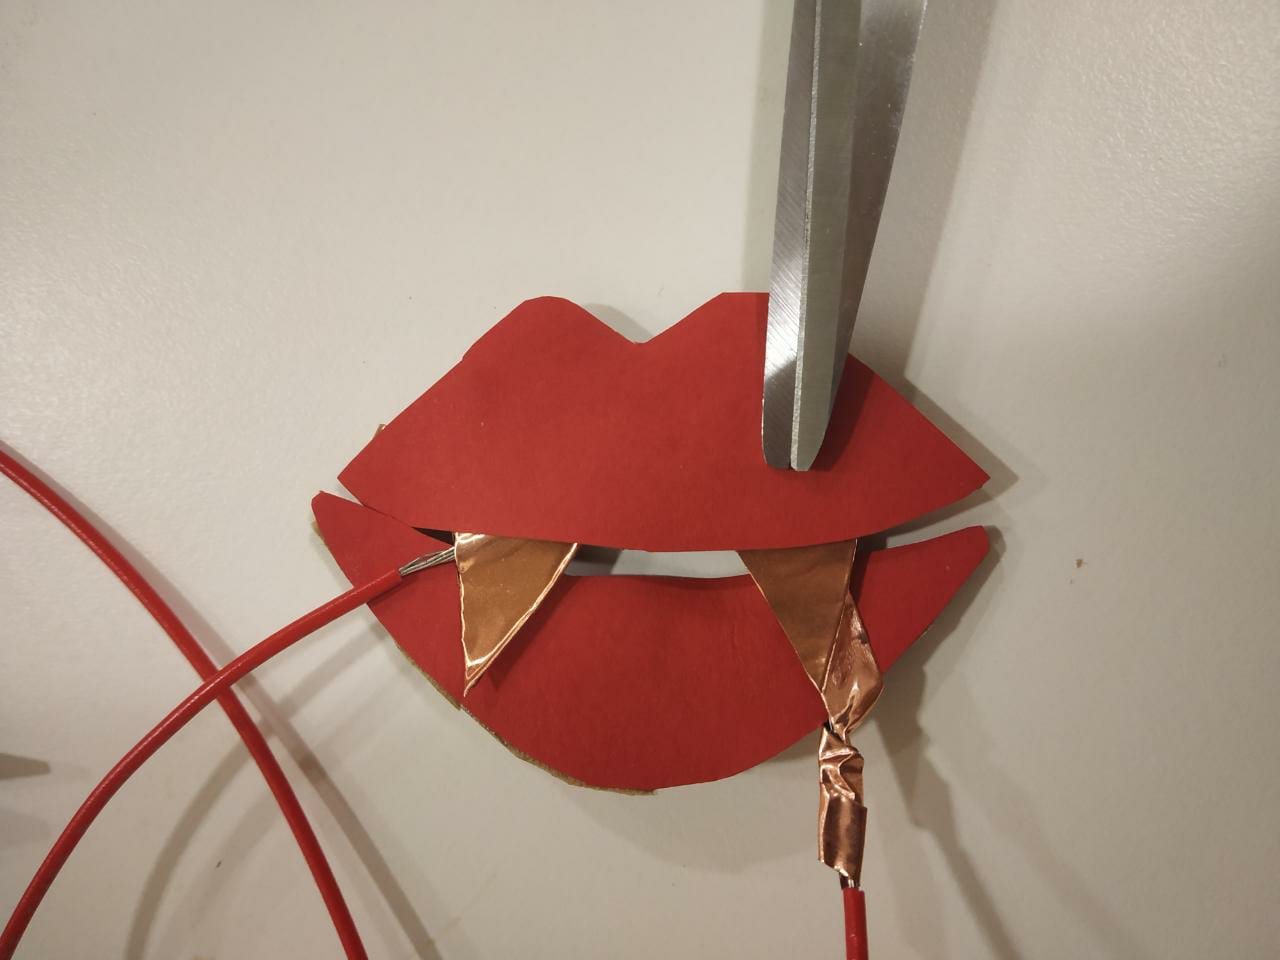
This was shaping up to be what I wanted it to be like, but first I thought I should test if my idea even works without red paper covering the tape. My circuit was a quite simple change from the ones we worked on in class. Instead of the button, I had two wires placed in the bread board where the legs would have been. This helped me place the resistors and other wires as required. The two wires which were replacing the button, each had their ends connected to one of the longer red wires, simply by twisting them together. So, if everything worked correctly and the right fang touched the “lip piercing”, the circuit should be complete and the LED would light up.
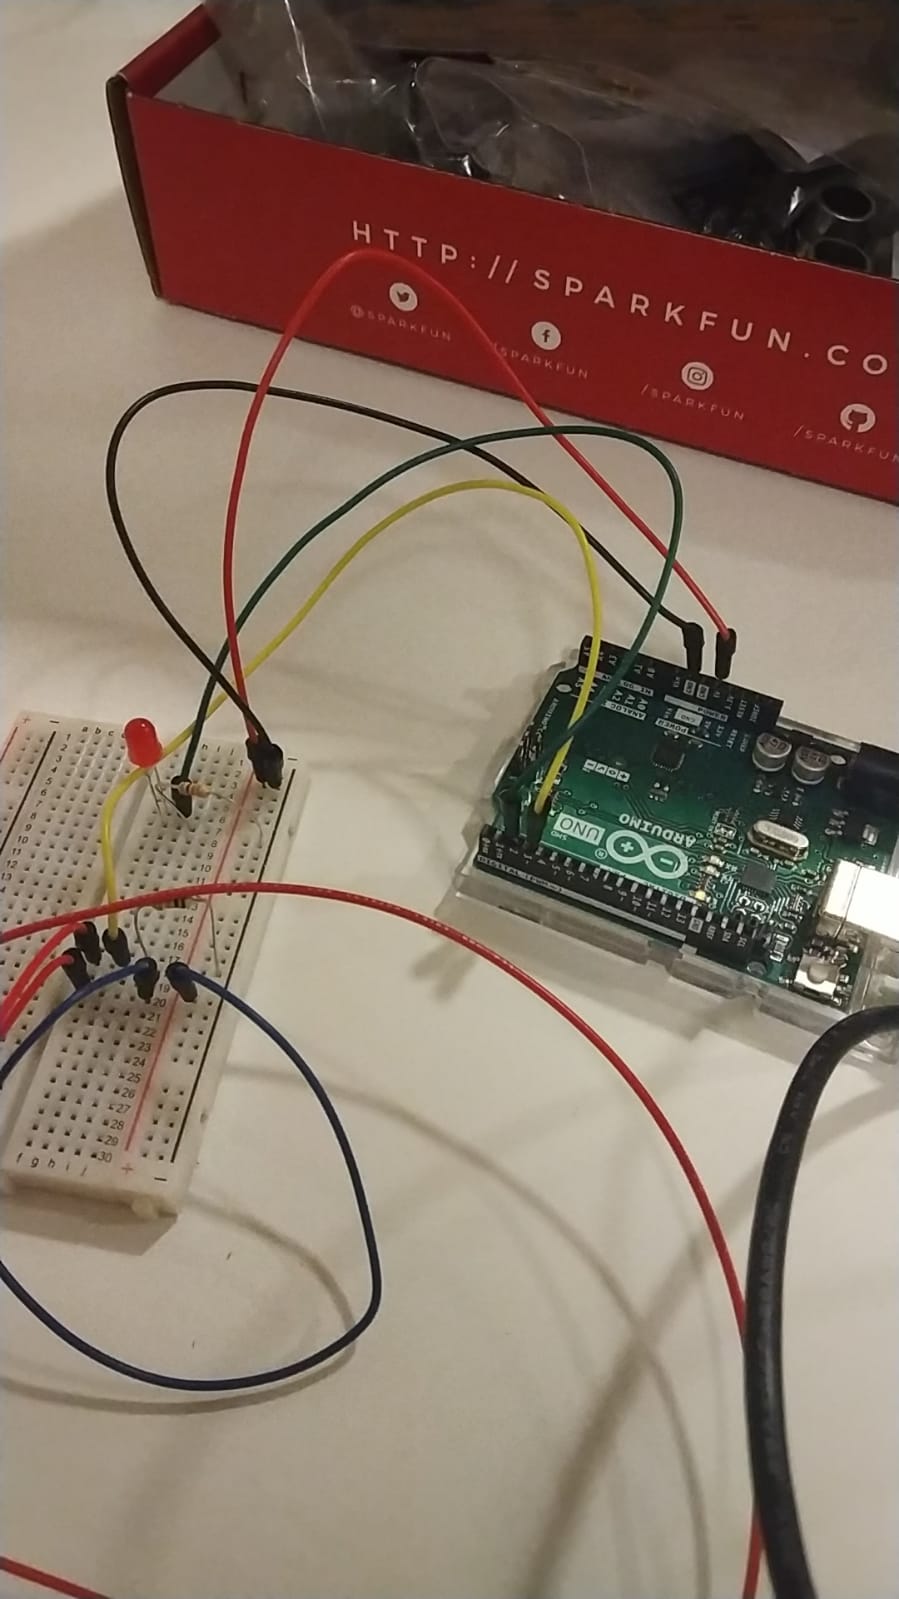
I had chosen the colour red because well, it reminded me of blood. And I decided that if the LED blinked when the vampire “bit” and sort of gave an alarm/heartbeat effect, it would be cool. My code combined the two main circuits we had done in Wednesday’s class. Here, LED was the output and the wire leading to the fangs was the input. When the input is HIGH, the light would start flashing at the given intervals. Otherwise, it should stop. It took me a bit of trial and error to arrive at a code which did what I wanted, but I finally got it.
const int ledPin = 2;
const int fangsPin = 3;

unsigned long timer = 0;
int timerAmount = 300;
bool flip = false;

void setup() {
  // put your setup code here, to run once:
  pinMode(ledPin, OUTPUT);
  timer = millis();
  pinMode(fangsPin, INPUT);
}

void loop() {
  // put your main code here, to run repeatedly:
  bool currentState = digitalRead(fangsPin);
  if (currentState == HIGH && millis() >= timer) {

    flip = !flip;
    digitalWrite(ledPin, flip);
    timer = millis() + timerAmount;

  }
  else if (currentState == LOW) {
    digitalWrite(ledPin, LOW);
  }

}
And this code worked with the lips I currently had, so I decided to go ahead and glue on the upper red part too. And too my relief, it worked with that too.
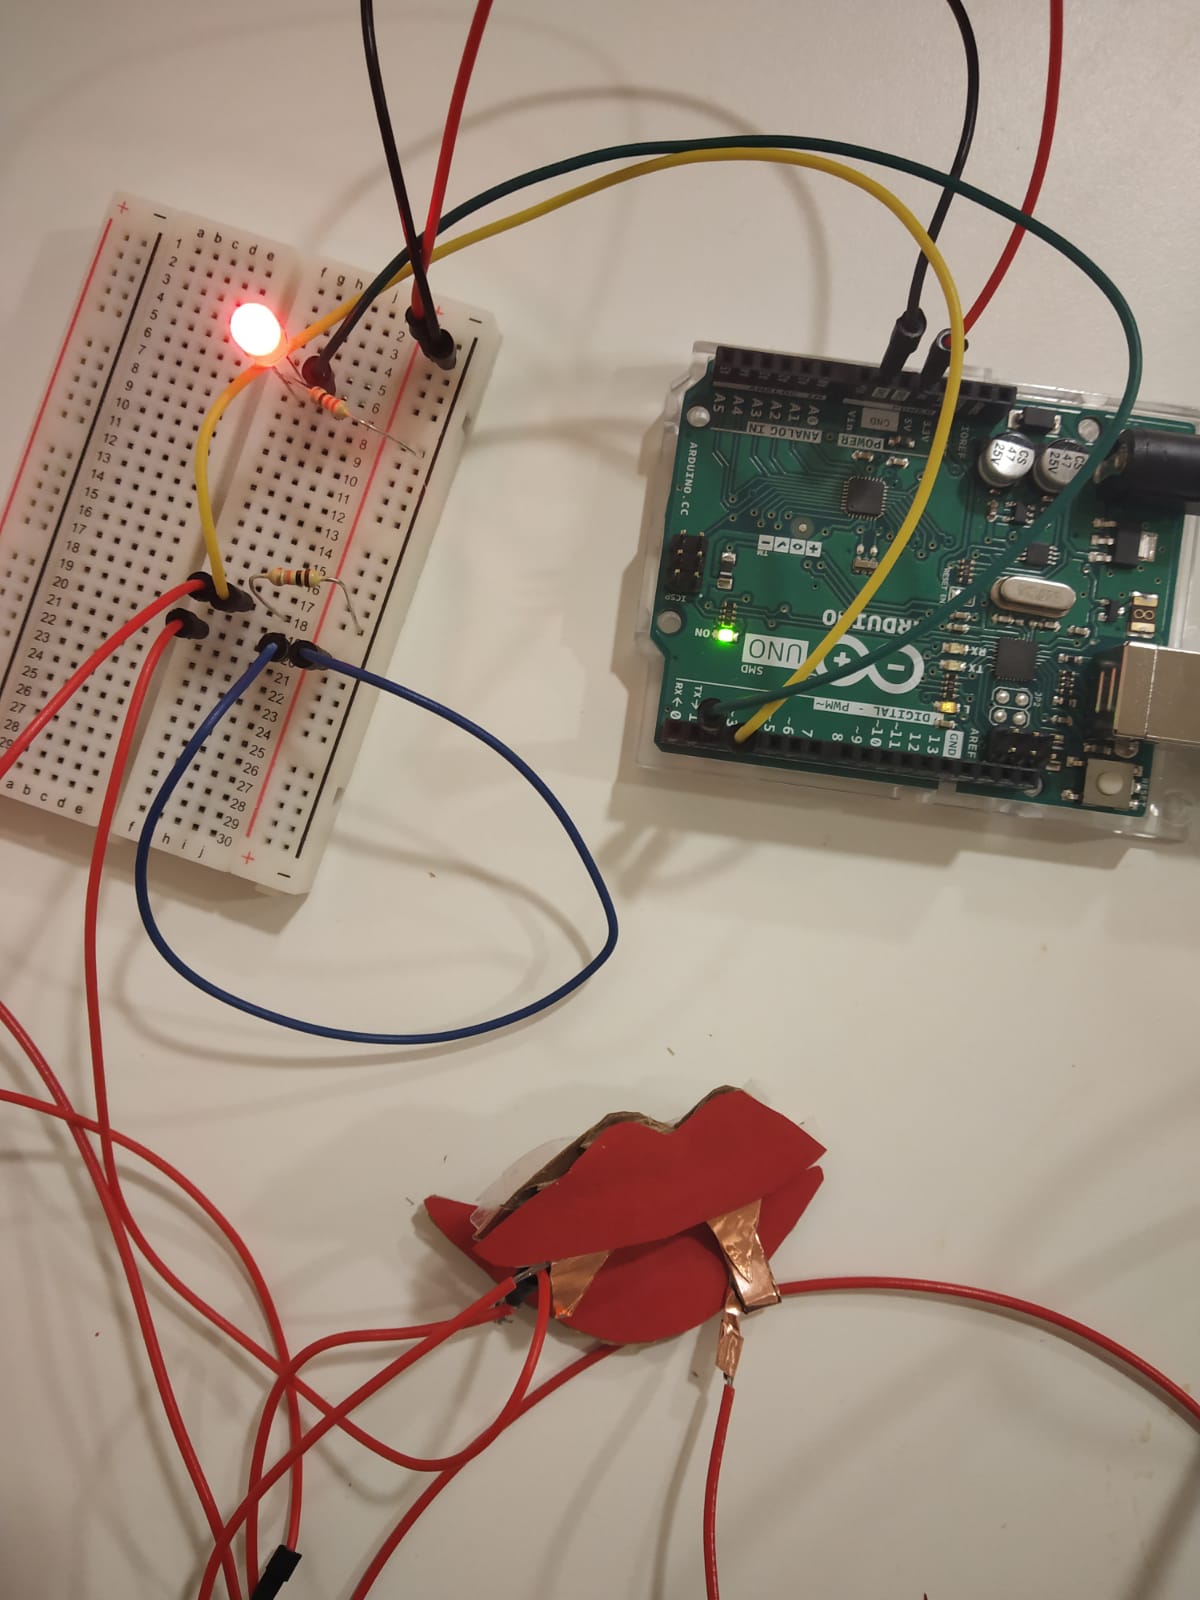
I hope these make my circuit a bit clearer.
Then came the hardest part: Attaching these lips to my own lips. This involved a lot of tape and adjusting for the flimsiness of the whole thing. I had to make the copper wire “piercing” on the lower lip much thicker by adding more and more rounds of wire- so that it would be easier for the fang to reach. And I had to figure out the pressure and angle I should use. A couple of times by the time I went to take a video, the tape attached to my lips would wear out and I would have to redo everything. This video is not perfect- the tape was a little flimsy again so I wasn’t able to close my mouth properly for a second, but you can see that it works without me having to touch my hand to the fang- which was what was happening initially. I also realised too late that in my bid to draw something which would completely cover my real lips, I had perhaps made the lips too thick. But oh well, I wanted something cartoony anyway. They might look a little lopsided here.
I think that’s about it. Though this isn’t as smooth and perfectly artistic as I would have wanted, I’m still pleasantly surprised that the concept worked out (I don’t know what I would have done if it hadn’t).
Happy end of spooky season to y’all!