This week’s assignment sounded very simple – just use LEDs as we did in class in a creative way. But, to be honest, making the entire circuit without having the professor in front of you to guide you made it pretty hard!
I did remember how to connect each component – that wasn’t the problem. What was problematic was connecting all of it together. Do I connect it in series? Or parallel? Do I put the 330-ohm resistor or the 10k-ohm one? And I think silliest of all… the design choice of my circuit. I ended up having so many wires in the circuit, it was hard to keep track of them all and even harder to add new components in the middle of this mesh or relocate any of the components.
Nevertheless, this assignment has been very crucial to make me understand how to set up my circuit and code it appropriately. It seemed very tough in the beginning, I had to keep going back to the lectures and class notes to see how to proceed. But now I know and am confident! :))
THE IDEA
So, for this week’s assignment, I decided to create a robbery scene. The bell-curve class example inspired me to do so. While playing around with the spread and speed of that code, I created a chain with reminded me of an alarm system. I initially thought of an ambulance light.. but this didn’t interest me enough to go ahead with. Then, inspired by one of my favourite shows – Money Heist, I came up with the idea of the Great Heist in which I could use the alarm system I imagined.
THE PROCESS
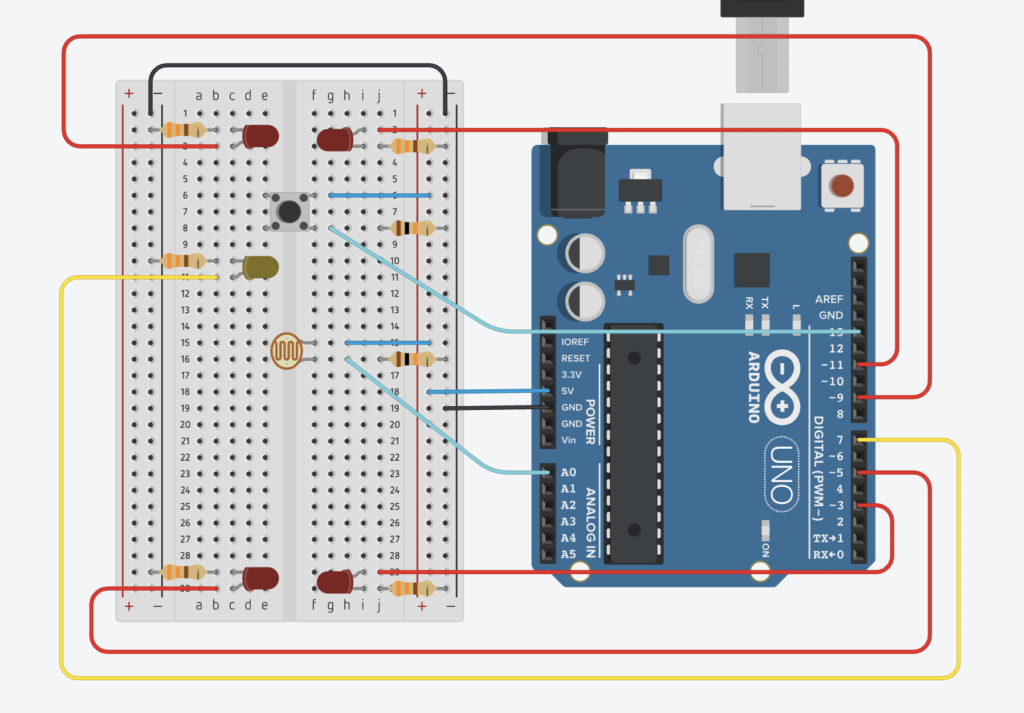
I first started with setting up the 4 LEDs in the corners which I wanted to use for my alarm. I did something very stupid – or rather did not do – connect the ground (-) vertical line on the left hand side to the right one or a separate ground. And for a long time, I went on going crazy as to why 2 of my LEDs were not working!
After that, I added a fifth LED. What I had initially planned for was, there would be a LED that would start blinking as a thief came nearer the diamond; also it would start blinking faster as the distance minimized. Then, when the thief would touch the diamond, the red LEDs would go on, signaling a museum lockdown. However, I could not go ahead with this idea for 2 reasons. First, I was unable to control the range using the LDR. I was getting very different values each time, and I figured after some trial and error that it was happening based on how I was positioned/seated, if I laid back or sat up straight, the position of my arm, and also, my hair! So, it wasn’t feasible to go ahead with this idea. Second, I needed digital input as well. The LEDs controlled by the LDR were analog ones.
Then, I came up with a very interesting idea. I decided to have a button that could disable the alarm system. Now, if it were Money Heist, the professor had to be saved, right! I couldn’t let my thief get caught. So, this made for a perfect escape. The button would be linked to a LED which would signal if the alarm system is disabled or not. From the museum’s perspective, They would have such a disabler for restoration purposes. In such a case, they would need an indicator that the alarm system is disabled so as to remember to turn it back on. From the thief’s perspective, the thief would need an indicator of when the system is disabled so that he can make his move. Hence, I then coded the fifth LED as such and made the red LEDs turn on only if the yellow LED was off (sin=gnaling the alarm system is enabled).
What next?
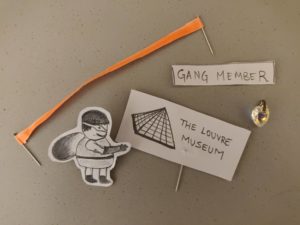
It was showtime! I prepared my museum for its opening (i.e. made the banner, placed the diamond and ribbon) and dressed my thief for his heist.
Here is a video of my final outcome – The Story of the Great Heist:
THE CIRCUIT
THE CODE
//for outer LEDs
const int numLEDs = 4;
float ledPos[numLEDs] = {0, .25, .5, .75};
int ledIndex[numLEDs] = {3, 5, 9, 11};
int speed = 5; //higher number is slower
float spread = 0.02; //to make bell curve wider or narrower
float bellCurveCenter = -spread; //set the postion to start outside of 0 to 1 so the first LED is dark
float brightness;

//for the inner LEDs
int LEDin = 7;
bool onOff = false;
long timer = 0;
int timerLength; //instead of delay(500)

//for LDR
int photoPin = A2;
float photoValue; //to keep track of the distance of object aka thief

//for button
int buttonPin = 13;
float buttonState;
float prevButtonState = false;

//==================================================================================================================

void setup()
{
  //the the 4 outer LEDs
  for (int i = 0; i < numLEDs; i++)
    pinMode(ledIndex[i], OUTPUT);

  //for the inner LED
  pinMode(LEDin, OUTPUT);

  //for photocell to keep track of the distance
  pinMode(photoPin, INPUT);

  pinMode(buttonPin, INPUT);

  Serial.begin(9600);
}

//==================================================================================================================

void loop()
{
  photoValue = analogRead(photoPin);
  //Serial.println(photoValue);

  buttonState = digitalRead(buttonPin);

  if (buttonState == 1 && prevButtonState == 0)
  {
    onOff = !onOff;
  }

  digitalWrite(LEDin, onOff);
  buttonState = prevButtonState;

  if (photoValue < 400 && !onOff)
    outerLEDs();
  else //switch the LED off irrespective of whatever state it was in
  {
    //brightness = 0;
    for (int i = 0; i < numLEDs; i++)
      analogWrite(ledIndex[i], 0);
  }
  //outerLEDs();
}

//==================================================================================================================

//for the outer 4 LEDs
void outerLEDs()
{
  // taken this code from our class example

  for (int i = 0; i < numLEDs; i++)
  {
    // finding the distance of each LED from the center of our bell curve
    float distance = abs(ledPos[i] - bellCurveCenter);
    // this is the formula for the bell curve, multiply by 255 to put in the proper range for brightness
    brightness = exp(-0.5 * pow(distance / spread, 2)) * 255;
    analogWrite(ledIndex[i], brightness);
  }

  // move the center
  // you could adjust the speed with a potentiometer
  if (millis() % speed == 0)
    bellCurveCenter += .01;

  // start it over when it reaches the end
  // reset based on the spread so that it fades all the way out before resetting
  if (bellCurveCenter > 1 + spread)
  {
    bellCurveCenter = -spread;
  }
}


