
For this week’s assignment, we had to make a musical instrument involving at least one digital sensor and one analog sensor. Aditi and I decided to create a simple piano-like instrument with lights whose pitch level can be controlled by a potentiometer. There are 4 buttons (switches) that act as the piano “keys” and play different sounds, while the potentiometer has been mapped to three different levels so that the keys produce a high-pitched, middle-pitched, and low-pitched sound.
Materials
- Analog sensor: 10K Trimpot
- Digital Switch: Red, Blue, Yellow, and Green tactile buttons
- Output: Piezo Buzzer to produce the sound and LEDs for light output
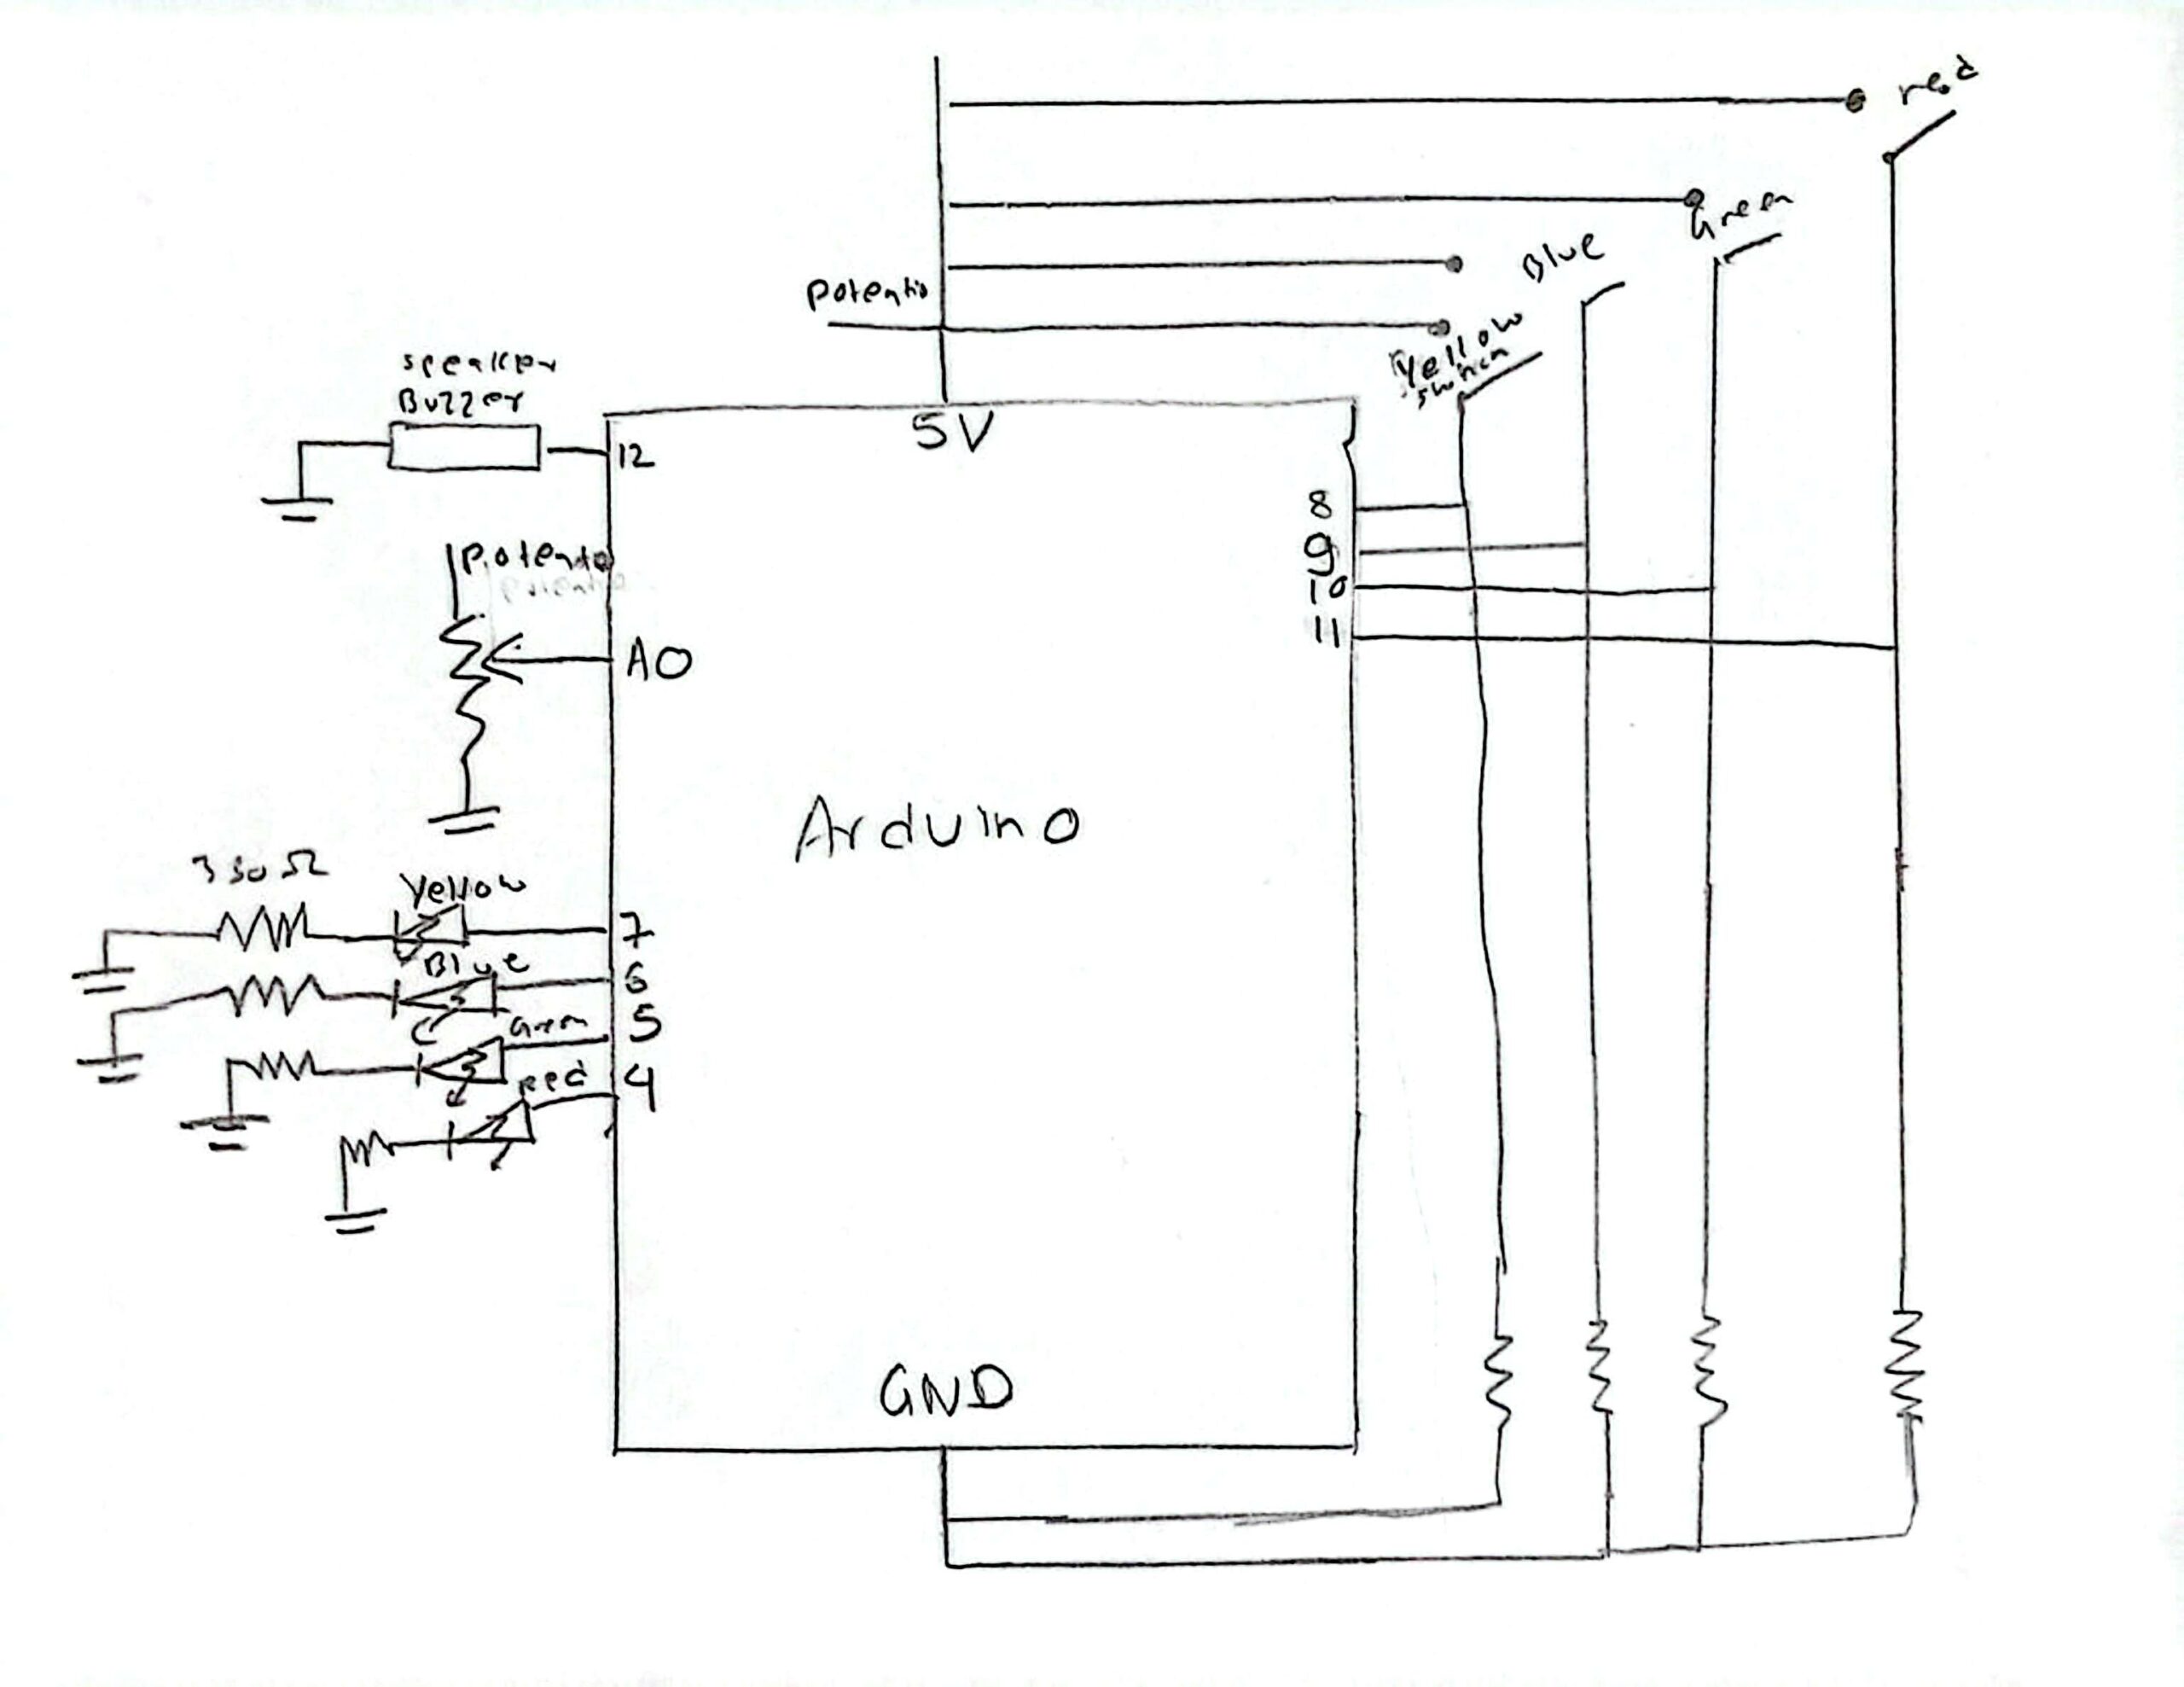
Schematic
Video
link: drive
Code
const int button_yellow=8;
const int yellow_light=7;
const int button_blue=9;
const int blue_light=6;
const int green_light=5;
const int button_green=10;
const int red_light=4;
const int button_red=11;
#define BUZZER 12
int potValue=0;
const int potPin=A0;
int melody[]={262,294,330,349,392,440,492,523}; // notes from C4-C5
int melody2[] = {523, 587, 659, 698, 784, 880, 988, 1047}; // notes from C5–C6
int melody3[] = {1047, 1175, 1319, 1397, 1568, 1760, 1976, 2093}; // C6–C7
int nodeDurations=4;
int increase=0;
int potValue_p;

void setup() {
  // put your setup code here, to run once:
  pinMode(button_yellow, INPUT);
  pinMode(yellow_light,OUTPUT);
  pinMode(button_blue, INPUT);
  pinMode(blue_light, OUTPUT);
  pinMode(button_green, INPUT);
  pinMode(green_light,OUTPUT);
  pinMode(button_red, INPUT);
  pinMode(red_light, OUTPUT);

  pinMode(BUZZER, OUTPUT);
  Serial.begin(9600);
}

void loop() {
  potValue = analogRead(potPin);

  if (digitalRead(8) == HIGH) {
    if (potValue <= 300) {
      tone(BUZZER, melody[1]);
    } else if (potValue >= 300 && potValue <= 550) {
      tone(BUZZER, melody2[1]);
    } else if (potValue >= 550 && potValue <= 1023) {
      tone(BUZZER, melody3[1]);
    }
    digitalWrite(yellow_light, HIGH);

  } else if (digitalRead(9) == HIGH) {
    if (potValue <= 300) {
      tone(BUZZER, melody[2]);
    } else if (potValue >= 300 && potValue <= 550) {
      tone(BUZZER, melody2[2]);
    } else if (potValue >= 550 && potValue <= 1023) {
      tone(BUZZER, melody3[2]);
    }
    digitalWrite(blue_light, HIGH);

  } else if (digitalRead(10) == HIGH) {
    Serial.print("green");
    if (potValue <= 300) {
      tone(BUZZER, melody[3]);
    } else if (potValue >= 300 && potValue <= 550) {
      tone(BUZZER, melody2[3]);
    } else if (potValue >= 550 && potValue <= 1023) {
      tone(BUZZER, melody3[3]);
    }
    digitalWrite(green_light, HIGH);

  } else if (digitalRead(11) == HIGH) {
    if (potValue <= 300) {
      tone(BUZZER, melody[4]);
    } else if (potValue >= 300 && potValue <= 550) {
      tone(BUZZER, melody2[4]);
    } else if (potValue >= 550 && potValue <= 1023) {
      tone(BUZZER, melody3[4]);
    }
    digitalWrite(red_light, HIGH);

  } else if(digitalRead(8)==LOW && digitalRead(9)==LOW && digitalRead(10)==LOW && digitalRead(11)==LOW) {
    Serial.println("Pin is LOW");
    noTone(BUZZER);
    digitalWrite(yellow_light, LOW);
    digitalWrite(blue_light, LOW);
    digitalWrite(green_light, LOW);
    digitalWrite(red_light, LOW);
  }
}
Reflection & Future Improvements
We had fun making this project, however it was also challenging to make all of the connections. Initially, we planned to have at least 6-7 switches, but the setup became so crowded with just 4. I started drawing the schematic diagram on paper before we began to build the connections physically, and this made the process much more manageable. We definitely could not have done it without having the diagram in front of us first. Sometimes, the setup for a particular switch would not work and we would face trouble in figuring out whether the issue was in the code or the wiring. In future versions, we would love to have more keys, as well as a tiny screen that displays the letter for the current note that is being played. We would also want to research on more “melodic” or pleasant sounding notes to add to the code.